
If you use Microsoft® Office Word frequently, you’re probably familiar with templates. These useful tools can help you quickly and easily create documents that share standard elements—for example, boilerplate text, special font and paragraph formatting, and paragraph styles.
You can also use templates in Microsoft Office Outlook® 2007 to streamline a variety of tasks. There is nothing magical about these templates; they are simply Office Outlook 2007 items that you use to create other Outlook 2007 items. For example, you might create an e-mail template for preparing a weekly status report that you send to your staff or management. Perhaps you use e-mail messages to submit expense reports and would like to use a template to simplify the process.
This chapter not only discusses e-mail templates but also explores the use of templates for other Outlook 2007 items. For example, you’ll learn how to use templates to create appointments, contact entries, task requests, and journal entries. The chapter also suggests some ways of sharing templates with others.
An e-mail template is really nothing more than a standard e-mail message that you have saved as a template. Here are some suggested uses for e-mail templates:
Create an expense report form.
Send product information to potential clients.
Create status reports for ongoing projects.
Send messages to specific groups of recipients.
Create a form for information requests or product registration.
When you need to send similar messages frequently, creating a message template can save you quite a bit of time, particularly if the message contains a great deal of frequently used text, graphics, or form elements. You also reduce potential errors by reusing the same message each time rather than creating multiple messages from scratch. You can use the template to provide the bulk of the message, filling in any additional information required in each particular instance.
Creating an e-mail template is as easy as creating an e-mail message. You can start by opening a new message form, just as you would if you were sending a new message to a single recipient or group.
To create an e-mail template from scratch, follow these steps:
With the Inbox folder open, click the New button on the toolbar to open a new mail message form. Enter the boilerplate text and any information that you want to include every time you send a message based on this template. For example, you can specify the subject, address, other headings, bullets, lists, and tables.
Click the Microsoft Office Button, and then click Save As in the message form.
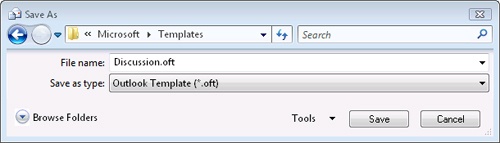
In the Save As dialog box, shown in Figure 25-1, specify a name for the file. Select Outlook Template in the Save As Type drop-down list. Outlook 2007 adds an .oft file name extension to the file name. You can specify a path if you want to save the file in a different location.
Outlook 2007 opens your My Documents folder with the file type corresponding to the current item (HTML, Rich Text Format, or Text Only). The default location for user templates, however, depends on your operating system version. On Microsoft Windows XP, the location is the <profile>Application DataMicrosoftTemplates folder, and on Windows Vista™, it is the <profile>AppDataRoamingMicrosoftTemplates folder, where <profile> is your user profile folder (which is Documents And Settings<user> on most Windows XP systems but is Users<user> on Windows Vista systems). When you select Outlook Template as the file type, Outlook 2007 automatically switches to your Templates folder.
Click Save to save the template. Close the message form, and then click No when asked whether you want to save changes.
You can create as many e-mail templates as you need, storing them on your local hard disk or on a network server. Placing templates on a network server allows other Microsoft Outlook users to use them as well.
After you create an e-mail template, it’s a simple matter to use the template to create a message by following these steps:
In Outlook 2007, click the arrow next to New on the Standard toolbar, and then click Choose Form. Alternatively, choose File, New, Choose Form. Outlook 2007 opens the Choose Form dialog box, as shown in Figure 25-2.
In the Look In drop-down list (which is set to Organizational Forms Library by default), select the location where the template is stored. In this example, the template is stored in the user default template folder. To use this template, select User Templates In File System.
Select the template from the list, and then click Open to display a message form based on the template data.
Fill in the message form to include any additional or modified information, and then send the message as you would any other.

You can easily send messages to recipients in a distribution list without using a template: Simply start a new message, select the distribution list from the address book, and send the message. If the messages you send to the members of the list are different each time you use the list, you don’t need a template. However, if the messages contain much the same information time after time, they’re good candidates for templates. For example, you might need to submit weekly reports to a group of administrators or managers, send task lists to people who work for you, or broadcast regular updates about products or services.
You create a template for a distribution list the same way you create any other e-mail template. The only difference is that you store the list of recipients within the template. To do so, simply select the distribution list in the appropriate address box when you create the template. If you don’t want the various members of the group to see the addresses of other members on the list, be sure to insert the distribution group in the Bcc box rather than in the To or Cc box.
Note
For more information about working with distribution lists, see Chapter 6.