
Around October every year, the Seattle wind
and rain bury our yard in huge drifts of leaves.
Inevitably a few big branches come down,
providing great raw material for a classic
whittling project. Let’s turn one of those branches
into a wooden chain.
First, you’re almost certainly going to cut
yourself at some point. Be really careful — hands
contain some delicate parts! Cut-resistant gloves
can help, but most importantly keep your knives
sharp. I use a fine stone to start, and a strop at
least every half hour while I work. Sharp knives
cut with less force, are less likely to slip, and cut
cleanly when things go wrong (so, faster healing).
They’re also just way more satisfying to use.
Next, it’s easier to carve green wood rather
than dry; the moisture makes for less “tear-out”
along the grain. That said, green wood will shrink
and can be vulnerable to cracking as it dries.
If you are working a piece over multiple days,
storing it in a plastic bag between sessions will
help hold the moisture content stable. Rubbing
with mineral oil will protect a finished piece.
A branch about 2" in diameter and 6" in length
makes three nice-sized links, a good number
to start. Most folks start with a square milled
blank — this is fine, but a straight fallen branch
works great too. The only trick is to pay attention
to the pith at the very center. Depending on the
tree, this pith can be super-soft, more like packed
brown sugar than wood. Since the center of the
branch will make up structural parts of each link,
I keep a bottle of thin CA or “Krazy” glue on hand.
Whenever I expose a new bit of pith I soak it with
the glue and let it dry before digging in, which
fixes the material in place well.
CARVE YOUR WOODEN CHAIN
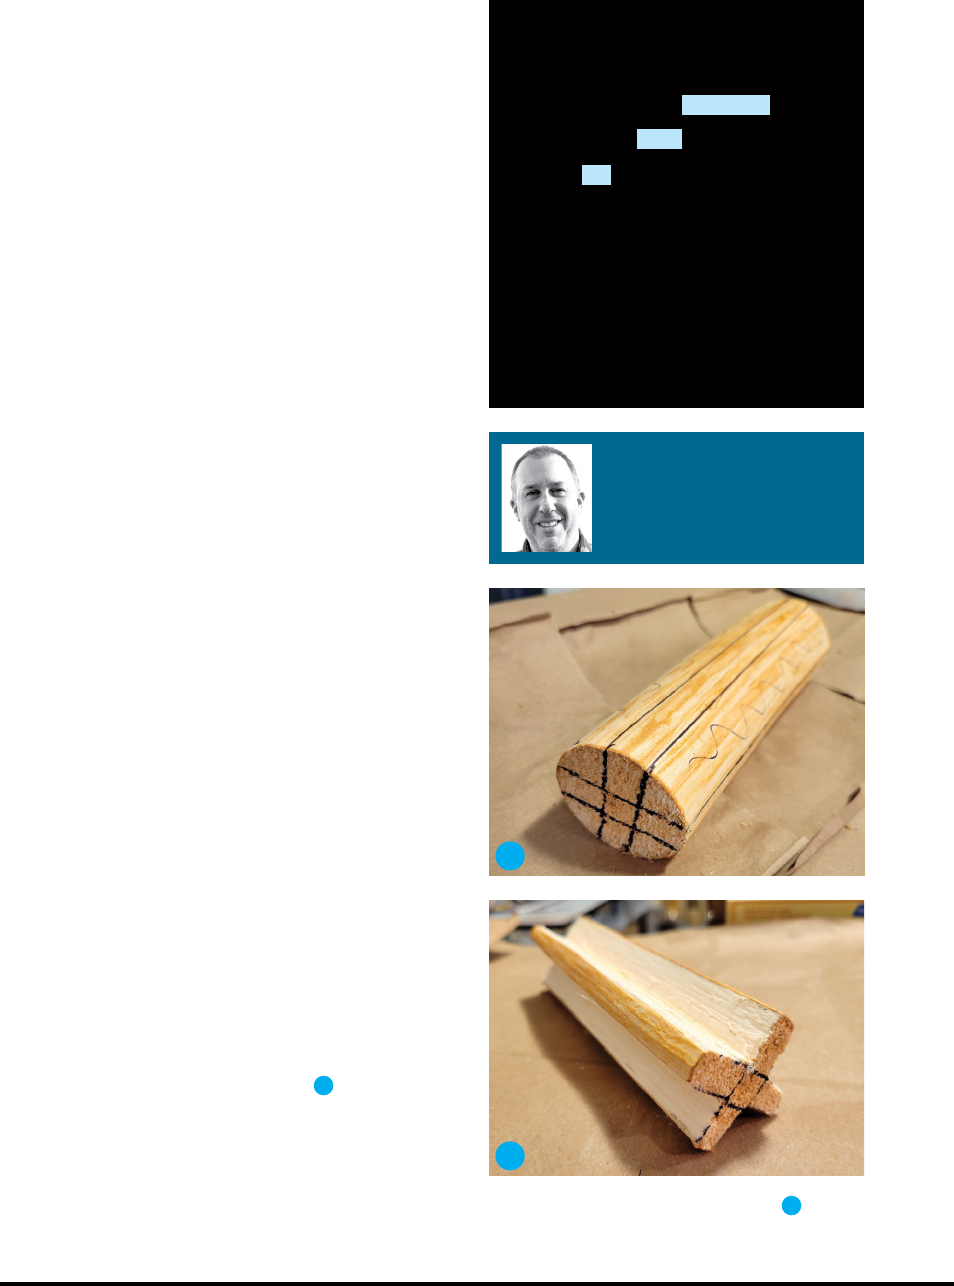
1. MARK THE ENDS
Draw a tic-tac-toe style cross on the end of the
branch, with the middle square being about ½"
or a bit more per side (Figure
A
). Use a ruler to
extend the ends down the length of the branch,
and then draw a matching cross on the other end.
The two crosses should be oriented together,
aligned as closely as possible.
2. CUT THE CROSS
Cut away the lengths along the corners, leaving
TIME REQUIRED:
2–4 Hours
DIFFICULTY:
Easy
COST:
$0
MATERIALS:
» A green section of branch, about 2" by 6"
» Cyanoacrylate (CA) glue aka super glue
TOOLS:
» Penknife or basic carving knife
» Knife sharpening tool: strop, whetstone, etc.
» Cut-resistant gloves (optional)
» Hand saw (optional)
SEAN NOLAN is a longtime
software guy who lives on Whidbey
Island in Washington State and
spends his days building stuff with
code and driftwood. Stop by and say
hello at his blog, shutdownhook.com.
A
you with a long X-shaped piece (Figure
B
). You
can do this with your knife, but I recommend a
rip-cut saw if you have one available.
B
75
make.co
M85_074-77_ChainFromBranch_F1.indd 75M85_074-77_ChainFromBranch_F1.indd 75 4/9/23 2:19 PM4/9/23 2:19 PM
..................Content has been hidden....................
You can't read the all page of ebook, please click here login for view all page.