
As you can see in the screenshot, the Bundle product is very well suited for build-your-own type products, in the example, a personal computer. There are multiple options presented in a different way (radio buttons, drop-down menus, checkboxes, and so on) depending on what is necessary for each option. For instance, it is possible to select multiple peripherals for the computer, but only one choice can be made for the amount of RAM (memory). Every choice that a customer can make for this computer is a Simple product itself and as such able to be sold separately in the store as well.
Besides, the more advanced presentation of the different choices, a Bundle product also differs from a Grouped product because some of the Bundle product's attributes such as its price and weight can be set for the Bundle product itself and item options can be set as required.
Adding a Bundle product starts in the usual fashion, by going to Catalog | Manage Products in the Magento Admin Panel. Click on the Add Product button, and in the next screen, choose Bundle Product in the Product Type drop-down menu and click on Continue:

The product we will be adding will be called "Hodge-Podge". Most of the input fields should be familiar, but a Bundle product differs from Simple products here:
- SKU: There's an extra drop-down menu where you can choose if the SKU is Fixed (the Bundle product will always only have the SKU you specify) or Dynamic (the Bundle product's SKU inside an order placed by a customer comprises the SKUs of the items that were selected when the customer configured the Bundle product). You always need to set a value for the SKU no matter the choice, Fixed or Dynamic.
- Weight: The Fixed versus Dynamic drop-down menu is also present here: whether there is one weight for the Bundle that always applies or the weight of the Bundle is determined when a customer is placing his/her order. If you choose Dynamic, no weight needs to be entered.
- Price (in the Prices tab): Again, the Fixed versus Dynamic drop-down menu is present. Here, a fixed price means there is a single price that is always applied to the Bundle, while dynamic means that the price to be paid by the customer is determined based on the items chosen when a customer chooses the Bundle options.
- Price View (in the Prices tab): This specifies if the product's price is shown as only the least expensive (As Low As) or as a range, from the least expensive component to the most expensive (Price Range).
- Bundle Items (a new tab): Here all the Bundle product choices are set.
When you get to the Bundle Items tab, the first input section is for specifying how the Bundle's items are shipped. The Ship Bundle Items drop-down menu has two choices: Together and Separately. Together means that in determining the shipping methods that apply, Magento will consider the entire bundle as one shipment. If the drop-down menu is set to Separately, Magento will consider the Bundle product order as an order for multiple separate products for the purposes of showing relevant shipping methods:

The Add New Option button starts the process of adding Bundle options. Taking the multitude of ways a Bundle product can be set up into account, our discussion of adding these options will be relatively short. We will demonstrate adding a checkbox and drop-down Bundle option and leave exploring the other types of Bundle options as an exercise to the reader:
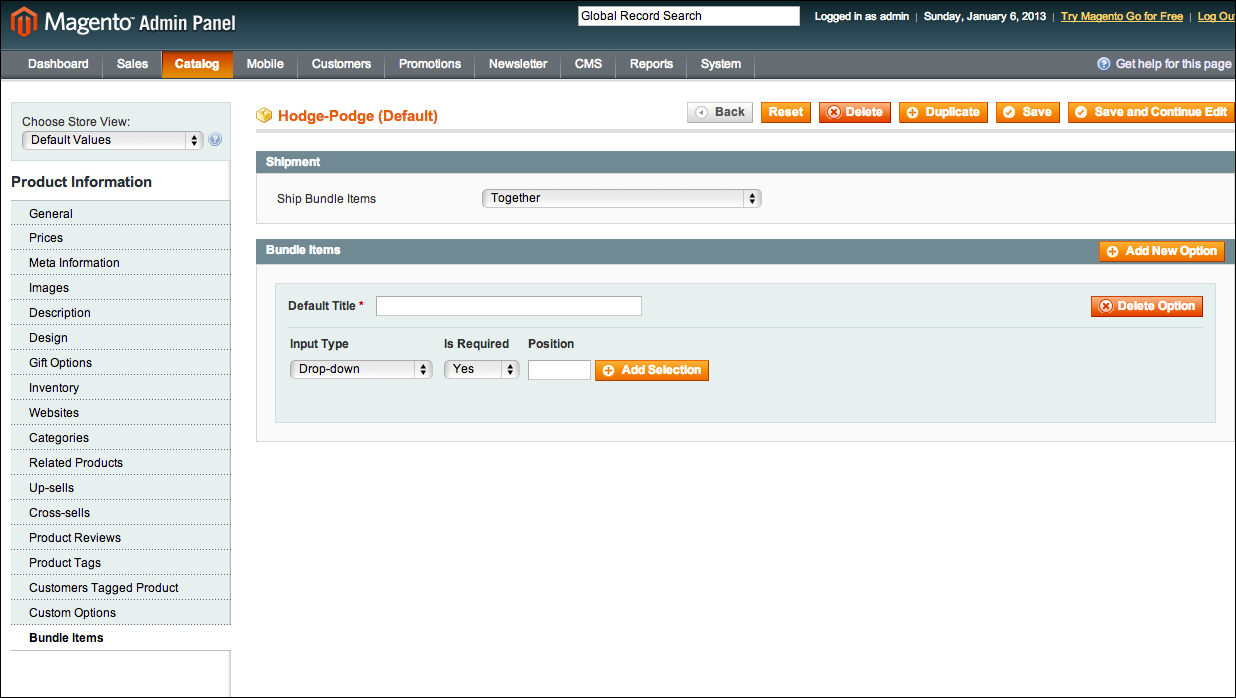
After clicking on the Add New Option button, a form section opens showing the following input options:
- Default Title: This is the title of the Bundle option you are entering that will be shown in the frontend. We will choose
Hodgehere. - Input Type: This is how the Bundle option is presented on the frontend, either as a drop-down menu, a multiple select element, radio buttons, or checkboxes.
- Is Required: If the Bundle option is mandatory in the frontend; you will have to choose Yes or No.
- Position: This is a whole number greater than or equal to zero, signifying the position of the Bundle option on the Bundle product's detail page. This is not required to be set.
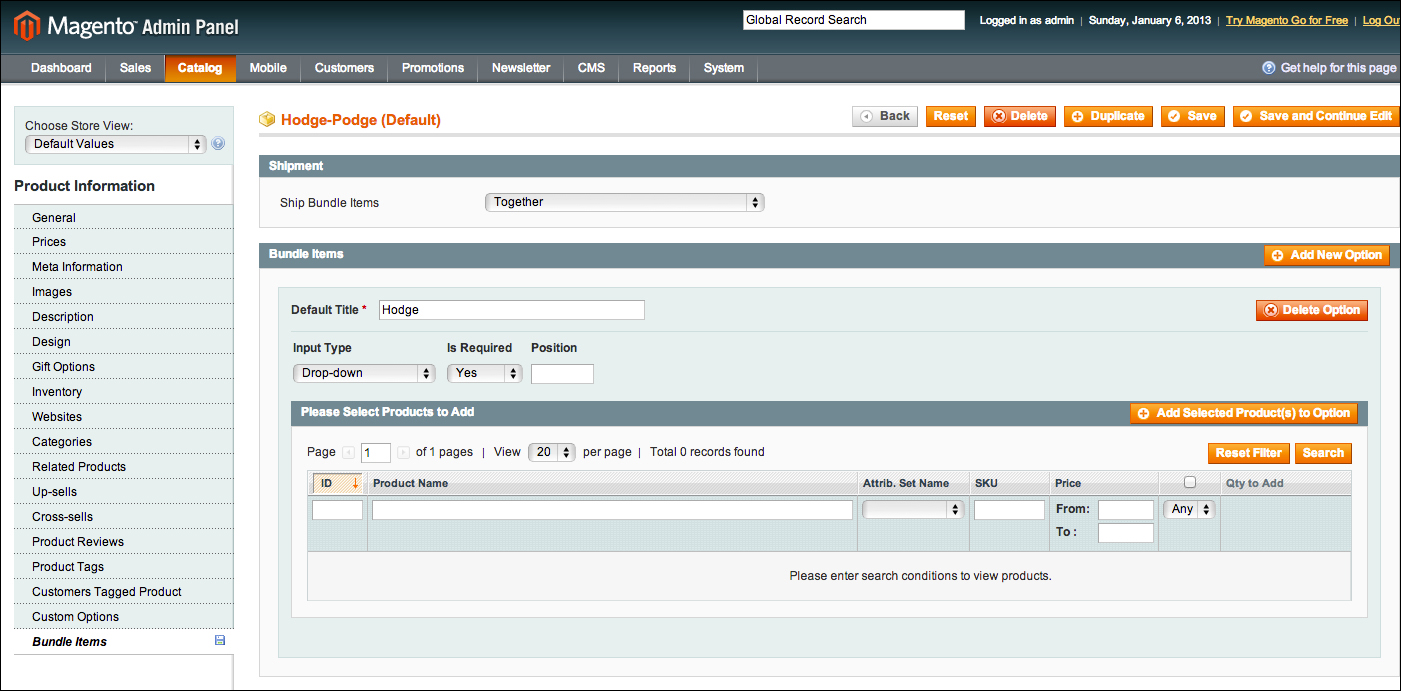
After clicking on the Add Selection button, a product grid appears, which functions in the same way as the product grids we saw earlier. Click on the Search button to start searching for products:
After clicking on Search, you will see a list of products. Associating a product to the Bundle option is done by selecting checkboxes for the products you want to associate, and by clicking on the Add Selected Product(s) to Option button after that:
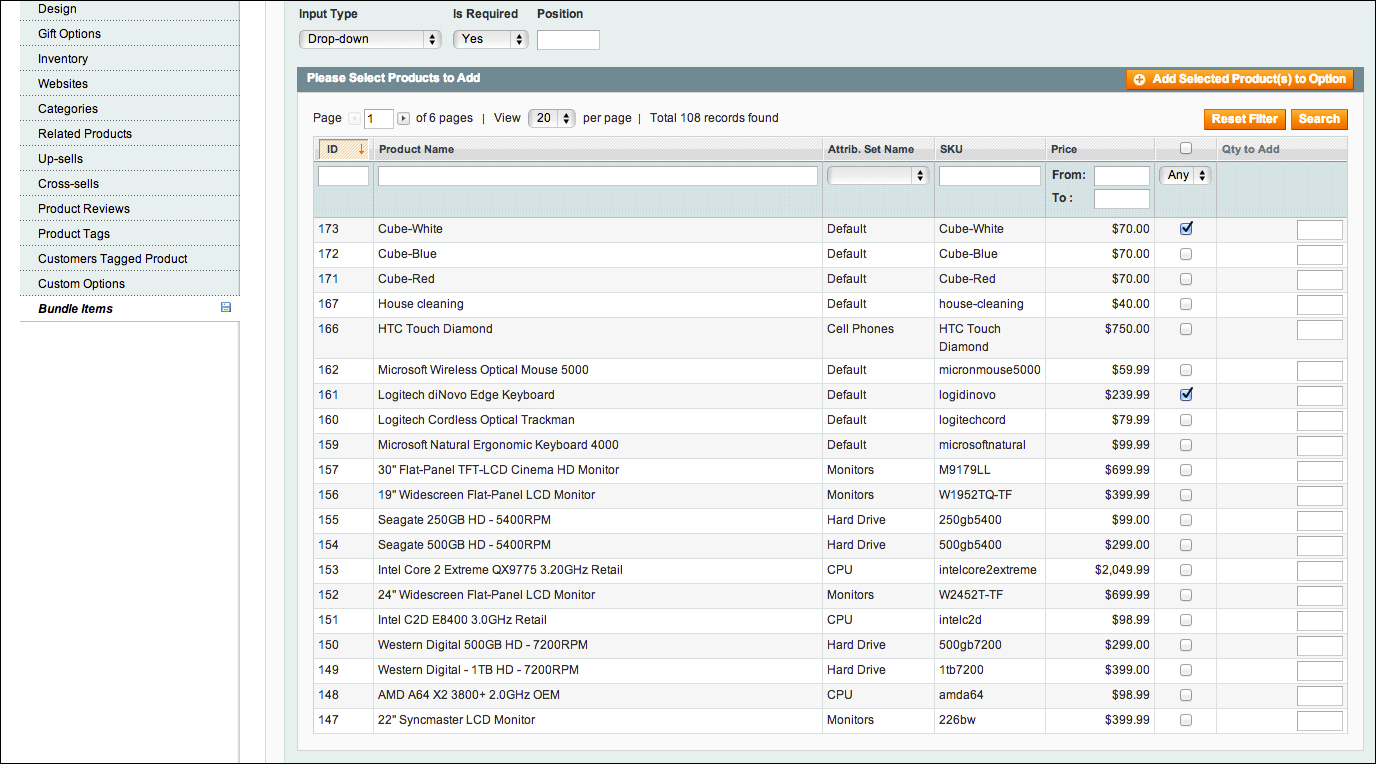
In our case, we will add the Cube-White and the Logitech Keyboard to our first Bundle option. If you do not have these available, you can pick any other products to follow along. The Bundle Items section will now show the products you selected inside the Bundle option, along with some final extra configurations inside the product rows, such as what is the default quantity (Default Qty) for that specific product, if a customer can specify how many of the product they want (User Defined Qty), the position of the product in the list of products within the Bundle option, and whether or not the product is the default choice within the Bundle option. The User Defined Qty input is only available for Bundle options of the type Radio Button or Dropdown.
We will repeat the aforementioned steps for a second Bundle option of type Checkbox with the name Podge. We have chosen the House Cleaning product and a monitor as the products to associate with this Bundle option:

Again, click on Add Selected Product(s) to Option and save the product. The end result of your Bundle Items section should look similar to this:

In the storefront the Hodge-Podge product is displayed as expected, with a drop-down menu for Hodge and checkboxes for Podge. After choosing some options and adding the product to the shopping cart, the shopping cart will reflect the options that were chosen. Of course, using Bundle products will require some planning up front. We threw together some non-related products in order to demonstrate how Magento lets you set up a Bundle, but actually creating a Bundle such as the computer shown earlier requires extensive knowledge of what you sell and how you want to present it to your customer.