
Chapter 6
Working with AJAX Data
In This Chapter
![]() Understanding the advantages of server-side programming
Understanding the advantages of server-side programming
![]() Getting to know PHP
Getting to know PHP
![]() Writing a form for standard PHP processing
Writing a form for standard PHP processing
![]() Building virtual forms with AJAX
Building virtual forms with AJAX
![]() Submitting interactive AJAX requests
Submitting interactive AJAX requests
![]() Working with XML data
Working with XML data
![]() Responding to JSON data
Responding to JSON data
AJAX and jQuery are incredibly useful, but perhaps the most important use of AJAX is to serve as a conduit between the web page and programs written on the server. In this chapter, you get an overview of how programming works on the web server and how AJAX changes the relationship between client-side and server-side programming. You read about the main forms of data sent from the server, and you see how to interpret this data with jQuery and JavaScript.
Sending Requests AJAX Style
AJAX work in other parts of this book involves importing a preformatted HTML file. That's a great use of AJAX, but the really exciting aspect of AJAX is how it tightens the relationship between the client and server. Figure 6-1 shows a page called AJAXtest.html, which uses a JavaScript function to call a PHP program and incorporates the results into the same page.

Figure 6-1: This page gets data from PHP with no form!
Sending the data
The AJAX version of this program is interesting because it has no form. Normally an HTML page that makes a request of a PHP document has a form, and the form requests the PHP page. This page has no form, but a JavaScript function creates a “virtual form” and passes this form data to a PHP page. Normally the result of a PHP program is a completely new page, but in this example the results of the PHP program are integrated directly onto the original HTML page. Begin by looking over the HTML/JavaScript code:
<!DOCTYPE html>
<html lang = "en-US">
<head>
<title>AJAXTest.html</title>
<meta charset= "UTF-8" />
<script type = "text/javascript"
src = "jquery-1.10.2.min.js"></script>
<script type = "text/javascript">
$(init);
function init(){
$.get("simpleGreet.php", { "userName": "Andy" }, processResult);
}
function processResult(data, textStatus){
$("#output").html(data);
}
</script>
</head>
<body>
<h1>AJAX Test</h1>
<div id = "output">
This is the default output
</div>
</body>
</html>
This program uses a jQuery function to simulate a form. It generates its own virtual form and passes it directly to the PHP program. The PHP program then processes the form data and produces text results, which are available for JavaScript to handle directly. In essence, JavaScript and jQuery are directly managing the server request (rather than allowing the browser to do it automatically) so that the programmer has more control over the process.
Here's how it works:
- Begin with an HTML framework.
As always, HTML forms the spine of any web program. The HTML here is quite simple — a heading and a div for output. Note that this example does not include a form.
- Include the jQuery library.
You can do AJAX without jQuery, but you don't have much reason to do that. The jQuery library makes life much easier and manages cross-browser issues to boot. You can also incorporate the jQuery UI and a theme if you choose, but they aren't absolutely necessary.
- Initialize as usual.
As soon as this program runs, it's going to get data from the server. (In the next example, I show you how to make this process more interactive.) Set up an init() function in the normal way to handle immediate execution after the page has loaded.
- Use the.get()function to set up an AJAX call.
jQuery has a number of interesting AJAX functions. The .ajax() function is a very powerful tool for managing all kinds of AJAX requests, but jQuery also includes a number of utility functions that simplify particular kinds of requests. The get() function used here sets up a request that looks to the server just like a form submitted with the get method. (Yep, there's also a post() function that acts like a post form.)
- Indicate the program to receive the request.
Typically your AJAX requests specify a program that should respond to the request. I'm using greetUser.php.
- Pass form data as a JSON object.
Encapsulate all the data you want to send to the program as a JSON object. (Check out Book IV, Chapter 4 for a refresher on JSON.) Typically this will be a series of name/value pairs. In this example, I'm simply indicating a field named userName with the value “Andy”.
- Specify a callback function.
Normally you want to do something with the results of an AJAX call. Use a callback function to indicate which function should execute when the AJAX call is completed. In this example, I call the processResult() function as soon as the server has finished returning the form data.
Simplifying PHP for AJAX
One of the nice things about AJAX is how it simplifies your server-side programming. Most PHP programs create an entire page every time. (Check out nameForm.html and greetUser.php on the companion website to compare a more typical HTML/PHP solution. See this book's Introduction for more on the website.) That's a lot of overhead, building an entire HTML page every pass. A lot of material is repeated. However, because you're using AJAX, the PHP result doesn't have to create an entire web page. The PHP can simply create a small snippet of HTML.
Take a look at simpleGreet.php and you can see that it's very stripped down:
<?php
$userName = filter_input(INPUT_GET, "userName");
print "<p>Hi, $userName!</p> ";
?>
 This is a lot simpler than most PHP programs. All it needs to do is grab the username and print it back out. The JavaScript function takes care of making the code go in the right place. When you're using AJAX, the HTML page stays on the client, and JavaScript makes smaller calls to the server. The PHP is simpler, and the code transmission is generally smaller because there's less repeated structural information. Be sure if the data was sent through the GET method, you extract it with INPUT_GET.
Back in the HTML, I need a function to process the results of the AJAX request after it has returned from the server. The processResult() function has been designated as the callback function, so take another look at that function:
function processResult(data, textStatus){
$("#output").html(data);
}
This function is pretty simple with jQuery:
- Accept two parameters.
AJAX callback functions always accept two parameters. The first is a string that contains whatever output was sent by the server (in this case, the greeting from processResult.php). The second parameter contains the text version of the HTTP status result. The status is useful for testing in case the AJAX request was unsuccessful.
- Identify an output area.
Just make a jQuery node from the output div.
- Pass the data to the output.
You sometimes do more elaborate work with AJAX results, but for now, the results are plain HTML that you can just copy straight to the div.
Building a Multipass Application
 The most common use of AJAX is to build an application that hides the relationship between the client and the server. For example, look at the multiPass.html page shown in Figure 6-2. This seems to be an ordinary HTML page. It features a drop-down list that contains hero names. However, that list of names comes directly from a database, which can't be read directly in HTML/JavaScript. When the user selects a hero from the list, the page is automatically updated to display details about that hero. Again, this data comes directly from the database. Figure 6-3 shows the page after a hero has been selected.

Figure 6-2: The user can choose from a list of heroes.

Figure 6-3: Hero data is automatically updated from the database.
It's certainly possible to get this behavior from PHP alone, but it's interesting to see an HTML/JavaScript page that can access data from a database. Of course, some PHP is happening, but AJAX manages the process. Take a look at the code for multiPass.html to see what's happening:
<!DOCTYPE html>
<html lang="en">
<head>
<title>multiPass.html</title>
<meta charset="UTF-8">
<script type = "text/javascript"
src = "jquery-1.10.2.min.js"></script>
<script type = "text/javascript">
$(init);
function init(){
//load up list from database
$("#heroList").load("loadList.php");
} // end init
function showHero(){
//pass a hero id, retrieve all data about that hero
heroID = $("#heroList").val();
$("#output").load("showHero.php", {"heroID": heroID});
} // end showHero
</script>
</head>
<body>
<h1>Multi - Pass Demo</h1>
<form>
<fieldset>
<label>hero</label><p>
<select id = "heroList"
onchange = "showHero()">
</select>
<div id = "output">
Please select a hero for more information...
</div>
</fieldset>
</form>
</body>
</html>
Setting up the HTML framework
As always, the HTML page provides the central skeleton of the page. This site is reasonably simple because it sets up some empty areas that will be filled in with AJAX requests later:
- Import jQuery.
The jQuery library makes AJAX really simple, so begin by importing the library. Check out Chapter 2 of this minibook if you need a refresher on importing jQuery. You can also include the jQuery UI modules if you want, but it isn't necessary for this simple example.
- Build a simple form.
The page has a form, but this form is designed more for client-side interaction than server-side. Note that the form does not specify an action parameter. That's because the form won't be directly contacting the PHP program. Let AJAX functions do that.
- Don't add a button.
 Traditional forms almost always have buttons (either standard buttons in client-side coding or submit buttons for server-side). Although you can still include buttons, one of the goals of AJAX is to simplify user interaction. The page will update as soon as the user selects a new hero, so you don't need a button.
 - Create an empty <select> object.
Build an HTML select element that will contain all the hero names, but don't fill it yet. The hero names should come from the database. Give the <select> object an id property so that it can be manipulated through the code.
- Apply an onchange event to the <select> object.
When the user chooses a new hero, call a JavaScript function to retrieve data about that hero.
- Build a div for output.
Create a placeholder for the output. Give it an id so that you can refer to it later in code.
Loading the select element
The first task is to load the select element from the database. This should be done as soon as the page is loaded, so the code will go in a standard init() function:
- Write an initialization function.
Use the standard jQuery technique for this. I just use the $(init) paradigm because I think it's easiest.
- Build a jQuery node based on the <select> object.
Use jQuery selection techniques to build a jQuery node.
- Invoke the jQuery load()method.
This method allows you to specify a server-side file to activate. Many AJAX examples in this book use plain HTML files, but in this case, you call a PHP program.
The load() method works just like get() (used earlier in this chapter), but it's a bit easier to use load() when the purpose of the AJAX call is to populate some element on your web page (as is the case here). - Call loadList.php.
When you call a PHP program, you won't be loading in the text of the program. Instead, you're asking that program to do whatever it does (in this case, get a list of hero names and heroIDs) and place the results of the program in the current element's contents. In this situation, the PHP program does a database lookup and returns the <option> elements needed to flesh out the <select> object.
Writing the loadList.php program
Of course, you need to have a PHP program on the server to do the work. AJAX makes PHP programming a lot simpler than the older techniques because each PHP program typically solves only one small problem, rather than having to build entire pages. The loadList.php program is a great example:
<?php
//connect to database
try {
$con= new PDO('mysql:host=host;dbname=dbName', "user", "pwd");
$con->setAttribute(PDO::ATTR_ERRMODE, PDO::ERRMODE_EXCEPTION);
$result = $con->query('SELECT * FROM hero'),
$result->setFetchMode(PDO::FETCH_ASSOC);
foreach($result as $row){
$id = $row["heroID"];
$name = $row["name"];
print <<< HERE
<option value = "$id">$name</option>
HERE;
} // end record loop
} catch(PDOException $e) {
echo 'ERROR: ' . $e->getMessage();
} // end try
?>
The code for loadList.php is typical of PHP programs using AJAX. It's small and focused and does a simple job cleanly. (I tend to think of PHP programs in AJAX more like external functions than complete programs.) The key to this particular program is understanding the output I'm trying to create. Recall that this example has an empty select element on the form. I want the program to add the following (bold) source code to the page:
<select id="heroList" onchange="showHero()">
<option value="1">The Plumber</option>
<option value="2">Binary Boy</option>
<option value="3">The Janitor</option>
</select>
It should go to the database and find all the records in the hero table. It should then assign heroID to the value attribute of each option, and should display each hero's name. After you know what you want to create, it isn't difficult to pull off:
- Make a database connection.
In this example, PHP is used mainly for connecting to the database. It's not surprising that the first task is to make a data connection. Build a connection to your database using the techniques outlined in Book VI, Chapter 5.
- Create a query to get data from the database.
The <option> elements I want to build need the heroID and name fields from the hero database. It's easiest to just use a SELECT * FROM hero; query to get all the data I need.
- Apply the query to the database.
Pass the query to the database and store the results in the $result variable.
- Cycle through each record.
Use the PDO associative array-fetching technique described in Book VI, Chapter 5.
- Build an <option> element based on the current record.
Because each record is stored as an associative array, it's easy to build an <option> element using fields from the current record.
- Print the results.
Whatever you print from the PHP program becomes the contents of the jQuery element that called the load() method. In this case, the <option> elements are placed in the <select> object (where all good <option> elements live).
Responding to selections
After the page has initialized, the <select> object contains a list of the heroes. When the user selects a hero, the showHero() function is called by the select element's onchange event.
The showHero() function is another AJAX function. It gathers the details needed to trigger another PHP program. This time, the PHP program needs a parameter. The showHero() function simulates a form with a data element in it and then passes that data to the PHP through the AJAX load() method:
function showHero(){
//pass a hero id, retrieve all data about that hero
heroID = $("#heroList").val();
$("#output").load("showHero.php", {"heroID": heroID});
} // end showHero
If the user has selected a hero, you have the hero's heroID as the value of the <select> object. You can use this data to bundle a request to a PHP program. That program uses the heroID to build a query and return data about the requested hero:
- Extract the heroID from the select element.
You're building a JSON object which will act as a virtual form, so you need access to all the data you want to send to the server. The only information the PHP program needs is a heroID, so use the jQuery val() method to extract the value from the <select> element.
- Use the load()method to update the output element.
Once again, use the exceptionally handy load() method to invoke an AJAX request. This time, load the results of showHero.php.
- Pass form data to the server.
The showHero.php program thinks it's getting information from a form. In AJAX, the easiest way to simulate a form is to put all the data that would have been in the form in a JSON object. In this case, only one data element needs to be passed: {“heroID”: heroID}. This sends a field called heroID that contains the contents of the JavaScript variable heroID. See Book IV, Chapter 4 if you need a refresher on the JSON format.
The virtual form technique is a common AJAX idiom. It's important because it overcomes a serious usability limitation of ordinary HTML. In old-school programming, the primary way to invoke a server-side program was through an HTML form submission. With AJAX, you can respond to any JavaScript event (like the onchange event used in this example) and use JavaScript code to create any kind of fake form you want. You can use variables that come from one or more forms, or you can send data from JavaScript variables. AJAX lets you use JavaScript to control precisely what data gets sent to the server and when that data gets sent. This improves the user experience (as in this example). It's also commonly used to allow form validation in JavaScript before passing the data to the server.
Writing the showHero.php script
The showHero.php script is a simple PHP program that has a single task: After being given a heroID, pass a query to the database based on that key, and return an HTML snippet based on the query. The code is a standard database access script:
<?php
//get heroID
$heroID = filter_input(INPUT_POST, 'heroID'),
try {
$con= new PDO('mysql:host=localhost;dbname=dbName', "user", "pwd");
$con->setAttribute(PDO::ATTR_ERRMODE, PDO::ERRMODE_EXCEPTION);
$stmt = $con->prepare("SELECT * FROM hero WHERE heroID = ?");
$stmt->execute(array($heroID));
$result = $stmt->fetchAll(PDO::FETCH_ASSOC);
foreach($result as $row){
foreach ($row as $field => $value){
print <<< HERE
<strong>$field: </strong>$value <br />
HERE;
} // end field loop
} // end record loop
} catch(PDOException $e) {
echo 'ERROR: ' . $e->getMessage();
} // end try
As far as the showQuery.php program is concerned, it got a request from an ordinary form. Its job is to produce HTML output based on that input:
- Get the $heroID value from the form.
Use the standard filter_input mechanism to extract data from the form. (It doesn't matter to the PHP program that this isn't a normal form. Note that the AJAX call is sending the data through the POST mechanism, so that's how you retrieve it.)
$heroID = filter_input(INPUT_POST, 'heroID'),
- Build a standard data connection.
Create your standard PDO connection, with an exception handler, the PDO connection, and the exception attributes.
try {
$con= new PDO('mysql:host=host;dbname=dbName', "user", "pwd");
$con->setAttribute(PDO::ATTR_ERRMODE, PDO::ERRMODE_EXCEPTION); - Build a prepared statement.
This query will involve user input (the heroID comes from the user form) so it should use a prepared statement to prevent SQL injection attacks. (See Book VI, Chapter 5 for more about SQL injection and prepared statements.)
You only want data from the hero identified by $heroID, so build a query that selects a single record.
$stmt = $con->prepare("SELECT * FROM hero WHERE heroID = ?");
$stmt->execute(array($heroID)); - Execute the statement with the heroID.
Pass the heroID to the prepared statement, place this element in an array, and pass it to the statement.
$result = $stmt->fetchAll(PDO::FETCH_ASSOC);
- Process the results. Use the ordinary foreach mechanism to print out the results of the query. You can get as fancy as you want with the output, but I'm going for a very standard “print all the contents” approach for now.
foreach($result as $row){
foreach ($row as $field => $value){
print <<< HERE
<strong>$field: </strong>$value <br />
Xxxxx
HERE;
} // end field loop
} // end record loop
Working with XML Data
Server-side work normally involves storage of data because that's one thing that's easy to do on the server and difficult to do on the client. Data can be stored in many ways:
- In plain-text files
- In HTML
- In JSON
- In XML
- In a relational database
The database approach is most common because it's incredibly powerful and flexible. Normally programmers use an HTML page to request information from the user, and then use this information in PHP to prepare a request for the database in a special language called SQL (Structured Query Language). The data request is passed to the database management system, which returns some kind of result set to the PHP program. The PHP program then typically builds an HTML page and passes the page back to the browser.
The process can be easier when you use AJAX because the PHP program doesn't have to create an entire web page. All that really needs to be passed back to the JavaScript program is the results of the data query. The examples in this chapter have created HTML snippets as their output, but you often want to make your server-side programs a little more generic so that the data can be used in a number of different ways. Normally, the data is returned using a special data format so that the JavaScript program can easily manage the data.
When a server-side program is designed to simply take some input and produce generic data for output, that program is sometimes called a web service. Web services are very popular because they can simplify coding and be re-used. These are good things.
Review of XML
The XML format has become an important tool for encapsulating data for transfer between the client and the server. You might already be familiar with XML because XHTML is simply HTML following the stricter XML standard.
XML is much more than HTML. XML can actually be used to store any kind of data. For example, take a look at the following file ( pets.xml):
<?xml version="1.0" encoding="US-ASCII"?>
<pets>
<pet>
<animal>cat</animal>
<name>Lucy</name>
<breed>American Shorthair</breed>
<note>She raised me</note>
</pet>
<pet>
<animal>cat</animal>
<name>Homer</name>
<breed>unknown</breed>
<note>Named after a world-famous bassoonist</note>
</pet>
<pet>
<animal>dog</animal>
<name>Jonas</name>
<breed>Cairn Terrier</breed>
<note>The dog that currently owns me</note>
</pet>
</pets>
If you look over pets.xml, you can see that it looks a lot like HTML. HTML tags are very specific (only a few are legal), but XML tags can be anything, as long as they follow a few simple (but familiar) rules:
- Begin with a doctype.
Formal XML declarations often have very complex doctypes, but basic XML data typically uses a much simpler definition:
<?xml version="1.0" encoding="US-ASCII"?>
Anytime you make your own XML format (as I'm doing in this example), you can use this generic doctype.
- Create a container for all elements.
 The entire structure must have one container tag. I'm using pets as my container. If you don't have a single container, your programs will often have trouble reading the XML data.
 - Build your basic data nodes.
In my simple example, each pet is contained inside a pet node. Each pet has the same data elements (but that is not a requirement).
Tags are case-sensitive. Be consistent in your tag names. Use camel-case and single words for each element. - Add attributes as needed.
You can add attributes to your XML elements just like the ones in HTML. As in HTML, attributes are name/value pairs separated by an equal sign (=), and the value must always be encased in quotes.
- Nest elements as you do in HTML.
Be careful to carefully nest elements inside each other like you do with HTML.
You can get an XML file in a number of ways:
- Most databases can export data in XML format.
- More often, a PHP program reads data from a database and creates a long string of XML for output.
For this simple introduction, I just wrote the XML file in a text editor and saved it as a file.
You manipulate XML in the same way with JavaScript, whether it comes directly from a file or is passed from a PHP program.
Manipulating XML with jQuery
XML data is actually familiar because you can use the tools you used to work with HTML. Better, the jQuery functions normally used to extract elements from an HTML page work on XML data with few changes. All the standard jQuery selectors and tools can be used to manage an XML file in the same way that they manage parts of an HTML page.
The readXML.html page featured in Figure 6-4 shows a JavaScript/jQuery program that reads the pets.xml file and does something interesting with the data.
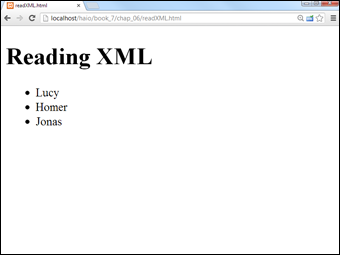
Figure 6-4: The pet names came from the XML file.
In this case, it extracts all the pet names and puts them in an unordered list. Here's the code:
<!DOCTYPE html>
<html lang = "en-US">
<head>
<meta charset = "UTF-8" />
<script type = "text/javascript"
src = "jquery-1.10.2.min.js"></script>
<script type = "text/javascript">
$(init);
function init(){
$.get("pets.xml", processResult);
} // end init
function processResult(data, textStatus){
//clear the output
$("#output").html("");
//find the pet nodes...
$(data).find("pet").each(printPetName);
} // end processResult
function printPetName(){
//isolate the name text of the current node
thePet = $(this).find("name").text();
//add list item elements around it
thePet = "<li>" + thePet + "</li>";
//add item to the list
$("#output").append(thePet);
} // end printPetName
</script>
<title>readXML.html</title>
</head>
<body>
<h1>Reading XML</h1>
<ul id = "output">
<li>This is the default output</li>
</ul>
</body>
</html>
Creating the HTML
Like most jQuery programs, this page begins with a basic HTML framework. This one is especially simple: a heading and a list. The list has an ID (so that it can be recognized through jQuery easily) and a single element (that will be replaced by data from the XML file).
Retrieving the data
The init() function sets up an AJAX request:
$(init);
function init(){
$.get("pets.xml", processResult);
} // end init
This function uses the get() function to request data:
- Use the jQuery get()mechanism to set up the request.
Because I'm just requesting a static file (as opposed to a PHP program), the get() function is the easiest AJAX tool to use for setting up the request.
- Specify the file or program.
Normally you call a PHP program to retrieve data, but for this example, I pull data straight from the pets.xml file because it's simpler and it doesn't really matter how the XML was generated. The get() mechanism can be used to retrieve plain text, HTML, or XML data. My program will be expecting XML data, so I should be calling an XML file or a program that produces XML output.
- Set up a callback function.
When the AJAX is complete, specify a function to call. My example calls the processResult() function after the AJAX transmission is complete.
Processing the results
The processResult() function accepts two parameters: data and textStatus:
function processResult(data, textStatus){
//clear the output
$("#output").html("");
//find the pet nodes...
$(data).find("pet").each(printPetName);
} // end processResult
The processResult() function does a few simple tasks:
- Clear the output ul.
The output element is an unordered list. Use its html() method to clear the default list item.
- Make a jQuery node from the data.
The data (passed as a parameter) can be turned into a jQuery node. Use $(data) for this process.
- Find each pet node.
Use the find() method to identify the pet nodes within the data.
- Specify a command to operate on each element.
Use the each() method to specify that you want to apply a function separately to each of the pet elements. Essentially, this creates a loop that calls the function once per element.
The each mechanism is an example of a concept called an iterator, which is a fundamental component of functional programming. (Drop those little gems to sound like a hero at your next computer science function. You're welcome.) - Run the printPetName function once for each element.
The printPetName is a callback function.
Printing the pet name
The printPetName function is called once for each pet element in the XML data. Within the function, the $(this) element refers to the current element as a jQuery node:
function printPetName(){
//isolate the name text of the current node
thePet = $(this).find("name").text();
//add list item elements around it
thePet = "<li>" + thePet + "</li>";
//add item to the list
$("#output").append(thePet);
} // end printPetName
- Retrieve the pet's name.
Use the find() method to find the name element of the current pet node.
- Pull the text from the node.
The name is still a jQuery object. To find the actual text, use the text() method.
- Turn the text into a list item.
I just used string concatenation to convert the plain text of the pet name into a list item.
- Append the pet name list item to the list.
The append() method is perfect for this task.
Of course, you can do more complex things with the data, but it's just a matter of using jQuery to extract the data you want and then turning it into HTML output.
Working with JSON Data
XML has been considered the standard way of working with data in AJAX (in fact, the X in AJAX stands for XML). The truth is, another format is actually becoming more popular. Although XML is easy for humans (and computer programs) to read, it's a little bit verbose. All those ending tags can get a bit tedious and can add unnecessarily to the file size of the data block. Although XML is not difficult to work with on the client, it does take some getting used to. AJAX programmers are beginning to turn to JSON as a data transfer mechanism. JSON is nothing more than the JavaScript object notation described in Book IV, Chapter 4 and used throughout this minibook.
Knowing JSON's pros
JSON has a number of very interesting advantages:
- Data is sent in plain text. Like XML, JSON data can be sent in a plain-text format that's easy to transmit, read, and interpret.
- The data is already usable. Client programs are usually written in JavaScript. Because the data is already in a JavaScript format, it is ready to use immediately, without the manipulation required by XML.
- The data is a bit more compact than XML. JavaScript notation doesn't have ending tags, so it's a bit smaller. It can also be written to save even more space (at the cost of some readability) if needed.
- Lots of languages can use it. Any language can send JSON data as a long string of text. You can then apply the JavaScript eval() function on the JSON data to turn it into a variable.
- PHP now has native support for JSON. PHP version 5.2 and later supports the json_encode() and json_decode() functions, which convert PHP arrays (even very complex ones) into JSON objects and back.
- jQuery has a getJSON()method. This method works like the get() or post() methods, but it's optimized to receive a JSON value.
If a program uses the eval() function to turn a result string into a JSON object, there's a potential security hazard: Any code in the string is treated as JavaScript code, so bad guys could sneak some ugly code in there. Be sure that you trust whoever you're getting JSON data from.
The pet data described in pets.xml looks like this when it's organized as a JSON variable:
{
"Lucy": { "animal": "Cat",
"breed": "American Shorthair",
"note": "She raised me"},
"Homer": { "animal": "Cat",
"breed": "unknown",
"note": "Named after a world-famous bassoonist"},
"Jonas": { "animal": "Dog",
"breed": "Cairn Terrier",
"note": "The dog that currently owns me"}
}
Note a couple of things:
- The data is a bit more compact in JSON format than it is in XML.
- You don't need an overarching variable type ( like pets in the XML data) because the entire entity is one variable (most likely called pets).
JSON takes advantages of JavaScript's flexibility when it comes to objects:
- An object is encased in braces: { }. The main object is denoted by a pair of braces.
- The object consists of key/value pairs. In my data, I used the animal name as the node key. Note that the key is a string value.
- The contents of a node can be another node. Each animal contains another JSON object, holding the data about that animal. JSON nodes can be nested (like XML nodes), giving the potential for complex data structures.
- The entire element is one big variable. JavaScript can see the entire element as one big JavaScript object that can be stored in a single variable. This makes it quite easy to work with JSON objects on the client.
Reading JSON data with jQuery
As you might expect, jQuery has some features for simplifying the (already easy) process of managing JSON data.
Figure 6-5 shows readJSON.html, a program that reads JSON data and returns the results in a nice format.

Figure 6-5: This program got the data from a JSON request.
Here's the complete code of readJSON.html:
<!DOCTYPE html>
<html lang = "en-US">
<head>
<title>readJSON.html</title>
<meta charset = "UTF-8" />
<style type = "text/css">
dt {
font-weight: bold;
float: left;
width: 5em;
margin-left: 1em;
clear: left;
}
</style>
<script type = "text/javascript"
src = "jquery-1.10.2.min.js"></script>
<script type = "text/javascript">
$(init);
function init(){
$.getJSON("pets.json", processResult);
} // end init
function processResult(data){
$("#output").text("");
for(petName in data){
var pet = data[petName];
$("#output").append("<h2>" + petName + "<h2>");
$("#output").append("<dl>");
for (detail in pet){
$("#output").append(" <dt>" + detail + "</dt>");
$("#output").append(" <dd>" + pet[detail] + "</dd>");
} // end for
$("#output").append("</dl>");
} // end for
} // end processResults
</script>
</head>
<body>
<h1>Reading JSON</h1>
<div id = "output">
This is the default output
</div>
</body>
</html>
Managing the framework
The foundation of this program is the standard XTML and CSS. Here are the details:
- Build a basic HTML page.
Much of the work will happen in JavaScript, so an H1 and an output div are all you really need.
- Put default text in the output div.
Put some kind of text in the output div. If the AJAX doesn't work, you'll see this text. If the AJAX does work, the contents of the output div will be replaced by a definition list.
- Add CSS for a definition list.
I print out each pet's information as a definition list, but I don't like the default formatting for <dl>. I add my own CSS to tighten up the appearance of the definitions. (I like the <dt> and <dd> on the same line of output.)
Retrieving the JSON data
The jQuery library has a special AJAX function for retrieving JSON data. The getJSON() function makes an AJAX call and expects JSON data in return:
$(init);
function init(){
$.getJSON("pets.json", processResult);
} // end init
It isn't difficult to get JSON data with jQuery:
- Set up the standard init()function.
In this example, I'm pulling the JSON data in as soon as the page has finished loading.
- Use the getJSON()function.
This tool gets JSON data from the server.
- Pull data from pets.json.
Normally you make a request to a PHP program, which does some kind of database request and returns the results as a JSON object. For this simple example, I'm just grabbing data from a JSON file I wrote with a text editor, so I don't have to write a PHP program. The client-side processing is identical whether the data came from a straight file or a program.
- Specify a callback function.
Like most AJAX methods, getJSON() allows you to specify a callback function that is triggered when the data has finished transferring to the client.
Processing the results
The data returned by a JSON request is already in a valid JavaScript format, so all you need is some for loops to extract the data. Here's the process:
function processResult(data){
$("#output").text("");
for(petName in data){
var pet = data[petName];
$("#output").append("<h2>" + petName + "<h2>");
$("#output").append("<dl>");
for (detail in pet){
$("#output").append(" <dt>" + detail + "</dt>");
$("#output").append(" <dd>" + pet[detail] + "</dd>");
} // end for
$("#output").append("</dl>");
} // end for
} // end processResults
- Create the callback function.
This function expects a data parameter (like most AJAX requests). In this case, the data object contains a complete JSON object encapsulating all the data from the request.
- Clear the output.
I replace the output with a series of definition lists. Of course, you can format the output however you wish.
$("#output").text("");
- Step through each petName in the list.
This special form of the for loop finds each element in a list. In this case, it gets each pet name found in the data element:
for(petName in data){
- Extract the pet as a variable.
The special form of for loop doesn't retrieve the actual pets but rather the key associated with each pet. Use that pet name to find a pet and make it into a variable using an array lookup:
var pet = data[petName];
- Build a heading with the pet's name.
Surround the pet name with <h2> tags to make a heading and append this to the output:
$("#output").append("<h2>" + petName + "<h2>");
- Create a definition list for each pet.
Begin the list with a <dl> tag. Of course, you can use whichever formatting you prefer, but I like the definition list for this kind of name/value data:
$("#output").append("<dl>");
- Get the detail names from the pet.
The pet is itself a JSON object, so use another for loop to extract each of its detail names (animal, breed, note):
for (detail in pet){
- Set the detail name as the definition term.
Surround each detail name with a <dt></dt> pair. (Don't forget to escape the slash character to avoid an HTML validation warning.)
$("#output").append(" <dt>" + detail + "</dt>");
- Surround the definition value with <dd></dd>.
This provides appropriate formatting to the definition value:
$("#output").append(" <dd>" + pet[detail] + "</dd>");
- Close the definition list.
After the inner for loop is complete, you're done describing one pet, so close the definition list:
$("#output").append("</dl>");