Chapter 2. Progressive Markup and Techniques
Introduction
As a web developer, you may be eager to implement HTML5’s new features within your website. However, HTML5 is still a budding technology, and browser support for many of its features is spotty at best.
Your excitement at the prospect of a cutting-edge HTML5 site may be tempered by the following questions:
How can I accommodate browsers that have yet to support many of HTML5’s elements?
What are the current best practices for coding a standards-compliant, cross-browser-compatible HTML5 website?
In this chapter you will learn how to test for supported HTML5 features within a browser, and the latest techniques for accommodating those features that aren’t supported. You will learn how to get started quickly with an HTML5 boilerplate template that includes all of the latest tricks, techniques, and best practices for implementing HTML5 technologies. You’ll find out how to validate your HTML5 documents, and even how to code your XHTML/HTML4 documents for future HTML5 upgradability.
The techniques presented in this chapter will give you the confidence to integrate modern HTML5 web technologies within your web pages, even as browser technology is still catching up with them.
2.1. Adding More Semantic Meaning
Solution
Apply markup in a semantic manner.
Semantic markup is markup that describes the
content it contains, rather than what the content should look like. This
means coding paragraphs with the p
element, titles with heading elements, and so on.
Discussion
Sometimes referred to as Plain Old Semantic HTML (POSH), semantic markup eschews the use of presentational elements like font or table for layout purposes (see http://microformats.org/wiki/posh).
POSH focuses on content. If you have a paragraph, use p. A heading? h1. The point is to use the element that best
describes the content.
Become familiar with the changes in HTML5 so that your code
remains both semantic and valid. HTML5 redefined several elements
like b and i (see Recipes 1.9 and 1.10)
and completely dropped others, like frame, frameset, and noframes. Also gone are presentational elements and attributes, as shown in Table 2-1.
See Also
For tips and tricks on how to style semantic markup, read CSS Cookbook by Christopher Schmitt (O’Reilly); visit http://www.w3.org/TR/html5/obsolete.html for the full list of obsolete elements and attributes.
2.2. Picking a Markup Style
Solution
One of the core changes HTML5 brings is a more relaxed syntax. Thanks to a simplified DOCTYPE (see Recipe 1.1), all coding styles are valid. HTML and XHTML are both welcome at the party. Some of the changes include:
Uppercase tag names
Optional quotes for attributes
Optional values for attributes
Optional closed empty elements
So, if you want to write loose and free, without concern for casing, quotes, or attribute values, you can go forth with confidence; your syntax will validate.
That being said, it is worth noting that valid syntax doesn’t necessarily equal good syntax, and that many developers still tout certain “best practices” that lend clarity to your code. These best practices include the following suggestions:
Code your tag names in lowercase. Uppercase is more difficult to read than lowercase, and distinguishing your code from your content in this manner is unnecessary: any decent text editor will color-code your HTML document so that you can visually pick out your tags with ease.
Enclose all attribute values in quotes. There might be instances in which you need to use quotes (e.g., if there is more than one value), and doing this universally helps to eliminate coding errors and leads to a consistent look.
Close all elements with content. Knowing where a
divends just makes for clearer code, and doing this consistently enhances clarity and makes your code easier to maintain.
Discussion
Whatever coding style you use, consistency is key: adhering to a strict syntax can help you more quickly identify errors in your markup.
A major benefit is that a strict syntax is easier to standardize for development teams. A standard convention can save hours in development time, particularly for large projects with distributed team members.
Ultimately, though, there is no right or wrong style in HTML5. Simply follow a style that helps you develop code consistently and troubleshoot efficiently.
See Also
For more style recommendations, see http://www.fredzlinkz.com/webcitymaster/html5-syntax-style-recommendations.
2.3. Understanding Browser Support for HTML5
Solution
As of this writing, the HTML5 specification is still evolving. Browsers are implementing portions of the specification before it’s complete, but support in modern browsers is not 100% complete (nor should it be).
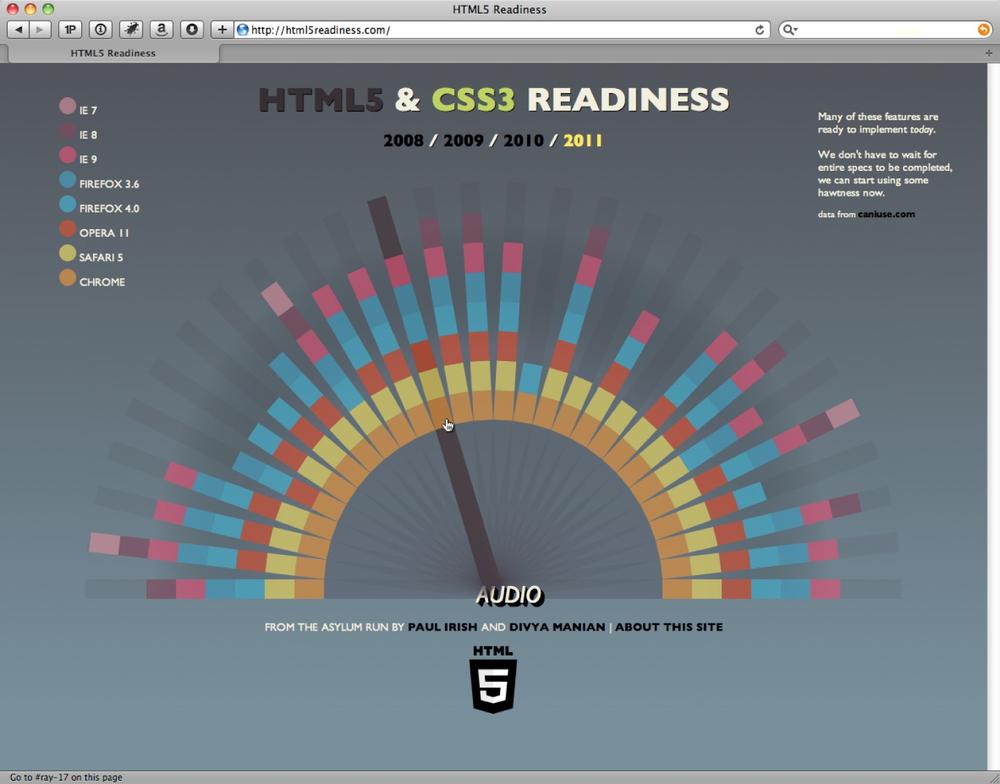
As demonstrated by the chapters in this book, there is a sizable portion of the HTML5 specification that is supported and can be utilized immediately. For a breakdown of HTML5 support across browsers, see http://caniuse.com/#cats=HTML5. A visual representation of HTML5 as well as CSS3 can be seen at http://html5readiness.com, as shown in Figure 2-1.
Discussion
Generally speaking, all of today’s latest browsers support HTML5 to some degree or another.
Using HTML5 isn’t an absolute proposition. You don’t have to use embedded content or web sockets to use the new structural elements, and vice versa. You don’t even have to use the new structural elements to have a valid HTML5 document; you just need the Document Type Definition (see Recipe 1.1).
Pick the features that work for you, and leave the rest. Or, rather, experiment with the rest to see if you may find a practical implementation for yourself or your projects.
See Also
See http://html5readiness.com for a visual representation of browser support for HTML5 and CSS3.
2.4. Making Internet Explorer Recognize HTML5 Elements
Problem
Internet Explorer doesn’t apply CSS to elements it doesn’t recognize. And, unfortunately, Internet Explorer (prior to IE9) doesn’t yet recognize most HTML5 elements. This means implementing HTML5 is difficult, as Internet Explorer won’t render any CSS that you apply to these new elements.
Solution
A clever solution to this problem, attributed to Sjoerd Visscher (see http://intertwingly.net/blog/2008/01/22/Best-Standards-Support#c1201006277) and known as the shim technique, involves creating a DOM element of the same name as the HTML5 element that you want to use. Once you create this element, Internet Explorer will apply CSS to it.
For example, let’s say you create the following simple body header that includes a navigation element:
<header>
    <h1>Riddles of the Sphinx</h1>
    <nav>
        <ul>
            <li><a href="EB9781449318444_2.html">Home</a></li>
            <li><a href="/about/">About</a></li>
            <li><a href="/blog/">Blog</a></li>
            <li><a href="/contact/">Contact Me</a></li>
        </ul>
    </nav>
</header>
and then style these elements:
header {
width: 600px;
height: 25px;
background-color: #ccffff;
border: 2px solid #66cc99;
padding: 10px;
}
nav {
width: 100%;
float: left;
list-style: none;
}
nav li {
float: left;
padding-right: 7px;
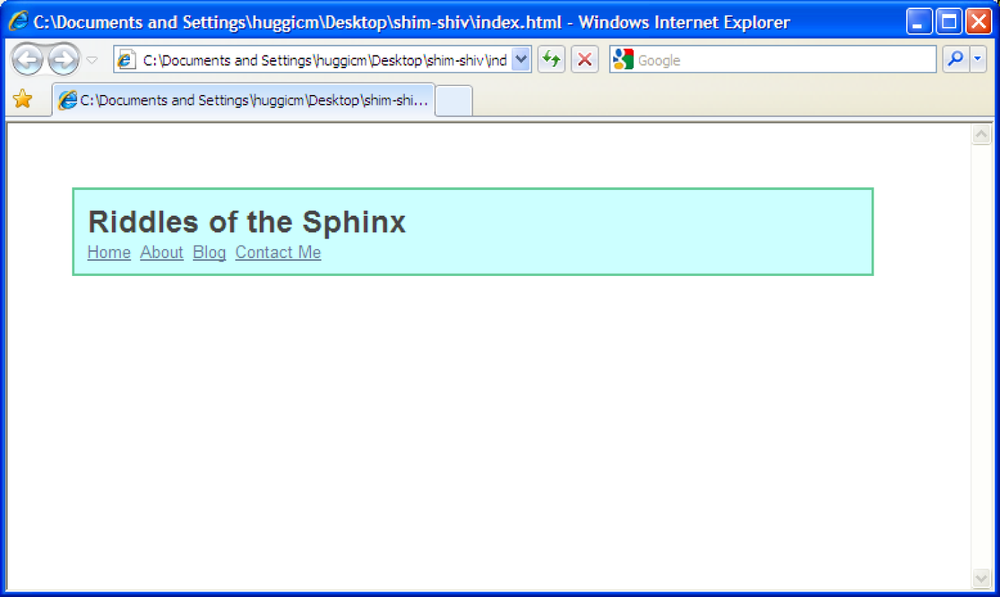
}When we view this page in Internet Explorer 8 or below (as shown in Figure 2-2), the CSS is not applied.
For Internet Explorer to recognize these elements, just add the
following script to the head of the HTML document (make sure
you add it to the head of the
document, as the elements need to be declared before the page renders):
<script>
    document.createElement("header");
    document.createElement("nav");
    document.createElement("footer");
</script>
Then declare the three HTML5 elements that we’ve used on the
page—header, nav, and footer—as DOM elements.
Now, when we view this page in Internet Explorer (as shown in Figure 2-3), the browser sees these elements and applies its CSS.

Discussion
While this technique is effective, it can be cumbersome to create DOM elements for all of the HTML5 elements on a page, especially if you are making heavy use of many of them.
Web developer Remy Sharp has created a script that enables
all of the HTML5 elements. Integrating this script into
your page can be much more convenient than handcoding a script every
time you want to sprinkle some HTML5 into your page. You can download
the script from http://remysharp.com/2009/01/07/html5-enabling-script/
and integrate it into the head of
your HTML, or you can hotlink the script from the Google code
repository:
<!--[if lt IE 9]>
    <script src="http://html5shim.googlecode.com/svn/trunk/html5.js"></script>
<![endif]-->
If you wrap this code within this conditional, it will only call the script if the browser is Internet Explorer 8 or lower (IE9 has broad-range support for HTML5 elements and technologies).
Note
To make the elements behave as block level elements, set the new
HTML5 elements to display:block in your style
sheet.
See Also
John Resig’s blog post detailing the HTML shim technique (Resig calls it “shiv” in his blog post): http://ejohn.org/blog/html5-shiv/.
2.5. Detecting HTML5 Features with JavaScript
Problem
You want to implement HTML5 features when they’re supported by the browser, but degrade to another solution when they’re not.
Solution
HTML5 comes with great cutting-edge technologies that, as a designer, you may be eager to take advantage of.
Unfortunately, HTML5 currently comes with limited browser support. You might like to implement some of these new technologies, but you also want to accommodate browsers that don’t yet support them.
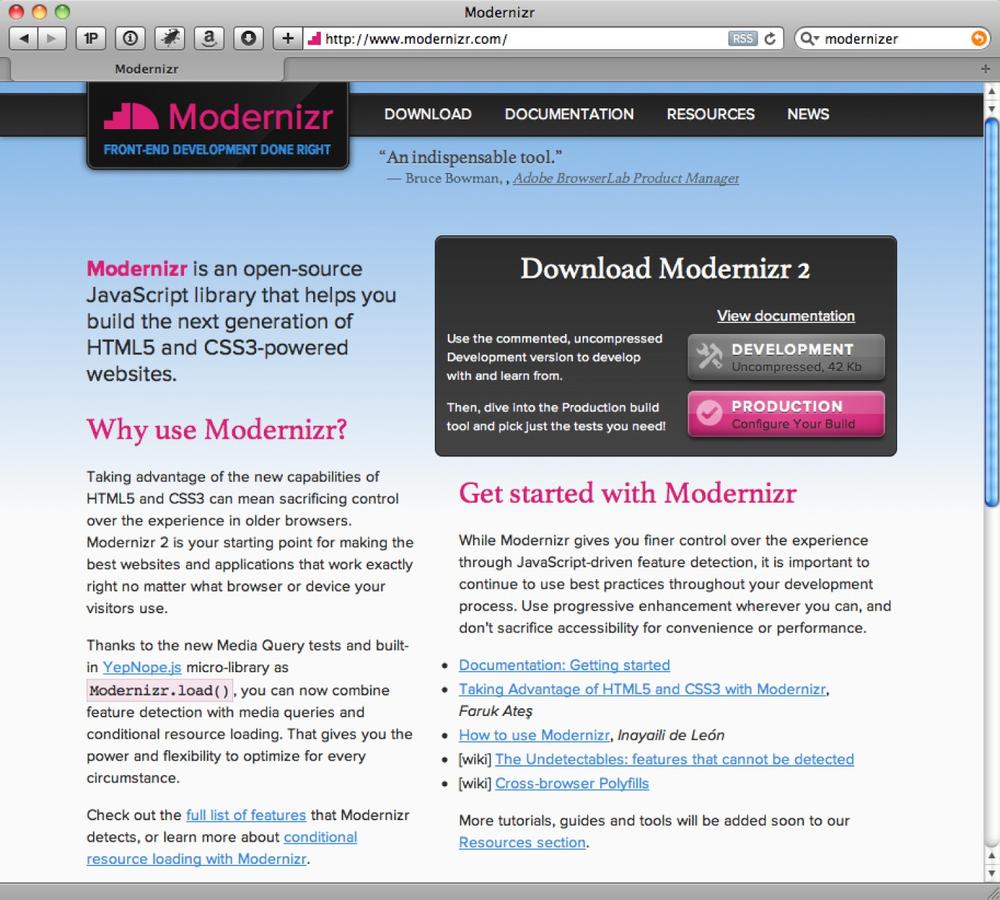
Modernizr (see http://modernizr.com) is a JavaScript library that makes it very easy to do just that: it detects the availability of various HTML5 and CSS3 features within a user’s browser and allows you to create fallbacks when a desired feature isn’t currently supported (see Figure 2-4).
Using Modernizr
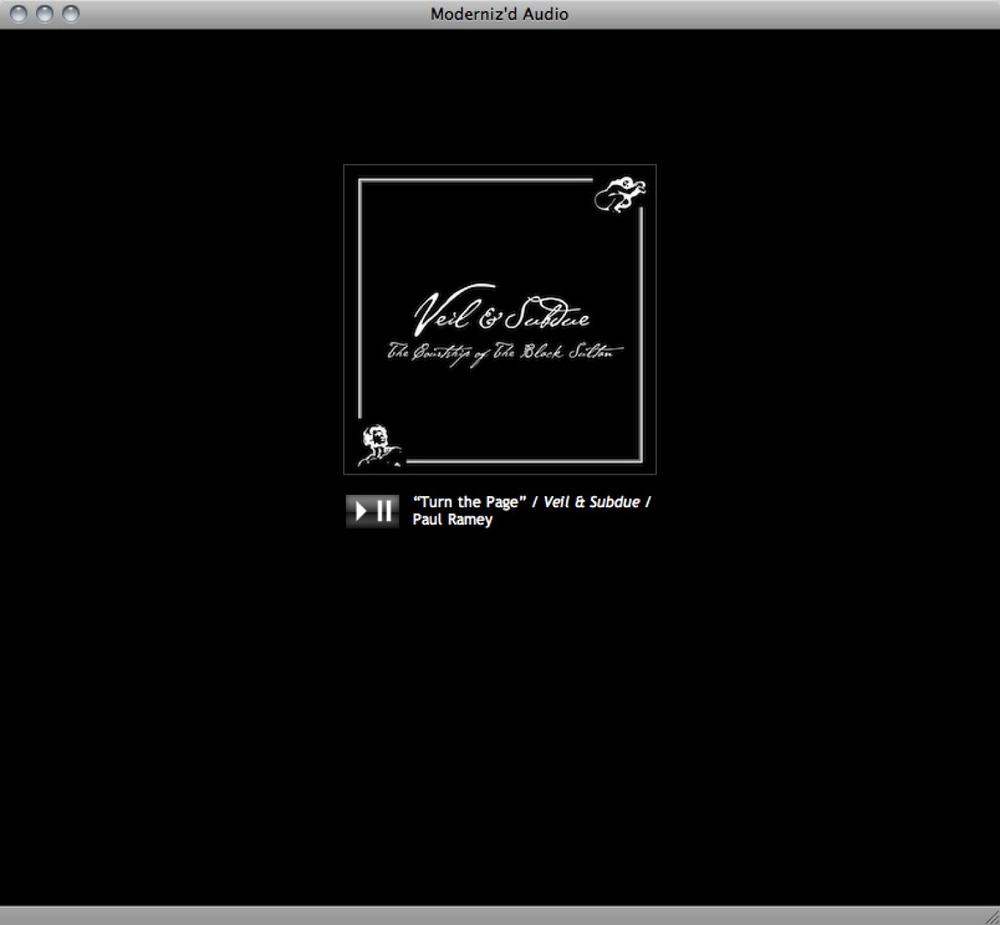
To see how Modernizr works, let’s run through an example using the JavaScript library where we
create an audio player using HTML5’s audio tag. If the user is viewing the page
with a browser that doesn’t support the audio element, we want to display an error
message alerting the user of the problem.
Note
If we wanted to really make this page cross-browser compatible, we would probably use a Flash audio player as a fallback. However, for the purposes of this recipe, we want to keep this example fairly simple.
Here is our basic HTML code for our player:
<img src="vscover.jpg" alt="Veil & Subdue: Courtship of the Black Sultan"/>
<div id="caption">
<div id="audio">
<audio>
<source src="turnthepage.ogg">
<source src="turnthepage.mp3">
</audio>
<p><input type=button onclick="playPause()" value=" " tabindex="0" />
“Turn the Page” / <em>Veil & Subdue</em> / Paul
Ramey</p>
</div>
</div><!--end caption-->We’ve included an image of the album cover art and our audio element, along with customized
controls.
First, download the Modernizr JavaScript library from http://modernizr.com. Include a reference to this file
within the head of your HTML
document:
<script src="js/modernizr-1.6.min.js"></script>
Note
This script must be included in the head of your document with a normal script tag; it
cannot be loaded dynamically with script loader techniques.
When this script runs, it detects whether or not the browser
supports the audio element and then
does two things:
Assigns a value (true or false) to the JavaScript property
Modernizr.audio.Adds a class to the HTML tag. If the browser supports the
audioelement, it will add a class calledaudio. If the browser doesn’t support theaudioelement, it will add a class calledno-audio.
Now you can write a script specifying what to do if the Modernizr.audio property is true or false
and code your CSS, specifying styles for elements when the audio element is supported and when it
isn’t.
So, let’s write a small script (we can put this in the head of our document) that only runs when
the audio element is
supported:
<script>
if (Modernizr.audio) {
    function playPause() {
        var myAudio = document.getElementsByTagName('audio')[0];
        if(myAudio.paused)
            myAudio.play();
        else
            myAudio.pause();
    }
}
</script>
This script adds functionality to the custom controls we added
to the page. It will only activate if the Modernizr.audio value is true (and thus
won’t waste browser resources if the browser doesn’t support the
audio element).
Next, it would be nice if we could get rid of the customized
controls altogether when the browser doesn’t support the audio element. This is easy to do with
Modernizr, as we can take advantage of the class it added to the HTML
tag:
.no-audio #audio {
    display: none;
}

.audio #audio input[type="button"] {
    width: 45px;
    height: 29px;
    background: url(button.png);
    border: 0px solid #000;
    float: left;
    margin-right: 10px;
}
When the audio element isn’t
supported, Modernizr adds a no-audio class to the header element. So, we can select for this
class in our CSS and set the display value to none for any element we want to disappear.
Here, it would be the div we
labeled “audio,” which encloses the controls.
When the audio element
is supported, however, Modernizr adds the
audio class to the header element. To cover this case we can select for this
class instead and style our control
button as we please.
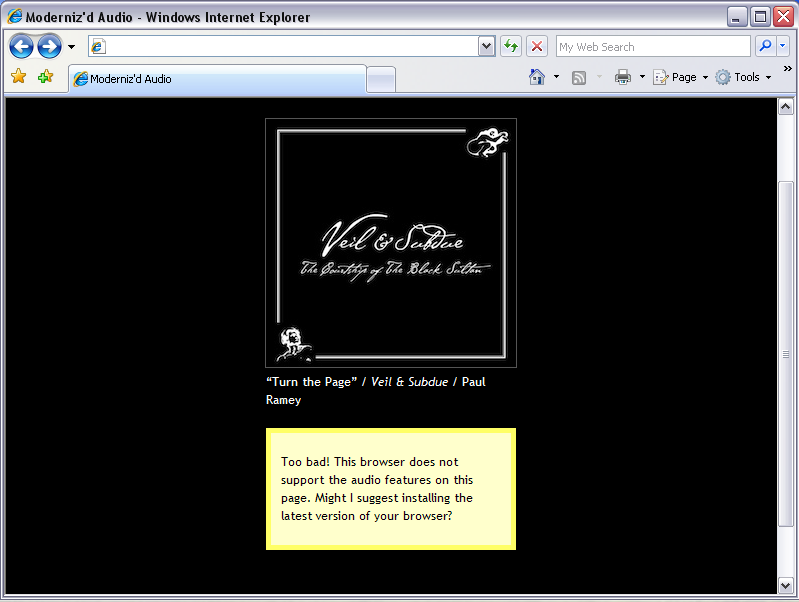
The next step is to set up an error message for when the
audio element isn’t supported.
First, we need to add the HTML for this error box to our HTML and then
place a notice underneath the “audio” div:
<div id="error">
<p>“Turn the Page” / <em>Veil & Subdue</em> / Paul Ramey</p>
<div id="error-box">
<p>Too bad! This browser does not support the audio features on this page.
Might I suggest installing the latest version of your browser?</p>
</div>
</div>Using the same basic technique as above, we can hide
this div when the
audio element is supported and
style it appropriately when it is not supported:
.audio #error {
    display: none;
}

.no-audio #error-box {
    background-color: #ffffcc;
    padding: 1px 10px;
    color: #000;
    border: 5px solid #ffff66;

}
.no-audio #error-box a {
    color: #333;
}
Figure 2-5
shows the audio element supported
by the browser, while Figure 2-6 shows the result
in a browser that does not support the audio element.
Currently Modernizr checks for over 20 HTML5 and CSS3 features and also includes the shim technique covered in Recipe 2.4. Each checked feature comes with its own specific CSS classes and JavaScript property. Check out Modernizr’s documentation at http://modernizr.com/docs/, which includes sample code for each feature that it supports.
Note
See Chapter 5 for more information and recipes on using HTML5 audio.
Discussion
Modernizr isn’t the only tool available to assess and work around this issue: traditionally, “UA sniffing” or “browser sniffing” was used to determine which browser a user was running. Then, the designer could implement browser-specific code to customize the page.
This method, however, is unreliable in a number of ways. First of all, a browser can fake a UA string, which is the value that the browser-sniffing technique looks at to determine the browser in use. Additionally, users can switch off certain features of their browsers, so that even if you can determine the correct browser, you still can’t be sure which features are supported.
Also, if the user is running a new browser, a newer version of a browser, or an alternative browser that you may not have bothered to check for, your code may fail to recognize it altogether. Not to mention that it falls on your shoulders to be on top of what browsers support which features.
Modernizr avoids these pitfalls, as it detects specifically which features are supported, rather than merely trying to detect what browser the user is viewing the page through. This is a far more reliable method if you want fine-tuned control over the user’s experience of your website.
Note
Modernizr now supports a “production” version (see http://www.modernizr.com/download/). This version generates a custom build of Modernizr with only the HTML5 tests needed for your sites or web applications.
See Also
The documentation on the official Modernizr website at http://www.modernizr.com/docs/.
2.6. Using HTML5 Boilerplate
Solution
Use Paul Irish’s HTML5 Boilerplate (as shown in Figure 2-7) as a jumping-off point for your website. Not only does it include an HTML5 template complete with an organized folder structure and CSS file, but it also incorporates current coding best practices, browser bug fixes, and popular JavaScript libraries.

It incorporates three years of research into current cutting-edge coding techniques, so you can just get on with building your website. In fact, HTML5 Boilerplate includes so much that it would be time prohibitive to mention it all. So, here are some of its highlights:
An index.html file that includes:
Valid HTML5 markup
References to Modernizr and jQuery JavaScript libraries (which are included with the template)
Conditional statements that add classes to body tags based on what version of Internet Explorer the page is being viewed on (so you can easily create IE6- or IE7-specific styles)
A basic structural skeleton within the
bodytagIE6 .png fix script
Google analytics script
A CSS file that includes:
A global reset
Font normalization (so your fonts are sized the same across all browsers)
Some basic styles for lists, tables, and so on
A few nonsemantic classes (for image replacement and element hiding)
Print styles
Space for mobile browser and orientation styles (e.g., an iPad displayed horizontally versus vertically)
A favicon and Apple touch icon (which you’ll probably want to customize)
Webserver config files
While a dizzying array of cutting-edge web technology, it’s fairly simple to get started with using the boilerplate.
Using HTML5 Boilerplate
First, download the latest version of HTML5 Boilerplate from https://github.com/paulirish/html5-boilerplate.
Unzip the files and place them at the root of your web project. The documentation suggests that you start off by deleting a couple of things:
The demo files (located in a folder called Demo)
The profiler code (located near bottom of the index.html file; it begins with the comment “yui profiler and profileviewer - remove for production”)
Use the index.html file as
a template for all of your HTML documents. Flesh out the basic
elements and div containers
included in the file, or start from scratch and create your own: while
Paul’s skeleton is a great start, feel free to take it as a starting
point.
You’ll also want to customize the information in the head of the document
(the title, author, and so on).
As a last tweak to your HTML document, add your site ID to the Google Analytics code at the bottom of the file. (If you don’t use Google Analytics, you’ll want to delete this section.)
Then, you’ll want to customize the style.css file. The boilerplate CSS file has a space for your primary CSS. It begins with the comment:
/* Primary Styles
   Author:
*/
Once you’ve added the primary CSS, feel free to add orientation styles and mobile browser styles. You’ll find these under the section beginning with the comment:
/*
 * Media queries for responsive design
 * These follow after primary styles so they will successfully override.
 */
Finally, customize the favicon and Apple touch icon. That should be as easy as replacing the current icons included in the boilerplate files.
Discussion
While it’s fairly simple to get a basic HTML5 site started with HTML5 Boilerplate, to really get the most out of the boilerplate you’ll want to study the online documentation to understand some of what is going on with the code.
For instance, if you don’t understand the classes that the boilerplate includes in the HTML (such as the IE body classes or the image-replacement class), you won’t be able to take advantage of these useful bits of CSS in your site. Similarly, if you don’t know how to implement the IE6 .png fix that’s included with the boilerplate, that script will turn out to be fairly useless.
Additionally, there may be some things you’ll want to get rid of, if you don’t use them: you can delete the IE6 .png script if you don’t care about supporting IE6, and you can delete the .htaccess file if you aren’t on an Apache server. Knowing what is included in the boilerplate makes it easy to trim it down to include only what you need.
That’s not to say you need to spend hours poring over the documentation to understand every bit of its inner workings. You might as well create your own boilerplate, if you go through all that trouble.
However, it will behoove you to get an overview of the pieces that make up the boilerplate; that way, if there is something you think may be useful for your site, you can study that bit in more detail.
See Also
The Official Guide to HTML5 Boilerplate at http://net.tutsplus.com/tutorials/html-css-techniques/the-official-guide-to-html5-boilerplate/ and the HTML5 Boilerplate Documentation at http://html5boilerplate.com/docs/.
2.7. Validating HTML5
Solution
Validating your code is one of the key best practices in web development and is a great first step in eliminating coding errors. While validation doesn’t guarantee that your web page will look or behave like you expect, it does guarantee that any unexpected behavior is not due to a mismatched tag or unrecognized CSS selector.
Why validate? Fortunately (or unfortunately, depending on your position on web standards), most web browsers try to compensate for invalid coding. So, even a horrendous collection of tag soup consisting of mismatched tags and improper nesting will probably look okay in most browsers. However, different browsers handle errors differently.
That means that if your code isn’t valid, a browser can try to compensate for errors in unexpected ways. Additionally, mobile browsers are less forgiving of erroneous code (they simply don’t have the resources to compensate for errors the way that desktop browsers can). So, an invalid page that renders fine on your desktop browser may break on your mobile phone. In light of modern web technologies, it is becoming increasingly important to validate your code and eliminate errors. In doing so, you go one step further in ensuring that your web page renders as expected across multiple browsing environments.
Fortunately, validating for HTML5 is not much different than
validating XHTML/HTML4. Indeed, you may find that creating a valid HTML5
document is much easier, as the HTML5 specification, in general, is much
more lenient than its predecessors. If you want to capitalize your HTML
tags, go ahead; the HTML will still validate. If you’re too lazy to
close out your li tags, you need not
feel guilty for doing so. The validator won’t chastise you—it will leave
that job up to your colleagues.
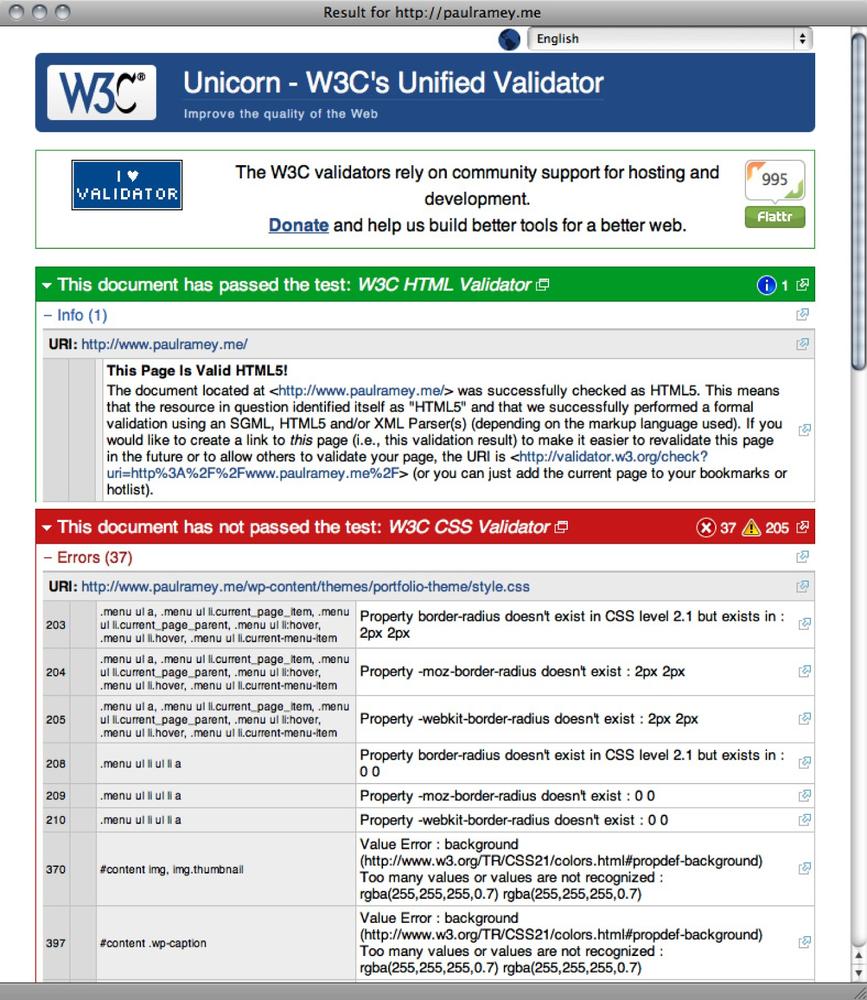
So, let’s get on to the business of validating our code. Currently, there are two popular online validators that you can use:
The W3C’s Unicorn unified validator (shown in Figure 2-8), which performs a variety of checks and can validate HTML5 and CSS3: http://validator.w3.org/unicorn/
The Validator.nu HTML5 Validator: http://html5.validator.nu/

To check your code, you can enter the URL, upload your HTML file, or simply paste the contents of the file into the validator. When you click Check, the validator will either verify that the code is valid HTML (and CSS, if you are checking that as well) or present you with a list of errors by line number, as shown in Figure 2-9.
Note that you will usually need to run your page through the validator more than once: many syntax errors (e.g., an improperly closed tag) can generate a cascade of further errors that are eliminated when the initial error is fixed, so you’ll want to revalidate your document as you correct your errors.
Currently, the W3C’s Unicorn validator checks CSS 2.1 by default, but you can customize this check to include CSS3 as well.
Discussion
Validation isn’t the end-all, be-all of good HTML coding. There may be instances in which you purposefully include invalid code in your HTML document. Perhaps there is a necessary hack that doesn’t validate, or you want to include a piece of cutting-edge CSS that isn’t yet widely supported across browsers (and thus is not recognized by modern validators).
These can be perfectly valid reasons for having a web document that doesn’t validate. And while it may be controversial whether you should include said hack or CSS technique, intentionally including a piece of invalid code can still be a part of good web development practice.
Validation should be seen as one of many tools in your web development toolbox, and not the final say as to whether your page is coded correctly. That said, validating your code is a great way to find unintentional errors in coding, and, all things being equal, a valid HTML5 document is generally better than an invalid one.
See Also
The documentation for these two services at http://code.w3.org/unicorn and http://about.validator.nu/.
2.8. Mapping HTML5 Elements to ID and Class Names
Problem
You aren’t ready for HTML5 yet, but you want to code your site so that upgrading to HTML5 in the future will be painless.
Solution
There may be legitimate reasons why you don’t want to take the HTML5 plunge yet. Perhaps you worry about browser support. Perhaps you like to keep things simple, and you don’t want to implement the myriad scripts and tweaks necessary to make an HTML5 site compatible with all modern browsers.
However, you still appreciate the semantic markup of HTML5, and you’d like to code your site so that, when all modern browsers catch up, your XHTML/HTML4 code will be as ready as possible for the transition to HTML5.
Fortunately, it’s quite simple to mirror the semantic structure of
an HTML5 site using divs labeled with
HTML5-ish id and class names. Let’s take a look at how this can
be done. We’re going to create a simple blog front page, as shown in
Figure 2-10.

Looking at this site, we can pick out a few key structural elements:
A body header, which contains the blog title and a navigation bar
A section that contains two blog posts
A footer
If we were coding this site in HTML5, we’d mark this up with
various header and footer tags, a nav tag, and article tags. However, as we’re going to mark
it up with XHTML/HTML4 instead, we’re going to mirror the structure and
naming conventions of HTML5 as closely as possible by using divs with id and class names.
First, let’s work on the header:
<div id="header">
    <h1>living with simplicity</h1>
    <div id="tagline">
        life. joy. simple.
    </div>
    <div class="nav">
        <ul>
            <li><a href="about/">About</a></li>
            <li><a href="archives/">Archives</a></li>
            <li><a href="contact/">Contact Me</a></li>
            <li><a href="subscribe/">Subscribe</a></li>
        </ul>
    </div><!--end nav-->
</div><!--end header-->
Ultimately, this may differ little from how you would have
initially coded this page. But note that we have mirrored the HTML5
element names with the "header" and
"nav" divs. In
HTML5, the header tag should include
a heading tag (here we have our h1
title tag) and can include the nav
element as well (hence the inclusion of the navigation bar within our
header).
Next, let’s mark up our blog posts:
<div class="posts">
    <div class="article">
        <div class="header">
            <h1>10 ways to eat ethically, cheaply, and well</h1>
            <div class="meta">Posted on <span class="date">February 1st, 2011</span>
            </div>
        </div><!--end header-->
        [Post Content]
        <div class="footer">
            <div class="meta">Tags: <a href="tags/simplicity" rel="tags">
             simplicity</a>, <a href="tags/food">food</a></div>
        </div><!--end footer-->
    </div><!--end article-->
    <div class="article">
        <div class="header">
            <h1>adventures in composting</h1>
            <div class="meta">Posted on <span class="date">January 15th, 2011</span>
            </div>
        </div><!--end header-->
        [Post Content]
        <div class="footer">
        <div class="meta">Tags: <a href="tags/simplicity" rel="tags">simplicity</a>,
        <a href="tags/green/" rel="tags">green</a></div>
        </div><!--end footer-->
    </div><!--end article-->
</div><!--end posts-->`
Note first that we’ve wrapped our posts in a div we labeled "posts". You
may be tempted to name it
“section” (along with the corresponding HTML5 section tag)—after all, a collection of blog
posts does seem to account for its own generic section. Recall, however,
that the HTML5 section element is not
meant to stand in for any old div:
something is justifiably a “section” only if it has at least one head
tag (i.e., only if it can represent a level in the outline of the HTML
document). This div does not have a
head tag, so we have given it an alternative semantic name.
Next, we’ve wrapped each post within a div that we’ve named
"article". This corresponds to the article tag in HTML5. Each article div, in turn, has its own header and footer
(which, again, would match up with the header and footer HTML5 tags).
Interestingly, we’ve also enclosed each post title in h1 tags. Prior to HTML5, having more than one
h1 tag within an XHTML/HTML document
was generally frowned upon. In order for your page to be outlined
properly within the DOM, your head tags should follow a natural
progression: h3 tags followed
h2, and h2 followed the h1 tag, which enclosed the title of the page.
With the advent of HTML5, this was no longer necessary: as the browser
understood the article element,
semantically, it could be ranked (and outlined) differently than, say,
the header element.
Thus, you no longer need to rely on the head tags to do all of the ranking and outlining of the information within your document—that task is instead handled by these new semantically rich elements.
So, each of your elements (such as header or article) can begin with its own h1 tag. While it may seem strange to mirror
this new coding convention in an XHTML/HTML4 document, it will
nonetheless make it easier to transition your page to HTML5
later.
Finally, we close our page with a div labeled "footer", which
maps onto the HTML5 footer
tag:
<div id="footer"> <p>© 2011 Christina Ramey</p> </div>
Now, when we are ready to switch to HTML5, it will be easy enough
to change all of these divs to their
corresponding HTML5 tags, thus saving us the headache of having to do
any major restructuring of the page.
Discussion
There is no mystery to this technique of mapping of HTML5 tags to
XHTML/HTML4 divs. Indeed, you many
not need to alter your current coding technique much, if at all.
However, once you decide on proper ID and class names that mirror HTML5
tags, it is best to stick with that naming convention (particularly if
you are coding a lot of pages).
That way, when it does come time to translate these pages to
HTML5, you won’t need to recall that you named your header
"header" in one document but
"main-header" in another. It will also make it easier
to do a quick find-and-replace with your text editor across multiple
documents.
See Also
Oli Studholme’s HTML5 ID and class name cheat sheet at http://oli.jp/2008/html5-class-cheatsheet/.