
Chapter 10. Advanced HTML5 JavaScript
Introduction
HTML5 has dramatically broadened its scope from previous revisions. Whereas HTML4 was primarily focused on markup, HTML5 is focused not only on markup but also on a variety of advanced JavaScript APIs that help bring new features to life. However, most of these new technologies actually have their own specifications, working groups, etc., so it can be confusing to refer to the entire group of technologies under one umbrella term like “HTML5.” It is for this reason that, as a way of being more precise, the trend has become to discuss such APIs as companions to HTML5—or, as some have put it, “HTML5 and friends.” So, in this chapter, we get familiar with several friends of HTML5.
We’ve already covered the JavaScript APIs behind several
markup-anchored elements, such as canvas, audio, and video. Here, our focus is on some other
companion APIs, which notably are not necessarily tied to a particular
markup element. You can think of the recipes in this chapter as being the
meat on the bones of what it takes to create a truly interactive web
application.
It’s important to note that the technologies discussed in this chapter are in varying degrees of standardization and implementation. They are not universally agreed upon or built into browsers yet, so using them requires some caution and planning. For some things, there are ways to fall back to older or less-capable functionality in non-supporting browsers, but in other cases you have to build a workflow into your application that will handle when certain features are simply not present.
Note
Because work on these particular sets of technologies is happening so rapidly, and what we know at the time of writing may be outdated by the time of reading, this chapter does not cover directly what things are supported where. You are encouraged to test these features in your target browser environments to get the most updated information.
10.1. Local Storage
Problem
You want to store some data (like user preferences or partially entered form data) persistently on a user’s system, so that it’s available on a subsequent visit.
Solution
HTML5 introduced two new APIs for in-browser persistent data
storage: sessionStorage, which stores
data only for the lifetime of the browser instance/session, and localStorage, which stores data persistently
“forever” (which in this case means, “until either the code or the user
clears it out”).
Both interfaces have the same API. The difference between the two is basically how long the browser persists the data.
Note
Data stored in these containers must be strings. If you need to
store complex data objects, one good option is to serialize the object
into JSON, using JSON.stringify().
To test if a browser supports either of the storage APIs, use the following feature-detect:
var storage_support = window.sessionStorage|| window.localStorage;
To store some data for only the current browser instance (i.e., so
it goes away when the user closes the browser), use sessionStorage:
var user_id = "A1B2C3D4";
var user_data = {
    name: "Tom Hanks",
    occupation: "Actor",
    favorite_color: "Blue"
    // ...
};

sessionStorage.setItem(user_id, JSON.stringify(user_data));
To store some data for a longer period of time, use localStorage:
var user_id = "A1B2C3D4";
var user_prefs = {
    keep_me_logged_in: true,
    start_page: "daily news"
   // ...
};

localStorage.setItem(user_id, JSON.stringify(user_prefs));
These code snippets look almost identical because the APIs are identical.
To pull data (if available) from the storage container, use code like this:
var user_id = "A1B2C3D4";
var user_data = { /* defaults */ };
var user_prefs = { /* defaults */ };

if (sessionStorage.getItem(user_id)) {
    user_data = JSON.parse(sessionStorage.getItem(user_id));
}
if (localStorage.getItem(user_id)) {
    user_prefs = JSON.parse(localStorage.getItem(user_id));
}
These storage APIs allow you to very simply set and retrieve key/value data, where the value is a string but can represent anything you want, including the string serialization of a complex data object.
Note
The localStorage and sessionStorage APIs are synchronous in
design, which makes them easier to use but can result in slower
performance. Be careful using these APIs in performance-sensitive
code.
Discussion
The solution for storing data client-side that most likely first popped into your head is cookies. However, cookies have a number of problems that make them less than ideal for storing user data. In this chapter we explore a new alternative: the HTML5 storage (also known as “DOM storage”) APIs.
sessionStorage and localStorage share the same API; the
difference, as belied by their names, is in how long they persist the
data. For data that you only need to persist for the lifetime of a
browser session—things such as user login data, shopping cart contents,
etc.—the sessionStorage API is
probably your best option. For more long-lived data—things such as
application preferences—localStorage
may be a better option.
Note
Many browsers even persist sessionStorage data across browser crashes.
This makes it a great container to temporarily mirror data being
entered into form fields: if the browser crashes, you can restore what
the user was typing.
The APIs for sessionStorage and
localStorage are as follows:
getItem(key)Returns an item of data from the storage container, referenced by its key
setItem(key,item)Adds an item of data to the storage container, referenced by its key
key(index)Returns the key for an item of data at the numerical index specified
removeItem(key)Removes an item from the storage container, referenced by its key
clear()lengthIdentifies how many items of data are in the storage container
Most browsers give up to 5 MB of space for these storage containers. For most practical applications, this is more than enough. Be prepared to detect and handle errors, though, if you are writing more data than the browser allows.
Unlike cookies (which have explicit expirations) and sessionStorage (which has implicit expiration
at the end of the browser instance/session), the localStorage API has no expiration at all.
This has both good and bad consequences.
The benefit is that data stays around as long as you need it to unless the user explicitly clears it herself, but the downside is that the 5 MB limit may be reached more quickly than anticipated, especially if old data is abandoned and left forever to sit idle in the storage container.
One common solution is to implement a custom expiration mechanism, by storing a timestamp with each piece of data and then checking manually on each page load to see if any old data needs to be removed.
For instance, your ecommerce site might keep a record of all items the user has viewed across various visits, so it can display that in a “Previously Viewed” area. However, you don’t want the application to remember those items forever, so you might manually expire entries that are older than, say, 21 days:
// first, store the currently viewed item in the history
var current_item = {
    id: "ABCD0123",
    data: "Mens' Running Shoes",
    ts: new Date() // current timestamp, used for expiration check later
};
localStorage.setItem(current_item.id, JSON.stringify(current_item));

// then manually "expire" all old entries
var key, data;

for (var i=0; i<localStorage.length; i++) {
    key = localStorage.key(i);
    data = localStorage.getItem(key);
    if (data.ts < ((new Date()) - 60*60*24*21)) { // more than 21 days old
        localStorage.removeItem(key);
    }
}
Both APIs restrict access to reading and writing data to the exact same page domain (domain, subdomain, schema, port, etc.) as the hosting page, meaning that you cannot share data across different domains with either of them. This is both a helpful and frustratingly restrictive reality: the benefit is that data is well protected privacy-wise (i.e., from other snooping sites), but the downside is that your application’s different services on different domains cannot share their data through this interface.
See Also
For more information on the DOM storage APIs, see this MDC entry: https://developer.mozilla.org/en/dom/storage.
10.2. Application Caching
Problem
You want to make your web application (including all its resources) available to users even in an offline state, without relying on the normal browser cache.
Solution
HTML5 defines a special application cache, commonly called the
appcache, that allows you to instruct the browser to
cache certain resources—images, CSS, JS, etc.—in a way that makes them
available to the application even if the user’s browser is offline and
not connected to the public Internet.
To test if the browser supports appcache functionality, use the following
feature-detect:
var appcache_support = !!window.applicationCache;
To utilize appcache in your
application, first you need to create a manifest file listing the
resources you want in the appcache.
This file might look like:
CACHE MANIFEST

CACHE:
index.html
help.html
style/default.css
images/logo.png
images/backgound.png
The appcache manifest file
should include a CACHE section for listing the
resources you want to include in the appcache. You can also specify a
NETWORK section for URLs that need to be dynamically
called (e.g., via Ajax) and should never be cached, and a
FALLBACK section that lists local (cached) file
fallbacks for any remote URL requests that fail (such as default content
in an offline scenario for a normally online call to a server
API).
Note
Applications executing in the appcache context are not allowed to connect
to remote URLs unless those URLs are listed within the
NETWORK section of the manifest. This is to provide
an additional layer of security to applications, preventing them from
contacting servers that aren’t known and whitelisted.
Once you have the manifest file—in this example we’ve named it
cache.manifest—tell the browser about the file by
adding a property to the html element
in your markup, like so:
<html manifest="cache.manifest">Note
The cache manifest file must be served with the MIME type
text/cache-manifest.
That’s it! Now your application is offline-capable via appcache. The browser persistently caches the
listed resources and does not re-request them on subsequent page loads,
unless the cache manifest file changes.
Updating the appcache
Simply changing a file that is stored in a user’s appcache is not enough
to get that new version of the file delivered to the user. The browser
will only check for updated versions of files in its appcache (and subsequently download any
changes) if the manifest file changes.
However, you may not have any changes to make to the manifest file itself if, for example, there are no new resources to list and none to remove.
So, one easy approach is to include in your file a comment that
you can update with a new value whenever you change one or more files
and want the browser to update its appcache:
CACHE MANIFEST
# cache version: 1257

CACHE:
index.html
help.html
style/default.css
images/logo.png
images/backgound.png
Each time you update a resource that is in the appcache, simply bump up the version number
in the comment. The next time a user loads the page, the browser will
see this new cache manifest file and update the appcache contents.
There’s a catch, however. Even if the browser sees during page
load that the manifest file has changed, it still lets the current
page load continue immediately, with the now out-of-date appcache contents; it then asks for the
updated files to be loaded in the background, to be ready for the
next page load.
Fortunately, the browser provides a JavaScript API to help:
the applicationCache
interface. Using this interface, you can detect that a new set of
appcache contents has been fetched
and is now available, and force them to be applied to the appcache right away, rather than on the next
page load:
var cache =applicationCache; cache.addEventListener("updateready", function(){ if (cache.stats == cache.UPDATEREADY) { cache.swapCache(); // swap in the new cache items } }, false);
This makes the new appcache
items available for any further uses during the current page
lifetime.
However, any places where the resources were already used on the page are not updated. That can result in a strange user experience, depending on the situation.
The cleanest way to force the entire page to be updated with the new resource versions is to simply reload the page. However, be kind to the user, and first ask if he wants to reload the page, like this:
var cache = applicationCache;
cache.addEventListener("updateready", function(){
    if (cache.stats == cache.UPDATEREADY) {
        if (confirm("This site has been updated. Do you want to reload?")) {
            location.reload();
        }
    }
}, false);
So far, we’ve only seen how to respond to cases where the
appcache is marked for updating
during a page load. However, some sites are designed to be long-lived,
with few or no page reloads. In this case, getting updates requires
special handling.
To force the browser to do a check for an updated
cache.manifest file and fetch the appcache contents if the file has been
modified, you can call the update()
API method:
function updateAppcache(){
    var cache = applicationCache;
    cache.update(); // check to see if the cache manifest file has been updated

    cache.addEventListener("updateready", function(){
    if (cache.stats == cache.UPDATEREADY) {
            if (confirm("This site has been updated. Do you want to reload?")) {
                location.reload();
            }
        }
    }, false);
}
Typically, you would wire up such a check to happen either on an automatic time interval, such as every 24 hours, or in response to a specific application action, such as the user clicking a button in your page.
Note
If you perform appcache
updates at an automatic time interval, prompting the user before a
reload is probably the friendliest approach. However, if the user
initiates the update you can probably safely reload the page without
prompting, as soon as the appcache is updated.
Discussion
We mentioned that the appcache
is special, and the reason for that assertion is that, unlike with the
browser cache, resources that are in the appcache never expire (this is similar to the
localStorage interface we discussed
in Recipe 10.1).
Practically speaking, this means any resources listed in the cache manifest are cached permanently. More specifically, the browser does not re-request any of those resources on subsequent page loads.
The persistent caching of resources definitely improves performance on subsequent page views, especially on bandwidth-limited mobile devices. However, it’s sometimes necessary to be able to update one or more items in that persistent cache.
There are two ways to go about forcing the browser to discard its cache and update the resources listed in the manifest. One technique is useful for subsequent page loads, while the other is useful for updates during the lifetime of a single page view.
It’s important to understand that if an appcache already exists for a page at the time
of page load, even if it’s determined to be out of date by virtue of
finding an updated cache manifest file, the browser still uses the
current appcache to render the page;
any updates to the appcache contents
are available only on the next page load.
However, using JavaScript via the UPDATEREADY event, as
shown above, you can detect that the current page was rendered with
out-of-date cache items and force an update of the appcache during that page view. This allows
any subsequent uses of resources in the page lifetime to use the updated
versions of the files. You can also just reload the entire page to use
the new appcache contents everywhere,
as long as this is okay with the user.
The appcache is considered to
be more reliable for offline application resource caching than the
normal browser cache. It also provides a JavaScript API for interacting
with updates—something the regular browser cache doesn’t provide.
See Also
The beginner’s guide provides an introduction to applicationCache functionality at http://www.html5rocks.com/en/tutorials/appcache/beginner/.
For more in-depth information on the applicationCache API, see this MDC entry:
https://developer.mozilla.org/en/offline_resources_in_firefox.
In addition, http://appcachefacts.info has a great
discussion of important nuances of appcache
behavior.
10.3. Drag and Drop
Problem
You want to implement native drag-and-drop functionality without managing mouse events manually or using a complex library.
Solution
Recognizing how common drag-and-drop interaction is in today’s complex web applications, HTML5 now defines a direct API for handling drag and drop (“D&D”).
To test if the browser supports native D&D functionality, use the following feature-detect:
var dnd_support = 'draggable' in document.createElement('span'),Now, let’s build a simple D&D demo. We’ll begin by setting up some visual styles for our D&D elements:
<style>
#foobar { background-color:yellow; width:100px; height:100px; cursor:move; }
#catcher { background-color:blue; width:150px; height:150px; padding:5px;
    margin-bottom:5px; }
</style>
The first step in enabling native D&D is to put the draggable attribute on
the element you want to be drag-enabled:
<div id="catcher">...</div>
<div id="foobar" draggable="true">...</div>
Next, we need to use the JavaScript API and D&D events to tell the browser where the element can be dragged to and what to do once it’s dropped there.
For example, we can listen for the dragstart event, and
style the element differently when it’s being dragged (e.g., putting a
border around it or making it partially transparent):
var foobar = document.getElementById("foobar");
foobar.addEventListener("dragstart", function(evt) {
    this.style.border = "3px dotted #000"; // black dotted-line border
}, false);
Now let’s style an element that can receive the drop, so that when the dragged item is over it, it is obvious that you can drop the element there (as opposed to just dropping it in any location):
var catcher = document.getElementById("catcher"); // catch the dropped element
catcher.addEventListener("dragenter", function(evt) {
this.style.border = "3px solid red"; // give the catcher a red border
}, false);
catcher.addEventListener("dragleave", function(evt) {
this.style.border = ""; // remove the border from the catcher
}, false);
catcher.addEventListener("dragover", function(evt) {
if (evt.preventDefault) evt.preventDefault();
return false;
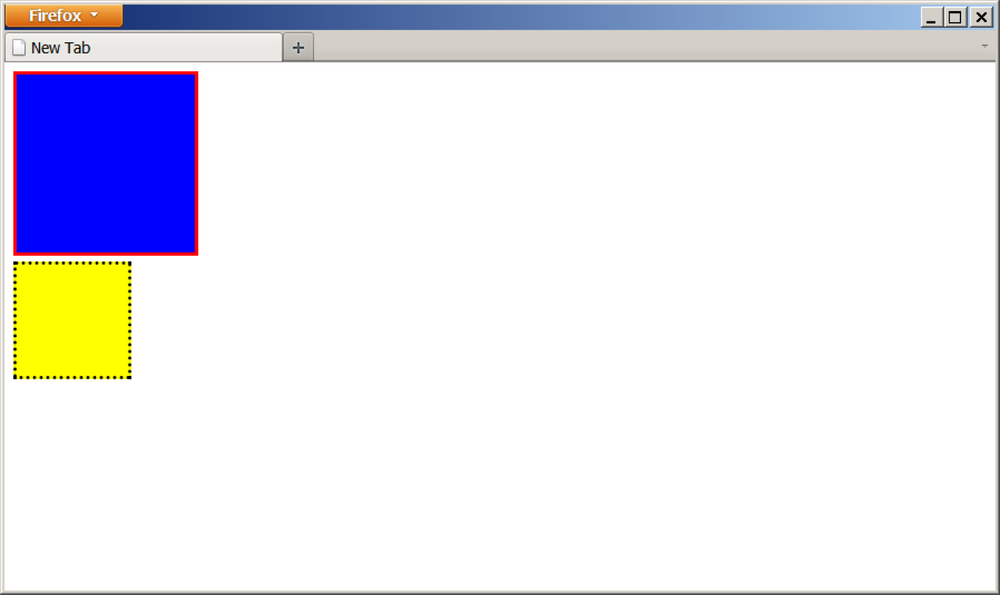
}, false);In the preceding snippet, we added event listeners to the element
that catches our dropped element for the dragover, dragenter, and dragleave events. The dragenter and dragleave events simply toggle on and off a
red border for our target element, to make it clear that you can drop
the element there (as shown in Figure 10-1).
The dragover event is fired
continuously while dragging the element around on top of the target, so
we do not want to toggle on the red border in that handler (doing so
would create unnecessary work for the browser). However, we do need to
prevent that event’s default behavior, depending on the type of element
being dragged. This is why we use preventDefault() and return false.
Lastly, we need to wire up a dataTransfer object with data that the browser
needs for handling the D&D actions. So, we’ll modify our dragstart event handler like so:
foobar.addEventListener("dragstart", function(evt) {
    this.style.border = "3px dotted #000"; // black dotted-line border

    evt.dataTransfer.effectAllowed = "move";
    evt.dataTransfer.setData("Text", this.id);
}, false);
The effectAllowed property
controls what visual feedback—generally the mouse
cursor—the browser gives on the type of drag event that is occurring
(move, copy, etc.).
The setData(...) method tells the D&D mechanism in the browser which
data from the element being dragged should be dropped into the target
element, otherwise known as the drop catcher. Here
we specify that only the id property
of the original element, which is used later to actually move the
element, is transferred.
Now we need to define a dragend
event handler to clear up the visuals and a drop event handler to actually do the moving of our
element:
foobar.addEventListener("dragend", function(evt) { this.style.border = ""; // remove the border }, false); catcher.addEventListener("drop", function(evt) { if (evt.preventDefault) evt.preventDefault(); if (evt.stopPropagation) evt.stopPropagation(); this.style.border = ""; // remove the border from the catcher var id = evt.dataTransfer.getData("Text"); // get the id var elem = document.getElementById(id);elem.parentNode.removeChild(elem); // remove the elementthis.appendChild(elem); // add the element back into our catcher return false; }, false);
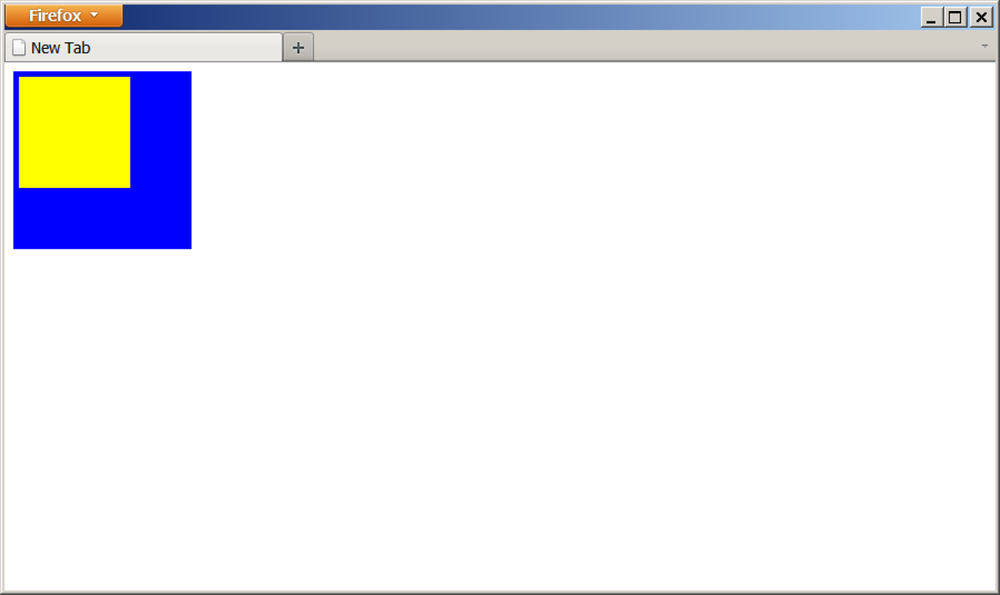
In the drop event handler, we
first get the data that was transferred in the drop, which in this case
was the id property of the original
source element that we dragged. Next, we remove that element from its
current location, and finally add it back into the new location inside
our catcher container. The result is shown in Figure 10-2.
Discussion
The native HTML5 drag-and-drop API is both useful and quite complex. As you can see from the previous code snippets, it doesn’t require an entire complex library to enable D&D on your site, but it’s not particularly trivial either. With that complexity, though, comes lots of flexibility.
The first and most obvious thing you’ll notice when attempting to run the above code yourself (it’s not entirely obvious just from the screenshots) is that the yellow box itself doesn’t move while you are holding down the mouse button and moving the mouse.
Different browsers render this experience slightly differently, but in general, the yellow box stays put during the drag; what shows is a different icon for the mouse cursor, to let the user know that a D&D event is in progress.
It may seem a bit counterintuitive that dragging an element doesn’t actually move the element itself. You might expect it to work the same as if you drag a window around on your desktop—the window tracks along directly under the mouse cursor as you move.
On the other hand, if you drag an icon around on the Windows OS desktop, the icon doesn’t move with the mouse—it only moves once you let go of the mouse button and stop the drag (this is the drop). This latter experience is more closely aligned with how native D&D works in HTML5.
Consider that native D&D is designed so you can drag all sorts of different things, not all of which have visual representations like our yellow box does. As such, native D&D does not necessarily imply actually visually moving any element on the page. Instead, D&D is about dragging a reference from one object to another and connecting the two in a D&D event, whereby you can then decide what that connection means and how to respond.
The events associated with native D&D are:
Sometimes, you might just be copying invisible attributes from one element to another. Other times, you might be initiating some action like deleting, by moving an element onto a trash icon. In our example, we are repositioning the yellow box inside the blue box, so once the D&D event finishes, we actually move the yellow box.
Since the yellow box is visible, it seems to make sense that we
might want to move it around as we drag (like when dragging a window).
However, the typical JavaScript approach to this does not work, because
the mousemove event does
not fire during a D&D action. The global drag event does fire on the document, but
cross-browser it doesn’t reliably have coordinates we can use to
position the element.
If you need to actually move an element around during the drag, it’s best not to use native D&D... for now, anyway. Hopefully this shortcoming will be addressed eventually. Until then, use established patterns and/or libraries for emulating D&D with mouse events.
Another very advanced usage of the native D&D functionality
that is on the horizon is the ability to drag items between windows, or
between your browser and the desktop, and vice versa. For instance, you
can drag a file from your desktop and drop it onto a target on a web
page. You respond to the drop the same way as in the code snippets
above; the only difference is that you don’t need an element on your
page with the draggable attribute to
be the thing that you dragged. For example:
catcher.addEventListener("drop", function(evt) { if (evt.preventDefault) evt.preventDefault(); if (evt.stopPropagation) evt.stopPropagation(); this.style.border = ""; // remove the border from the catcher var files_array =evt.dataTransfer.files; // Now you have a reference to the file(s) that the user dragged // onto your page. Do something cool with them! return false; }, false);
As you can see, the native D&D functionality is focused on
data transfer between two elements, rather than on moving an element
from one position to another. This helps us out here big time. We
receive in the dataTransfer.files
property a list of references to the file(s) that the user chose to drag
onto our application. There is nothing visual about this operation—it is
entirely about dragging data (file references) from the desktop to an
element on our page!
Note
Once we have a reference to a file on the user’s system, what can we do with it? We address that in Recipe 10.7.
There are likely to be a lot of changes to this advanced functionality before it settles and is standardized across all browsers. But it’s exciting to know that it’s coming soon!
See Also
For more information on native HTML5 drag and drop, see this tutorial: http://www.html5rocks.com/en/tutorials/dnd/basics/.
10.4. Web Workers
Problem
You want to run a complex, long-running JavaScript task without locking up the UI in the browser.
Solution
You need to run the JavaScript task in a separate thread, and the
way to do this is with the Worker
API, otherwise known as Web Workers.
Web Workers create a special environment for JavaScript code to run in that occurs in a separate thread from the main UI of your page. This means that your page’s UI won’t be locked up if you have particularly long-running JavaScript code.
To test if the browser supports Web Workers, use the following
feature-detect for the Worker
API:
var webworkers_support = !!window.Worker;
Now let’s build a simple Web Workers demo. We’ll initialize a
large two-dimensional array with random numbers, a task that may take
long enough to cause a noticeable UI delay. (You might use such a 2D
array of random numbers to represent random pixels in a canvas element; see Chapter 9.) Two nested for loops do the trick:
var data = [];
for (var i=0; i<1500; i++) {
    data[i] = [];
    for (var j=0; j<1500; j++) {
        data[i][j] = Math.random();
    }
}
There’s nothing particularly exciting going on here. Such an array, with 2.25 million (1500 × 1500) operations to initialize it, may very well lock up the UI for anywhere from 2 to 30 seconds, depending on browser and device capability.
A more graceful way to handle this, without locking the UI, is to put such an operation into a separate thread—a Web Worker—and simply wait to be notified of it finishing before continuing.
To do this, put the above code into a separate file (called, for
instance, init_array.js) and wrap the code in
an onmessage event
handler:
self.onmessage = function(evt) { var data = []; for (var i=0; i<1500; i++) { data[i] = []; for (var j=0; j<1500; j++) { data[i][j] = Math.random(); } }self.postMessage(data);data = null;// unassign our copy of the data now, to free up memory };
This is the code for the Web Worker. The code first tells the
worker to listen for the message event, which
lets the worker know when to start. Once started, the worker performs
the long-running computation. Finally, the worker sends back a message
(the data array in our example), using postMessage(...), to the main page. Workers
can also be started by other workers, and the communication works
exactly the same.
Note
Unlike in normal JavaScript operations, where passing an object around is done by reference, the data passed in worker messages is copied, which means that double the memory is consumed during the transmission. For most types of data, this is not an issue to be concerned with.
But in our example with the large array, the considerable memory usage is something to watch out for as it may cause issues on memory-limited mobile devices. To conserve memory, only keep variables with large amounts of data in them around for the shortest amount of time necessary.
In the main page of our UI, we create the worker, pointing it at
the appropriate file. Then we set up a listener for the message event, to receive the message (the
initialized array) from the worker when it finishes its job. Finally, we
start the worker by sending it an empty message using postMessage():
var worker =new Worker("init_array.js"); worker.onmessage= function(evt) { alert("Data array initialization finished!"); var data =evt.data; }; worker.postMessage(); // tell our worker to start its task
Discussion
Web Workers are very useful for offloading complex or long-running tasks to another thread, something that JavaScript itself cannot do.
If Web Workers are not supported in a particular browser, you’ll need to just run your code in the main JavaScript thread, and deal with the delays it may cause. In some circumstances, you can break up your long-running code into smaller chunks and run one chunk at a time, pausing briefly in between to let the UI update before resuming. For example:
function doNextChunk() {
    var done_yet = false;
    for (var i=0; i<500; i++) { // do 500 iterations at a time
        // do something
        // when done, set done_yet = true
    }
    if (!done_yet) setTimeout(doNextChunk,0);
    else alert("All done finally!");
}

doNextChunk();
Using a setTimeout(...,0)
pattern, we do 500 iterations of a long-running loop, pause for a brief
moment (just long enough for the UI to update), then resume and do
another 500 iterations, and so on. This technique has better performance
than letting a long-running piece of code tie up the UI indefinitely,
but it is still far less efficient than if Web Workers can be
used.
By creating a Web Worker, you are creating a bridge between the
main JavaScript in your page and a sandboxed piece of JavaScript running
in another thread. The two sides of the bridge communicate with each
other by asynchronously sending and receiving messages, using postMessage(...) and listening for the message
event.
Note
An asynchronous Ajax call using XMLHttpRequest (“XHR”) to a server is quite
similar to sending and receiving asynchronous messages to/from a Web
Worker.
The Web Workers communication interface also allows errors to be
sent and received. To signal an error from inside a worker, simply
throw a JavaScript error, like
so:
self.onmessage = function(evt) {
    var data = [];
    for (var i=0; i<1500; i++) {
        data[i] = [];
        for (var j=0; j<1500; j++) {
            data[i][j] = Math.random();
            if (data[i][j] == 0) {
                throw "I don't like zeros in my array!";
            }
        }
    }

    self.postMessage(data);
    data = null; // unassign our copy of the data now, to free up memory
};
To receive an error message from a worker, listen for
the error event:
var worker = new Worker("init_array.js");

worker.onerror = function(err) {
    alert("An error occurred in the initialization of the array.");
    throw err; // optional
};

worker.onmessage = function(evt) {
    alert("Data array initialization finished!");
    var data = evt.data;
};

worker.postMessage();
A Web Worker is sandboxed away from the main page, and basically
can only communicate with the page using these messages. That means the
worker cannot access the DOM to read or modify any information. Also,
UI-centric tasks like calling an alert(...) dialog are not allowed.
However, a worker does have several helpful things available to
it. For example, it can access the navigator object, to identify the user agent
(browser) running it, and it can load scripts into itself using
the importScripts(...)
command:
if (navigator.userAgent.test(/MSIE/)) { // UA sniffing is *bad* practice!!
    importScripts("ie_helper.js");
}
self.onmessage = function(evt) {
    /* ... */
};
Note
loadScripts(...) loads one or
more scripts in parallel, but always executes them in the order
requested. Also, loadScripts(...)
executes synchronously, meaning it blocks the rest of the worker until
it finishes loading and executing the scripts.
A worker may spawn another worker, as we’ve just seen. The code
that created a worker may also terminate it, by calling terminate() on the worker instance.
Finally, workers may use timeouts and intervals,
including setTimeout(...),
clearTimeout(...), setInterval(...), and clearInterval(...). This would be useful if,
for instance, you wanted to have a worker running in the background
every so often, notifying the page each time it runs:
self.onmessage = function(evt) {
    setInterval(function(){
        self.postMessage(Math.random()); // send a random number back
    }, 60*60*1000); // execute once per hour
};
See Also
The W3C specification for Web Workers at http://dev.w3.org/html5/workers/.
10.5. Web Sockets
Problem
You want to create persistent, two-way communication between your web application and the server, so that both the browser and the server can send and receive data to and from each other as needed.
Solution
Most browsers now have the native ability to establish a
bidirectional socket connection between themselves and the server, using
the WebSocket API. This means that
both sides (browser and server) can send and receive data. Common use
cases for Web Sockets are live online games, stock tickers, chat
clients, etc.
To test if the browser supports Web Sockets, use the following
feature-detect for the WebSocket
API:
var websockets_support = !!window.WebSocket;
Now, let’s build a simple application with chat room–type functionality, where a user may read the current list of messages and add her own message to the room.
We’ll have a text entry box where new messages are written before being sent, and we’ll have a list of messages in the chat room. We don’t need features such as login or authentication here, only simple chat room message sending and receiving:
<!DOCTYPE html>
<html>
<head>
<title>Our Chatroom</title>
<script src="chatroom.js"></script>
</head>
<body>
<h1>Our Chatroom</h1>

<div id="chatlog"></div>

<input id="newmsg" /><br />
<input type="button" value="Send Message" id="sendmsg" />
</body>
</html>
Now, let’s examine the JavaScript in chatroom.js:
var chatcomm =new WebSocket("ws://something.com/server/chat"); chatcomm.onmessage= function(msg) { msg = JSON.parse(msg); // decode JSON into object var chatlog = document.getElementById("chatlog"); var docfrag = document.createDocumentFragment(); var msgdiv; for (var i=0; i<msg.messages.length; i++) { msgdiv = document.createElement("div"); msgdiv.appendChild(document.createTextNode(msg.messages[i])); docfrag.appendChild(msgdiv); } chatlog.appendChild(docfrag); }; chatcomm.onclose= function() { alert("The chatroom connection was lost. Refresh page to reconnect."); }; document.getElementById("sendmsg").addEventListener("click", function(){ var newmsg = document.getElementById("newmsg"); chatcomm.send(newmsg.value); // send the message to the server newmsg.value = ""; // clear out the message entry box }, false);
Let’s break down that code just a little bit. First we create the socket and point it at a location on our server. The server URL in our example uses the “ws://” protocol, as opposed to the more common “http://” you’re familiar with. This signals the special protocol that Web Sockets use between client and server.
Next, we set up two event listeners on our socket object: onmessage and
onclose. The onclose handler is self-explanatory—it is
fired when the connection is closed.
Note
The server-side implementation of this chat room demo is beyond the scope of this chapter, but there are lots of tutorials and software projects that make this very easy to implement in any of your favorite server-side languages, including PHP, JavaScript (node.js), Java, etc.
Such a chat room server just needs to implement basic send and receive actions, much like the JavaScript you see here for the client. As a basic implementation, the server doesn’t even need to persist the messages; it can just publish each message out to the socket stream as it is received, meaning that all clients that are currently connected see it.
Our onmessage handler receives
a string of data (which in our example we expect to be JSON) and parses
it into a message object. The message object contains an array of one or
more messages (each one is just simple text). The handler loops through
each message, adding it to the chat log in the order received.
Lastly, the code sets up a click event handler on the “Send Message”
button. When clicked, the handler takes whatever has been typed into the
text entry input and sends it to the server, using the send(...) method.
Discussion
Admittedly, this type of functionality is not at all new. Since
the advent of Ajax, using the XMLHttpRequest (“XHR”)
object, developers have been sending and receiving data between browser
and server. Other approaches have included instantiating an invisible
Flash object and using Flash’s socket communication capabilities.
However, it’s quite inefficient in the XHR approach to establish a whole new connection for each piece of data you need to send from browser to server. It’s similarly undesirable to instantiate a memory-heavy Flash instance to use socket communication. So, Web Sockets are understandably a welcomed addition to the “HTML5 & Friends” family of technologies.
The message sending and receiving in Web Sockets is like a sensible mix between XHR and Web Workers, which we looked at in the previous recipe.
Note
Web Sockets require both the browser and the server to speak a standardized and agreed-upon protocol (much like HTTP is for normal web pages). However, this protocol has undergone quite a lot of experimentation and change as it has developed over the last couple of years.
While things are beginning to stabilize, Web Sockets are still quite volatile, and you have to make sure that your server is speaking the most up-to-date version of the protocol so that the browser can communicate properly with it.
The WebSocket object instance
has, similar to XHR, a readyState
property that lets you examine the state of the connection. It can
have the following constant values:
{worker}.CONNECTING (numeric value
          0)
Connection has not yet been established
{worker}.OPEN (numeric value
          1)
Connection is open and communication is possible
{worker}.CLOSING (numeric value
          2)
Connection is being closed
{worker}.CLOSED (numeric value
          3)
Connection is closed (or was never opened successfully)
The events that a WebSocket
object instance fires are:
For each of these events, you can add an event listener using
addEventListener(...), or you can set
a corresponding handler directly on the worker object instance,
including onopen, onmessage, onerror, and onclose.
If Web Sockets are not supported, you’ll need to provide some fallback functionality for your application, or at least gracefully notify the user that his browser doesn’t support the required functionality. Fortunately, there’s a very easy way to do that.
Because consistent browser support for Web Sockets has been elusive, the best practice suggestion for using Web Sockets is to use a library like Socket.io (http://socket.io), which attempts to use Web Sockets if available, and falls back to a variety of other techniques for communication if Web Sockets are not present.
You should also be aware of how Web Sockets usage scales in terms of server resources. Traditional web requests only take up dedicated resources from the server for a split second at a time, which means you can serve a lot of web traffic from your server without having too much overlap and thus running out of resources.
Sockets, on the other hand, tend to be more dedicated, so there can be issues with resource availability under high load. Your server setup and architecture will vary greatly with your application’s needs and are a big factor in how well you are able to utilize Web Sockets.
See Also
For more information about Socket.io, see the project home page at http://socket.io.
10.6. History
Problem
For your web application, you want fine-grained control to manage the forward/backward button history queue, as well as the displayed URL in the address bar of the browser.
Solution
HTML5 brings us several important enhancements to the browser’s
window.history object, commonly
referred to as the History
API.
To test if the browser supports the enhanced History API,
use the following feature-detect:
var history_support = !!(window.history && window.history.pushState);
Normally, when you change the URL in the address bar, the browser initiates a new request to the server for that new page. But today’s complex web applications more commonly use Ajax to load only new information, without full-page refreshes. This leads to a disconnect, where web applications can’t update the address bar URL because they don’t want a browser page refresh.
To change the URL in the address bar without forcing a new page
load, use the history.pushState(...)
method. This method updates the URL in the address bar and creates a
special state-oriented entry in the browser’s history. This means that
if a user then clicks the back button in her browser, instead of doing a
reload of the previous page, the browser fires the new popstate event, which
your application can respond to by setting the page back to that
previous state.
Note
The new URL you pass to pushState() or replaceState() must have the same origin
(domain, etc.) as the current page, or the API throws an error. You
can change the path, filename, query string, and hash portions of the
URL, just not the protocol/schema, domain, or port.
It would make no sense, and indeed would be a security risk, to allow mixing of URL origins in the state queue. Use normal location/history manipulation if you need to navigate across different origins.
Let’s take a look at an example of how these two additional functionalities work together to allow you to handle forward/backward navigation with only state changes (and not separate page loads), as well as keeping the displayed URL in the address bar up-to-date.
Our example keeps track of whether an element is visible or not, and maintains this state in the browser’s forward/backward navigation stack—as well as reflecting that state in the browser address bar URL—so that the current state can be copied and pasted or bookmarked:
<html>
<head>
<title>History Exmaple</title>
<script>
function showText(updateHistory) {
    document.getElementById("long_desc").style.display = "block";
    if (updateHistory) history.pushState(null, null, "?show");
}
function hideText(updateHistory) {
    document.getElementById("long_desc").style.display = "none";
    if (updateHistory) history.pushState(null, null, location.href.replace(/?show/, ""));
}
function toggleText() {
    var elem = document.getElementById("long_desc");
    if (elem.style && elem.style.display == "none") showText(true);
    else hideText(true);
}
function manageText() {
    if (location.href.match(/?show/)) showText();
    else hideText();
}

window.addEventListener("popstate", manageText, false);
window.addEventListener("DOMContentLoaded", function(){
    document.getElementById("toggle").addEventListener("click", function(e){
        toggleText();
        e.preventDefault();
        return false;
    }, false);

    manageText();
}, false);
</script>
</head>
<body>
<p>Here's a short description.</p>
<a id="toggle" href="#">toggle</a>
<p id="long_desc">Here's a longer description, which can be shown or hidden.</p>
</body>
</html>
If you run this demo and click successively on the “toggle” link, you’ll see that the longer text description paragraph is indeed toggled on and off. You’ll also notice that when the paragraph is visible, the URL has “?show” in it, and when it’s hidden, this parameter is removed. Finally, you will notice the forward/backward navigation cycles through these states, showing and hiding the paragraph as appropriate.
Try copying the URL while the “?show” is visible and pasting it into a new browser tab, and you’ll see that indeed the paragraph is visible—the state really was preserved in the URL, as we wanted.
The above example keeps track of the state changes in the forward/backward queue of the browser. For some applications, this is desirable. For other applications, polluting the forward/backward queue with lots and lots of intermittent state changes is not appropriate.
In this case, instead of using pushState(...) you can use replaceState(...), which (as the name implies)
replaces the current state entry in the forward/backward navigation with
the new desired state. If we do that for our example above, it looks
like this:
// ...

function showText(updateHistory) {
    document.getElementById("long_desc").style.display = "block";
    if (updateHistory) history.replaceState(null, null, "?show");
}
function hideText(updateHistory) {
    document.getElementById("long_desc").style.display = "none";
    if (updateHistory) history.replaceState(null, null, location.href.replace(/?show/, ""));
}

// ...
Running that updated demo, you’ll see that the toggling and the URL behave the same. The only difference is that there’s no forward/backward queue state to cycle through.
Discussion
Browsers have long supported a History API. The difference that HTML5 brings
is the enhanced functionality of pushState(...), replaceState(...), and popstate.
Before the HTML5 History API
enhancements were added to browsers, the only way to emulate the
functionality described above was using the URL’s “hash” (the end of a
URL that looks like “#some|stuff|here”).
In terms of behavior, most browsers agree in that if you change the current page’s hash, the browser saves that state in the forward/backward queue, updates the displayed URL, and does not request a new page from the server. On the surface, that sounds just like what we’re looking for. However, there are several browser quirks (race conditions, etc.) that make it hard to get consistent and reliable results when dealing with hash changes.
In particular, older browsers don’t all support the hashchange event,
which is very helpful in monitoring the state of the URL hash in case a
user copies and pastes a URL into the address bar. Without that event,
you must poll the URL hash using a timer.
Fortunately, all this mess is generally taken care of by various
helper libraries. One particularly useful library is History.js (https://github.com/balupton/history.js), which attempts
to use the new HTML5 History API
enhancements and falls back to URL hash management automatically.
The above code example stores a simple state in the URL (“?show”). This is good for the copy/paste (or bookmarking) use case, as the entirety of the state is in the URL and thus restorable.
If you have a more complex set of states to manage, and copy/paste
or bookmarking is not important, you can actually store a much richer
and more complex set of states with each entry. This complex state is
saved with an entry, and then retrieved and sent back to your
application via the popstate event
handler as the user navigates back with the back button.
The first parameter to pushState(...)/replaceState(...) is the state object, which can be any arbitrarily
complex object that you need, as long as it’s serializable to a string
value. For example:
window.addEventListener("popstate", function(e){
    alert("Current state data: " + JSON.stringify(e.state));
}, false);

window.pushState({foo:"bar"}, null, "?foobar");
window.pushState({bar:"baz"}, null, "?barbaz");
history.back(); // triggers popstate to go back to the "?foobar" page/state
Note
Browsers currently don’t support the second parameter, which is
a “title” for the new state, so
just pass null or an empty string
for that parameter.
See Also
For more information about using the API, see the following MDC entry: https://developer.mozilla.org/en/DOM/Manipulating_the_browser_history. For more information about History.js, see the github repo at https://github.com/balupton/history.js.
10.7. Local Files
Problem
You want users to be able to read an image file from their local filesystem and do something with it in the web page, such as previewing or uploading it.
Solution
Prior to HTML5, the only interaction users could have with their
local filesystem was through the <input
type="file"> element. This functionality was opaque as far
as the page’s JavaScript was concerned, because the page couldn’t see
anything about the file selected, or interact with it in any meaningful
way.
HTML5 gives us the FileReader
API, which lets us take a reference to a local file and read
its contents directly into the web page. To test if the browser supports
the enhanced FileReader API, use the
following feature-detect:
var history_support = typeof FileReader != "undefined";
We saw in Recipe 10.3, how to get a reference
to a local file or files using the native drag-and-drop functionality.
In a very similar way, we can now get a reference to the local file(s)
selected by the user in an <input
type="file"> element:
<p>Pick an image file:</p>
<input type="file" id="file_selector" />

<script>
var file_selector = document.getElementById("file_selector");
file_selector.addEventListener("change", function(){
    var files_array = this.files;
    // Now you have a reference to the file(s) that the user selected.
    // Do something cool with them!
}, false);
</script>
Either way, once you have a reference to a local file, such as an
image file, you can read the contents of that file using a FileReader instance:
function read_image_file(file) {
    var reader = new FileReader();
    reader.onload = function(e){
        var image_contents = e.target.result;
        // now you have the contents of the file
    };
    reader.readAsDataURL(file);
}
Now that you have the file contents—in this case, as a
data URI (base64 encoding of the file)—you can
display the contents in an img
element. The code all put together looks like this:
<p>Pick an image file:</p>
<input type="file" id="file_selector" />

<script>
var file_selector = document.getElementById("file_selector");
file_selector.addEventListener("change", function(){
    var files_array = this.files;
    // we only allowed one file to be selected
    if (files_array[0].type.match(/image/)) { // it's an image file
        read_image_file(files_array[0]);
    }
}, false);

function read_image_file(file) {
    var reader = new FileReader();
    reader.onload = function(e){
        var image_contents = e.target.result;
        var img = document.createElement("img");
        img.src = image_contents;
        document.body.appendChild(img);
    };
    reader.readAsDataURL(file);
}
</script>
Note
This code snippet assumes only one file has been selected, but
the <input type="file">
element now supports the multiple attribute, which
allows the user to select more than one file at a time. This is why we
receive an array of file references, rather than a single file
reference.
If you also want to let the user upload the selected image file, you simply need to send the file’s contents to the server via an XHR Ajax call:
<p>Pick an image file:</p>
<input type="file" id="file_selector" />
<input type="button" id="upload" value="Upload Image" disabled />

<script>
var file_selector = document.getElementById("file_selector");
file_selector.addEventListener("change", function(){
    var files_array = this.files;
    // we only allowed one file to be selected
    if (files_array[0].type.match(/image/)) { // it's an image file
        read_image_file(files_array[0]);

        file_selector.disabled = true; // disable the file selector now
        var upload = document.getElementById("upload");
        upload.disabled = false;
        upload.addEventListener("click", function(){
            upload_file(files_array[0]);
        }, false);
    }
}, false);

function upload_file(file) {
    var xhr = new XMLHttpRequest();
    xhr.setRequestHeader("Content-Type", "multipart/form-data");
    xhr.setRequestHeader("X-File-Name", file.fileName);
    xhr.setRequestHeader("X-File-Size", file.fileSize);
    xhr.setRequestHeader("X-File-Type", file.type);
    xhr.open("GET", "image_upload.php");
    xhr.send(file);
}

function read_image_file(file) {
    var reader = new FileReader();
    reader.onload = function(e){
        var image_contents = e.target.result;
        var img = document.createElement("img");
        img.src = image_contents;
        document.body.appendChild(img);
    };
    reader.readAsDataURL(file);
}
</script>
Notice that you now have access to the file’s name, size, and type, so you send that data along to the server with the file’s contents. Other than that, we’re not doing much extra here that’s particularly HTML5y—we’re just using standard XHR to upload the file.
Discussion
HTML5 gives us the FileReader
API, so we can read the contents of a user’s local file and use those
contents in our web pages.
The example above shows how to use the contents of an image file
to display a preview, and how to send (i.e., upload) those file contents
to a server using Ajax. Of course, there are a variety of other things
you might want to do with the file’s contents. For instance, the
FileReader API provides a readAsBinaryString(...) method that gives you
a binary string representation of the file’s contents. If you know the
format of the file you are reading, you can perform various operations
on this data.
As another example, if you put the image data into an img element (as shown above), you could use
what you learned in Recipe 9.5, to render that image
to a canvas element, where you can
then perform various color and geometric transformations (see Recipes
9.6 and 9.7).
At this time, access to local files is restricted to read-only,
and it must be initiated by a user action, such as dragging a file onto
the web page or selecting one or more files from the <input type="file"> element. This is
probably for the best, safety-wise, as allowing pages to write to the
local filesystem, while cool, could be quite dangerous!
Also, keep in mind that local file access is still heavily evolving in browsers, so it’s very important to test the functionality you want in your target browser environments and to provide fallback behavior if it isn’t present or doesn’t work the way you need it to.
See Also
For more information about interacting with local files from the web page, see this MDC entry: https://developer.mozilla.org/en/Using_files_from_web_applications.