5/Arduino and the Pi
As you’ll see in the next few chapters, you
can use the GPIO pins on the Raspberry Pi
to connect to sensors or things like blinking
LEDs and motors. And if you have experi-
ence using the Arduino microcontroller de-
velopment platform, you can also use that
alongside the Raspberry Pi.
When the Raspberry Pi was first announced,
a lot of people asked if it was an Arduino kill-
er. For about the same price, the Pi provides
much more processing power, so why use
an Arduino when you have a Pi? It turns out
the two platforms are actually complemen-
tary, and the Raspberry Pi makes a great
host for the Arduino. There are quite a few
situations where you might want to put the
Arduino and Pi together:
• To use the large number of libraries and sharable examples for
the Arduino.
• To supplement an Arduino project with more processing power.
For example, maybe you have a MIDI controller that was hooked
up to a synthesizer, but now you want to upgrade to synthesizing
the sound directly on the Pi.
Arduino and the Pi 77 77
GSW_RASPI_4ED_FIN.indd 77GSW_RASPI_4ED_FIN.indd 77 10/28/21 10:54 AM10/28/21 10:54 AM
• When you’re dealing with 5V logic levels. The Pi operates at
3.3V, and its pins are not tolerant of 5V. The Arduino can act as
a “translator” between the two.
• To prototype something a little out of your comfort zone,
in which you may make some chip-damaging mistakes. For ex-
ample, we’ve seen students try to drive motors directly from
a pin on the circuit board (don’t try it). On an Arduino, it was easy
to pry the damaged microcontrollerchip out of its socket and
replace it (less than $10 usually). Not so with the Raspberry Pi.
• When you have a problem that requires exact control in
real-time, such as a controller for a 3D printer. As we saw
in Chapter 4, the Raspberry Pi OS is not a real-time operating
system, and programs can’t depend on the same “instruction
per clock cycles” rigor of a microcontroller.
The examples in this section assume that you know at least the
basics of using the Arduino development board and integrated
development environment (IDE). If you don’t have a good grasp
of the fundamentals,
Getting Started with Arduino
by Massimo Banzi
and Michael Shiloh is a great place to start. The official Ardui no tuto-
rials (bit.ly/1oTWBNB) are quite good as well, and provide a lot of
opportunities to cut and paste good working code.
78 Getting Started with Raspberry Pi
GSW_RASPI_4ED_FIN.indd 78GSW_RASPI_4ED_FIN.indd 78 10/28/21 10:54 AM10/28/21 10:54 AM
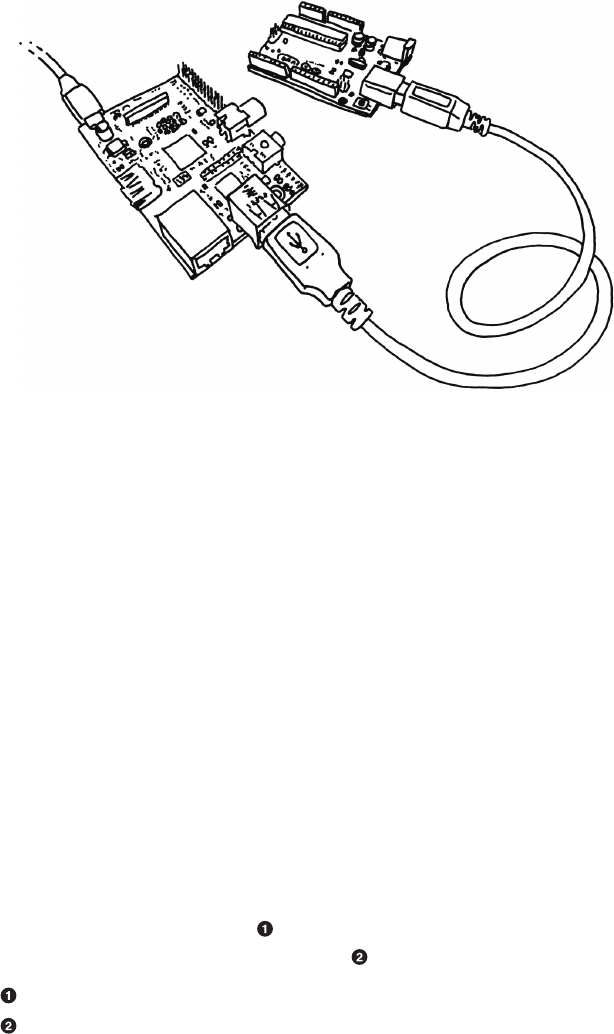
Figure 5-1.
Arduino and the Raspberry Pi are BFFs.
Installing Arduino
on the Raspberry Pi OS
To program an Arduino development board, you need to hook it up
to a computer with a USB cable, then compile and flash a program
to the board using the Arduino IDE. You can do this with any com-
puter, or you can use your Raspberry Pi as a host to program the
Arduino.
Using the Raspberry Pi to program the Arduino will be quicker to
debug, and though compiling might be a
teensy
bit slower on the
Pi, it’s not going to be particularly noticeable. The Arduino IDE also
only compiles code that has changed since the last compilation,
so after the first compile, it’s smooth sailing.
To install the Arduino IDE on the Raspberry Pi, type the following
into a terminal:
sudo apt-get update
sudo apt-get install arduino
Make sure you have the latest package list.
Download the Arduino package.
Arduino and the Pi 79
GSW_RASPI_4ED_FIN.indd 79GSW_RASPI_4ED_FIN.indd 79 10/28/21 10:54 AM10/28/21 10:54 AM

This command will install Java plus a lot of other dependencies.
The Arduino environment will appear under the
Programming
sec-
tion of the program menu (don’t launch it just yet though).
You can just plug the Arduino into one of the Raspberry Pi’s open
USB ports. The USB connection will be able to provide enough
electrical power for the Arduino, but you might want to power the
Arduino separately, depending on your application (if you’re run-
ning motors or heaters, for instance). Too much of a power draw on
the Pi’s USB ports can cause it to act strangely, and can even cause
a system crash and/or spontaneous reboot.
Note that you’ll need to plug the Arduino USB cable in
after the Raspberry Pi has booted up. If you leave it
plugged in at boot time, the Raspberry Pi may hang as
it tries to figure out all the devices on the USB bus.
80 Getting Started with Raspberry Pi
GSW_RASPI_4ED_FIN.indd 80GSW_RASPI_4ED_FIN.indd 80 10/28/21 10:54 AM10/28/21 10:54 AM

When you launch the Arduino IDE, it polls all the USB
devices and builds a list that is shown in the Tools→
Serial Port menu. Click Tools→Serial Port and select
the serial port (most likely
/dev/ttyACM0
), then click
Tools→Board, and select the type of Arduino Board
you have (e.g.,
Uno
). Click File→Examples→01. Ba-
sics→Blink to load a basic example sketch. Click the
Upload button in the toolbar or choose File→Upload to
upload the sketch, and after the sketch loads, the Ardu-
ino’s onboard LED will start blinking.
To access the serial port on versions of the Raspberry
Pi OS older than Jessie, you’ll need to make sure that
the
pi
user has permission to do so. You don’t have to do
this step on Raspbian Jessie. You can do that by adding
the
pi
user to the
tty
and
dialout
groups. You’ll need to
do this before running the Arduino IDE:
sudo usermod
-a -G tty pi
sudo usermod -a -G dialout pi
usermod is a Linux program to manage users.
-a -G puts the user (pi) in the specified group
(tty, then dialout).
Finding the Serial Port
If for some reason,
/dev/ttyACM0
doesn’t work, you’ll need to do
a little detective work. To find the USB serial port that the Arduino
is plugged into without looking at the menu, try the following from
the command line. Without the Arduino connected, type:
ls /dev/tty*
Plug in the Arduino, then try the same command again and see what
changed. When I plugged in the Arduino, /dev/ttyACM0 popped up
in the listing.
Arduino and the Pi 81
GSW_RASPI_4ED_FIN.indd 81GSW_RASPI_4ED_FIN.indd 81 10/28/21 10:54 AM10/28/21 10:54 AM
..................Content has been hidden....................
You can't read the all page of ebook, please click here login for view all page.