
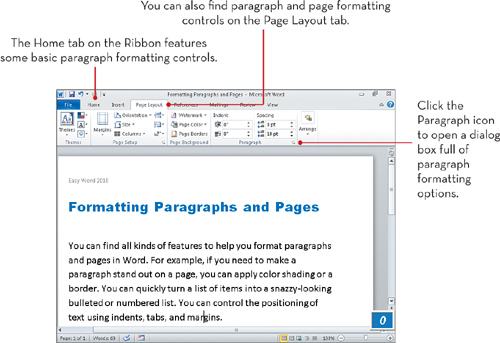
Chapter 5. Formatting Paragraphs and Pages
In the previous chapter, you learned some basic techniques for applying formatting to text. Now you’re ready to take formatting to the next level and start applying it to paragraphs and pages. Word offers all kinds of commands for controlling the placement and positioning of text in a document, as well as features for adding page elements. For example, you can indent text, apply tabs to create columns, and turn text into a bulleted or numbered list. You can also add page numbers, section breaks, and headers or footers. Word groups paragraph commands in a section on the Ribbon’s Home tab labeled Paragraph. You can also find another group of Paragraph commands on the Page Layout tab. The Page Layout tab is the place to go for general page features.

Adding Indents
You can use indents to move text horizontally from the page margin to set it apart from surrounding text. The Increase Indent and Decrease Indent commands create left indents in increments. You can find these two commands on the Home tab. You can set more precise indent controls on the Page Layout tab, which includes a setting for specifying left and right indents on a page.
![]()

![]() Select the text you want to indent.
Select the text you want to indent.
![]() Click the Home tab on the Ribbon.
Click the Home tab on the Ribbon.
![]() Click Increase Indent.
Click Increase Indent.
![]() Word indents the text.
Word indents the text.
![]() Click Decrease Indent.
Click Decrease Indent.
![]() Word decreases the indent.
Word decreases the indent.
Tip: Dragging Indents
![]()
You can also control indents using Word’s ruler. Click the View tab and click Ruler to display the rulers. The top horizontal ruler has indent and margin markers you can drag to new locations to set new indents and margins for a page.

![]() Click the Page Layout tab.
Click the Page Layout tab.
![]() Click the spinner arrows for the Left or Right indents to specify an indentation amount.
Click the spinner arrows for the Left or Right indents to specify an indentation amount.
![]() Word applies the indent to your text.
Word applies the indent to your text.
![]()
Tip: Paragraph Spacing
![]()
Next door to the Indent spinner arrows on the Page Layout tab are spacing controls to specify how much space you want to add before and after paragraphs. Paragraph spacing controls allow you to add some extra space between paragraphs without inserting extra lines of text.
Tip: Ruler Indents
![]()
You can use Word’s ruler to add First Line and Hanging Indents. A first line indent moves the first line of a paragraph only, while a hanging indent indents everything except the first line of text in a paragraph. To view the ruler, click the View tab and click Ruler. Click the Tab stop icon until you see the indent you want to set and then click where you want the indent to appear on the ruler.
Setting Tabs
You can use tab stops to line up text in a document or create columns of text. By default, Word’s tabs indent text by half an inch. You can use a default tab stop simply by pressing the Tab key. To define your own tab stops, you can use Word’s ruler. You can apply tabs before you type or to selected text in a document.
![]()

![]() Click the View tab on the Ribbon.
Click the View tab on the Ribbon.
![]() Click Ruler.
Click Ruler.
![]() Click the Tab icon box to find the type of tab you want to set. Keep clicking to view all the different tab types: Left, Center, Right, Decimal, and Bar.
Click the Tab icon box to find the type of tab you want to set. Keep clicking to view all the different tab types: Left, Center, Right, Decimal, and Bar.
![]() Click on the ruler where you want to add a tab stop.
Click on the ruler where you want to add a tab stop.
Tip: Paragraph Dialog Box
![]()
You can also define your own tab stops using the Tabs dialog box. To find your way there, click the Paragraph icon on the Home tab or on the Page Layout tab. This opens the Paragraph dialog box. Click the Tabs button. This opens a dialog box where you can add and edit tab stops, set tab stop alignments, and specify special tab leader characters.

![]() Press Tab and type your text.
Press Tab and type your text.
![]() Continue adding as many tab stops as you need and entering your tabbed text. In this example, a Decimal tab is applied, causing all the decimals to line up in the column.
Continue adding as many tab stops as you need and entering your tabbed text. In this example, a Decimal tab is applied, causing all the decimals to line up in the column.
![]() To move the tab, drag it to a new location on the ruler.
To move the tab, drag it to a new location on the ruler.
![]() To remove a tab stop, drag it off the ruler.
To remove a tab stop, drag it off the ruler.
![]()
Tip: Leader Characters
![]()
Leader characters are simply characters that appear between tab stops. Dots, for example, are a common leader character used, or a dash or solid line. Leader characters extend from one tabbed column to the next, filling in the extra space between columns. You can set leader characters through the Tabs dialog box described in the previous tip.
Creating Bulleted and Numbered Lists
Bulleted and numbered lists are a great way to organize list text in a document and make it stand out from the rest of the text. You can even specify a style to use for your bullets or numbers.
![]()

![]() Select the text you want to turn into a bulleted list.
Select the text you want to turn into a bulleted list.
![]() Click the Home tab on the Ribbon.
Click the Home tab on the Ribbon.
![]() Click the drop-down arrow next to the Bullets button.
Click the drop-down arrow next to the Bullets button.
![]() Click the bullet style you want to apply.
Click the bullet style you want to apply.
![]() Word applies the bullets to the text.
Word applies the bullets to the text.
Tip: Quick Bullets or Numbers
![]()
You don’t have to open the bullets or numbering menus to create a list. You can just click the Bullets button to assign the default bullet style, or click the Numbering button to apply the default number style.

![]() Select the text you want to turn into a numbered list.
Select the text you want to turn into a numbered list.
![]() Click the Home tab on the Ribbon.
Click the Home tab on the Ribbon.
![]() Click the drop-down arrow next to the Numbering button.
Click the drop-down arrow next to the Numbering button.
![]() Click the number style you want to apply.
Click the number style you want to apply.
![]() Word applies the numbers to the text.
Word applies the numbers to the text.
![]()
Tip: Continued List
![]()
After you assign bullets or numbers to selected text, any new lines you add below the list are also assigned bullet or numbering status. To turn this off, just press Ctrl+z or click the Undo button on the Quick Access toolbar.
Controlling Paragraph Spacing
By default, Word adds extra space below every paragraph. You can control the spacing to suit your own document needs. For example, if you are typing up a letter or a report, you might want normal spacing between paragraphs. You can specify how much space to include before and after paragraphs.
![]()

![]() Select the paragraph or paragraphs you want to edit.
Select the paragraph or paragraphs you want to edit.
![]() Click the Page Layout tab.
Click the Page Layout tab.
![]() Click the Spacing After spinner arrows to select the measurement you want to assign.
Click the Spacing After spinner arrows to select the measurement you want to assign.
![]() If you prefer to set spacing before a paragraph, click the Spacing Before spinner arrows to set a spacing measurement.
If you prefer to set spacing before a paragraph, click the Spacing Before spinner arrows to set a spacing measurement.
![]() Word applies the new spacing to the paragraph. In this example, 0 paragraph spacing is applied.
Word applies the new spacing to the paragraph. In this example, 0 paragraph spacing is applied.
![]()
Tip: Line Spacing
![]()
Word 2010 also adds extra spacing between lines, which you will notice whenever you press the Enter key to start a new line. Multiline spacing (1.15) is assigned by default. In previous editions of the program, the line spacing was set to single line (1.0). To assign single line spacing in Word 2010, click the Home tab, click the Line and Paragraph Spacing button and click 1.0.
Setting Margins
Word’s default margins are set to 1-inch on all sides of the page. You can change these margins to suit your document needs. Word includes several preset margins you can apply, or you can create your own custom margins.
![]()

![]() Click the Page Layout tab.
Click the Page Layout tab.
![]() Click Margins.
Click Margins.
![]() Click the margins setting you want to apply.
Click the margins setting you want to apply.
![]() Word applies the new margins to the document pages.
Word applies the new margins to the document pages.
![]()
Tip: Custom Margins
![]()
You can use the Page Layout dialog box to set customized margins for your document. Click Margins, Custom Margins to open the dialog box to the Margins tab. Here you can set Top, Left, Bottom, and Right margins. Measurements are specified in inches from the edge of the page. Your last custom margins always appear listed at the top of the Margins menu list so you can easily apply them again.
Tip: Ruler Margins
![]()
You can use Word’s horizontal and vertical rulers to check out your page margins. You can also use the margin markers on the rulers to reset margins simply by dragging them to a new position on the ruler. To turn on the Ruler, click the View tab and click the Ruler check box.
Creating Columns
You can turn your Word text into columns much like those found in a newspaper or magazine. With the column feature, text snakes from column to column on a page. Columns are perfect for newsletters, bulletins, and other publications.
![]()

![]() Select the text you want to turn into columns.
Select the text you want to turn into columns.
![]() Click the Page Layout tab.
Click the Page Layout tab.
![]() Click the Columns button.
Click the Columns button.
![]() Click the number of columns you want to create.
Click the number of columns you want to create.
![]() Word applies the columns to the text.
Word applies the columns to the text.
![]()
Tip: Custom Columns
![]()
You can create custom columns with a little help from the Columns dialog box. To display the dialog box, click the Columns button and click More Columns. You can set a specific measurement for each column and set the amount of spacing that appears between the columns.
Adding a Paragraph Border
One way to set off a paragraph in a document is to add a border surrounding the text. You might use this technique to set apart a quote or important fact in the middle of a report, for example. You can customize paragraph borders to include all four sides, or just one or two sides, and so on.
![]()

![]() Select the paragraph.
Select the paragraph.
![]() Click the Home tab.
Click the Home tab.
![]() Click the Paragraph Border drop-down arrow.
Click the Paragraph Border drop-down arrow.
![]() Click the border you want to apply.
Click the border you want to apply.
![]() Word applies the new border.
Word applies the new border.
![]()
Tip: Table Borders
![]()
You can also use the Paragraph Border feature to add borders to tables. See Chapter 7, “Adding Tables,” to learn more about creating tables in Word 2010.
Tip: Turn It Off
![]()
To remove a paragraph border, select the paragraph, click the Paragraph Border drop-down menu again, and click the No Border command.
Adding Shading to a Paragraph
Along with paragraph borders, you can also set off a paragraph with color shading. For example, you might add a light color shading behind paragraph text detailing a note in the middle of your report or brochure. Word’s color palettes include a theme-based palette as well as a standard color palette from which you can choose just the right color for your document.
![]()

![]() Select the paragraph.
Select the paragraph.
![]() Click the Home tab.
Click the Home tab.
![]() Click the Shading drop-down arrow.
Click the Shading drop-down arrow.
![]() Click the color you want to apply.
Click the color you want to apply.
![]() Word applies the new color shading to the paragraph.
Word applies the new color shading to the paragraph.
![]()
Tip: More Colors
![]()
If you don’t see a color you like listed in the color palette, click the More Colors option at the bottom of the palette. This opens the Colors dialog box where you can choose from a larger listing of standard colors as well as set a custom color.
Tip: No Color
![]()
To remove color shading from a paragraph, select the paragraph and then click the No Color option from the Shading palette.
Inserting Page Numbers
It’s easy to add page numbers to longer documents you create in Word. You can choose to insert page numbers at the top or bottom of your pages. Page numbers are part of Word’s Header and Footers feature. As such, you can choose from a variety of preset page number styles, each with a different appearance or positioning on the page.
![]()

![]() Click the Insert tab on the Ribbon.
Click the Insert tab on the Ribbon.
![]() Click the Page Number button.
Click the Page Number button.
![]() Click a page location.
Click a page location.
![]() Click the number style you want to use.
Click the number style you want to use.
![]() Word opens the Header or Footer area and applies the page numbers to the document.
Word opens the Header or Footer area and applies the page numbers to the document.
![]() Click Close Header and Footer to exit the feature.
Click Close Header and Footer to exit the feature.
![]()
Customize the format and starting number of your page numbers by selecting the Format Page Numbers option from the Page Numbers menu.
Tip: Remove Them
![]()
To remove page numbers, simply redisplay the Page Number menu and click Remove Page Numbers at the bottom of the list.
Adding Headers and Footers
You can use headers and footers in Word to add extra text in the top and bottom margin areas. A header appears at the top of every page, while a footer appears at the bottom. You can use headers and footers to display the document title, name of your organization, your name, date, and so on. Word offers a wide variety of preset headers and footers you can use, or you can create your own. This task shows a header added to a document, but you can use the same steps to add a footer instead.
![]()

![]() Click the Insert tab.
Click the Insert tab.
![]() Click the Header or Footer button.
Click the Header or Footer button.
![]() Click a preset header or footer to apply.
Click a preset header or footer to apply.
![]() Word opens the header or footer area and displays the placeholder text, along with a special tab of header and footer tools.
Word opens the header or footer area and displays the placeholder text, along with a special tab of header and footer tools.
Tip: Switch Between Them
![]()
If your document has both headers and footers assigned, you can switch between the areas on your page using the Go to Header or Go to Footer buttons on the Header & Footer Tools tab.


![]() Replace the header or footer text with your own text.
Replace the header or footer text with your own text.
![]() Click the Close Header and Footer button to return to the document.
Click the Close Header and Footer button to return to the document.
![]() Word displays the header or footer text at the top or bottom of the page.
Word displays the header or footer text at the top or bottom of the page.
![]()
Tip: Customize It
![]()
You can create your own custom headers and footers and add them to Word’s Headers and Footers gallery. Simply select all the elements that comprise the header or footer you’ve customized, click the Insert tab, click the Header or Footer drop-down arrow, and then click Save Selection to Header Gallery or Save Selection to Footer Gallery. The Create New Building Block dialog box opens and you can give the header or footer a unique name. Click OK and it’s added to the gallery.
Inserting Page and Section Breaks
You can use page breaks and section breaks to control how your pages are laid out in a document. By default, Word breaks your document into pages for you. You can force a page break whenever you want to start a new page yourself. You can use section breaks to start new sections of your document.
![]()

![]() Click where you want a page break to occur in the document.
Click where you want a page break to occur in the document.
![]() Click the Page Layout tab.
Click the Page Layout tab.
![]() Click the Insert Page and Section Breaks button.
Click the Insert Page and Section Breaks button.
![]() Click Page.
Click Page.
![]() Word inserts the page break in the document.
Word inserts the page break in the document.
Tip: Insert Tab
![]()
You can also insert a page break through the Insert tab on the Ribbon. Click the Pages button and click Page Break.
Tip: Keyboard Shortcuts
![]()
You can insert a manual page break using the keyboard. Simply press Ctrl+Enter. You can also break a line instead of a page and start a new line without starting a new paragraph by pressing Shift+Enter.

![]() Click where you want a section break to occur in the document.
Click where you want a section break to occur in the document.
![]() Click the Page Layout tab.
Click the Page Layout tab.
![]() Click the Insert Page and Section Breaks button.
Click the Insert Page and Section Breaks button.
![]() Click the type of section break you want to insert.
Click the type of section break you want to insert.
![]() Word adds the section break to the document.
Word adds the section break to the document.
![]()
Tip: Column Breaks
![]()
You can control where the column breaks and where a new column starts. Click where you want the break to occur and then click the Insert Page and Section Breaks button and click Column.
Tip: Section Breaks
![]()
A Next Page break starts the next section on a new page. A Continuous section break starts a new section on the same page. An Even Page or Odd page break starts the new section on the next even- or odd-numbered page.
Adding a Watermark
Watermarks are images, patterns, or text that appear behind text on the page’s background. Watermarks are often used to mark a document’s importance, such as Confidential, Draft, or Urgent. You might also use a company logo as a watermark. Because they appear in the background, watermarks are typically faded out so you can still read any text that appears on top of the image. Word has several preset watermarks you can choose from, or you can create your own.
![]()

![]() Click the Page Layout tab.
Click the Page Layout tab.
![]() Click the Watermark button.
Click the Watermark button.
![]() If you want to use a preset watermark, choose one from the gallery.
If you want to use a preset watermark, choose one from the gallery.
![]() To create your own watermark, click the Custom Watermark option to open the Printed Watermark dialog box.
To create your own watermark, click the Custom Watermark option to open the Printed Watermark dialog box.
![]() To create a text-based watermark, click the Text watermark option.
To create a text-based watermark, click the Text watermark option.
Tip: Picture Watermark
![]()
You can use a picture as a watermark, such as a company logo. Click the Picture watermark option in the Printed Watermark dialog box and select the picture file you want to use. You can experiment with the scale to create just the right look. By default, it’s best to leave the Washout check box selected so document text is legible over the watermark.

![]() Click the Text drop-down arrow and choose the text you want to use or type in your own text.
Click the Text drop-down arrow and choose the text you want to use or type in your own text.
![]() Use the formatting drop-down arrows to further customize the font, size, and color of the watermark.
Use the formatting drop-down arrows to further customize the font, size, and color of the watermark.
![]() Choose whether you want to display the watermark diagonally or horizontally across the page.
Choose whether you want to display the watermark diagonally or horizontally across the page.
![]() Click OK.
Click OK.
![]() Word applies the watermark to the page.
Word applies the watermark to the page.
![]()
Tip: Remove It
![]()
To remove a watermark you no longer want, click the Watermark button on the Page Layout tab and click Remove Watermark.
