
Downloadable products are used to, as the name implies, sell anything that can be downloaded. Examples are e-books, MP3s, videos, images, and software. The process of adding a Downloadable product is much like that of adding a Virtual product, with the addition of a tab on the product edit screen where the download options are set.
- First go to Catalog | Manage products. In this screen, click on Add Product in the top-right corner. You will see the screen asking for an attribute set and product type. Now choose Downloadable Product from the Product Type drop-down list and click on Continue:

In this example we'll add a Downloadable product called Top secret document. In the left column the final tab is Downloadable Information. Compared to the Virtual product, this is where you fill in the additional information pertaining to the download options.

- Fill in all product information as usual, and proceed to the Downloadable Information tab. In this tab, you will see two sections: Samples and Links. Samples are not mandatory; using the Samples section you can make a preview of the Downloadable product available on the product page in your storefront. Filling in the Links section is necessary; otherwise your Downloadable product will appear out of stock.
- In this example we shall fill in the Samples and Links sections. Click on the Samples section to expand it. You will see an input field for the title of the sample and an empty table with the headings Title, File, and Sort Order:

- Magento allows you to add multiple sample files. We shall be adding one; the process is similar if you want to display multiple sample files. To add a sample file, click on the Add New Row button in the Sample section. You will see a row appear containing an input field for the title of this specific sample row and an input section for the location of this sample row's file. Fill in the general title for the Sample section and the title for the sample row. We have picked Sample of secret document as the title for the sample section and First paragraph of secret document as the sample row's title. Next, Magento should know which file to offer as a sample. There are two choices, either a file upload or a URL. By default the radio button for file upload is selected. A file upload works by pressing the ... button next to the text saying File:, which opens your computer's file browser. Double-click on the file you want to upload and you will see the file's name appear in the row (sample in the following example):

- This does not yet save the file to Magento! The final step is to click on the Upload Files button, after which the row slightly changes in appearance to signify the file is uploaded.
The final two columns of a sample row are the sort order and a delete buttons (the delete button is the red button with an X). By using sort order you can adjust in which order samples appear by filling in whole numbers signifying the row's position, if you have used multiple rows. The delete button deletes a sample row.
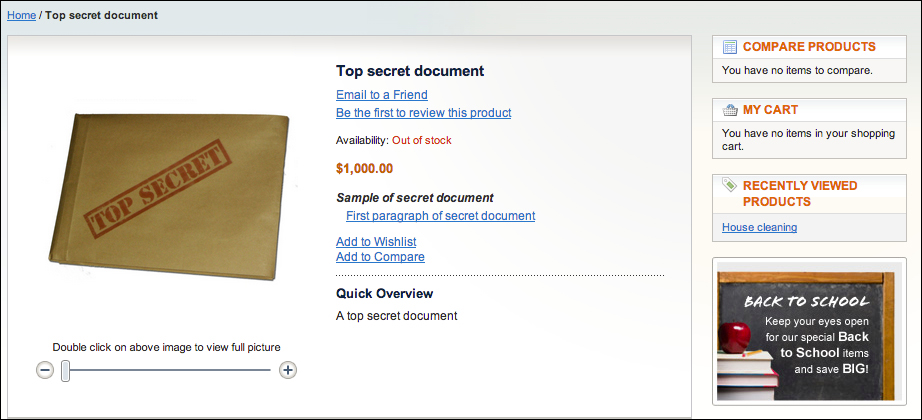
- Now save the product and visit it in the frontend of your store. You will see the product is out of stock because the Links section is not yet filled, but you can see the information you filled in under the Samples section already present!
- Head back to the Magento Admin and open the Downloadable product again. In the Downloadable Information tab, the Links section will be expanded by default. The first input field in the Links section is for the general title of all the links, where we have filled in The secret document. The second is a choice whether the downloadable files you add in the Links section can be purchased separately or not. We will get back to this choice after discussing the Links section so we can show the effect of this choice better.

- The most important part of the Links section is the table where one or more downloadable files can be set. In general, this table functions similarly to the downloadable files table in the Samples section. We will be adding two files to the Links section: Part 1 and Part 2 of our top secret document. Because we are adding two files, click on the Add New Row button twice. This results in the following view:
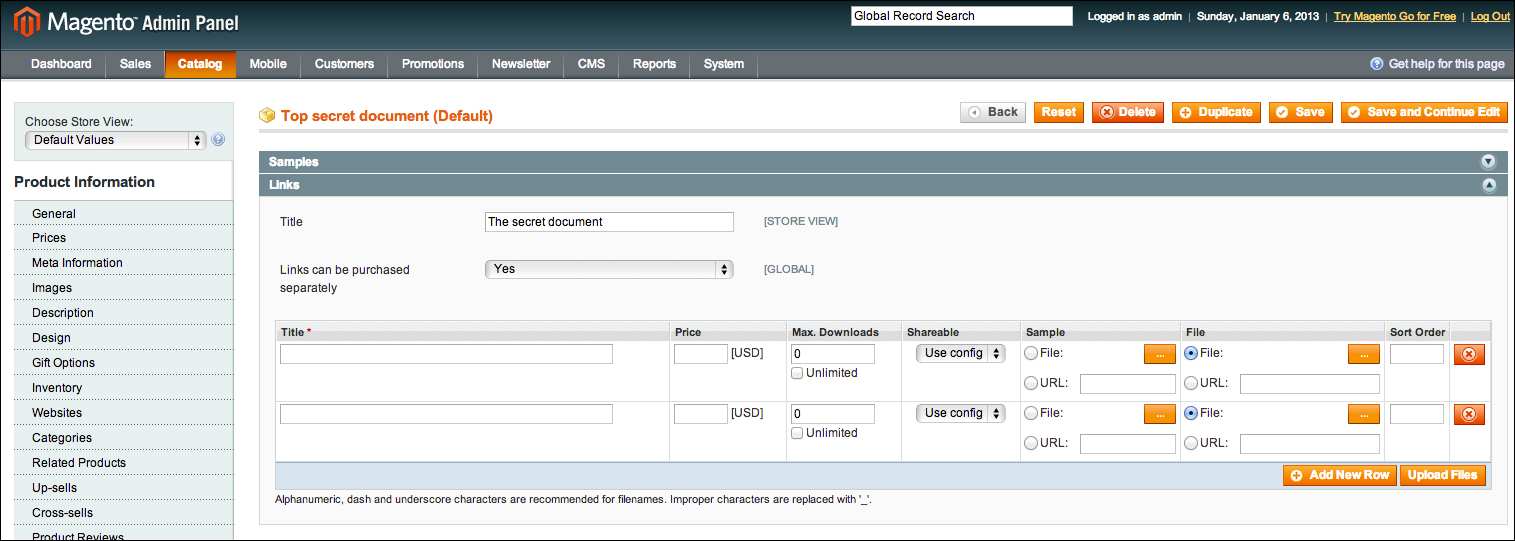
The Title, File, and Sort Order columns have the same purpose as in the Samples section. The same goes for the delete buttons. The columns that differ from the Samples section are Price, Max. Downloads, Shareable, and Sample.
- Under Price, you can fill in an additional price for a specific downloadable file. For instance, if the base product price is 1000 and we would want to give Part 1 of our top secret document an additional price of 100, the customer would have to pay 1000 + 100 = 1100 for the purchase of Part 1 of the top secret document. Filling in this price is not required and the input field should be left empty unless specific downloadable files, which you are adding, have specific additional costs to your customers.
- Under Max. Downloads you can set the maximum number of downloads for each downloadable file by filling in a whole number greater than zero in the input field. Magento automatically selects the Unlimited checkbox for you if you do not do anything with this column.
- Under Shareable you will see a drop-down that lets you set the product to be shareable or not. Setting this to Yes means that your customers can share the URL of the Downloadable product with others. Generally, this is not desired. The default setting for this drop-down menu is Use Config, and Magento's default config value is to not allow sharing of downloadable files. We recommend you to leave it at the default settings and do not change anything in this column.
- Under Sample you have the option of uploading a specific sample of the downloadable file. This is not mandatory and you can see that no radio button is selected by default.
If you are already using the Samples section, filling in the Sample column in the Links section can be superfluous and confusing to manage. We recommend that you either use the Samples section or the sample column in the Files section unless you have a solid reason to use both. In our example we have added sample files for download in the Links section to be able to show how it will render on the frontend. If you choose to add a sample for a downloadable file in the Links section, make sure to click on the radio button for File Upload or URL, otherwise your sample will not get saved even if you have uploaded the sample file or provided the URL for the sample file.
After filling in the titles and choosing the files for the samples and actual downloads, the table looks as follows:

Now the files have to be uploaded by clicking on the Upload Files button. After that, the layout changes to the view shown in the following screenshot:

Note
Uploading a file does not work if the directory permissions for your store are not set correctly. If you are using a local installation, we recommend that you set your full Magento directory open for read and write access from all users. In the Mac section of Chapter 1, Installation, we provided some more information about that. If you are using a Magento installation hosted by a hosting provider, please contact your hosting provider for information about fixing directory permission issues.
Finally, after saving the product, the Downloadable Information section of our top secret document looks like this:

The storefront will now display the product as shown in the following screenshot. An Add to Cart button is now available, and there is a new section called The secret document, which is what we filled in as the title for the Links section in the Downloadable Information section of the product edit screen. Inside the The secret document section there are two rows displaying the two downloadable files we added in the backend, including sample links after their titles:

Finally, it's time to discuss the Links can be purchased separately option that can be found in the Links section of the Downloadable Information section of the product edit screen.

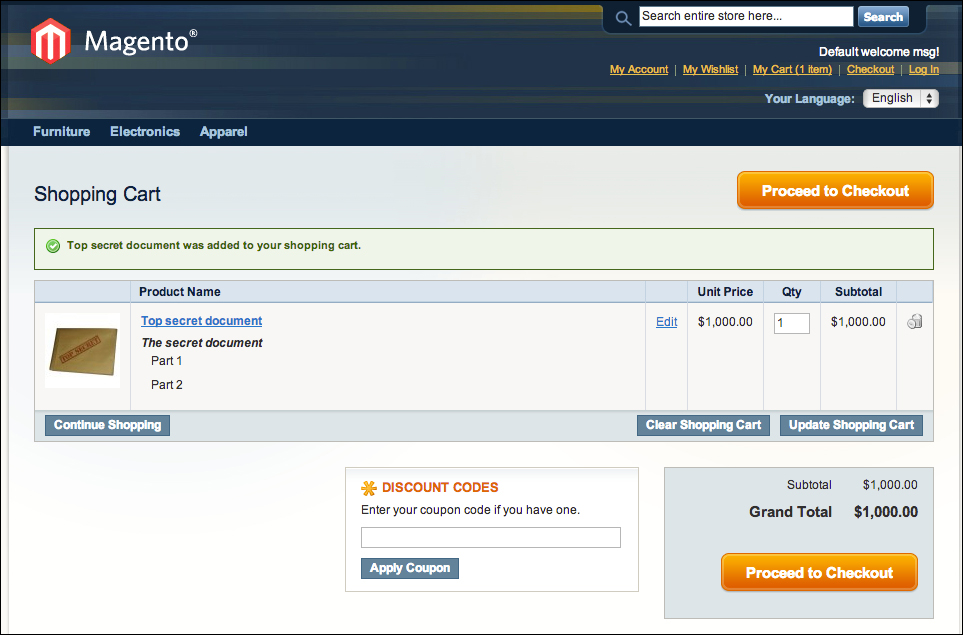
By default this drop-down menu is set to Yes. Looking at the preceding product page screenshot, you will see checkboxes in front of each downloadable. This happens when the Links can be purchased separately drop-down box is set to Yes, and means your customers have to select the checkbox for each file they want to order. Setting the drop-down menu to No results in a product presentation as shown in the following screenshot, meaning customers do not need to select checkboxes, and they will be able to add all downloadable files to the cart:

The shopping cart reflects the files that were chosen: both in the following screenshot. After clicking on Proceed to Checkout, Magento's one-page checkout appears. Like the checkout for a Virtual product, the shipping method step is gone. There is a difference with the checkout for Virtual products however. Magento links the Downloadable products to customer accounts. Because of this there is no possibility to checkout as a guest anymore!
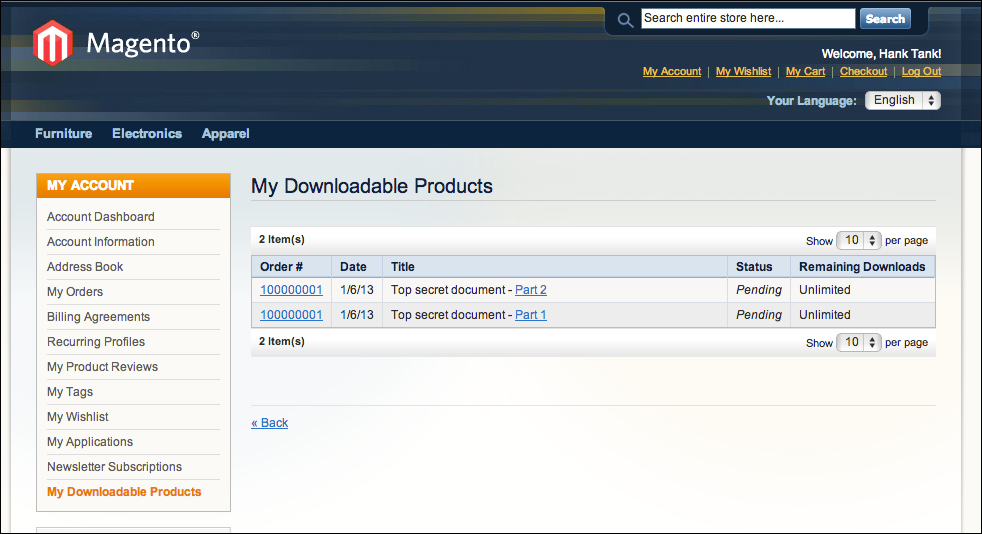
After placing an order, your customers can go to their customer account to get access to their Downloadable products in the Downloadable Products section. In it, customers can see which files they have ordered, if they are available and how many downloads are remaining. By clicking on the hyperlinks behind the entries in the Title column, customers can download their files.
The general configuration settings for Downloadable products can be found at System | Catalog, in the Downloadable Product Options section:

We advise you to leave these options to their default values. The first option is important to be aware of: by default Magento makes downloadable files available to your customers only after your customer's order is invoiced.
Note
Set the Links can be purchased separately choice to No if you only have one row in the Links section of the Downloadable product. Otherwise, your customers have to mark the checkbox for that single file before they can add the product to their cart, reducing the effectiveness of your product page!