
Appendix B. Pythonanywhere: Deploying Your Webapp

At the end of Chapter 5, we claimed that deploying your webapp to the cloud was only 10 minutes away.
It’s now time to make good on that promise. In this appendix, we are going to take you through the process of deploying your webapp on PythonAnywhere, going from zero to deployed in about 10 minutes. PythonAnywhere is a favorite among the Python programming community, and it’s not hard to see why: it works exactly as you’d expect it to, has great support for Python (and Flask), and—best of all—you can get started hosting your webapp at no cost. Let’s check out PythonAnywhere.
Step 0: A Little Prep
At the moment, you have your webapp code on your computer in a folder called webapp, which contains the vsearch4web.py file and the static and templates folders (as shown below). To prepare all this stuff for deployment, create a ZIP archive file of everything in your webapp folder, and call the archive file webapp.zip:

In addition to webapp.zip, you also need to upload and install the vsearch module from Chapter 4. For now, all you need to do is locate the distribution file that you created back then. On our computer, the archive file is called vsearch-1.0.tar.gz and it’s stored in our mymodules/vsearch/dist folder (on Windows, the file is likely called vsearch-1.0.zip).
Note
Recall from Chapter 4 that Python’s “setuptools” module creates ZIPs on Windows, and .tar.gz files on everything else.
You don’t need to do anything with either archive file right now. Just make a note of where both archive files are on your computer so that they are easy to find when you upload them to PythonAnywhere. Feel free to grab a pencil and scribble down each archive file’s location here:

Step 1: Sign Up for PythonAnywhere
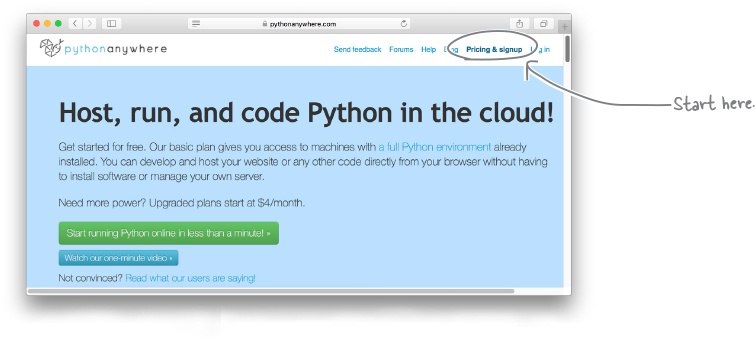
This step couldn’t be any easier. Surf over to pythonanywhere.com, then click on the Pricing & signup link:
Click on the big, blue button to create a Beginner account, then fill in the details on the signup form:

If all is well, the PythonAnywhere dashboard appears. Note: you are both registered and signed in at this point:

Step 2: Upload Your Files to the Cloud
Click on the Files tab to view the folders and files available to you:

Use the Upload a file option to locate and upload the two archive files from Step 0:

You’re now ready to extract and install these two uploaded archive files, and you’ll do that during Step 3. To get ready, click the Open a bash console here link at the top right of the above page. This opens up a terminal window in your browser window (on PythonAnywhere).
Step 3: Extract and Install Your Code
When you click the Open a bash console here link, PythonAnywhere responds by replacing the Files dashboard with a browser-based Linux console (command prompt). You’re going to issue a few commands to extract and install the vsearch module as well as your webapp’s code within this console. Begin by installing vsearch into Python as a “private module” (i.e., just for your use) using this command (be sure to use vsearch-1.0.zip if you’re on Windows):

With the vsearch module successfully installed, it’s time to turn your attention to your webapp’s code, which has to be installed into the mysite folder (which already exists on your PythonAnywhere home folder). To do this, you need to issue two commands:

Step 4: Create a Starter Webapp, 1 of 2
With Step 3 done, return to the PythonAnywhere dashboard and select the Web tab, where PythonAnywhere invites you to create a new starter webapp. You’ll do this, then swap out the starter’s webapp code for your own. Note that each Beginner account gets one webapp for free; if you want more, you’ll have to upgrade to a paid account. Luckily—for now—you only need the one, so let’s keep going by clicking Add a new web app:

As you are using a free account, your webapp is going to run on the site name shown on the next screen. Click the Next button to proceed with PythonAnywhere’s suggested site name:

Click Next to continue with this step.
Step 4: Create a Starter Webapp, 2 of 2
PythonAnywhere supports more than one Python web framework, so the next screen offers you a choice among the many supported systems. Pick Flask, then select the version of Flask and Python you wish to deploy to. As of this writing, Python 3.4 and Flask 0.10.1 are the most up-to-date versions supported by PythonAnywhere, so go with that combination unless a newer combination is offered (in which case, pick the newer one instead):

You’re nearly there. The next screen offers to create a quickstart Flask webapp. Go ahead and do that now by accepting the values on this page and clicking on the Next button to continue:
Step 5: Configure Your Webapp
With Step 4 complete, you are presented with the Web dashboard. Don’t be tempted to click that big, green button just yet—you haven’t told PythonAnywhere about your code yet, so hold off on running anything for now. Instead, click in the long link to the right of the WSGI configuration file label:

Clicking that long link loads your newly created Flask webapp’s configuration file into PythonAnywhere’s web-based text editor. At the end of Chapter 5, we told you that PythonAnywhere imports your webapp code before invoking app.run() for you. This is the file that supports that behavior. However, it needs to be told to reference your code, not the code in the starter app, so you need to edit the last line of this file (as shown below), and then click Save:

Step 6: Take Your Cloud-Based Webapp for a Spin!
Be sure to save your changed configuration file, then return to the Web tab on the dashboard. It is now time to click on that big, tempting, green button. Go for it!

After but a brief moment, your webapp appears in your browser, and it works exactly as it did when you ran it locally, only now anybody with an Internet connection and a web browser can use it too:

And with that, you’re done. The webapp you developed in Chapter 5 has been deployed to PythonAnywhere’s cloud (in less than 10 minutes). There’s lots more to PythonAnywhere than what’s shown in this short appendix, so feel free to explore and experiment. At some point, remember to return the PythonAnywhere dashboard and log out. Note that, despite your logging out, your webapp keeps running in the cloud until you tell it otherwise. That’s pretty cool, isn’t it?