
Chapter 7: Shooting Photos
To create beautiful photographs, you first must understand how to use your camera. The T5i/700D has many useful features that make creating images easier. Camera control modes, such as Shutter-priority AE ( ![]() ) and Aperture-priority AE (
) and Aperture-priority AE ( ![]() ), also known as the Creative Zone modes, give you flexibility and control over your photographs. The automatic modes, such as Landscape (
), also known as the Creative Zone modes, give you flexibility and control over your photographs. The automatic modes, such as Landscape ( ![]() ), give you options best suited for various subjects. It takes practice and experience to take high-quality photographs.
), give you options best suited for various subjects. It takes practice and experience to take high-quality photographs.
This chapter explores different types of photography and includes tips for improving your images. It includes information about composition, lighting, equipment, and the best practices for advancing your skills. The best part of this chapter, in my opinion, are the tips from photographers who have years of experience with various photographic disciplines. The more information you have, the better decisions you will make before clicking the shutter button.
Wildlife is a favorite subject for photographers, and you don’t have to travel too far to find great photography opportunities.
Portrait Photography
Creating portraits is an art, and developing your style takes time. A good way to begin a portrait session is to ask how the picture will be used. Is the photograph for professional use or family memories? There are many reasons why people want a portrait. Images of family and friends are in demand, whether in print or for online sharing. You never know which photographs you create will become a treasured family memory. Develop a plan before you start shooting, and think about who will view the photos.
There are two main types of portraits: Studio and environmental. Although taken in different environments, both are controlled by the photographer. A studio portrait is created in a photographer’s studio or a portable one that is used on location. An environmental portrait is taken in the subject’s environment, outside the traditional studio. The idea behind this type of portrait is to tell the subject’s story with the support of her surroundings. These types of photos are common in documentary photography and photojournalism. In a candid portrait, the subject is unaware of or ignoring the camera.

7.1 This graduation portrait was shot in a studio. Exposure: ISO 200, f/5.6, 1/200 second, 28-70 2.8 USM lens.
Equipment
Most studio portrait photographers use lenses over 70mm because they don’t want a wide-angle lens to distort their subjects. The preferred range is 70mm to 135mm. Lenses that are 200mm or larger also take great portraits, but they can be intimidating. To add a formal look to your photographs, consider purchasing a background. Photographers often use a longer lens to create candid-style photographs. Longer lenses are nice when you want to stay out of your subject’s personal space. Use a wide-angle lens, such as a 20mm, to create a portrait that shows the environment and tells the subject’s story.
Lighting is an important part of creating a portrait. Most portrait photographers prefer to use a soft light to minimize the harshness of shadows. A softbox, umbrella, or using a soft filter on the flash is highly recommended. When photographing groups, a soft light is even more important because it minimizes harsh shadows created when people stand close together. Consider using window light for your portraits — the soft light or warm glow of a sunset through a window adds a nice dimension to your pictures. If one side of your subject’s face is too dark, use a reflector, white board, or bounce a flash off the opposite wall to add fill light.

7.2 A studio portrait shot using a softbox. Exposure: ISO 100, f/5.6, 1/160 second, 100mm f/2.8 lens.
The self-portrait is a popular form of photography. If you don’t have a wide enough lens (or long enough arms), I recommend using a tripod along with your camera’s self-timer to take a portrait. One nice feature of the continuous self-timer option is that you can take multiple images without having to run back and forth to your camera to reset it. If you handhold your camera, an ultrawide-angle lens is helpful. Use the Live View mode ( ![]() ) and turn the LCD screen to face the same direction as your lens so that you can see what is in the frame.
) and turn the LCD screen to face the same direction as your lens so that you can see what is in the frame.
It’s helpful to carry tools in your bag to make the experience of creating a portrait more pleasant for your subjects. Include little things, such as small toys, that might grab a child’s attention. Keep a mirror handy for your subjects to check their hair and makeup. Small clips are useful to hold back loose clothing. Often, these extras can make the difference between an average image and a great portrait. Another thing that professionals do is carry a booklet of sample poses on which you and your subject can collaborate. This tool also breaks the ice and can give nervous subjects a bit more confidence.
Best practices
Most formal portraits are photographed with a long lens (over 70mm) while holding the camera vertically. However, this does not mean that all portraits must be shot vertically — horizontal studio portraits are interesting, too. Studio portraits are usually best when photographed using a shallow depth of field, as shown in Figure 7.3. Use the lowest aperture number possible on your lens (I prefer f/2.8 to f/4.5). The Portrait mode ( ![]() ) on your camera does this automatically.
) on your camera does this automatically.

7.3 It is normally best to shoot portraits with a shallow depth of field. Exposure: ISO 125, f/3.5, 1/125 second, 100mm f/2.8 lens.
When using a shallow depth of field for portraits, pay close attention to your focus, especially around the subject’s eyes.
Environmental portraits tend to be horizontal, wide-angle photos. Sometimes, though, the best choice is to use a longer lens (70mm or more) vertically, as shown in Figure 7.4. The objective of environmental portraiture is to see the subject’s environment, so creating a large depth of field by using a large aperture number (which is a smaller opening), such as f/16, is recommended.
7.4 Environmental portraits can show the subject either sitting or standing. Some may feature props, while others rely on the environment to tell the story. Exposure: ISO 125, f/6.3, 1/200 second, 50mm f/1.4 lens.
When photographing a group, make sure that heads are not aligned — that is, directly above one another. It’s better to stagger people so that they are at different heights. It is also important to make sure that all of your subjects are in focus. Make sure that you have enough depth of field by using an aperture of at least f/5.6. After you take a group shot, double-check it by pressing the Playback button ( ![]() ), and then zooming in on each individual to make sure everyone is in focus. You can zoom in by pressing the Magnify button (
), and then zooming in on each individual to make sure everyone is in focus. You can zoom in by pressing the Magnify button ( ![]() ), or by spreading your index finger and thumb across the LCD touchscreen.
), or by spreading your index finger and thumb across the LCD touchscreen.
No matter which portrait style you choose, your main goal is to keep your subject’s eyes in focus. If the eyes are not in focus, it is hard for the viewer to relate to the person in the photograph. This can be tough when using a shallow depth of field, especially at apertures of f/2.8 or lower. Take the time to review a few of your portraits to make sure you are on target. Press the Playback button ( ![]() ) and you see an instant preview of your last image. Also, keep your subject away from walls. Depending on the lens and depth of field you are using, you may capture distracting details on a wall behind your subject. Pulling people away from the wall allows the shallow depth of field to do its job and blur any distracting elements in the background. Walls are not all bad, but only use them as a backdrop if you think it will enhance the photograph.
) and you see an instant preview of your last image. Also, keep your subject away from walls. Depending on the lens and depth of field you are using, you may capture distracting details on a wall behind your subject. Pulling people away from the wall allows the shallow depth of field to do its job and blur any distracting elements in the background. Walls are not all bad, but only use them as a backdrop if you think it will enhance the photograph.
Try different compositional techniques, such as the Rule of Thirds and new perspectives. Not every portrait needs to be shot at eye level. Take advantage of your camera’s Live View shooting mode ( ![]() ), hold the camera higher or lower, and use different lenses. Look for objects that compete with your subject, and if you see distracting elements try a new angle. Make sure that the background is free of poles and other intrusive objects that might appear to be coming out of your subject’s head or body.
), hold the camera higher or lower, and use different lenses. Look for objects that compete with your subject, and if you see distracting elements try a new angle. Make sure that the background is free of poles and other intrusive objects that might appear to be coming out of your subject’s head or body.
In a candid portrait, the subject ignores, or is unaware of, the camera. The goal is to be patient enough to wait for peak moments when people are laughing, gesturing, or smiling. This takes practice, a little stealth, and luck. The photographer must be ready to press the shutter button at any moment. Many photographers do not consider these portraits, but a good candid image captures a moment in time and tells a story. Children are excellent candid subjects, especially because they usually don’t like to sit in one spot for very long. However, pointing the camera down at a child does not effectively capture his world and point of view. Make sure that you get down on their level. Interact and play with them for a few minutes before you start shooting. Just let kids be kids and you will capture some great shots.
You rarely get the best photo on the first shot (although, it can happen), so take a lot of pictures. A slight movement, smile, or shift of the eye can change the entire mood of an image, turning a nice shot into a great portrait. The more photos you take, the greater your chance of capturing the right moment.
Tips
Use your camera in the Live View mode ( ![]() ) to allow interaction between you and your subject while you shoot. People come in all shapes, sizes, and colors, and knowing how to approach a subject makes for a better photograph. For example, people with long noses should be photographed straight on to minimize the size, rather than allowing the nose to detract from other facial features. Ask older people to look up at you to smooth out any wrinkles in their necks and faces. Overexpose photos of people with darker skin by 1 stop or, better yet, add more light so you can see facial details.
) to allow interaction between you and your subject while you shoot. People come in all shapes, sizes, and colors, and knowing how to approach a subject makes for a better photograph. For example, people with long noses should be photographed straight on to minimize the size, rather than allowing the nose to detract from other facial features. Ask older people to look up at you to smooth out any wrinkles in their necks and faces. Overexpose photos of people with darker skin by 1 stop or, better yet, add more light so you can see facial details.
It’s not unusual for portrait subjects to stiffen when the camera is pointed their way. Remember to have fun — portraits don’t have to be such serious business. I’m not very good at telling jokes, but I try to relate to my subjects in any way that I can to make them feel comfortable and get them to smile. Sometimes, subjects may think they are smiling when they are not. Show them a few of your photographs so that they can make adjustments and understand what you are doing. A trick I learned a long time ago from an opera singer was to ask your subjects to look down and count to three. On three, ask them to look up with a big smile. Another idea is to ask your subjects to pretend that they just ran into an old friend they haven’t seen in years.

7.5 Use the LCD screen in the Live View shooting mode to check your composition. When shooting portraits, this also allows you to interact with your subject.
Try different backdrops or locations behind your subject. Sometimes, just turning the other direction makes a big difference. It’s amazing how different background objects can improve your photograph. Always look for light, colors, or interesting textures that you can use as part of your composition. Don’t be afraid to use props in your images. Include things that relate to the subject, such as a teddy bear if you’re photographing a child. Have someone hold a photograph of a grandparent at a younger age, or pose him with his favorite piece of sporting equipment. Let the props help tell the story.

7.6 Black-and-white photographs can be more dramatic. Exposure: ISO 160, f/3.2, 1/160 second, 100mm f/2.8 lens.
You can also use the Monochrome Picture Style ( ![]() ) on your camera to create black-and-white portraits. In some cases, you might want to wait until postproduction to change your photos to black and white. This is especially true if you are shooting JPEG files because you cannot later convert them back to color. If you generally don’t do a lot of post-processing, take a few color and black-and-white shots for variety. Try using the Portrait mode (
) on your camera to create black-and-white portraits. In some cases, you might want to wait until postproduction to change your photos to black and white. This is especially true if you are shooting JPEG files because you cannot later convert them back to color. If you generally don’t do a lot of post-processing, take a few color and black-and-white shots for variety. Try using the Portrait mode ( ![]() ) and see if it enhances your photos to your satisfaction. If you don’t like the results of the preset modes in your camera, you can create up to three of your own Picture Styles.
) and see if it enhances your photos to your satisfaction. If you don’t like the results of the preset modes in your camera, you can create up to three of your own Picture Styles.
Regardless of whether photography is your hobby or career, it is always good to remember that interesting subjects make the most interesting photos. This may seem obvious, but it is a fact that is often overlooked. Look for interesting (not just beautiful) people to photograph — people with character in their faces, or interesting clothing, hairstyles, and body art.
Try photographing parts of the body, such as the hands or legs, as part of an environmental portrait. The face does not have to be in every shot, especially if the photo is one in a series of images. Creating a series can be a lot of fun. It can be composed of the subject in different poses, making faces, or in different environments. Usually a series is grouped in odd numbers such as three, five, or seven photographs. Use your imagination — you will be surprised at the interesting combinations you can envision.

7.7 Here, a person’s body is used to display the subject. Exposure: ISO 400, f/3.5, 1/1000 second, 100mm f/2.8 lens.
If you want to create a softer, cleaner look, experiment with overexposing your portraits. It’s not right for every subject, but a quick test never hurts. Try playing with movement. Sometimes, blurring your subject in the foreground adds interest. This technique doesn’t work well for formal portraits, but it’s a nice addition to a series. Another idea is to ask your subject to stand still, and then use a slow shutter speed to show the motion of people or traffic in the background. You should also always keep model release forms on hand. You never know how you might want to use your photographs in the future. If you have signed model releases for all of your portraits, you’re good to go.
Portrait Photography Tips
Geoffrey Creighton, a photographer based in Halifax, Nova Scotia, believes that a strong interaction between the photographer and the subject is the key to creating a successful portrait. Good rapport is an important part of capturing the personality of a subject, which, in turn, helps create a connection between the subject and the viewer. Here, Geoffrey shares some tips for taking portraits with your Canon Rebel T5i/700D:
• Use the Creative Zone modes — specifically Aperture-priority AE ( ![]() ).
).
• Use the lowest aperture possible, such as f/2.8.
• Experiment with the main light behind the subject (backlight). This is a more advanced technique that can produce exciting results.
• Don’t photograph your subject straight on. Shooting at different angles can add depth and make your subject more interesting.
• Ask people to shake their hips to loosen up before you shoot.
• Take a range of shots from no smile to insanity, and then back to no smile. You will find your hero shot at some point during the process.
• Use reflectors and fill flash. These tools will help improve the quality of your images.
Geoffrey Creighton specializes in actor headshots and portraits. You can view his work at: www.geoffreycreighton.com.
Family Photography
Family portraits are one of the most common types of photography. For most people, it is an integral way to remember the milestones in our lives. When shooting family portraits, it is important to take a variety of photographs. Don’t position everyone against a wall for every shot. Take some candid images, and use different lenses and techniques to help tell the family’s story. Let personalities shine — don’t do too much directing. If a child is holding her favorite toy, let her keep it. The more natural family photographs are, the better the memories will be.

7.8 Casual family photographs can capture fun memories. Exposure: ISO 400, f/5.6, 1/250 second, 50mm f/1.4 lens.
Equipment
I recommend using zoom lenses for family photo opportunities because you never know what will happen at family gatherings. The ability to use a wide-angle lens one moment and a telephoto the next can mean the difference between capturing a memorable image or not.
Don’t forget about yourself. Use a tripod to set up your camera for formal and casual photographs that include you. You can also use a remote to take photographs from a distance in both group and random photographs.
Best practices
If you plan to take formal family portraits, setting them outdoors tends to yield the best results. Coordinate clothing, if possible, to help create unity. Suggest that no one wear loud colors, patterns, or extreme styles. Of course, how you approach this topic depends on your family dynamic. When photographing groups, use soft light or shade to avoid unwanted shadows.
Try to plan family photo shoots when kids are likely to be in a good mood. This is most important for younger children who take naps. Inquire and plan ahead if more than one family is involved. Don’t forget about four-legged family members — they are also an important part of a family’s story, so make sure to get some shots with and without pets. Take individual portraits of each of the animals, too.
7.9 Let kids be kids to preserve their personalities in your photographs. Exposure: ISO 400, f/2.8, 1/400 second, 100mm f/2.8 lens.

7.10 I took this casual portrait between formal shots. Exposure: ISO 400, f/5.6, 1/320 second, 50mm f/1.4 lens.
Tips
Use a wide aperture for group shots and a small aperture for individuals. Take many pictures, especially if there is more than one person in a photograph. It can take many frames before you successfully capture an image in which everyone looks their best.
Family Photography Tips
Todd Muskopf, a professional family and senior portrait photographer, believes the first thing an aspiring photographer should learn is how to use light. Fill-flash and reflectors are a good place to start. In Muskopf’s opinion, the most important thing to do then is shoot a ton of images. The following are Todd’s eight tips for photographing friends and family:
• Never ask people to look directly into the sun.
• Consider the angles at which you photograph people. Make sure the result is desirable. For example, you might want to photograph heavier people at a higher angle rather than straight on.
• When posing people, remember, if it bends — bend it. This prevents portraits from looking stiff.
• Use a longer lens for portraits. An 85mm f/1.2 or 70-200mm f/2.8 lens is ideal.
• Use a shallow depth of field for a single person and a larger depth of field for multiple subjects.
• Purchase an external flash. It improves the quality of photographs without adding a lot of cost.
• Bounce flash indoors. Point your flash at walls and ceilings, rather than directly at your subject. Bounce flash softens the shadows on your subject.
• Always keep backup batteries and memory cards with you. You don’t want your camera to run out of power or space on the memory card before your session is complete.

Image courtesy of Todd Muskopf
Todd Muskopf is based in Beavercreek, Ohio. He has photographed professionally for over 10 years, and has sold his images in over 16 countries. You can see more of his work at his website: http://www.muskopf.org.
After your photo session ends, you can identify the people in the photograph in the metadata. Metadata is information stored in your image files. You can access and add to the photograph’s metadata under File Info in most photo-editing software. Be aware that some Internet websites, including many social media platforms, strip the metadata from photographs, so don’t depend on these locations for archival storage. Frame your memories and pick a special place in your home to display family photos. These become conversation pieces and serve as reminders to take more photos.
Action and Sports Photography
Action photography takes a lot of practice. When it comes to sports photography, it is helpful to understand the sport you are shooting. The goal for most action photographers is to capture the peak moment, also known as the decisive moment. It takes patience and timing (and many frames) to capture it right.
Equipment
Most sports photographers use a long, fast (f/2.8 is ideal) lens to photograph their subjects. Setting the camera at a higher ISO, such as 800 or 1600, helps get the shutter speed as high as possible. Your Canon T5i/700D has a Sports mode ( ![]() ) designed to photograph fast action.
) designed to photograph fast action.
Photographers at professional sporting events can create stunning and clear images because the buildings and locations they work in usually have bright lights for television. In some cases, they even have flashes mounted in the ceiling. I’m not suggesting this is the only reason they capture such great images, but it is an advantage most don’t have at the local school gymnasium. Local gyms tend to have low light that requires high ISO settings and fast lenses. Fortunately, your camera has an ISO range to help keep your shutter speed as high as possible with an f/2.8 lens.

7.11 The Canon 70-200mm f/2.8 is a good all-around sports lens.
If you are in the middle of the action and a full tripod is not practical to prevent camera shake, use a monopod (which is like a tripod, but only has one leg) to stabilize your camera.
You are going to take many photographs if you’re shooting action, so I recommend that you shoot in the JPEG format rather than RAW. The RAW format is nice for making corrections later, but RAW-format images quickly fill up your camera’s buffer. The last thing you need is your camera to stop shooting during peak action because it is processing your images. Your camera shoots 5 frames per second (fps), which is helpful, but it does not replace good timing on your part. Don’t rely on the fast frame advance to capture the action. I recommend that you use your instincts and press the shutter button at the peak moment. Leave your finger on the shutter button to continue shooting and capture the rest of the action.
Best practices
If you want stop action, you have to get your shutter speed over 1/500 second. In some cases, if the subject is moving toward or away from you, a lower shutter speed does the trick. If the action is moving from side to side, the higher your shutter speed is, the better. Keep your camera in the AI Servo focusing mode ( ![]() ) to follow focus your subject so that when you are ready to press the shutter button, the camera is already focused.
) to follow focus your subject so that when you are ready to press the shutter button, the camera is already focused.
Be prepared — great action shots can happen at any moment. Don’t put your camera down, even if you think the play or action is complete. Watch for emotions and accidents, which often happen before and after a play. If you are on the slopes, follow the action as the skier or snowboarder does his tricks. Follow him until you see the reaction or emotion on his face after a successful run. One thing you learn over time when shooting action is how to compose quickly. Just because something happens fast is no excuse for a lack of composition or background that plays off your subject.
Go where the players are or be patient for the action to come to you. Photos taken from across a field (unless you have a very large, expensive lens) are useless. This is especially true when shooting football, soccer, or any game played on a large field. If you have to photograph subjects from farther away, shoot horizontally, and when they get close switch to vertical. Try to fill the frame with the action. When shooting sports, it is important to capture the faces of the players and the ball, if possible. The backs of heads and players running away from the camera rarely make for successful sports images.
Once you know that you have some good shots, try different techniques, such as panning or ghosting. Panning is using a slower shutter speed and following the subject. Ghosting is a similar process, except it’s done while using a flash. In the resulting image, the subject is in focus and the background is blurred. This is a good technique when shooting cars, bikes, or other moving objects. If you know where the action ends (such as at a finish line or home plate), I recommend that you pre-focus on that area and prepare for the runner or player to appear in the frame.

7.12 This image from a cycle cross race was caught at the peak moment. Exposure: ISO 400, f/4.5, 1/1000 second, 70-200mm f/2.8 lens at 190mm.

7.13 For this shot, I pre-focused on the track and waited for the cyclist to reach that spot. Exposure: ISO 800, f/4.5, 1/1600 second, 100mm f/2.8 lens.
See Chapter 5 for more information about panning and ghosting.
Try to tell the story of the game through your images. The action may be on the field, slope, or raceway, but coaches, teammates, and fans are all part of it, too, and make great photographic subjects. Use your imagination and try to shoot images you’ve never seen before. Don’t be intimidated by photographers who have larger lenses. Remember, the size of a lens doesn’t automatically mean its owner is a good photographer. Learn how to use the equipment you do have to the best of your ability.
Usually, a little post-processing is required for action and sports photographs. Some images may need sharpening, lightening, darkening, or color correction. The biggest alteration that might be necessary in postproduction is cropping images to fill the frame with the action.
Tips
If you are going to be photographing a sport, learn about it. This includes Little League, school teams, and pickup games. Sometimes, the rules are adjusted at different levels, and knowing what to expect helps ease the learning curve. By understanding what should happen next, you can anticipate photo opportunities. Always keep extra memory cards and batteries with you. When you notice that your memory card is getting full, pull it during a break in the action before it gets full. This way, you won’t run out of space at a peak moment.
Keep business cards with you. Even if you are photographing family and friends at a local ball field, people often ask for copies. Have a plan in place about how you will handle that request. You should also be prepared for all types of weather. Make sure that you have a way to protect your valuable equipment in case it rains or snows. Also, be prepared for the action to come a little too close. Through my years of photographing sports, balls have hit me, hockey pucks flying at dizzying speeds have just missed my head, and I have been run over by large players. Always be aware of what is going on around you.
Event Photography
Event photography is one of the more popular forms of photography. Most photographers enjoy capturing these moments for family, friends, and themselves to document memories. Once people know that you have a good camera and like to take photographs, you will most likely be asked to shoot events.
When photographing an event, it’s important to plan ahead. Set expectations about what you are going to do, including how long you will shoot, how many images you plan to take, and the amount of postproduction you want to do. Postproduction takes a long time if you plan to correct and adjust every image. Plan in advance where and how you will share the photos. Make sure that you understand what the event is about, who the key people are, and if there are any special restrictions regarding photography. For example, some churches and historical locations do not allow flash photography.
Equipment
Using a zoom lens, such as an EF 28-135mm f3.5-5.6 IS USM, is a good idea for events because you might be asked to photograph a group one moment and an intimate exchange the next. A zoom lens helps you adjust quickly. Keep a flash handy to illuminate subjects in a dark room and use as fill flash when you have to photograph in front of bright windows.
If you plan to shoot video at an event, make sure that you have a tripod and an external microphone with you. This will keep your camera steady and the sound will be high quality.
For more information about shooting video, see Chapter 8.
Make sure that you have extras of everything, including batteries and memory cards. An event is generally not something that can be re-created. If any piece of your equipment breaks or runs out of power, it is important to have a backup.
Best practices
When photographing an event, I use what I call the triangle method of photographing. The idea is to create a variety of images, rather than shooting the same style or composition repeatedly. The triangle method forces you to think about and take a variety of shots. Begin with a wide shot to set the scene. Next, shoot medium-distance shots that help tell the story. Try to capture images featuring one to three people, either posed or candid. Finally, take some close-up shots that highlight details. For example, photograph the food, the floral centerpiece, or details on the cake. Look for decorations on the wall, signs, or focus on someone’s hands.
Challenge yourself to take a variety of images using different angles, lighting methods, and compositions. Employ the same three-part method of wide, medium, and close-up shots. When you are done, you will have a great collection of images that tell a story.

7.14 This establishing shot sets the scene at a communion celebration. Exposure: ISO 800, f/4.0, 1/80 second, 12-24mm f/4.0 lens at 24mm.
Avoid using flash whenever you can so it is not flashing in people’s eyes while they are having a good time. If you must use one, consider using a flash filter to soften the light. A slower shutter speed also helps capture the ambient light in the room. Ambient light adds depth to an image and prevents the room from looking like a black curtain behind your subject. If you don’t use a flash, chances are that you will get better candid shots that include emotion and laughter. The best compliment an event photographer can receive is that people didn’t even know she was there.
Tips
When using an external flash, keep it off the camera to avoid red eye. Use a cord to hold your flash off-camera or a bracket in a fixed position for convenience. Try not to interrupt people by asking them to pose for photos. If you need to get a group shot, try to capture a few good candids first. Using your camera’s Live View shooting mode ( ![]() ), hold the camera up high to capture crowd shots and new angles.
), hold the camera up high to capture crowd shots and new angles.

7.15 This detail shot was captured using the triangle method to capture the spirit of the event. Exposure: ISO 100, f/1.8, 1/200 second, 50mm f/1.4 lens.

7.16 When using the triangle method, a medium shot (in this case a portrait) should tell the whole story of an event. Exposure: ISO 800, f/2.8, 1/100 second, 100mm f/2.8 lens.
When photographing an event at which someone is speaking, make sure that you photograph the speaker before and after he leaves the podium. Many of the best photographs in those situations are captured before someone starts speaking. Pay attention to the speaker’s hand movements, and try to capture any interesting gestures. Look away from the podium occasionally — there are often great subjects to capture in the audience.
Avoid photographing people during a meal. It may seem like a good idea at the time, but people don’t look very good when they are eating and if you ask them to stop, they generally are not very happy about it. This is especially true if you ask them to stand up and move around the table for a better shot. It is better to get group shots after everyone is done eating and away from the dirty plates.
Landscape and Nature Photography
Wildlife, landscape, and nature are some of the most enjoyable and rewarding types of photography. The adventure and discovery of new locations and subjects is exciting. Every trip outdoors becomes a mission to bring back quality photos. Remember that what makes an enjoyable photograph is up to you. Everyone has his own vision or way he approaches certain subjects. Many photographers simply want to capture memories with family in the beautiful outdoors. Others are on a quest for breathtaking scenery, elusive wildlife, or rare flowers.
Equipment
Landscape photographers use a wide lens to capture as much of the scene as possible. Wildlife photographers require a long lens to get close to animals that don’t want to be anywhere near humans. Some forms of nature photography require all types of lenses. Macro lenses are common for photographing insects, plants, and rocks found in the field.
A strong and lightweight (carbon fiber) tripod is helpful, especially for keeping long and macro lenses steady in the field. I also prefer backpacks designed for camera equipment because it’s easier to carry items in the organized compartments when hiking. Make sure that you are always prepared for changing weather — both extreme heat and cold can be dangerous. Always carry backup equipment, such as extra memory cards and batteries.
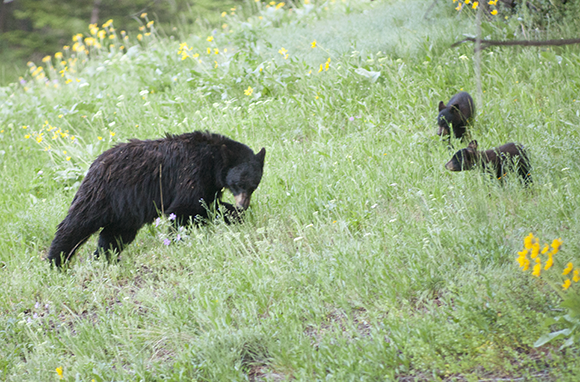
7.17 For some photographers, successfully capturing wildlife is what makes photography enjoyable. Exposure: ISO 1250, f/2.8, 1/160 second, 135mm f/2.8 lens.

7.18 Landscape photography should capture as much of a scene as possible. Exposure: ISO 800, f/8.0, 1/1600 second, 135mm f/2.8 lens.
Best practices
Quality imagery is expected of outdoor photography. You want to use the best practices, such as lower ISO settings and photographing in the RAW format, to create the best photographs you possibly can. Lower ISO settings produce less noise in your images so you can enlarge them. Shooting in the RAW file format allows greater latitude when you adjust your images in postproduction.
Most landscape photographs require a large depth of field so the viewer can see all of the details in the scene. Your wide-angle lens makes this easier, but a tripod is also helpful during the twilight hours because you must use a slower shutter speed in dwindling light. Remember the Rule of Thirds, and keep your horizon lines above or below the middle of the frame, depending on what you want to highlight in your scene. The best landscape photographers understand that it’s not always the land that makes the shot, but the weather. Keep an eye on the weather— especially clouds, and how they play off the landscape and sunlight.
When photographing landscapes, make sure that you have a focal point (where you want the viewer’s eye to go) in your image. Use the fore- and background to balance each other. For example, you can balance the composition of a flower with a cloud. Look for interesting rocks to balance with the peak of a mountain in the distance.
Look for patterns and lines. As covered previously, lines lead the eye into the distance or toward your main subject. Patterns add interest to a photograph, such as rows of corn or trees. The S-curve of a stream can lead the viewer’s eye through a beautiful valley or to the base of a mountain. Look for contrasts in nature, and play the soft and beautiful off the strong and hard.
Wildlife photography, like so many other types, takes patience. Just as it is with people, it’s important to capture the eyes and faces of your subjects. Filling the frame can sometimes be difficult, but it is a necessity if you want it to be considered a successful image by many viewers. Always keep the focus on your subject — you never know when an animal might do something interesting. It is helpful to study the animals you expect to encounter ahead of time, but perseverance provides the biggest reward.

7.19 This intimidating subject was not photographed in the wild, but this is a good example of how patience and preparation can pay off. Exposure: ISO 400 f/2.8, 1/4000 second, 100mm f/2.8 lens.

7.20 You can practice wildlife photography at the local zoo; be prepared to capture interesting moments, like this one. Exposure: ISO 100, f/2.8, 1/800 second, 100mm f/2.8 lens.
Try to keep your photographs simple — too much information can be overwhelming and hard for viewers to digest. Break your scene down into different photographic opportunities rather than trying to get everything in one shot. Nature photography also requires planning. For example, flowers bloom at different times of the year. If you are in a mountain region, the same flower may bloom at different times at various elevations.
For many, nature photography is a peaceful search for the small things you may never notice if you walk too fast. Others look for the grand scenes that nature has to offer. Whether you are looking for large or small subjects, good light improves the quality of them all. Plan to shoot around the Golden Hours of sunrise or sunset. These times of day add beautiful color and dramatic shadows to your images. In addition, just being outdoors and away from the city with your camera offers great rewards.
Tips
When photographing sunsets, look behind you. The clouds or landscape reflecting the fading light may be more dramatic than the sunset itself. You can practice your wildlife photography at a local zoo. You will gain patience as you realize that animals rarely do what you want them to do. When it comes to nature, you might be surprised at the number of interesting photographs you can find in your own backyard, especially with a macro lens.
It is best to travel with other people when you leave the main roads of civilization. If you go alone, always tell people where you are going and when you plan to be back. Be prepared and always dress properly for the conditions.
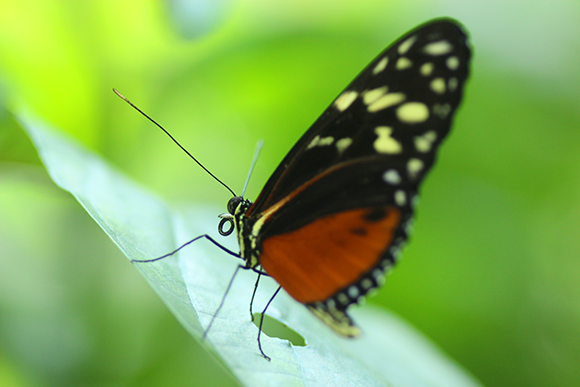
Macro Photography
Exploring the world of small objects is fun with macro photography. This type of photography requires at least 1X magnification. This means that the subject is projected onto the sensor by the lens at life size. For small creatures, such as bees, this takes a good macro lens and patience. One of the great things about Macro photography is that you don’t have to go far to find new subjects and interesting opportunities. Small objects and unseen worlds are all around you. In fact, your backyard is a great place to start. Use the Close-up mode ( ![]() ) to increase your chances of success when photographing with a macro lens.
) to increase your chances of success when photographing with a macro lens.

7.21 Macro photography allows you to see details like the edges of this leaf. Exposure: ISO 400, f/5.6, 1/100 second, 100mm f/2.8 macro lens.
Equipment
Macro photographers use different types of equipment for photographing small objects. A macro lens is a good start, but you can also use extension tubes (also known as extension rings) that fit between your camera and lens. These move the lens farther from the image plain so the lens can focus more closely on the subject. Magnifying filters can be the less expensive option. They fit on the front of the lens and increase magnification for macro photography.
Kenko (www.kenkoglobal.com) is a popular brand of extension tubes worth considering if you want to pursue Macro photography.
Macro lenses produce a very shallow depth of field. It is worth using a tripod and setting your camera at a larger aperture number to get as much depth of field as possible. Even at f/11, the depth of field will be shallow because your subject is so close to the lens.
Consider using a flash when shooting macro — a ring flash or twin light flash holders are beneficial. These provide additional, even light on small subjects. Try using back- and sidelighting for macro photographs, especially when photographing an object with a lot of detail, such as a bee. This makes the details of the subject stand out. The backlight can come from the sun or your own external flash. Keep a reflector handy; a simple index card or piece of paper often does the trick. You can also use reflectors to either reflect light onto your subject or block unwanted light from the scene. To reflect light, place the index card opposite the source light. This reflects the light onto the darker side of the subject. To block light, place the card in front of the light source. These items can also create a clean background or block the wind. Macro photography and wind do not mix well — every movement pushes your subject out of focus.
Best practices
Sometimes photographers forget about composition when shooting macro. They are so excited to get such a small subject in focus, they sometimes forget that the same rules of composition apply in the small world. When shooting macro, balance your subjects off each other. Use your fore- and backgrounds effectively, and keep your images simple by filling the frame as much as possible.

7.22 Objects you may ignore in everyday life can become more interesting with a macro lens. Exposure: ISO 800, f/3.2, 1/160 second, 100mm f/2.8 macro lens.
Manual focus is highly recommended with macro photography. Your camera focuses close up using a macro lens. Unfortunately, considering the depth of field is so shallow, you may not want to depend on where the camera decides to focus. One millimeter off in focus can make the difference between a great or unusable photo.
Tips
When you photograph insects, try to get them in action. For example, photograph bees just before they land on, or after they leave, a flower. This is much easier said than done. As in wildlife photography, it takes patience. Also, just like any type of photography, viewers want to see the face of your subject, not the back end.
Don’t let your tripod keep you trapped in one location. Try different angles, and look for patterns and textures. Consider the time of day. The Golden Hours of the morning and evening have the same quality effect on small objects that they do on larger ones. Don’t forget that there are many subjects to photograph — Macro photography is more than just insects and flowers. Consider shooting the imperfect, old, and strange items around your yard or city. I like to look around older buildings for little details. Old cars also make interesting subjects for Macro photography.

7.23 Your backyard can provide some great subjects for Macro photography, like this bee I caught in my garden. Exposure: ISO 640, f/5.6, 1/160 second, 100mm f/2.8 macro lens.
Night and Low-Light Photography
You may not think of nighttime as the optimal time to take photos. However, although you don’t have the sun to work with, the night is full of light. In a city, you find neon signs, and street and car lights; in the country, you have the moon and stars. Many wonderful images can be taken at night, but because the light is not as powerful, a longer exposure is required. This means that moving lights (like headlights) create action in your photographs. If you plan it right, these movements around your scene can enhance your image. The movement of water, clouds, and lights can also add great points of interest to your photos. Like all of the other types, night and low-light photography takes practice and experimentation. Experience plays a big role in your success — the more you practice, the better you will get.

7.24 I took this night shot on a busy street using a tripod. Exposure: ISO 200, f/9.0, 4 seconds, 12-24mm f/4.0 lens at 12mm.
Equipment
A tripod is a necessity for night photography. Your camera also has a number of features to help you when you are shooting in very little light. The Long exp. noise reduction setting, found in Shooting menu 3 ( ![]() ) helps reduce noise in long-exposure photographs. For really long exposures, the combination of a tripod and remote makes for much more successful photos.
) helps reduce noise in long-exposure photographs. For really long exposures, the combination of a tripod and remote makes for much more successful photos.
Time-lapse photography has become more popular in the last decade. If this is something that interests you, consider purchasing an intervalometer to make the process easier. An intervalometer takes photographs after set periods of time, such as every 2 minutes. It works like a remote and plugs in to your camera in the same location as the Canon remote. Like the remote, you can leave the shutter open for long periods of time on the Bulb setting ( ![]() ) using an intervalometer. The big difference compared to a standard remote is that you can program an intervalometer to take multiple photographs over a specific period of time. When you import it into a video or slide show editing program, you can then create a time-lapse photography video. You can find intervalometers, such as the Vello ShutterBoss, online or at your favorite camera store.
) using an intervalometer. The big difference compared to a standard remote is that you can program an intervalometer to take multiple photographs over a specific period of time. When you import it into a video or slide show editing program, you can then create a time-lapse photography video. You can find intervalometers, such as the Vello ShutterBoss, online or at your favorite camera store.
Best practices
Night photography is all about testing. The camera’s light meter will be useless in most cases because there is not enough light for your average meter reading — especially if you are going to add light to the scene with a flashlight or glow stick. Photograph in the RAW format, so that you can make adjustments later. Use a wide lens and manually set the focus to infinity so that everything is in focus. It may be tempting to use a higher ISO setting, but you have time on your side, so keep your ISO setting as low as you can. This will give you better quality images with less noise.
Light painting is another technique that is a lot of fun. To do it, you use an artificial light to draw shapes, words, or images in the air in a completely dark environment. You can use any light source — a flashlight, a candle, a glow stick, the backlight of a cell phone — to create interesting effects. To light paint, set up a tripod in a low-light or dark environment, and then move the light source around to create different patterns. Consider using multiple types of light to capture different shapes and colors. Some lights have a dimmer switch that enables you to control the light. Like all other types of low-light photography, you should use a tripod, a remote, and Custom Function 5 to lock the mirror up when light painting.
To lock the camera’s mirror up, go to Setup menu 4 ( ![]() ) and select Custom Function 5.
) and select Custom Function 5.

7.25 I created this image by moving a bug-shaped LED around on a table. Exposure: ISO 400, f/8.0, 16 seconds, 12-24mm f/4.0 lens at 20mm, tripod.
Tips
If you want to photograph lightning, point your camera in the direction of the storm. Place your camera on a tripod and use the remote and Bulb setting ( ![]() ) to keep the shutter open. Eventually, a flash of lightning will streak across the sky and expose your image. Take a few test shots to find the right exposure. Don’t let a few sprinkles hold you back — reflections in the rain can be an interesting addition to a night shoot. However, weather can also quickly turn on you, so always be cautious, and have a planned escape route. Keep a flashlight with you in case you need to check your equipment, light up the foreground of a photograph, or find your way back to your car.
) to keep the shutter open. Eventually, a flash of lightning will streak across the sky and expose your image. Take a few test shots to find the right exposure. Don’t let a few sprinkles hold you back — reflections in the rain can be an interesting addition to a night shoot. However, weather can also quickly turn on you, so always be cautious, and have a planned escape route. Keep a flashlight with you in case you need to check your equipment, light up the foreground of a photograph, or find your way back to your car.
When shooting at night, you should also consider the environment. By combining the movement of the stars with trees or other fixed structures, you can add scale to your photographs. Take note of when meteor showers are happening so you can plan to catch the streaks across the sky. If you just want stars to appear as pinpoints in the sky, you have to use an exposure of less than 20 seconds for most wide-angle lenses. Record your exposure times so you have a reference point to work from in the future. Use prime lenses because they have fewer elements, thereby decreasing the chance of unwanted lens flare.
If you are going to photograph fireworks, bring a black card to use as a handheld shutter. When the fireworks start, place your camera on a steady tripod pointed toward the sky. Set the camera to the Bulb setting ( ![]() ) and leave the shutter open using your remote. Place the black card in front of the lens and, when you see interesting fireworks, remove it. When you think you have enough fireworks for one image, advance to the next frame and repeat the process.
) and leave the shutter open using your remote. Place the black card in front of the lens and, when you see interesting fireworks, remove it. When you think you have enough fireworks for one image, advance to the next frame and repeat the process.
Travel Photography
Creating photographs of your travel adventures may be why you purchased your Canon T5i/700D. Photography is a great way to keep the memories alive. Prepare for travel photography opportunities in advance by researching your destination before you leave. Think about the people, the history, and the story of your location. You should also think about how you are going to use the photographs — documenting personal memories, stock shots, or a serious outdoor adventure publication. Think about the type of photography on which you plan to focus, such as people, landscapes, or food. Whatever your intention, make sure you bring the right equipment for the job.
Equipment
A zoom lens is helpful for travel photography because you don’t have to carry as much equipment. The goal is to keep it light: your camera, one or two lenses, a flash, backup batteries, and extra memory cards should be the foundation of your travel photography kit. A large tripod is not practical when traveling, but there are numerous mini-tripods available on the market that can keep your camera steady in low-light situations.
If you have a laptop computer, make sure that you download your images on a regular basis. Bring extra CDs or flash drives to back up your images. You can even mail a CD home as a backup. If you have reasonable Internet access while traveling, consider uploading some of your best images to a cloud storage service, such as Dropbox (www.dropbox.com).

7.26 Travel photos, like this one taken in China, should tell the story of your trip. Exposure: ISO 400, f/2.8, 1/750 second, 135mm f/2.8 lens.
Best practices
Most travel is relatively safe, but remember that you have expensive equipment with you, so always be aware of your surroundings. Consider using small, nondescript bags and unbranded camera straps. Be respectful of the local people; not everyone wants his picture taken. Don’t be intimidated, though — photos of the locals are an important part of your trip. Just be courteous and ask people if you can take their picture — you will be surprised at how friendly most are to visitors.
When you first arrive at a new location, look around before you start shooting. Look for colors, contrast, and textures. Notice the little things in your environment. What do you smell or hear? What is the weather like? Can you photograph any of these things? Using your camera to answer these types of questions helps you tell the story of your travels and create lasting memories.

7.27 Using your camera to tell the story of a location creates lasting memories. This street marker reminds me of the places I’ve been in Australia. Exposure: ISO 200, f/5.6, 1/400 second, 50mm f/1.4 lens.
After photographing the well-known sites, visit the non-touristy areas. These locations may not be instantly recognizable, but there are just as many (and in some cases, more) interesting subjects off the beaten path. Use the triangle method: shoot wide-angle establishing shots, medium shots to tell the story, and close-ups to get the details.
Food is as much a part of a culture as the clothing the local people wear. Look for interesting signs that help tell the story of the environment and the people who live there. Consider what a day in the life of a local person might be like, and what elements represent the native people and culture.
Learn to work with the available light. If it’s not working in your favor, try creative techniques, such as creating a silhouette. A silhouette is the black outline of a subject with a bright light behind it. Use the camera meter to expose for the light behind your subject. If you have a tripod, use the HDR Backlight mode ( ![]() ) for a better exposure when shooting subjects that are backlit. You can use this mode without a tripod, but you must remain very steady as the camera takes three rapid exposures. Experiment and use the different functions on your camera to see if they improve your photos.
) for a better exposure when shooting subjects that are backlit. You can use this mode without a tripod, but you must remain very steady as the camera takes three rapid exposures. Experiment and use the different functions on your camera to see if they improve your photos.

7.28 Architectural details, like those on this building in Beijing, China, can make an interesting theme for your travels. Exposure: ISO 200, f/4.5, 1/1500 second, 135mm f/2.8 lens.
Tips
Take notes about your trip. Keep a journal, notebook, or use a digital recorder so you will remember what you photographed on your journey. This is especially helpful when trying to remember names and places. If you’re in an historic building or museum, don’t shoot through glass with a flash because it will reflect into your photograph. Increase the ISO and consider buying a polarizing filter for your camera to remove the glare from glass.
Pick a different theme each day to keep things interesting. One day, it could be architecture, and the next people or food. This exercise helps you study more facets of the environment in which you are traveling. Some people put themselves in every photo, and that is fine. Unfortunately, others go through an entire vacation without one shot of themselves. Make sure that you are in at least some of the photos.
Be ready at all times to take a photograph. Don’t edit in the field — you might miss a great photo opportunity. Try to find an angle or composition that is different from what everyone else is taking, especially at tourist locations. Take the time to see the world with your eyes, as well as through the lens — after all, you want to experience the location as well as photograph it.
Travel Photography Tips
Here are a few tips for getting better travel shots from travel and landscape photographer, James Brandon:
• Bring a tripod. Even a small one will enhance your images. Some tripods even come with a case you can carry on your back while traveling.
• Put your photo gear in a backpack rather than a rolling travel case. This is particularly helpful if you plan to use multiple types of transportation, such as airplanes and trains.
• Get up early or plan time in the evening to photograph during sunrise and sunset. The warm light and long shadows create stronger photographs than those taken in the midday sun.
• Photograph the details. Photographers often forget to do this, but it’s the little things that support the story of your travels and often make your images more memorable.
• Be respectful. Ask people for their permission before you take their photograph.
• Explore the camera’s Creative Zone modes. Don’t leave your camera on automatic. Taking control of the settings provides more opportunities to capture your creative vision.
• Shoot what makes you happy, not what you think other people want to see. You don’t have to spend your time shooting famous landmarks — focus on the people or the food if that is what you enjoy.
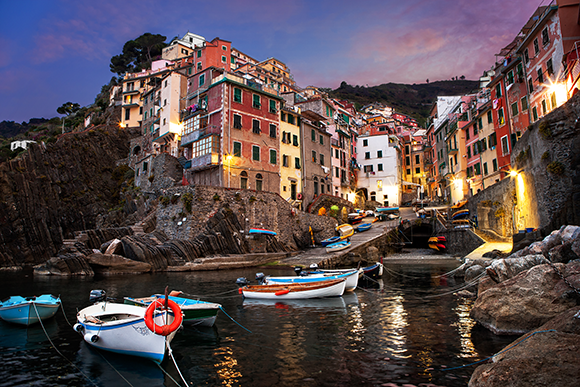
Image courtesy of James Brandon
James Brandon is based in Fort Worth, Texas. He has been a professional corporate photographer since 2009, and regularly teaches and speaks about photography. You can see more of his work at his website: http://james-brandon.com/.