Appendix A: Postproduction
After you press the shutter button to create a photograph or capture a video, you’re only halfway done. Next, you need to download, store, and edit the photos you want to share. Chances are you will make some adjustments to improve the sharpness, color, and contrast of the images you select. If you need to upload photographs to a social media site or send them via e-mail, you may want to resize or crop the images. Other times, you many want to print or create a work of art.
To create a successful video, postproduction is an important part of the creative process. After shooting a video, you combine the best clips to tell a story. Entire books have been written about image editing and image-editing software, so I recommend that you refer to those for more detailed information. However, this appendix will give you a brief introduction.

AA.1 I used a slow shutter speed and panning technique to capture this image. In postproduction, I applied a high-contrast style. Exposure: ISO 100, f/18, 1/50 second, 12-24mm f/4.0 lens at 24mm.
Photo-Editing Software
Selecting the best versions of a batch of images is an important, and often, time-consuming task. Most photographers put a lot of emotional energy into choosing their best images. However, they often select images to share for the wrong reasons. For example, perhaps the photographer is emotionally linked to the backstory of how a photograph was created. Unfortunately, the backstory is often not apparent to the viewer. Sometimes, you might capture an image just in time or overcome an obstacle to get a shot, but the result isn’t as great as the experience. It takes practice to pick your best photographs, and both aesthetic and technical considerations are part of the process. Some considerations are the exposure of the image, composition, subject matter, and focus. You have multiple editing options available on your camera while shooting, such as adding filters, resizing, and applying Pictures Styles.
Once you make your selections, you need to apply additional adjustments. When you are reviewing the images on your computer, there are numerous photo-editing programs that can help you enhance them, and I cover these later in this appendix. If you don’t have photo-editing software on your computer, use the Canon Digital Photo Professional software that came with your camera.
You will find basic functions, such as color correction, cropping, and sharpening, in most photo-editing programs, but each program handles the tools a bit differently. I cover the additional features specific to each program later in this appendix. The following are some of the standard options found in most photo-editing software:
• Color balance. Sometimes your photographs look too red, too green, or too blue (among other possible shades) and need to be corrected. Often, the goal is to neutralize a color that is tinting your entire photograph away from the natural color. Color balance is generally presented in the form of a slider or curves tool (a grid with a diagonal line). A curves tool is designed to be more precise than a slider, although sliders are easier to use.
• Cropping. If you don’t like all of the elements in your image, you can cut them out with a cropping tool. Some tools allow you to crop any way that you want, others offer ratio guides so that you don’t crop at odd dimensions, and some offer both. If your final crop is not in line with a standard ratio, it makes it difficult to print using traditional paper sizes.
• Dodge and burn. If you want to lighten an area of a photograph, select the dodge tool. When you want to darken an area, pick the burn tool.
• Exposure. This option makes your photograph either lighter or darker.
• Fill light. The idea behind this tool is to lighten your subject as a fill flash would so that you can see more detail in the shadow areas.
• Filter effects. Each program has its own suite of filter tools. These effects can range from turning a color shot into a black and white, to softening or posterizing (that is, changing the entire color scheme).
• Red-eye correction. When you use flash in a dark environment, the subject’s eyes can reflect light back to the camera lens, making them appear red. This is called red-eye, and these tools make adjustments to minimize the effect.
• Resize. Sometimes you need a large image resized for the web or e-mail. Although you can accomplish this in your camera, it may not be necessary at the time. There are free photo-resizing tools available online, such as www.picresize.com or www.webresizer.com.
• Rotate. When you want to turn your image to the left or right, use the rotate option.
• Saturation. When you want to intensify the colors in your image, use this option. A little saturation is helpful for most images, but too much makes the photographs look unnatural.
• Sharpening. Sometimes, your image may not be as sharp as you want. Sharpening tools are helpful, but don’t expect miracles, especially from online editing software. Higher-end programs, such as Photoshop, do a good job depending on the degree of blur. There is a point, however, at which sharpening tools cannot save your photos, such as subject motion blur.
• Touching-up/healing. These tools are good for small imperfections in the photograph, such as dust or blemishes on skin. They do a good job in most cases. The larger the area, the more effort it will take to correct it.
There are many photo-editing software programs available. Some are available on your computer when you buy it, such as Apple’s iPhoto or Photo Gallery for Windows. Others, like GIMP, are open source and can be downloaded from the Internet. If you want to take your photographs to a professional level, you can purchase premium software with deep features and more control.
The following sections offer an introduction to some of the available photo-editing options. The secret to using editing software is to avoid overdoing it. Although heavy effects, such as high-contrast and saturation filters, are popular, it is good to start small and work your way up. Not every technique or filter works for every image. Don’t use more than one or two effects on an image unless you have a well-thought-out plan. Too many styles in one photograph usually do not work. As I tell my students, if the first thing people think when they see your image is that you used Photoshop, you need to rethink your process.
Digital Photo Professional
I cover this program more extensively than the others because it comes with your camera. If you don’t have a software option available to you, such as an updated version of Lightroom, this program works with Canon T5i/700D RAW images. You may also work with your TIFF and JPEG files in this software.
When you launch Digital Photo Professional, the main options, such as Edit image window, Tool palette, and Batch process, appear at the top of the program screen. To find the photographs you want to process, select the Folder view button located on the menu bar. This will open a selection window on the left side of the software where you can locate your images. You can also save collections of images for future processing or viewing. To view an image larger than the provided thumbnail, highlight it, and then double-click it.

AA.2 The main window of the Digital Photo Professional software that comes with your camera.
After you select the image(s) you wish to edit in the Main window, you can select from the following tools available in the toolbar of the Digital Photo Professional software:
• Edit image window. After you highlight the photos you want to work on, click the Edit image window button. This takes you to the editing window where you can work on your images.
• Folder view. To select images to work on, you need to see the folders on your computer. This option lets you display or hide the window showing your files.
• Tool palette. You can use this palette to make color corrections with curves, or to sharpen, increase saturation, or adjust contrast and brightness on both RAW and JPEG files. The palette contains a section under the first tab to adjust RAW files. In this section, you can adjust brightness and white balance, and add or change Picture Styles. You can also adjust contrast, highlight and shadow detail, color tone, saturation, and sharpness.
• Info. To see the photograph’s shooting information, select this option to view items such as shutter speed, aperture, ISO, and image size.
• Select all. Use this option to select all of the images available in the Main window. Selecting all images allows you to apply the same action or adjustment (such as rotate or batch processing) to all of them.
When all images are selected, you cannot make exposure adjustments to your files with the RGB adjustments in the Tool palette.
• Clear all. To deselect all selected images, click this button.
• Rotate left/Rotate right. Use these buttons to rotate your photos left or right.
• Quick check. This option is good for a quick review of metadata. You can also rate or rotate your images. A nice feature is the ability to see which focal points were used to create the image.
• Stamp. This tool can replace part of your image with a similar section to repair it. If you are using the Dust data collection option, found in Shooting menu 3 ( ![]() ) on your camera, you can also process it in this window.
) on your camera, you can also process it in this window.
• Trimming Angle. This cropping tool allows you to make crop adjustments by rotating your image up to 45 degrees in either direction.
• Batch process. Use this option when you need to resize or rename multiple files.
A stand-alone batch process program called Digital Photo Professional Batch also comes with your camera.
When you click the Edit image window button, a new screen appears with a different set of icons. Some of these are the same as those in the Main window, such as Tool palette, Info, and Batch process. If your photograph needs a lot of work, this is the window you want. You also have access to the Tool menu at the top of the screen.

AA.3 You can batch process to resize or rename multiple photographs in Digital Photo Professional.

AA.4 The Edit image window of the Digital Photo Professional software. The options are at the top of the screen.
After you select Edit image, the following options are available:
• Main window. This option returns you to the Main window.
• Thumbnails. This displays the images selected in the Main window as thumbnails.
• Tool palette. This is the same palette found in the Main widow. You can use it to adjust curves, sharpen, increase saturation, or adjust contrast and brightness in both RAW and JPEG files.
• Info. Click this button to review shooting info and metadata.
• Grid. Clicking this places a grid across the image. Use this option when you want to confirm that the image lines are straight. The size of the grid can be adjusted (grid pitch 8-256 pixels) in Preferences under the View settings tab.
• Fit to window. If you magnify or reduce your photograph, use this to resize it to the original viewing size that fits the screen.
• 50%, 100%, and 200% view. These buttons magnify or reduce your images for viewing purposes.
• Previous image/Next image. These buttons take you to the next or previous photograph within your selected group.
• Rotate left/Rotate right. Use these buttons to rotate your photos to the left or right.
• Stamp. This same tool appears in the Main window. You can use it to replace part of an image with a similar-looking section to repair it. If you are using the Dust data collection option found in Shooting menu 3 ( ![]() ) on your camera, you apply that information and process it here.
) on your camera, you apply that information and process it here.
• Trimming Angle. This same tool appears in the Main window. You can use it to crop your photos by rotating them.
• Batch process. This is the same option as that in the Main window. Use it when you want to resize or rename multiple files.
You can use the NR/ALO option at the top of the Tool palette to reduce noise in RAW or JPEG images. You can adjust the NR (noise reduction) sliders as needed. Use the ALO (Auto Lighting Optimizer) setting to lighten images and increase contrast.
Image Browser EX
The CD included with your camera also contains a photography management program called Image Browser EX. This software can be used for quick browsing, importing, and managing your photos and videos. Image Browser EX is also useful for importing the content from your camera to review on your computer. You have three review options: Thumbnails, Preview, and Full screen. The software opens a new window specific to each adjustment. I find the pop-up window awkward, but the adjustments are easy to access.

AA.5 The main screen of Image Browser EX.
The following features are available in Image Browser EX:
• Correct Red Eye. This reduces or eliminates the red-eye effect from a subject’s eyes. You have both automatic and manual removal options.
• Auto Correct. Use this option to correct image color and brightness automatically.
• Adjust color and brightness. This option allows you to adjust color, saturation, and brightness manually.
• Increase sharpness. Use this option to improve the sharpness of your photos.
• Crop image. Basic image-cropping options are available here, as well as a few advanced features.
• Insert text. Use this option to add text to your photograph. You can choose the text color, size, and font.
• Correct levels. Correct your photo’s brightness, contrast, and color levels.
• Correct tone curves. Correct your photo’s brightness, contrast, and color curves.
• Stitch photos. This option allows you to merge multiple photos into one image. The images can be displayed in four arrangements: Horizontal, vertical, matrix, and 360 degrees.
• Process Raw Images. Image Browser EX opens Digital Photo Professional to process RAW images.
• Edit Movie. Edit your movies with effects, such as transitions, text, and audio effects.
• Extract multiple images from movie. Use this tool to extract still images from your movies.
• Edit EOS video snapshot. Here, you can edit your short 2-, 4-, or 8-second video snapshots.
While Image Browser EX can be helpful for organization and making minor adjustments, if you have a lot of editing to do, I recommend that you use your favorite editing software or Digital Photo Professional.
Lightroom
Lightroom is a photo-management and editing software package made by Adobe, the same company that owns Photoshop. It makes it much easier to work with many photos because you can make the same adjustments, such as sharpening, contrast, color, and saturation, to multiple images. When you have major enhancement or repair work to do on a photograph, you can also switch to Photoshop (if you own it) to complete that task. If you don’t own Photoshop, you can use Digital Photo Professional or your favorite photo-editing software. Like Photoshop, you can create and download Presets in Lightroom. A Preset is a recorded series of commands that create a specific effect and can be applied to other images.
Lightroom features the following seven modules to help you manage and share your photos:
• Library. The Library module helps you organize your photography. Here, you can import, export, rank, and review images. You can also add keywords, apply presets (programs that adjust or add specific settings to your images), or publish your photographs to Facebook and Flickr.
• Develop. You adjust your photographs in this module. All of the basic options, such as cropping, exposure, contrast, and color correction, are available. Presets are also available under this module. Presets are like actions — they allow you to run a series of adjustments on a photograph at the click of a button.
• Map. If you geotag your photographs, this map displays the location at which the image was shot. You can also add location information to your photos in this module.
• Book. This module allows you to lay out a photo book that can be uploaded to the book-publishing service Blurb (a Blurb account is required). You can also create a PDF or JPEG version of your book.
• Slideshow. In this module, you can create a slide show of your favorite images. It features useful options, such as adding text, sound, background images, and transitions. You can also export your slide show as a PDF or movie.
• Print. Use the Print module to send your files to a selected printer.
• Web. This option helps you create a website gallery to display your images online. It is also helpful as a preview site creator for friends or clients. You can save your gallery to your desktop, or upload it to your server or website-hosting service.

AA.6 Adobe Lightroom is a powerful photography management tool.
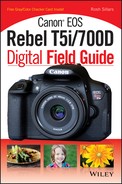
iPhoto
This software is available for Mac users. It comes preloaded on Apple computers, and it can be upgraded as part of Apple’s iLife software package. It is more of a photo-management tool than editing software. It does have basic adjustments available, such as lighten, darken, saturation, and creative filters. I often use iPhoto for slide shows and presentations.
AA.7 iPhoto is a good photo-management tool for the Mac platform.
iPhoto has a few options worth noting. You have three tool sections found under the Edit button called Quick Fixes, Effects, and Adjust. Quick Fixes is convenient when you have a few minor adjustments. Here, you can Rotate, Enhance (increases saturation), Fix Red-Eye, Straighten, Crop, and Retouch. Effects includes the following exposure adjustments: Lighten, Darken, Contrast, Warmer, Cooler, and Saturate. Effects also has nine style options, including B&W, sepia, and vignette. Adjust gives you more manual control with the use of sliders to change image exposure and color.
Photoshop
If you have heavy-duty work to do on your images, Photoshop is the software you need. Most photographers consider this program the standard for professional photo editing, touchups, and manipulation. In my opinion, the layers feature is better than that of any other program. It has powerful filters, such as Liquify, sharpening, and the blurring options. Additionally, it includes the Content-Aware Patch, which allows you to move subjects from one area to another within an image, and the Adaptive Wide Angle tool, which corrects camera distortion. Even with so much potential at your fingertips, it’s important to learn the basics first.

AA.8 Advanced amateurs and professionals often use Photoshop for heavy-duty editing projects.
The following list covers some of the tools available in Photoshop:
• Actions. This feature helps you complete a series of tasks at the click of a button. If you regularly perform the same adjustments on multiple photographs, create an action (a mini program) rather than performing repetitive clicks. To create an action, open a photograph, and then click the Actions tab (next to History). Use the Record, Stop, and Play buttons at the bottom of the window as you would any recorder. The next time that you need to apply the same steps, click Play, and the action adjusts one image or a folder full of them.
• Burn tool. There are many uses for both the Dodge (lighten) and Burn (darken) tools, and you should learn to use both well. One common use is to darken distracting backgrounds or create a vignette around the edges of your photograph.
• Color dodge. Try using the Color dodge option in combination with the Brush tool to lighten an area of your photograph rather than the standard Dodge tool. Select the Brush tool, click the Mode menu, and then select Color dodge. Use the Eyedropper tool to select the color you want to use as part of the dodge function. Make sure that you use this option at a low opacity (15–25 percent). I apply this technique to create a sunlight effect on the front of a building or to add a glow of light through a window.
• Erase. This tool’s use may seem simple and obvious, but it’s also an excellent blending tool when used with layers. If you erase portions of an upper layer, you see the layer below it. In some cases, the best option is to set the eraser at a lower opacity, and then gradually erase the top layer until the front and back layers are blended to your satisfaction. Click the eye icons next to the layers to review what sections have been erased.
• History Brush tool. Use this tool to revert sections of your image back to their original state (that is, when the file was first opened).
• Layers. Learn to use layers (multiple images stacked on top of each other) well. They are helpful when making adjustments, adding effects, or blending objects and scenes.
• Liquify. This tool is so much fun to use, it’s easy to overdo it. Liquify (found under the Filter menu) allows you to push, pull, and move sections of your image as if it were liquid. It is common to use this option to exaggerate your subject’s features. A more practical use is to make small adjustments to your scene or subject. For example, photographers use Liquify to make their subjects look thinner.
• Patch tool. This freehand healing tool (my personal favorite) blends areas of any shape, making it easy to remove scratches, blemishes, or dents from your subject. The Content Aware Patch tool allows you to remove or move a subject from one part of the image to another.
• Transform. These options are found under the Edit menu. Select a portion of or an entire image to apply one of the Transform options. I often use Transform to straighten lines in scenes or buildings. Other useful options under Transform are Scale (use this to increase or decrease the size of a layer image, an object, or the entire image), rotate, distort, adjust perspective, and warp.
Experiment with each of these options to find the ones that suit your needs. One tip is not to use every tool at 100 percent — a little goes a long way, and that includes filters. Learn to use the basic tools, such as Crop, Healing, Eyedropper, Paintbrush, Dodge, and Burn to develop your own style. There are excellent books on the topic of Photoshop that can guide you through this feature-rich program. If you don’t want to invest in the full version of Photoshop, Adobe offers a stripped-down, but still powerful version called Photoshop Elements.
Video-Editing Software
Your goal when editing a video is to tell a story. Unlike still photography, the story is not told in one moment of time, but in moments of time. Editing takes a lot of work, and organization is one of the editor’s best friends. If your video has a lot of sections, take the time to plan the result. When shooting your video, think about what you might need during editing, such as b-roll (that is, extra video elements and details), ambient sound recordings, and extra footage before or after a scene. In other words, don’t be too quick on the trigger — keep the camera rolling a little longer. In this section on video editing, I introduce different types of software you can use for video editing.
The following are some of the basic features found in most of these software packages:
• Edit clips. To tell your story, you need to trim and combine different video clips.
• Sound. Sound is a very important part of your video. Some editors have multiple tracks so you can add or replace the sound on your video.
• Timeline. This displays your video and audio in chronological order within the software. Some programs also call it a storyboard.
• Track. A track contains video media data within different points of the video timeline. Editors like to have a lot of tracks for complex videos. Some editing programs limit the number of tracks available.
• Transitions. Rather than having hard cuts between clips, you have the option of adding transitions. These make the ending of one clip and the beginning of another more natural, exciting, or dynamic. Professionals use transitions, but tend to keep them simple. Some transitions dissolve, some swirl, and others fade between clips. Also, once you select a transition, use the same one throughout the movie to keep your presentation looking professional rather than gimmicky.
• Text. Usually, you will want to add text as an introduction or title for your video. You may also want to display information, such as an introduction to the story, the name of your subject, or list credits at the end of your video.
• User Interface. If a program is difficult to navigate, or you can’t figure out where some features are or how to use them, you are not going to be able to create the best possible video. Don’t settle for the first editor that you try. Download and test free trials to see which option works best for you.
Windows Movie Maker and iMovie for Mac are two of the better free choices available. Image Browser EX comes with your camera and is a good alternative if the other options are not available. It is easy to use and should fit well with your workflow, especially if you use Digital Photo Professional and the other Canon software that comes with your camera. If you want to create higher production videos, consider some of the more professional software, such as Final Cut Pro X and Adobe Premiere Pro CC.

AA.9 Adobe Premiere Pro is used by advanced amateurs and professionals for video editing.
Image Browser EX
This browser comes with your camera. It is relatively easy to use and has some basic editing features, such as Transitions, Filter effects, and Text. You can also add external audio. I find the Image Extraction tool very useful. If you want to use a single frame as a still image for another use, this tool makes it easy to do. The browser also has a basic tool for editing video snapshot albums created in your camera.
To add videos to the Edit module, highlight the file in the main photo window in your Browser EX software. Under Edit, select Edit Movie to open a new pop-up window containing the video(s) you selected and the available editing options. The Edit module has four tabs: Arrange, Effect, Audio, and Save. Click Arrange to combine clips by dragging and dropping them into the desired timeline position. Effect contains the transitions, text, and filter effects. You can add seven transitions and 15 text options to your video here. Filter Effects has three options: RGB adjustment, Sepia, and Monochrome. RGB adjustment is helpful for correcting color when your video scene environment colors do not match. Audio allows you to add audio files from external recorders or music from your computer. Save gives you export options, such as File size, Type of file, and Sound quality.
iMovie
If it’s not already installed on your Mac, this software is available in the Apple App Store. It is easy to use and can handle most basic editing. I often use it to edit basic videos for the Web, such as how-to or testimonial videos. It interacts with iPhoto and iTunes, so you can easily add music and still photos. It includes basic features, such as transitions, and adding text and fun video effects. iMovie also gives you the option of exporting your movies to online platforms, such as Facebook, YouTube, and Vimeo.
Editing is as simple as highlighting your desired scene, and then copying and pasting it into your timeline. You don’t have to highlight an entire scene; you can select portions of a file down to a fraction of a second. You can rearrange the timeline by dragging and dropping scene files. Transition times can be adjusted, and audio levels are raised and lowered by highlighting the audio section found below the video file. Once you complete your video, you can upload it to YouTube, Vimeo, or render it to your computer.

AA.10 iMovie is a good basic editor that comes with Mac computers.
Windows Live Movie Maker
Microsoft offers free editing software for those using Windows Vista, Windows 7, or Windows 8. It is bundled with Windows Live Essential. You can download it at the Microsoft Windows website in the Downloads section. It is similar in design to iMovie but has fewer windows. It has standard features, such as Titles, Transitions, and Auto track. It also has nonstandard features, such as animated titles. Editing is easy: First, import your video and photos by browsing your hard drive or dragging and dropping them to your storyboard window. You can rearrange your files as desired. If you click the Auto Movie button, the software adds titles, transitions, and zoom and panning effects for you. You will be asked to add an audio file from your computer during the process.
The auto feature is most effective for slide show presentations. If you don’t like the results of the Auto Movie feature, you can always tweak it. It’s a good tool to help you quickly create movies. You can also share your movies directly to Facebook and YouTube. When you save videos to your desktop, the files are saved with the .wmv (Windows Media Video) file extension. If you have a version of Windows before Vista, you can use Windows Movie Maker.
Other video-editing software
The following programs are powerful video-editing tools, and have features most amateur and semi-professional filmmakers and video producers need:
• Adobe Premiere Pro. This is a professional-based video-editing tool. It gives you more flexibility for the finer details of editing. Available plug-ins and applying options from Adobe After Effects make this level of editing very deep. It has multicamera editing, adjustment layers, and a nice stabilizing feature for shaky clips. Even the layout allows you to customize available buttons and options. Good transitions (21 available) and filters, such as colorize, give you options you don’t have in basic editing software. Another advantage this software offers is that it is compatible with other Adobe products.
• Final Cut Pro X. This video-editing software is created by Apple and is the preferred platform of many advanced amateurs and professionals. It’s well organized, similar to iMovie, has a good drag-and-drop editing interface, and has become faster with recent upgrades. Final Cut has all of the basic editing features you would expect, including a large number of transitions and effects, plus third-party plug-ins to expand its capabilities. If you find that iMovie is not giving you the flexibility or advanced edits that you need, consider upgrading to this program.