Chapter 9: Viewing, Editing, and Sharing Your Content
Once you fill a memory card with images, it’s time to review and edit them. Postproduction editing with computer software can sometimes be complex. Portrait touch-up, for example, is an art unto itself. If you only want to make a few minor adjustments to your photographs or movies, you can do so on your camera.
The T5i has some helpful options, including a series of creative filters, an image lock, and a photo rating system. This chapter covers the options available for reviewing your content, making simple edits, and sharing your images with family and friends.
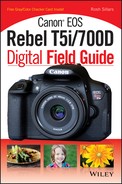
You can use your fingers to zoom in on the details of your photograph.
Viewing Content
As soon as you shoot images, you want to view them, and the LCD touchscreen on the back of your camera makes this easy. There are multiple ways that you can review your images beyond the LCD screen, but it’s a good starting point.
Viewing content on the camera
In most cases, the first place that you see your photographs and videos is on the LCD screen on the back of your camera. I highly recommend that you protect the LCD screen from scratches by closing it when it’s not in use. To close the screen, turn it around to face the camera. The LCD touchscreen is a helpful feature on the Canon T5i/700D. It’s fun, easy to use, and adds a new dimension to viewing pictures. I’m sure that it’s soon to become a standard feature on Canon cameras.

9.1 The LCD touchscreen on the back of the camera.
Playback
To review your photos or videos, press the Playback button ( ![]() ). To scroll through your images, use the Cross keys (
). To scroll through your images, use the Cross keys ( ![]() ) or swipe your finger across the LCD screen. To magnify an image, place two fingers (generally the thumb and index finger) on the LCD screen and spread them apart in a swiping motion across the LCD screen. To zoom out, create a pinching motion, bringing your fingers together across the LCD screen. If the image on your screen is a video, you see a large Playback icon (
) or swipe your finger across the LCD screen. To magnify an image, place two fingers (generally the thumb and index finger) on the LCD screen and spread them apart in a swiping motion across the LCD screen. To zoom out, create a pinching motion, bringing your fingers together across the LCD screen. If the image on your screen is a video, you see a large Playback icon ( ![]() ) in the middle of the screen; press it to start the video. To stop a video, tap the LCD screen with your finger or press the Setting button (
) in the middle of the screen; press it to start the video. To stop a video, tap the LCD screen with your finger or press the Setting button ( ![]() ). If you see the Movie Set icon (
). If you see the Movie Set icon ( ![]() ) in the upper-left side of the LCD screen, this means that the video is part of a video snapshot album.
) in the upper-left side of the LCD screen, this means that the video is part of a video snapshot album.
For more information about video snapshot albums, see Chapter 8.
To control a video, use the other icons along the bottom of the screen. The Slow motion playback button ( ![]() ) is next to the Playback button (
) is next to the Playback button ( ![]() ). Use the Cross keys (
). Use the Cross keys ( ![]() ) to change the playback speed rate. The next icon, First Frame playback mode (
) to change the playback speed rate. The next icon, First Frame playback mode ( ![]() ), takes you back to the first frame. Next to that are the Previous Frame playback (
), takes you back to the first frame. Next to that are the Previous Frame playback ( ![]() ) and the Next Frame playback (
) and the Next Frame playback ( ![]() ) buttons.
) buttons.
On the far right is the Last Frame playback button ( ![]() ), and then the very last icon turns music on or off. Above the music icon is the Edit mode button (
), and then the very last icon turns music on or off. Above the music icon is the Edit mode button ( ![]() ). You also can use the Magnify (
). You also can use the Magnify ( ![]() ) and Reduce (
) and Reduce ( ![]() ) buttons on the upper-right side of your camera to zoom in or out on a video or image. Press the Delete button (
) buttons on the upper-right side of your camera to zoom in or out on a video or image. Press the Delete button ( ![]() ) to erase the image you are viewing.
) to erase the image you are viewing.
If you want to hear the sound of your recording, the speaker is on the back of the camera. I recommend downloading the video to your computer and listening to it with a good set of headphones.
The Quick Control/Print and Info buttons
There are additional viewing and editing options available via the Quick Control/Print button ( ![]() ). In the left corner of the LCD screen, you see the following list of helpful features:
). In the left corner of the LCD screen, you see the following list of helpful features:
• Protect images ( ![]() ). This option protects important images from being accidentally deleted. Once protected, locked images cannot be erased until you unlock them or clear all information by formatting the memory card.
). This option protects important images from being accidentally deleted. Once protected, locked images cannot be erased until you unlock them or clear all information by formatting the memory card.
• Rotate image ( ![]() ). You can rotate images 90 degrees to the left or right, or rotate them to be horizontal. If you need to flip or turn your photograph upside down, you have to do so in photo-editing software.
). You can rotate images 90 degrees to the left or right, or rotate them to be horizontal. If you need to flip or turn your photograph upside down, you have to do so in photo-editing software.
• Rating ( ![]() ). For better organization of your photographs, you can rate them based on how much you like each one using a 1–5 star rating system.
). For better organization of your photographs, you can rate them based on how much you like each one using a 1–5 star rating system.
• Creative filters. You can add creative filters to your photographs in-camera. You have the following options: Grainy B/W, Soft focus, Fish-eye Effect, Art Bold Effect, Water Painting Effect, Toy Camera Effect, and Miniature Effect. All options are saved as a new file on your memory card.
• Resize. If you want to save your file as a smaller size, use this option. You can resize an image to any size smaller than its current one. For example, you can resize a Large fine image ( ![]() ) to the Small 3 size (
) to the Small 3 size ( ![]() ). You cannot increase the size of any image. Once you resize an image, it is saved as a new file. RAW and Small 3 image files cannot be resized.
). You cannot increase the size of any image. Once you resize an image, it is saved as a new file. RAW and Small 3 image files cannot be resized.
When you press the Info button ( ![]() ), you get one of four display options in which you can review image data, such as the aperture, shutter speed, and ISO settings. Other options let you review histogram data, including brightness and RGB.
), you get one of four display options in which you can review image data, such as the aperture, shutter speed, and ISO settings. Other options let you review histogram data, including brightness and RGB.
Viewing content on a TV or smart device
Sometimes, you may want to view your images on a larger screen. The following list includes additional options for viewing and sharing your photos and videos:
• Viewing images on a standard TV. Connecting your camera to a non-HDTV requires a stereo AV cable (the AVC DC400ST is available from Canon). Insert the plug into the AV Out terminal on the left side of your camera. Connect the three split connects to the TV’s right audio (red), left audio (white), and video (yellow) ports. Turn on the TV and select the TV’s video input option. Turn on your camera and press the Playback button ( ![]() ). You should then see the camera screen on your TV.
). You should then see the camera screen on your TV.
• Viewing images on an HDMI HDTV. To connect your camera to a high-definition TV (HDTV), you need an HDMI cable (HTC-100) compatible with the HDMI terminal on the left side of your camera. Connect the cable to your camera’s HDMI Out port and the other end to the TV’s In port. Turn on the camera and press the Playback button ( ![]() ). The image only appears on your camera’s LCD screen — you must press the Info button (
). The image only appears on your camera’s LCD screen — you must press the Info button ( ![]() ) to change the view settings.
) to change the view settings.
• Viewing images on a smart device. You can connect your camera to some smart devices using downloadable apps. Some require that you connect to a Wi-Fi-enabled computer first or use an Eye-Fi card with workarounds, which I do not recommend. Workarounds can get complicated and even void your device warrantee. Apple has an iPad camera connection kit available that allows you to connect your device via a USB cable to view photos and video. This area is continually evolving, so it’s worth searching the Internet occasionally to check out the latest updates.
Downloading and Storing Your Images
There are three main methods of downloading images to your computer. You can connect your camera to your computer via a USB cord. If your computer is equipped, you can insert the memory card into a built-in reader, or you can take the memory card out of the camera and use an external memory card reader. If you prefer to use software programs such as iPhoto, Image Browser EX (which came with your camera), or Lightroom, you can easily import your photos.
Another option is to use an Eye-Fi card, which transfers your photos wirelessly. The downside to transferring your images wirelessly is that it can take longer than a direct connection. Your camera has Eye-Fi card settings in Setup menu 1 ( ![]() ). Once you are connected to (or after you have transferred your photographs to) your computer, you can open them in your favorite editing program. I recommend that you tweak and adjust your photographs before sharing them. I cover how to use your Digital Photo Professional software later in this chapter.
). Once you are connected to (or after you have transferred your photographs to) your computer, you can open them in your favorite editing program. I recommend that you tweak and adjust your photographs before sharing them. I cover how to use your Digital Photo Professional software later in this chapter.
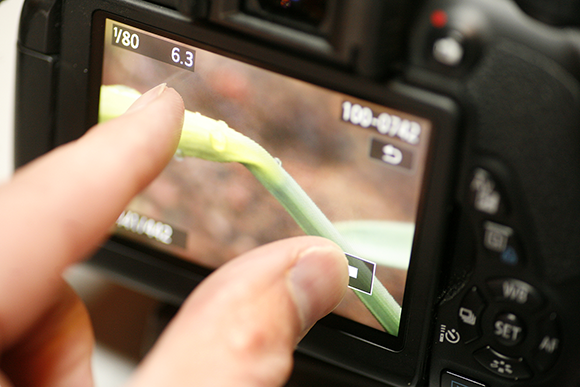
9.2 Some photographers prefer to use an external memory card reader to download their images.
Storage
Storage is an often overlooked and important part of the photography process. You don’t want to lose your digital files. You have many choices when it comes to storing your photographs. Many casual photographers just leave photos on memory cards, and buy new ones or erase old images on them when they run out of room. If this is your method of storage, I recommend that you consider using one of the following options instead. Your computer hard drive is a good starting point. If you take a lot of photos and videos, your computer’s hard drive will fill up fast. Consider purchasing an external hard drive on which to store all of your photos and videos.
Optical storage options, such as CDs, DVDs, and Blu-ray discs, are another storage option. Optical storage uses light (such as lasers) to read and record data. They are easy to use and are a good short-term option or for use as part of an overall storage plan. I don’t recommend optical storage for the long-term, though, because they can degrade over time if not stored in a cool, dry location.
If you are concerned about backup and generate many images, consider purchasing something like a RAID (redundant array of independent disks) system or Drobo hard drive. These are designed to be redundant and prevent data from being lost by using multiple hard drives. If one drive crashes, it can be replaced without the worry of losing information, like your photographs.
The cloud is another storage option to consider. Storing your images on the cloud means that your photos are saved on a company server via the Internet — such as Google, Amazon, or Dropbox. So, consider the cloud as one more place that can keep your files safe. There are many locations online that give you even more storage space for a price, so make sure that you compare costs. I wouldn’t recommend storing all of your photographs online because it can get expensive very quickly, especially if you shoot video. It also takes a lot of time to upload an entire vacation’s worth of photos and videos. However, consider storing at least some of your prize photographs, such as important memories and portfolio-worthy images, online.
You should definitely take the time to organize your photographs. Give them filenames that make it easy for you to find them later. You have a numbering system available on your camera in the Setup menu 1 ( ![]() ). There are three options: Continuous, Auto reset, and Manual reset. Continuous keeps the name of your files in order from 0001 to 9999, and then resets. Auto reset restores the file number to 0001 each time the memory card is replaced or when you create a new folder. Manual reset lets you reset the numbers at any point in time.
). There are three options: Continuous, Auto reset, and Manual reset. Continuous keeps the name of your files in order from 0001 to 9999, and then resets. Auto reset restores the file number to 0001 each time the memory card is replaced or when you create a new folder. Manual reset lets you reset the numbers at any point in time.
Photograph files start with IMG_ and video files begin with MVI_. This may not be the best way to store your files for the long term. Creating folders with descriptive names is a good way to store your images. A better way is to use software, such as Lightroom or Digital Photo Professional Batch, to rename your images so that they can easily be found through the search function. I explain this in more detail later in this chapter.
The 3-2-1 rule
When storing your photographs, it is important to follow the 3-2-1 rule. My friend Peter Krogh, who is an expert in digital asset management, taught me this rule. He suggests having three copies of your photographs on two types of media, including one off-site. Saving three copies of all of your files could mean putting them on different hard drives, DVDs, or Blu-ray discs. The idea is that you don’t keep all of your images in one location where you could lose everything in a matter of seconds — this includes storing all of your photographs on your camera.
The rule to save your files on two different media forms is a safety net in the event that one type fails or becomes obsolete. Remember Zip drives and floppy disks? If you had data saved on any of those mediums, you would have trouble retrieving it. Storage methods are changing all of the time and you should be prepared. It has been said that a CD will last 100 years, and some might, but I’m sure many CDs from just 10 years ago are not being stored at their optimal temperature and humidity levels. Many people have lost data that they thought was secure on CDs and DVDs. Make sure that you increase the odds in your favor by using multiple technologies.
Finally, make sure that one of your storage devices is off-site. This could be at your office, in a safety deposit box, or on the cloud. The bottom line is if all of your data is stored in the same place, and that place burns in a fire or is swept away by a flood, it really doesn’t matter if you kept your files on three different devices.
Editing and Adjusting Content on the Camera
Deleting unwanted images is the most common form of in-camera editing; however, it is the one that I least recommend. You never know which images you might want to share later. Additionally — with the possible exception of obviously out-of-focus images — your camera’s lower-resolution LCD screen is not the best way to judge the quality of an image. Sometimes, though, you may have to delete images to make room on the memory card. This is why having backup memory cards is important — it prevents you from having to delete images on-camera.
Other editing options in your camera include resizing and creative filters, all of which are found under Playback menu 1 ( ![]() ). Resizing allows you to decrease your images to sizes smaller than the originals. The creative filters give you seven options to enhance or experiment with your photographs. The options include Grainy B/W, Soft focus, Fish-eye Effect, Art Bold Effect, Water Painting Effect, Toy Camera Effect, and Miniature Effect.
). Resizing allows you to decrease your images to sizes smaller than the originals. The creative filters give you seven options to enhance or experiment with your photographs. The options include Grainy B/W, Soft focus, Fish-eye Effect, Art Bold Effect, Water Painting Effect, Toy Camera Effect, and Miniature Effect.

9.3 The Canon T5i/700D has creative filters, such as the Art Bold Effect, which can enhance your photos. Exposure: ISO 100, f/2.8,1/320 second, 100mm f/2.8 macro lens.
You can also use the Picture Style Editor to adjust photographs on your camera. If you don’t like the results of the auto or Picture Style setting you chose before shooting, you can adjust or change it. You can also customize a RAW ( ![]() ) photo with a custom style using the available tools (sharpness, contrast, color saturation, and color tone) under the advanced menu in the Picture Style Editor. Use the Side-by-side windows option to compare your adjustments to the original image.
) photo with a custom style using the available tools (sharpness, contrast, color saturation, and color tone) under the advanced menu in the Picture Style Editor. Use the Side-by-side windows option to compare your adjustments to the original image.
If you like the Picture Style you have created using this utility, you can save it to your camera as one of the user-defined options. To do this, click the File menu in the Picture Style Editor and save the style as a Picture Style file. If you don’t want anyone to make additional adjustments to your file, select the Disable subsequent editing check box. If you do this, though, note that you can’t reload the file in the Picture Style Editor for use or additional adjustments.

9.4 The Picture Style Editor with one of my RAW images loaded, displaying standard and advanced options.
To load your Picture Style onto your camera, connect the camera to your computer and launch the EOS Utility. Click on Camera settings/Remote shooting, and then click the red camera icon in the middle of the screen. Next, select Register User Defined style. To the right of the current listed Picture Style is an open folder icon that opens a browser to your computer files so that you can search for your Picture Style file (called a PF2 file). Select the file, and then click OK, and the computer and camera do the rest. Now you can use your Picture Style with the remote utility and on your camera.
You can also perform some basic video-editing functions on the camera. Press the Edit mode button ( ![]() ) to go to the Editing screen. You can delete the first or last 1 second of your video at a time. This option is not available for video clips in albums. You do have the option to save your edited video as a new file or overwrite the old file.
) to go to the Editing screen. You can delete the first or last 1 second of your video at a time. This option is not available for video clips in albums. You do have the option to save your edited video as a new file or overwrite the old file.
You can download additional Picture Styles from Canon here: http://web.canon.jp/imaging/picturestyle/file/index.html.
Sharing Photos and Videos
The Internet and social media make it easier to share photos with friends and family. I enjoy the instant feedback I receive from people I know around the world. This section covers how to share your images using the latest technology.
E-mailing images
You can use the Image Browser EX software that came with your camera to e-mail your photos. The e-mail option is under the Share menu, and it downsizes the file for you before launching your e-mail program. You can also download and attach an image in your e-mail program. If you need to downsize your image for e-mailing purposes, it can be done on your camera. Press the Playback button ( ![]() ) and use the Cross keys (
) and use the Cross keys ( ![]() ) to find the image you want. Then, press the Quick Control/Print button (
) to find the image you want. Then, press the Quick Control/Print button ( ![]() ) and select the Resize option. You can also select Resize in the Playback 1 menu (
) and select the Resize option. You can also select Resize in the Playback 1 menu ( ![]() ). Small 2 (
). Small 2 ( ![]() ) or Small 3 (
) or Small 3 ( ![]() ) are good file sizes for e-mail.
) are good file sizes for e-mail.
Printing images
Your Canon Rebel T5i/700D supports Pictbridge, the industry standard for printing directly from a camera to a printer without a computer. The options that appear on the camera’s LCD screen differ depending on the printer. Some of the most common options include brightness adjustment, contrast, histogram distribution, cropping, frame rotation, and image title correction.
To print from the camera, turn it off and connect it to your printer via the provided USB cable. Set up your printer to communicate with your camera (you may have to consult your printer manual to do this). Turn on the printer — it may beep to let you know that it is connected to the camera. Next, press the Playback button ( ![]() ) and use the Cross keys (
) and use the Cross keys ( ![]() ) to find the image you want to print. Press the Setting button (
) to find the image you want to print. Press the Setting button ( ![]() ), and then follow the directions on the back of your camera.
), and then follow the directions on the back of your camera.
Your camera has multiple options and adjustments you can make before you print your image. For example, you need to decide if you want the date or file number imprinted on your image and how many copies you want.
If your camera and printer are not compatible, you can try placing your memory card directly into the printer, if that option is available. You can also use the Image Browser EX software to print your images from your computer.
Uploading content to a website
When you upload a photograph to a website or a blog, you don’t want to upload the original file because it’s too big. In most cases, website images only need to be less than 800 pixels wide (often, they are even smaller than that). Your camera’s RAW and large files produce 51.3MB images with more than 5000 pixels, which are too large and take too long to upload. This means that you need to reduce the size of your images in editing software. If your original file is still on the memory card in your camera, you can downsize your photos on-camera. This option is found under Playback menu 1 ( ![]() ).
).
The following are just a few of the many ways in which you can upload images to the Internet:
• FTP (File Transfer Protocol). If you need to upload your photos to a website or for storage on the web, this is generally the way to do it. There are many FTP programs, such as Filezilla (http://filezilla-project.org/), available for Windows users. Some cloud storage websites have their own FTP sites available for customers to transfer files. I use the FTP client Transmit on my Mac (http://panic.com/transmit/). It has two windows: One displays my computer files and the other is where they are uploaded or downloaded. I like this program because you can easily drag and drop files onto the server folder.
• WordPress. A blog is a good way to share your images with friends and family. WordPress is a popular blogging platform. It certainly isn’t the only one, but if you know how to use WordPress, the others will be easier to navigate. Under the title box on your post or page, there is an icon that looks like a camera. This is a common icon in social media, and when you click it, it opens a new window with multiple options. Select an image from your computer using a browser window, or drag and drop it. There is also an option for sharing an image via a URL, which is a link to a photograph that is already posted on the Internet. The final option is to use images already uploaded and stored in the WordPress gallery.

9.5 To upload images to WordPress, press the Add Media button above the main post window, and then select upload files.
Sharing content via social media
Social media is a great way to share your story with friends, family, and associates around the world. Your photos and videos tell your story and keep you connected. Websites such as Google+ and Facebook have nice gallery options to display your photos in groups. Although you can store many photographs online through these services, I would not recommend using them as permanent archival locations.

9.6 Google+ is just one of the many online options available for sharing photos.
The following are a few of the social media websites on which you can share your photos and videos:
• Google+. Adding a photograph to Google+ is easy. All you need to do is click the camera icon below the status update icon. You are then given two upload choices: Upload from your computer or add from your Google+ photos. There is also a drag and drop option. Next to the Link icon, you’ll see the video icon, which allows you to upload a video from your computer.

9.7 On Google+, you can upload images, or drag and drop them from your computer or your Google+ photo album.
• Facebook. To attach a photograph to your Facebook status update, click the Add Photos/Video button above where you place status updates at the top of the page. Two options appear: Upload photo/video, and Create photo album. Click Upload Photo/Video to select a video from your computer.

9.8 Click the Photo button above the status bar to share your images with friends on Facebook.
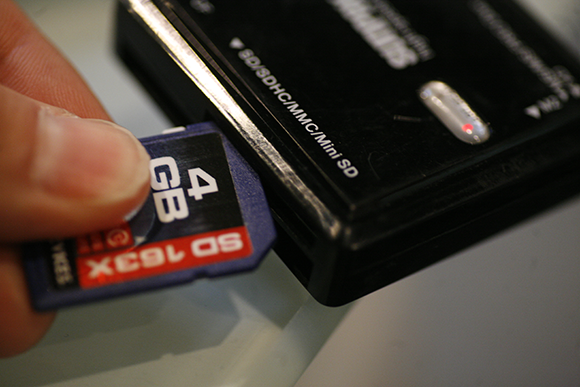
• Twitter. To add a photograph to Twitter, click the camera icon in the lower-left corner of the Tweet message box. The browser screen appears so you can search your computer and upload your image.
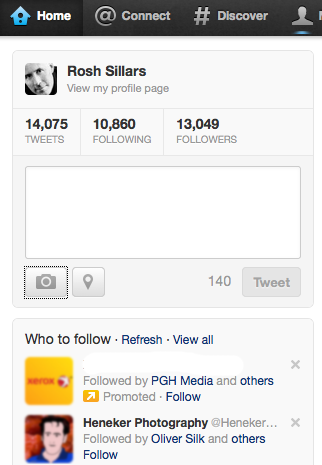
9.9 Click the camera icon to upload a photo to Twitter.
• Pinterest. To upload a photograph to Pinterest, click the Add button (+) inside a board and a new screen appears with two Add a Pin options: Choose File and Find pins. The first option is for uploading photos from your computer and the second allows you to find a Pin via a web address (URL).
When sharing your images on social websites, always read the terms of service, and make sure you understand how they apply to your content. Many terms of service for websites indicate that the owners of the website have the legal right to do anything they want with your files. If you are concerned about losing control of a specific photograph, don’t upload it to any Internet website.

9.10 Click the Add button (+) on the front page of Pinterest, and then click Choose File to share photos from your computer.
The following are seven social media tips for the photographer:
• Think before you upload. Ask yourself if the photograph you are posting on Facebook, Flickr, or Instagram is one you will regret sharing later.
• Consider adding a watermark to your photographs. Your name or website, year the photograph was taken, and the copyright symbol are good standards. This information can usually be added in any software that allows you to place text on your images.

9.11 This photo has a watermark with the copyright symbol, my name, and the year. Exposure: ISO 200, f/7.1, 1/1000 second, 50mm f/1.4 lens.
• Link to your work. If you post an image to a blog or website, attach a link to more of your photos or your portfolio.
• Let criticism roll off your back. When you post your work for the world to see, don’t expect everyone to like all of your images. Of course, you shouldn’t tolerate abusive behavior, but just be open to opinions. I’ve found constructive criticism from my social media community helpful for improving my work.
• Learn online. Most photographers like to help other photographers via social media. Tips, tricks, and tutorials are all available on the Web. Ask pros any questions you may have about lighting, Photoshop, and so on.
• Use interesting titles. Often, people see the title of a photo post before they see the image, so make your titles interesting. Asking a question is a good way to encourage people to click.
• Explore new photography-sharing websites. It seems like there is a new way to share photographs every week. Test new sites and applications to stay on top of the latest technology.