3. Personalizing the Way Your iPad Looks and Works

In this chapter, you learn how to personalize various aspects of your iPad experience.
![]() Personalizing the Lock and Home Screens
Personalizing the Lock and Home Screens
Every iPad looks and acts the same right out of the box. But that doesn’t mean that you can’t configure your iPad to your own personal tastes.
Want a different background picture? You can do that. Want a brighter or dimmer screen? You can do that, too. Don’t like the way you receive notifications onscreen, and from which apps? Then change the notification settings.
Truth is, there’s a lot you can do to personalize your very own iPad. This chapter walks you through managing your screens, backgrounds, and more detailed settings. Change is coming!
Personalizing the Lock and Home Screens
One of the most visible things that people like to change is the look of the iPad screens. You can change the background wallpaper of the Lock and Home screens, as well as the way app icons are arranged onscreen.
Change the Wallpaper
The default wallpaper you see on your iPad’s Home and Lock screens is pretty enough, but you can probably find something more to your liking. You can choose different wallpaper for the Lock and Home screens, or use the same wallpaper for both.
![]() From the Dock or Home screen, tap the Settings icon to display the Settings screen.
From the Dock or Home screen, tap the Settings icon to display the Settings screen.

![]() Tap Wallpaper in the left column.
Tap Wallpaper in the left column.

![]() Your current wallpaper is displayed on thumbnails of your Lock (left) and Home (right) screens. Tap Choose a New Wallpaper.
Your current wallpaper is displayed on thumbnails of your Lock (left) and Home (right) screens. Tap Choose a New Wallpaper.

![]() Tap Dynamic to select one of Apple’s dynamic (moving) wallpapers. Or…
Tap Dynamic to select one of Apple’s dynamic (moving) wallpapers. Or…
![]() Tap Stills to select one of Apple’s supplied still photos.
Tap Stills to select one of Apple’s supplied still photos.
![]() Tap one of the photo folders to use one of your own pictures as wallpaper.
Tap one of the photo folders to use one of your own pictures as wallpaper.

![]() Tap to select one of the available choices.
Tap to select one of the available choices.

![]() To create a slight motion effect for the background, tap to turn on Perspective Zoom.
To create a slight motion effect for the background, tap to turn on Perspective Zoom.
Perspective Zooming
When you select Perspective Zoom you enable what experts call a parallax effect. It essentially creates a slight motion effect on the Home or Lock screens when you tilt your iPad; the background seems to follow you as you move your device. Some people like it, some people don’t. It’s not really a big thing.
![]() Tap Set Lock Screen to set this picture for only your Lock screen.
Tap Set Lock Screen to set this picture for only your Lock screen.
![]() Tap Set Home Screen to set this picture for only your Home screen.
Tap Set Home Screen to set this picture for only your Home screen.
![]() Tap Set Both to use this picture as the background for both your Lock and Home screens.
Tap Set Both to use this picture as the background for both your Lock and Home screens.

Arrange App Icons
Whatever size iPad you have, app icons are displayed on the Home screen in the same 4 × 5 grid. (That’s 4 columns by 5 rows if held vertically, or 4 rows by 5 columns if held horizontally.) There’s also the Dock that floats at the bottom of the screen, where you can permanently “dock” icons for your most-used apps.
Which icons appear where on your Home screens is totally up to you. You can easily move icons from one position to another, and even from one screen to another.
![]() Press and hold the icon you want to move until all the icons onscreen start to jiggle. (You also see a little X next to each icon, which means you’re in editing mode.) You can tap the X to delete an app, if you want.
Press and hold the icon you want to move until all the icons onscreen start to jiggle. (You also see a little X next to each icon, which means you’re in editing mode.) You can tap the X to delete an app, if you want.

![]() Drag the icon to a new position. The other icons rearrange themselves to make room. Lift your finger when the icon is in place.
Drag the icon to a new position. The other icons rearrange themselves to make room. Lift your finger when the icon is in place.

![]() Press the Home button to return to normal screen mode.
Press the Home button to return to normal screen mode.

To move an icon to a different Home screen, drag the icon to the side of the screen until the adjacent screen appears. You can then “drop” the icon to a new position on this screen. If you try to drag an icon to a screen that’s already full, it pushes the last icon (on the bottom right) to the next screen.
Add Icons to and Remove Icons from the Dock
The Dock is that area at the bottom of every screen that holds icons for your most-used apps. By default, the Dock holds five set icons—Settings, Messages, Safari (web browser), Mail, and Music—plus icons for the three most recently used apps. You can remove any of the five default app icons, or add icons for other apps. In fact, you also can populate the Dock with more than a dozen icons.
If you stock up the Dock with icons for the apps you use most, you won’t have to move back to the Home screen as often. Because the Dock hovers on top of most open apps (and you can redisplay it simply by swiping up from the bottom of the screen), you can do all your app launching from the Dock rather than from the Home screen.
![]() Add an icon to the Dock by dragging it from any screen down to the Dock.
Add an icon to the Dock by dragging it from any screen down to the Dock.

![]() Rearrange icons on the Dock by dragging any icon to a new position.
Rearrange icons on the Dock by dragging any icon to a new position.

![]() Remove an icon from the Dock by dragging it from the Dock to any Home screen.
Remove an icon from the Dock by dragging it from the Dock to any Home screen.

Organize Apps with Folders
If you have too many apps crowding too many screens, you can organize those apps into folders. Each folder can contain multiple apps; to open a folder, tap it and then tap the appropriate app inside.
![]() Create a new folder by dragging one icon on top of another. This creates the folder and displays it full screen.
Create a new folder by dragging one icon on top of another. This creates the folder and displays it full screen.

![]() Tap anywhere outside the folder to close the folder and return to the desktop. The folder is displayed in position there. (You can drag the folder to move it to another position, if you like.)
Tap anywhere outside the folder to close the folder and return to the desktop. The folder is displayed in position there. (You can drag the folder to move it to another position, if you like.)

![]() Add another app to this folder by dragging the app icon on top of the folder icon.
Add another app to this folder by dragging the app icon on top of the folder icon.

![]() Remove an app from a folder by opening the folder and then dragging the icon outside of the folder.
Remove an app from a folder by opening the folder and then dragging the icon outside of the folder.

![]() Rename a folder by pressing and holding the folder icon to open it for editing. You can then open the folder, tap the default folder name, and use the onscreen keyboard to edit or enter a new name.
Rename a folder by pressing and holding the folder icon to open it for editing. You can then open the folder, tap the default folder name, and use the onscreen keyboard to edit or enter a new name.

>>>Go Further: ORGANIZE BY TYPE
I find it useful to organize my lesser-used apps into folders. Those apps I use all the time I want to tap immediately from the Home screen; those I use less regularly I put into folders so they’re not cluttering my screens.
When I use folders, I try to put similar apps together. For example, if I have a half dozen or so games, I might create a folder labeled Games to hold them all. Similarly, I might group my music, video, and photos apps into a folder labeled Lifestyle, or the Numbers, Pages, and Keynote apps into a Productivity folder.
The point is to group similar apps together in folders where I can quickly and easily find them. I’ve found that creating a folder labeled Misc is the best way to “lose” apps on my device!
Customizing the Today Screen and Control Center
In addition to personalizing your iPad’s Home screens, you can also customize what notifications you see on the Today screen and which controls are visible in the Control Center.
Customize the Today Screen
When you swipe from left to right on the main Home screen, you display your iPad’s Today screen. There’s a search box at the top of this screen, as you might expect, but also a variety of widgets. These are small panels that display specific types of information—weather, news, and the like.
You can personalize which widgets you display on the Today screen. This makes this screen more useful for you.
![]() Swipe to the right from the main Home screen to display the Today screen.
Swipe to the right from the main Home screen to display the Today screen.

![]() Your current widgets are displayed. If you have many widgets installed, you can scroll up and down through all of them. Tap a widget to display more information or open a given app.
Your current widgets are displayed. If you have many widgets installed, you can scroll up and down through all of them. Tap a widget to display more information or open a given app.

![]() Scroll to the bottom of the Today screen and tap Edit to display the Add Widgets screen.
Scroll to the bottom of the Today screen and tap Edit to display the Add Widgets screen.

![]() Your current widgets are listed by their position. To move a widget to another position, press and drag it to its new position.
Your current widgets are listed by their position. To move a widget to another position, press and drag it to its new position.
![]() Tap the red – button to remove a widget from the Today screen, and then tap the Remove button.
Tap the red – button to remove a widget from the Today screen, and then tap the Remove button.
![]() Add a new widget by scrolling to the More Widgets section and tapping the green + for the widget you want to add.
Add a new widget by scrolling to the More Widgets section and tapping the green + for the widget you want to add.
![]() Tap Done to return to the Today screen.
Tap Done to return to the Today screen.

Customize the Control Center
When you swipe up from the bottom of any screen, you see the Control Center. (You also see thumbnails of any open apps, or what Apple calls the App Switcher.) A number of useful controls are displayed by default in the Control Center; you can further personalize the Control Center by adding additional controls.
![]() Tap the Settings icon in the Dock or on the Home screen to display the Settings screen.
Tap the Settings icon in the Dock or on the Home screen to display the Settings screen.

![]() In the left column, tap Control Center.
In the left column, tap Control Center.

![]() In the right column, tap Customize Controls.
In the right column, tap Customize Controls.

![]() To add a new control to the Control Center, tap the green + next to that control’s name.
To add a new control to the Control Center, tap the green + next to that control’s name.
![]() To remove a control from the Control Center, tap the red – next to that control’s name.
To remove a control from the Control Center, tap the red – next to that control’s name.

Configuring Device Settings
There are many other settings you can configure to better personalize your iPad. You configure all these settings from the iPad’s Settings page.
Display the Settings Page
The Settings page is organized into a series of tabs, which are accessible from the left column. Tap a tab to view the individual settings of a given type.
![]() From the Dock or Home screen, tap the Settings icon to open the Settings screen.
From the Dock or Home screen, tap the Settings icon to open the Settings screen.

![]() Tap the tab on the left to display related settings.
Tap the tab on the left to display related settings.
Configure Notifications
Many apps display notifications for various types of events. The Mail app, for example, can display notifications when you receive new emails; the News app can display notifications with recent news headlines.
You can determine what types of notifications you receive on an app-by-app basis. For that matter, you can opt to turn off all notifications for specific apps, thus reducing the number of annoying notifications you have to deal with.
Different Notifications
Different apps will have different notification options. This how-to discusses some of the more common notification options.
![]() From the Settings screen, tap Notifications in the left column to display the Notifications tab.
From the Settings screen, tap Notifications in the left column to display the Notifications tab.

![]() Tap the app you want to configure.
Tap the app you want to configure.

![]() Tap “on” the Allow Notifications switch to display notifications from this app. Tap “off” this control to disable all notifications from this app.
Tap “on” the Allow Notifications switch to display notifications from this app. Tap “off” this control to disable all notifications from this app.
![]() Tap “on” the Sounds switch to enable notification sounds for this app. Tap “off” this control to turn off these sounds. (Not all apps have notification sounds.)
Tap “on” the Sounds switch to enable notification sounds for this app. Tap “off” this control to turn off these sounds. (Not all apps have notification sounds.)
![]() Some apps display a number on top of the icon to indicate the number of notifications or actions pending. (For example, the icon for the Mail app displays a red “2” if there are two unread emails in the inbox.) Turn on this numbering by tapping “on” the Badge App Icon switch.
Some apps display a number on top of the icon to indicate the number of notifications or actions pending. (For example, the icon for the Mail app displays a red “2” if there are two unread emails in the inbox.) Turn on this numbering by tapping “on” the Badge App Icon switch.
![]() Show notifications from this app on the Cover Sheet (and the Lock screen) by tapping “on” the Show on Lock Screen switch. Tap “off” this switch to not show notification on the Cover Sheet.
Show notifications from this app on the Cover Sheet (and the Lock screen) by tapping “on” the Show on Lock Screen switch. Tap “off” this switch to not show notification on the Cover Sheet.
![]() Display notifications from this app in your iPad’s History by tapping “on” the Show in History switch. Tap “off” this switch to not track this notification history.
Display notifications from this app in your iPad’s History by tapping “on” the Show in History switch. Tap “off” this switch to not track this notification history.

![]() To display alerts as banners, tap “on” the Show as Banners switch and then select a banner style (Temporary or Persistent).
To display alerts as banners, tap “on” the Show as Banners switch and then select a banner style (Temporary or Persistent).
![]() To show previews from this app (not available with all apps) in the notifications, tap Show Previews and then select what type of preview: Always, When Unlocked, or Never.
To show previews from this app (not available with all apps) in the notifications, tap Show Previews and then select what type of preview: Always, When Unlocked, or Never.

Configure the Display and Brightness
You can adjust how bright your iPad’s display appears, along with several other display-related settings.
![]() From the Settings screen, tap Display & Brightness in the left column.
From the Settings screen, tap Display & Brightness in the left column.

![]() Drag the Brightness slider to the left to make the screen less bright, or to the right to make it brighter. (Remember, the brighter the screen, the faster it drains your battery.)
Drag the Brightness slider to the left to make the screen less bright, or to the right to make it brighter. (Remember, the brighter the screen, the faster it drains your battery.)
![]() To let your iPad automatically shift the display colors warmer (more reddish) after dark, tap Night Shift. You see the Night Shift panel.
To let your iPad automatically shift the display colors warmer (more reddish) after dark, tap Night Shift. You see the Night Shift panel.

![]() Schedule when Night Shift is enabled by tapping “on” the Scheduled switch and making a selection.
Schedule when Night Shift is enabled by tapping “on” the Scheduled switch and making a selection.
![]() Manually enable Night Shift from now to daylight tomorrow by tapping on the Manually Enable Until Tomorrow switch.
Manually enable Night Shift from now to daylight tomorrow by tapping on the Manually Enable Until Tomorrow switch.
![]() Adjust how warm the Night Shift colors appear by dragging the Color Temperature slider to the left (less warm) or right (warmer).
Adjust how warm the Night Shift colors appear by dragging the Color Temperature slider to the left (less warm) or right (warmer).
![]() Tap Back to return to the Display & Brightness screen.
Tap Back to return to the Display & Brightness screen.

![]() Change the amount of idle time that must elapse before your iPad automatically locks by tapping Auto-Lock and making a new selection (2 minutes, 5 minutes, 10 minutes, 15 minutes, or never).
Change the amount of idle time that must elapse before your iPad automatically locks by tapping Auto-Lock and making a new selection (2 minutes, 5 minutes, 10 minutes, 15 minutes, or never).
![]() If you have a Smart Cover on your iPad, you can disable it so that your device doesn’t automatically unlock when the cover is opened—just tap “off” the Lock/Unlock switch.
If you have a Smart Cover on your iPad, you can disable it so that your device doesn’t automatically unlock when the cover is opened—just tap “off” the Lock/Unlock switch.
![]() Tap Text Size to change the size of the text you see onscreen.
Tap Text Size to change the size of the text you see onscreen.

![]() Drag the slider to the left to make the text smaller, or to the right to make the text larger. Tap Back to return to the previous screen.
Drag the slider to the left to make the text smaller, or to the right to make the text larger. Tap Back to return to the previous screen.

![]() To make the text for icons and other system elements bold (and thus, perhaps, easier to read), tap “on” the Bold Text switch. When reminded that applying this setting will restart your iPad, tap Continue; your iPad then restarts.
To make the text for icons and other system elements bold (and thus, perhaps, easier to read), tap “on” the Bold Text switch. When reminded that applying this setting will restart your iPad, tap Continue; your iPad then restarts.

Change System Sounds
You can select different sounds for different system actions, such as sending an email or making a Facebook post. You can also opt to hear sounds when your iPad locks or when you tap the keys of the onscreen keyboard.
![]() From the Settings screen, tap Sounds in the left column.
From the Settings screen, tap Sounds in the left column.

![]() Drag the Ringer and Alerts slider to the left to decrease the volume; drag to the right to make them louder.
Drag the Ringer and Alerts slider to the left to decrease the volume; drag to the right to make them louder.
![]() To control these system sounds with your iPad’s physical volume buttons, tap “on” the Change with Buttons switch. (Otherwise, the volume buttons only control the volume of music and videos you’re listening to or watching.)
To control these system sounds with your iPad’s physical volume buttons, tap “on” the Change with Buttons switch. (Otherwise, the volume buttons only control the volume of music and videos you’re listening to or watching.)
![]() Change the sound for any specific system function by going to the Sounds section, tapping that function, and selecting a new sound.
Change the sound for any specific system function by going to the Sounds section, tapping that function, and selecting a new sound.
![]() Tap “off” the Keyboard Clicks switch to turn off sounds when you tap your iPad’s onscreen keyboard. (Some people find all these clickity clacks annoying when they type.)
Tap “off” the Keyboard Clicks switch to turn off sounds when you tap your iPad’s onscreen keyboard. (Some people find all these clickity clacks annoying when they type.)
![]() Tap “off” the Lock Sound switch to turn off sounds when you lock or unlock your iPad.
Tap “off” the Lock Sound switch to turn off sounds when you lock or unlock your iPad.

Configure Individual Apps
Most of the apps installed on your iPad have their own individual settings you can configure. Use the Settings screen to adjust settings for any app.
![]() From the Settings screen, scroll down to the list of individual apps in the left column.
From the Settings screen, scroll down to the list of individual apps in the left column.
![]() Tap an app to display and configure its settings.
Tap an app to display and configure its settings.

Managing System Settings
We’ve covered some of the most used settings you may want to configure on your iPad. But there are more settings available, on the General tab, that let you fine-tune various system options—and show you information about your device.
Display and Manage General Settings
The General tab on the Settings page is home to a variety of settings that affect all the apps on your iPad—as well as the iPad itself.
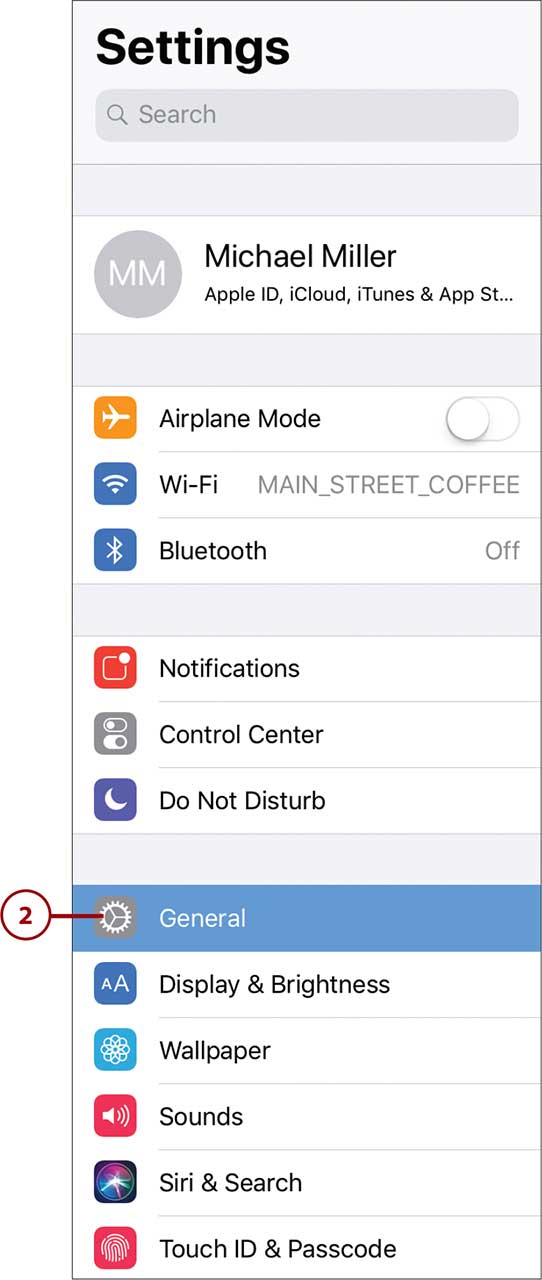
![]() From the Settings screen, tap General in the left column to select the General tab.
From the Settings screen, tap General in the left column to select the General tab.

![]() Tap About to see information about your device—how many items of various types you have stored, total capacity, available storage space, model and serial number, and more.
Tap About to see information about your device—how many items of various types you have stored, total capacity, available storage space, model and serial number, and more.
![]() Tap Software Update to manually force any available software update.
Tap Software Update to manually force any available software update.
Automatic Updates
Most available software updates will automatically install; manual updates are not typically needed.
![]() Tap AirDrop to configure your iPad’s AirDrop feature, which lets you instantly share contacts and other data with nearby Apple devices.
Tap AirDrop to configure your iPad’s AirDrop feature, which lets you instantly share contacts and other data with nearby Apple devices.

![]() Tap Handoff to deactivate the ability to start work on one device and resume that work on another device.
Tap Handoff to deactivate the ability to start work on one device and resume that work on another device.
![]() Tap Multitasking & Dock to deactivate the abilities to use multiple apps, display a persistent overlay when playing videos, use four- and five-finger touch gestures, and show suggested and recent apps on the Dock.
Tap Multitasking & Dock to deactivate the abilities to use multiple apps, display a persistent overlay when playing videos, use four- and five-finger touch gestures, and show suggested and recent apps on the Dock.

![]() Tap Accessibility to configure your device for enhanced accessibility.
Tap Accessibility to configure your device for enhanced accessibility.
Accessibility Options
To learn more about your iPad’s accessibility options, see Chapter 4, “Making Your iPad More Accessible.”
![]() Tap iPad Storage to view how much storage space you’ve used and have left.
Tap iPad Storage to view how much storage space you’ve used and have left.
![]() Some apps automatically refresh themselves in the background. To turn this off, tap Background App Refresh.
Some apps automatically refresh themselves in the background. To turn this off, tap Background App Refresh.
![]() Tap Restrictions to enable restrictions for specific apps (useful if small children are using your iPad).
Tap Restrictions to enable restrictions for specific apps (useful if small children are using your iPad).

![]() Tap Date & Time to set your iPad’s date and time.
Tap Date & Time to set your iPad’s date and time.
![]() Tap Keyboard to configure various options for the onscreen keyboard.
Tap Keyboard to configure various options for the onscreen keyboard.
![]() Tap Language & Region to reset the language and region for your iPad.
Tap Language & Region to reset the language and region for your iPad.
![]() Tap Dictionary to select which dictionary your iPad uses when checking text you enter.
Tap Dictionary to select which dictionary your iPad uses when checking text you enter.

![]() Tap iTunes Wi-Fi Sync to manually sync data on your iPad with your computer via Wi-Fi.
Tap iTunes Wi-Fi Sync to manually sync data on your iPad with your computer via Wi-Fi.
![]() Tap VPN to configure your iPad to use a virtual public network.
Tap VPN to configure your iPad to use a virtual public network.
![]() Tap Profile to view your configuration profile.
Tap Profile to view your configuration profile.
