Lesson 2. Advanced Editing Techniques
Once you master the basics of Final Cut Pro X, you’ll find that variations of its myriad edit styles can accommodate every situation. When the end point of the edit is more important than the starting point, you can backtime your cuts; or when the clip placement in the project is paramount, you can use project-defined edits. By using multiple storylines, you can create collections of b-roll or cutaway shots that can be moved and manipulated as a group. Compound clips allow you to treat a multilayer segment as a single item.
All of these techniques elevate your editing prowess, speed your work, ensure that you cut more accurately, and help you improve your storytelling effectiveness.
Reviewing Editing Basics
Before we get into the advanced topics, let’s briefly review some of the fundamental aspects of editing clips in Final Cut Pro X.
Tip
If you’re already very confident in your knowledge, feel free to skip ahead to the “Modifying Edits” section and begin work with Project_2B.
Adding Clips to a Project
One of the most fundamental aspects of the editing process is the assembly, when you first add your clips to a Timeline. Although nothing prevents you from adding clips in a random or imprecise manner, the more care you take when performing this basic assembly, the more time you’ll save when the time comes to modify and finesse the project.
To accommodate this, Final Cut Pro has many ways to add clips to your project, each one tailored to various situations you may encounter. In the following exercise, you’ll use different edit types to construct a basic project.
Appending Clips
The least destructive way to add a clip to a project is to use the append edit. Appending always adds the new clip to the end of the project.
Unlike other edit types, append isn’t affected by clips already placed in the project, whether a selection is active in the project, or where the project playhead is located, which makes the append edit very reliable and consistent. But it does have correspondingly limited use.
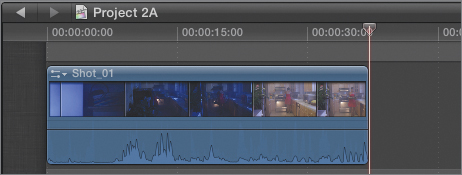
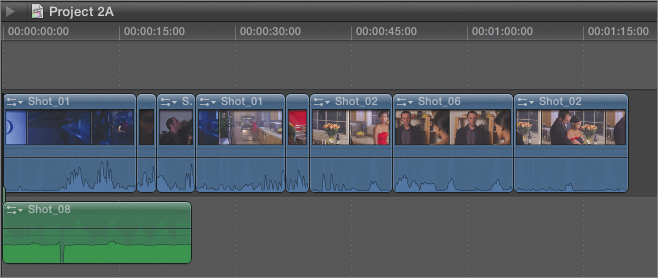
1. In the Project Library, open the Lesson 02 folder and double-click Project 2A to open this empty project into the Timeline.
2. In the Event Library, select the Lesson_02 Event.
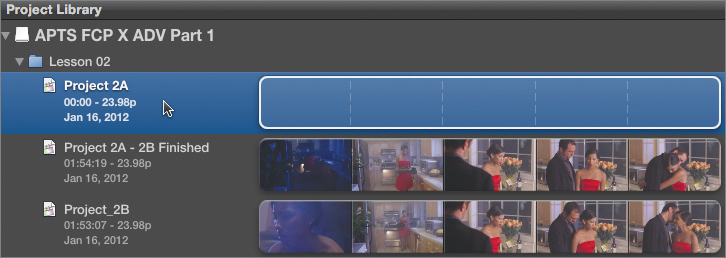
3. In the Event Library, click Shot_01 and press the Spacebar to watch the clip.
4. Watch the clip a second time, and just before the camera move begins (at approximately 16:54:06:00), press I to set a start point.
5. Press O to set an end point as the woman walks back through the kitchen, right after she coughs (at approximately 43:00).

6. To add the selected range of the clip to the project, click the Append button, or press E.

Tip
When adding the first clip to a project, you get the same results whether you choose append, insert, or overwrite.
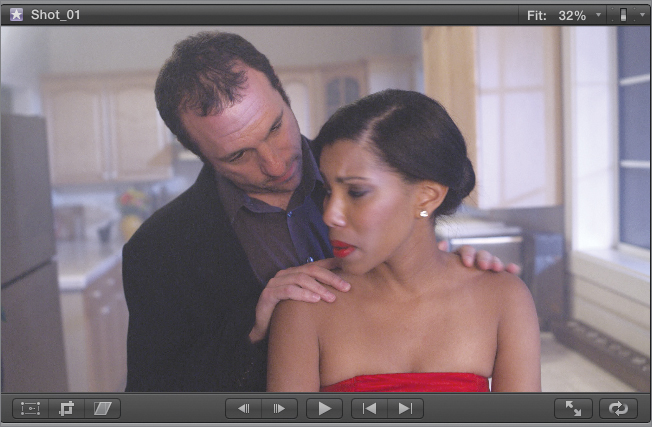
7. In the Event Browser, select Shot_02.
This shot has a Favorite section marked, which saves you the task of manually choosing the desired start and end points.
8. Click the green favorite bar in the clip preview area, or click the disclosure triangle to the left of the clip name, and click the Favorite item to select the desired range of the clip.

9. Click the Append button or press E.
The selected range of the second clip is added to the end of the project.

Inserting Clips
Sometimes you may want to add a clip between two existing clips. You could manually rearrange the clips after adding them to the Timeline, but adding the clip to the correct location in the first place is far more efficient.
Tip
You can also use an insert edit to split an existing clip by adding a new clip in the middle and moving the downstream footage farther to the right.
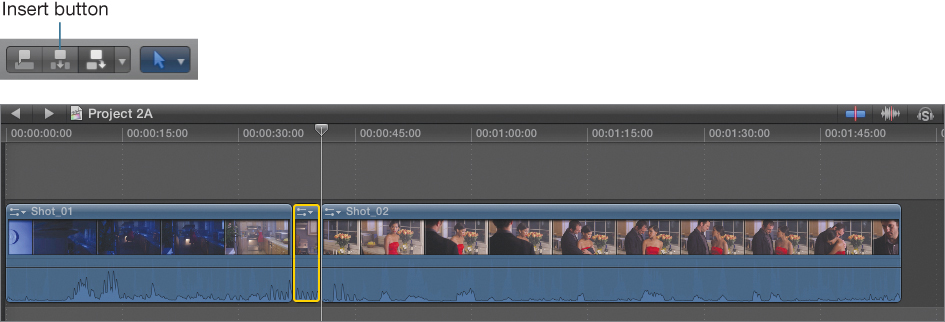
1. In the Event Browser, select Shot_03.
2. Select the section of the clip marked as a Favorite, as you did in the previous exercise.

3. In the Timeline, position the playhead between the two clips.

Tip
Press Up Arrow to navigate exactly to the previous edit point, or press Down Arrow to navigate exactly to the next edit. Using these keyboard shortcuts (instead of skimming or dragging the playhead) ensures that the playhead is placed precisely between the two clips and you don’t erroneously split an existing clip, which can result in an unwanted two- to three-frame flash.
4. Click the Insert button, or press W, to insert the clip between Shot_1 and Shot_2.
Tip
You can deliberately split an existing clip by positioning the project playhead in the middle of a clip prior to performing the insert edit.
Overwriting Clips
Overwriting clips allows you to align the matching timing of similar shots and cover an existing clip with a new clip. This edit is most frequently used for narrative cutting when editors frequently lay in a master shot, and then bit by bit overwrite it with the coverage (other angles).
1. Skim or play the project from the beginning, and find the point after the woman grabs the potholders and reaches into the oven (at approximately 17:10). Click to place the playhead on that frame.
2. In the Event Browser, select Shot_04 and select the Favorite section.
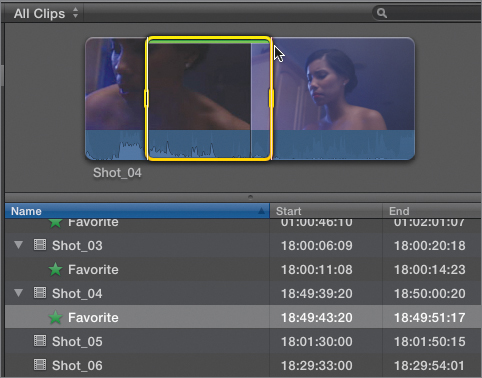
3. Press / (slash) to play the selected area. This close-up provides much more emotion than the long shot from over her shoulder.
4. Choose Edit > Overwrite, or press D.
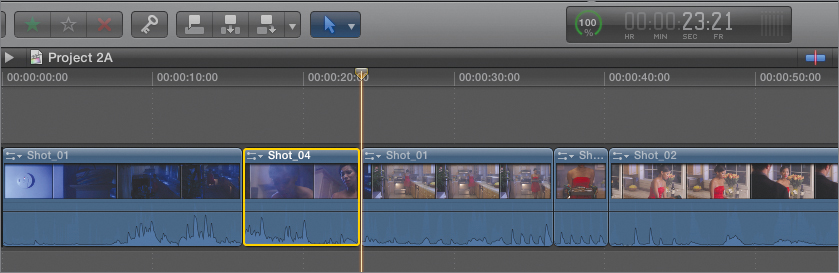
Shot_04 is edited into the project, covering the portion of Shot_01 beginning where you positioned the playhead and continuing for five seconds (the duration of the marked section of Shot_04).
5. Play the project to see how your edit is shaping up.
Replacing Clips
You can also cover an existing clip by replacing it with another clip. Replacing a clip exchanges the existing clip in the project with one from the Event Browser.
You can control the timing of the replace edit in one of three ways: You can replace a shot using the marked area in the Event Browser (thus changing the duration of the shot in the Timeline). You can retain the timing of the shot in the Timeline and replace its contents by cutting off the new clip when it reaches the end of the selection in the Timeline—regardless of the duration of the marked area in the Event Browser. This method is called Replace from Start.
Note
Alternatively you can Replace from End, in which the clip in the Timeline retains its length but the end point in the Event Browser is lined up with the end point in the Timeline. For more about this type of edit, see the “Backtiming Edits” section in this lesson.
1. In the Event Browser, play Shot_05.
This shot is similar to Shot_03 that you inserted earlier, but its framing is a bit tighter and the smoke coming off the chicken is more pronounced.
2. In the preview area, click the green bar to select the Favorite range. Observe that the selected section of the clip in the Event Browser is 4:15 seconds long, whereas Shot_03 in the Timeline is 3:00 seconds.
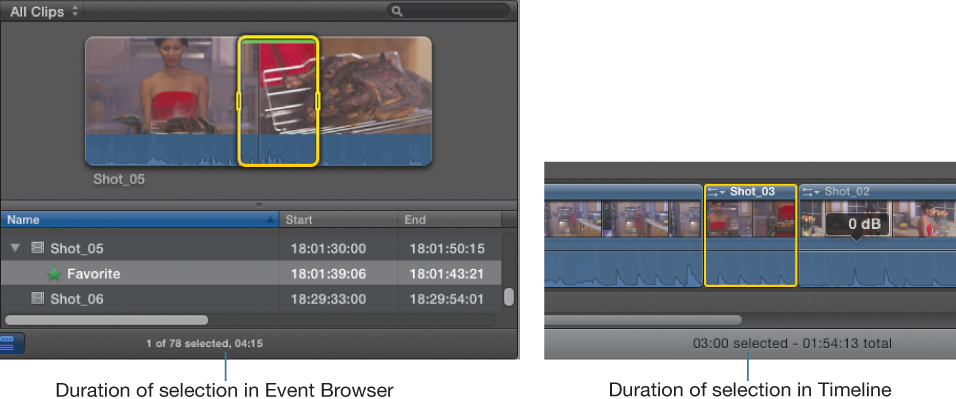
3. Drag the selected range of the clip from the Event Browser onto Shot_03, but do not release the mouse button. When a white highlight appears around the clip, release the mouse button.
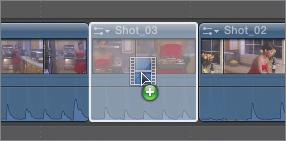
A drop-down menu appears listing the replace edit options.

4. Choose Replace. Shot_05 replaces Shot_03 in the Timeline, thereby increasing the overall duration of the project.

5. Play the project to see how the new shot fits. Unfortunately, the new clip duplicates the action where she puts the dish down in Shot_03.
6. Press Command-Z to undo the replace edit.
7. Repeat step 3, but this time, choose Replace from Start.
The shot is once again replaced, but is limited to the 3:00 duration based on the clip it replaced.
8. Play the project to verify that the overlapping action is gone and the edit is much smoother.
Modifying Edits
Now that you’ve refamiliarized yourself with the most common edit types, you’ll learn how to control those edits in various ways to dramatically increase your versatility and flexibility as an editor.
Note
If you chose to skip the “Reviewing Editing Basics” section, open Project_2B to proceed with the following exercises.
Using Project-Defined Edits
One powerful way to control how edits occur is by specifying both a starting and an ending point in the project itself.
You’ve previously specified start and end points in the Event Browser and positioned the project playhead to determine where that selection was edited into the project. But at times it’s more important that you cover a specific range in the project, and it’s less critical to identify the exact frames of the source clip that are used.
For example, imagine a mistake in the clip in which a light stand is visible for three seconds. No problem; you can cut away to another shot during that section, but you want to make absolutely sure that you cover those entire three seconds. Using ordinary edits, you’d have to manually ensure that the selection in the Event Browser is exactly the right length, which means you’d have to measure twice (once to figure out how long the bad section is, and once again when marking the source clip selection). Using a project-defined edit, you can just make the selection in the project and let Final Cut Pro X make the selection in the Event Browser.
1. Play the project all the way to the end.
2. Play the project again, and press I to set a start point right after the woman says, “It said two hours,” and the man comes into frame, but before he starts talking (at about 50:00).

3. Press O when the man starts walking toward her (at 1:06:00) to mark a selection that is approximately 16 seconds long.


4. In the Event Browser, select Shot_06.
5. Play or skim until just before the man says, “Yeah, well, we’ll just go back out” (at approximately 18:31:37:00). Leave the playhead at that frame.

6. Press D to overwrite the clip into the project.

The clip is added, beginning at the selected frame and filling the selected range in the Timeline with the footage from the source clip.
Tip
You can mark a start point in the source clip, and the project selection will override the selected duration in the clip.
Backtiming Edits
So far, you’ve made edits based on the starting point of the source clip. This is great for many situations because it ensures a smooth edit. But occasionally you’ll want to base the timing of the edit based on the source clip’s ending point.
In such a case, you ensure that the end of the new clip fits smoothly into the project by aligning the end of the source clip in the Event Browser with the playhead in the Timeline. This procedure is called backtiming.
Note
Backtiming is most commonly performed as an overwrite edit, but you can also backtime a connect edit or a replace edit by choosing Replace from End.
1. In the Event Browser, select Shot_07 and select the Favorite section.
2. Press / (slash) to play the selection.
The selection ends precisely after the man disables the alarm. It’s most important in this case that turning off the alarm corresponds to a specific moment in the project; you want it to occur precisely before she turns on the lights.
3. Play the project, and stop the playhead precisely at 25:00, an instant before she turns on the room lights.
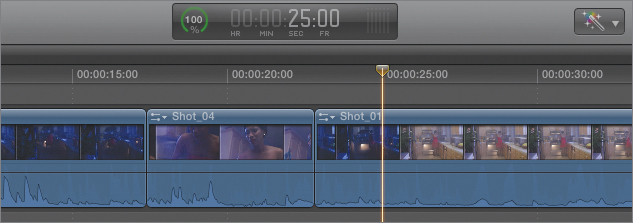
If you performed an overwrite edit at this point, the new clip would begin, and the section in the project where the woman turns on the light would be covered. By backtiming the edit, you can force the end of the clip to line up with the playhead and instead overwrite the section leading up to that frame.
4. Press Shift-D to perform a backtimed overwrite edit that adds the clip to the project, ending at the playhead position.

5. Play the project to watch the result. The man disables the alarm and then the project cuts immediately to the woman turning on the light.
Tip
If you’re confused about the usefulness of backtiming an edit, undo step 4, perform a regular overwrite edit (press D) and observe the different result.
Limiting Source Media
One very common modification to an edit is to limit it to add only the video or the audio to the project. This is how you add a video cutaway while still hearing the sound of an interview, or line up a sound effect from one clip with the picture from another different clip.
You can perform audio-only or video-only edits regardless of which edit type you use: append, overwrite, insert, replace, or connect.
1. In the toolbar, from the Source Media pop-up menu, choose Audio Only, or press Shift-3.

Tip
You can also change source media settings by choosing Edit > Source Media and selecting one of the menu items.
The edit buttons turn green to show that the next edit will be an audio-only edit.
Note
When you specify an edit as Video Only or Audio Only, that state remains persistent until you change it again.
2. In the Event Browser, play Shot_08. This shot contains the sound of the beeping smoke alarm. You want to add that sound to the existing project, while leaving all the existing audio intact. But first, you’ll identify the portion of the project where you want to hear the alarm sound—from the beginning of the scene until the man disables the alarm.
3. In the Timeline, position the playhead at the very first frame of the project, and press I, to place a start point.
4. Find the frame where the man disables the alarm (at approximately 24:00), and press O to mark the end of the selection.
5. In the Event Browser, skim through Shot_08 until you find the last beep of the alarm sound (at approximately 31:04, and press O.
6. Press Shift-Q to perform a backtimed connect edit.
Connect edits add the clip above the primary storyline (for video) or below it (for audio), and are connected to the frame at the Timeline playhead position.
Note
If you move or trim the clip to which a clip is connected, the connected clip will automatically move with it. If you trim past the connection point, the connected clip will automatically attach itself to the new clip.
7. Play the project to hear the results of your work. The alarm sound is added to the project, and ends precisely when the man presses the button on the device.
8. From the Source Media pop-up menu, choose All to prepare for the remainder of the lesson.
Combining Complex Edits
You can combine these techniques when the situation calls for it. For example, you just performed an audio-only, project-defined, backtimed, connect edit. Pretty amazing, huh?
As you grow more proficient, you’ll intuitively understand when you want to use these tools and when to combine them, but don’t despair if all those modifiers and possibilities seem overwhelming. You can always do a simple edit and modify the other elements one at a time after the fact.
Using Secondary Storylines
As you become more comfortable connecting clips to the primary storyline you may find yourself building a collection of connected clips you want to treat as a single item. For example, you might have a series of cutaways related to a particular interview, and you want to apply a single effect to the group; or you want to move this group, en masse, to another location in the project. In these situations, you would want to create a secondary storyline.
A secondary storyline allows you to combine a group of connected clips so they have a single connection line. This allows the whole group to be connected to a single frame in the primary storyline.
Creating Secondary Storylines
You can create a secondary storyline in several ways. The most common situation is to begin with existing connected clips.
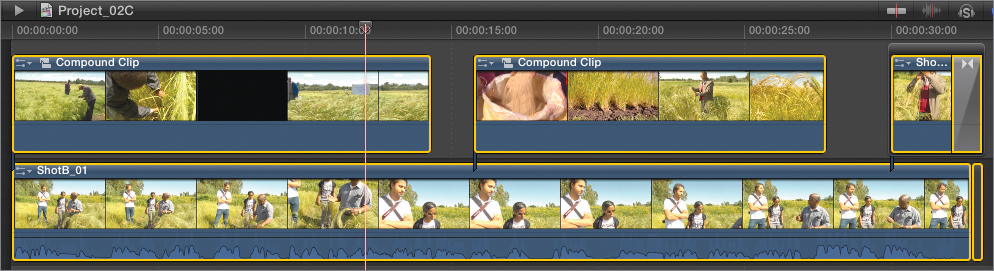
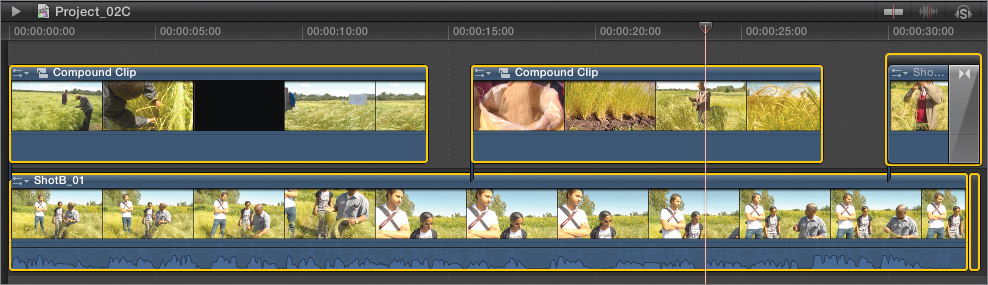
1. Open the Project Browser, and double-click Project_02C to open it into the Timeline.
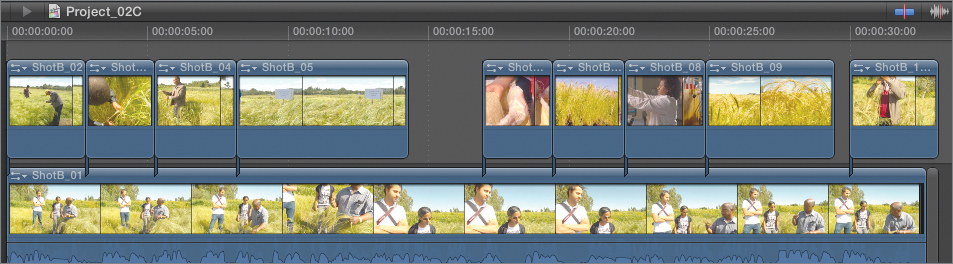
2. Play the project to get familiar with it. The primary storyline contains a single interview clip with several connected cutaway shots.
3. Drag a selection rectangle around the first four connected clips.

4. Choose Clip > Create Storyline, or press Command-G.
The clips are grouped into a new storyline. You can still adjust any of the individual clips; however, you also can manipulate the clips as a group.
5. Click the gray bar over the clips, and drag it to the right until it pushes ShotB_06 out of the way. The entire storyline moves as a single unit.

6. Drag the storyline back to the left until it lines up with the beginning of the project.

Applying Transitions to Connected Clips
When you create a storyline, it enables you to add transition effects (such as a cross-dissolve) between connected clips. Ordinarily, each connected clip is attached to a specific frame in the primary storyline, so even if two connected clips are adjacent (or overlapping), editing the clips to which they’re attached could move them and change that relationship.
To apply a transition effect between two connected clips, they must share a single connection line so they can maintain their relative positions. In other words, they must be converted into a storyline.
Fortunately, when you add a transition effect to a connected clip, Final Cut Pro converts it into a storyline for you.
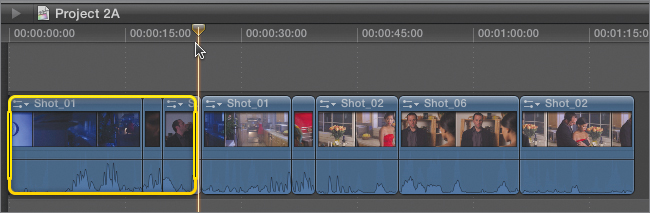
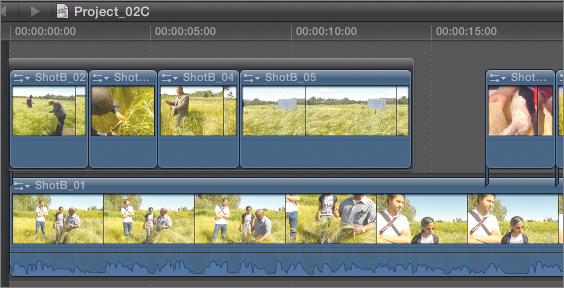
1. Select the four connected clips beginning at 17:00.

2. Choose Edit > Add Cross Dissolve, or press Command-T.

The clips are grouped into a secondary storyline, and cross dissolves are added to the beginning and end of each clip.
3. Play the project.
4. Stop the playhead just after the botanist says, “reducing,” at around 15:10.

5. Drag the storyline to the left until it aligns with the playhead position.
Tip
To make this step easier, enable snapping (if it’s not enabled) by pressing N, or clicking the Snapping button in the upper right of the Timeline.
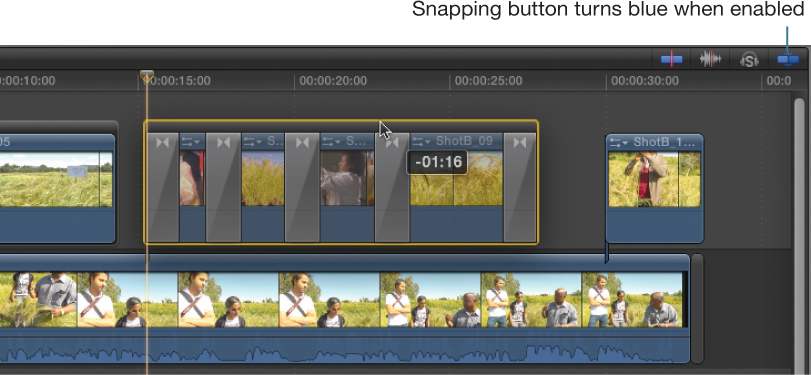
All the connected clips in the storyline and their cross dissolve effects move together to better align with the dialogue.
6. Play the project again to see your work.
You can use the same technique to create a fade-out on the last clip.
7. Select the end point of the last clip.

8. Press Command-T to add a cross dissolve effect.

A secondary storyline is created containing that one clip, and the effect is added to its end.
9. Play the project.
Now the scene ends with a nice, clean fade-out.
Breaking Apart Storylines
Secondary storylines have many benefits, but sometimes you may want to remove a clip from a storyline, or convert a storyline back into connected clips.
1. Select the storyline that begins at 15:10.

2. Choose Clip > Break Apart Clip Items, or press Command-Shift-G. A warning appears to alert you that separating the clips will remove the transition effects.
3. Click Break Apart.
Tip
If you don’t want to be warned about this issue in the future, select the checkbox.

The clips return to their pre-storyline states.
You can also drag individual items out of an existing storyline.

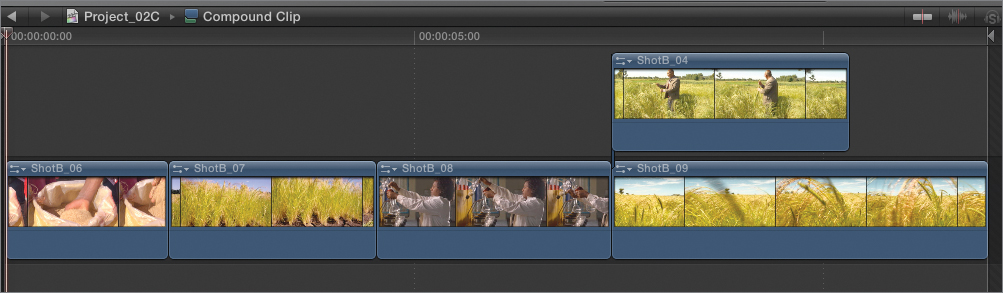
4. Drag the third clip in the first secondary storyline (ShotB_04) out of that storyline, and place it above ShotB_09.
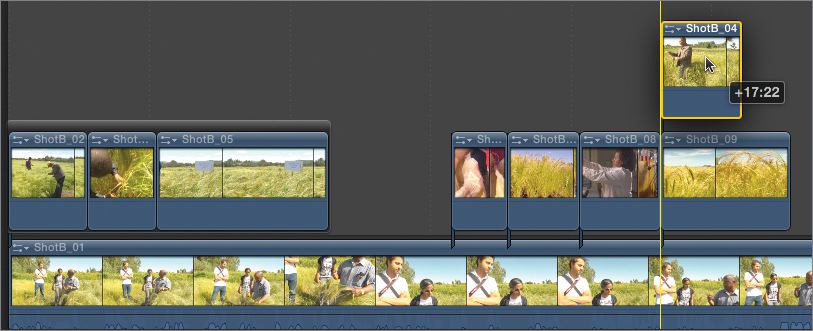
The clip is removed from the storyline, and the gap is automatically closed, unlike what would have occurred if the clips were connected clips, each one with its own connection line.
Let’s look at the other behavior using the Position tool.
5. Press Command-Z to undo step 4.
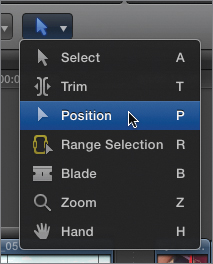
6. From the Tools pop-up menu, choose the Position tool, or press P.
7. Repeat step 4 by dragging the clip out of the storyline and on top of ShotB_09.

This time, a gap is left where the clip was. The storyline will maintain that gap unless you explicitly remove it, either by positioning another clip into the space, or by selecting and deleting the gap itself.
8. Press A to return to the Select tool to prepare for the next exercise.
Understanding Compound Clips
On occasion, you may want to group objects that span multiple layers or storylines. For example, you might want to collapse all the connected clips into the primary storyline to tidy up an overly complex Timeline; or you might align a title to a connected clip so the two objects always move together. Creating a compound clip will achieve both of these goals.
A compound clip can also be used when you want to apply a single effect to a group of shots all at once, or to group a collection of overlapping audio clips so they can be represented by a single bar in the Timeline.
A compound clip can even contain other compound clips. Best of all, creating compound clips (like everything in Final Cut Pro X) is nondestructive. You can continue to edit the contents of the compound clip after creating it, or even break it apart into its constituent clips.
Creating Compound Clips
You can create compound clips at any point during the editing process. In this exercise, you’ll create multiple compound clips and navigate in and out of them.
1. Drag a selection rectangle around the five connected clips beginning at 15:10.

2. Choose File > New Compound Clip, or press Option-G.

The group of five clips is combined and represented by a single bar in the Timeline.
Note
Compound clips can also be created in the Event Browser, allowing you to create a single object containing multiple source clips. This happens automatically when you apply the Synchronize Clips command.
3. Double-click the newly created compound clip.
The Timeline updates to show the contents of the compound clip. You can edit these clips just like clips in any Timeline. Changes you make will be reflected in the parent project.
At any time, you can dive into, or step out of the compound clip using the Timeline History controls.
4. Click the Timeline history back arrow button, or press Command-[ (left bracket).

Note
You can see the name of the compound clip’s parent project in the Timeline header bar.
The Timeline updates to show the entire project.
5. Select the compound clip.

6. Open the Effects Browser, scroll down, and double-click the Background Squares effect to apply it to the entire compound clip.
7. Play the project to see the result. To achieve a similar result without using a compound clip, you would have to apply the filter five separate times to each of the five clips.
Furthermore, this technique ensures that all the clips are filtered in exactly the same way. If you later want to change the filter, you’ll only have to do so once for the entire compound clip.
Attaching Titles to Connected Clips
You can also use compound clips to connect a title to a connected clip (or in this exercise, a secondary storyline). Ordinarily titles can be connected only to the primary storyline, but by grouping a title and a connected clip into a compound clip, you can ensure that whenever you move, edit, or modify the connected clip, the title remains attached to it.
1. Position the playhead at approximately 9:00.

At this location you’re going to add a title to identify the field seen in the cutaway shot.
2. Choose Edit > Connect Title > Basic Title, or press Control-T, to add a 10-second title to the project.

3. In the onscreen text controls, type Oromia Province, 2011, and drag the text to the lower-right corner of the screen.
To make the text more legible, you can change its size and color.

4. In the Text Inspector (press Command-4, if the Inspector is not open), change the Size to 80, the Face > Color to bright cyan/blue, and select the Drop Shadow checkbox. Reposition the text as necessary to keep it visible on the screen.

Tip
When you’re working with a small display, you can more easily see your title by zooming into the Canvas and using the onscreen navigation control to move within the frame.
The timing of the title is linked to the clip in the primary storyline; but in this case, you want to connect it to the clip in the secondary storyline.
5. Drag the right edge of the title to the left so it ends at approximately 13:00.

6. Select the title, as well as the secondary storyline below it.

Note
Be sure to select the storyline and not just the one clip beneath the title.
7. Press Option-G to create a new compound clip.

The title and the secondary storyline are combined into a compound clip. To change the title or any of the clips, double-click the compound clip to open a new Timeline displaying its component parts.
You can also incorporate clips from the primary storyline into compound clips.
8. Press Command-A to select all the items in the Timeline.
9. Press Option-G to combine them into a compound clip.

All the connected clips are collapsed into the primary storyline. You could now move this interview segment around within a larger program, and all the associated cutaways and titles would automatically move with it.
If at any time you want to remove the compound clip and return the Timeline to its previous state, you can easily do that as well.
10. Select the compound clip and choose Clip > Break Apart Clip Items, or press Command-Shift-G.
The compound clip is removed and the clips that were inside appear instead.
Lesson Review
1. What is the least destructive edit type?
2. Where in a project will an overwrite, insert, or connect edit begin?
3. What will be the duration of a clip after performing a Replace from Start edit?
4. What is a project-defined edit?
5. What is a backtimed edit?
6. How do you limit an edit to audio-only?
7. How many storylines can exist in a single Timeline?
8. Can storylines contain multiple layers?
9. Can clips within a storyline be edited?
10. How do you edit the clips inside a compound clip?
11. Can compound clips contain multiple layers?
Answers
1. The append edit is the least destructive.
2. At the current playhead (or skimmer) position
3. The same duration as the original clip in the project
4. An edit based on a range selection in the Timeline
5. An edit in which the end of the selection of the source clip is lined up with the playhead position in the project.
6. From the Source Media pop-up menu in the toolbar, choose Audio Only.
7. There is no limit to the number of storylines in a Timeline.
8. No, storylines must be flat.
9. Yes, clips in a storyline can be edited as any other clip in the Timeline.
10. Double-click the compound clip to open its own Timeline.
11. Yes
Keyboard Shortcuts
