Lesson 1. Organizing Your Media
Good editing begins with good organization. No matter how skilled you may be at juxtaposing images, finding a scene’s rhythm, or making your cuts invisible, you still need to find the right footage when you need it. And that means effectively cataloging your clips and adding enough metadata (information about the content of the clips) to ensure that everything is always at your fingertips.
Final Cut Pro X has an expansive and extendable metadata architecture that allows you to categorize, organize, manage, and otherwise prepare your source media with precision, ease, and tremendous flexibility.
Final Cut Pro X automatically detects a wide range of metadata from the source clips. Camera type, format, image settings, and other data are passed directly from the camera. You can also instruct Final Cut Pro to detect additional information such as areas that are very shaky (and require stabilization); human faces that appear in the frame; and the number of human subjects and their distances from the camera.
For each clip, you can enter information such as scene number, camera roll, or camera angle; and create custom fields to identify character name, shot type, interview style, or other information that might be useful for your project.
You can search for and sort by all of this information when looking to find a particular shot. You can also create custom layouts to view this data at a glance, enabling you to easily see the information most important for any given project.
Finally, you can use some of this information (as well as a variety of other metadata) to automatically rename your clips, turning that filename into a basic identifier to quickly supply essential information and ultimately speed your editing workflow.
Using Hands-Free Metadata
Much of the metadata associated with your clips is generated automatically—either imported directly from the camera or determined by analyzing the clip contents.
Adding this information to your Event (for searching, sorting, filtering, and so on) requires no manual work on your part—no selecting, no typing, no thinking. It’s just there when you need it. This metadata falls into two categories: source media metadata and auto-analysis metadata.
The two types are acquired in different ways and are generally stored in separate places. Source media metadata is present whether you want it or not. Auto-analysis data requires you to make a one-time request, either during import or at any later point.
Viewing Source Media Metadata
Source media metadata includes the basic information about your clips, such as duration, frame size, frame rate, compression type, data rate, and so on. It also may include information about the brand and model of your camera, lens used, focal length, ISO setting, date and time of the recording, and any other data your camera stores with the source clips.
All of this information is visible in the Info Inspector.
1. In the Finder, double-click the APTS FCP X ADV Part 1.sparseimage disk image to mount it.
2. In Final Cut Pro X, in the Event Library, click the disclosure triangle for the APTS FCP X ADV Part 1 mounted drive, and then select the Lesson_01 Event.
If you want to match the settings displayed in the preceding figure, from the Event Library Action pop-up menu, choose:
• Group Events by Date > Don’t Group Events by Date
• Group Clips By > None
• Arrange Clips By > Name
• Arrange Clips By > Ascending
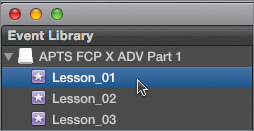
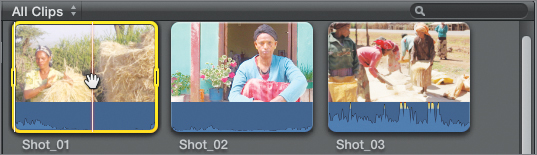
3. In the Event Browser, click Shot_01 to select it.
4. In the toolbar, click the Inspector button to display the Inspector.
5. Click the Info button to open the Info pane of the Inspector (if it’s not already open).

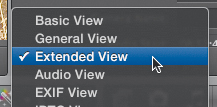
6. From the Metadata View pop-up menu, choose Extended View. The Info Inspector updates to show the extended view.

7. Scroll down in the Inspector to view the various data fields.
Fields such as Media Start, Media End, Media Duration, Frame Size, Video Frame Rate, Codecs, and so on contain hard-coded data gathered from the inherent properties of the file or using information passed from the camera to Final Cut Pro during the import process.
8. In the Event Browser, click Shot_02. The Inspector automatically updates to show the metadata for that clip.

Notice that this clip has a different video codec and frame size. That’s because this clip was transcoded from the original camera file to a file format optimized for editing.
For the most part, source media metadata isn’t used on a day-to-day basis during editing. However, this information can be useful to compare different footage types or to understand the exact nature of your source files (such as the number of native audio channels in a clip, or its frame rate).
Using Auto-Analysis Metadata
A second category of metadata consists of information that Final Cut Pro can identify automatically during import (or later, if you choose to analyze your clips after importing them). Final Cut Pro can examine every frame and locate useful information to speed your editing workflow.
Final Cut Pro performs two main types of analysis to identify visual mistakes the software can correct (such as shaky camerawork or rolling shutter artifacts), and to detect human faces. Facial detection not only attempts to identify when a human face is in the shot, but also how many people appear, and how close their faces are to the camera.
Auto-analysis can be performed during the import process (regardless of how you import files into your Event) by choosing the appropriate options in the Import Settings window, or it can be performed after clips are already imported.
Note
Analysis settings appear in different places, depending on whether you use the “Import from Camera” or Import Files windows. When dragging a clip from the Finder into Final Cut Pro X, the settings in the Import pane of Final Cut Pro X Preferences determine if analysis is performed.
The advantage to performing analysis on import is that all your files are scanned. By the time you are ready to edit, this data is already added to your clips.
The advantage to delaying analysis until after your clips are imported is that you can select specific clips for this time-consuming task, thereby avoiding analysis of clips you’ll never use. Post-import analysis also allows you to choose the specific type of analysis for specific clips. (You don’t need to analyze scenic vistas for human faces, or search for shaky camerawork in interview clips shot with a rock-steady tripod.)
Finding People
In this exercise, you’ll analyze specific clips for specific types of information, beginning with facial recognition.
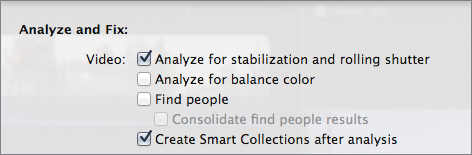
1. Control-click (or right-click) Shot_02, and from the shortcut menu, choose Analyze and Fix.

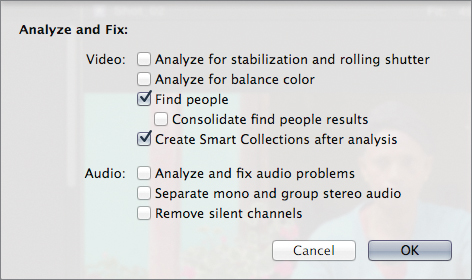
2. In the “Analyze and Fix” sheet, select “Find people” and “Create Smart Collections after analysis.” Click OK.
Note
You could also select “Consolidate find people results” to group any Find People keywords into two-minute sections. This avoids too many short keyworded sections in shots with much variability across a range of footage. For the purpose of this exercise, leave this setting deselected.
Final Cut Pro examines the clips for human faces, and if it finds any, automatically creates a Smart Collection associated with the types of faces it finds. The analysis is performed in the background, so you can continue your work without waiting for the results.
Note
If you skim or play other clips during analysis, the background processing will automatically pause. This helps keep the application fully responsive, but ultimately delays the analysis.
You can monitor the progress of the background analysis to the left of the current timecode in the middle of the toolbar.

3. Click the Background Process button to open the Background Tasks window.

4. Click the disclosure triangle to expand the “Transcoding and Analysis” section and see the progress of the current task.
When the analysis is complete, you’ll notice several things: A purple keyword bar covers the duration of the clip to represent the areas marked with analysis keywords, and the Event Library now contains a folder called People. Inside that folder are two new Smart Collections: Medium Shot and One Person.

Auto-analysis represents the data it collects with these special keywords. Analysis keywords are different from user-generated keywords (which are covered later in this lesson). You cannot modify analysis keywords, and they appear in a different color than user-generated ones.
5. In the Event Library, select the Medium Shot Smart Collection.
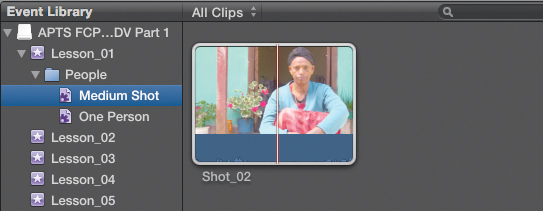
The Smart Collection contains the one clip that contains that keyword. As you analyze more clips from this event, any additional clips with that keyword will automatically appear in that collection.
Although it may seem like magic, the analysis simply examines the pixels of your clips looking for human faces. It can be fooled, both by pixels that look similar to a face, and by the presence of people in the frame who are not facing the camera.
6. In the Event Library, select Lesson_01 to view all the clips.
7. In the Event Browser, select Shot_03, and choose Modify > Analyze and Fix to open the “Analyze and Fix” sheet. The settings remain the same as in step 2.
8. Click OK to begin the analysis.
9. When the analysis is finished, observe the clip in the Event Browser.

The purple line representing the analysis keyword is only present for the second half of the clip. Even though people appear in the first half, none of their faces are clearly visible, so the analysis ignores them.
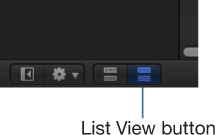
10. Click the List View button to switch the Event Browser to list view. In list view, clips with keywords have disclosure triangles beside their names.
11. Click the Shot_03 disclosure triangle to view the keywords assigned to that clip.
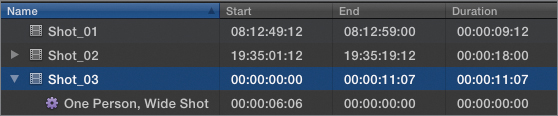
In this case, two keywords were added: One Person and Wide Shot. Final Cut Pro recognized one face, and based on the relative size of the face in the frame determined that the person was far from the camera.
12. Click the One Person keyword. The keyworded area is selected in the filmstrip.

Tip
You can also click the purple line directly in the filmstrip to select the keyworded area.
If you skim the marked section of the clip, you’ll see there are obviously two or more people in the shot; however, Final Cut Pro marked it as One Person because only a single face is clearly visible.
As keywords are added to clips, those keyworded sections are added automatically to the Smart Collections associated with those keywords.
13. In the Event Library, click the One Person Smart Collection. The Smart Collection contains the keyworded area of the clip (as well as the previously marked clip).
Removing Analysis Keywords
If you find that analysis keywords are not accurate, you may choose to remove them to avoid later confusion.
1. In the Event Library, click the formatting icon to view all the clips in that Event.
2. In the Event Browser, select Shot_03, and choose Mark > Remove All Analysis Keywords, or press Control-Option-0, to remove the analysis keywords from the clip.
Note
You can manually add more accurate keywords to better identify this clip, as you’ll learn later in this lesson.
3. In the Event Library, click the Wide Shot Smart Collection.
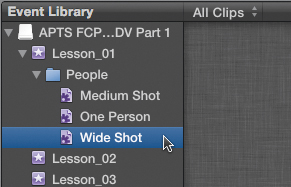
Another clip still appears in the One Person Smart Collection, but removing the analysis keywords from Shot_03 emptied the Wide Shot Smart Collection.
If further analysis tags other clips with this keyword, they will be added to the Smart Collection. However you can also tidy your Event Library by deleting the empty collection.
4. Select the Wide Shot Smart Collection, and press Command-Delete to remove it.
Creating Additional People Keywords
To add to the keywords already created, other people-related keywords may be created depending on the specifics of the shot. If two faces are visible, Final Cut Pro will assign a Two Persons keyword. If more than two faces appear, Final Cut Pro will assign a Group keyword.
Also, in addition to Wide Shot and Medium Shot keywords, close-ups will garner a Close Up Shot keyword.
1. Select the Lesson 01 Event. In the Event Browser, Control-click Shot_04, and from the shortcut menu, choose Analyze and Fix.
2. Leave the settings as they are, and click OK to begin analysis.
3. When the analysis is complete, click the disclosure triangle beside the clip’s name to observe the analysis keywords that were automatically assigned.

Note
Also notice the new Smart Collections added to the People folder in the Event Library.
Finding Shaky Camerawork
Auto-analysis can also identify clip areas where the camera is excessively shaky, or when clips display rolling shutter artifacts (an undesirable visual distortion caused when CMOS camera sensors pan quickly across vertical lines).
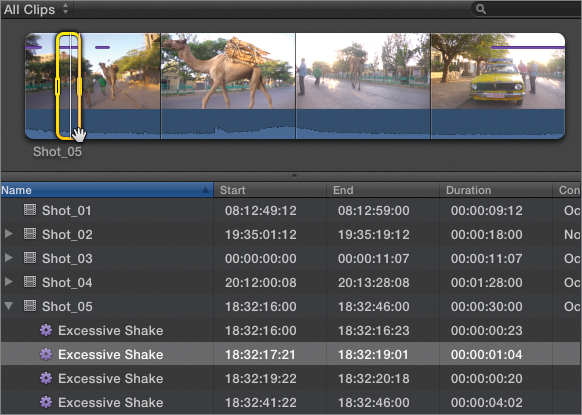
1. In the Event Browser, Control-click Shot_05, and from the shortcut menu, choose “Analyze and Fix.”
2. In the “Analyze and Fix” sheet, select “Analyze for stabilization and rolling shutter,” and deselect “Find people.” (Leave “Create Smart Collections after analysis” enabled.)
3. Click OK to begin the analysis.
4. When the analysis is completed, observe the clip in the Event Browser.

A few small areas are marked with the purple analysis keyword indicator near the beginning of the shot, and one longer section is marked at the very end.
5. Click the second purple bar to select that marked area.
6. Press / (slash) to play the selected range. This is clearly not an area of smooth camerawork.
Note
To stabilize the shaky shot, you must first add the clip to a project, and then adjust the appropriate settings in the Video Inspector.
A new folder and Smart Collections were added to the Event Library for Excessive Shake and Steady Shot. Each of the shaky sections appears in the Excessive Shake Smart Collection. Clips that are not shaky appear in the Steady Shot collection.
Note
Clips that are not yet analyzed also appear in the Steady Shot Smart Collection, so if you’re analyzing clips on an individual basis (as in this lesson), the list in the Steady Shot collection may be inaccurate.
Entering Metadata Manually
In addition to all that automatically generated metadata, you can also manually add additional data about your clips. This information is sometimes visible in the Inspector, and sometimes visible as keywords in the Event Library and Event Browser.
Creating Clip-Based Metadata
Some metadata are stored on a clip-by-clip basis. These primarily include logging information such as general notes, the scene name/number, take number, camera reel, and so on. But you can also add custom data fields.
1. In the Event Browser, select Shot_01.
2. If the Inspector is not currently visible, press Command-4.
3. From the Metadata View pop-up, make sure Extended View is chosen.
4. In the Inspector, in the Notes field, type Walks right to left.
5. In the Scene field, type Nazret Farmer.

6. Click the clip name in the Event Browser to confirm the selection, and deselect the clip.
Note
If this were one of multiple takes or multiple camera angles, you might also have entered a value in the Take or Camera Angle fields.
Entering Data for Multiple Clips
You can simultaneously enter data for more than one clip at a time, which is much quicker than entering data to individual clips. Doing so has the added benefit of ensuring that the entered data are identical across the various clips.
1. In the Event Browser, Shift-click Shot_06, Shot_07, and Shot_08 to select them. The Inspector shows multiple values for the source media metadata fields, but the user-editable fields remain available for text entry.

2. In the Scene field in the Inspector, type Injera Making, which adds the data to all three clips.
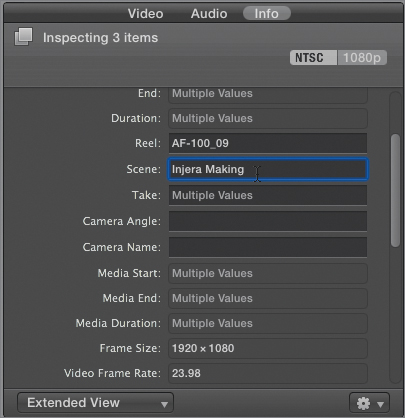
3. In the Event Browser, click any one of the clips to confirm the text entry, and then deselect the group of clips.
Creating Custom Metadata Fields
You can also create custom fields to identify information that may be especially important for your particular Event.
Note
Once added, custom metadata fields are visible across all the Events on your system. Hide or show them by creating custom metadata views, as described later in this lesson.
1. Select any clip in the Event Browser, and from the Inspector Action pop-up menu, choose Add Custom Metadata Field.
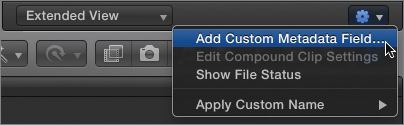
2. In the Name field, type Region, and in the Description field, type Shooting location of scene.
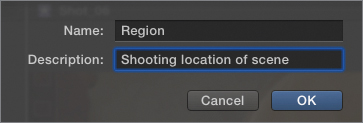
3. Click OK to create the new field and add it to the current view.
Tip
Hover your pointer over a field in the Inspector to see that field’s description (as shown in the figure).

4. Scroll to the bottom of the Inspector to see the new field.
5. In the Event Browser, Shift-click Shot_06, Shot_07, and Shot_08, and in the Region field, type Tigray.
6. In the Event Browser, select Shot_01 and Shot_02, and in the Region field, type Oromia.
Organizing Clip-Based Metadata
As you use custom metadata fields more frequently, you’ll probably want to modify the Inspector’s layout to display frequently used fields near the top of the window.
You can customize the built-in views and even create your own views featuring just those fields you care about most. Doing so quickly increases the usefulness of the Inspector and the metadata displayed within it.
Switching Between Metadata Views
Final Cut Pro X has seven default views, each containing a different set of metadata useful for various types of clips. You can switch between the views on-the-fly.
1. In the Event Browser, select Shot_08.
2. In the Inspector, from the Metadata View pop-up menu, choose Basic View. The basic view hides the Scene, Take, and Camera Angle fields; moves the Camera Name field to the bottom; and otherwise simplifies the view to show a small subset of essential information about your clips.
Other views show data useful for specific media types.
3. From the Metadata View pop-up menu, choose EXIF View. This view displays data that many still-photo cameras use to document the camera settings. You can use this view with a video clip, but it is much more useful when applied to a still photograph.
4. In the Event Browser, select Shot_09 (still image). The EXIF view updates to show the camera data for the image.
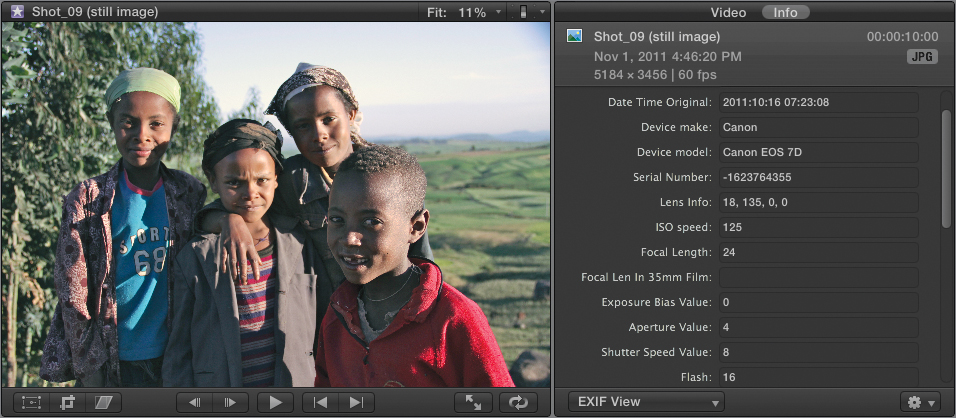
5. Scroll through the Inspector to view the various data fields available in this view.
There’s also a view to display metadata commonly associated with music files.
6. In the Event Browser, select Shot_10 (audio only).
7. In the Inspector, from the Metadata View pop-up, choose Audio View. Scroll through the Inspector to see which fields are filled in.

Note
Metadata can be added to audio clips in a program such as iTunes.
Customizing Metadata Views
The fields in many of these views cannot be edited within Final Cut Pro. The information is stored in the media files on the disk. However, as you add more of your own editable fields, you can modify the layouts and even create your own views.
1. In the Event Browser, select Shot_01.
2. In the Inspector, from the Metadata View pop-up menu, choose General View. This view shows a standard collection of commonly used metadata fields.
3. From the Metadata View pop-up menu, choose Edit Metadata View to open the Metadata Views window.

This window shows all the possible metadata fields and allows you to decide which fields are visible in a view.
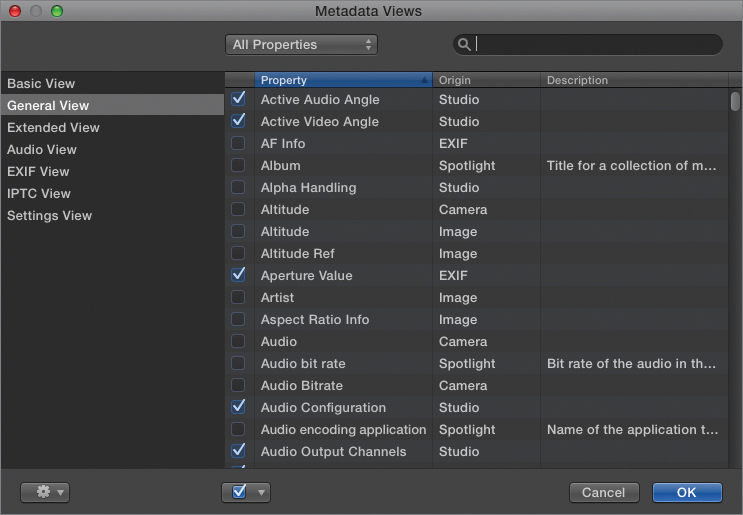
The list on the left shows the available views. The General View is currently selected. In the list in the center of the window, checkmarks indicate fields that are displayed in the Inspector for the selected view.
4. In the search field in the upper right, type date. The list of parameters is filtered to show only fields containing the word date.

5. From the Properties pop-up menu, choose Camera Properties. The list is filtered to show only camera-generated data including the word date.

6. Select the Shooting Date Start property. That field will now appear in the Inspector when the general view is selected.
Note
The Inspector won’t update until you close the Metadata Views window.
7. In the search field, click the Reset button (X) to clear the text filter.
8. From the Properties pop-up menu, choose Custom Properties. The filtered list shows just the Region field you created earlier.

Note
When you create a custom field, it is added to the currently selected view. Because you created the Region field while looking at the extended view, the field is enabled in that view, but disabled in the other views.
9. Select the Region field checkbox to add the field to the current view.
10. Control-click the Region field, and choose Edit Custom Metadata Field from the shortcut menu.

The sheet opens at the top of the window, allowing you to modify the field’s name or description. In this example you are not required to make any changes.
11. Click OK to close the sheet without making any changes.
Tip
To delete a custom metadata field, Control-click it in the Metadata Views window, and choose Delete Custom Metadata Field from the shortcut menu.
Next, you’ll hide the fields you’re not using so that the view contains only the most useful information.
12. From the Properties menu, choose Selected Properties. The window updates to show only the active fields in the selected view.
Note
Some active fields will only appear in the Inspector when appropriate media types (video, still, or audio) are selected.
13. Deselect the Camera Angle and Codecs fields.
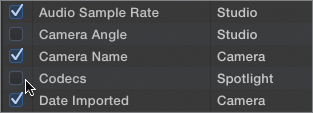
14. Click OK.
The Metadata Views window closes, and the Inspector updates to show the new collection of fields you have selected.
Managing Metadata Views
The changes you made in the previous exercise were helpful, but you were modifying one of the default views. This modified view might confuse another editor who is used to the default set of fields in the general view. To avoid any confusion, you can convert this modified view into a custom view and restore the general view to its default settings.
1. In the Inspector, from the Metadata View pop-up menu, choose Save Metadata View As to open the Save As sheet.
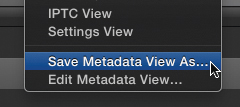
2. Type awesome new view into the Name field, and click OK.
The custom view you created now has a unique name; but at the moment, it’s also a duplicate of the general view you previously modified.
3. From the Metadata View pop-up menu, choose Edit Metadata View to open the Metadata Views window.
4. In the left column, select General View.
5. From the Action pop-up menu, choose Restore Metadata View to Default.
The general view is reset to contain its default fields.
The Action pop-up menu also allows you to create new custom views or delete custom views. You cannot delete the default views.
6. Click OK to close the window.
Tip
You can also delete fields from a particular view without opening the Metadata Views window. Control-click a field in the Inspector, and from the shortcut menu, choose Remove From [view name].

Using Intraclip-Based Metadata
You’re probably already using the last category of metadata quite often: Rating clips as Favorites or Rejects, and adding custom keywords using the Keyword Editor and its associated shortcuts.
These methods of identifying the contents of your clips are intuitive and user-friendly, but they’re also incredibly powerful and constitute a significant part of Final Cut Pro X metadata.
Note
If you’re already familiar with rating clips as Favorites or Rejects, you may skip this section.
Rating Clips
Any clip or portion of a clip can be rated as a Favorite or a Reject. You can create ratings in a variety of ways.
In this exercise, you’ll identify the portion of the clip you would use if you were going to edit the clip into a project. Because clip selections are discarded every time you deselect a clip, you can apply a Favorite rating to create a selection that sticks around.
Contrarily, you can use the Reject rating to identify a portion of the clip you want to avoid using when it comes time to edit the clip into a project.
1. In the Event Browser, select Shot_11. In this shot, a farmer is unwrapping an ear of corn.
2. Play the clip by pressing L. At about 14 seconds, you begin to see the corn kernels. Press I to mark a start point there.

3. Keep playing the clip, and when the ear is fully unwrapped (at around 23 seconds), press O to mark the end of the selection.

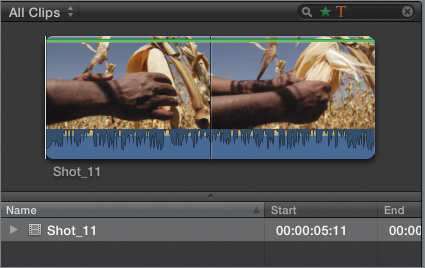
4. Mark the selected area as a Favorite by clicking the Favorite button in the toolbar, or by pressing F. A green bar appears in the filmstrip to indicate the rated area.
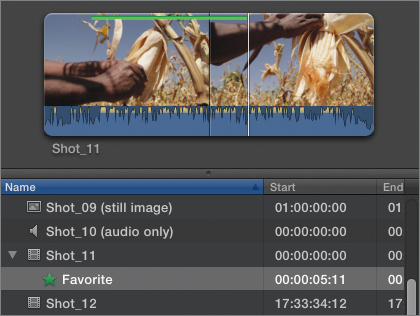
Tip
To match the preceding figure, deselect the clip (click outside of the filmstrip in the Event Browser) to make it easier to see the green Favorite bar.
5. Press Option-I to change the start point to the beginning of the clip.
An end point is automatically chosen for you, but you can ignore that and set your own.
6. Play forward until you hear the cinematographer say, “OK,” (at around 1:15); and press O to set an end point at that point.
7. Mark this area as a Reject by clicking the Reject button in the toolbar, or pressing the Delete key.

A red bar appears in the filmstrip to indicate the rejected area.
Filtering by Rating
Final Cut Pro allows you to restrict the Event Browser view to clips of certain ratings, which you might do to hide rejected footage or to limit the view to just those clip areas that have not yet been viewed.
1. From the Filter pop-up menu in the upper-left corner of the Event Browser, choose Hide Rejected, or press Control-H.
The portion of Shot_11 you rejected is hidden.
Note
If you have rejected areas in the middle of a clip and choose to hide rejected clips, the remaining clip may be split into multiple instances, each with the same clip name.
2. From the Filter pop-up menu, choose Rejected, or press Control-Delete.

The Event Browser updates to show only the Rejected clip. You can also choose to view only Favorites, or clips without any rating or keywords.
3. From the Filter pop-up menu, choose All Clips, or press Control-C.
The view returns to showing all clips, and the Rejected or Favorite areas are indicated by red and green lines in the filmstrip.
Tip
You can also view Favorite and Rejected sections by expanding the disclosure triangle to the left of the name of a rated clip when in list view.
Adding Keywords
Identifying your most (or least) favorite parts of clips is helpful, but it can be a bit of an all-or-nothing approach. In many cases, you will want to add much more descriptive or elaborate identifiers using keywords.
In this exercise, you’ll mark the specific ranges of a clip so that later—when you’re ready to edit it into a project—you’ll have easy access to the most useful sections of the clip.
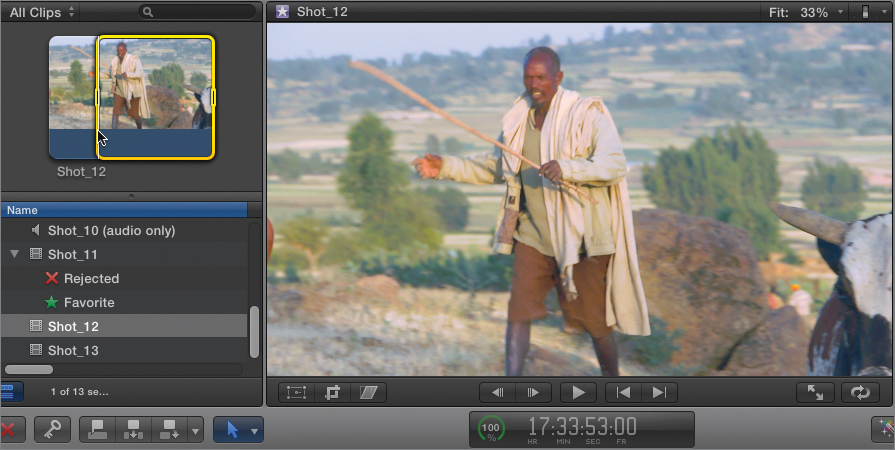
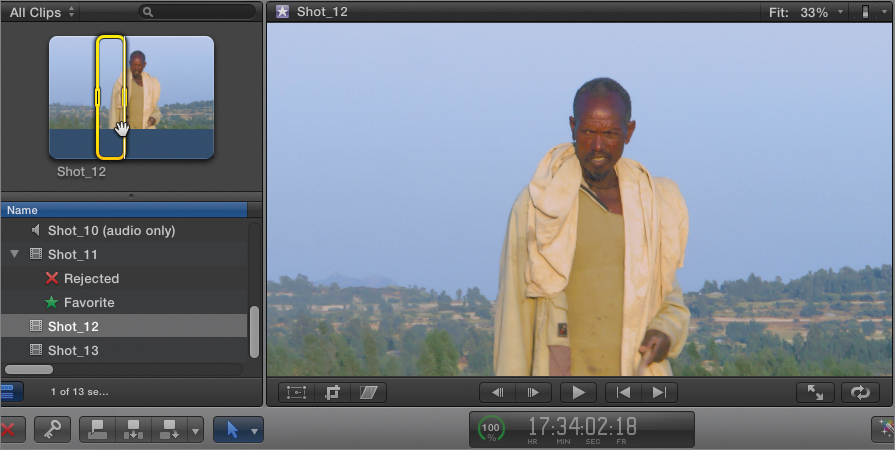
1. In the Event Browser, select Shot_12 and play it. This shot shows a shepherd leading his oxen down the road.
2. Play the clip until the oxen clear the frame and you have a clear full shot of the shepherd (around 17:33;53:00). Press I to set a start point at that point.
3. Play forward until just before the camera pans away from the shepherd (at around 17:34:03:00), and press O to mark the end of the selection.
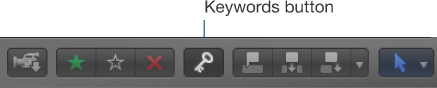
4. In the toolbar, click the Keywords button, or press Command-K, to open the Keyword Editor.
5. Type Full shot shepherd, and press Return to apply the keyword to the selected section of the clip.
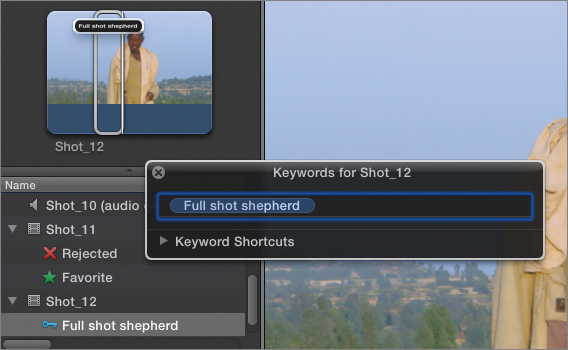
A Keyword Collection is also added to the Event in the Event Library. If you later mark any other bits of your footage with the same keyword, that new section will appear inside the Keyword Collection alongside this clip.
Because grouping clips using identical keywords can be very helpful, creating multiple simple keywords instead of a single complex keyword is often best.
For example, rather than marking this area with one Full shot shepherd keyword, you could label it with two keywords, Full shot and Shepherd. This approach makes it easier to later identify and locate any clip that contains a shepherd (even in close-ups or medium shots); as well as any full shots, even if they’re of firemen, musicians, or anteaters. Let’s make this change.
6. With Shot_12 still selected, in the Keyword Editor, click the keyword item (the words Full shot shepherd), and press Delete. The keyword is deleted and vanishes with a “poof.”

Tip
You can also press Control-0 at any point to delete all keywords from a selected clip.
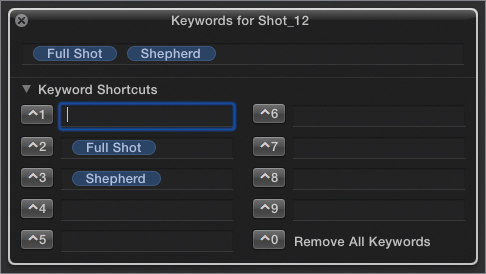
7. In the Keyword Editor, type Full Shot, and press Return. Then type Shepherd, and press Return.
Tip
Final Cut Pro will try to auto-complete your text entry to match the keyword you previously used. Just press Delete when the word shepherd appears to create the Full Shot keyword.
Both individual keywords are added to the marked section of the clip.
8. Click the disclosure triangle next to the Keyword Shortcuts section to expand the Keyword Editor.
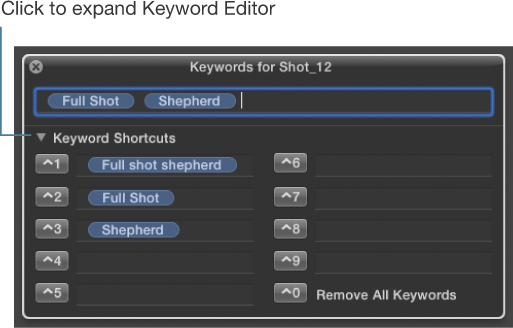
As you create keywords, they are automatically assigned to shortcut keys. The three keywords you created are assigned to the first three shortcut slots.
You’re very unlikely to use the Full shot shepherd keyword in the future, so you certainly don’t need it assigned to a shortcut.
9. Click the Full shot shepherd keyword in the Control-1 shortcut slot, and press Delete to remove it from the slot.
Next, you’ll identify a different section of the clip, and mark it with a different keyword.
10. Play the clip forward to around 17:34:10:00. At that point, the shot focuses on a group of women and children walking down the road.

11. Press I to mark the start of a selection. The end of the media is automatically marked as the end of the selection.
12. In the Keyword Editor, type women, and press Return. Then type children, and press Return. The two keywords are applied to this section of the clip and also added to the next two available shortcut slots in the Keyword Editor.

When keywords are assigned to shortcut slots, you can easily apply them to other clips, even without having the Keyword Editor open.
13. In the Event Browser, select Shot_04.
14. Close the Keyword Editor.
Note
If you’ve used the Keyword Editor prior to beginning this lesson, the shortcuts in your Keyword Editor may not match those listed here.
15. Press Control-4 to add the children keyword to Shot_04. This technique allows you to very quickly add common keywords to your footage.
16. In the Event Library, click the children Keyword Collection. The footage containing that keyword appears in the collection.

Organizing Keywords
As you create more keywords, the Keyword Collections in the Event Library can create a bit of a mess, which can make finding what you need a bit harder.
To manage all the Keyword Collections, you can create folders in which to group Keyword Collections and Smart Collections.
Note
Folders cannot contain individual clips. They can hold only collections.
You already have two folders in your Event: the People folder, and the Stabilization folder created automatically to hold the analysis keywords you generated earlier in the lesson.
In this exercise, you’ll create a folder to group the new keywords you added in the previous section.
1. In the Event Library, select the Lesson_01 Event, and choose File > New Folder, or press Command-Shift-N. A new, untitled folder appears within the Event, and its name is automatically highlighted so you can immediately name it.
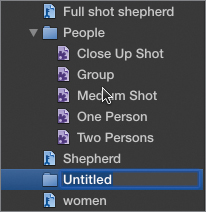
2. Type Humanfolk to give the folder a unique name.
3. Drag the children collection, the women collection, and the Shepherd collection into the Humanfolk folder.

Notice that a Full shot shepherd Keyword Collection still appears in the Event, even though you earlier deleted the one use of that keyword. Keyword collections are never automatically deleted. Even if they contain no clips, they remain in case you later assign their namesake keyword.
However, in this case, you don’t want that unused collection cluttering your Event Library. Let’s get rid of it.
4. Select the Full shot shepherd collection, and press Command-Delete to delete the collection.
Note
Be careful when deleting Keyword Collections! Deleting a Keyword Collection automatically deletes any instance of that keyword in the Event.
Adding Markers
You have one more device to add metadata to your clips: markers. These are indicators associated with a specific frame within a shot. Markers can be used in the Event Browser and in the Timeline when you’re editing projects. For the purpose of this exercise, you’ll add markers in the Event Browser.
1. In the Event Library, select Shot_06. This shot shows a woman making an Ethiopian staple bread called injera. The bread is made by pouring a thin, fermented teff-based batter onto a hot griddle.
2. Play the clip until the batter is pouring onto the griddle (approximately 17:46:08:00).

3. Press M to add a marker to the clip at that frame.

4. Press M again to open the Marker window.

5. In the Marker window, type Pouring batter, and press Return, or click Done.
6. Play forward in the clip until the woman lowers the lid over the griddle (at approximately 17:46:38:00).
7. Press Option-M to add a new marker at that point, and to open the Marker window.
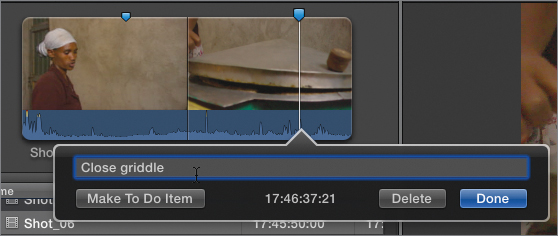
8. Type Close griddle, and press Return, or click Done.
9. Select Shot_07 and add similar markers (Pouring batter at 17:49:13:00 and Close griddle at 17:49:39:00).
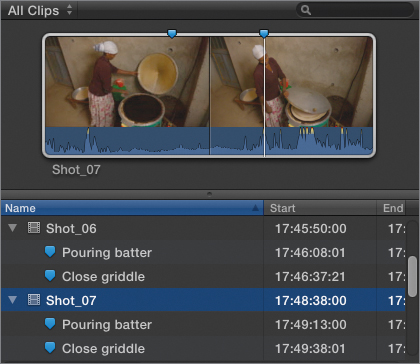
You can add as many markers as you like. They’ll make it easier to quickly line up the similar action in multiple angles when the time comes to edit the shots together.
Filtering Clips
The main reason you enter all this metadata is to help you quickly find the precise clip you’re looking for when you need it. Rather than scrolling through large lists of clips, metadata allow you to instantly hone in on the right shot.
One of the most powerful ways to do this is to utilize the built-in filtering capabilities of the Final Cut Pro Event Browser. You can filter clips based on almost any combination of metadata, regardless of where they are stored. For example, using the metadata in this project, you could search for Favorite shots of shepherds in Tigray from Reel 04 that were imported at least three months ago.
Searching for Text
Before you combine all the types of metadata, you’ll start off with some simple search examples. To start, you’ll search for some text to find the specific clips you might need for editing this footage into a real-world project.
The text you search for can appear in the name of the clip, in the Notes field in the Inspector, or in the marker text.
1. In the Event Library, select the Lesson_01 Event.
2. In the search field of the Event Browser, type 02. The Event Browser is instantly filtered to show two clips: Shot_02 (which has the number 02 in its name), and Shot_07 (which has the number 02 in the Take field in the Inspector).

3. Click the Reset button (X) to clear the search field.
4. In the search field, type walks. The Event Browser updates to show the clip containing the word Walks in the Notes field in the Inspector.
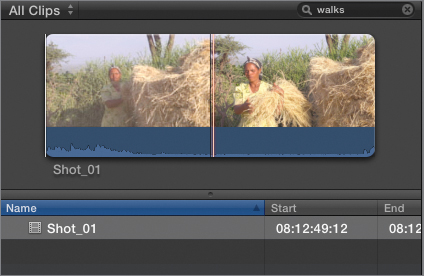
Note
This text was entered earlier in this lesson. If you didn’t complete the earlier part of this lesson, this search won’t work.
5. Click the Reset button (X) to clear the search field.
6. Type batter in the search field. The two clips with markers containing that word appear in the Event Browser.
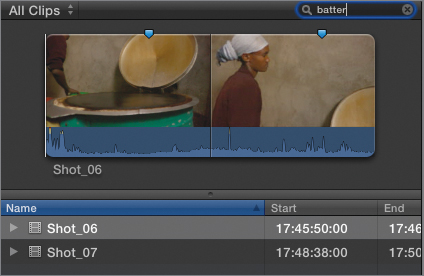
7. Click the disclosure triangle to reveal the relevant markers.

This method allows you to very quickly find clips and markers based on their names.
Note
You can automatically rename your clips in a variety of ways based on other metadata in the project. For details, see the “Renaming Clips” section later in this lesson.
Searching for Metadata
You can search for any of the metadata stored in your Event, including metadata displayed in the Inspector and data stored as ratings and keywords. Furthermore, you can specify the terms of the search, omit criteria, limit criteria, and so much more. You can take advantage of all this mega-metadata power in the Filter window.
1. To open the Filter window, do one of the following:
• In the search field, click the magnifying glass icon.
• Press Command-F.
• Choose Edit > Find.
By default the Filter window contains the same text that was in the search field, but you now have the option to be much more specific in your search.
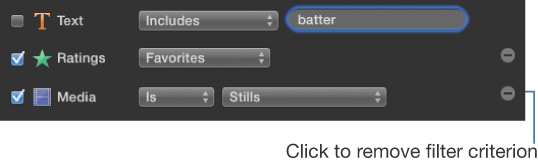
2. From the Includes pop-up menu, choose Does Not Include.

The Event Browser instantly updates, now displaying all the clips that do not include the current search term.
3. Click the Add Rule (+) button, and choose Ratings to add a Ratings search term to the window.

Now, you are searching for clips that are Favorites and also that do not include the search term batter.
4. In the upper-left corner, choose Any from the pop-up menu.

You are now searching for any clip that is a favorite OR does not have the search term.
5. From the Does Not Include pop-up menu, choose Includes.

The Event Browser updates to show clips that have a Favorite rating or include the text search term batter. This includes the two clips with the batter markers plus the one shot with a Favorite rating.
6. Deselect the checkbox to the left of the Text search term.
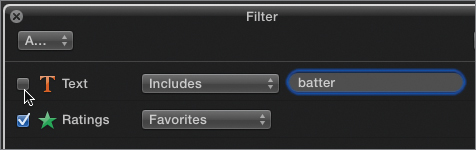
The text is now excluded from the search, and the Event Browser immediately reflects the change by showing only those clips that meet this new criteria.
7. Click the Add Rule (+) button, and choose Media Type to add a Media search term to the Filter window.
8. Set the Media Type pop-up to Stills.
The still image is added to the find results in the Event Browser.
9. Click the Remove (–) button to the right of the Media Type search term.
The Media item is deleted from the view, and the Browser updates accordingly.
10. Click the Add Rule (+) button, and choose Keywords.

The Keywords search term is added to the filter list. Each of the keywords in the project appears with a checkbox next to it. Select or deselect the specific keywords to show or hide those keywords in the list.
11. From the Checkmark pop-up menu, choose Uncheck All. Then select the children checkbox.

Only shots with the children keyword (or Favorites) appear in the Event Browser.
12. Click the Remove (–) button to the right of the Keywords search term.
13. Click the Add Rule button, and choose People.

The People search term appears in the list and works exactly like the Keywords search term. You can select specific keywords and choose whether to search for all or any of the selected terms.
Choosing Include All locates clips that contain all the criteria. If you selected both Group and Close Up Shot, only clips that have the Group keyword AND the Close Up Shot keyword would appear in the Event Browser.
Choosing Include Any locates clips that have either the Group keyword OR the Close Up Shot keyword. Generally this search will yield more results than choosing All.
14. Click the Remove (–) button to the right of the People search term.
15. Click the Add Rule (+) button, and choose Format Info.

This search term allows you to search the metadata fields that appear in the Inspector.
16. Click the Reel pop-up menu, and type AF-100_10 to add clips from that reel to the search results.

You can search for specific text in the Reel, Scene, Take, Camera Angle, or Camera Name fields; or you can search for specific information about the number of audio tracks, frame size, frame rate, and audio sample rate.
17. Set the pop-up menu to Scene, and type Injera in the search field to find clips containing that search term.
You can add even more criteria, searching based on date or role.
Creating Smart Collections
Once you create a complex search filter, you can save the search as a Smart Collection. Not only does this allow you to return to it at a later date, but because it’s a Smart Collection, if any clips qualify for the search terms they are automatically added to the collection. (Or if they no longer qualify, they’re removed.) So if you add (or remove) keywords, markers, or other metadata, that information is automatically evaluated to see if the affected clips meet the search criteria for your saved Smart Collection. Clips that match show up in the Smart Collection, and clips that don’t do not.
1. In the Filter window, click New Smart Collection.

The Smart Collection is added to the Event Library, and the name is highlighted so you can immediately add a memorable name.

2. Type Favorites & Injera, and press Return to name the Smart Collection.
3. Select the Lesson_01 Event, clear the search field, and in the Event Browser, select Shot_04.
4. Press F to mark the clip as a Favorite.
5. In the Event Library, click the Favorites & Injera collection.
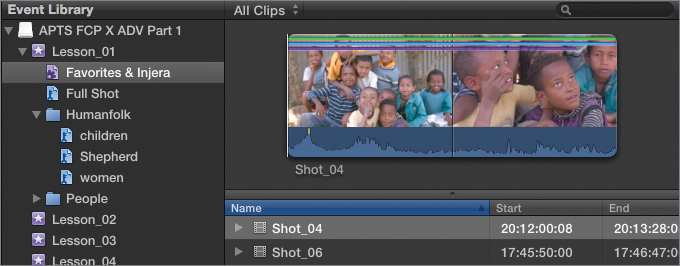
Shot_04 now appears in the list.
Clearing the Filter Window
Unless you create a Smart Collection, search terms continue to filter an Event even when you close the Filter window.
Note
Various icons in the search field represent the types of search terms.
To clear the filter, you must manually delete or disable the various items in the filter window, or you can clear the whole search at once.
1. In the search field, click the Reset button (X) to clear the search criteria.
2. Note that the browser updates to reflect the filter removal.
Renaming Clips
Another benefit of the embedded metadata in Final Cut Pro is the ability to nondestructively rename clips using a wide range of criteria. You can rename clips using the data in the Scene and Take fields, the date and time the clip was created, the original filename created by the camera, or any number of custom metadata combinations.
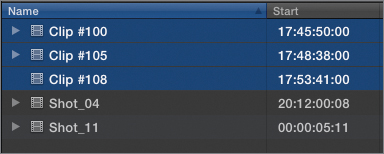
1. In the Event Browser, Shift-click Shot_06, Shot_07, and Shot_08 to select them.

2. In the Inspector, from the Action pop-up menu, choose Apply Custom Name > Original Name from Camera.
The clips are renamed based on the name provided by the camera.
3. From the Action pop-up menu, choose Apply Custom Name > Scene/Shot/Take/Angle.

The clips are renamed based on the information in the Scene, Take, and Angle fields.
Note
These clips don’t have any data in the Angle field, so that info is ignored.
Creating Custom Naming Options
In addition to switching between the preset naming options, you can create custom naming schemes.
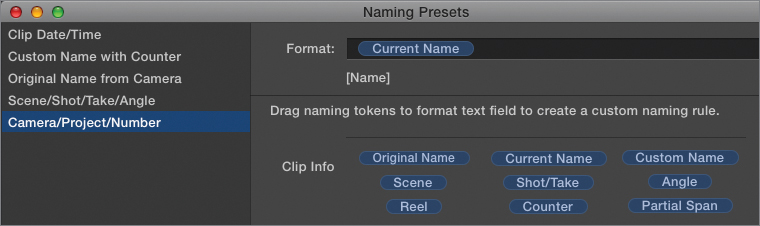
1. From the Inspector Action pop-up menu, choose Apply Custom Name > Edit to open the Naming Presets window.

In this window, you can modify any of the existing naming presets, or create new ones by stringing together naming “tokens” based on the metadata associated with the clips.
2. Click various items in the list on the left and observe how the tokens are represented in the Format field on the right. Each name comprises a collection of the tokens from the underlying categories. A preview of the name appears beneath the Format field.
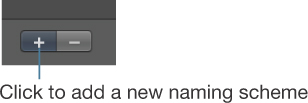
3. Click the Add (+) button to create a new naming scheme. A new Untitled item is added to the list on the left, highlighted and ready for you to give it a custom name.
Tip
You can drag naming presets to rearrange their order in the list and they will appear in the new order in the Inspector Action pop-up menu.
4. Name the new naming scheme Camera/Project/Number.
Tip
You can also open the window with a new scheme already created by choosing Apply Custom Name > New from the Inspector Action pop-up menu.
5. In the Format field, select the Current Name token, and press Delete.
6. Drag the Manufacturer token from the Camera section into the Format field.

7. In the Format field, type a hyphen (–) and a space.

Note
You can add any characters you want, but remember these will be the same for every clip.
8. Drag the Custom Name token from the Clip Info section into the Format field. When using the Custom Name token, type the name you want in the Custom Name field near the bottom of the window.

9. In the Custom Name field, type Ethiopia.

10. In the Format field, type another hyphen (–) and space after the Custom Name token.
11. Drag the Counter token from the Clip Info section into the Format field. When you use a counter, you can specify the number of digits and starting number at the bottom of the window.
12. Leave the “Incrementing counter starting at” field set to 1, and set “# of digits” to 2.

13. Click OK to close the window.
14. With the three clips still selected in the Event Browser, from the Inspector Action pop-up menu, choose Apply Custom Name > Camera/Project/Number.

The custom name is applied to the clips. At any point you can switch between any of the naming schemes or create new ones.
Lesson Review
1. Where is metadata viewed in the Final Cut Pro interface?
2. What clip characteristics can auto-analysis detect?
3. Where are analysis keywords displayed?
4. Can you enter metadata for more than one clip at a time?
5. How can you enter metadata that doesn’t fit in one of the preexisting data fields?
6. Can you modify one of the existing Inspector views?
7. Where can you control which data fields are visible in metadata views?
8. Can you attach multiple keywords to the same clip selection?
9. Can you search for clips based on text entered in the Notes field in the Inspector?
10. If you set the Filter window to All, will the results find clips that meet any one of the listed search terms?
11. Can you search for multiple people keywords (analysis keywords) at the same time?
12. True or false: Renaming clips using the Apply Custom Naming command always permanently replaces the existing name.
Answers
1. In the Info Inspector, in the Event Library, and in the Event Browser
2. Shaky camerawork, rolling shutter artifacts, and people
3. In the Event Library as Keyword Collections, and in the Event Browser when in list view
4. You can enter clip-based metadata (fields in the Inspector) for all selected clips.
5. Create a custom metadata field using the Action pop-up menu in the Inspector.
6. Yes. You can modify any of the existing views or create custom views.
7. Turn off or on specific fields in the Metadata Views window.
8. Yes. You can add as many keywords to the same clip selection as you like.
9. Yes. Text searches find clips containing the search term in the marker text, or in the Name, Notes, or Scene fields.
10. No. All locates only those clips that contain all the search terms.
11. Yes
12. False
Keyboard Shortcuts
