Lesson 14. Advanced Sharing and Sending to Compressor
In this final lesson, you’ll discover some of the advanced sharing options available in Final Cut Pro X. In particular, you’ll learn about exporting XML, exporting media using roles, and sending your projects to Compressor for customized output in a wide variety of formats.
Additionally, you’ll use Compressor to perform other essential tasks such as inserting closed captioning and creating surround sound assets—both of which are common deliverables in professional workflows.
More Info
Basic sharing techniques are covered extensively in Apple Pro Training Series: Final Cut Pro X by Diana Weynand (Peachpit Press). You’re encouraged to consult that book for additional information on sharing to disc, to the web, to Apple devices, or to other formats.
Exporting Projects and Media for Finishing
Final Cut Pro X provides many tools for polishing and finishing your project, but you may sometimes find it desirable to export project data and media to other applications for specialized modification.
This section covers two Final Cut Pro X workflows that incorporate other applications: XML export and import of project data; and roles, which allow the structured export of categorized media.
Using XML Roundtrips
XML (extensible markup language) is a file format that writes structured data that can be read by other applications. Final Cut Pro X can export and import a type of XML file that lets you exchange project data with other postproduction applications supporting the same XML format.
This feature allows you to use third-party applications for particular tasks. For example, Assisted Editing publishes two applications, 7toX and Xto7, that let you exchange projects between Final Cut Pro 7 and Final Cut Pro X, a conversion not natively supported in Final Cut Pro X.
XML project exchange also enables “roundtrips” between Final Cut Pro X and other applications such as DaVinci Resolve, a dedicated color correction application with an extensive toolset and focused user interface specifically designed for grading different types of content. An XML-format project from Final Cut Pro X imported into DaVinci Resolve is linked to the same source media as the original project; and Resolve allows you to color correct your project more intensively.
When you’re finished working in Resolve, you render out a new set of color-corrected media, along with a brand new XML file to pass your changes back to Final Cut Pro X. This is why it’s called a roundtrip. You move your project from Final Cut Pro to another application and back again. After importing the new XML file into Final Cut Pro X, you have an updated project that uses the new Resolve-modified media ready for export to QuickTime, web delivery, disk authoring, or whatever purpose or format you have in mind.
Exporting XML to Other Applications
To initiate a roundtrip, you need to first export an XML file from Final Cut Pro X. In this exercise, you’ll learn how to perform this simple procedure.
1. Open the Lesson 14 folder, and select the Hero Scene for Grading project.
2. Choose File > Export XML.
3. In the Export Final Cut XML dialog, type a name into the Save As field, choose a location for the saved file, and click Save.

That’s all there is to it. You can now import the resulting XML file into any application that supports the Final Cut Pro X XML format.
Note
If you’d like to experiment by importing this XML file into DaVinci Resolve, a free version—DaVinci Resolve Lite—is available for download from www.blackmagic-design.com/products/davinciresolve/.
Importing XML from Other Applications
Importing XML to Final Cut Pro X works identically whether you’re importing project data that originated in another application, or importing project data originally exported from Final Cut Pro X as part of a roundtrip operation.
In a roundtrip workflow, after you’ve completed your work in the secondary application, new media is typically created and an updated XML file is exported that references the altered media.
In the following exercise, you’ll import the previously exported project, but accessing a color-corrected version of the XML and media that was generated in DaVinci Resolve.
1. Select the Lesson 14 folder.
2. Choose File > Import > XML.
3. In the Import XML dialog, navigate to APTS_FCP_X_Part_3/Lesson 14 Additions/Graded Media and XML/. Choose Hero Scene for Grading (Resolve).fcpxml, and click Import.
A new project using the selected XML file is created and opened. The media linked to by this project was graded and rendered in DaVinci Resolve.
The aggressive grade makes it easy to see the externally affected media.
Exporting Media Using Roles
One of your principal finishing tasks is to sweeten your program’s audio. As you’ve learned, this can involve segmenting the program audio to split out dialogue from ambience and effects, re-editing dialogue clips to fix small problems with enunciation, adding additional sound effects, editing music, and laying down ambience beds. All of these changes are intended to provide a fuller, richer sonic experience.
The Magnetic Timeline, for all its convenience, makes it difficult to organize multiple types of audio clips as you do this work. Fortunately, Final Cut Pro X provides a unique interface for assigning roles to each of the clips in your project to sort them by type. Roles let you define the type of audio or video that each clip contains. For example, you can assign a Music role to every piece of music in your project to identify those clips.
Once you’ve assigned the standard or customized roles to your clips, you can use them to manage your Timeline while you do other tasks.
Furthermore, after you’ve completed your sound design and sweetening in Final Cut Pro X, you can use the assigned roles to export stems—separately mixed-down audio clips—for each role you’ve assigned. You can export fully mixed stems as a set of dialogue-music-effects stems for deliverable handoffs, or you can export custom sets of stems for handoff to an audio specialist using a digital audio workstation (DAW) to further enhance the project audio.
In the following exercise, you’ll assign roles, create new roles, use roles for Timeline organization, and export roles as separate audio stems.
1. Make sure that you mount both the APTS_FCP_X_Part_1 and APTS_FCP_X_Part_3 disk images before proceeding with the exercises in this chapter. The Burnt Dinner Finishing project uses media from both images.
2. Open the Burnt Dinner Finishing project, located in the Lesson_14 folder.
Scroll down to see that this project has some additional audio edited into the Timeline to create a richer sonic environment. You’ll use roles to assign a specific category to each piece of audio so that you can export a structured series of audio tracks as individual audio files.
Notice that the source audio from each clip was detached and chopped up using the Blade tool, thereby separating actor dialogue from ambience and sound effects. In this process, the editor already assigned Dialogue and Effects roles to the majority of these clips, so you don’t have to worry about them.
First, you’ll assign roles to the music clips.
3. Select all the clips directly beneath the video clips. By coincidence, these are all the music segments edited into the project.

4. Choose Modify > Assign Roles > Music, or press Control-Option-M.
By default, the Assign Roles submenu includes three roles: Dialogue, Effects, and Music. When this project was created, the editor added a custom role, Unassigned, to the new audio clips he imported. This is the fourth role you need to reassign.
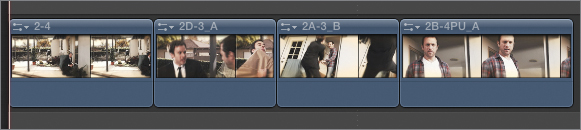
5. Select the two clips labeled Shot_08, the two short clips immediately underneath them (Door Knob 02 and Door 05), and the tiny Switch 3 clip at approximately 00:00:26:00 on the Timeline in the fourth row of clips from the top.

6. Because these are sound effects clips—even though the Shot_08 clips were recorded along with video—choose Modify > Assign Roles > Effects, or press Control-Option-E to assign the Effects role to them.
7. Select the two large Air Conditioner 03 clips.
Ordinarily, these clips would be assigned the Effects role, but in this case there’s some controversy as to how much of this background rumble should be included with the completed mix. The decision was made to give this clip a separate role so a final decision can be made later in a better mixing environment.
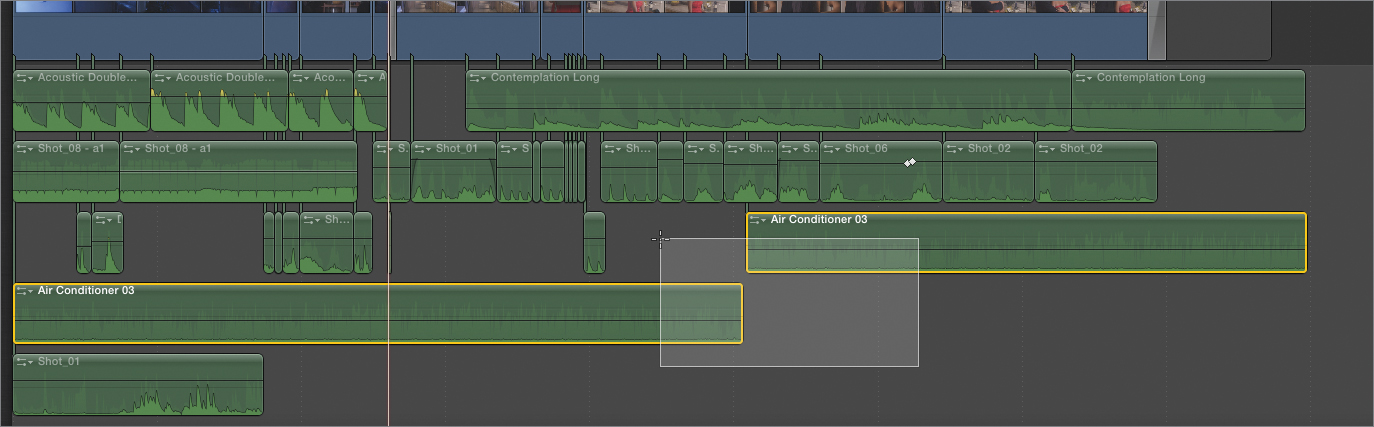
8. Choose Modify > Edit Roles to open the Role Editor window.
You can add roles for clip categorization in two ways. You can add a role to the list at the left, or you can add a subrole to the currently selected role (that is, subcategories of effects). In this case, let’s create a new role.
9. From the Add (+) pop-up menu at the bottom of the Roles list, choose New Audio Role. A new audio role appears in the list named New Audio Role, and it’s selected so you can easily change its default name.
10. Type Ambience, press Return, and click OK.
11. Now that you’ve created the new role, assign it to the selected clips by choosing Modify > Assign Roles > Ambience.
With roles assigned to all the audio clips in the edit, you can use those roles to dynamically reorganize the Timeline while you work.
12. Click the Timeline Index button to show the Timeline Index to the left of the Timeline.
13. At the top of the index list, click Roles. A list of roles appears. Three controls are attached to each role that let you perform various functions.
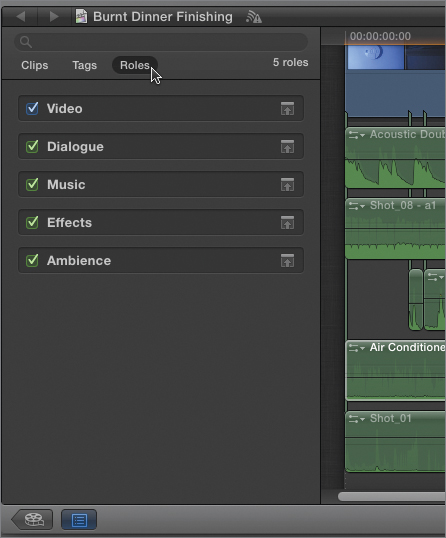
14. Click the name of the Dialogue role to highlight every dialogue clip in the Timeline. Any functions that act upon selected clips can now be performed on just the selected audio in the Timeline.
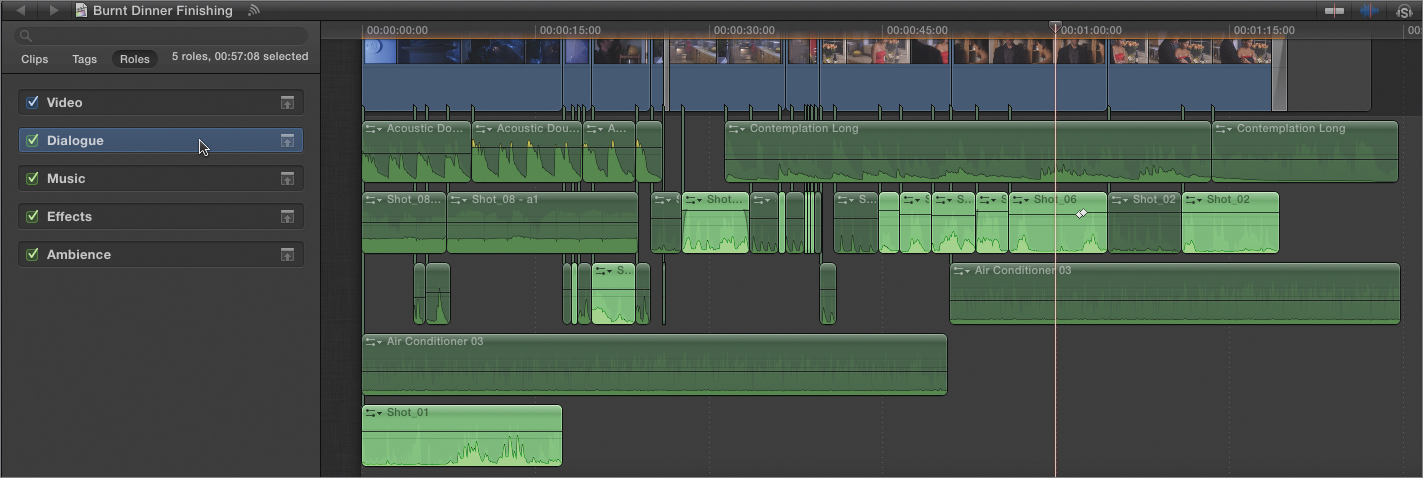
15. Deselect the role by clicking underneath the Roles list. Now all clips should be deselected.
16. Deselect the Dialogue and Music roles checkboxes. This turns those roles off, which disables all clips that have been assigned them.

17. Play through the project from the beginning, and you’ll hear only the sound effects and ambience. Because the clips assigned Dialogue and Music roles are disabled, they are muted.
18. Select all the roles checkboxes, and click the Minimize button at the right end of the Music and Ambience roles entries in the list.
All clips that are assigned the Music and Ambience roles are reduced in height to make room in the Timeline for other clips you may want to add.

Now that you’ve seen how to use roles to manage clips in the Timeline, you’re ready to use roles to export stems, or separated audio tracks as individual audio files, corresponding to each role you assigned.
19. Turn off the Minimize controls, close the Timeline Index, and then return to the Project Library.
20. Select the Burnt Dinner Finishing project, and choose Share > Export Media.
21. In the Export sheet, from the Export pop-up menu, choose Audio Roles Only As Separate Files.
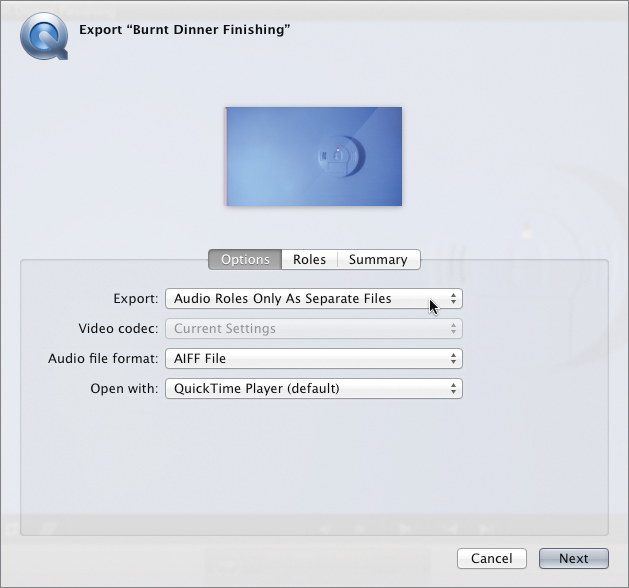
Several options are available when exporting clips with assigned roles; but when you’re handing off audio stems to someone else, the most flexible method is to export each role as a separate AIFF or WAVE audio file.
22. Click Next, enter a name and choose a destination for the resulting files, and click Save. By default, four audio files are created and opened in the QuickTime Player.
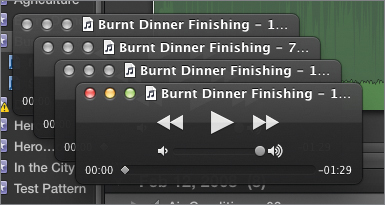
At this point, you’re finished, and you can hand off these audio files to whomever needs them.
Outputting with Compressor
In the Share menu, you have many options for outputting, or sending, your project to different devices, web services, or file formats. Most of these options are covered in detail in Apple Pro Training Series: Final Cut Pro X (Peachpit Press).
However, many times you’ll want to output a custom-compressed version of your program using a group of settings not included in the Share menu’s available options. In these instances, you can send a Final Cut Pro X project to Compressor to apply one of many presets when exporting your program, or you can create a unique preset of your own.
Compressor is a video and audio compression application that is powerful and flexible enough to perform many kinds of format conversions and disc burning. The next few exercises will help you understand how to set up batches and jobs for processing in Compressor, and how to create custom settings to generate media in formats compatible with any purpose you might encounter.
Sending to Compressor
Sending a project from Final Cut Pro X to Compressor can be a very simple process. In the following exercise, you’ll get an overview of Compressor’s basic functionality by sending a project to Compressor, assigning two preset settings, and processing them.
1. Open the Lesson 14 folder, and select the Burnt Dinner Finishing project.
2. Choose Share > Send to Compressor to open Compressor. The project you sent appears inside an Untitled window.
3. To make sure your interface looks the same as in this exercise, choose Window > Layouts > Standard 1280×800.
Note
Compressor remembers the previously used window layout. This choice sets Compressor to its default layout.

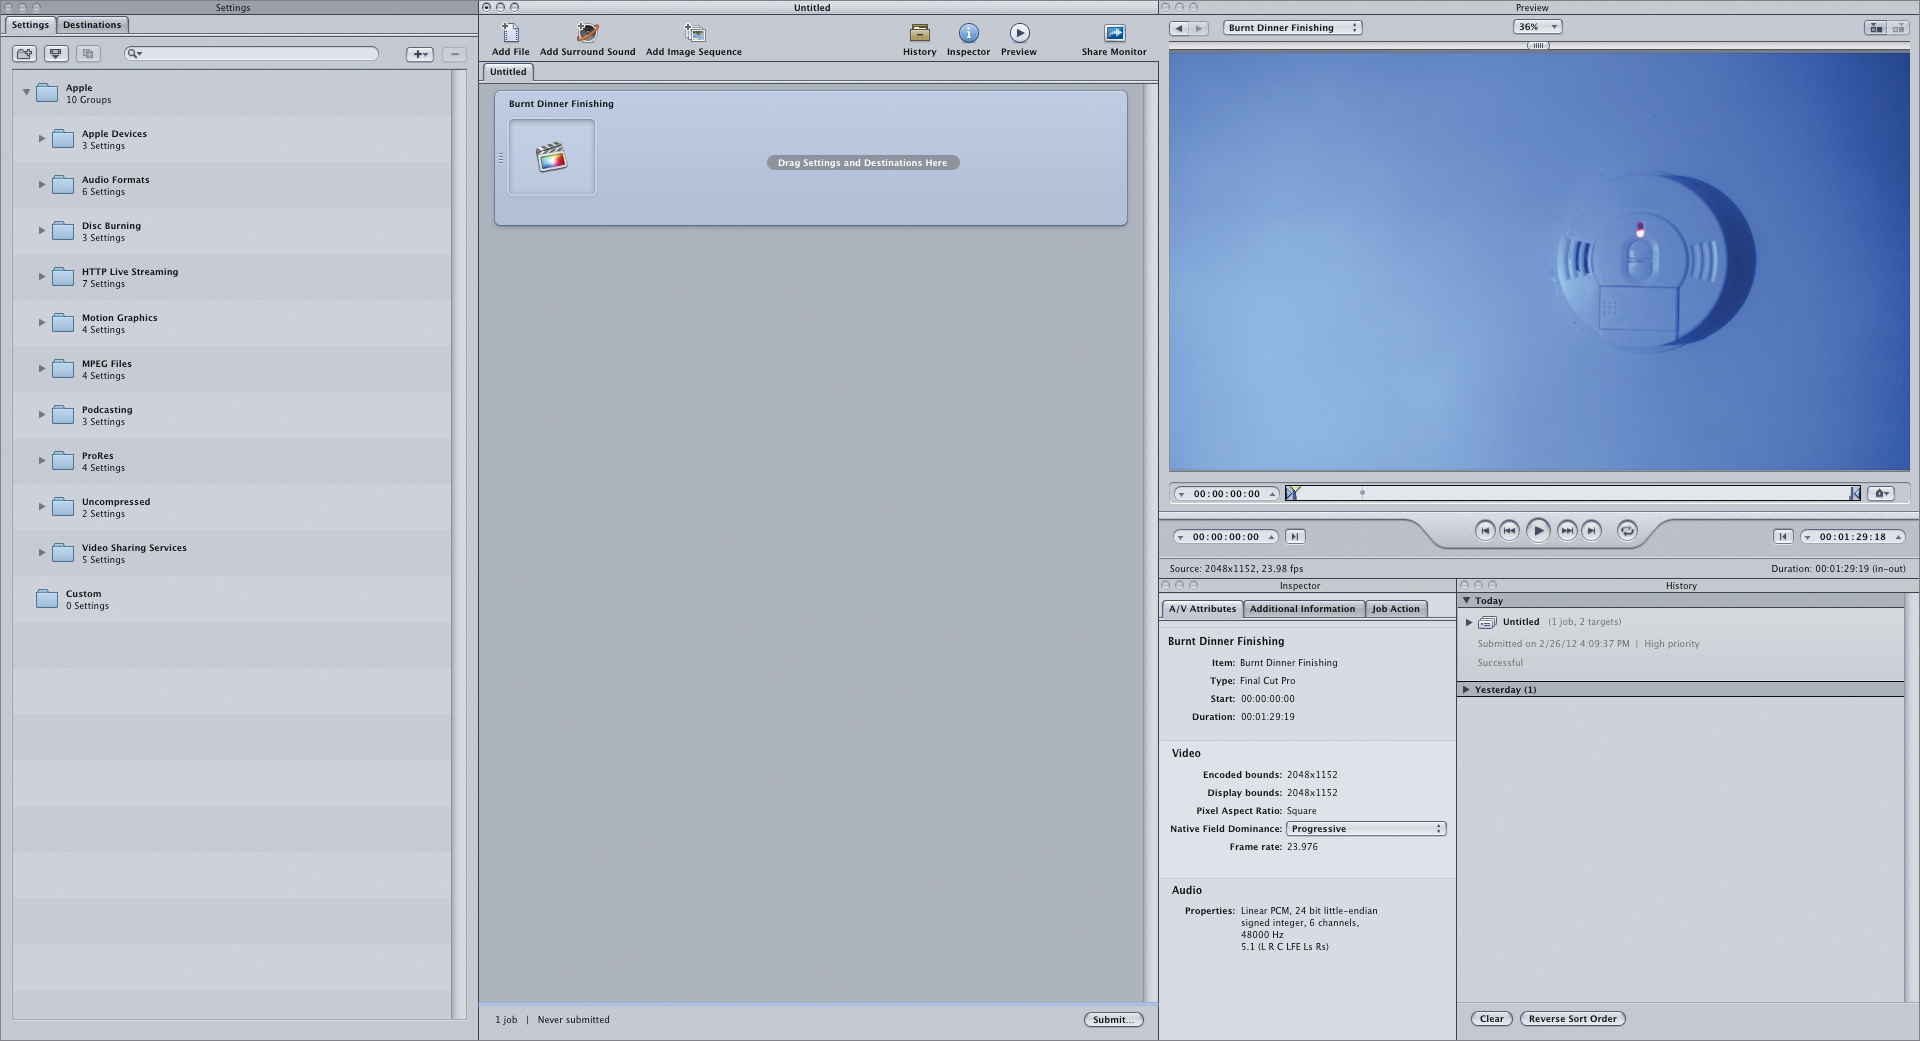
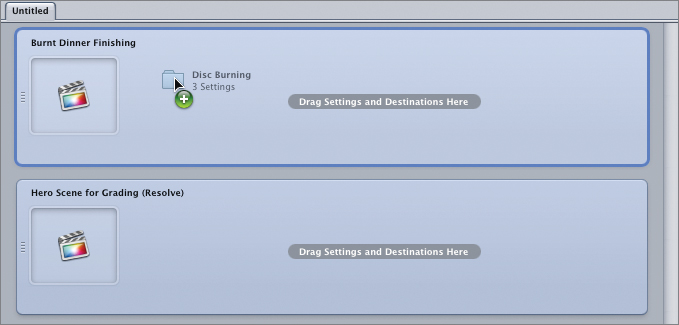
Inside the Untitled window, the Untitled tab represents a batch, and the Burnt Dinner Finishing box is a specific job that lets you set how the project should be processed. The job box is a drop target, onto which you need to drag the presets you want to use for processing.
4. In the Settings window, click the disclosure triangle to the left of the HTTP Live Streaming folder to examine its contents.

The Settings tab in the Settings window is a browser for all the presets in Compressor. Most of these are named to describe the type of media they’ll help you to create.
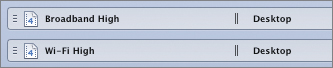
5. Drag the Broadband High preset from the Settings window to the Burnt Dinner Finishing job box in the Untitled 2 window.

When you release the mouse button, the preset appears inside the job box. At this point, you can process the project with that setting. However, the Compressor interface lets you drop multiple presets onto a job to process multiple versions of the project, one after another.
6. Scroll down the Settings tab, and drag the Wi-Fi High setting onto the Burnt Dinner Finishing job box. The current job now has two attached presets.

At this point, you need to choose the destination where you want to save the compressed files. By default, each setting you add writes the resulting file to the source, the location of the original media. You can change this location to any volume or directory available to your computer.
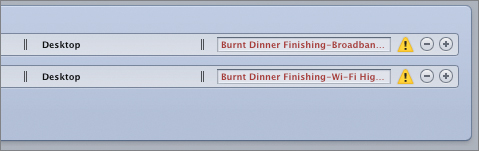
7. Click the Burnt Dinner Finishing job, and choose Target > Destination > Desktop. Both job settings now display Desktop to show where the files will be written.
That job and batch is now set up and ready for processing.
8. Click Submit.
A dialog appears at the top of the window.

9. While you don’t have to name batches, it’s a good idea for you to be more meticulous than the author and type a name into the Name field to clearly identify the batch to be processed. Doing so makes it easy to keep track of what’s already been processed when you’re compressing a series of different clips.
10. Optionally, you may also choose a cluster from the Cluster pop-up menu (if you’ve set up clusters using Qmaster), and choose an option from the Priority pop-up menu (which lets OS X know how to prioritize processing power relative to other things your computer may be doing).
11. Click Submit. Immediately, your job appears in the History window with a progress bar.

12. Click Share Monitor to open the Share Monitor.
You can use this application to track the progress of the job as it is processed in the background. If you click the disclosure triangle for the Untitled batch and for the Burnt Dinner Finishing job, you can see separate progress bars for each preset you added.
When the batch is finished processing (it should only take a few minutes), the Untitled batch should display Successful in both the Share Monitor and the History window. When you go to the desktop, the two compressed versions of your program should be ready to play.

13. Quit Share Monitor to close it. One last thing you should notice. Now that you’ve processed the batch, the names to the right of each setting inside the current job are flagged to warn you that files with those names are already saved in the currently specified location. This happens every time you compress a file, cautioning that you might overwrite those files if you run the batch again.
Note
If you were to quit Compressor at this point, you’d be prompted to save the Untitled 2 batch you’ve set up. Saving a batch lets you reprocess it at a future date. However, you don’t have to save your batches.
14. Click each of the settings in the Burnt Dinner Finishing job, and press the Delete key to remove them.
Understanding the Compressor Interface
Now that you’ve explored the Compressor basics, let’s examine the Compressor interface in greater detail. Comprising multiple windows, the Compressor interface can seem complex because it has been designed to accommodate a wide variety of workflows, from the very simple to the surprisingly complex.
The Compressor interface consists of five main windows, some with multiple tabs of functionality.

• Batch window—The Batch window contains jobs, each of which is a project or media file you want to process. Each job can be assigned one or more presets, each of which produces a separate file. You can use multiple Batch windows, or you can use a single Batch window with multiple batch tabs. The toolbar contains shortcuts for adding jobs, as well as controls for showing and hiding other windows of the Compressor interface. You can customize the toolbar to show other commands by Control-clicking it, and from the shortcut menu, choosing Customize Toolbar.
• Settings window—Contains both the preset compression settings that come with Compressor, as well as any custom presets you create and save. This window also contains the Destinations tab, which contains draggable destinations you can add to jobs or to individual settings in the Batch window.
• Inspector—What the Inspector shows depends on what you have selected. If you select a job box in the Batch window, it shows the A/V Attributes, Additional Information, and Job Action tabs that let you set additional parameters. Otherwise, the Inspector shows the currently selected setting in the Settings or Batch windows. The Inspector lets you customize settings you’ve duplicated in the Settings window, along with settings you’ve selected in the Batch window.
• Preview window—Shows the currently selected job in the Batch window, and provides an interface for setting start and end points to identify how much of a job to render. You can also create markers of different kinds, set a poster frame, use transport controls for playback, and drag a split-screen slider (at the top of the image frame) to see a before/after preview of the compression applied to the clip.
• History window—A hierarchical list that shows you a progress bar for batches that are currently rendering, as well as a list of batches that have been processed (and whether or not the processing was successful or unsuccessful).
Compressor provides several ways to manage and organize these windows as you work.
Tip
If you find yourself switching between several applications while you work—for example, checking your email while a batch is processing—you may find that some of the Compressor windows get lost behind other applications. To bring all of the windows to the front, click its Dock icon, or choose Window > Bring All to Front.
Customizing the Compressor Interface
By default, the Compressor windows are arranged with their edges aligned. By positioning the pointer at the seam or corner where the windows meet, you can resize groups of windows relative to one another, keeping your workspace tidy in the process.

Drag the seam between two windows to resize them both.

Drag an intersecting corner of three windows to resize them all.
If it helps you to work faster, you can also freely reposition these windows in any arrangement you prefer. Of course, when you’re moving and resizing windows in a hurry, window positioning can very quickly get out of hand. In this case, the Compressor layout commands let you select from multiple window arrangements, or workspaces, quickly and easily.
In the following exercise, you’ll create a custom workspace layout, and learn how to manage all your available layouts.
1. Move the windows into a workspace arrangement you like. Notice that whenever you align two window edges with one another, they snap together so that the next time you move that edge they will resize together.
In the following figure, the windows are arranged to provide more space for the Preview window. Taller versions of the Settings and Batch windows are arranged one next to the other with the Inspector and History windows placed underneath the Preview window so that the bottoms of all windows align perfectly.
2. Choose Window > Save Window Layout to open a Save Window Layout dialog.
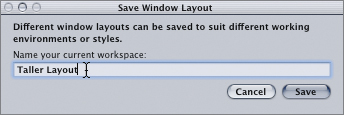
3. In the “Name your current workspace” field, type Taller Layout, and click Save.
4. Choose Window > Layouts > Batch 1440×900 to change the current layout.
5. Choose Window > Layouts > Taller Layout to return to your custom layout.
You can create as many window layouts as you find convenient for the type of work you do.
6. Choose Window > Manage Layouts to open the edit dialog. You can use this dialog to add, remove, or rename layouts.
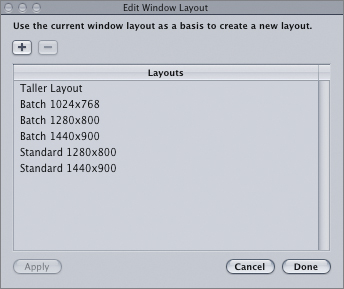
7. Click Done.
Now that you’ve learned how to manage the Compressor user interface, it’s time to dig deeper into the nuts and bolts of working with Compressor.
Understanding the Compressor Workflow
In this section, you’ll learn how to assemble batches, jobs, and settings in various ways with an emphasis on exporting edited programs using custom settings.
The key to harnessing Compressor’s full feature set is to understand the following hierarchy: A batch contains one or more jobs, each of which contains a reference to a clip or program being compressed, and one or more settings that specify how you want Compressor to process that job.
Let’s look at this hierarchy in more detail.
Using Batches and Multiple Jobs
In the Batch window, you can queue up one or more jobs for processing in a single compression session. You can also create multiple batches each in its own tab. Each job has a source, represented by the icon or thumbnail to the left of the job box.
When you send two projects to Compressor from Final Cut Pro X, you’ll create two Batch tabs. If you like, you can consolidate the jobs in each batch, as in the next exercise.
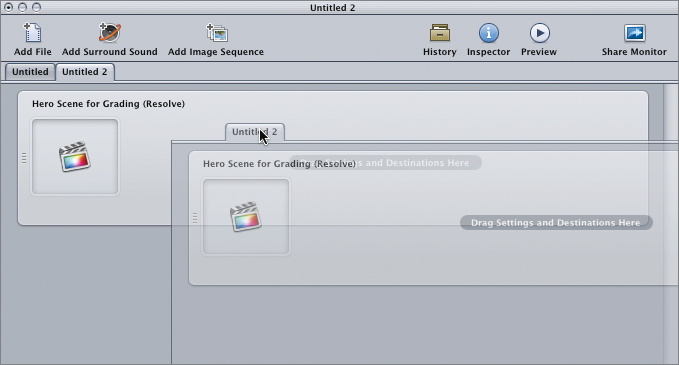
1. Switch to Final Cut Pro X, and select the Hero Scene for Grading (Resolve) project you previously imported. Choose Share > Send to Compressor.
A new tab appears in the Batch window named Untitled 3.
2. Drag the Untitled 3 tab out of the tab area until it expands to its own window, and release the mouse button.
3. Drag the Hero Scene for Grading (Resolve) job from the Untitled 3 window to the Untitled window.
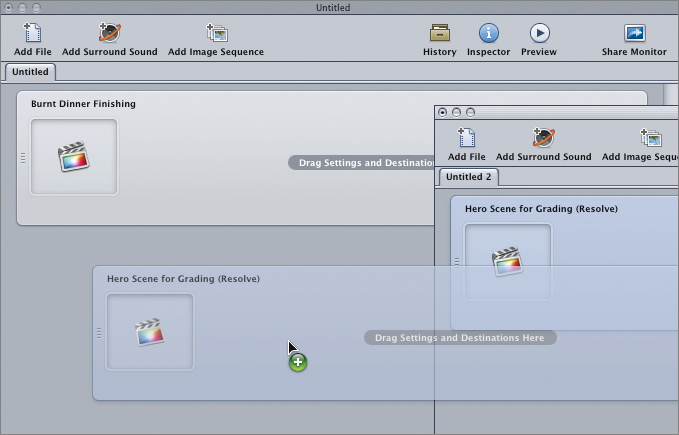
4. Close the Untitled 3 batch, and in the Save dialog click Don’t Save.
At this point, you have two jobs in the Batch window ready to receive some compression settings.

Adding Jobs
As you’ve seen, you can send Final Cut Pro X projects to Compressor as a batch, but you can also add QuickTime media files and image sequences (in supported formats).
You can add items to the Batch window by dragging them from the Finder. However, you can also manually create batches and assign media in separate steps, which can be helpful when you want to change the source media in a job without recreating the settings already assigned to it.
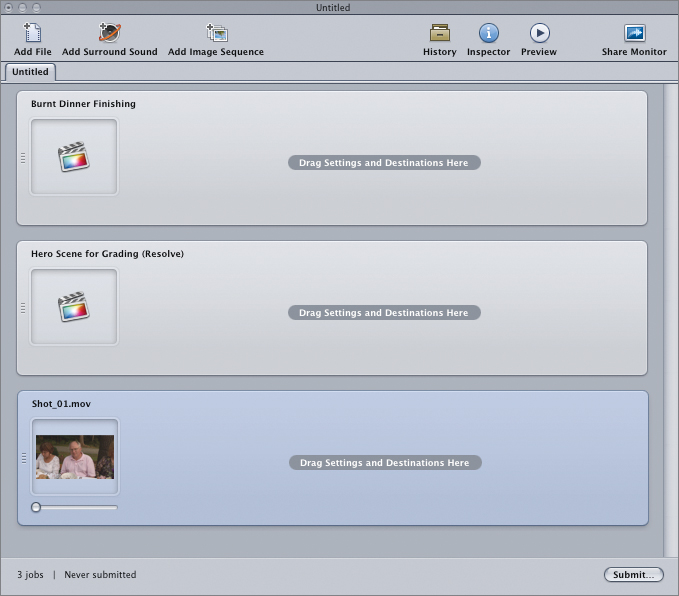
1. With the Untitled 2 window selected, choose Job > New Job With File.
2. Select APTS_FCP_X_ADV_Part_3/Lesson 10 Media for Relinking/Shot_01.mov, and click Open. A new job is created, populated with a link to Shot_01.mov.
Note
There are also commands for adding image sequences and surround sound groups, which you will learn later in this lesson.
Now that you’ve added this new job, let’s suppose you chose the wrong source media. You could delete the job and add a new one, but you could also choose new source media.
3. Select the Shot_01.mov job, and then choose Job > Source > File. Select Shot_02.mov, and click Open. The selected job updates to show the new source media.

You can add as many jobs to a batch as you like for automated processing (while you go out and have a nice dinner).
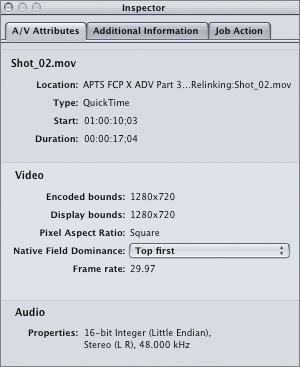
Once you’ve added a job, tabs are available in the Inspector for accessing information about the source media, adding closed captioning and annotations, and setting up job actions.
4. With the Shot_02.mov job selected, look at the Inspector. The A/V Attributes tab of the Inspector displays information about the source media referenced by that job.
5. Click the Additional Information tab.

The Additional Information tab provides controls for embedding a closed-captioning file. Other controls let you add annotations or metadata to the final processed media file—such as author, copyright, description, and title to name a few.
6. Click the Job Action tab.

The Job Action tab has a single pop-up menu, “When job complete,” that provides a list of actions you can use to automate what happens for every completed job. Options range from adding the job to the iTunes library to running Automator workflows that automatically perform a variety of housekeeping, file management, and other tasks.
Applying Settings and Destinations
Now that you’ve added a number of jobs, it’s time to add settings and destinations to set up how you want each job processed.
As you’ve seen, you can add multiple settings to any one job to create differently processed versions of that job’s source media. Compressor has a wide variety of useful presets in its Settings window for processing media destined for all kinds of playback environments.
The available settings are grouped into categories. Clicking the disclosure triangle to the left of any category reveals a list of its contents.

You can see that the settings aren’t just for creating highly compressed media files. Some settings, such as the Motion Graphics settings, convert projects and media into alternate formats, such as Open EXR and TIFF image sequences. Although these formats are highly specialized, when you need them, Compressor is a very valuable tool.
You can freely mix and match settings among the different jobs you’ve added to the current batch. However, some settings categories are specifically designed to be used together.
In the following exercise, you’ll use the Disc Burning category to create media designed for DVD and Blu-ray disc authoring.
1. Select the Burnt Dinner Finishing project, and then Shift-click the Hero Scene for Grading (Resolve) project.
2. Click the Disk Burning folder’s disclosure triangle to view its three settings: one for creating a Dolby Digital audio file, one for creating a Blu-ray-compatible H.264 file, and one for creating a DVD-compatible MPEG-2 file. You will add all three to the selected jobs.
3. Drag the Disc Burning folder from the Settings tab onto one of the selected jobs.
When you release the mouse button, both jobs appear with all three settings added.

4. Now imagine that the third job is a clip you need to compress for posting on a file sharing site to secure the approval of a completely different client. To do this, open the Apple Devices category, and drag the “HD for Apple Devices (10 Mbps)” setting onto the Shot_02.mov job.
Now that you’ve assigned different settings to each of the jobs, it’s time to define where the resulting files will be written. In an earlier exercise, you chose from the Target > Destination submenu to make this assignment. However, you can also drag predefined destinations from the Destinations tab of the Settings window.
5. Click the Destinations tab, and open the Apple folder.
6. Drag the Desktop icon onto the Shot_02.mov job.
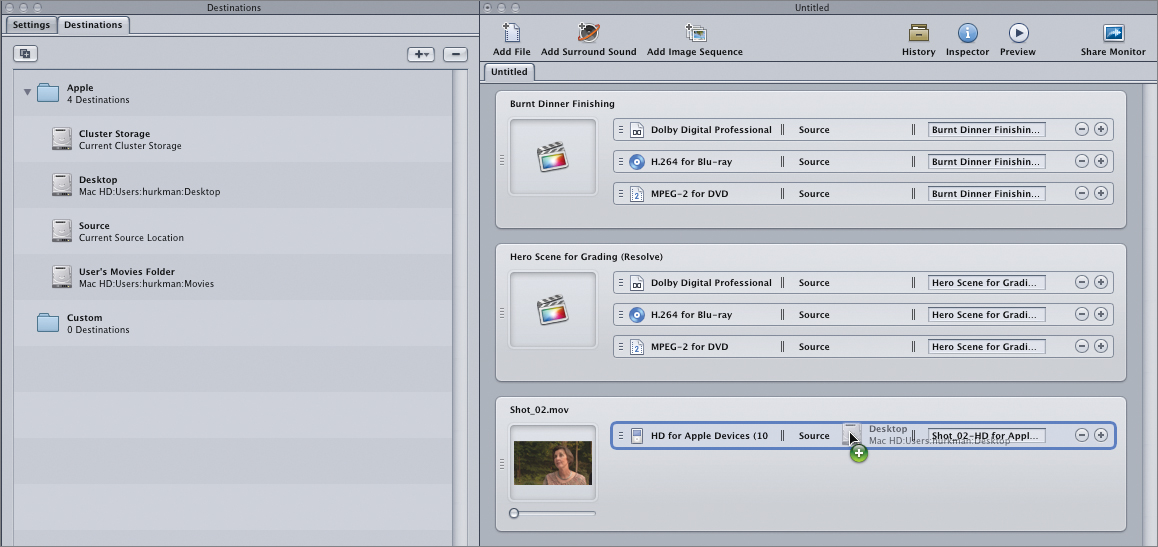
The Destination changes to Desktop. Now you want to assign the destinations of the two jobs; but because these jobs will generate so many files, you want those files to be organized into appropriate locations.
7. From the Add (+) pop-up menu in the upper-right corner of the Destinations tab, choose Local.
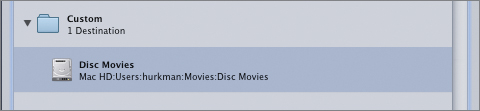
8. Navigate to the Movies directory within your user directory. Click the New Folder button, type Disc Movies into the Name field, and click Create.
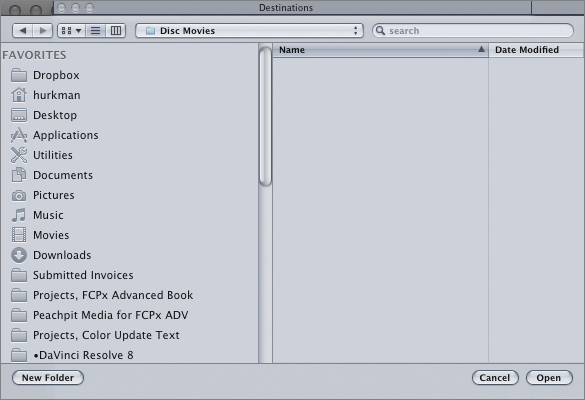
9. Click Open. A new destination appears in the Custom folder of the Destinations tab.
10. With this new destination added, Shift-click the six jobs currently associated with the top two jobs, and choose Target > Destination > Disc Movies to add the new destination to the settings.

Custom destinations automatically become available in the Target menu, which makes it easy to apply them to groups of selected settings. You should notice that each setting can have its own destination, so you can place each type of media you process into as intricate a directory structure as is required for your organizational needs.
Creating Custom Settings
Although Apple presets provide settings for many purposes, there are bound to be situations where you need a unique group of settings that doesn’t otherwise exist. In these cases, creating your own setting and saving it for future use is easy.
In the following exercise, you’ll create a custom setting for generating highly compressed video suitable for downloading from a web hosting service.
In general, video compression reduces file sizes by shrinking some combination of video quality, video size, and frame rate. These days, bandwidth is fast enough so that you need only reduce video quality and frame size while preserving a native frame rate, especially if your native media is 23.98 or 24 frames per second. Let’s look at creating some custom settings, and in the process, get familiar with the options available in the Inspector.
1. Open the Settings tab, and close any open categories.
2. Click the Add (+) pop-up menu, and examine its contents.

This pop-up menu contains blank templates for each type of media that Compressor can generate. It’s a good starting point when creating a new setting from scratch.
Keep in mind that each setting template provides access to different options and parameters. For example, the “H.264 for Apple Devices” template will have very different compression options available compared to the Image Sequence template.
3. Choose MPEG-4. An Untitled preset appears in the Custom folder at the bottom of the window, selected, and the Inspector shows its settings.
The Inspector has six panes, and you’ll be adjusting settings in each of them. At the top, Name and Description fields let you enter identifying text.
4. Click the button for the first panel. It’s a summary of all the parameters for that setting.

5. Click the Encoder button to reveal the video and audio settings.
At the top of the panel is a File Format pop-up menu that identifies the type of media you’re going to create, and as a result, which audio/visual settings are available. If you discover you chose the wrong template, you can change the File Format here.
Note
Although the Encoder options change depending on the chosen File Format, none of the other panes of controls change.
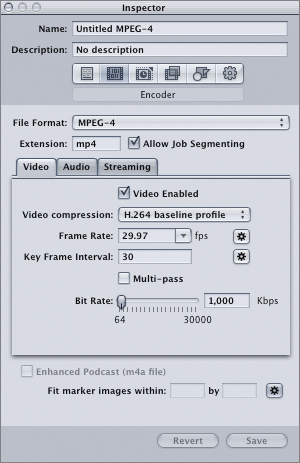
6. For this MPEG-4 setting, you’ll want to select the Multi-pass checkbox to improve the analysis that Compressor uses to maximize quality by applying a variable bit rate. You’ll also raise the Bit Rate slider to 8,000 Kbps, which is a good target bit rate to strike a balance between quality and file size. The other default values can be left as they are.
7. Click the Audio tab, and set Channels to Mono to save an additional bit of space (assuming the source mix is mono). With this choice, you’re not wasting space by including the redundant second track of stereo audio.
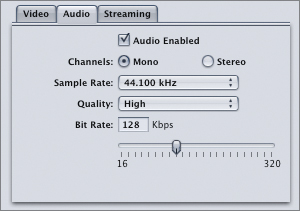
Be aware that the Streaming tab includes settings for adding streaming hints that allow QuickTime to “fast play” web movies before they’ve fully downloaded. However, you don’t need to change those settings for this exercise.
8. Click the Frame Controls button.
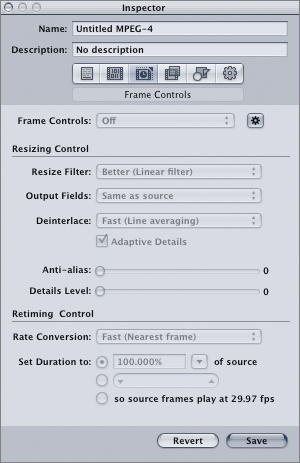
The Frame Controls provide parameters for setting the quality of the resizing performed in the Geometry pane, as well as choosing whether to deinterlace or interlace your video, whether to retime the frame rate, and the quality level of these operations.
9. Click the gear button to enable the Frame Controls pop-up menu, and then choose On to enable all the controls in this pane.
10. Because you’ll be shrinking the video in the Geometry pane, set the Resize Filter pop-up menu to “Better (Linear filter),” set Output Fields to Progressive, and set Deinterlace to “Better (Motion adaptive).”
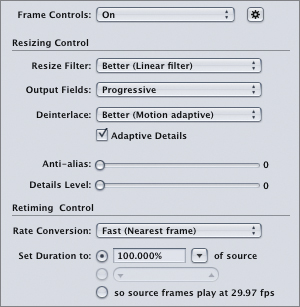
In general, the Best quality settings in this pane use advanced processing to achieve the highest-quality results. However, these processing methods require significantly more processing power and may slow down compression. For the Resize Filter, you should choose Best only when increasing the size of an image. When deinterlacing, choosing Best provides the most visible improvement when you’re not shrinking the video.
You’ll be leaving the Rate Conversion and “Set Duration to” parameters at their current defaults. You’re shrinking the video signal enough through compression and (later) by shrinking the frame size that reducing the frame rate is unnecessary.
11. Click the Filters button.
In the Filters pane, you can add a bit of color correction or audio filtration, if necessary, to compensate for the processing done by Compressor. In general, this isn’t usually necessary when the media being compressed has already been color corrected in Final Cut Pro X.

However, if you scroll down to the bottom of the Video tab list, you’ll also see options for Text Overlay, Timecode Generator, and Watermark, all of which can be used to identify media for different purposes.
12. Select Text Overlay, and type For Review Purposes Only into the Overlay Text field. Select Text Color, choose white in the color picker, and then close it. Lastly, set the Alpha slider to 0.7.
13. Click the Geometry button.
In the Geometry pane, you can set cropping (useful for chopping off letterboxing or pillar-boxing that’s been embedded in a video signal); change the frame size; and “Output Image Inset (Padding),” otherwise known as adding letterboxing or pillarboxing to cover portions of the image you don’t want shown.
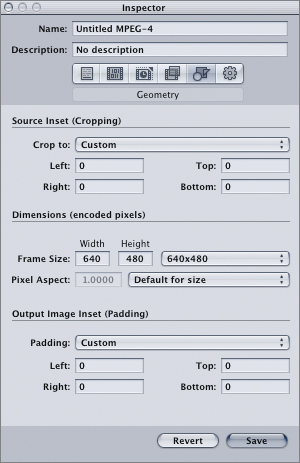
Each control in this pane has both relative and absolute settings. You’ll want to use relative settings when you’re creating a generic setting into which you can feed any kind of media you want and process it relative to its original size. Absolute settings are more useful when you have a target video specification you must match.
14. In this exercise, you’re creating a generic setting, so change the Frame Size pop-up menu to “50% of source,” so that all generated video will be half the size of the original clip.
The Actions pane provides two options. The first is the ability to automatically send an email to yourself upon completion of the processing job (if you’ve added an email address and outgoing mail server in the Compressor Preferences). The second option is to assign a default destination to that setting.
16. From the Default Destination pop-up menu, choose Desktop.

17. To wrap up, type Review MPEG-4 into the Name field, and type A preset for client reviews into the Description field. Click Save.
At this point, the newly named setting appears at the bottom of the Settings tab, ready for your use.

Using Advanced Compressor Features
This section explores three additional capabilities of Compressor pertaining to high-end workflows. The first is the ability to create Dolby Digital surround sound files suitable for DVD and Blu-ray disc authoring. The second is the ability to insert closed captioning into video files as they are encoded. The third is the ability to create Droplets to make it easier to use Compressor to perform common tasks without setting up everything from scratch every time you compress files.
Creating and Auditioning Surround Sound Assets
Compressor can natively encode Dolby Digital 5.1 surround sound. In the following exercise, you’ll encode a stand-alone Dolby Digital file from a series of individual 5.1 audio tracks provided by a mixing facility.
1. In the Batch window’s toolbar, click Add Surround Sound. A dialog appears with buttons for each track of a 5.1 mix.
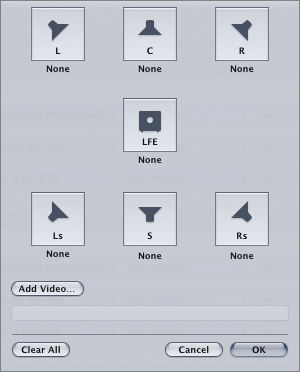
2. Click each of these buttons, and as each Open dialog appears, navigate to the APTS_FCP_X_ADV_Part_3/Lesson 14 Additions/Burnt Dinner Surround Mix folder, and choose the filename that corresponds to that button’s channel name. Alternatively, you could open the Burnt Dinner Surround Mix folder in the Finder, and then drag each file onto the appropriate button in the dialog.
When you’re done, the dialog should look like the following figure:

3. Click OK. A new job appears in the batch, waiting for you to add a setting.
4. In the Settings tab, open the Disc Burning folder, and drag the Dolby Digital Professional setting onto the new job.

At this point, the surround job’s ready to be processed into a stand-alone surround audio file whenever you submit the batch.
Adding Closed Captions and Annotations
Closed captioning is a plain text subtitling system designed to make programming more accessible to the hearing impaired. Unlike film subtitles, which simply translate dialogue, closed captions need to relate all important sound effects, music cues, nonverbal expressions, and dialogue that occur as a program plays.
Closed captioning is displayed by the television receiving the video signal or by the computer application decoding the media. (QuickTime Player is capable of decoding closed captioning.) As a result, closed captioning can be turned on and off, and the font and style of the closed captioning is dependent on the decoding device or app.
In the United States, the FCC stipulates that distributors of programming for residential distribution—such as terrestrial, satellite, and cable—must provide a minimum number of hours of closed-captioned programming per calendar quarter. Because of this requirement, many broadcasters insist on a closed-captioned master as one of their deliverables.
Note
In Europe, closed captioning is based on Teletext, a text-based information retrieval system for TV developed in the United Kingdom. European digital broadcasting currently uses the DVB-T and DVB-S standards for encoding Teletext-style data into digital video streams. Compressor does not support these standards.
Closed-caption files are not human-readable, and are typically created using specialized third-party applications such as CPC MacCaption. When you’re creating a transcript to hand off to a finishing facility using CPC MacCaption, it’s easiest if you create a tab-delimited plain text file with individual entries that contain the timecode and accompanying sound cue or dialogue for each caption. Don’t forget to put a tab at the end of each entry so that each line has this format:
Timecode [Tab] Sound cue or dialog [Tab] [Carriage return]
Compressor requires closed-caption files in the Scenarist format (with an .scc file extension). The timecode values that synchronize the text with the video must be based on the timecode of the project or file being encoded if sync is to be maintained.
Using Compressor, you can insert the data from a closed-caption file into a movie file during encoding by choosing an .scc file or a QuickTime file with an embedded closed-caption track. You can include closed captioning in the following media formats:
• For QuickTime output—Compressor can add a closed-caption file as a CEA-608 closed-caption track within the QuickTime output file, viewable using QuickTime Player.
• For MPEG-2 elementary stream output—Compressor embeds CEA-608 closed-caption data in an elementary MPEG-2 video stream so that it can be used for authoring in DVD authoring applications. After DVD authoring, you can use Apple DVD Player to play the resulting DVD Studio Pro build files and verify that the closed caption is present.
• For MPEG-2 program and transport stream output—Compressor embeds the closed-caption data in program and transport MPEG-2 streams using the CEA-708 standard.
In the following exercise, you’ll add an .scc closed-captioning text file made in MacCaption for the Burnt Dinner Finishing job.
1. At the top of the batch list, select the Burnt Dinner Finishing job, and click the Additional Information tab of the Inspector.
2. Near the top of the Additional Information tab, click Choose, and navigate to APTS_FCP_X_ADV_Part_3/Lesson 14 Additions. Choose Burnt Dinner.scc, and click Open.
That file is attached to the job. Every closed-caption-compatible video encoding setting that’s applied to the job will include this data.

3. To quickly encode a video and see the closed captioning in action, delete all other jobs from the batch, and clear all the other settings from the remaining Burnt Dinner Finishing job.
4. Open the ProRes settings folder and drag the Apple ProRes 422 setting to the job. Then open the Destinations tab, and drag the Desktop destination to the Apple ProRes 422 setting you just added. Click Submit, and when the dialog appears, click Submit again.
5. After the batch is processed, open the resulting .mov file in QuickTime Player, choose View > Show Closed Captioning, and play the file. The closed captions appear in plain white-on-black text as the movie plays.

When mastering for broadcast, closed captioning can be embedded in all Apple ProRes codecs.
Creating and Using Droplets
You may want to more fully automate the common compression tasks you perform all the time. Compressor lets you create Droplets, or self-contained scripts, you can use to perform compression and format conversion with a simple drag-and-drop method. Using Droplets, you avoid the need to open Compressor and assign settings every time you want to process a file.
You can create Droplets using one of two methods.
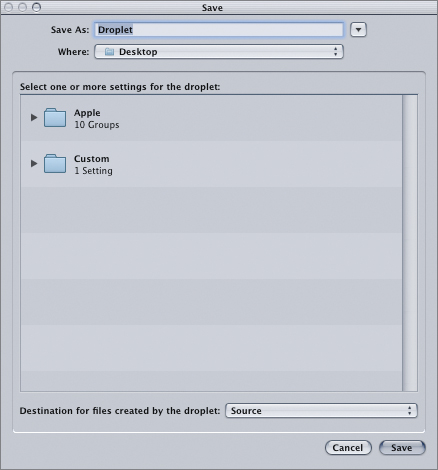
1. Open the Settings tab, Control-click the Review MPEG-4 setting you created in an earlier exercise, and from the shortcut menu, choose Save As Droplet.
2. In the Save dialog, navigate to the desktop, and from the “Choose Destination for Droplet results” pop-up menu, choose Disc Movies. Click Save.
A new Droplet appears on the desktop, ready for use.
3. You can also create a Droplet by choosing File > Create Droplet. A Save dialog appears containing the entire settings list, in addition to the Destination pop-up menu.
4. Open the Custom folder, and select the Review MPEG-4 setting. From the Destination pop-up menu, choose Disc Movies. Click Save. A new Droplet appears on the desktop, ready for use.
To use a Droplet, you only need to drag a compatible file format onto it. If Compressor is properly installed on that computer, a Droplet window will open (by default), and the file will be processed and then written to the destination specified in the Droplet.
You can change a Droplet’s settings at any time.
5. Double-click the Droplet you want to modify.
A Droplet window appears with controls governing destination, the format, whether to open the resulting files using the QuickTime Player, and whether to show the window on startup (selected by default).

6. Use these controls to modify the Droplet, and then close the window. The Droplet is automatically saved with the new settings.
You can create as many Droplets as you require, each with its own destination folder, to accommodate all your media processing needs.
Speed Your Workflow Using Qmaster and Cluster Rendering
Installing and configuring a distributed processing cluster is beyond the scope of this book. However, you should know that the option is available. A cluster is a group of networked computers that can be used together to process Compressor batches. By using the processing power of multiple computers, compression operations can be significantly accelerated.
Each computer in a cluster must have Compressor installed and be configured as a service node. To configure a computer as a service node, open Compressor, choose Apple Qmaster > Share This Computer. Select the “Share this computer” checkbox, select “as Services only,” and then click OK.
Once you’ve set up all your service nodes, you can send batches to the cluster by clicking Submit as usual, and selecting the This Computer Plus checkbox in the drop sheet prior to submitting the batch.
For more information on distributed processing and using Qmaster, consult the “Apple Qmaster and Distributed Processing” section of the Compressor onscreen user manual.
Lesson Review
1. How is XML used in Final Cut Pro X workflows?
2. For what two types of tasks are roles most useful?
3. Can you create new roles?
4. Where can you access roles for disabling, selecting, or minimizing clips in the Timeline?
5. Which of the following does Compressor not do? (a) Creates highly compressed versions of a project sent from Final Cut Pro X (b) Converts projects and media to image sequences (c) Lets you merge multiple QuickTime movies into a single movie (d) Lets you add closed captioning to a media file during processing.
6. Define a Droplet.
7. Can jobs be assigned multiple settings?
8. Do batches contain jobs, or do jobs contain batches?
9. What does the Share Monitor do?
10. In which Compressor window do you edit settings?
11. What kind of surround sound file is Compressor capable of making?
12. In which window and tab do you assign a closed-captioning file to a job?
Answers
1. Exchanging project data with other applications, and roundtrip workflows
2. Managing clips in the Timeline, and exporting clips by role as separate files
3. Yes
4. In the Roles pane of the Timeline Index
5. C. Compressor will merge several QuickTime movies into a single movie file.
6. A Droplet is an exported setting you can drag media onto for immediate processing.
7. Yes
8. Batches contain jobs.
9. The Share Monitor monitors the progress of files being processed in the background.
10. The Inspector
11. Dolby Digital surround sound
12. The Additional Information tab of the Inspector
Keyboard Shortcuts
