
Chapter Topics
In this section, we will take a brief look at network programming using sockets. We will first present some background information on network programming, how sockets apply to Python, and then show you how to use some of Python’s modules to build networked applications.
What is client/server architecture? It means different things to different people, depending on whom you ask as well as whether you are describing a software or a hardware system. In either case, the premise is simple: The server, a piece of hardware or software, is providing a “service” that is needed by one or more clients, users of the service. Its sole purpose of existence is to wait for (client) requests, service those clients, then wait for more requests.
Clients, on the other hand, contact a (predetermined) server for a particular request, send over any necessary data, and wait for the server to reply, either completing the request or indicating the cause of failure. While the server runs indefinitely processing requests, clients make a one-time request for service, receive that service, and thus conclude their transaction. A client may make additional requests at some later time, but these are considered separate transactions.
The most common notion of “client/server” today is illustrated in Figure 16-1. A user or client computer is retrieving information from a server across the Internet. Although such a system is indeed an example of a client/server architecture, it isn’t the only one. Furthermore, client/server architecture can be applied to computer hardware as well as software.

Print(er) servers are examples of hardware servers. They process incoming print jobs and send them to a printer (or some other printing device) attached to such a system. Such a computer is generally network-accessible and client machines would send print requests.
Another example of a hardware server is a file server. These are typically machines with large, generalized storage capacity, which is remotely accessible to clients. Client machines “mount” the disks from the server machine onto their local machine as if the disk itself were on the local machine. One of the most popular network operating systems that support file servers is Sun Microsystems’ Network File System (NFS). If you are accessing a networked disk drive and cannot tell whether it is local or on the network, then the client/server system has done its job. The goal is for the user experience to be exactly the same as a local disk—the “abstraction” is normal disk access. It is up to the programmed “implementation” to make it behave in such a manner.
Software servers also run on a piece of hardware but do not have dedicated peripheral devices as hardware servers do, i.e., printers, disk drives, etc. The primary services provided by software servers include program execution, data transfer retrieval, aggregation, update, or other types of programmed or data manipulation.
One of the more common software servers today is the Web server. A corporate machine is set up with Web pages and/or Web applications, then the Web server is started. The job of such a server is to accept client requests, send back Web pages to (Web) clients, i.e., browsers on users’ computers, and wait for the next client request. These servers are started with the expectation of “running forever.” Although they do not achieve that goal, they go for as long as possible unless stopped by some external force, i.e., explicitly shut down or catastrophically due to hardware failure.
Database servers are another kind of software server. They take client requests for either storage or retrieval, perform that service, then wait for more business. They are also designed to run “forever.”
The last type of software server we will discuss are windows servers. These servers can almost be considered hardware servers. They run on a machine with an attached display, such as a monitor of some sort. Windows clients are actually programs that require a windowing environment with which to execute. These are generally considered graphical user interface (GUI) applications. If they are executed without a window server, i.e., in a text-based environment such as a DOS window or a Unix shell, they are unable to start. Once a windows server is accessible, then things are fine.
Such an environment becomes even more interesting when networking comes into play. The usual display for a windows client is the server on the local machine, but it is possible in some networked windowing environments, such as the X Window system, to choose another machine’s window server as a display. In such situations, you can be running a GUI program on one machine, but have it displayed at another!
One way to imagine how client/server architecture works is to create in your mind the image of a bank teller who neither eats, sleeps, nor rests, serving one customer after another in a line that never seems to end (see Figure 16-2). The line may be long or it may be empty on occasion, but at any given moment, a customer may show up. Of course, such a teller was fantasy years ago, but automated teller machines (ATMs) seem to come close to such a model now.
Figure 16-2. The bank teller in this diagram works “forever” serving client requests. The teller runs in an infinite loop receiving requests, servicing them, and going back to serve or wait for another client. There may be a long line of clients, or there may be none at all, but in either case, a server’s work is never done.

The teller is, of course, the server that runs in an infinite loop. Each customer is a client with a need that requires servicing. Customers arrive and are serviced by the teller in a first-come-first-served manner. Once a transaction has been completed, the client goes away while the server either serves the next customer or sits and waits until one comes along.
Why is all this important? The reason is that this style of execution is how client/server architecture works in a general sense. Now that you have the basic idea, let us adapt it to network programming, which follows the software client/server architecture model.
Before any servicing can be accomplished, a server must perform some preliminary setup procedures to prepare for the work that lies ahead. A communication endpoint is created which allows a server to “listen” for requests. One can liken our server to a company receptionist or switchboard operator who answers calls on the main corporate line. Once the phone number and equipment are installed and the operator arrives, the service can begin.
This process is the same in the networked world—once a communication endpoint has been established, our listening server can now enter its infinite loop to wait for clients to connect and be serviced. Of course, we must not forget to put that phone number on company letterhead, in advertisements, or some sort of press release; otherwise, no one will ever call!
On a related note, potential clients must be made aware that this server exists to handle their needs—otherwise, the server will never get a single request. Imagine creating a brand new Web site. It may be the most super-duper, awesome, amazing, useful, and coolest Web site of all, but if the Web address or Uniform Resource Locator (URL) is never broadcast or advertised in any way, no one will ever know about it, and it will never see the light of day. The same thing applies for the new telephone number of corporate headquarters. No calls will ever be received if the number is not made known to the public.
Now you have a good idea as to how the server works. You have gotten past the difficult part. The client side stuff is much more simple than on the server side. All the client has to do is to create its single communication endpoint, establish a connection to the server. The client can now make a request, which includes any necessary exchange of data. Once the request has been serviced and the client has received the result or some sort of acknowledgement, communication is terminated.
Sockets are computer networking data structures that embody the concept of the “communication endpoint” described in the previous section. Networked applications must create sockets before any type of communication can commence. They can be likened to telephone jacks, without which engaging in communication is impossible.
Sockets originated in the 1970s from the University of California, Berkeley version of Unix, known as BSD Unix. Therefore, you will sometimes hear these sockets referred to as “Berkeley sockets” or “BSD sockets.” Sockets were originally created for same-host applications where they would enable one running program (aka a process) to communicate with another running program. This is known as interprocess communication, or IPC. There are two types of sockets, file-based and network-oriented.
Unix sockets are the first family of sockets we are looking at and have a “family name” of AF_UNIX (aka AF_LOCAL, as specified in the POSIX1.g standard), which stands for “address family: UNIX.” Most popular platforms, including Python, use the term “address families” and “AF” abbreviation while other perhaps older systems may refer to address families as “domains” or “protocol families” and use “PF” rather than “AF.” Similarly, AF_LOCAL (standardized in 2000-2001) is supposed to replace AF_UNIX, however, for backward-compatibility, many systems use both and just make them aliases to the same constant. Python itself still uses AF_UNIX.
Because both processes run on the same machine, these sockets are file-based, meaning that their underlying infrastructure is supported by the file system. This makes sense because the file system is a shared constant between processes running on the same host.
The second type of socket is networked-based and has its own family name, AF_INET, or “address family: Internet.” Another address family, AF_INET6, is used for Internet Protocol version 6 (IPv6) addressing. There are other address families, all of which are either specialized, antiquated, seldom used, or remain unimplemented. Of all address families, AF_INET is now the most widely used. Support for a special type of Linux socket was introduced in Python 2.5. The AF_NETLINK family of (connectionless [see below]) sockets allow for IPC between user- and kernel-level code using the standard BSD socket interface and is seen as an elegant and less risky solution over previous and more cumbersome solutions such as adding new system calls, /proc support, or “IOCTL”s to an operating system.
Python supports only the AF_UNIX, AF_NETLINK, and AF_INET* families. Because of our focus on network programming, we will be using AF_INET for most of the remaining part of this chapter.
If a socket is like a telephone jack, a piece of infrastructure that enables communication, then a hostname and port number are like an area code and telephone number combination. Having the hardware and ability to communicate doesn’t do any good unless you know whom and where to “dial.” An Internet address is comprised of a hostname and port number pair, and such an address is required for networked communication. It goes without saying that there should also be someone listening at the other end; otherwise, you get the familiar tones followed by “I’m sorry, that number is no longer in service. Please check the number and try your call again.” You have probably seen one networking analogy during Web surfing, for example, “Unable to contact server. Server is not responding or is unreachable.”
Valid port numbers range from 0-65535, although those less than 1024 are reserved for the system. If you are using a Unix system, the list of reserved port numbers (along with servers/protocols and socket types) is found in the /etc/ services file. A list of well-known port numbers is accessible at this Web site:
Regardless of which address family you are using, there are two different styles of socket connections. The first type is connection-oriented. What this basically means is that a connection must be established before communication can occur, such as calling a friend using the telephone system. This type of communication is also referred to as a “virtual circuit” or “stream socket.”
Connection-oriented communication offers sequenced, reliable, and unduplicated delivery of data, and without record boundaries. That basically means that each message may be broken up into multiple pieces, which are all guaranteed to arrive (“exactly once” semantics means no loss or duplication of data) at their destination, to be put back together and in order, and delivered to the waiting application.
The primary protocol that implements such connection types is the Transmission Control Protocol (better known by its acronym TCP). To create TCP sockets, one must use SOCK_STREAM as the type of socket one wants to create. The SOCK_STREAM name for a TCP socket is based on one of its denotations as stream socket. Because these sockets use the Internet Protocol (IP) to find hosts in the network, the entire system generally goes by the combined names of both protocols (TCP and IP) or TCP/IP.
In stark contrast to virtual circuits is the datagram type of socket, which is connectionless. This means that no connection is necessary before communication can begin. Here, there are no guarantees of sequencing, reliability, or non-duplication in the process of data delivery. Datagrams do preserve record boundaries, however, meaning that entire messages are sent rather than being broken into pieces first, like connection-oriented protocols.
Message delivery using datagrams can be compared to the postal service. Letters and packages may not arrive in the order they were sent. In fact, they might not arrive at all! To add to the complication, in the land of networking, duplication of messages is even possible.
So with all this negativity, why use datagrams at all? (There must be some advantage over using stream sockets!) Because of the guarantees provided by connection-oriented sockets, a good amount of overhead is required for their setup as well as in maintaining the virtual circuit connection. Datagrams do not have this overhead and thus are “less expensive.” They usually provide better performance and may be suitable for some types of applications.
The primary protocol that implements such connection types is the User Datagram Protocol (better known by its acronym UDP). To create UDP sockets, we must use SOCK_DGRAM as the type of socket we want to create. The SOCK_DGRAM name for a UDP socket, as you can probably tell, comes from the word “datagram.” Because these sockets also use the Internet Protocol to find hosts in the network, this system also has a more general name, going by the combined names of both of these protocols (UDP and IP), or UDP/IP.
Now that you know all about client/server architecture, sockets, and networking, let us try to bring this concept to Python. The primary module we will be using in this section is the socket module. Found within this module is the socket() function, which is used to create socket objects. Sockets also have their own set of methods, which enable socket-based network communication.
To create a socket, you must use the socket.socket() function, which has the general syntax:
socket(socket_family, socket_type, protocol=0)
The socket_family is either AF_UNIX or AF_INET, as explained earlier, and the socket_type is either SOCK_STREAM or SOCK_ DGRAM, also explained earlier. The protocol is usually left out, defaulting to 0.
So to create a TCP/IP socket, you call socket.socket() like this:
tcpSock = socket.socket(socket.AF_INET, socket.SOCK_STREAM)
Likewise, to create a UDP/IP socket you perform:
udpSock = socket.socket(socket.AF_INET, socket.SOCK_DGRAM)
Since there are numerous socket module attributes, this is one of the exceptions where using “from module import *” is somewhat acceptable because of the number of module attributes. If we applied “from socket import *”, we bring the socket attributes into our namespace, but our code is shortened considerably, i.e.,
tcpSock = socket(AF_INET, SOCK_STREAM)
Once we have a socket object, all further interaction will occur using that socket object’s methods.
In Table 16.1, we present a list of the most common socket methods. In the next subsection, we will create both TCP and UDP clients and servers, all of which use these methods. Although we are focusing on Internet sockets, these methods have similar meanings when using Unix sockets.


Core Tip: Install clients and servers on different computers to run networked applications
In our multitude of examples in this chapter, you will often see code and output referring to host “localhost” or see an IP address of 127.0.0.1. Our examples are running the client(s) and server(s) on the same machine. We encourage the reader to change the hostnames and copy the code to different computers as it is much more fun developing and playing around with code that lets machines talk to one another across the network, and to see network programs that really do work!
We will first present some general pseudocode involved with creating a generic TCP server, then describe in general what is going on. Keep in mind that this is only one way of designing your server. Once you become comfortable with server design, you will be able to modify the pseudocode to operate the way you want it to:

All sockets are created using the socket.socket() function. Servers need to “sit on a port” and wait for requests, so they all must “bind” to a local address. Because TCP is a connection-oriented communication system, some infrastructure must be set up before a TCP server can begin operation. In particular, TCP servers must “listen” for (incoming) connections. Once this setup process is complete, a server can start its infinite loop.
A simple (single-threaded) server will then sit on an accept() call waiting for a connection. By default, accept() is blocking, meaning that execution is suspended until a connection arrives. Sockets do support a non-blocking mode; refer to the documentation or operating systems textbooks for more details on why and how you would use non-blocking sockets.
Once a connection is accepted, a separate client socket is returned [by accept()] for the upcoming message interchange. Using the new client socket is similar to handing off a customer call to a service representative. When a client eventually does come in, the main switchboard operator takes the incoming call and patches it through, using another line to the right person to handle their needs.
This frees up the main line, i.e., the original server socket, so that the operator can resume waiting for new calls (client requests) while the customer and the service representative he or she was connected to carry on their own conversation. Likewise, when an incoming request arrives, a new communication port is created to converse directly with that client while the main one is free to accept new client connections.
Core Tip: Spawning threads to handle client requests
We do not implement this in our examples, but it is also fairly common to hand a client request off to a new thread or process to complete the client processing. The SocketServer module, a high-level socket communication module written on top of socket, supports both threaded and spawned process handling of client requests. We refer the reader to the documentation to obtain more information about the SocketServer module as well as the exercises in Chapter 17, Multithreaded Programming.
Once the temporary socket is created, communication can commence, and both client and server proceed to engage in a dialog of sending and receiving using this new socket until the connection is terminated. This usually happens when one of the parties either closes its connection or sends an empty string to its partner.
In our code, after a client connection is closed, the server goes back to wait for another client connection. The final line of code, where we close the server socket, is optional. It is never encountered since the server is supposed to run in an infinite loop. We leave this code in our example as a reminder to the reader that calling the close() method is recommended when implementing an intelligent exit scheme for the server, for example, a handler that detects some external condition whereby the server should be shut down. In those cases, a close() method call is warranted.
In Example 16.1, we present tsTserv.py, a TCP server program that takes the data string sent from a client and returns it timestamped (format: “[timestamp]data”) back to the client. (“tsTserv” stands for timestamp TCP server. The other files are named in a similar manner.)
Example 16.1. TCP Timestamp Server (tsTserv.py)
Creates a TCP server that accepts messages from clients and returns them with a timestamp prefix.

After the Unix start-up line, we import time.ctime() and all the attributes from the socket module.
The HOST variable is blank, an indication to the bind() method that it can use any address that is available. We also choose an arbitrarily random port number, which does not appear to be used or reserved by the system. For our application, we set the buffer size to 1K. You may vary this size based on your networking capability and application needs. The argument for the listen() method is simply a maximum number of incoming connection requests to accept before connections are turned away or refused.
The TCP server socket (tcpSerSock) is allocated on line 11, followed by the calls to bind the socket to the server’s address and to start the TCP listener.
Once we are inside the server’s infinite loop, we (passively) wait for a connection. When one comes in, we enter the dialog loop where we wait for the client to send its message. If the message is blank, that means that the client has quit, so we would break from the dialog loop, close the client connection, and go back to wait for another client. If we did get a message from the client, then we format and return the same data but prepended with the current timestamp. The final line is never executed, but is there as a reminder to the reader that a close() call should be made if a handler is written to allow for a more graceful exit, as we discussed before.
Creating a client is much simpler than a server. Similar to our description of the TCP server, we will present the pseudocode with explanations first, then show you the real thing.

As we noted before, all sockets are created using socket.socket(). Once a client has a socket, however, it can immediately make a connection to a server by using the socket’s connect() method. When the connection has been established, then it can participate in a dialog with the server. Once the client has completed its transaction, it may close its socket, terminating the connection.
We present the code for tsTclnt.py in Example 16.2; it connects to the server and prompts the user for line after line of data. The server returns this data timestamped, which is presented to the user by the client code.
Example 16.2. TCP Timestamp Client (tsTclnt.py)
Creates a TCP client that prompts the user for messages to send to the server, gets them back with a timestamp prefix, and displays the results to the user.

The HOST and PORT variables refer to the server’s hostname and port number. Since we are running our test (in this case) on the same machine, HOST contains the local hostname (change it accordingly if you are running your server on a different host). The port number PORT should be exactly the same as what you set for your server (otherwise there won’t be much communication[!]). We also choose the same buffer size, 1K.
The TCP client socket (tcpCliSock) is allocated on line 10, followed by (an active) call to connect to the server.
The client also has an infinite loop, but it is not meant to run forever like the server’s loop. The client loop will exit on either of two conditions: the user enters no input (lines 14-16), or the server somehow quit and our call to the recv() method fails (lines 18-20). Otherwise, in a normal situation, the user enters in some string data, which is sent to the server for processing. The newly timestamped input string is then received and displayed to the screen.
Now let us run the server and client programs to see how they work. Should we run the server first or the client first? Naturally, if we ran the client first, no connection would be possible because there is no server waiting to accept the request. The server is considered a passive partner because it has to establish itself first and passively wait for a connection. A client, on the other hand, is an active partner because it actively initiates a connection. In other words:
In our example running of the client and server, we use the same machine, but there is nothing to stop us from using another host for the server. If this is the case, then just change the hostname. (It is rather exciting when you get your first networked application running the server and client from different machines!)
We now present the corresponding (input and) output from the client program, which exits with a simple RETURN (or Enter key) keystroke with no data entered:

The server’s output is mainly diagnostic:

The “... connected from ...” message was received when our client made its connection. The server went back to wait for new clients while we continued receiving “service.” When we exited from the server, we had to break out of it, resulting in an exception. The best way to avoid such an error is to create a more graceful exit, as we have been discussing.
Core Tip: Exit gracefully and call server close() method
One way to create this “friendly” exit is to put the server’s while loop inside the except clause of a try-except statement and monitor for EOFError or KeyboardInterrupt exceptions. Then in the except clause, you can make a call to close the server’s socket.
The interesting thing about this simple networked application is that we are not only showing how our data take a round trip from the client to the server and back to the client, but we also use the server as a sort of “time server,” because the timestamp we receive is purely from the server.
UDP servers do not require as much setup as TCP servers because they are not connection-oriented. There is virtually no work that needs to be done other than just waiting for incoming connections.

As you can see from the pseudocode, there is nothing extra other than the usual create-the-socket and bind it to the local address (host/port pair). The infinite loop consists of receiving a message from a client, returning a timestamped one, then going back to wait for another message. Again, the close() call is optional and will not be reached due to the infinite loop, but it serves as a reminder that it should be part of the graceful or intelligent exit scheme we’ve been mentioning.
One other significant different between UDP and TCP servers is that because datagram sockets are connectionless, there is no “handing off” of a client connection to a separate socket for succeeding communication. These servers just accept messages and perhaps reply.
You will find the code to tsUserv.py in Example 16.3, a UDP version of the TCP server seen earlier. It accepts a client message and returns it to the client timestamped.
Example 16.3. UDP Timestamp Server (tsUserv.py)
Creates a UDP server that accepts messages from clients and returns them with a timestamp prefix.

After the Unix startup line, we import time.ctime() and all the attributes from the socket module, just like the TCP server setup.
The HOST and PORT variables are the same as before, and for all the same reasons. The call socket() differs only in that we are now requesting a datagram/UDP socket type, but bind() is invoked in the same way as in the TCP server version. Again, because UDP is connectionless, no call to “listen() for incoming connections” is made here.
Once we are inside the server’s infinite loop, we (passively) wait for a message (a datagram). When one comes in, we process it (by adding a timestamp to it), then send it right back and go back to wait for another message. The socket close() method is there for show only, as indicated before.
Of the four highlighted here in this section, the UDP client is the shortest bit of code that we will look at. The pseudocode looks like this:

Once a socket object is created, we enter the dialog loop of exchanging messages with the server. When communication is complete, the socket is closed.
The real client code, tsUclnt.py, is presented in Example 16.4.
Example 16.4. UDP Timestamp Client (tsUclnt.py)
Creates a UDP client that prompts the user for messages to send to the server, gets them back with a timestamp prefix, and displays them back to the user.

After the Unix startup line, we import all the attributes from the socket module, again, just like in the TCP version of the client.
Because we are running the server on our local machine again, we use “localhost” and the same port number on the client side, not to mention the same 1K buffer. We allocate our socket object in the same way as the UDP server.
Our UDP client loop works in almost the exact manner as the TCP client. The only difference is that we do not have to establish a connection to the UDP server first; we simply send a message to it and await the reply. After the timestamped string is returned, we display it to the screen and go back for more. When the input is complete, we break out of the loop and close the socket.
The UDP client behaves the same as the TCP client:

Likewise for the server:

In fact, we output the client’s information because we can be receiving messages from multiple clients and sending replies, and such output helps by telling us where messages came from. With the TCP server, we know where messages come from because each client makes a connection. Note how the messages says, “waiting for message” as opposed to “waiting for connection.”
In addition to the socket.socket() function which we are now familiar with, the socket module features many more attributes that are used in network application development. Some of the most popular ones are shown in Table 16.2.
For more information, we refer you to the socket Module documentation in the Python Library Reference.


SocketServer is a higher-level module in the standard library. Its goal is to simplify a lot of the boilerplate code that is necessary to create networked clients and servers. In this module are various classes created on your behalf:

We will create a TCP client and server that duplicates the base TCP example shown earlier. You will notice the immediate similarities but should recognize how some of the dirty work is now taken care of so you do not have to worry about that boilerplate code. These represent the simplest synchronous server you can write. Please check out the exercises at the end of the chapter to turn your server into an asynchronous one.
In addition to hiding implementation details from you, another difference is that we are now writing our applications using classes. Doing things in an object-oriented way helps us organize our data and logically direct functionality to the right places. You will also notice that our applications are now “event-driven,” meaning they only work when “reacting to” an occurrence of an event in our system.
Events include the sending and receiving of messages. In fact, you will see that our class definition only consists of an event handler for the receiving of a client message. All other functionality is taken from the SocketServer classes we use. GUI programming (Chapter 18) is also event-driven. You will notice the similarity immediately as the final line of our code is usually a server’s infinite loop waiting for and responding to client service requests. It works almost the same as our infinite while loop in the original base TCP server we create earlier in the chapter.
In our original server loop, we block waiting for a request, then service it when something comes in, and then go back to waiting. In the server loop here, instead of building your code in the server, you define a handler that the server can just call your function when it receives an incoming request.
In our code, we first import our server classes, then define the same host constants as before. That is followed by our request handler class, and then startup. More details follow our code snippet.
The initial stuff consists of importing the right classes from SocketServer. Note that we are using the Python 2.4 multi-line import. If you are using an earlier version of Python, then you will have use the fully-qualified module.attribute names or put both attribute imports on the same line:
from SocketServer import TCPServer as TCP, StreamRequestHandler as SRH
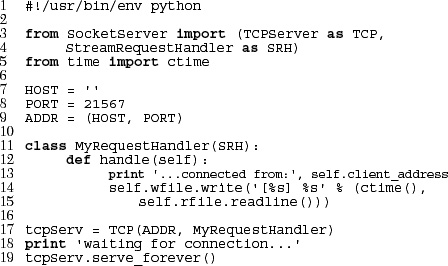
The bulk of the work happens here. We derive our request handler MyRequestHandler as a subclass of SocketServer’s StreamRequestHandler and override its handle() method, which is stubbed out in the Base Request class with no default action as:
def handle(self):
pass
The handle() method is called when an incoming message is received from a client. The StreamRequestHandler class treats input and output sockets as file-like objects, so we will use readline() to get the client message and write() to send a string back to the client.
In accordance, we need additional carriage return and NEWLINE characters in both the client and server code. Actually, you will not see it in the code because we are just reusing those which come from the client. Other than these minor differences we have mentioned, it should look just like our earlier server.
Our client will naturally resemble our original client, much more so than the server, but it has to be tweaked a bit to work well with our new server.
Nothing special here ... this is an exact replica of our original client code.

The default behavior of the SocketServer request handlers is to accept a connection, get the request, and close the connection. This makes it so that we cannot keep our connection throughout the execution of our application, so we need to create a new socket each time we send a message to the server.
This behavior makes the TCP server act more like a UDP server; however, this can be changed by overriding the appropriate methods in our request handler classes. We leave this as an exercise at the end of this chapter.
Other than the fact that our client is somewhat “inside-out” now (because we have to create a connection each time), the only other minor difference was previewed in the line-by-line explanation for the server code: the handler class we are using treats socket communication like a file, so we have to send line-termination characters (carriage return and NEWLINE) each way. The server just retains and reuses the ones we send here. When we get a message back from the server, we strip() them and just use the NEWLINE automatically provided by the print statement.


Twisted is a complete event-driven networking framework that allows you to both use and develop complete asynchronous networked applications and protocols. It is not part of the Python Standard library at the time of writing and must be downloaded and installed separately (see link at the end of the chapter). It provides a significant amount of support for you to build complete systems with: network protocols, threading, security and authentication, chat/IM, DBM and RDBMS database integration, Web/Internet, e-mail, command-line arguments, GUI toolkit integration, etc.
Using Twisted to implement our tiny simplistic example is like using a sledgehammer to pound a thumbtack, but you have to get started somehow, and our application is the equivalent to the “hello world” of networked applications.
Like SocketServer, most of the functionality of Twisted lies in its classes. In particular for our examples, we will be using the classes found in the reactor and protocol subpackages of Twisted’s Internet component.
You will find our code similar to that of the SocketServer example. Instead of a handler class, we create a protocol class and override several methods in the same manner as installing callbacks. Also, this example is asynchronous. Let us take a look at the server now.
The setup lines of code include the usual module imports, most notably the protocol and reactor subpackages of twisted.internet and our constant port number.
We derive the Protocol class and call ours TSServProtocol for our timestamp server. We then override connectionMade(), a method that is executed when a client connects to us, and dataReceived(), called when a client sends a piece of data across the network. The reactor passes in the data as an argument to this method so we can get access to it right away without having to extract it ourselves.
Example 16.7. Twisted Reactor Timestamp TCP Server (tsTservTW.py)
This is a timestamp TCP server using Twisted Internet classes.

The transport instance object is how we can communicate with the client. You can see how we use it in connectionMade() to get the host information about who is connecting to us as well as in dataReceived() to return data back to the client.
In the final part of our server, we create a protocol Factory. It is called a “factory” so that an instance of our protocol is “manufactured” every time we get an incoming connection. We then install a TCP listener in our reactor to check for service requests and when it gets one, to create a TSServProtocol instance to take care of that client.
Unlike the SocketServer TCP client, this one will not look like all the other clients. This one is distinctly Twisted.
Example 16.8. Twisted Reactor Timestamp TCP Client (tsTclntTW.py)
Our familiar timestamp TCP client written from a Twisted point of view.

Again, nothing really new here other than the import of Twisted components. It is very similar to all of our other clients.
Like the server, we extend Protocol by overriding the same methods, connectionMade() and dataReceived(). Both execute for the same reason as the server. We also add our own method for when data need to be sent and call it sendData().
Since we are the client this time, we are the ones initiating a conversation with the server. Once that connection has been established, we take the first step and send a message. The server replies, and we handle it by displaying it to the screen and sending another message to the server.
This continues in a loop until we terminate the connection by giving no input when prompted. Instead of calling the write() method of the transport object to send another message to the server, loseConnection() is executed, closing the socket. When this occurs, the factory’s clientConnectionLost() method will be called, and our reactor is stopped, completing execution of our script. We also stop the reactor if a clientConnectionFailed() for some other reason.
The final part of the script is where we create a client factory and make a connection to the server and run the reactor. Note that we instantiate the client factory here instead of passing it in to the reactor like in the server. This is because we are not the server waiting for clients to talk to us, and its factory makes a new protocol object for each connection. We are one client, so we make a single protocol object that connects to the server whose factory makes one to talk to ours.
The Twisted client displays output similar to all our other clients:

The server is back to a single connection. Twisted maintains the connection and does not close the transport after every message:
![]()
The “connection from” output does not have the other information because we only asked for the host/address from the getPeer() method of the server’s transport object.
Table 16.4 lists some of the other Python modules that are related to network and socket programming. The select module is usually used in conjunction with the socket module when developing lower-level socket applications. It provides the select() function, which manages sets of socket objects. One of the most useful things it does is to take a set of sockets and listen for active connections on them. The select() function will block until at least one socket is ready for communication, and when that happens, it provides you with a set of which ones are ready for reading. (It can also determine which are ready for writing, although that is not as common as the former operation.)

The async* and SocketServer modules both provide higher-level functionality as far as creating servers is concerned. Written on top of the socket and/or select modules, they enable more rapid development of client/server systems because all the lower-level code is handled for you. All you have to do is to create or subclass the appropriate base classes, and you are on your way. As we mentioned earlier, SocketServer even provides the capability of integrating threading or new processes into the server for more parallelized processing of client requests.
Although async* provide the only asynchronous development support in the standard library, we have seen a third-party package that is much more contemporary and powerful than those older modules, Twisted. Although the example code we have seen in this chapter is slightly longer than the barebones scripts, Twisted provides a much more powerful and flexible framework and has implemented many protocols for you already. You can find out more about Twisted at its Web site:
The topics we have covered in this chapter deal with network programming with sockets in Python and how to create custom applications using lower-level protocol suites such as TCP/IP and UDP/IP. If you want to develop higher-level Web and Internet applications, we strongly encourage you to read ahead to Chapter 17 and 20.
16-1. Sockets. What is the difference between connection-oriented versus connectionless?
16-2. Client/Server Architecture. Describe in your own words what this term means and give several examples.
16-3. Sockets. Between TCP and UDP, which type of servers accept connections and hands them off to separate sockets for client communication?
16-4. Clients. Update the TCP (tsTclnt.py) and UDP (tsUclnt.py) clients so that the server name is not hard-coded into the application. Allow the user to specify a hostname and port number, and only use the default values if either or both parameters are missing.
16-5. Internetworking and Sockets. Implement Guido van Rossum’s sample TCP client/server programs found in Section 7.2.2 of the Python Library Reference and get them to work. Set up the server, then the client. An online version of the source is also available here:
http://docs.python.org/lib/socket-example.html
You decide the server is too boring. Update the server so that it can do much more, recognizing the following commands:

You do not need a network to do this assignment—your machine can talk to itself. Note: After the server exits, the binding must be cleared before you can run it again. You may experience “port already bound” errors. The operating system usually clears the binding within 5 minutes, so be patient!
16-6. Daytime Service. Use the socket.getservbyname() to determine the port number for the “daytime” service under the UDP protocol. Check the documentation for getservbyname() to get the exact usage syntax (i.e., socket.getservbyname.__doc__). Now write an application that sends a dummy message over and wait for the reply. Once you have received a reply from the server, display it to the screen.
16-7. Half-Duplex Chat. Create a simple, half-duplex chat program. By “half-duplex,” we mean that when a connection is made and the service starts, only one person can type. The other participant must wait to get a message before he or she is prompted to enter a message. Once a message is sent, then the sender must wait for a reply before being allowed to send another message. One participant will be on the server side, while the other will be on the client side.
16-8. Full-Duplex Chat. Update your solution to the previous problem so that your chat service is now full-duplex, meaning that both parties can send and receive independently of each other.
16-9. Multi-User Full Duplex Chat. Further update your solution so that your chat service is multi-user.
16-10. Multi-User Multi-Room Full Duplex Chat. Now make your chat service multi-user and multi-room.
16-11. Web Client. Write a TCP client that connects to port 80 of your favorite Web site (remove the “http://” and any trailing info; use only the hostname). Once a connection has been established, send the HTTP command string “GET /
” and write all the data that the server returns to a file. (The GET command retrieves a Web page, the “/” file indicates the file to get, and the “
” sends the command to the server.) Examine the contents of the retrieved file. What is it? How can you check to make sure the data you received is correct? (Note: You may have to give one or two NEWLINEs after the command string. One usually works.)
16-12. Sleep Server. Create a “sleep” server. A client will request to be “put to sleep” for a number of seconds. The server will issue the command on behalf of the client, then return a message to the client indicating success. The client should have slept or should have been idle for the exact time requested. This is a simple implementation of a “remote procedure call” where a client’s request invokes commands on another machine across the network.
16-13. Name Server. Design and implement a name server. Such a server is responsible for maintaining a database of hostname-port number pairs, perhaps along with the string description of the service that the corresponding servers provide. Take one or more existing servers and have them “register” their service with your name server. (Note that these servers are, in this case, clients of the name server.)
Every client that starts up has no idea where the server is that it is looking for. Also as clients of the name server, these clients should send a request to the name server indicating what type of service they are seeking. The name server, in reply, returns a hostname-port number pair to this client, which then connects to the appropriate server to process its request.
Extra credit:
(1) Add caching to your name server for popular requests;
(2) Add logging capability to your name server, keeping track of which servers have registered and which services clients are requesting;
(3) Your name server should periodically “ping” the registered hosts at their respective port numbers to ensure that the service is indeed up. Repeated failures will cause a server to be delisted from the list of services.
You may implement real services for the servers that register for your name service, or just use dummy servers (which merely acknowledge a request).
16-14. Error Checking and Graceful Shutdown. All of our sample client/server code in this chapter is poor in terms of error-checking. We do not handle when users press ^C to exit out of a server or ^D to terminate client input, nor do we check other improper input to raw_input() or handle network errors. Because of this weakness, quite often we terminate an application without closing our sockets, potentially losing data. Choose a client/server pair of one of our examples, and add enough error-checking so that each application properly shuts down, e.g., closes network connections.
16-15. Asynchronicity and SocketServer. Take the example TCP server example and use either mix-in class to support an asynchronous server. To test your server, create and run multiple clients simultaneously and show output that your server is serving requests from both interleaved.
16-16. *Extending SocketServer Classes. In the SocketServer TCP server code, we had to change our client from the original base TCP client because the SocketServer class does not maintain the connection between requests.
(a) Subclass the TCPServer and StreamRequestHandler classes and rearchitect the server so that it maintains and uses a single connection for each client (not one per request).
(b) Integrate your solution for the previous problem with your solution to part (a) such that multiple clients are being serviced in parallel.