
Part III
Advancing to Professional Windows 8 Development
- Chapter 13: Creating Windows 8 Style Applications with C++
- Chapter 14: Advanced Programming Concepts
- Chapter 15: Testing and Debugging Windows 8 Applications
- Chapter 16: Introducing the Windows Store
Chapter 13
Creating Windows 8 Style Applications with C++
WHAT YOU WILL LEARN IN THIS CHAPTER:
- Understanding the scenarios where the C++ programming language is the right choice
- Getting to know the most important recent enhancements to the C++ language
- Getting acquainted with the new features that make it possible to write Windows 8 style applications in C++
WROX.COM CODE DOWNLOADS FOR THIS CHAPTER
You can find the wrox.com code downloads for this chapter on the Download Code tab at www.wrox.com/remtitle.cgi?isbn=012680. The code is in the Chapter13.zip download and individually named, as described in the corresponding exercises.
Although the title of this chapter may suggest that it is only for C++ developers, this is not true. In this chapter, if you are a C#, Visual Basic, or JavaScript developer, you learn in which scenarios C++ is the best choice of available Windows 8 languages. If you have had experience with C++ in the past (even if it was frustrating), this chapter demonstrates that C++ has become a modern, fast, clean, and safe language, as well as a first-class citizen in Windows 8 style application development.
First, you learn about the renaissance of C++, and then you are presented with an overview of recent improvements to the programming language. In most of this chapter, you learn about new features that Microsoft has added to its C++ implementation in Visual Studio 2012, additions that support Windows 8 style application development and integration with Windows Runtime. After learning about all these new things and extensions, you work with a small sample application to see how the theory works in practice.
Microsoft and the C++ Language
Although circumstances may show that .NET languages (C# and Visual Basic) are the standard programming languages for Microsoft (and, thus, are used in most products), this is not the situation. Most product development within Microsoft still happens with C++, and it seems as though this development will go on with this language for a long time.
Why is this so? Does Microsoft not believe in its own managed runtime environment (.NET Framework), and is that why it does not utilize it? Does Microsoft not want to (or can’t) leverage the productivity benefits of .NET? No! C++ provides two things that challenge managed programming languages: performance and fine-grained control over system resources.
When you work with the managed languages of the .NET Framework, the compiler creates executable programs that contain Microsoft Intermediate Language (MSIL) code, or instructions from an intermediate language. When this program runs, MSIL instructions are compiled to CPU-specific instructions on the fly with a just-in-time (JIT) compiler, and then this CPU-specific code is executed. Although the managed languages and MSIL contain constructs that make software development really productive, it is circuitous to describe low-level instructions (such as bit-level operations), which are very easy to declare with CPU-specific instructions. So, although an algorithm’s performance benefits significantly from low-level constructs, managed languages have challenges.
Of course, using native languages (including C++) has its drawbacks. By controlling all the details in order to achieve performance, you often must deal with many subtle things. For example, if you want to have total control over memory consumption, you must allocate and dispose of resources explicitly. This activity requires a lot of attention to avoid memory leaks, or to reuse disposed resources.
Earlier, you learned that the beginning of the Windows era was about C and C++ programming. At that time, productivity of developers was very low in contrast to productivity achieved by using the managed languages emerging with .NET in 2002. Managed languages always had a performance penalty in exchange for productivity. For a long time, with great hardware (especially at the server side), it was an acceptable trade-off, because buying hardware with about 20 percent more performance was cheaper than paying developers to tune the app for a few more months.
Smartphones, new-generation tablets, and ultra-mobile devices totally changed the rules of the game. The CPUs in these devices are generally less powerful than in desktop computers, so the same algorithms may run longer on them. To keep the device weight low, these devices work with batteries that have limited capacity. The more performance you use, the shorter the time the battery holds on. Moreover, consumers want to have a great user experience with these devices, so they prefer responsive user interfaces (UIs), and do not like bitty animations.
The key to writing well-behaving applications for these mobile devices is efficiency. The applications should carry out many activities in a short time, with as little CPU usage as possible. They must be frugal with memory and other hardware resources. This is the point at which native coding can be drawn into the scene, because these requirements are exactly the ones where native programming languages (including C++) perform their best.
So, it is not surprising that Microsoft wanted to support the C++ language as a first-class citizen in Windows 8 style application development. Microsoft not only solved Windows 8 style development in C++, but also modernized the language by making it clean and safe.
Clean and Safe
Most programmers either love or hate C++. No one would say, “I like it a bit,” or “It’s OK, but I don’t like that feature.” Lovers of C++ like it because of the full control this language provides over the application’s execution. It’s a kind of excitement to almost know in advance what instructions will be executed on the CPU as a result of a certain C++ programming construct. Those who hate C++ hate the low-level constructs and the common pitfalls coming from them.
With the newest C++ implementation (the one you can find in Visual Studio 2012), Microsoft invested a lot to make C++ a modern language by means of productivity, while still keeping the opportunity to maintain full control over the application’s execution. Microsoft implemented a number of new features in C++11. Moreover, Microsoft extended the language to support Windows 8 style applications and Windows Runtime integration.
To understand what kind of features make C++ more productive than it ever was before, let’s take a look at a code sample written with C++03 (the previous revision of the C++ standard), as shown in Listing 13-1 (code file: LegacyCppLegacyCpp.cpp).
Listing 13-1: A simple C++ program — using the old style
// --- Create a vector of 10 rectangles
vector<rectangle *> shapes;
for (int i = 1; i <= 10; i++)
{
    shapes.push_back(new rectangle(i * 100, i * 200));
}

// --- This is the rectangle we are looking for
rectangle* searchFor = new rectangle(300, 600);

// --- Iterate through all rectanges
for (vector<rectangle*>::iterator i = shapes.begin(); i != shapes.end(); i++)
{
    (*i)->draw();
    if (*i && **i == *searchFor)
    {
        cout << "*** Rectangle found." << endl;
    }
}

// --- Dispose resources held by this program
for (vector<rectangle*>::iterator i = shapes.begin(); i != shapes.end(); i++)
{
    delete *i;
}
delete searchFor;
This program creates a vector of ten rectangle objects (stored in shapes), and then draws them in a for loop and checks if any of these rectangles matches with the one stored in the searchFor variable. A few points add disturbing complexity to this simple task:
- The shapes variable is a vector of pointers to rectangle objects. The first for loop that goes from 1 to 10 creates rectangle objects and attaches them to shapes. The programmer must keep in mind that these objects must be disposed of at a certain point of the program. The last for loop with the delete i body performs this cleanup.
- The searchFor variable holds a pointer to a rectangle object. This object is disposed of with the delete searchFor statement in the last line.
- Two for loops use an iterator object that goes through the elements of the vector. Although the intention of this cycle is really clear, the code expressing it seems a bit lengthy.
- The *i && **i == *searchFor conditional expression is simple, but still difficult to decode. In this expression, i is an iterator and *i represents the pointer to a rectangle object the iterator is currently referring to. The **i expression is the rectangle the iterator points to, and *searchFor is the rectangle object the cycle is looking for. This condition says that, if the iterator is pointing to a rectangle object, and that rectangle has the same value as the one you search for, it is a match. Although the meaning is trivial for seasoned C++ developers, it’s still difficult to read.
A potential pitfall with such a program is that the programmer ought to take the full control of the heap where rectangle objects are stored. It is not always entirely clear who is responsible for managing the rectangle objects stored in shapes. In Listing 13-1, it is clear, because the code disposes of them. But if you see only the for loop allocating these objects, this intention is not trivial at all.
With the new C++ language that now is available in Visual Studio 2012, this program can be written in a more elegant way, as shown in Listing 13-2 (code file: ModernCppModernCpp.cpp).
Listing 13-2: A simple C++ program — using the new style
// --- Create a vector of 10 rectangles
vector<shared_ptr<rectangle>> shapes;
for (int i = 1; i <= 10; i++)
{
    shapes.push_back(shared_ptr<rectangle>(
        new rectangle(i * 100, i * 200)));
}

// --- This is the rectangle we are looking for
auto searchFor = make_shared<rectangle>(300, 600);

// --- Iterate through all rectangles
for_each(begin(shapes), end(shapes), [&](shared_ptr<rectangle>& rect)
{
    rect->draw();
    if (rect && *rect == *searchFor)
    {
        cout << "*** Rectangle found." << endl;
}
});
This program contains a few elements that resolve the issues noted in Listing 13-1:
- The shapes vector holds reference-counted rectangle objects (as is indicated by shared_ptr). One or more objects can hold such a pointer to a rectangle. When the last object is destroyed (which owns the pointer), the rectangle is freed.
- The auto keyword before the searchFor variable declaration automatically infers the type of this variable from the initialization expression. If you did not use auto, you should know that make_shared<rectangle> creates a shared_ptr<rectangle> and use this type instead of the auto keyword.
- The for_each method clearly tells that it’s a loop that traverses through the items of the shapes vector. The first two arguments of the method are begin(shapes) and end(shapes), respectively, making it clear that the loop goes from the first to the last element. The third argument is a lambda expression (a new feature in C++11) that draws the rectangle and checks for matching. Comparing the body of the lambda expression with Listing 13-1, you can see that here rect is a reference to a rectangle, and so the *rect == *searchFor is easier to understand than **i == *searchFor.
Listing 13-2 does not contain any statement to explicitly dispose of the memory held by the rectangles in shapes. The behavior of shared_ptr type reclaims the memory automatically; developers do not have to explicitly do it.
This little code snippet was just one example of the changes in C++ that make the language modern and productive. Microsoft also implemented numerous new features in its C++ compiler, according to the C++11 standard.
C++ and Windows 8 Apps
In Chapter 3, you learned that by creating an independent stack of layered components for Windows 8 style applications, Microsoft has introduced a new concept that re-images the idea of Windows API and language run times. As shown in Figure 13-1, these components allow C++, C#, Visual Basic, and the HTML5/CSS3/JavaScript technology stack to be first-class citizens in programming Windows 8 apps.
Figure 13-1: Windows 8 style application technology layers

Let’s dive deeper into this figure and see what types of Windows 8 apps can be implemented with the direct or indirect utilization of C++.
Privileges of C++ in Windows 8 Apps
Figure 13-1 shows the four programming languages (C/C++, C#, Visual Basic, and JavaScript/HTML/CSS3) as if they were co-equal. But, in reality, C++ is “more equal” than the others. The C++ language has a few privileges in terms of accessing Windows 8 system resources that are unavailable in the other programming languages:
- You can still use a narrow set of Win32 API services (Windows Kernel Services) from C++. These do not go through Windows Runtime. They are available through system dynamic link libraries (DLLs).
- You can easily use DirectX technologies (Direct2D, Direct3D, DirectWrite, XAudio2, and so on) from C++. These use the graphics processing unit (GPU) and sound devices directly with amazing performance.
- A brand-new technology, C++ Accelerated Massive Parallelism (C++ AMP) enables you to use today’s massively parallel hardware — that is, GPUs and audio processing units (APUs). C++ AMP enables you to run parts of your C++ program on the GPU in your computer.
As Figure 13-1 points out, you can use C++ entirely to write Windows 8 apps with the XAML UI. However, you have other scenarios where C++ is also a great choice:
- You can write Windows 8 style games that use DirectX and C++. Because most games need to squeeze out the last drops of performance that the CPU and the GPU can provide, C++ seems the perfect tool for game development.
- You can write hybrid Windows 8 apps that use C++ components, but are implemented either in C#, Visual Basic (of course, using .NET Framework in the back, and XAML for the UI), or in JavaScript with HTML5/CSS3 UI. In this case, C++ components can undertake those tasks that require direct system resource access and/or solid performance.
Let’s take a look at how Windows Runtime and C++ work together.
Windows Runtime and C++
Almost every chapter in this book mentions Windows Runtime, and it would be difficult to avoid using its objects and operations. As you have already learned, Windows Runtime objects have been implemented in native (C++ and assembly) code. However, it has scarcely been mentioned that these objects utilize a new version of the old component object model (COM).
COM is an almost 20-year-old binary interface standard developed by Microsoft in 1993. Its original aim was to enable a wide range of programming languages to create their own dynamic objects and proffer them to other processes — even written in a different programming language. COM itself became an umbrella term that embraces other related technologies, such as distributed component object model (DCOM), Object Linking and Embedding (OLE), OLE automation, COM+, and ActiveX.
Although this binary standard is technically great, using it is often a pain, especially from C++:
- Objects and their interfaces must be registered in the Windows system registry, which is a main source of deployment issues.
- The lifetime management of COM objects is based on reference counting. When the address of an object is assigned to a new variable, a reference counter must be increased manually. When the object is detached from this variable, or the variable is disposed of, this counter must be decreased. When the counter reaches zero, the COM object is automatically disposed of. You can imagine what confusion could be caused when this manual reference counting is misused!
- Exceptions are handled through the HRESULT values (32-bit integers) retrieved from method calls. Callers of COM operations always must check these values to check whether operations are successful.
Now, Windows Runtime uses a new version of COM that does not require interface and object registration, and provides a transparent way to manage reference counting — as you learn in the next section.
Managing Windows Runtime Objects in C++
In Visual Studio 2012, Microsoft added new features to C++ to manage Windows Runtime objects with the ease that developers have used to handle .NET Framework objects in C# and Visual Basic. This set of new language extensions is called C++ for Windows Runtime.
The objects of Windows Runtime are strongly typed, and implement automatic reference counting. Instead of HRESULT values, you can use structured exception handling to catch and manage operation failures. Windows Runtime objects are deeply integrated with the STL, so all functions, collections, and algorithms implemented in the STL still work together with Windows Runtime types. There is a boundary between Windows Runtime and the external world; the new version of COM is a well-defined binary contract between these two domains. This brings up some obvious questions.
When and how should C++ programmers use these language extensions? Should they use these new types for every Windows 8 app? How can old-fashioned C++ types and the STL be used?
The answer to these questions is really simple! You should use the Windows Runtime types when you need to cross this boundary — either when you want to call Windows Runtime operations, or when you want to provide services for other languages. Figure 13-2 shows the programming style you need to follow.
Figure 13-2: Using C++ with Windows Runtime objects

So, you can write a C++ module (assuming you are already a C++ programmer) just as you’ve been doing it, and these modules can be consumed directly by native C or C++ callers and callees. The same module can consume Windows Runtime objects or proffer operations to other Windows Runtime objects or other languages through a thin boundary layer that passes all data to and fro through Windows Runtime compatible objects.
To allow this kind of boundary crossing, C++ comes with component extensions (C++/CX) that provide bindings to foreign type systems such as the ones used by .NET or the JavaScript engine. Table 13-1 summarizes the new data types in C++/CX.
Table 13-1: New C++ Component Extensions Data Types
| Type | Description |
| Value types | Value type instances are always stored in the call stack or in the static data of an application. Value structures (declared using the value struct keyword) contain only public data fields. Value classes (declared with the value class keyword), which are less frequently used, contain only public data fields and methods. |
| Reference types | Reference type instances are always allocated dynamically (and disposed of) in the memory space of the application. A reference class can be declared with the ref class keyword, and it can contain public, protected, and private function members; data members; and even nested classes. A reference structure is signified with the ref struct keyword. It is the same as a reference class, except that a ref class declares a runtime class that, by default, has public accessibility. |
| Interface classes | Interface classes (declared with the interface class keyword) are very similar to the native C++ interfaces. However, they have a number of specialties:
|
| Generic types | Now you can use generic interface classes in C++ following the same semantics as generic types in the .NET Framework. They are declared with the generic<typename T1, …, typename Tn> interface class construct. Generic interfaces can be implemented with C++ template definitions, too. However, these templates can use only typename parameters. Non-type parameters are not supported. |
| Properties | The standard C++ does not support properties. With the property keyword of the C++/CX, now you can define a property with the same GET/SET semantics as used by the .NET languages. |
| Delegates | Delegates declare type-safe function pointers, and so they resemble a function declaration, except that a delegate is a type. They are declared with the delegate keyword. |
| Events | Events are special types (you may call them “delegate properties”) that have add/remove semantics just as .NET events have. They are declared with the event keyword. In addition to the add/remove semantics, they contain a raise accessor that defines the way an event is signed. |
As you learned earlier, Windows Runtime types are COM types, and so they are inherently reference counted. To avoid the manual work of managing reference counters, there is a special notation for pointers referencing Windows Runtime types. They use the ^ (“hat” or “handle”) character to signify they are reference counted, and they must be allocated with the ref new keyword, as this sample code snippet shows:
Map<String^, int>^ MainPage::CreateMap()
{
    map<String^, int> myMap;
    myMap.insert(pair<String^, int>("One", 1));
    myMap.insert(pair<String^, int>("Two", 2));
    myMap.insert(pair<String^, int>("Three", 3));
    return ref new Map<String^, int>(move(myMap));
}
Here, the CreateMap() method creates an associative dictionary of integer values with string keys. Both Map and String are Windows Runtime types. The method returns a reference-counted pointer to a Map, so the ref new operator is used, and the return value has the ^ notation. Also, the keys of the map use reference-counted pointers to a String, so these are declared as String^.
Defining Runtime Classes
When writing Windows 8 apps in C++, in addition to consuming Windows Runtime objects, you create Windows Runtime types. For example, the application and its pages are also represented with these runtime classes. From the implementation point of view, these should be reference classes with a few restrictions, as this code snippet shows:
public ref class Customer sealed
{
public:
    Customer(String^ firstName, String^ LastName);
    Customer(String^ lastName);
    property String^ FullName
    {
        String^ get();
    }
    void MarkAsKeyAccount();
    ~Customer();
private:
     std::wstring m_firstName;
     std::wstring m_LastName;
};
The runtime classes must be marked with the public modifier so that they can be consumed by external applications and other languages. Although the parameters and return values of function members can be any arbitrary C++ types, public members can use only Windows Runtime types. You also must apply the sealed keyword to prevent derivation from these classes.
You can instantiate your own runtime class with the ref new operator, just like any other Windows Runtime class:
Customer^ myCustomer = ref new Customer("John", "Doe");Using a runtime class as a simple local variable also provides automatic life-cycle management:
{
    Customer myOtherCustomer("Jane", "Doe");
    myOtherCustomer.MarkAsKeyAccount();
    // ...
    // Process customer data, i.e. query it, modify it, etc.
    // ...
}   // ~Customer() is automatically invoked
In this code snippet, myOtherCustomer is a local variable. The compiler manages its life cycle, and automatically destroys it, as soon as the variable exits its scope. In this case, the ~Customer() destructor is invoked when the control flow of the application leaves the statement block.
Exceptions
Managing COM exceptions was a laborious task, because COM operations returned HRESULT error codes. For example, when you passed a wrong argument to an operation, an HRESULT value with E_INVALIDARG code was retrieved. If you did not check the return value for this code and allowed the program to flow ahead, sooner or later you might have caused an application crash.
Windows Runtime still uses COM, but now it also allows structured exception handling. Instead of dealing with HRESULT codes directly, you can now catch and handle exceptions that represent the HRESULT codes. Table 13-2 shows these COM-specific exception types with the HRESULT codes they represent.
Table 13-2: Windows Runtime Exceptions with Related HRESULT Codes
| Exception Type | HResult Code |
| InvalidArgumentException | E_INVALIDARG |
| NotImplementedException | E_NOTIMPL |
| AccessDeniedException | E_ACCESSDENIED |
| NullReferenceException | E_POINTER |
| InvalidCastException | E_NOINTERFACE |
| FailureException | E_FAIL |
| OutOfBoundsException | E_BOUNDS |
| ChangedStateException | E_CHANGED_STATE |
| ClassNotRegisteredException | REGBD_E_CLASSNOTREG |
| DisconnectedException | E_DISCONNECTED |
| OperationCanceledException | E_ABORT |
| OutOfMemoryException | E_OUTOFMEMORY |
You do not need to care about how HRESULT codes are wrapped into exceptions; the runtime environment does it for you. If you want to handle potential issues with using Windows Runtime objects, you can follow this pattern:
void MyWIndowsRTOperation(String^ parameter1, int parameter2)
{
    OtherRuntimeObject^ otherObj = ref new OtherObj();
    try
    {
        otherObj->SimpleOperation(parameter1);
        // ...
        otherObj->AnotherOperation(parameter2);
        // ...
        otherObj->CompountOperation(parameter1, parameter2)
        // ...
    }
    catch (NotImpelentedException^ ex)
    {
        // Respond to the issues when an operation is not implemented
    }
    catch (InvalidArgumentException^ ex)
    {
        // Log that the operation was invalid
       throw ex;
    }
    catch (COMException^ ex)
    {
        // Examine ex->HResult values and decide what to do
    }
    catch (...)
    {
        // Decide what to do with any other exceptions
    }
}
The first two catch blocks handle a specific COM exception. The third catch block accepts a pointer to a COMException instance. Because all exception types in Table 13-2 derive from COMException, this block catches all of them except NotImplementedException and InvalidArgumentException, because these two are handled with the previous catch blocks. In this block, you can examine the HResult property of the exception instance to decide how to go on. The fourth catch block traps any other exceptions. In this pattern, you can see that the most-specific exceptions are always caught first, and the least-specific ones at the end.
Because these exceptions derive from COMException, you might be tempted to create your own COM-specific exception with your own failure code by inheriting a new class from COMException. Well, because of internal implementation details, it will not work. In this case, you need to raise a COMException and pass the HRESULT code to the constructor, as shown in this code snippet:
void MyOperation(int param)
{
    if (param == 0)
    {
        throw ref new COMException(MY_ERROR_CODE);
    }
    // ...
}
// ...

try
{
    // ...
    MyOperation(0);
    // ...
}
catch (COMException^ ex)
{
    if (ex->HResult == MY_ERROR_CODE)
    {
        // Handle your own error code
    }
    // ...
}
The COMException instance can be caught only in the catch (COMException^ ex) branch. Even if you raise a COMException instance with a known failure code that has a corresponding exception class in Table 13-2, you cannot catch it with that exception, only with COMException:
try
{
    // ...
    throw ref new COMException(E_FAIL)
    // ...
}
catch (FailureException^ ex)
{
    // The COMException above cannot be caught here
}
catch (COMException^ ex)
{
    if (ex->HResult == E_FAIL)
    {
        // This is where to handle the COMException above
    }
}
You’ve now learned enough about C++ and Windows 8 apps. It’s time to try out these features with Visual Studio.
Discovering C++ Features with Visual Studio
Visual Studio provides great support for C++ applications. You can find all important productivity enhancement tools in the IDE, just like for the other programming languages. In this section, you learn a few things about creating and editing C++ applications. You also get to know some new C++ features.
In the previous chapters, you learned some important things about creating a Windows 8 application UI, so, in this section, you start with a prepared sample, and add new code snippets to that application in each exercise. Before you start to play with the sample, let’s have a look at creating C++ projects.
Creating C++ Projects
You can create C++ programs in Visual Studio with the File &menuarrow; New Project command (Ctrl+Shift+N), just as you already learned. Of course, you need to select the Visual C++ node under Templates, as shown in Figure 13-3. In the middle of this figure you can see the types of Windows 8 style templates supported by C++ in Visual Studio 2012 Express for Windows 8.
C++ supports the same standard Windows 8 application templates as the other languages (Blank Application, Grid Application, and Split Application), and a few additional ones, as described here:
- Blank Dynamic-Link Library — Use this project type to create a library that is compiled into a .dll file. Although this library has the same extension as .NET component library assemblies, it’s in native code, so you cannot reference it from C# or Visual Basic projects.
- Blank Static Library — With this project type, you can compile libraries with a .lib extension. You can link these libraries statically with executable files of your other projects.
- Unit Test Library — As the name of this template suggests, you can create unit test projects for your C++ applications and libraries.
- WinRT Component DLL — This project type enables you to create native Windows Runtime components that can be referenced from any other languages. In addition to the component library, this project creates a .winmd file that contains metadata information about your public classes.
- Direct2D Application and Direct3D Application — These templates help you to start creating applications using the Direct2D and Direct3D technologies, respectively.
Figure 13-3: Windows 8 style templates for the C++ programming language

To specify the attributes of your projects, the New Project dialog box provides you with the same options (for example, solution and application name, location, and solution creation mode) as the other programming languages.
Elements of a C++ Project
To examine the elements of a project, you use the CppDemo Start solution, which you can find in the Chapter13.zip download. The structure of a C++ project is very similar to the one created with other programming languages. However, slight differences exist, as you learn from the next exercise.
Figure 13-4: The CppDemo project in Solution Explorer

Figure 13-5: The CppDemo application in action
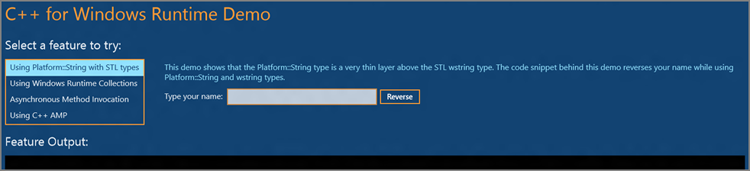
You are now ready to modify this simple C++ application.
Using the Platform::String type
To provide a way to pass character strings to Windows Runtime components, and retrieve strings from Windows Runtime operations, Microsoft created a new String type that is located in the Platform namespace. This new type is a very thin wrapper type that enables the construction of immutable string objects with a few operations. The great thing about this type is that it totally cooperates with the STL’s wstring type, as you learn in the next exercise.
void MainPage::ReverseStringButton_Tapped(Object^ sender, TappedRoutedEventArgs^ e)
{
    String^ yourName = YourName->Text;
    Feature1OutputText->Text += "Your name: " + yourName + "
";
    wstring inputString(yourName->Data());
    wstring reverseString(inputString.rbegin(), inputString.rend());
    String^ yourReversedName = ref new String(reverseString.c_str());
    Feature1OutputText->Text += "Reversed: " + yourReversedName + "
";
}Your name: My nickame is DeepDiver
Reversed: reviDpeeD si emankcin yMThis type of cooperation between Windows Runtime types and STL types is a common pattern. You can use Windows Runtime collections together with STL collections in a similar way, as you learn in the next exercise.
Using Runtime Collections
The C++ STL defines a number of collections with a plethora of related operations. Moreover, as you learned earlier from Table 13-1, C++11 adds new collection types to the STL. You can use the STL collections everywhere, but you cannot pass them to Windows Runtime objects directly.
The solution is to use the Windows Runtime collections that are found in the Platform::Collections namespace. In the next exercise, you learn to utilize the Vector and the VectorView collections.
col::Vector<int>^ MainPage::CreateRandomVector()
{
    vector<int> myNumbers;
    srand((unsigned)time(0));
    for (int i = 0; i < 10; i++)
    {
        myNumbers.push_back(rand()%100 + 1);
    }
    return ref new col::Vector<int>(move(myNumbers));
}void MainPage::SumAVectorButton_Tapped(Object^ sender, TappedRoutedEventArgs^ e)
{
wstringstream streamVal;
WFC::IVectorView<int>^ vv = CreateRandomVector()->GetView();
int sum = 0;
int index = 0;
for_each(begin(vv), end(vv), [&](int value)
{
streamVal << "Number " << ++index << " is " << value << endl;
sum += value;
});
streamVal << "Sum of these values is " << sum;
Feature2OutputText->Text = ref new String(streamVal.str().c_str());
}Using Asynchronous Operations
In previous chapters, you saw many examples using asynchronous method calls. In C#, the new async and await keywords performed magic with the compiler, and enabled you to consume asynchronous methods as if they were synchronous — while keeping the UI responsive. In JavaScript, you can use the Common JavaScript Promises pattern, as you learned in in Chapter 5.
Well, C++ does not have such a compiler trick like C#, but it has a great component, the Parallel Pattern Library (PPL), which helps you to invoke asynchronous operations with a relatively simple pattern, as you learn in the next exercise.
void MainPage::WriteFileButton_Tapped(Object^ sender, TappedRoutedEventArgs^ e)
{
    Feature3OutputText->Text += "File creation has been started.
";
    StorageFolder^ documentsFolder = KnownFolders::DocumentsLibrary;
    // --- Start file creation
    task<StorageFile^> createTask(documentsFolder->CreateFileAsync(
        "MySample.txt", CreationCollisionOption::ReplaceExisting));
    createTask.then([this](StorageFile^ file)
    {
        Feature3OutputText->Text += "File " + file->Name + " has been created.
";
        // --- Start writing into the file
        task<void> writeTask(FileIO::WriteTextAsync(file, YourMessage->Text));
        writeTask.then([this](void)
        {
            Feature3OutputText->Text += "Text '" + YourMessage->Text +
                "' has been written to the file.
";
        });
    });
}Using Accelerated Massive Parallelism
Most computers contain not only a CPU, but also a very high-performance GPU and other processing units (such as APUs). Many operations can be executed much faster on these units, because they have special architecture that allows a high level of concurrency of special operations. Microsoft’s C++ Accelerated Massive Parallelism (AMP) is an open specification implementing data parallelism directly in C++.
The Direct2D and Direct3D technologies use the GPU for rendering complex graphics. GPUs have an architecture that can process pixels and vectors in a very fast way. They can carry out many operations simultaneously. You can use this power not only to draw graphics, but also for processing data. C++ AMP is a technology that extends C++ with its own library and a compiler that is able to generate code that executes on GPUs and other accelerator units.
You can use C++ AMP in Windows 8 apps, as you learn in the next exercise. In this exercise you multiply float-number matrices with 1,000 rows and 1,000 lines. This is a complex operation because of the size of matrices. For calculating the 1 million cells altogether, this operation requires 1,000 multiplications of float-number pairs, and then summing up the result of these multiplications. In total, this results in 2 billion operations.
In the next exercise you implement this operation both with the traditional sequential algorithm and with C++ AMP.
void MainPage::CalculateSerialButton_Tapped(Object^ sender,
    TappedRoutedEventArgs^ e)
{
    Feature4OutputText->Text += "Sequential matrix multiplication started...
";
    CalculateSerialButton->IsEnabled = false;
    MatrixOperation matrixOp;
    task<unsigned long long> matrixTask (matrixOp.MultiplyMatrixSeriallyAsync());
    matrixTask.then([this](unsigned long long elapsed)
    {
        CalculateSerialButton->IsEnabled = true;
        wstringstream streamVal;
        streamVal << "Sequential operation executed in " << elapsed << "ms.
";
        Feature4OutputText->Text += ref new String(streamVal.str().c_str());
    });
}void MainPage::CalculateWithAMPButton_Tapped(Object^ sender,
TappedRoutedEventArgs^ e)
{
Feature4OutputText->Text += "AMP matrix multiplication started...
";
CalculateWithAmpButton->IsEnabled = false;
MatrixOperation matrixOp;
task<unsigned long long> matrixTask (matrixOp.MultiplyMatrixWithAMPAsync());
matrixTask.then([this](unsigned long long elapsed)
{
CalculateWithAmpButton->IsEnabled = true;
wstringstream streamVal;
streamVal << "AMP operation executed in " << elapsed << "ms.
";
Feature4OutputText->Text += ref new String(streamVal.str().c_str());
});
}void MatrixOperation::MultiplySequential(vector<float>& vC,
const vector<float>& vA, const vector<float>& vB,
int M, int N, int W)
{
for (int row = 0; row < M; row++)
{
for (int col = 0; col < N; col++)
{
float sum = 0.0f;
for(int i = 0; i < W; i++)
sum += vA[row * W + i] * vB[i * N + col];
vC[row * N + col] = sum;
}
}
}void MatrixOperation::MultiplyAMP(vector<float>& vC,
const vector<float>& vA, const vector<float>& vB,
int M, int N, int W)
{
concurrency::array_view<const float,2> a(M, W, vA);
concurrency::array_view<const float,2> b(W, N, vB);
concurrency::array_view<float,2> c(M, N, vC);
c.discard_data();
concurrency::parallel_for_each(c.extent,
[=](concurrency::index<2> idx) restrict(amp) {
int row = idx[0]; int col = idx[1];
float sum = 0.0f;
for(int i = 0; i < W; i++)
sum += a(row, i) * b(i, col);
c[idx] = sum;
});
}concurrency::array_view<const float,2> a(M, W, vA);
concurrency::array_view<const float,2> b(W, N, vB);
concurrency::array_view<float,2> c(M, N, vC);concurrency::parallel_for_each(c.extent,
[=](concurrency::index<2> idx) restrict(amp) {Summary
C++ is a co-equal programming language with the others (C#, Visual Basic, and JavaScript) when creating Windows 8 apps. Because of new devices such as tablets, smartphones, and ultra-mobile computers, C++ has experienced a renaissance — sort of. These devices have less powerful CPUs and GPUs than desktop computers, and they also must be frugal with their batteries, while user expectations (most importantly, the responsiveness of the UI) are very high. Application performance is a key in these devices. The lower-level constructs of C++ and its capability leverage underlying hardware capabilities directly, which makes C++ the best programming language for these new devices.
In the past, C++ never had greater productivity than other (especially managed) languages. However, the C++11 standard added new features to the language that made it cleaner, faster, and more robust. To make it a first-class citizen for Windows 8 app development, Microsoft extended the language with new features. These provide seamless integration with Windows Runtime, and new constructs (such as generics, value, reference types, and so on) make C++ as strong as managed languages.
C++ has some unique features in Windows 8 app development. It can use DirectX technologies, and create Windows 8 apps that leverage Direct2D, Direct3D, DirectWrite, and XAudio2, among others. Microsoft created a new technology for leveraging hardware-accelerated devices such as GPUs and APUs, called C++ AMP, which can be accessed only from C++.
In Chapter 14, you learn advanced techniques that help you create hybrid applications (apps with mixed programming languages) and perform often-used chores, such as running background tasks or managing network status changes.
Exercises
What You Learned In This Chapter
| Topic | Key Concepts |
| C++11 | The latest major revision of the C++ standard is C++11, approved by ISO/IEC on August 12, 2011. |
| auto keyword | This new feature of C++11 implements an automatic type deduction, provided that an explicit initializer is given. The compiler infers the type of the variable from the initialization value. |
| Smart pointers in C++11 | C++11 deprecates the auto_ptr, and introduces three new smart pointers: unique_ptr (sole ownership of an object), shared_ptr (shared ownership of an object), and weak_ptr (non-owning reference to an object). |
| Rvalue references | C++11 uses the && notation to bind rvalue (right-hand side value) references to identifiers. |
| Move semantics | C++11 introduces move semantics to improve the performance in such situations where a large amount of data should be copied between caller and callee methods. Move semantics allow moving the ownership of the data instead of the data itself. |
| Lambda functions | Lambda functions are anonymous functions that allow capturing variables from the enclosing scope of the expression. |
| C++ for Windows Runtime | In Visual Studio 2012, Microsoft added new features to C++ in order to manage Windows Runtime objects with the ease that developers are used to in the .NET Framework. This set of new language extensions is called C++ for Windows Runtime. |
| C++Component Extensions | Microsoft provides C++ Component Extensions (C++/CX) to provide bindings to foreign type systems, such as the ones used by .NET or the JavaScript engine. |
| Reference counter management | Windows Runtime types are COM types and so inherently they are reference counted. There is a special notation for pointers referencing Windows Runtime types. The ^ (“hat” or “handle”) character signifies that they are reference counted, and they must be allocated with the ref new keyword. Using ^ and ref new, the compiler takes over the responsibility of managing reference counting and object disposal automatically. |
| COM exceptions | Windows Runtime still uses COM, but now it also allows structured exception handling. Instead of dealing with HRESULT codes directly, you can now catch and handle exceptions representing those HRESULT codes. |
| Creating C++ projects in Visual Studio | Use the File &menuarrow; New Project command (Ctrl+Shift+N) and select Visual C++ node under Templates to list the available C++ templates. Set the solution properties, and click OK to create the selected project. |
| Platform::String | This Windows Runtime type is a very thin wrapper around the STL’s wstring type, and it is used to pass reference-counted immutable string values crossing the Windows Runtime boundary. |
| Windows Runtime Collections | You can use these types to pass reference-counted collections crossing the Windows Runtime boundary. They can be used in cooperation with the STL’s standard collection types. |
| Parallel Pattern Library (PPL) | This library provides useful types to implement asynchronous operations in C++, using the task pattern with continuations. |
| C++ AMP | Accelerated Massive Parallelism (AMP) is a unique feature of C++. It is able to use hardware-accelerated devices (such as GPUs and APUs) to execute programs written in C++. It may provide a great performance boost for methods running on these devices. |