
Defining an Android Application: The Manifest File
An Android application can consist of a multitude of different components:
Activities: These are user-facing components that present a UI with which to interact.
Services: These are processes that work in the background and don't have a visible UI. For example, a service might be responsible for polling a mail server for new e-mails.
Content providers: These components make parts of your application data available to other applications.
Intents: These are messages created by the system or applications themselves. They are then passed on to any interested party. Intents might notify us of system events such as the SD card being removed or the USB cable being connected. Intents are also used by the system for starting components of our application, such as activities. We can also fire our own intents to ask other applications to perform an action, such as opening a photo gallery to display an image or starting the Camera application to take a photo.
Broadcast receivers: These react to specific intents, and they might execute an action, such as starting a specific activity or sending out another intent to the system.
An Android application has no single point of entry, as we are used to having on a desktop operating system (for example, in the form of Java's main() method). Instead, components of an Android application are started up or asked to perform a certain action by specific intents.
What components comprise our application and to which intents these components react are defined in the application's manifest file. The Android system uses this manifest file to get to know what makes up our application, such as the default activity to display when the application is started.
NOTE: We are only concerned about activities in this book, so we'll only discuss the relevant portions of the manifest file for this type of component. If you want to make yourself dizzy, you can learn more about the manifest file on the Android Developers site.
The manifest file serves many more purposes than just defining an application's components. The following list summarizes the relevant parts of a manifest file in the context of game development:
- The version of our application as displayed and used on the Android Market
- The Android versions on which our application can run
- Hardware profiles our application requires (that is, multitouch, specific screen resolutions, or support for OpenGL ES 2.0)
- Permissions for using specific components, such as for writing to the SD card or accessing the networking stack
We will create a template manifest in the following subsections that we can reuse, in a slightly modified manner, in all the projects we'll develop throughout this book. For this, we'll go through all the relevant XML tags we'll need to define our application.
The <manifest> Element
The <manifest> tag is the root element of an AndroidManifest.xml file. Here's a basic example:
<manifest xmlns:android="http://schemas.android.com/apk/res/android"

      package="com.helloworld"

      android:versionCode="1"

      android:versionName="1.0"

      android:installLocation="preferExternal">

…

</manifest>
We are assuming that you have worked with XML before, so you should be familiar with the first line. The <manifest> tag specifies a namespace called android, which is used throughout the rest of the manifest file. The package attribute defines the root package name of our application. Later on, we'll reference specific classes of our application relative to this package name.
The versionCode and versionName attributes specify the version of our application in two forms. The versionCode is an integer that we have to increment each time we publish a new version of our application. It is used by the Android Market to track our application's version. The versionName is displayed to users of the Android Market when they browse our application. We can use any string we like here.
The installLocation attribute is only available to us if we set the build target of our Android project in Eclipse to Android 2.2 or newer. It specifies where our application should be installed. The string preferExternal tells the system that we'd like our application to be installed to the SD card. This will only work on Android 2.2 or newer, and this string is ignored by all earlier Android applications. On Android 2.2 or newer, the application will always get installed to internal storage where possible.
All attributes of the XML elements in a manifest file are generally prefixed with the android namespace, as shown previously. For brevity, we will not specify the namespace in the following sections when talking about a specific attribute.
Inside the <manifest> element, we then define the application's components, permissions, hardware profiles, and supported Android versions.
The Application Element
As in the case of the <manifest> element, let's discuss the <application> element in the form of an example:
<application android:icon="@drawable/icon" android:label="@string/app_name"

android:debuggable="true">

…

</application>
Now doesn't this look a bit strange? What's up with the @drawable/icon and @string/app_name strings? When developing a standard Android application, we usually write a lot of XML files, where each defines a specific portion of our application. Full definition of those portions requires that we are also able to reference resources that are not defined in the XML file, such as images or internationalized strings. These resources are located in subfolders of the res/ folder, as discussed in Chapter 2, when we dissected the Hello World project in Eclipse.
To reference resources, we use the preceding notation. The @ specifies that we want to reference a resource defined elsewhere. The following string identifies the type of the resource we want to reference, which directly maps to one of the folders or files in the res/ directory. The final part specifies the name of the resource. In the preceding case, this is an image called icon and a string called app_name. In the case of the image, it's the actual filename we specify, as found in the res/drawable/ folder. Note that the image name does not have a suffix like .png or .jpg. Android will infer the suffix automatically based on what's in the res/drawable/ folder. The app_name string is defined in the res/values/strings.xml file, a file where all the strings used by the application will be stored. The name of the string was defined in the strings.xml file.
NOTE: Resource handling on Android is an extremely flexible, but also complex thing. For this book, we decided to skip most of resource handling for two reasons: it's utter overkill for game development, and we want to have full control over our resources. Android has the habit of modifying resources placed in the res/ folder, especially images (called drawables). That's something we, as game developers, do not want. The only use we'd suggest for the Android resource system in game development is internationalizing strings. We won't get into that in this book; instead, we'll use the more game development-friendly assets/ folder, which leaves our resources untouched and allows us to specify our own folder hierarchy.
The meaning of the attributes of the <application> element should become a bit clearer now. The icon attribute specifies the image from the res/drawable/ folder to be used as an icon for the application. This icon will be displayed in the Android Market as well as in the application launcher on the device. It is also the default icon for all the activities that we define within the <application> element.
The label attribute specifies the string being displayed for our application in the application launcher. In the preceding example, this references a string in the res/values/string.xml file, which is what we specified when we created the Android project in Eclipse. We could also set this to a raw string, such as My Super Awesome Game. The label is also the default label for all of the activities that we define in the <application> element. The label will be shown in the title bar of our application.
The debuggable attribute specifies whether or not our application can be debugged. For development, we should usually set this to true. When you deploy your application to the market, just switch it to false. If you don't set this to true, you won't be able to debug the application in Eclipse.
We have only discussed a very small subset of the attributes that you can specify for the <application> element. However, these are sufficient for our game development needs. If you want to know more, you can find the full documentation on the Android Developer's site.
The <application> element contains the definitions of all the application components, including activities and services, as well as any additional libraries used.
The <activity> Element
Now it's getting interesting. Here's a hypothetical example for our Mr. Nom game:
<activity android:name=".MrNomActivity"

          android:label="Mr. Nom"

          android:screenOrientation="portrait"<

          android:configChanges="keyboard|keyboardHidden|orientation"<

    <intent-filter>

        <action android:name="android.intent.action.MAIN" />

        <category android:name="android.intent.category.LAUNCHER" />

    </intent-filter>

</activity>
Let's have a look at the attributes of the <activity> tag first.
name: This specifies the name of the activity's class relative to thepackageattribute we specified in the<manifest>element. You can also specify a fully-qualified class name here.
label: We already specified the same attribute in the<application>. This label is displayed in the title bar of the activity (if it has one). The label will also be used as the text displayed in the application launcher if the activity we define is an entry point to our application. If we don't specify it, the label from the<application>element will be used instead. Note that we used a raw string here instead of a reference to a string in thestring.xmlfile.
screenOrientation: This attribute specifies the orientation that the activity will use. Here we specifiedportraitfor our Mr. Nom game, which will only work in portrait mode. Alternatively, we could specifylandscapeif we wanted to run in landscape mode. Both configurations will force the orientation of the activity to stay the same over the activity's life cycle, no matter how the device is actually oriented. If we leave out this attribute, then the activity will use the current orientation of the device, usually based on accelerometer data. This also means that whenever the device orientation changes, the activity will be destroyed and restarted—something that's undesirable in the case of a game. We usually fix the orientation of our game's activity either to landscape or portrait mode.
configChanges: Reorienting the device or sliding out the keyboard is considered a configuration change. In the case of such a change, Android will destroy and restart our application to accommodate the change. That's not desirable in the case of a game. TheconfigChangesattribute of the<activity>element comes to the rescue. It allows us to specify which configuration changes we want to handle ourselves, without destroying and recreating our activity. Multiple configuration changes can be specified by using the|character to concatenate them. In the preceding case, we handle the changeskeyboard,keyboardHidden, andorientationourselves.
As with the <application> element, there are, of course, more attributes that you can specify for an <activity> element. For game development, we get away with the four attributes just discussed.
Now, you might have noticed that the <activity> element isn't empty, but it houses another element, which itself contains two more elements. What are those for?
As we pointed out earlier, there's no notion of a single main entry point to your application on Android. Instead, we can have multiple entry points in the form of activities and services that are started due to specific intents being sent out by the system or a third-party application. Somehow, we need to communicate to Android which activities and services of our application will react (and in what ways) to specific intents. That's where the <intent-filter> element comes into play.
In the preceding example, we specify two types of intent filters: an <action> and a <category>. The <action> element tells Android that our activity is a main entry point to our application. The <category> element specifies that we want that activity to be added to the application launcher. Both elements together allow Android to infer that, when the icon in the application launcher for the application is pressed, it should start that specific activity.
For both the <action> and <category> elements, the only thing that gets specified is the name attribute, which identifies the intent to which the activity will react. The intent android.intent.action.MAIN is a special intent that the Android system uses to start the main activity of an application. The intent android.intent.category.LAUNCHER is used to tell Android whether a specific activity of an application should have an entry in the application launcher.
Usually, we'll only have one activity that specifies these two intent filters. However, a standard Android application will almost always have multiple activities, and these need to be defined in the manifest.xml file as well. Here's an example definition of this type of a subactivity:
<activity android:name=".MySubActivity"

          android:label=“Sub Activity Title"

          android:screenOrientation="portrait">

          android:configChanges="keyboard|keyboardHidden|orientation"/>
Here, no intent filters are specified—only the four attributes of the activity we discussed earlier. When we define an activity like this, it is only available to our own application. We start this type of activity programmatically with a special kind of intent; say, when a button is pressed in one activity to cause a new activity to open. We'll see in a later section how we can start an activity programmatically.
To summarize, we have one activity for which we specify two intent filters so that it becomes the main entry point of our application. For all other activities, we leave out the intent filter specification so that they are internal to our application. We'll start these programmatically.
NOTE: As indicated earlier, we'll only ever have a single activity in our games. This activity will have exactly the same intent filter specification as shown previously. The reason we discussed how to specify multiple activities is that we are going to create a special sample application in a minute that will have multiple activities. Don't worry—it's going to be easy.
The <uses-permission> Element
We are leaving the <application> element now and coming back to elements that we normally define as children of the <manifest> element. One of these elements is the <uses-permission> element.
Android has an elaborate security model. Each application is run in its own process and VM, with its own Linux user and group, and it cannot influence other applications. Android also restricts the use of system resources, such as networking facilities, the SD card, and the audio-recording hardware. If our application wants to use any of these system resources, we have to ask for permission. This is done with the <uses-permission> element.
A permission always has the following form, where string specifies the name of the permission we want to be granted:
<uses-permission android:name="string"/>
Here are a few permission names that might come in handy:
android.permission.RECORD_AUDIO: This grants us access to the audio-recording hardware.
android.permission.INTERNET: This grants us access to all the networking APIs so we can, for example, fetch an image from the Net or upload high scores.
android.permission.WRITE_EXTERNAL_STORAGE: This allows us to read and write files on the external storage, usually the SD card of the device.
android.permission.WAKE_LOCK: This allows us to acquire a so-called wake lock. With this wake lock, we can keep the device from going to sleep if the screen hasn't been touched for some time. This could happen, for example, in a game that is controlled only by the accelerometer.
android.permission.ACCESS_COARSE_LOCATION: This is a very useful permission as it allows you to get non-gps-level access to things like the country in which the user is located, which can be useful for language defaults and analytics.
android.permission.NFC: This allows applications to perform I/O operations over NFC (near-field communication), which is useful for a variety of game features involving the quick exchange of small amounts of information.
To get access to the networking APIs, we'd thus specify the following element as a child of the <manifest> element:
<uses-permission android:name="android.permission.INTERNET"/>
For any additional permissions, we simply add more <uses-permission> elements. You can specify many more permissions; we again refer you to the official Android documentation. We'll only need the set just discussed.
Forgetting to add a permission for something like accessing the SD card is a common source of error. It manifests itself as a message in device log, which might survive undetected due to all the clutter in log. Think about the permissions your game will need, and specify them when you initially create the project.
Another thing to note is that, when a user installs your application, he or she will first be asked to review all of the permissions your application requires. Many users will just skip over these and happily install whatever they can get hold of. Some users are more conscious about their decisions and will review the permissions in detail. If you request suspicious permissions, like the ability to send out costly SMS messages or to get a user's location, you may receive some nasty feedback from users in the Comments section for your application when it's on the Market. If you must use one of those problematic permissions, you also should tell the user why you're using it in your application description. The best thing to do is to avoid those permissions in the first place or to provide functionality that legitimately uses them.
The <uses-feature> Element
If you are an Android user yourself and possess an older device with an old Android version like 1.5, you will have noticed that some awesome applications won't show up in the Android Market application on your device. One reason for this can be the use of the <uses-feature> element in the manifest file of the application.
The Android Market application will filter all available applications by your hardware profile. With the <uses-feature> element, an application can specify which hardware features it needs; for example, multitouch or support for OpenGL ES 2.0. Any device that does not have the specified features will trigger that filter so that the end user isn't shown the application in the first place.
A <uses-feature> element has the following attributes:
<uses-feature android:name="string" android:required=["true" | "false"]

android:glEsVersion="integer" />
The name attribute specifies the feature itself. The required attribute tells the filter whether we really need the feature under all circumstances or if it's just nice to have. The last attribute is optional and only used when a specific OpenGL ES version is required.
For game developers, the following features are most relevant:
android.hardware.touchscreen.multitouch: This requests that the device have a multitouch screen capable of basic multitouch interactions, such as pinch zooming and the like. These types of screens have problems with independent tracking of multiple fingers, so you have to evaluate if those capabilities are sufficient for your game.
android.hardware.touchscreen.multitouch.distinct: This is the big brother of the last feature. This requests full multitouch capabilities suitable for implementing things like onscreen virtual dual sticks for controls.
We'll look into multitouch in a later section of this chapter. For now, just remember that, when our game requires a multitouch screen, we can weed out all devices that don't support that feature by specifying a <uses-feature> element with one of the preceding feature names, like so:
<uses-feature android:name="android.hardware.touchscreen.multitouch"

android:required="true"/>
Another useful thing for game developers to do is to specify which OpenGL ES version is needed. In this book, we'll be concerned with OpenGL ES 1.0 and 1.1. For these, we usually don't specify a <uses-feature> element as they aren't all that different from each other. However, any device that implements OpenGL ES 2.0 can be assumed to be a graphics powerhouse. If our game is visually complex and needs a lot of processing power, we can require OpenGL ES 2.0 so that the game only shows up for devices that are able to render our awesome visuals at an acceptable frame rate. Note that we don't use OpenGL ES 2.0, but we just filter by hardware type so that our OpenGL ES 1.x code gets enough processing power. Here's how we can do this:
<uses-feature android:glEsVersion="0x00020000"android:required="true"/>
This will make our game only show up on devices that support OpenGL ES 2.0 and are thus assumed to have a fairly powerful graphics processor.
NOTE: This feature is reported incorrectly by some devices out there, which will make your application invisible to otherwise perfectly fine devices. Use it with caution.
Let's say you want to have optional support of USB peripherals for your game so that the device can be a USB host and have controllers or other peripherals connected to it. The correct way of handling this is to add:
<uses-feature android:name="android.hardware.usb.host" android:required="false"/>
Setting "android:required" to false says to the market “We may use this feature, but it's not necessary to download and run the game.” Setting usage of the optional hardware feature is a good way to future-proof your game for various pieces of hardware that you haven't yet encountered. It allows manufacturers to limit the apps only to ones that have declared support for their specific hardware and, if you declare optional support for it, you will be included in the apps that can be downloaded for that device.
Now, every specific requirement you have in terms of hardware potentially decreases the number of devices on which your game can be installed, which will direct affect your sales. Think twice before you specify any of the above. For example, if the standard mode of your game requires multitouch, but you can also think of a way to make it work on single-touch devices, you should strive to have two code paths—one for each hardware profile—so that your game can be deployed to a bigger market.
The <uses-sdk> Element
The last element we'll put in our manifest file is the <uses-sdk> element. It is a child of the <manifest> element. We implicitly defined this element when we created our Hello World project in Chapter 2 and we specified the minimum SDK version in the New Android Project dialog. So what does this element do? Here's an example:
<uses-sdk android:minSdkVersion="3" android:targetSdkVersion="13"/>
As we discussed in Chapter 2, each Android version has an integer assigned, also known as an SDK version. The <uses-sdk> element specifies the minimum version supported by our application and the target version of our application. In this example, we define our minimum version as Android 1.5 and our target version as This element allows us to deploy an application that uses APIs only available in newer versions to devices that have a lower version installed. One prominent example would be the multitouch APIs, which are supported from SDK version 5 (Android 2.0) onward. When we setup our Android project in Eclipse, we use a build target that supports that API; for example, SDK version 5 or higher (we usually set it to the latest SDK version, which is 13 at the time of writing). If we want our game to run on devices with SDK version 3 (Android 1.5) as well, we specify the minSdkVersion, as before, in the manifest file. Of course, we must be careful not to use any APIs that are not available in the lower version, at least on a 1.5 device. On a device with a higher version, we can use the newer APIs as well.
The preceding configuration is usually fine for most games (unless you can't provide a separate fallback code path for the higher-version APIs, in which case you will want to set the minSdkVersion attribute to the minimum SDK version you actually support).
Android Game Project Setup in Ten Easy Steps
Let's now combine all of the preceding information and develop a simple step-by-step method to create a new Android game project in Eclipse. Here's what we want from our project:
- It should be able to use the latest SDK version's features while maintaining compatibility with the lowest SDK version that some devices still run. That means that we want to support Android 1.5 and above.
- It should be installed to the SD card when possible so that we don't fill up the internal storage of the device.
- It should be debuggable.
- It should have a single main activity that will handle all configuration changes itself so that it doesn't get destroyed when the hardware keyboard is revealed or when the orientation of the device is changed.
- The activity should be fixed to either portrait or landscape mode.
- It should allow us to access the SD card.
- It should allow us to get a hold of a wake lock.
These are some easy goals to achieve with the information you just acquired. Here are the steps:
- Create a new Android project in Eclipse by opening the New Android Project dialog, as described in Chapter 2.
- In the New Android Project dialog, specify your project's name and set the build target to the latest available SDK version.
- In the same dialog, specify the name of your game, the package in which all your classes will be stored, and the name of your main activity. Then set the minimum SDK version to 3. Press Finish to make the project a reality.
- Open the
AndroidManifest.xmlfile. - To make Android install the game on the SD card when available, add the
installLocationattribute to the<manifest>element, and set it topreferExternal. - To make the game debuggable, add the
debuggableattribute to the<application>element and set it totrue. - To fix the orientation of the activity, add the
screenOrientationattribute to the<activity>element, and specify the orientation you want(portraitorlandscape). - To tell Android that we want to handle the
keyboard,keyboardHidden, andorientationconfiguration changes, set theconfigChangesattribute of the<activity>element tokeyboard|keyboardHidden|orientation. - Add two
<uses-permission>elements to the<manifest>element, and specify thenameattributesandroid.permission.WRITE_EXTERNALSTORAGEandandroid.permission.WAKE_LOCK. - Finally, add the
targetSdkVersionattribute to the<uses-sdk>element and specify your target SDK. It should be the same as the one you specified for the build target in step 1.
There you have it. Ten easy steps that will generate a fully-defined application that will be installed to the SD card (on Android 2.2 and over), is debuggable, has a fixed orientation, will not explode on a configuration change, allows you to access the SD card and wake locks, and will work on all Android versions starting from 1.5 up to the latest version. Here’s the final AndroidManifest.xml content after executing the preceding steps:
<?xml version="1.0" encoding="utf-8"?>

<manifest xmlns:android="http://schemas.android.com/apk/res/android"

      package="com.badlogic.awesomegame"

      android:versionCode="1"

      android:versionName="1.0"

      android:installLocation="preferExternal">

    <application android:icon="@drawable/icon"

                 android:label="Awesomnium"

                 android:debuggable="true">

        <activity android:name=".GameActivity"

                  android:label="Awesomnium"

                  android:screenOrientation="landscape"

                  android:configChanges="keyboard|keyboardHidden|orientation">

            <intent-filter>

                <action android:name="android.intent.action.MAIN" />

                <category android:name="android.intent.category.LAUNCHER" />

            </intent-filter>

        </activity>

    </application>

    <uses-permission android:name="android.permission.WRITE_EXTERNAL_STORAGE"/>

    <uses-permission android:name="android.permission.WAKE_LOCK"/>

    <uses-sdk android:minSdkVersion="3" android:targetSdkVersion="9"/>

</manifest>
As you can see, we got rid of the @string/app_name in the label attributes of the <application> and <activity> element. This is not really necessary, but having the application definition in one place is preferred. From now on, it’s all about the code! Or is it?
Market Filters
There are so many different Android devices, with so many different capabilities, that it's necessary for the hardware manufacturers to allow only compatible applications to be downloaded and run on their device, or the user will have the bad experience of trying to run something that's just not compatible. To deal with this, the Android Market filters out incompatible applications from the list of available applications for a specific device. For example, if you have a device without a camera, and you search for a game that requires a camera, it simply won't show up. For better or worse, it will appear to you, the user, like the app just doesn't exist.
Many of the previous manifest elements we've discussed are used as market filters. Besides <uses-feature>, <uses-sdk> and <uses-permission> that we went over, there are a few more elements that are specific to market filtering that you should keep in mind:
<supports-screens>:This allows you to declare the screen sizes and densities your game can run on. Ideally, your game will work on all screens, and we'll show you how to do that. However, in the manifest, you will want to declare support explicitly for every screen size you can.
<uses-configuration>:This lets you declare explicit support for an input configuration type on a device, such as a hard keyboard, qwerty-specific keyboard, touchscreen, or maybe trackball navigation input. Ideally, you'll support all of the above, but if your game requires very specific input, you will want to investigate and use this tag for market filtering.
<uses-library>:This allows for the declaration that a third-party library, on which your game is dependent, be present on the device. For example, you might require a text-to-speech library that is quite large, but very common, for your game. Declaring the library with this tag ensures that only devices with that library installed can see and download your game. A common use of this is to allow GPS/map-based games to work only on devices with the Google maps library installed.
As Android moves forward, more market filter tags are likely, so make sure to check the official market filters page on the developer's site to get up-to-date before you deploy.
Defining the Icon of Your Game
When you deploy your game to a device and open the application launcher, you will see that its entry has a nice, but not really unique, Android icon. The same icon would be shown for your game in the market. How can you change it to a custom icon?
Have a closer look at the <application> element again. There, we defined an attribute called icon. It references an image in the res/drawable directory called icon. So, it should be obvious what to do: replace the icon image in the drawable folder with your own icon image.
When you inspect the res/ folder, you'll see more than one drawable folder, as depicted in Figure 4–1.
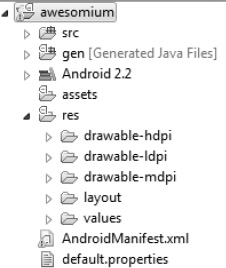
Figure 4–1. What happened to my res/ folder?
Now, this is again a classic chicken-and-egg problem. In Chapter 2, only a single res/drawable folder was available in our Hello World project. This was due to the fact that we specified SDK version 3 as our build target. That version only supported a single screen size. That changed with Android 1.6 (SDK version 4). We saw in Chapter 1 that devices can have different sizes, but we didn't talk about how Android handles those. It turns out that there's an elaborate mechanism that allows you to define your graphical assets for a set of so-called screen densities. Screen density is a combination of physical screen size and the number of pixels of the screen. We'll look into that topic in a later section in more detail. For now, it suffices to know that Android defines three densities: ldpi for low-density screens, mdpi for standard-density screen, hdpi for high-density screens, and xhdpi for extra-high-density screens. For lower-density screens, we usually use smaller images; and for higher-density screens, we use high-resolution assets.
So, in the case of our icon, we need to provide four versions: one for each density. But how big should those versions each be? Luckily, we already have default icons in the res/drawable folders that we can use to reengineer the sizes of our own icons. The icon in res/drawable-ldpi has a resolution of 36×36 pixels, the icon in res/drawable-mdpi has a resolution of 48×48 pixels, the icon in res/drawable-hdpi has a resolution of 72×72 pixels, and the icon in res/drawable-xhdpi has a resolution of 96x96 pixels. All we need to do is create versions of our custom icon with the same resolutions and replace the icon.png file in each of the folders with our own icon.png file. We can leave the manifest file unaltered as long as we call our icon image file icon.png. Note that file references in the manifest file are case sensitive. Always use all lowercase letters in resource files, to play it safe.
For true Android 1.5 compatibility, we need to add a folder called res/drawable/ and place the icon image from the res/drawable-mdpi/ folder there. Android 1.5 does not know about the other drawable folders, so it might not find our icon.
Finally, we are ready to get some Android coding done.