
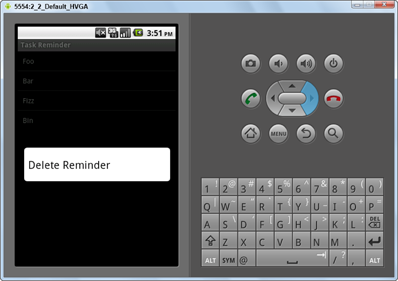
Figure 10-3: The context menu in the Task Reminder application.
Creating a Context Menu
A context menu appears when a user long-presses a view. The context menu is a floating menu that hovers above the current screen and allows users to choose from various options related to the view they long-pressed.
Thankfully, creating a context menu is quite similar to creating an option menu. You can define the menu in XML and inflate it using the same mechanism that you used when you created the options menu. All you need to do is call registerForContextMenu() with a view as the target. (See Chapter 9 to find out how to create a view as the target.) After you create that, you need to override the onCreateContextMenu() call — also demonstrated in Chapter 9.
The Task Reminder application needs a mechanism in which to delete a task when it’s no longer needed. Users can long-press the task in the list, and a context menu pops up that allows them to delete the task by selecting an item from the menu.
Creating the menu XML file
To create this menu, create a new XML file in the res/menu directory. Name it list_menu_item_longpress.xml. Type the following into the XML file:
<?xml version=”1.0” encoding=”utf-8”?>
<menu xmlns:android=”http://schemas.android.com/apk/res/android”>
<item android:id=”@+id/menu_delete”
android:title=”@string/menu_delete” />
</menu>
Notice that the title property uses a new string resource menu_delete. You need to create a new string resource with the name of menu_delete and the value of Delete Reminder. Also note that you don’t need an icon associated with this menu.
 A context menu doesn’t support icons; it’s simply a list of menu options that floats above the current activity.
Loading the menu
To load the menu XML and display it to the user, type the following code into the onCreateContextMenu() method:
@Override
public void onCreateContextMenu(ContextMenu menu, View v,
ContextMenuInfo menuInfo) {
super.onCreateContextMenu(menu, v, menuInfo);
MenuInflater mi = getActivity().getMenuInflater();
mi.inflate(R.menu.list_menu_item_longpress, menu);
}
This code performs the same function as the onCreateOptionsMenu() call, but this time you’re inflating the menu for the context menu — and you’re loading the context menu. Now, if a user long-presses a list item in the list view, he receives a context menu, as shown in Figure 10-3.
Handling user selections
Handling the selection of the context menu items is very similar to handling that with an option menu. Type the following code into the bottom of your class file:
@Override
public boolean onContextItemSelected(MenuItem item) { →2
switch(item.getItemId()) { →3
case R.id.menu_delete: →4
// Delete the task
return true;
}
return super.onContextItemSelected(item);
}
The code lines are explained here:
→2 This is the method that’s called when a context menu item is selected. The item parameter is the item that was selected in the context menu.
→3 A switch statement determines which item was selected, based on the ID as defined in the list_menu_item_longpress.xml file.
→4 This is the ID for the menu_delete button in the list_menu_item_longpress.xml file. If this menu option is selected, the following code would perform some action based on that determination. Nothing is happening in the code block in this chapter, but that changes in Chapter 12, where you delete the task from the SQLite database.
 You can add many different context menu items to the
 list_menu_item_longpress.xml file and switch between them in the onContextMenuItem Selected() method call — each performing a different action.
..................Content has been hidden....................
You can't read the all page of ebook, please click here login for view all page.