
In Chapter 1, Installing Activiti, we saw how we can install the Activiti Explorer on a web server. In Chapter 2, Modeling Using the Activiti Modeler, we went through using the Activiti Modeler for designing workflows and in Chapter 3, Designing Your Process Using the Activiti Designer, we went through using the Activiti Designer to design the workflows. However, to understand how it actually works, we need to understand the workings of the development environment behind the scenes.
As mentioned earlier, the Activiti Engine is a separate layer that can be used independently. It consists of the engine interface, which we will be covering in Chapter 6, The Activiti ProcessEngine API, and also implements the BPMN 2.0 specification. The next layer is the process virtual machine layer, which supports the other processes' languages. The entire engine component is implemented using the activiti-engine-version.jar file.
Hence, to deal with the development, we have to use activiti-engine.version.jar. In Chapter 1, Installing Activiti, we have already deployed Activiti in a Tomcat web server. So, this JAR file will be available within the path apache-tomcat-7.0.37/webapps/activiti-explorer/WEB-INF/lib, as shown in the following screenshot:
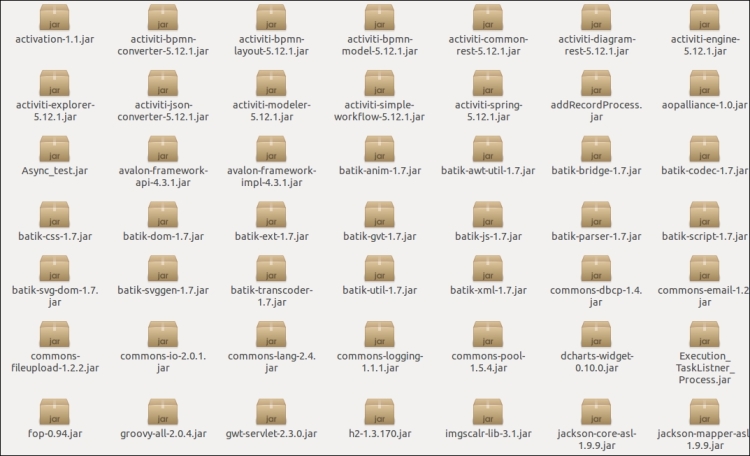
All the libraries required for development will be available within this folder. If you don't want to use the JAR file, you can use Maven. Activiti, by default, creates a Maven project; it makes dependency management easy. You have only configured your pom.xml file with the required dependencies as in the following code:
<project xmlns="http://maven.apache.org/POM/4.0.0" xmlns:xsi="http://www.w3.org/2001/XMLSchema-instance"
xsi:schemaLocation="http://maven.apache.org/POM/4.0.0 http://maven.apache.org/maven-v4_0_0.xsd">
<modelVersion>4.0.0</modelVersion>
<groupId>org.activiti.examples</groupId>
<artifactId>activiti-examples</artifactId>
<version>1.0-SNAPSHOT</version>
<packaging>jar</packaging>
<name>BPMN 2.0 with Activiti - Examples</name>
<properties>
<activiti-version>5.9</activiti-version>
</properties>
<dependencies>
<dependency>
<groupId>org.activiti</groupId>
<artifactId>activiti-engine</artifactId>
<version>${activiti-version}</version>
</dependency>
<dependency>
<groupId>com.h2database</groupId>
<artifactId>h2</artifactId>
<version>1.2.132</version>
</dependency>
</project>
In the preceding pom.xml file, you can see that there is an activiti-engine dependency for the Activiti Engine and an h2 dependency for configuring the process with an in-memory H2 database. In this case, if you want to perform unit testing for your development, you need to add the unit testing dependency as well.
If you are not comfortable with Maven, don't worry; all the JAR files are available in the lib folder, so you can import them to your Eclipse project. For that, you will have to perform the following steps:
- Select the project for importing libraries, right-click on it, and browse through the Properties option. We can select the Properties option as shown in the following screenshot:

- On selecting the Properties option, a window will pop up. From that window, select Java Build Path; this displays all the libraries associated with the project. By default, it will not have any Activiti Engine libraries associated with it.
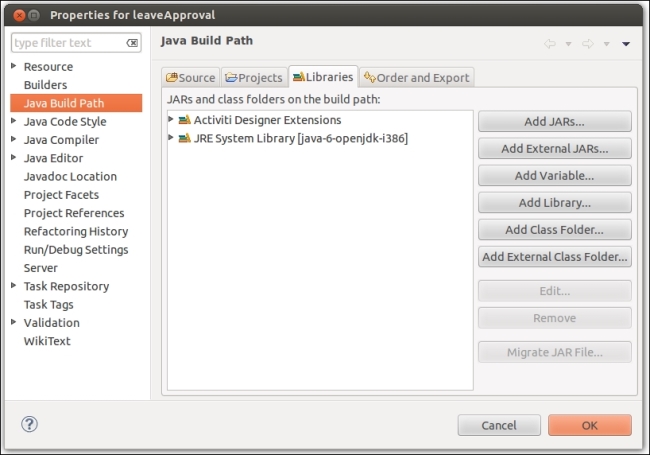
- To add the JAR files, select Add External JARs in the window. On selecting this option, another window will pop up in which you need to browse to the path where your JAR files are located, for example,
/apache-tomcat-7.0.37/webapps/activity-explorer/WEB-INF/lib. By going to the given path, you can select the JAR file required for your development.