In this Chapter
Reviewing famous examples
Understanding game design: Presenting challenges
Embracing Multi-Touch
Envisioning animations
Programming: AmuckSlider
Analyzing business aspects
Now that you've gotten your feet wet, we are going to examine our first game. The games developed in this chapter can be found on the App Store and the source code downloaded from our Web site, http://appsamuck.com. Puzzle apps can be the least complex type of game to build, so they are a great place to start. However, do not underestimate the popularity of your app just because it is easy to build. A good puzzle app can have a longer life span than just about any other type of game. Puzzle apps can be fun, challenging, and addictive. Just think for a minute how many platforms you have seen Tetris ported to. Tetris has a staying power like no other application. Even in its simplest form, Tetris is still a fun game to play to pass the time.
In this chapter we'll review some of the classic examples of puzzle games, and hopefully they will inspire you to invent the next great puzzle app for the iPhone.
Successful games all share a few key features: They need to be easy to learn, increasingly challenging, and downright addictive. It is fairly straightforward to code a game that is easy to learn or one that challenges the players. However, creating a game that is fun and addictive is not so black and white. To accomplish this you have to mix the ingredients in such a way that they synergize into an exciting and addictive game.
As we've mentioned, Tetris is one of the most celebrated puzzle applications ever written. It is difficult to find any gaming platform that it is not available on. Tetris meets our requirements of being easy to learn and increasingly challenging. Most importantly, Tetris is addictive!
What are some other puzzle applications we can think of? Here are a few that come to mind. All meet the requirements of being easy to learn, increasingly challenging, and addictive:
Minesweeper.
http://en.wikipedia.org/wiki/Minesweeper_(computer_game)Bomberman.
http://en.wikipedia.org/wiki/BombermanThe Incredible Machine.
http://en.wikipedia.org/wiki/The_Incredible_MachineSudoku.
http://en.wikipedia.org/wiki/SudokuLuxor.
http://en.wikipedia.org/wiki/Luxor_(computer_game)Pipe Dream.
http://en.wikipedia.org/wiki/Pipe_Dream_(video_game)Portal.
http://en.wikipedia.org/wiki/Portal_(video_game)Bejeweled.
http://en.wikipedia.org/wiki/BejeweledLemmings.
http://en.wikipedia.org/wiki/Lemmings_(video_game)
You've probably played at least one game in this list. You may even have them on your iPhone now. If so, identify the attributes that make the game fun and exciting for you. Now with these elements in mind, dig deep and try to develop an idea that will keep a player occupied time and time again. If you look at the list, the most addictive element about these games is the fact that they become increasingly challenging the longer you play them.
Here are three techniques you can use to present challenges, which we'll discuss in detail in the next section:
Create time pressure. When solving the puzzle, make sure gamers have only a limited amount of time to complete the task.
Limit number of turns. Some puzzle games are turn- or step-based applications. You can limit the number of turns allowed to gamers or base their score on how few moves they can complete the level in.
Limit space. If you allow blocks to fill up all the space at the top of the screen, the game ends. Tetris is a perfect example of this.
The best bonus concerning puzzle games is they can be easy to develop. Most of them have a very small code base compared to other game types that can take so long to pull together that they become a full-fledged production. However, do not let this trap you into taking the easy way out. You still need to spend plenty of time polishing up the menus and screens to get noticed when you get to the App Store.
So, what can you learn from the previous examples and other puzzles that will help ensure that your game is successful? Make sure your puzzle game ...
Is user friendly and easy to learn.
Makes a good first impression and has an attractive overall appearance.
Engages the gamer in an increasingly challenging series of stages or levels.
Is addictive enough to keep the gamer coming back and telling his friends about the game.
Note
See Chapter 8 for an in-depth discussion on turn-based games.
It is a fact that the human mind likes challenges. Very early in our lives we are presented with learning challenges. When we were toddlers we liked to play with learning toys. You have probably seen the shape-sorter cubes that toddlers play with, such as the one shown in Figure 3.1. The cube has different-shaped holes in it and it comes with matching plastic or wooden shapes that will only fit into the matching hole. At this age most children cannot talk much, yet they love to be challenged.

Preschool children like to play games that require them to recognize patterns, match similar items, or follow a mechanical process. As we age we continue to crave challenges. This drive compels us to stick with a challenge until we can defeat it. Infusing these challenges into your design is what creating puzzle games is all about.
Earlier in the chapter we mentioned the three different ways puzzle games can present challenges. Let's look at each of these ways in more detail.
It is always beneficial to analyze a system that is not software based to help understand a concept before committing it to code. With applying this concept to games, browse through the board game section of your local toy store. Here you can find a bounty of rich examples. For time-sensitive games, take a look at the game Perfection.
Perfection requires the player to locate and fit odd-shaped pegs into their matching holes before the timer runs out. Does this remind you of the sorter cube we just looked at? With just a little imagination you should be able to conceive how you could apply this concept in code.
Tip
When brainstorming ideas, grab a pen and paper and jot them down so you don't forget them. You may find yourself writing some of your best ideas on napkins or in the Notes app on the iPhone.
Time pressure adds an element of anxiety to a video game. Adding time pressure may lure players into making rash decisions that they would otherwise have reasoned through with ease. This pressure also opens up possibilities for increasing the difficulty level as players progress. You can start players off with an ample amount of time to complete the puzzle, then your game can become greedier with the time allotted as players progress through your levels.
Most turn-based games limit the user to exactly one turn. This gives the user only one decision or move on each turn to change the course of the game. This limitation often leads to users memorizing and employing move patterns to be successful at the game. Consider the game of chess, shown in Figure 3.2.

The best chess players can think several moves ahead even though they are limited to making one move at a time. The creators of chess probably never envisioned that the game would become such a fertile ground for challenge and competitiveness. Chess has transcended beyond a simple board game that holds a player's attention for one or two turns into a culture of players with their own unique styles and strategies.
Okay, we understand that trying to build a game that is as good as chess would be setting a high standard; however, it really showcases the potential for a great turn-based game. Think in terms of progression and goals. If you are playing a game that limits turns, like in chess, that generally means there is another player with his own goals and agenda. You take a turn, then the other player takes a turn, and this continues until one of the players achieves his goal.
When creating a turn-based game, consider the following tips:
Craft a clear and simple goal. The goal should be enticing and the reward should deliver a certain degree of excitement.
Carve a clear and easy path to the goal. When you first start the game, the first few levels should be easy. Achieving the goal should be more instructional than challenging. Use this as a starting point, or you can even make this the first level to help orient the player to your game.
Introduce obstacles. Now that the player can see the goal, throw in a few roadblocks. This can even be controlled by the other player. Player 1 overcomes an obstacle on his turn, and then player 2 introduces a new obstacle on her turn.
Add escalation elements. No matter how great your game is, players will get tired if it drags out too long. If the game lasts too long, consider giving more power to the players on each sequential turn. This adds pressure on each turn for the player to try and end the match. You see this in a lot of sports with tiebreakers, sudden death, and so on.
An excellent example of a puzzle game that utilizes some of these tips is Trism, which is played on a board of triangular prisms called trisms (Figure 3.3). The game is played by sliding the trisms in six different directions to match colors. The game starts at an easy level and progresses in difficulty. The game becomes even more interesting and difficult as obstacles such as bombs and locks are introduced.
Check out Trism for yourself by browsing to http:/itunes.com/apps/trism on your iPhone or on a computer with iTunes installed.
Note
The link http:/itunes.com/apps/trism is an iTunes Deep Link. See Chapter 10 for more about iTunes Deep Links.
Your game should not be so easy that players always know what the best move is to make on their next turn. If that is the case, you will want to consider making some changes to make the game more challenging. If users approach your game with calculation and strategy, you have crafted a good turn-based game.

Courtesy of Steve Demeter
A good puzzle game can present challenges by requiring the player to navigate in a limited space. These types of challenges work really well on the iPhone because your screen real estate is limited to begin with. Instead of trying to work around this limitation, you will find you can compile games that leverage this limitation.
Here again, we can look at Tetris as a classic example of a challenge that is enhanced by making space a limiting factor. In Tetris, as the blocks pile to the top of the screen, the play area becomes very cramped and it becomes increasingly challenging to position the blocks without taking up even more space.
Consider some of the same key points when presenting challenges by limiting space:
Craft a clear and simple goal. You could provide the player with a target or exit, or you could have a puzzle that is only solved when all the pieces are oriented properly.
Carve a clear and easy path to the goal. Again, start with a simple, achievable goal. On early levels space may not even be a factor. However, it should be apparent that less space presents a challenge, which can actually add more enjoyment to the game.
Introduce obstacles. As the play progresses, you can start closing in the walls. Some of the same puzzles that players breezed through earlier become more difficult as the available space vanishes.
You have looked at three examples of presenting challenges, but by no means are these the only three. If you can invent a new way to present challenges, your game will stand out because it will be fresh and unique.
Multi-Touch is one of the many exciting features of the iPhone. You have probably played around with touchscreens before, but something about the experience created by the iPhone is new and unique. When your applications embrace Multi-Touch, you are delivering the experience iPhone owners have come to love (and expect).
When envisioning your game, try to think beyond buttons and joysticks and think in terms of interaction with your virtual environment. This is a bit more challenging than buttons because the interaction is no longer so cut and dry. The iPhone does not have a big red button to fire missiles. The relationship between input and response becomes fuzzier. This is a good thing! Input is now a rich and flexible world for you to leverage.
Your goal should be to design a puzzle app with a user interface that delivers a more immersive experience than is possible with joysticks and keyboards. Multi-Touch opens the door to a new level of interaction that would be cumbersome otherwise. Think about dealing with keyboard input on joystick-based games. How many times have you had to enter your initials or name in a game where you had to scroll through the alphabet to select each character? The iPhone simply scrolls a virtual keyboard on the screen, allowing you to quickly enter the characters with minimal keystrokes. The AmuckSlider game we discuss later in this chapter greatly benefits from Multi-Touch (Figure 3.4).
In a real slider puzzle game, you physically slide the tiles from where they are to an adjacent empty cell (Figure 3.5). To truly embrace Multi-Touch, you need to create a virtual experience as close to the physical sensation as possible. AmuckSlider accomplishes this by requiring players to mimic the same physical gestures that they would use on a real puzzle.


The examples on the Apple development portal are great! If you have not done so already, we highly recommend that you peruse the plethora of example apps available there. At the time of this writing you could find an example there called MoveMe (http://developer.apple.com/iphone/library/samplecode/MoveMe/), which is a great introduction to Multi-Touch. This simple application has a placard on the screen that you can grab and drag with your finger (Figure 3.6). When you release the placard, it springs back to the center and wobbles a little.

Figure 3.6. The MoveMe example from iPhone Dev Center is an excellent example to get you started with Multi-Touch.
Let's examine the code that makes this work. In order to begin capturing touch input, you will need to implement one or more of the following events in your UIView:
- (void)touchesBegan:(NSSet *)touches withEvent:(UIEvent *)event;
- (void)touchesMoved:(NSSet *)touches withEvent:(UIEvent *)event;
- (void)touchesEnded:(NSSet *)touches withEvent:(UIEvent *)event;
- (void)touchesCancelled:(NSSet *)touches withEvent:(UIEvent *)event;
If you run the example, you will notice that when you touch the placard it grows a little and then you can drag it. This first response is captured in the touchesBegan event:
- (void)touchesBegan:(NSSet *)touches withEvent:(UIEvent *)event {
   UITouch *touch = [touches anyObject];
   if ([touch view] != placardView) {
      ...
      return;
   }
   CGPoint touchPoint = [touch locationInView:self];
   [self animateFirstTouchAtPoint:touchPoint];
}
Notice that you do not have a single touch parameter but an NSSet of touches. The first thing this example does is distill this down to one touch within the line:
UITouch *touch = [touches anyObject];
Now a check is performed to see if the view that is responsible for reporting the touch is the placard; if it is not, the method exits before any animations are started:
- (void)touchesBegan:(NSSet *)touches withEvent:(UIEvent *)event {
   UITouch *touch = [touches anyObject];
   if ([touch view] != placardView) {
      ...
      return;
   }
   CGPoint touchPoint = [touch locationInView:self];
   [self animateFirstTouchAtPoint:touchPoint];
}
Next, locationInView is used to convert the position of the touch into a new position that is relative to the Main View:
CGPoint touchPoint = [touch locationInView:self];
Finally, an animation is performed and you see the button grow on the screen:
[self animateFirstTouchAtPoint:touchPoint];
As you drag your finger on the screen, you experience the placard sliding across the screen. This behavior is achieved by responding to the touchesMoved event:
- (void)touchesMoved:(NSSet *)touches withEvent:(UIEvent *)event {
   UITouch *touch = [touches anyObject];
   if ([touch view] == placardView) {
      CGPoint location = [touch locationInView:self];
      placardView.center = location;
      return;
   }
}
Most of the setup code in touchesMoved is the same as in touchesBegan. All you need to do is reset the center of the placard to the center of the touch:
placardView.center = location;
When you remove your finger from the screen, you see the placard spring back to the center of the screen. This behavior is achieved by responding to the touchesEnded event:
- (void)touchesEnded:(NSSet *)touches withEvent:(UIEvent *)event {
   UITouch *touch = [touches anyObject];
   if ([touch view] == placardView) {
      self.userInteractionEnabled = NO;
      [self animatePlacardViewToCenter];
      return;
   }
}
Most of the setup code in touchesEnded is the same as in touchesBegan. After the common setup is complete, you will want to turn off any user interaction until the placard returns to its original location. This is accomplished with the following line:
self.userInteractionEnabled = NO;
Now that interaction is disabled, you can begin the animation. In our example this is accomplished by a call to the instance method animatePlacardViewToCenter:
[self animatePlacardViewToCenter];
It is important that you restore user interaction when the animation is complete. It is not shown here, but when the animation is complete, user interaction is restored. You can accomplish this by setting the value of the property userInteractionEnabled to YES, as shown below:
self.userInteractionEnabled = YES;
The touchesCancelled event is fired when the touch sequence is cancelled by a system event, such as an incoming phone call. You should respond to this event, but your goal should be to clean up and get out as quickly as possible:
- (void)touchesCancelled:(NSSet *)touches withEvent:(UIEvent *)event {
   placardView.center = self.center;
   placardView.transform = CGAffineTransformIdentity;
}
Notice that we are simply setting the placard back to its original state with no glitz or animations. The player will probably not even see this happen, so keep it short and sweet.
Like Multi-Touch, animations add an element of excitement and immersion to a player's overall gaming experience. Animations are not new to gamers; in fact, we would argue that in today's gaming market, this is a minimal expectation. However, high-quality games with smooth animations were not generally seen on a hand-held phone. This is yet another quality of the iPhone that sets it apart from other mobile devices.
Luckily for you, Apple did not stop with making high-quality animations possible. High-quality animations are easy to achieve without having to code every frame of the process. Let's revisit the previous example but this time focus on animations.
Earlier you saw the code for the method touchesBegan. In touchesBegan you will see a call to the method animateFirstTouchAtPoint. This method is responsible for the animation you see when you first touch the placard. Here's a look at the source to this method:
- (void)animateFirstTouchAtPoint:(CGPoint)touchPoint {
   NSValue *touchPointValue = [[NSValue valueWithCGPoint:touchPoint] retain];
   [UIView beginAnimations:nil context:touchPointValue];
   [UIView setAnimationDuration:0.15];
   CGAffineTransform transform =
      CGAffineTransformMakeScale(1.2, 1.2);
   [UIView setAnimationDidStopSelector:
      @selector(growAnimationDidStop:finished:context:)];
   placardView.transform = transform;
   [UIView commitAnimations];
}
The previous block of code is the complete animateFirstTouchAtPoint method. In this method you will see that the first line sets the touchPointValue by converting the parameter touchPoint to an NSValue. The touchPointValue is passed as the context parameter of the call to beginAnimations:context:. Ultimately, the context parameter will be passed the method growAnimationDidStop, which is assigned as the selector parameter of the method setAnimationDidStopSelector:. Now the growAnimationDidStop method will be called when the animation stops and touchPointValue will be passed in as the context parameter.
The following code is a further breakdown of the animation steps. First, you will set up the animation by calling these methods:
[UIView beginAnimations:nil context:touchPointValue];
[UIView setAnimationDuration:0.15];
[UIView setAnimationDidStopSelector:
   @selector(growAnimationDidStop:finished:context:)];
The first line above begins the animation and passes in the context. The second line tells the animation how long it should last. The third line assigns a selector to be called when the animation is finished.
Now you are ready to tell the view how to animate:
CGAffineTransform transform = CGAffineTransformMakeScale(1.2, 1.2);
placardView.transform = transform;
In the previous section of code, a call to CGAffineTransformMakeScale is made to create a transform. The transform will scale the placard up by 20 percent:
[UIView commitAnimations];
Finally, the previous line of code is responsible for committing the animation. This is all you have to do! When you call commitAnimations, the animation engine calculates how many frames are necessary and plays them one by one until the specified transform has been performed. In this example, once this is complete, the message growAnimationDidStop is sent.
Now we are going to review our first game with you. We have used Multi-Touch and animations to create the simple puzzle application that we call AmuckSlider. With each of the applications in this book, we will guide you through some design and analysis before you get started reviewing the code.
Before beginning any project, you need to define its goals. In AmuckSlider we want to create a simple but entertaining puzzle game reminiscent of the classic puzzle slider games that were played before we had video games. Here are our goals for AmuckSlider:
Note
Viral sales are a good thing—we are not talking about creating a virus! Viral marketing and viral advertising are buzzterms that refer to marketing through word of mouth or social networking. Any time you have a player's attention, you should be thinking about how to make it easy for him to tell a friend about your game.
Our options will be constrained by the goals we have chosen. We must also filter our options based on the capabilities of the iPhone SDK.
Let's examine our first goal: "The game should feel similar to classic slider games so that the game play is easy to learn." This goal has Multi-Touch written all over it. When playing a classic slider game, you generally hold the game in one hand and use a finger to slide the tiles with the other. This is exactly the experience we want to try and achieve with the Multi-Touch interface.
Our second goal is "The game should try to introduce elements that you can only experience in an electronic device." This takes a little creativity. Instead of just having a plain old slider app, we wanted to add some spice. After considering this awhile, we decided that instead of having a scrambled picture, we would put arrows on the tiles. The arrows should point in the direction of their home or the correct location they need to be in in order for the puzzle to be solved. This provides a slightly different challenge than a classic slider puzzle and hopefully enough difference to set AmuckSlider apart from the other slider puzzles already available on the App Store.
Our third goal is "The game should increase in difficulty as you play." We can accomplish this by increasing the number of tiles as you progress in the game. Another option is to increase the number of tiles you have to get in the correct position in order to solve the puzzle. Since we are not using a picture, we can limit the number of tiles that the player has to get in the right location in order to solve the puzzle. The best option is to combine the two and increase the difficulty a little on each level.
Our final goal is "The game should include some viral aspect to help increase sales." Two options immediately come to mind:
Have a high-score system that allows players to view and upload their high score to a high-score server, and then to send an e-mail to their friends bragging about their score.
Allow players to e-mail their high score to a friend, and in the e-mail include a link that encourages them to get the game and beat their friend's score.
For AmuckSlider, we chose the second option. This option does not require a high-score server and we do not have to invest in an online service to accomplish this goal. If the game does extremely well, we may want to consider the first option in an update.
Now it's time to get started reviewing the code in the application. We know how we want to build the code, and we have reviewed some of skills necessary to make it happen. Each of the game projects in this book can be very detailed, so in order to prevent the important details from getting lost, we will focus on explaining the important areas.
We recommend that you download the code for this example from http://appsamuck.com/gamedevbook/amuckslider and peruse the source as you read the book. Download the "Before Polish" version of the source code.
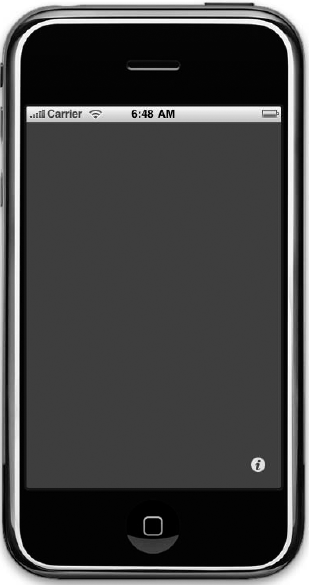
For this project we have chosen to use the Utility Application template. This template has a small information icon in the bottom-right corner (Figure 3.7). When you click this icon the screen flips, revealing an information screen (Figure 3.8).
Note
You can include information about yourself or your company and advertise other games and products you may have on the info screen.
You can use the info screen to do the following:
Show some information and a description for the game.
Show the player's current high score (in our case, the highest level that has been completed).
Provide a button that, when clicked, allows players to brag to their friends about their high score.
Tell people about this book and show them how to get it.
Tell people about other games in this book.

Hopefully you have already downloaded the code from http://appsamuck.com and are ready to follow through. If you have been using Xcode and developing for the iPhone, you already know how to create new projects. However, if you have not, we'll take a moment at the beginning of the application to walk you through the steps of creating a project and a new class for some of the shorter, less involved items. As we progress to larger items, we'll assume you are following along and just cover the relevant material and methods.
Here are the steps you need to follow to create a utility app the same way we started AmuckSlider. Launch Xcode and choose File

You will be prompted to name your project. We named ours AmuckSlider, but choose whatever name you like. When the project is created, several files are created for you. To get started, let's go ahead and complete our Info View.
You will find the source you will want to modify for the Info View in the files FlipsideViewController.h and FlipsideViewController.m. Most of the information in this screen is static, but two elements are not. First, we need the high score to change to reflect the player's current best score. Second, we need a button that sends a message to the controller whenever it is clicked so we can send an e-mail to a friend bragging about our score. Start by opening up FlipsideViewController.h. You will need an IBOutlet to reference the highScoreLabel, and you will need an IBAction to respond to your button click. When you open FlipsideViewController.h, you see the following code:
#import <UIKit/UIKit.h>
@interface FlipsideView : UIView {
}
@end
Add a label and action to the code so that it looks like this (additions are in bold):
#import <UIKit/UIKit.h>
@interface FlipsideView : UIView {
   IBOutlet UILabel *highScoreLabel;
}
@property (nonatomic, retain) UILabel *highScoreLabel;
IBAction onEmailButtonClick;
@end
Now we need to make some completer changes to FlipsideViewController.m. When you open this file it will look like this:
#import "FlipsideViewController.h"
@implementation FlipsideViewController
- (void)viewDidLoad {
   [super viewDidLoad];
   self.view.backgroundColor = [UIColor viewFlipsideBackgroundColor];
}
- (void)didReceiveMemoryWarning {
   [super didReceiveMemoryWarning];
}
- (void)dealloc {
   [super dealloc];
}
@end
Again, add code for a label and action so that it looks like Listing 3.1.
Note
To download all of the code listings in this chapter, go to www.wileydevreference.com and click the Downloads link.
Example 3.1. The Complete Implementation for the FlipsideViewController Class
#import "FlipsideViewController.h"
@synthesize highScoreLabel;
@implementation FlipsideViewController
- (void)viewDidLoad {
   [super viewDidLoad];
   NSString* highScore = [Helper getUserValueForKey:
      @"highscore" withDefault:@"0"];
   highScoreLabel.text = [NSString stringWithFormat:
@"High Score: %@", highScore];
self.view.backgroundColor = [UIColor viewFlipsideBackgroundColor];
}
- (void)onEmailButtonClick {
NSString* highScore = [Helper getUserValueForKey:
@"highscore" withDefault:@"0"];
NSString *emailBody = [NSString stringWithFormat:
@"Do you think you can beat my high score at AmuckSlider?
My current high score is:%@", highScore];
[Helper sendEmailWithSubject:@"Beat this score!" withBody:emailBody];
}
- (void)didReceiveMemoryWarning {
[super didReceiveMemoryWarning];
}
- (void)dealloc {
[highScoreLabel release];
[super dealloc];
}
@endYou probably noticed that sendEmailWithSubject and getUserValueForKey are method calls from the static class Helper. As you know, it's best to encapsulate code that you will be using time and time again. The full listings for the methods sendEmailWithSubject and getUserValueForKey are right here:
+ (void)sendEmailWithSubject:(NSString*)aSubject withBody:(NSString*)aBody{
   NSString *urlString = [NSString stringWithFormat:
      @"mailto:?subject=%@&body=%@", aSubject, aBody];
   urlString = [urlString stringByReplacingOccurrencesOfString:
      @" " withString:@"%20"];
   NSURL* mailURL = [NSURL URLWithString: urlString];
   [[UIApplication sharedApplication] openURL: mailURL];
}
+ (NSString*)getUserValueForKey:(NSString*)aKey
   withDefault:(NSString*)aDefaultValue {
   NSString *result = [[NSUserDefaults standardUserDefaults]
      stringForKey: aKey];
   if (result == nil || [result isEqualToString:@""]) {
      return aDefaultValue;
   }
   return result;
}We want our game to have several different levels to keep players' interest, and we need to store data for each of our levels. In addition, we want our game to have different degrees of challenge, such as easy, medium, and hard. Since this is a puzzle game and you have to be clever to figure out the patterns, we have decided to make the degree of challenge a literal degree. The levels of difficulty are Bachelors for easy, Masters for medium, and Doctorate for hard. We have eight levels for each degree, for a total of 24 levels.
We need to set up some interfaces to define this model. The ultimate goal is to create an easy way for us to get level data and to separate that concern from the rest of the system. In order to host the class model, we've created a new pair of files, Game.h and Game.m. In these files we have defined a few interfaces and enumerations to fulfill our requirements.
The whole purpose of the Game class is to implement the following methods:
+ (Difficulty)getBestDifficulty;
+ (int)getBestLevelForDifficulty:(Difficulty)aDifficulty;
+ (int)getCurrentLevelIndex;
+ (void)setCurrentLevelIndex;
+ (Level*)getLevelAtLevelIndex:(int)aLevelIndex;
These methods will help us easily access information necessary to the game system. Here is a short description of what these methods do:
getBestDifficulty: Initially, a player can only play at the Bachelors level; he must earn the right to play at the Masters and Doctorate levels. This method indicates at which level a player is allowed to play.
getBestLevelForDifficulty: A player must start at level one and complete it before he is allowed to progress to level two, and so on. This method indicates the level a player is allowed to play next for the difficulty specified.
getCurrentLevelIndex: This method returns the player to the level he last played on startup without needing to go to the menu. This is convenient for returning to the game after being interrupted by a phone call, for example.
setCurrentLevelIndex: This method allows you to set the current level index. Call this method to record when a player beats a level so the next level will be unlocked.
getLevelAtLevelIndex: This method returns data necessary to describe a given level. A level is defined by its grid size, tile size, and tile data. The tile data defines the location in grid coordinates where the tile currently resides. It defines the index of where the tile should be. Finally, it defines a type: an empty, blank, or arrow tile.
The Game class is responsible for defining these methods. The class interface is listed here:
@interface Game : NSObject {
   Level *levels[24];
}
+ (Difficulty)getBestDifficulty;
+ (int)getBestLevelForDifficulty:(Difficulty)aDifficulty;
+ (int)getCurrentLevelIndex;
+ (void)setCurrentLevelIndex;
+ (Level*)getLevelAtLevelIndex:(int)aLevelIndex;
@end
Let's look at each of these items in more detail. First, we define a field array of Level:
Level *levels[24];
Since we know there will be exactly 24 levels, we can go ahead and create an array to reference each one. This makes the call to getLevelAtLevelIndex easy; all we need to do is return the level for the specified index, like so:
+ (Level*)getLevelAtLevelIndex:(int)aLevelIndex {
  return [Game getInstance].levels[aLevelIndex];
}
Notice that we called [Game getInstance] to get an instance of the Game class. The array of levels is populated here when the Game class is constructed. Later in this section we will show you the method that populates the array.
The methods getCurrentLevelIndex and setCurrentLevelIndex enable us to keep track of the last level the player was on. This way, when he comes back to the game, the last level he has not completed can be automatically loaded. This index is a number between 0 and 24 to make it easier to load levels and reference the levels array:
+ (int)getCurrentLevelIndex {
   return [[Helper getUserValueForKey:@"currentlevel"
      withDefault:@"0"] intValue];
}
+ (void)setCurrentLevelIndex:(int)aLevelIndex {
   int bestIndex = [[Helper getUserValueForKey:@"currentlevel"
      withDefault:@"0"] intValue];
   if (bestIndex < aLevelIndex)
      [Helper setUserValue:[NSString stringWithFormat:@"%d", aLevelIndex]
      forKey:@"bestlevel"];
   [Helper setUserValue:[NSString stringWithFormat:@"%d", aLevelIndex]
      forKey:@"currentlevel"];
}
We use our Helper class again to get and set values by their key names. Notice that we do not use a private field; we just go ahead and write and read directly to the user settings. This keeps us from having to decide when to save the value, and you can rest assured the value will be what you set it to even if the game is interrupted by a phone call. We also set the best level index when we write the current level index. This is good practice because it helps us keep data logic out of the Game View later.
Now we'll look at the methods getBestDifficulty and getBestLevelForDifficulty. These methods prevent users from having to perform data logic in the Menu View (covered later in this chapter):
+ (Difficulty)getBestDifficulty {
   int bestIndex = [[Helper getUserValueForKey:@"currentlevel"
      withDefault:@"0"] intValue];
   return (Difficulty)floor(bestIndex / 3);
}
+ (int)getBestLevelForDifficulty:(Difficulty)aDifficulty {
   int bestIndex = [[Helper getUserValueForKey:@"currentlevel"
      withDefault:@"0"] intValue];
   int offset = [self getBestDifficulty] * 8;
   return bestIndex - offset;
}
These methods give us a way to find the best level the player has completed. The player is presented with levels in the menus as Bachelors levels 1–8, Masters levels 1-8, and so on. This means that Masters level 1 is actually level index 8, and Bachelors level 1 is actually level index 0. By providing these methods, we ensure that we always calculate levels the same way.
There are a handful of other classes and a couple of enums that are used to help support the Game class. Now you are going to get a closer look at these supporting items.
As you have seen earlier, the Game class ultimately exposes tile data, and on each tile you encounter a tile type. For the enum TileType, there are three different types of tiles:
Empty is used if the tile is the blank puzzle. There should only be one empty tile per puzzle.
Blank is used if the tile is active but does not have an arrow. Blank tiles can be moved around, but they are not part of the solution. Early levels should have many blank tiles.
Arrow is used to define a tile with an arrow on it; these tiles have to be in the correct location to solve the puzzle.
The following code defines these types for us:
typedef enum {
   empty,
   blank,
   arrow
} TileType;
The Tile itself is very simple; it is just a struct used to hold the data elements for the tile. You may have noticed that we mentioned a tile index, but it is not present here. The index is the same index used to store the item in its collection. Therefore, to keep from creating redundant data, we do not store that information again here.
Here is the definition you will see in the code for the Tile:
typedef struct {
   int location;
   TileType tileType;
} Tile;
Note
Duplication of data can lead to mistakes and confusion. In this case we chose not to store the index because we can just use the index we used to pull an item out of the tile array. If we were to store the index in the struct, we would have to be extremely careful to always update or set this index when necessary. By choosing not to store it again, we eliminate this concern.
Now that you have seen tiles, you can understand how they can be used to construct a level. Levels contain a collection of tiles, among other parameters. One of these other parameters is difficulty. We discussed difficulty earlier and decided to create three different levels. Here is the listing for the enum Difficulty:
typedef enum {
   bachelors,
   masters,
   doctorate
} Difficulty;
Like the Tile, the Level is just a simple struct used to hold the data elements for the level. Here is what the definition looks like:
typedef struct {
   Difficulty difficulty;
   int tileSize;
   int gridSize;
   Tile tiles[16];
} Level;
That's it for type definitions, but we have left out an important piece. Where does the data come from? This is really up to you. We have chosen to use a static array to store all of the level data. When the game instance is initialized, we rip through the static array and load our collections, tiles, and levels. As you can imagine, this is very straightforward. However, if you are interested in the details, please download the source if you have not already and take a look. You can download the code from http://appsamuck.com/gamedevbook/amuckslider.
Now we need to erect a menu so the user can start the game, select a difficulty level, and all those good things. In puzzle games, it is at times best to lock the player out of advanced levels at first and have them build up to them. If you fail to do this, many players will rush to the difficult levels first and quickly get bored with the game. There is just something about the way we are programmed—if we are challenged to defeat levels in sequence, we are always lured by the temptation to attempt just one more level. So in the spirit of keeping the challenge high, we have chosen to require the player to defeat the levels in sequence the first time through. Once a challenge has been beaten, a player can go back and replay a previous level.
You could take this idea a step further by allowing the player to achieve badges for accomplishing specific items. A badge system keeps players coming back to replay existing levels after they get good at the game. For example, the second time through the game would challenge the player to try and finish faster or with fewer moves. You could award an "Ace" badge if the player beats a level with minimal moves or award a "Speedster" badge if he beats the level in record time. But before any of this is possible, we must begin by setting up a menu system.
Follow these steps to create the Menu View by adding a new view controller and view XIB:
Under Groups & Files, choose the root project node. In our case it is the topmost node named AmuckSlider.
From the menu choose Project

From the menu choose File
From the New File dialog box, choose iPhone OS
Name the class MenuViewController.m. Make sure the check box Also create MenuViewController.h is checked, then click Finish.
Choose the group Resources.
Again, choose File
This time, in the New File dialog box, choose iPhone OS
Tip
If you are creating a new class and an XIB to match, you will need to recompile the app before you can connect IBActions and UIOutlets to controls in Interface Builder.
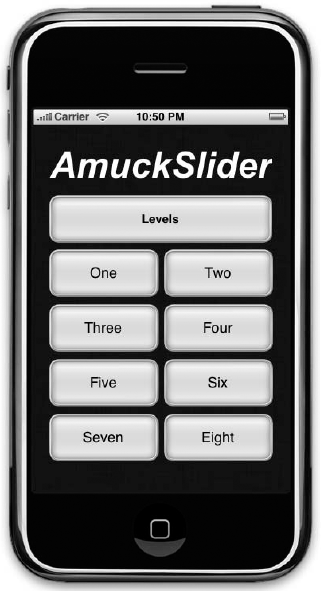
Now let's add some controls to the view. Double-click the MenuView.xib file to open the menu user interface in Interface Builder. If you have downloaded the code and are following along, you should see a screen that looks like the one shown in Figure 3.10.

Notice in the previous figure that the third button is blurry. That's because the text from two different buttons is overlapping. This is not a problem, because we manage which button is shown at run-time in the class MenuViewController. When you click New Game from the Game View, you are presented with a menu that has the buttons Levels and Help on it (Figure 3.11).

When you click Levels, you are presented with the three levels of difficulty: Bachelor, Masters, and Doctorate (Figure 3.12).

After choosing the difficulty, you will be presented with levels One through Eight (Figure 3.13). Finally, you can click the Help button to display a list of instructions.
Notice that this is not a very attractive set of screens. We will come back later and polish up the menu. You will find that if you spend time polishing as you go along you will get caught up in the details too early in the process. If you do this you can lose your focus on the big picture and have trouble getting reoriented at each stage of the process.
Another problem with polishing too early is that if you have to rethink or change anything, you will have to throw away work and time that you cannot recoup. Take it from us: Get the app working and functional, then come back and polish it up. You will save time and find the polishing process fun and rewarding.

Now open the file MenuViewController.h and you will see the following:
@protocol MenuViewDelegate <NSObject>
@optional
   -(void)loadLevel:(int)levelIndex;
@end
@interface MenuViewController : UIViewController {
   Difficulty difficulty;
   int level;
   id <MenuViewDelegate>delegate;
   UIButton *levelNumberButton[8];
   IBOutlet UIButton *levelButton;
IBOutlet UIButton *helpButton; IBOutlet UIButton *bachelorsButton; IBOutlet UIButton *doctorateButton; IBOutlet UIButton *mastersButton; } @property (nonatomic, retain) id /*<UIAlertViewDelegate>*/ delegate; - (IBAction)onLevelClick; - (IBAction)onHelpClick; - (IBAction)onBachelorsClick; - (IBAction)onDoctorateClick; - (IBAction)onMastersClick; - (void)showRoot:(bool)aHidden; - (void)showDifficulity:(bool)aHidden; - (void)showLevels:(bool)aHidden; @end
We have used two styles of building a user interface on this controller in order to give you a little variety. The buttons defined with IBOutlet UIButton*... are connected at design time using Interface Builder. When connecting with Interface Builder, you will need to connect the IBOutlet and the IBAction using the same method described in the Hello World example from Chapter 2. The other style used is to create the buttons at run-time when the MenuViewController class is instantiated. After these buttons are created, they are stored in this array:
UIButton *levelNumberButton[8];
In the example code file MainViewController.m you will find the method initLevelNumberButtons (Listing 3.2). This method creates the buttons that are stored in the array.
Example 3.2. The Method initLevelNumberButtons Positions the Level Buttons on the Screen
- (void)initLevelNumberButtons {
   int btnTopOffset = 65;
   int btnHeight = 37;
   int btnWidth = 137;
   int btnTopMargin = 9;
   int btnEvenLeft = 20;
   int btnOddLeft = 164;
   for (int i=0; i<8; i++) {
      int btnRow = i/2;
      int btnLeft = i%2 == 0 ? btnEvenLeft : btnOddLeft;
      int btnTop = ((btnHeight + btnTopMargin) * btnRow) + btnTopOffset;
      CGRect buttonFrame = CGRectMake(btnLeft, btnTop, btnWidth, btnHeight);
levelNumberButton[i] = [UIButton buttonWithType: UIButtonTypeRoundedRect];
levelNumberButton[i].frame = buttonFrame;
levelNumberButton[i].hidden = true;
levelNumberButton[i].tag = i+1;
[levelNumberButton [i] addTarget:self action:
   @selector(onLevelNumberButtonClick:)
   forControlEvents:UIControlEventTouchUpInside];
[levelNumberButton [i] setTitle:buttonNames[i]
forState:UIControlStateNormal];
[self.view addSubview: levelNumberButton [i]];
}
}Take notice of the following line from above:
[levelNumberButton [i] addTarget:self action: @selector(onLevelNumberButtonClick:) forControlEvents:UIControlEventTouchUpInside];
This line attaches the selector onLevelNumberClick to the button's TouchUpInside event. All eight buttons are assigned to the same method. However, we are using the tag property of the button to distinguish which button was clicked. This is what the onLevelNumberButtonClick method looks like:
- (void)onLevelNumberButtonClick:(id)sender {
   UIButton *btn = (UIButton*)sender;
   int levelIndex = (int)btn.tag;
   [self selectLevel:levelIndex];
}
Since we have all the buttons on the same view at the same time, it is simple to just hide and show the appropriate buttons by changing the button's "hidden" property. This gives the player the feeling that he is paging through options while keeping all of the view logic in one class.
Once the player has made a selection, we need to report his choice back to the main Game View. This is where the protocol that you saw at the top of MenuViewController.h comes into play:
@protocol MenuViewDelegate <NSObject>
@optional
   -(void)loadLevel:(int)levelIndex;
@end
This protocol defines an interface that the implementing classes can define to receive messages from. In this case, the MainViewController implements the method loadLevel as defined by the protocol. The selectLevel method in MenuViewController calls the loadLevel of the delegate, which sends the message to the implementing class instance referenced by the delegate:
- (void)selectLevel:(int)levelIndex {
   [delegate loadLevel:levelIndex-1];
}We recommend that you completely finish the game logic before polishing up the Game View. However, since we are guiding you through a complete example, let's take a break from discussing implementation and look at how our screens are going to look after we polish them up. In this example we are going to add a better background image and a little animation to spice it up a bit. You will be amazed how a few simple changes can add interest. Go back to the AmuckSlider source link (http://appsamuck.com/gamedevbook/amuckslider) and this time download the "After Polish" version of the source code.
To polish up the menus, we will add a background image to the Menu View. You can do this in Interface Builder without touching this code. For each of the buttons we will add a background image to add a little spice there, too. This is a little more complicated because you need to tell the button how to treat the edges of the background image. You will see that a background image has been assigned to each button similar to the line below:
UIImage *buttonBackground = [[UIImage imageNamed:@"menuButtonBackground.png"]
   stretchableImageWithLeftCapWidth:12.0 topCapHeight:12.0 ];
[levelButton setBackgroundImage:buttonBackground
   forState:UIControlStateNormal];
The trick to this is creating the UIImage with the imageNamed:stretchableImageWithLeftCapWidth:topCapHeight: signature. Figures 3.14, 3.15, and 3.16 show what the finished product looks like.


We could leave it alone now because it looks good, but let's add just a bit more excitement. When a button in clicked, add a little animation to the process to make the click feel more interactive. Figure 3.17 shows the animation midway through its progress, but you really need to run the app to get the full effect.

For one final touch as part of polishing the menu, you can add a default.png image to your project. When you launch your app, the iPhone OS displays this image while the player is waiting for the app to load. Apple asks that you do not use this image as a splash screen. Apple prefers that you use an image that looks like the first page your player will see. The best way to do this is to take a screen shot of your root menu screen and save it in your project with the name default.png. If you have never taken a screen shot before, it's easy. Hold down the Home button and then click the on/off button located at the top of your device. You should see the screen flash, and then you will find the screen shot in the Camera Roll of the Photos app.
Once you have a screen shot you can add it to your app as a resource with the name Default.png.
Apple recommends that you use an image that looks like the first page users will see. However, this may make the app feel unresponsive to users during initial startup, because they will see a screen where they expect to be able to tap buttons yet they cannot because they are looking at an image instead of a UI. We have found placing the text "loading... " in the center of the screen helps players understand what to expect.
Now that we have some content on the info screen, a way to persist and retrieve game data, and a menu, it's time to build the Game View. For simplicity we will place most of the game logic for AmuckSlider in the class MainViewController and a little view logic in the class TileView. In more complicated examples you will want to take time to break up your concerns into relevant classes.
Tip
Notice the pattern of having a View and a ViewController. As a general rule, try to place your game or business logic in the ViewController. Game logic would be collision detection, processing user input, calculating moves, and so on. Likewise, try to place all of your view logic in the View classes. View logic can include animations, setting backgrounds, colors, and things of this nature.
Go ahead and review the classes MainViewController and TileView from the unpolished version of the source code. (Again, this source can be found at http://appsamuck.com/gamedevbook/amuckslider.) Now we will review all the key pieces of game and view logic found in these files. When you are done you will understand what makes AmuckSlider tick.
The TileView class wraps up all the view logic necessary to give our tiles the desired appearance and behavior for our requirements. We decided that a tile could be blank or contain an arrow. When a TileView is created, an arrow UImageView is added as a subview:
UIImage *arrowImage = [UIImage imageNamed:@"arrowImage.png"];
UIImageView *imageView = [[UIImageView alloc] initWithImage:arrowImage];
// make the arrow image half the size of the TileView so that when it is
// rotated it will not wander outside the bounds of the tile.
imageView.frame = CGRectMake(aSize/4, aSize/4, aSize/2, aSize/2);
[imageView release];
[imageView setHidden:true];
[self addSubview:imageView];
self.arrowView = imageView;
[self updateArrowPoint];
This code can be found in the initialization method initWithIndex. The last line above calls out to updateArrowPoint. The method rotates the arrow image so that it points in the direction of its home location, or hides the arrow if the tile is in the home location. Also note that if the tile is not an arrow, this code makes sure the arrow image is never shown:
- (void)updateArrowPoint {
   // if this tile in not an arrow never show it
   if (tileType != arrow) return;
   [self updateArrowPointToIndex:self.index fromIndex:self.location];
}
- (void)updateArrowPointToIndex:(int)toIndex fromIndex:(int)fromIndex {
   // if the tile is in its home location then hide the arrow
   if (toIndex == fromIndex){
      [self.arrowView setHidden:true];
      return;
   }
   [self.arrowView setHidden:false];
   // calculate the angle
   float angle = [self getArrowDirectionToIndex:toIndex fromIndex:fromIndex];
   CATransform3D rotationTransform = CATransform3DIdentity;
   rotationTransform = CATransform3DRotate(rotationTransform, angle, 0.0, 0.0,
      1.0);
    self.arrowView.layer.transform = rotationTransform;
}
The angle for the arrow is calculated in getArrowDirectionToIndex. We need to know what angle to point the arrow in. The "to" and "from" positions are calculations in grid coordinates. From there we have the information to calculate the rise and run. Finally, we use the atan2() function to derive the angle:
- (float)getArrowDirectionToIndex:(int)toIndex fromIndex:(int)fromIndex {
   CGFloat toX = toIndex % dimension;
   CGFloat toY = toIndex / dimension;
   CGFloat fromX = fromIndex % dimension;
   CGFloat fromY = fromIndex / dimension;
   double rise = toY - fromY;
   double run = toX - fromX;
   float angle = atan2(rise, run);
   return angle;
}
One last thing to take notice of: TileView defines three helper methods that calculate where to place a tile based on an index or location. This is needed because we frequently reference tiles based on their index in the tile array:
+ (CGRect)getRectForLocation:(int)aLocation withDimension:(int)aDimension
      withSize:(int)aSize{
   int x = [TileView getXForLocation:aLocation withDimension:aDimension];
   int y = [TileView getYForLocation:aLocation withDimension:aDimension];
   return CGRectMake(x*aSize+x, y*aSize+y, aSize, aSize);
}
+ (int)getXForLocation:(int)aLocation withDimension:(int)aDimension {
   return aLocation % aDimension;
}
+ (int)getYForLocation:(int)aLocation withDimension:(int)aDimension {
   return aLocation / aDimension;
}The MainViewController or Game View is where the rest of the game logic resides. Here you will find the code that initializes the collection of tiles and positions them in the grid. The MainViewController receives touch events and translates these gestures into the expected behavior of the tiles.
In MainViewController.h you will find a concise definition for the MainViewController class. Here is a listing of the MainViewController interface:
@interface MainViewController : UIViewController <MenuViewDelegate> {
   int currentLevelIndex;
   Level currentLevel;
   int emptyTile;
   TileView *tiles[100];
   MenuViewController *menuViewController;
}
-(void)loadLevel:(int)levelIndex;
@end
In the previous code segment, pay attention to the following items of interest:
<MenuViewDelegate>is defined inMenuViewController.h. As you see above,MainViewControllerimplements this protocol. This allows us to receive the messageloadLevel:whenever theMenuViewis closed.currentLevelIndexkeeps track of the integer value of the current level the player is on.currentLevelis assigned to the active level structure.emptyTilecontains the location index of where the empty tile currently resides.tiles[25]is the collection of pointers to theMainViewControllerstiles. Not all the tile pointers are used depending on the difficulty of the currently active level.menuViewControllerprovides a reference for the active instance of our menu that we discussed earlier.
In the initialization method initWithNibName we fill all the tile pointers with nil. Shortly you will see iterations that perform a nil check on this array. This step gives us confidence that the value will be correct when this happens. Next, we load the initial value currentLevelIndex using the Game class discussed earlier (Listing 3.3).
Example 3.3. Code Used to Initialize the Display and Load Current Level
- (id)initWithNibName:(NSString *)nibNameOrNil bundle:(NSBundle *)nibBundleOrNil {
    if (self = [super initWithNibName:nibNameOrNil bundle:nibBundleOrNil]){
      for (int i=0; i<25; i++) tiles[i]=nil;
      currentLevelIndex =[Game getCurrentLevelIndex];
    }
    return self;
}
-(void)loadLevel:(int)levelIndex {
   currentLevelIndex = levelIndex;
   [Game setCurrentLevelIndex:levelIndex];
   [menuViewController.view removeFromSuperview];
   [self clearTiles];
   currentLevel = [Game getLevelAtLevelIndex:levelIndex];
   for (int i=0 ; i<(currentLevel.gridSize*currentLevel.gridSize)-1; i++) {
      Tile tile = currentLevel.tiles[i]; //[currentLevel getTileAtIndex:i];
      TileView *tileView = [[TileView alloc] initWithIndex:i
         atLocation:tile.location withSize:currentLevel.tileSize
         withDimension:currentLevel.gridSize withType:tile.tileType];
      tiles[i] = tileView;
      [self.view addSubview:tiles[i]];
   }
   emptyTile = currentLevel.gridSize*currentLevel.gridSize-1;
}
- (void)viewDidLoad {
   [super viewDidLoad];
   menuViewController = [[MenuViewController alloc] initWithNibName:
      @"MenuView" bundle:nil];
   menuViewController.delegate = self;
   [self.view addSubview:menuViewController.view];
}touchesMoved is a key method of the MainViewController. As discussed earlier in the example we reviewed, this event is fired whenever one or more touch gestures have moved. When this happens we locate the tile (if any) that the touch is inside of. If the tile can be moved, we allow it to move as the location of the touch moves. We determine if the tile can be moved by checking to see if it is adjacent to the empty tile. Finally, we restrict the movement of the tile in order to keep it inside an allowed region. This region is calculated by union of the original location rectangle of the tile in motion with the rectangle of the empty tile (Listing 3.4).
Example 3.4. Code Used to Move a Tile from Its Current Tile to an Empty Cell
- (void)touchesMoved:(NSSet *)touches withEvent:(UIEvent *)event {
   UITouch *touch = [touches anyObject];
   for (int i=0 ; i<(currentLevel.gridSize*currentLevel.gridSize)-1; i++) {
      if ([touch view] ==tiles[i]) {
         if ([self tileCanMoveToIndexFromIndex:tiles[i].location]) {
            CGPoint location = [touch locationInView:self.view];
            CGFloat maxX, minX, minY, maxY;
            CGRect movingTileRect = [TileView
               getRectForLocation:tiles[i].location
               withDimension:currentLevel.gridSize
               withSize:currentLevel.tileSize];
            CGRect emptyTileRect = [TileView getRectForLocation:emptyTile
               withDimension:currentLevel.gridSize
               withSize:currentLevel.tileSize];
            CGRect slideRect = CGRectUnion(movingTileRect, emptyTileRect);
            CGFloat centerPadding = (currentLevel.tileSize) / 2;
            minX = slideRect.origin.x + centerPadding;
            minY = slideRect.origin.y + centerPadding;
            maxX = slideRect.origin.x + slideRect.size.width - centerPadding;
            maxY = slideRect.origin.y + slideRect.size.height - centerPadding;
            if (location.x > maxX)
               location.x = maxX;
            if (location.y > maxY)
               location.y = maxY;
            if (location.y < minY)
               location.y = minY;
            if (location.x < minX)
               location.x = minX;
            tiles[i].center = location;
            return;
         }
      }
   }
}
Once again, as discussed in the earlier example, the touchesEnded event fires whenever a player lifts his finger off the glass at the conclusion of a touch gesture. When this happens we check to see if the touch is inside of any of our tiles that can move as we did in the previous listing. If the touch is in a legal tile, we check to see if the center of the tile that the touch is inside of is contained in the original tile location or in the empty tile location. We then animate the tile to the appropriate location and update the location property of the tile and the emptyTile field of the MainViewController. This ensures that the tile is always in a legal location and gives the player the feeling that it snaps into place:
- (void)touchesEnded:(NSSet *)touches withEvent:(UIEvent *)event {
   UITouch *touch = [touches anyObject];
   for (int i=0 ; i<(currentLevel.gridSize*currentLevel.gridSize)-1; i++) {
      if ([touch view] == tiles[i]) {
         if ([self tileCanMoveToIndexFromIndex:tiles[i].location]) {
            int oldLocation = tiles[i].location;
            int newLocation = emptyTile;
            // only move to the new location if the center of the moving tile is
            // inside the empty tile
            CGRect emptyTileRect = [TileView getRectForLocation:emptyTile
               withDimension:currentLevel.gridSize
               withSize:currentLevel.tileSize];
            if (CGRectContainsPoint(emptyTileRect, tiles[i].center)) {
               [self moveTile:tiles[i] toLocation:newLocation];
               emptyTile = oldLocation;
            }
            else {
               [self moveTile:tiles[i] toLocation:oldLocation];
            }
         }
         break;
      }
   }
   [self testDidWin];
}
After reviewing these two methods that handle touch, play around with the example on the iPhone. We believe you will find that this treatment of the touch events creates a realistic experience for players.
The moveTile method is used to snap a tile into place. First, it begins the animation. Next, we set the location of the tile. By setting the location index of the tile view, we will internally update its frame. Finally, we commit the animation. This produces our nice little effect of snapping the tile into place:
- (void)moveTile:(TileView*)tileView toLocation:(int)aLocation {
   [UIView beginAnimations:nil context:nil];
   [UIView setAnimationDuration:0.25];
   tileView.location = aLocation;
   [UIView commitAnimations];
   [tileView updateArrowPoint];
}
You will see the method tileCanMoveToIndexFromIndex used a lot. As expected, this method returns true if a tile can make a legal move from its current index to the empty tile index. This is calculated by checking to see if the tile in question is adjacent to the empty tile:
- (bool)tileCanMoveToIndexFromIndex:(int)index {
   int fromX = [TileView getXForLocation:index
      withDimension:currentLevel.gridSize];
   int fromY = [TileView getYForLocation:index
      withDimension:currentLevel.gridSize];
   int toX = [TileView getXForLocation:emptyTile
      withDimension:currentLevel.gridSize];
   int toY = [TileView getYForLocation:emptyTile
      withDimension:currentLevel.gridSize];
   if (fromX == toX && (fromY+1 == toY || fromY-1 == toY) )
      return true;
   if (fromY == toY && (fromX+1 == toX || fromX-1 == toX) )
      return true;
   return false;
}
The method tilesInCorrectLocation checks to see if all arrow tiles are currently seated in their correct location. We can determine this by comparing the tile's index to the tile's location. If this is the case for every arrow tile, this method returns true:
- (bool)tilesInCorrectLocation {
   for (int i=0 ; i<(currentLevel.gridSize*currentLevel.gridSize)-1; i++) {
      TileView *tileView = tiles[i];
      if (tileView.tileType == arrow && tileView.location != i)
         return false;
   }
   return true;
}
The last method we will review in this example is testDidWin. This method is called at the completion of each move (look at the earlier method touchesEnded). If the method tilesInCorrectLocation returns true, we know that the player has completed the level.
If we pass this condition, we see an alert view that proclaims the player's success. Finally, we call loadLevel to automatically load the next level in the sequence. When the player dismisses the alert, he can begin playing the next level:
- (void)testDidWin {
   if (![self tilesInCorrectLocation]) return;
   NSString *message = [NSString stringWithFormat:
      @"You have just completed level %d on to the next level",
      currentLevelIndex+1];
   UIAlertView *alertView = [[UIAlertView alloc] initWithTitle:
      @"Level Complete!" message:message delegate:nil cancelButtonTitle:
      @"OK" otherButtonTitles:nil];
   [alertView show];
[alertView release];
[Helper setUserValue:[NSString stringWithFormat:
@"%d", currentLevelIndex] forKey:@"currentlevel"];
currentLevelIndex++;
[self loadLevel:currentLevelIndex];
}Now you have been over all of the important details of how this application works. This is a simple puzzle app, but it illustrates how easy it can be to bring ideas to life on the iPhone. Most everything else you will find in the source is just the standard scaffolding necessary in all the applications you will build. Here is what the AmuckSlider looks like before any polishing (Figure 3.18).

Tip
Try to prevent your code from nesting too deep. Change your logic so that you exit instead of nesting if-statements. You will thank yourself because the code will be much easier to maintain.
So far you have been looking at the source from the unpolished version of this application. Now let's look at ways we can add excitement to the user's experience in the Game View just like we did for the Menu View. Like the Menu View, it does not take much to make the screen look a lot snazzier. Simply adding a few images and animations will do the trick. After a little image treatment you'll see how much more interesting the game board can be.
Here are the things we added to accomplish a better look:
A background image to the whole Game View
A semi-opaque background image to each tile
A much more interesting arrow image
A glass effect in front of the arrow
A green glow image that is visible when a tile is seated in its correct location
We also added a few animations to make the game more interesting:
The arrow spins to its correct location instead of snapping at the end of each turn.
The arrow fades out as the green glow fades in when the tile is in the correct location.
A puff effect shoots out from around a tile when it pops into the correct location.
When a level is completed, the puff effect replays for each arrow tile.
That is about it for polish. You will need to add an application icon before you are ready to publish an application to the App Store. For this application we have chosen to show a small two-by-two grid version of the AmuckSlider game board. You need two images to submit a game: One needs to be 57 × 57 pixels (Figure 3.19) and the other should be 512 × 512 pixels (Figure 3.20).


Note
Apple suggests that the large icon should not be a stretched version of the small one. The large icon is displayed in iTunes and will not have the quality you will want to attract buyers if it is stretched and dithered. Also, there is a good chance your app will be rejected if you try to submit a stretched image.
Figures 3.21 and 3.22 show the images we used for AmuckSlider.


You have planned, implemented, and polished—now it's time to reap some rewards. When its doors first opened, simply publishing an application to the App Store meant good sales. Now that the newness has worn off, the App Store is saturated with applications. A new strategy is needed. By analyzing the business aspect, you can learn how to use apps to your advantage.
Puzzle apps are generally less involved and thus less costly to write than other types of applications. Most puzzle apps are pattern driven. You generally only have to set up the engine and plug in several levels as simple data files. This will help you release many updates by simply adding levels. Be careful to keep this in mind when deciding on how to process your logic to make sure you can make small adjustments to the code or even allow the player to download new content.
Since puzzle apps are easy to create, they tend to dominate the market. Your game really needs to have something to set it apart and to excel in this arena. When building AmuckSlider, we looked at all the other slider apps that we could find on the App Store and made it a requirement to add something different and compelling that would hopefully attract users to ours instead of to other slider apps. We came up with using arrows instead of a sliced-up picture of numbers on each tile.
As we mentioned earlier in this chapter, puzzle apps need to be addictive. We have chosen to lock levels to require and entice players to continue on to the next level until they complete the game. We also noticed that slider apps can be pretty tough. Puzzle apps are generally better if they start easy and increase in difficulty. To help make the game easier to start with, AmuckSlider does not require players to get all the tiles in the right location in the beginning levels. Also, we start with a 3 × 3 grid and increase to a 5 × 5 grid as players gain skills and increase their difficulty.
Obviously, we hope AmuckSlider will be a runaway success simply by putting it on the App Store. However, we will be sorely disappointed if we just depend on that for marketing. If we make the mark and build an app that is addictive, then word of mouth will be our best sales tool. Just as the App Store has made applications easy to buy, you should focus on making your apps easy to sell. What do we mean by this? Remember the little e-mail bragging we added on the info page? This type of feature makes it easy to tell a friend about the game and at the same time challenge them to beat your score. Facebook is another great way to brag about your app.
Note
See Chapter 6 for more on how you can display your game achievements as a Facebook status.
Puzzle apps are a great place to get started programming for the iPhone. They can be very simple and easy to build, yet still be some of the most addictive games you will find. A great puzzle app can keep your players interested much longer than any other type of game. For this reason your application will have a much longer shelf life than other games you spent more time developing.
In this chapter you reviewed some existing popular puzzle games such as Tetris and Trism. You learned how to add elements of strategy to your game by limiting time, number of turns, and space. You reviewed how animations could be used to make the game more compelling and interesting. You used Multi-Touch to see how to give your game a more realistic feel and how to make it truly become a game designed for the iPhone.
We hope this chapter has helped you get your feet wet and that you're beginning to feel comfortable developing for the iPhone. If you're like us, once you whet your appetite for this platform, you develop a hunger that will keep you motivated. Now take what you have learned and build something fun and exciting! Tell us about your creation at http://appsamuck.com. We love to hear from our readers!