
Picture libraries are similar in use and function to the document libraries you read about in Chapter 9. A picture library is basically a list of all of the graphics files you plan to store and display on your SharePoint site. In most cases, you will use the Picture Library as a collection point, and reference the content in other Web Parts and pages.
You can display any image in the Picture Library on any Web Part page using an Image Web Part. The Image Link property of the Image Web Part allows you to enter the URL of the desired graphic’s location in the library. You can also use the Source Editor in the Content Editor Web Part to create a link to the graphic in HTML.
Tip
See Chapter 8 for more details.
Once the graphic in the Picture Library is linked to a Web Part page, the image will be displayed in the part of the page containing the Image Web Part or, if linked with HTML, the image will appear where you have indicated in the link. If the image in the Picture Library is modified, the modifications will automatically appear on any page with a link to the Picture Library.
Warning
If you do not know HTML well enough to control the size and location of an image link, use the Image Web Part.
Image libraries, like document libraries, can be accessed either by an individual site or by an entire site collection. Use the Image Library to restrict access to your graphics to just the site containing the library. Use the Site Collection Images Library to share your images with all the sites in the site collection.
MOSS 2007 includes page layouts that contain a Page Image field control and a Page Content field control. These field controls are used on site pages that are not Web Part pages, allowing you to add and edit content. An example of page field controls open in SharePoint Designer Toolbox is shown in Figure 13-1.

The Page Image field control is an element built into specific page layouts that allow you to add images to those pages. The specific page layouts containing Page Image field controls are:
Article page with image on the left
Article page with image on the right
Intranet home page for internal access
Welcome page with summary links
Welcome page with a table of contents
Welcome splash page
You can use a Page Image field control to add a graphic by linking to any picture or photo in the Picture Library.
Similar to the Page Image field control, specific page layouts in MOSS 2007 contain Page Content field controls. These controls enable you to add links to graphics using HTML in a way similar to using the Source Editor in a Content Editor Web Part. By default, the page layouts containing Page Content field controls are:
Intranet Home
Welcome page with summary links
Welcome page with table of contents
Your particular site may have other page layouts containing Page Image field controls and Page Content field controls. If you want to find out whether a page layout has either of these elements, you can edit the page by clicking Site Action → Edit Page. When the page is in Edit Mode, each element appears with a label. A Page Image field control is labeled Page Image, and a Page Content field control is labeled Page Content.
One variation on a picture library is a slide library. As the name implies, a slide library is used to contain all of your Office PowerPoint 2007 slides and slide shows. The Slide Library stores your slide shows as individual slides. However, each slide presentation is preserved and can be opened and presented using PowerPoint. You might want to use a slide library if your organization makes use of a large number of standard slides in custom presentations.
Just as with picture libraries, individual slides can be accessed and modified in the Slide Library. When the slide show is opened again, any modifications will appear in the presentation. The Library can be set up to share your slides with others, in the event that other people or teams need to use all of your presentation or just specific slides.
The process of creating image libraries is almost the same as creating any other library, with just some minor configuration changes. In fact, in SharePoint 2003, you could probably upload a Word document in a picture library and a GIF file in a document library, but trying to keep track of what was placed where would be chaotic. The reason for categorizing libraries by content type was primarily organizational rather than technical.
MOSS 2007 uses content types to specify what types of files must be stored in what kinds of lists or libraries. The properties of each content type—such as a graphic or document—are different, and a library set for a specific content type will have different options. For instance, the tools used to edit an image in a picture library are not the same as those available in a document library for editing a document.
Despite these differences, the actual library creation process is virtually the same from one library type to another.
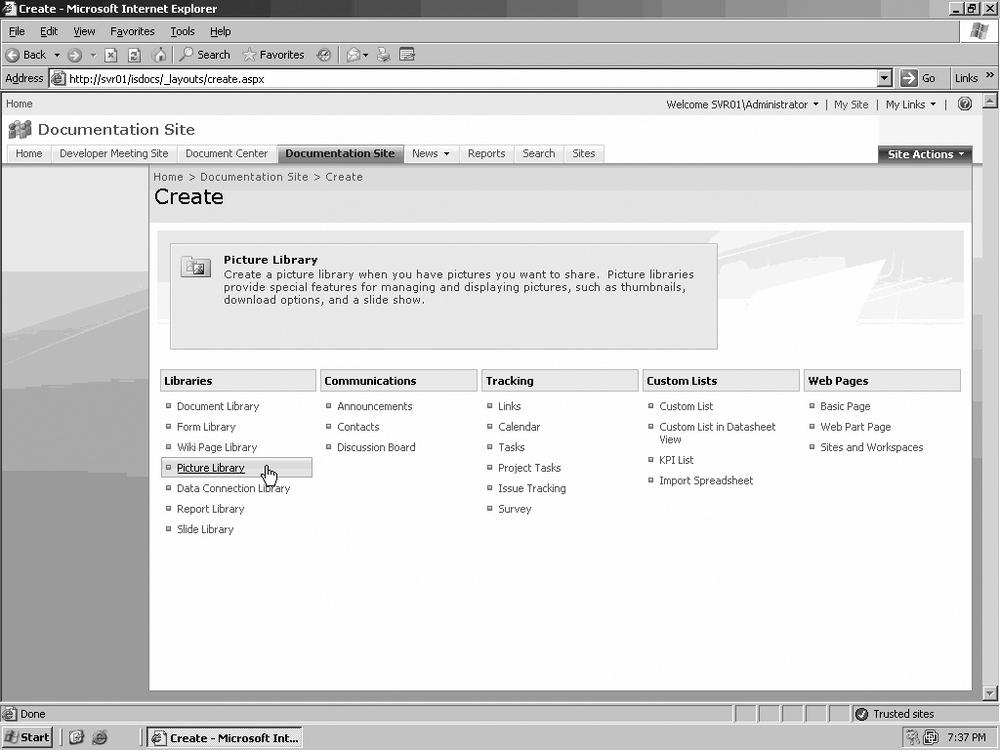
On your site, click Site Actions and select Create from the menu.
Under Libraries, click Picture Library, as seen in Figure 13-2.
On the Create a Library Page, in the Name field, type the name of your library.
Type a brief description of the library in the Description field.
If you want to add a link to this library in Quick Launch, click the Yes radio button under Navigation.
Under Picture Version History, if you want a different version of a picture to be created every time you edit a graphic, click the Yes radio button, as seen in Figure 13-3.

After the picture library is created, you are ready to add images to it.
There is only one main difference between creating a slide library and creating a picture library:
On your site, click Site Actions and select Create from the menu.
Under Libraries, click Slide Library.
On the “Create a Library” page, in the Name field, type the name of your library.
Type a brief description of the library in the Description field.
If you want to add a link to this library in Quick Launch, click the Yes radio button under Navigation.
Configure the other available options, and then click Create.
The only difference between these two tasks is in step 2, where you choose the library content type (Figure 13-4).

The instructions for adding image content to a picture library are also valid for adding PowerPoint .ppt files to a slide library:
Open the picture library, either from Quick Launch or by clicking View All Site Content and then clicking on the picture library name.
Click Upload and select Upload Picture from the menu, as in Figure 13-5.
Next to the Name field, click the Browse button.
Browse your computer’s directory or the network to locate the desired graphic.
If a prior version of this picture is already in the library and you want to overwrite it, verify that the “Overwrite existing file(s)” checkbox is checked.
Tip
In SharePoint 2003, if you wanted to upload more than one picture file at the same time, you could click “Upload multiple files” and browse to the folder where the pictures were located. In that case, it would have been best to collect these files in the same folder on your hard drive. In this version of SharePoint, that option is not available from this page.
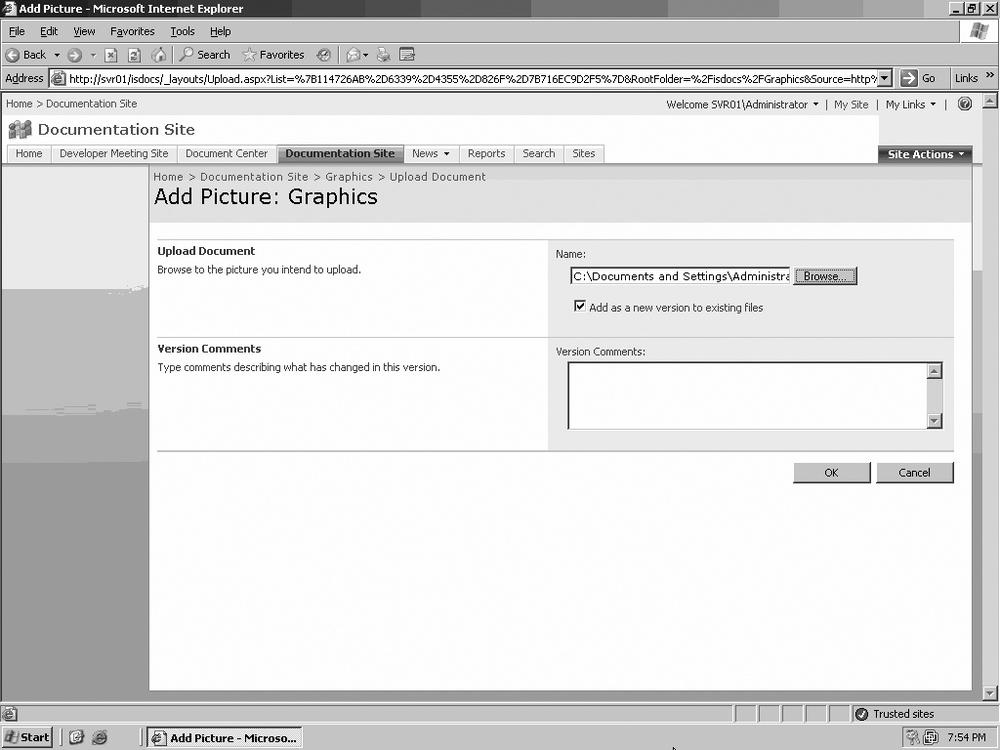
In the Version Comments field, you can add whatever note you would like about this version of the picture.
Click OK to upload the graphic or graphics into the picture library, as in Figure 13-6.
On the Edit Item page, you can configure the following properties of the graphic (see Figure 13-7; note that at the top of this figure, there is a notice that the picture was successfully uploaded):
- Title
Add a name for the graphic in the Title field.
- Date Picture Taken
You can include the date and time a photograph was taken or a graphic was created.
Click OK to finish.

A picture library is more than just a “holding cell” for your graphics. It is possible to edit graphics within the library itself and to control versioning of the picture library contents.

The benefit of requiring that an image be checked out in order to be edited is that only one person can edit an image at a time. If the image is checked out and then another user attempts to check it out, the second user will receive a message indicating the image is unavailable. Once the first user has checked the image back into the library, any other user can access it and edit the graphic further. This procedure is more important for pictures than for documents, since it is almost impossible to “merge changes” on a picture:
Open the picture library, either by clicking its name in Quick Launch or by clicking View All Site Content and then clicking the library’s name.
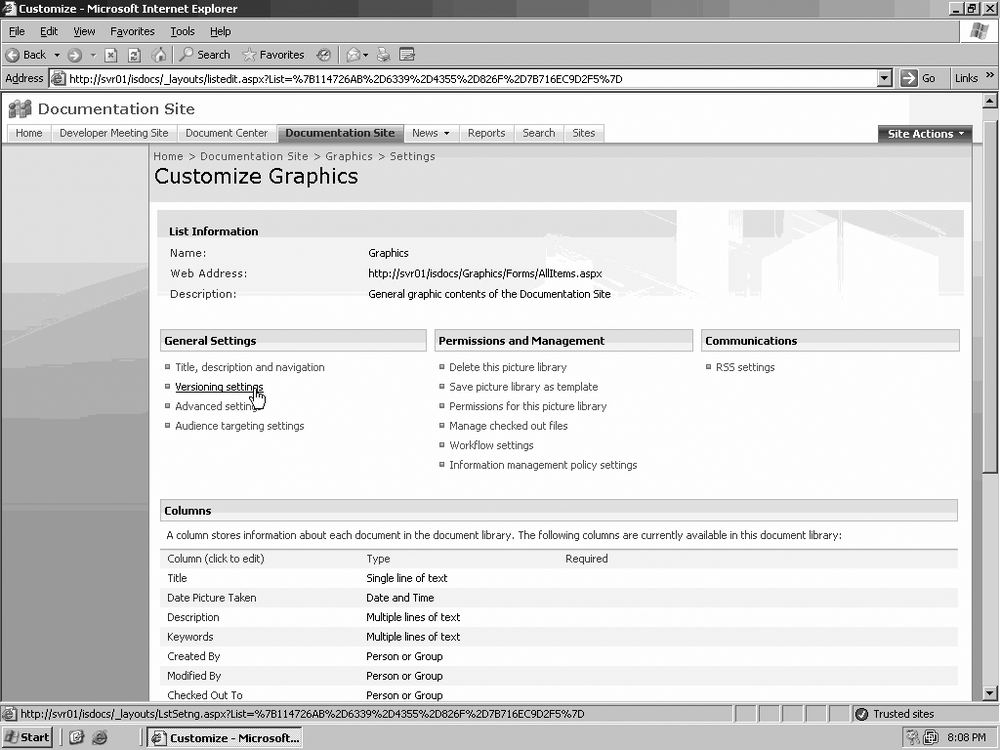
Click Settings and select Picture Library Settings from the menu.
Under General, click “Versioning settings,” as seen in Figure 13-8.
Under Require Check Out, click the Yes radio button next to “Require documents to be checked out before they can be edited,” as shown in Figure 13-9, and then click OK.

Now that you have required that images must be checked out prior to editing, let’s see how this process works:
Open the picture library, either by clicking its name in Quick Launch or by clicking View All Site Content and then clicking the library’s name.
Click the image file to open the properties list and then select Check Out, as in Figure 13-10.
Click on the graphic again to open it, and then click Edit Item.
Tip
SharePoint does not have a built-in graphics editor. If you do not have any other editing program on your local computer, the picture will open in Edit Mode, as shown previously in Figure 13-7, but you will not be able to modify the graphic.
When you are finished changing the image, click OK.
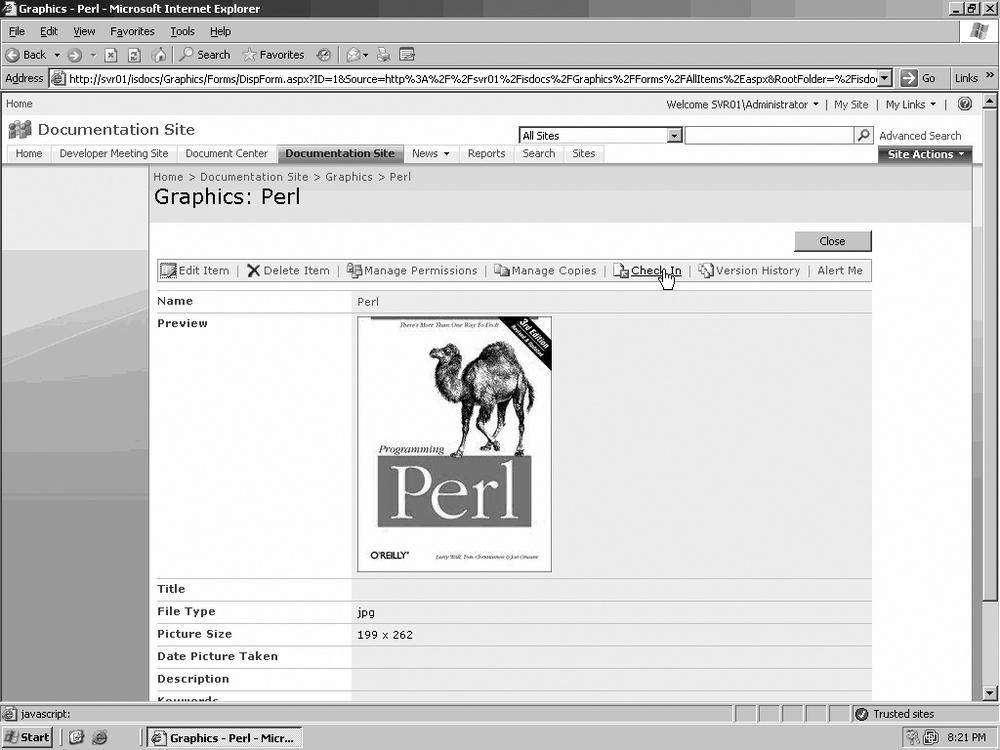
Click the graphic again and then click Check In, as in Figure 13-11.
In the document Check In section, you can click Yes to keep the item checked out after checking in this version or No to check in the item.
Click OK to check the graphic back into the picture library.

When you enable versioning, the Picture Library tracks each change made to an image by giving it a version number. This way, all the versions of an image can be saved and previous versions can be recovered. Versioning can be set up to track all versions of an image file or to retain only a limited number of versions.
Versioning can be set up to record both major and minor versions. Major versions are used when significant changes are made to an image, such as cropping, resizing, and modifying the color balance and contrast. The numbering system for major versions uses whole numbers: 1, 2, 3, and so on.
Minor versions are used when small changes have been made to an image, such as removing “red eye” from a photograph. Numbering for minor versions uses decimal numbering: 0.1, 0.2, 0.3, and so on.
Tip
In other words, the versioning numbering system for libraries follows the same format as software versioning.
Open the picture library, either by clicking its name in Quick Launch or by clicking View All Site Content and then clicking the library’s name.
Click Settings and then select Picture Library Settings from the list, as seen in Figure 13-12.
Under General, select “Versioning settings.”
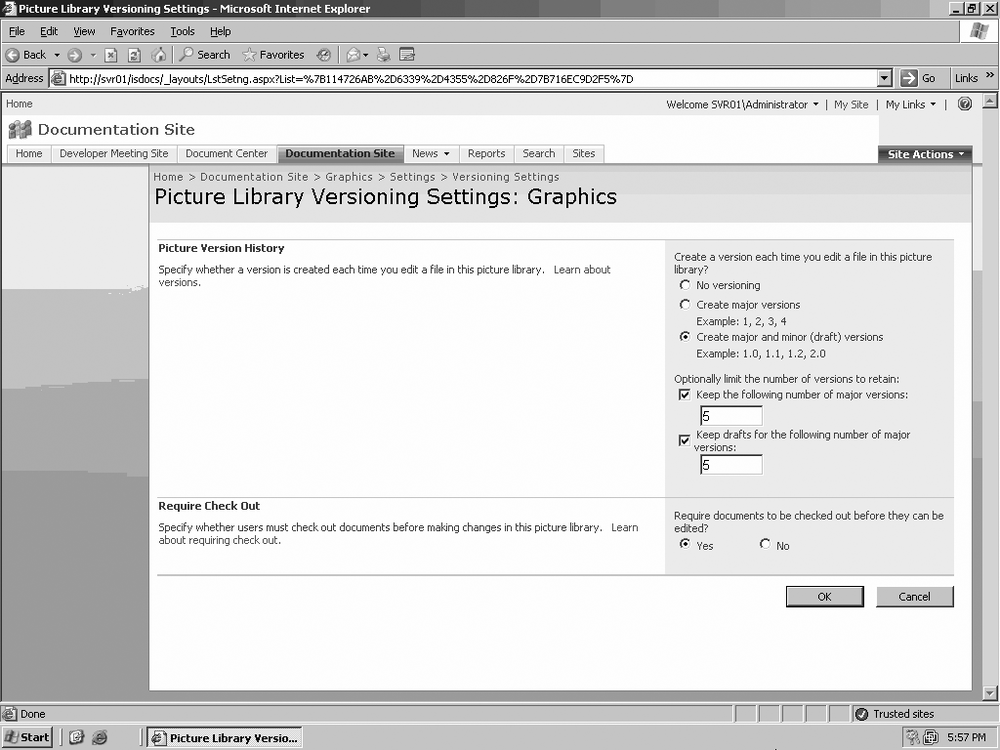
Select one of the two following options in the Version History section:
Click “Create major versions.”
Click “Create major and minor (draft) versions.”
To control the number of versions of a file that will be retained, select from the following options, as in Figure 13-13:
Click the “Keep the following number of versions” checkbox, and then enter the number of versions you want to retain.
Click the “Keep the following number of major versions” checkbox, and then enter the number of major versions you want to retain.
Click the “Keep drafts for the following number of major versions” checkbox, and then enter the number of major versions to retain in draft form.
Click OK to save the setup.

In Chapter 8, you learned how to add a Web Part to a Web Part page. Image Web Parts are added to Web Part pages using that process and then linked to images in the Picture Library. There are other methods of adding images, as described in the following section.
If you are working on a page containing a Page Image field control, you can use it to add an image to that page.
On the page where you want to add the image, click Site Actions and select Edit Page to make the Page Image field control visible.
In the Page Image field control, click Edit Picture to open the Edit Image Properties Web Page dialog box, as in Figure 13-14.
In the General section, click the Browse button next to the Selected Image field.
After the Image Library opens in a separate window, select the desired image and click OK. This will cause the image library window to close and populate the Selected Image field with the URL of the chosen picture. (See Figure 13-15.)
Set the layout properties to what you want, and click OK to add the image.
If this is a top-level site, you may have to click Publish to exit Edit Mode.

As you can see in Figure 13-16, the new image is now present on the page.


In step 5 of the previous exercise, you were instructed to set the image layout properties. There are numerous image controls that you can use to affect the appearance and position of the image on the web page, specified as follows.
In the General section of the Page Image field control, you will find the following properties, as seen in Figure 13-17:
- Alternate Text
This is the text that appears if the image cannot be viewed or when you use your cursor to hover over the image.
- Hyperlink
Use this if you want the image to act as a hyperlink to another web page or site.
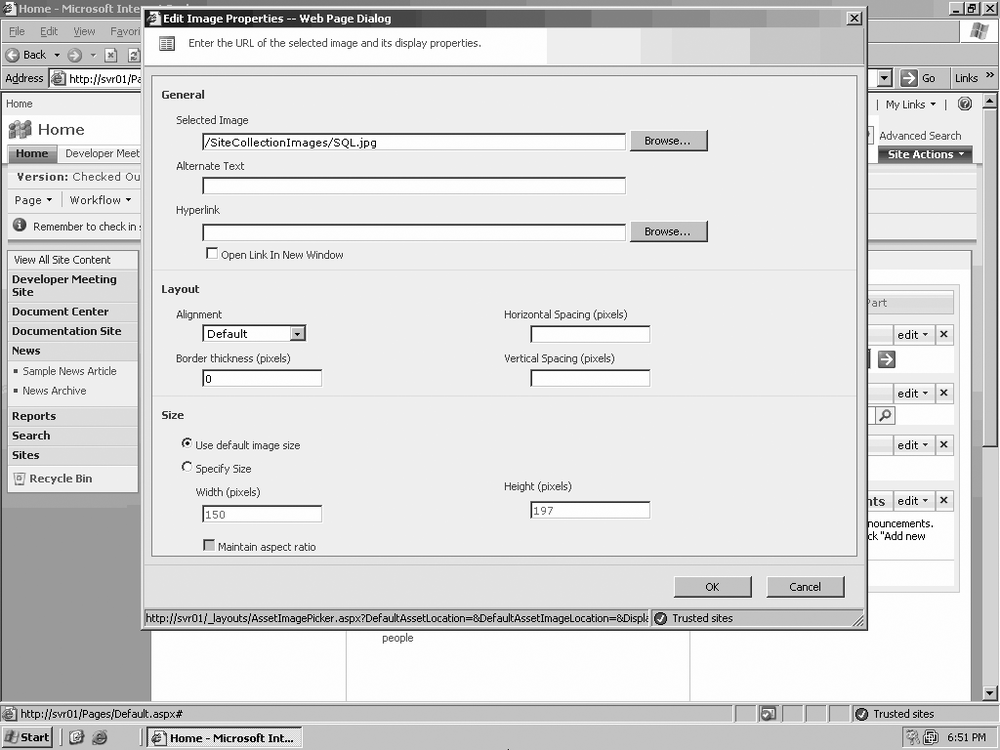
In the Layout section, you will find the following:
- Alignment
This determines the position of the image within the Page Image field control.
Tip
The Page Image field control is automatically sized to fit the selected image, so the alignment property is not meaningful.
- Border thickness
Use this option if you want to create a border around the image and determine the thickness of the border in pixels.
- Horizontal Spacing
Use this to create space to the left and right of the image, measured in pixels.
- Vertical Spacing
Use this to create space at the top and bottom of the image, measured in pixels.
In the Size section, you will find the following:
- Use default image size
Use this option if you want the size of the image to be determined by the image file’s properties.
- Specify Size
Select this option if you want to manually configure the width and height of the image in pixels.
- Maintain aspect ratio
Use this option when you manually configure the image’s size, to avoid distorting the image.
Whereas the Page Image field control is specifically designed to display images, the Page Content field control usually contains text data. You can, however, use the HTML Editor to add an image using standard HTML tags.
Warning
Do not employ this option unless you have sufficient knowledge of HTML to design your own page. You will need to control all aspects of the image, including its size, border, alternate text, and so on.
On the page where you want to add the image, click Site Actions and select Edit Page to make the Page Content field control visible.
In the Page Content field control, click Edit Content to open the HTML Editor, and place the cursor in the place in the field control where you want to display the image, as in Figure 13-18.
Click Insert Image in the HTML Editor toolbar to open the Edit Image Properties–Web Page Dialog box.
In the General section, click the Browse button next to the Selected Image field to open the image library in a new window.
Select the desired image, and click OK to close the Image Library window and populate the Selected Image field with the URL of the selected image.
Set the layout properties to what you want, and click OK to add the image.

Although not recommended, you can use the source editor in a Content Editor Web Part to insert an image with HTML. You must have a good knowledge of how this is done, since you will be manually linking, positioning, and aligning an image on the page using source code.
Tip
See Chapter 8 for details on working with a Content Editor Web Part.
The following exercise assumes that a Content Editor Web Part has already been added to a Web Part page and that you are at that specific page:
Click the arrow next to the Web Part title to open the menu and then click Source Editor, as in Figure 13-19.
When the source editor opens, add your HTML, including the link to the image in the Picture Library, as shown in Figure 13-20.
When finished, click Save to close the source editor and then OK to close the pane.

The figure is added to the Content Editor Web Part according to the properties specified in HTML, as seen in Figure 13-21.
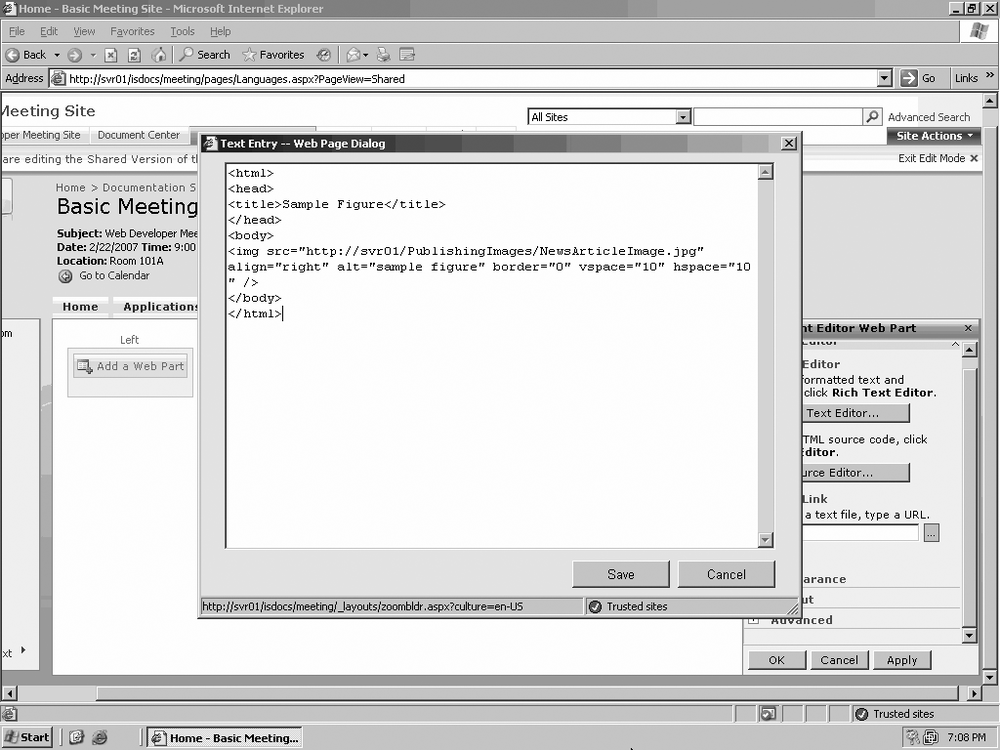

The following is a very simple example of HTML source that places an image to the right of the page near the top:
<html>
<head>
<title>HTML Sample</title>
</head>
<body>
<IMG  src="http://svr01/graphics/logo-perl01.gif" align="right" vspace="1" alt=perl
hspace="10" border="0">
<BLOCKQUOTE>
<H2>Charter</H2>
<blockquote>
<P> Perl at our company is supported by the Developer Services Team. Our charter is
to provide quality support for Perl developers on all supported platforms,
with both language and distribution issues. </P>
</blockquote>
</BLOCKQUOTE>
</body>
</html>