
Using 3D Paint mode
Adding image adjustments to 3D objects
Creating great composites
In the last two chapters, you learned how the 3D workspace in Photoshop functions to allow you to create, manipulate, and change the look of 3D objects by changing their color, texture, and lighting. In this chapter, I show you how to integrate 3D objects into the Photoshop workspace, using the tools you are probably more familiar with to paint over your 3D objects and create adjustments, styles, and filters.
The last section of this chapter walks you through some very complex exercises that demonstrate some of the tools and techniques that can be used to create a successful composite with 3D objects and images. At this point, you should be familiar with all the techniques used to create these composites, but completing these exercises gives you practice using these tools and shows you how they can work together.
You can grab a paintbrush in Photoshop and start slapping paint on your 3D objects. The paint conforms to the 3D object because even though you are looking at your 3D object, you are changing the texture file, which is wrapped around your 3D object. This gives you the distinct advantage of being able to change areas of the texture as it is mapped to your object, instead of trying to guess where to paint in a flat, rectangular texture file.
You can paint color onto your object, of course, but you also can paint texture, shine, opacity, and reflection onto your object. This makes the 3D Paint tool a versatile way to change the materials of your 3D object.
Before I show you how to use the 3D Paint tools, I show you options for selecting areas of your object to paint on and hiding areas of your object that you want to protect. These options in Photoshop are definitely a little rough around the edges (literally as well as figuratively); still, they can be useful.
You can create selections on a 3D image using the Selection tools just as you can with a two-dimensional image. The problem is that the selections you create are two-dimensional selections, and they won't conform to the 3D object. You can see in Figure 24.1 that, after creating a selection around the hat, I moved the hat. The selection didn't move with it. You can use the Selection tools to make changes to 3D objects, but be sure that your object is placed just how you want it to be viewed, because the changes don't extend to unseen areas of your object.

You can, however, use the Selection tools to select paintable areas of your object or to hide areas that you want to protect. These tools also are affected by the fact that selections are two-dimensional. You can't simply select an area of your 3D object and hide it or paint onto it; you are limited by the way the two-dimensional selection interacts with the 3D object. This is apparent as you use the following tools to hide areas of your 3D object.
You need to use the Selection tools to select the area of your model that you want to hide and select any one of these options from the 3D menu:
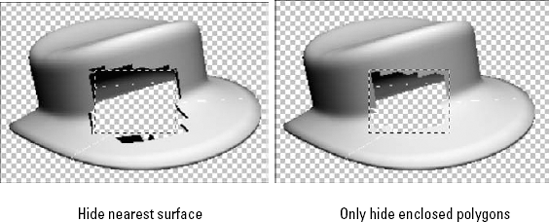
Hide Nearest Surface: This hides the surfaces within the selection that are closest to the view area. The results are usually jagged, as you can see in Figure 24.2. You also can select this option multiple times for a cumulative effect, hiding more and more of your 3D object.
Only Hide Enclosed Polygons: This option hides all the polygons that are enclosed within the selected area. Notice in Figure 24.2 that not all of the selected area disappears, only the complete polygons within the selected area.
Invert Visible Surfaces: This option swaps the visible areas with the areas that are hidden, so you can make changes to the opposite areas.
Reveal All Surfaces: This brings into view any areas that are hidden.
So are you ready to paint on your 3D object? All you need to do is grab a brush and start painting. The cello in Figure 24.3 has blank textures, so I want to liven it up by adding some color. The first thing I do is open the 3D {Materials} panel and make sure the cello body is selected, as shown in Figure 24.3. Now I select a dark brown color and a hard, round brush. Dragging the Brush tool over the cello adds color to it, as shown in Figure 24.4. As I drag my brush, the color is restricted to the cello body because that is the material I have selected in the 3D panel. That gives me the freedom to make big, bold strokes that completely fill the cello with paint. I could have just as easily used the paint bucket to drop the color onto the body of the cello.
Note
3D objects created in Photoshop often tile the texture. You can see this when you paint on a section; the paint appears in several areas of the object. Hiding those areas won't stop the paint from being applied to them, because the paint is really being applied to the image file that is being used as the object's texture.
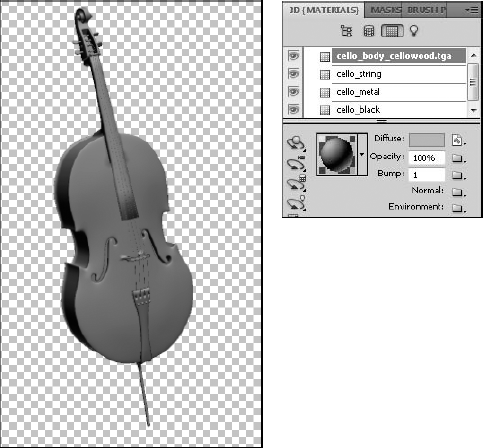
Figure 24.3. With the cello body selected in the Materials panel, it is the material affected by my painting.
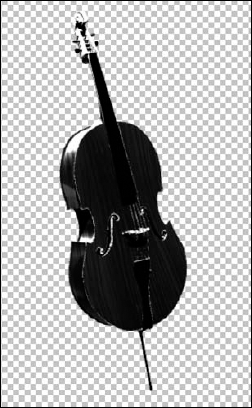
The brown is much better than the white, but it still doesn't look much like the texture of the wood that would make up a cello in real life, so I choose a bristly, angled brush and create some wood grain on the surface of the cello. This time, I have to be much more careful with my paintbrush, creating fairly straight, clean strokes that don't overlap. I use a darker brown color to create a deeper wood grain over the brown of the cello. The finished effect looks more like wood, as you can see in Figure 24.5.

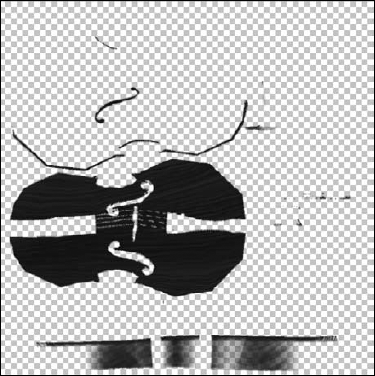
The texture file can be opened by double-clicking the cello_body layer in the Layers panel or by selecting the Edit the Diffuse Texture button in the 3D {Materials} panel and choosing Edit Texture. You can see in Figure 24.6 what the new texture looks like after my paint job. Oops! Forgot to paint the back!
Now I show you how to take painting a 3D object beyond color. From the 3D menu, you can choose any one of seven different textures to paint on. Follow these steps to see how it's done:
Create a 3D shape from a layer in Photoshop.
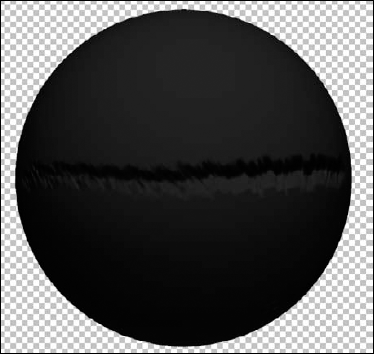
The sphere is a good shape for this exercise because the texture isn't tiled, and the changes you make to it are not duplicated in other areas of the sphere. See the sphere in Figure 24.7.
Choose 3D

Now as you paint directly onto your object, you make changes to a bump map.

Figure 24.7. The sphere uses the texture map only once around it, so your changes appear only in the area that you make them.
Note
To learn more about the different types of texture you can apply to your 3D object and how to edit the texture files, see Chapter 23.
Open the 3D {Materials} panel, and click the Edit the Bump Texture icon next to the bump setting.
From the drop-down menu, select New Texture, as shown in Figure 24.8.
Choose the brush that suits your needs, and drag over your 3D object.
The paint is applied to the bump map, which adds depth rather than color to your object, as you can see in Figure 24.9.

You can quickly see the merits of being able to paint directly to your object in this manner. Placing your brush strokes exactly where they need to be on the texture to get the effect you want is incredibly easy. You can continue to make changes to the different textures of your object in this manner, simply by choosing the texture you want to change in the 3D menu.
Note
If the texture you choose to paint on (glossiness, opacity, and so on) has not already been applied to your object, you can either create a new texture in the 3D {Materials} panel as I had you do with the bump texture, or you can simply drag your brush over your object. After you've tried to paint into a texture that doesn't exist, Photoshop creates that texture for you.
You also can change the look of a 3D object the same way you can change the look of any image—using adjustments, layer styles, and filters over the entire object. Especially as you use 3D objects in composites, you'll want to use these tools to create just the right look. This isn't as straightforward as working with an image file, so I show you how it works.
Note
Using adjustments, layer styles, and filters over a 3D file should not be confused with using these tools on a texture map. The texture maps attached to a 3D file are image files and can be adjusted in the time-honored method that is always used to adjust image files in Photoshop. This section focuses on applying these tools to a 3D layer.
You can apply an adjustment to a 3D layer in much the same way as you would apply it to an image file and for much the same reason. Often, as you adjust the light and color of the diffuse texture, you find that after it's been applied to a 3D object, it looks much different than it did as an image. It's much darker, for one thing. Applying an adjustment that changes the look of the light or color directly to the 3D object is often the solution to getting just the look you want without having to go back and forth between the 3D file and the texture file, trying to adjust the light and color.
Tip
If you are making adjustments to just your 3D object layer, be sure to clip the Adjustment layer to your 3D object layer using the icon in the Adjustment panel. This ensures that the adjustments are applied only to your 3D layer and not any other layers in your document.
Note
Learn more about adjustments and Adjustment layers in Chapter 13.
Of course, these changes are made unilaterally to your 3D object, unlike the more subtle changes that can be made by adding and changing lights or making changes to individual texture maps. Another caveat to adding adjustments to a 3D layer is that the adjustments must be added through an Adjustment layer. The adjustments in the Image menu are not available for a 3D object. I hardly ever use the Image menu, anyway, so this doesn't usually affect the way I work, but you may occasionally have a reason to use the adjustments in the Image menu. If you want to add these adjustments, you must do one of two things:
Rasterize your 3D layer by choosing either Rasterize
Turn your 3D layer into a Smart Object layer by choosing Convert to Smart Object from the Layers panel menu. I discuss 3D layers as Smart Objects a little later in this chapter.
Applying a layer style to a 3D object is a wonderful way to add an effect that can't be achieved using the 3D textures. It is easy to add elements like inner glow, drop shadows, and stroke outlines to your 3D objects and spice up the way they look. The best thing about using layer styles on a 3D object is that the style is reapplied each time you move your object, so creating a stroke around the cone in Figure 24.10 didn't leave behind a cone-shaped outline when I changed the angle of the cone. This is true for all the layer styles.

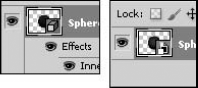
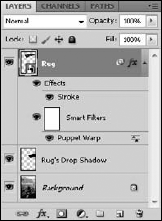
The layer styles are added as effects sublayers right along with the textures, as shown in Figure 24.11. You can change the settings of the styles that are applied by double-clicking any of the Effects layers to bring up the Layer Styles dialog box.

Note
The layer styles are covered in Chapter 10.
Applying filters to a 3D layer is a little trickier than adding an adjustment or layer style. You might want to add a filter directly to a 3D layer instead of to the texture for the same reason that you would add an adjustment directly to the 3D layer. The effects of a filter look different after the texture has been wrapped around your 3D object, and you can preview the filter in real time if it's added directly to your 3D object.
Furthermore, if your texture is tiled onto your 3D object, adding a filter to the texture makes the tiling apparent. When you add the filter directly to your object, it doesn't matter how the texture is applied; the filter is applied to the entire object uniformly.
You can add a filter directly to a 3D object, but it affects only the visible surfaces. If you move your 3D object at all after applying a filter, you see the filter's effects end, as shown in Figure 24.12.
The best way to add a filter to a 3D object is to change it to a Smart Object. That shouldn't surprise you, because turning your layers into Smart Objects is almost always the best way to add filters to them, no matter what type of layer it is. After you've turned your 3D layer into a Smart Object layer, you can add filters to it just as you would a Smart Object layer created from an image or any other kind of layer. The ironic thing is that these filters still affect only the visible surface, but when you open a Smart 3D Object and move it, the filter is reapplied to the new visible surfaces.
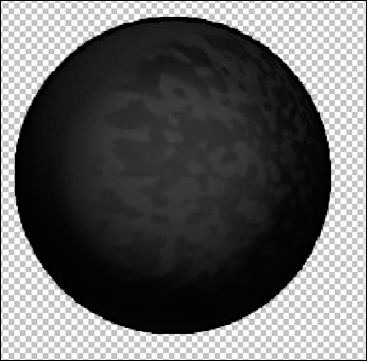
Figure 24.12. I applied the Watercolor filter to the sphere and then rotated it a little. You can see the watercolor effect come to an abrupt stop.
Note
You can learn all about the filters and Smart Filters in Chapter 20.
To create a Smart Object from a 3D layer, right-click it and choose Convert to Smart Object from the flyout menu. This converts the 3D layer into a Smart Object and changes the icon on the thumbnail from the 3D layer icon to a Smart Object icon, as shown in Figure 24.13. Now you have texture and effect files embedded inside of a 3D object layer, which is embedded inside a Smart Object! It sounds complicated, but it allows you so much versatility in the changes that can be made (and then changed) to your 3D object.
After you've turned your 3D layer into a Smart Object layer, you can apply Smart Filters that show up as (yes, another set) of sublayers. You also can add adjustments directly to your object and use the transformations found in the Edit menu, including the Puppet Warp.
A Smart Object layer gives you the best of both worlds. You still can make changes to your 3D scene, using the 3D Transformation tools to manipulate it, adding lights and textures, and doing anything else you want to do. Simply double-click the Smart Object layer, and your 3D layer opens as a separate file that you can change. These changes are immediately updated to the main file, even before you save your 3D layer file (save it before you close it, of course).
You also can open the texture files from the 3D layer file, just as you always could. The changes you make to these files also are updated in both the 3D layer file and the Smart Object file.
Now that you understand how to work with 3D objects as 3D layers and as Smart Objects, you are ready to use these versatile files to create fantastic composites.
Now that you've gone over the basics, you can get started with the fun stuff! You are familiar with the tools that help you create fantastic images in Photoshop. I showed you the basics of working with 3D objects. Now I take you through some exercises that put several of these techniques together to create composites using images and 3D objects. This gives you a chance to walk through a few examples before you venture out on your own. These examples are pretty step-intensive, but they include several different techniques so you can see how those techniques work together. When you're finished, you'll have a better understanding of the fantastic things that you can do with a 3D model in Photoshop.
The following example shows you how to create a flying carpet over a lake. Because several different exercises go into creating this composite, I take you through them one at a time, with each exercise building on the last one so you can do them in more manageable chunks.
The first exercise is to create a 3D rug. You do this using the Repoussé feature. Follow these steps:
Create a new blank document in Photoshop.
Tip
You'll find out very quickly that working with 3D objects in Photoshop is a memory-intensive process. Because these objects are vector files and can be resized without losing quality, it's best to start with a very small file. Smaller files save you time and ultimately frustration. Remember that the textures applied to these files are raster files, however. You may want to create larger textures, even when the 3D file itself is small.
Use the Pen tool to draw a rectangle in your document, as shown in Figure 24.14.
Hold down the Shift key while you are drawing so the lines are perfectly straight. After closing the rectangle, use the Direct Selection tool to make the last line of your rectangle straight, if needed.
Choose 3D
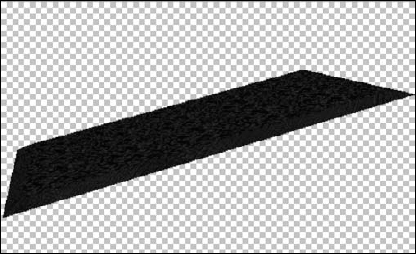
From the Repoussé dialog box, change the depth to 0 and create a bevel that gives the rug a nice edge, as shown in Figure 24.15.
The numbers you use to create this edge will vary, depending on the size of your rug. Close the Repoussé dialog box by clicking OK.
Double-click the texture layer.
Because you created a bevel, you have two layers; choose the one that is not labeled "Extrusion." This opens the rug's texture for you to edit.
Use the Paint Bucket tool to fill the texture with color.
I used a deep maroon, but it's your rug, so be creative!
Click the Layer Styles icon (fx) at the bottom of the Layers panel.
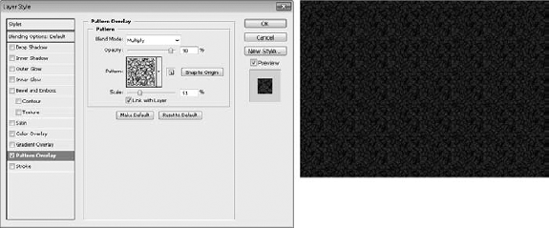
From the Layer Styles menu, choose Pattern Overlay.
This opens the Layer Styles dialog box.
Click the down arrow next to the pattern thumbnail to open the pattern selector.
Choose a pattern for your rug. I used the metal landscape. Don't forget to use the little black arrow in the pattern selector to open the pattern menu where you find additional pattern presets. The metal landscape pattern is found in the Patterns presets.
Change the opacity and scale of the pattern so your rug looks good.
These settings depend on the size and color of your rug.
Try different blend modes until you find one that you like.
I chose Multiply. Click OK to close the Layer Style dialog box, shown in Figure 24.16.
Save the texture document and return to the 3D model of the rug using the tab in the document window in Photoshop.
Leaving the texture document open gives you the capability of quickly returning to it to make changes if you find that you don't like the way the 3D object looks.


Note
In the interest of space and to reduce the number of steps involved, I didn't add extra steps in creating this rug you could very well use to make your rug look fantastic. Add a bump map to give the rug a woven texture. Add lights to create dimension. Because the rug is a relatively flat object, I'm going to take a shortcut in the next steps and create a drop shadow rather than using the ground plane, but you can experiment with the ground plane to see if you can create the shadow that way.
Follow these steps to create a flying carpet that any kid would want to ride on:
Note
You will find the image file you need to complete this exercise saved as Figure 24-18 on the Web site.
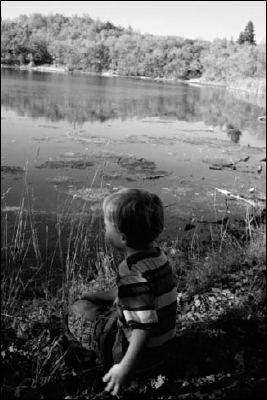
Open Figure 24-18 from the Web site, as shown in Figure 24.18.
This photo works great for what you want to do because it has a large, horizontal surface
Choose File
Browse to the rug file you created in the last exercise, and click OK.
Place the rug in your image file, and scale it to fit the image.
Click the check mark in the Options bar to accept the placement.
If you need to make adjustments to the 3D file, such as changing the angle of the rug, double-click the Smart Object thumbnail in the Rug layer to open the 3D file and make those changes.
Save the changes, and return to the image document. I changed the angle of the rug, as shown in Figure 24.19.
With the Rug layer highlighted, choose Edit
Placing pins and using the mesh, change the rug to look more like a soft fabric, as shown in Figure 24.20.
Give it wrinkles, and make it look like it's traveling through the air. This is a fun step, so play around and give your rug personality!
Click the check mark in the Options bar to accept the changes.
Note
Notice that the Puppet Warp is added as a Smart Filter? That means that you can return and edit it whenever you want.
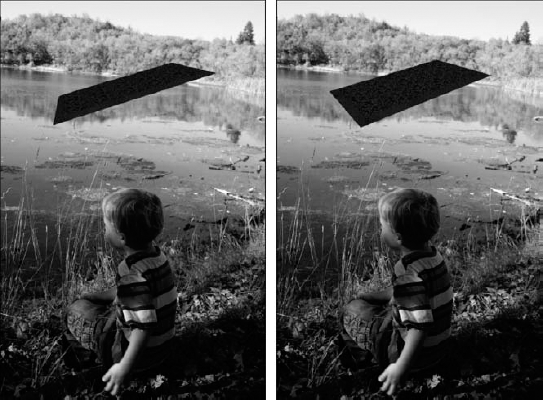
Figure 24.19. It would be great if every 3D object placed looked just right, but it's easy to change it by opening the original file.
Double-click the Smart Object thumbnail in the rug layer to open the 3D object.
From the 3D {Lights} panel, use the Add New Light icon to add a spot light to the rug scene.
Angle it so that it lights the rug from the same direction where the sun is shining in the photo.
Save the changes, and exit the 3D file.
With the Rug layer highlighted, click the Layer Styles icon in the bottom of the Layers panel and choose Drop Shadow.
Set the spread and size depending on the brightness of your background image.
The bright image used in this exercise creates hard shadows, so set the spread and size to a smaller value. Hard sunlight makes hard shadows.
Click OK to exit the Layer Styles dialog box.
Right-click the Drop Shadow sublayer, and choose Create Layer.
Click OK when you are warned: "Some aspects of the Effects cannot be reproduced with Layers!"
It's all about the details, isn't it? Especially in Photoshop, the details can make an okay image look like a great composite. You can add details to the image to give it that final touch:
Highlight the Drop Shadow layer.
Inside the image, use the Move tool to drag the shadow below the rug to rest on the lake.
Reduce the opacity of the shadow layer to match the opacity of other shadows in the image.
Your final result should be similar to Figure 24.21.
Tip
Depending on the angle of sunlight in your image, you may want to rotate, scale, or even warp the shadow to make it look more realistic. With the Drop Shadow layer selected, choose Edit
With the Rug layer highlighted, click the Layer Styles icon in the bottom of the Layers panel and choose Stroke.
Set the size, position, blending mode, and opacity to create a solid border that outlines the rug.
Click OK to exit the Layer Style dialog box.
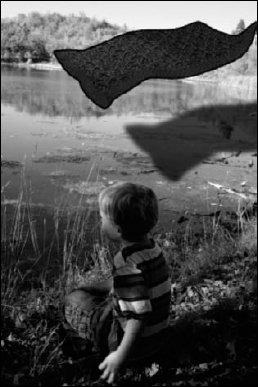
The steps you took to create a flying carpet follow a precise order. It's important to transform the rug by turning and warping it before creating the drop shadow. After the drop shadow has been separated into its own layer, it no longer mimics the changes made to the rug. In fact, you can make changes to the Drop Shadow layer itself.
These effects are just a sampling of several things I could have done. Play around with your file, and see if you can add even more realism to it. As with anything else you do, balancing the amount of time you spend with the effect you create is the key to being efficient.
Look at the Layers panel shown in Figure 24.22. You've created quite an array of layers. They are well organized and easy to understand, especially after you create them yourself. Take the chance to edit them or reorganize them if you are still not fully familiar with how they work.
Now let me show you another example that uses different techniques. In this exercise, you create cross sections and place more than one instance of an object in a file. You also place a second 3D object in the same file. You can make a present of the moon by following the steps in the following sections.
Follow these steps to create the first part of the package perfectly wrapped for gift-giving:
Note
Find the files you need to do this exercise on the Web site. They are saved as Figure 24-23 and Figure 24-25.
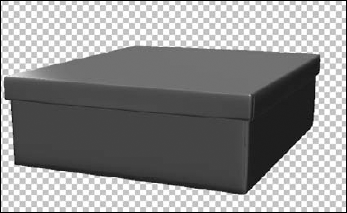
Open Figure 24-23 from the Web site.
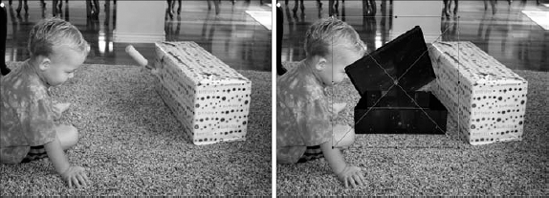
This is a PSD file of a 3D box with a lid, as shown in Figure 24.23.
Open the 3D {Scene} panel.
Change the following settings: Check Cross Section, click Flip Cross Section, uncheck Intersection, set the offset to +12, and click Z-axis.
You should be left with the lid of the box.
Rename the layer Lid by right-clicking the layer and selecting Layer Properties.
Select File
Click the check mark to accept Placement.
Double-click the thumbnail in the Figure 24-23 layer.
When you are reminded to save, click OK.
Open the 3D {Scene} panel.
Change the following settings: Check Cross Section, uncheck Intersections, click Z-axis, and set the offset to 11.
You should be left with the bottom of the box, minus the lid.
Use the 3D Manipulation tools to place the bottom of the box so you can see into it.
Save the changes, and exit the File.
Rename the Figure 24-23 layer Box by right-clicking the layer and selecting Layer Properties.
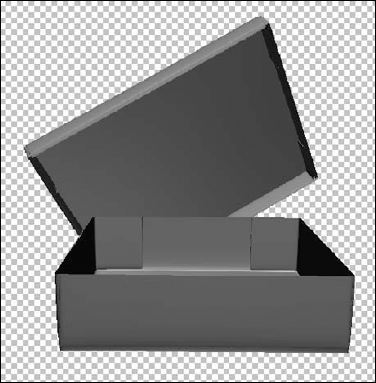
Use the 3D Manipulation tools to tilt the lid so it looks like it is being opened, as you see in Figure 24.24.
Double-click the lid texture in the Layers panel of the Lid layer to open the texture.
Select File
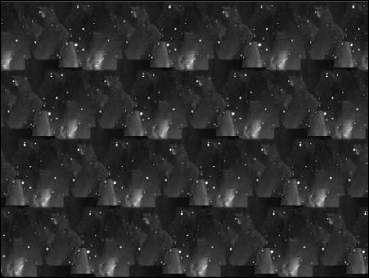
This file is a pattern created from an image of a nebula, as seen in Figure 24.25.
Stretch the pattern to fill the texture of the box.
Click the check mark in the Options bar to accept the placement of the pattern.
Save the changes to the texture, and close the texture file.
The lid of the box should now have a new texture.
Double-click the thumbnail in the Box layer.
When you are reminded to save, click OK.
Double-click the box texture of the Box layer in the Layers panel to open the texture.
Repeat Steps 16-20 to add the texture to the main portion of the box.
Save this file, and close it.
You used the Cross Section tool to create and place the same 3D object in a file twice. You added texture to both portions of that object. Your final result should be similar to Figure 24.26. Now you are ready to create the moon.
To create the moon, you create a sphere in Photoshop and map an image of the moon over it. Follow these steps:
Note
Find the texture of the moon saved as Figure 24-27.

Browse to Figure 24-27, and open it.
Double-click the Figure 24-27 layer, and rename the layer Moon.
This converts the background layer to a regular layer and gives it a descriptive name.
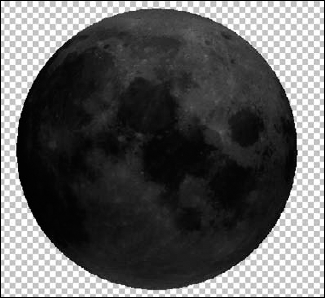
Use the 3D Shape Preset in the 3D panel to create a sphere from the layer.
You see a representation of the moon, as shown in Figure 24.27.
Open the 3D {Lights} panel.
From the Light Preset drop-down menu, select Blue Lights.
Click the Layer Styles icon (fx) in the Layers panel, and choose Inner Glow.
Adjust the settings to give the moon a nice glow.
You can see my settings in Figure 24.28.
In the Layer Styles dialog box, select Outer Glow.
Adjust the settings to give the moon a nice outer glow as well.
Click OK to exit the Layer Styles dialog box.
Save your file.
Now that you've created two 3D object files, let's add them to an image file to make a complete composite. Follow these steps to create a composite that gives the moon away as a gift:
Note
Find the image used in this composite saved as Figure 24-29.

Open the file shown in Figure 24-29.
Choose File
Position and size the box in the file however you'd like, and click the check mark to accept placement.
Note the areas that need to be masked, and then hide the box by clicking the eye icon.
Using the Selection tool of your choice, select the areas that need to be masked, as shown in Figure 24.30.
Tip
I created a jagged selection along the edge of the box as well as a selection around the face to take away the sharp edge that should have been sunk slightly into the carpet.
Choose Select
Note
You can, of course, select the areas that need to be shown rather than the areas to be masked. Then there is no need to Inverse the selection.
Click Refine Edge in the Options bar.
Adjust the settings to refine the edge of your selection.
Choose Output to Layer Mask and click OK to close the Refine Edge dialog box.
Drag the mask from the Image layer to the Box layer.
Click the eye icon to restore the Box layer to view.
Your box should be masked into the photo.
Choose File
Size the moon to fit in the box, and click the check mark to accept placement.
Drag the Moon layer to the top of the Layers panel, placing it on top of the box.
Set the moon inside the box.
With the Moon layer highlighted, click the Rectangular Marquee Selection tool and create a selection that includes everything in the moon layer that is above the box, as shown in Figure 24.31.
Click the Mask icon in the Layers panel to create a mask from the selection.
The moon is placed into the box. Your finished product should look like Figure 24.32.


You can see that even the most rudimentary 3D objects can become very interesting by using Photoshop tools to enhance them. Just imagine what you can do with more elaborate 3D models.

Note
If you would like to see the final PSD file used to create Figure 24.32, you can find it on the Web saved as Figure 24-32.
In this chapter, you learned some of the advanced techniques for working with 3D objects, how to use the Photoshop tools to change them, and how to add them to composite images successfully. You learned how to do the following:
Use the 3D paint tools to paint textures directly onto a 3D object
Use adjustment layers, layer styles, and filters on a 3D object
Create composites using images and 3D objects