
Hour 14. Creating and Adjusting Cameras
What You’ll Learn in This Hour:
![]() How to create cameras
How to create cameras
![]() What the different camera attributes do
What the different camera attributes do
![]() What the different types of cameras are used for
What the different types of cameras are used for
![]() How to properly animate a camera
How to properly animate a camera
Fundamentally, you are using cameras all the time when you use Maya. The Persp panel is indeed just a perspective camera that you have been flying around the scene, adjusting its position and rotation. In CG visual effects and in fully CG animation, however, knowledge of the many attributes of a camera and proper manipulation of those attributes are paramount.
Note: Cameras and Panels
Any panel can display the point of view of any camera. In fact, more than one panel can display the same camera. You should note that a panel’s display is independent of the camera. In other words, if you have a panel that is displaying the Persp camera and everything is in wireframe mode, with NURBS curves hidden, and another panel also showing the Persp camera, it can be in shaded and textured mode with all objects displaying. A panel is merely a window through which you can load any camera, and each panel has its own display settings.
In this Hour, you will see how cameras are created and adjusted to bring the best result to the shot. You will see some of the attributes in action and their effect on a camera’s point of view. We will take a brief look at the different types of cameras Maya offers, and also use a simple rig to give our camera some animation.
Creating Cameras
Maya’s cameras are all created through the Create menu. Follow these short steps to create a simple camera:
![]() Click on Create, Cameras, Camera
Click on Create, Cameras, Camera ![]() .
.
![]() In the options dialog box that opens, leave all the settings at their default, but change the Focal Length setting to 50.0.
In the options dialog box that opens, leave all the settings at their default, but change the Focal Length setting to 50.0.
![]() Click Create.
Click Create.
Tip: “CG” Camera
Because Maya and nearly all other 3D programs create a 35mm camera by default, when you don’t change the focal length, your work will stick out as “CG.” Audiences (and CG recruiters) have an eye for the default camera, so you want to avoid using a 35mm focal length as much as possible. One nice trick is to change the default camera’s Create settings to have a focal length of 50. This is a slightly more “zoomed” lens—one that is a standard lens for photography and does not seem so “wide” and “CG” looking.
There should be a camera created at the world origin, as in Figure 14.1.

But now that you have a camera, how do you see through it? There are a few ways to change to a camera’s view:
![]() Select the camera, and in any panel that you would like to switch to this camera’s view, click on Panels, Look Through Selected.
Select the camera, and in any panel that you would like to switch to this camera’s view, click on Panels, Look Through Selected.
![]() Select the camera, and in any panel that you would like to switch to this camera’s view, click on Panels, Perspective, camera1.
Select the camera, and in any panel that you would like to switch to this camera’s view, click on Panels, Perspective, camera1.
![]() MMB-drag a camera from the Outliner onto a panel window, and it will switch to that camera’s view automatically.
MMB-drag a camera from the Outliner onto a panel window, and it will switch to that camera’s view automatically.
Let’s load a panel configuration that allows us to see the camera and the camera’s view simultaneously:
![]() In the Toolbox (left side of screen), select the Four View layout. Alternatively, you can click in any panel on Panels, Layouts, Four Panes.
In the Toolbox (left side of screen), select the Four View layout. Alternatively, you can click in any panel on Panels, Layouts, Four Panes.
![]() Now in the top panel, select camera1 and click on Panels, Look Through Selected.
Now in the top panel, select camera1 and click on Panels, Look Through Selected.
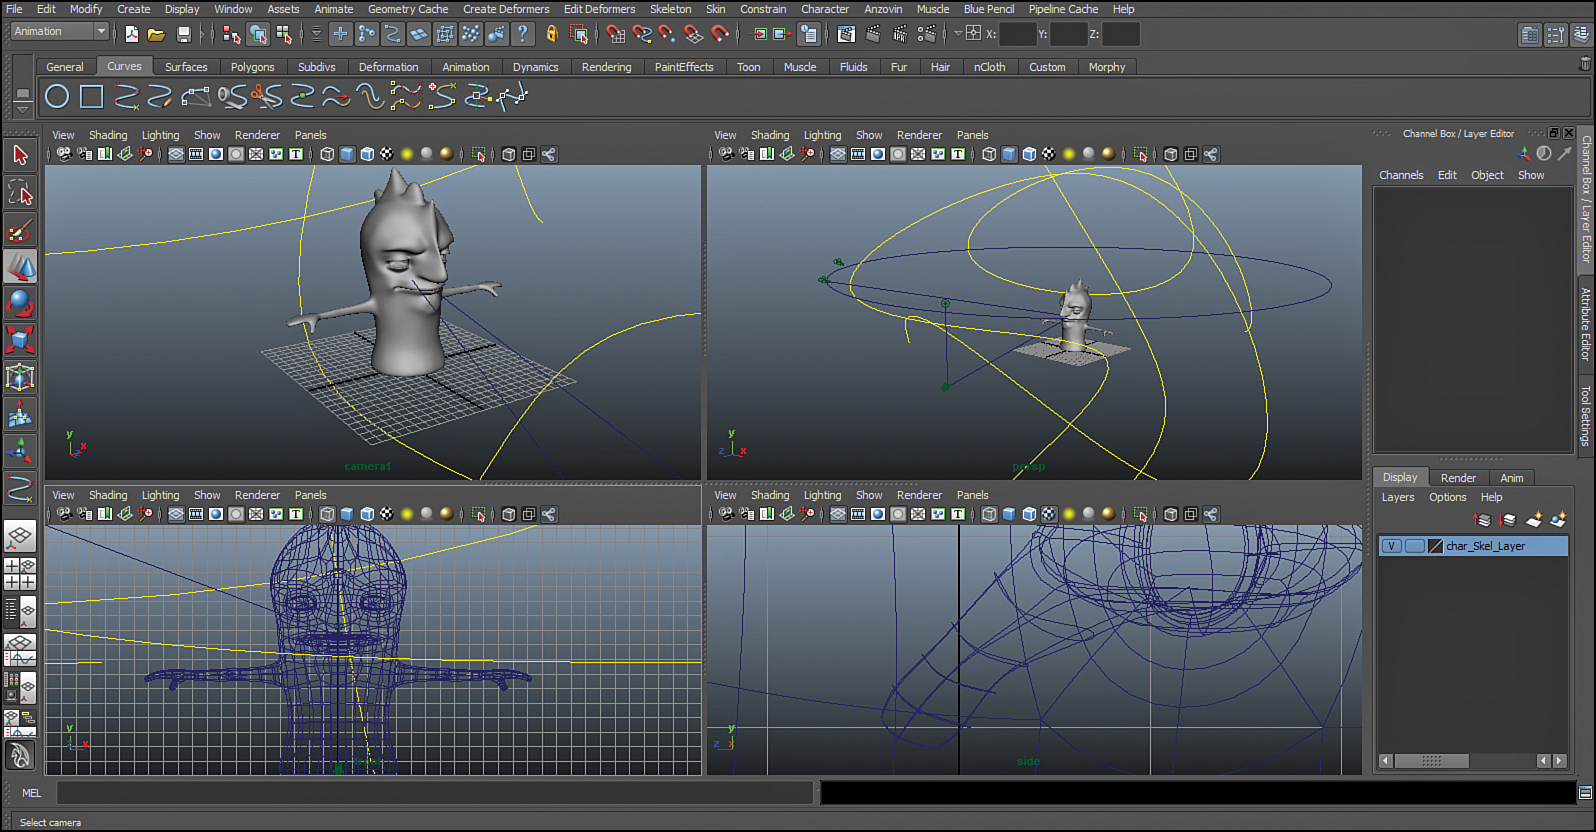
Your layout should resemble the one in Figure 14.2.

FIGURE 14.2 This is a common Maya layout—a perspective panel, a few orthographic panels, and a camera panel ready for animation.
Now that we can see what is going on, let’s manipulate the camera a bit.
First, in the camera1 panel, use the camera dolly, track, and orbit controls and watch the resulting movement in the Persp panel. You will be able to confirm that although Alt+RMB is commonly called “zooming” by artists and books alike, it is in fact “dollying.” There is no change in the focal length (zooming), only movement of the camera in the local Z axis.
Select the camera in the Persp panel again, and use the Move and Rotate tools to manipulate the camera’s position and rotation. You will notice that translating the camera is akin to tracking within the camera view (Alt+MMB), but that rotating the camera actually rotates the camera in place, whereas orbiting the camera in its panel rotates the camera around a point in space in front of it called the “point of interest.” This is not just rotating it but applying translations as well.
Tip: Orbiting and Rotating
When you start animating cameras, you will see how dangerous it can be to use AutoKey while you orbit a camera. Because the camera is rotating around a fixed point in front of it, all of the rotation channels are being changed in unpredictable ways, even during very simple camera moves. It is always better to use the Translate and Rotate tools on the camera in a Persp panel than to use the camera-moving tools within the camera panel. Better still is to have a camera rig for controlling animation.
We will look at how to better manipulate the camera in scene and create predictable animation in a little bit. Now let’s look at the attributes of a camera.
Common Camera Attributes
Cameras come with hundreds of attributes, many of which you will not touch, even if you are working in a high-end production. Many of the attributes deal with calculations or output methods that are very specific, such as matching a certain camera that was used to capture footage for a visual-effects shot. To get up and running in Maya, though, you should know what the following attributes do and how to control them. Create a new scene and create a camera (Create, Cameras, Camera). Select the camera and press Ctrl+A to open the Attribute Editor, like in Figure 14.3.

FIGURE 14.3 The Attribute Editor with a camera selected. Notice how many different sections there are for a camera’s settings.
Now open the first tab, labeled Camera Attributes.
Camera Attributes
Because they have to match real-world cameras, Maya’s cameras are loaded with attributes. These many settings give artists the control they need to create impressive imagery or to match footage shot in real life.
Controls
This attribute allows you to change your camera’s control set to a different type after creating the camera. You may use this if you are having trouble making your camera behave like you want it to.
Angle of View
This attribute is automatically determined by the film back and focal length ratio. You normally do not need to adjust this attribute because your focal length will determine your angle of view for you.
Focal Length
This attribute is the most commonly adjusted attribute for a camera. Focal length is otherwise known as “zoom.” Simply put, the more “zoomed in” a camera is, the smaller the angle of view; therefore, less perspective is shown in a scene. The lower the focal length, the higher the angle of view; therefore, more perspective is shown. A low focal length is called “fisheye,” and a high focal length is called “telephoto.” Follow these steps to familiarize yourself with focal length:
![]() Open focal_Test.ma in this Hour’s files. There are two spheres. One is smaller than the other.
Open focal_Test.ma in this Hour’s files. There are two spheres. One is smaller than the other.
![]() Create a camera and change the Focal Length attribute to 15.
Create a camera and change the Focal Length attribute to 15.
![]() Switch to the camera’s view in a panel and then move the camera back in Z until the panel resembles the view in Figure 14.4.
Switch to the camera’s view in a panel and then move the camera back in Z until the panel resembles the view in Figure 14.4.

![]() Now create another camera. This time set the focal length to 120.
Now create another camera. This time set the focal length to 120.
![]() Change another panel’s view to look through this new camera.
Change another panel’s view to look through this new camera.
![]() Move the second camera back in Z until the view looks like the one in Figure 14.5.
Move the second camera back in Z until the view looks like the one in Figure 14.5.

As you can see, the front sphere is relatively the same size in both views. The rear sphere, however, has radically different sizes. This is due to the fact that the camera with the low focal length of 15 has a very wide field of view that really displays the effect of perspective.
Focal length can be animated to make the camera zoom in and out.
Camera Scale
This attribute is not used often; it affects the relationship between the camera focal length and the scene. It is therefore used only in matching live-action cameras—and then only infrequently.
Auto Render Clip Plane
Checking this box means that at render time, Maya will determine what the closest point and the furthest point to be rendered will be, based on the objects that exist in the scene.
Near Clip Plane and Far Clip Plane
With Auto Render Clip Plane unchecked, you will set the near clip plane and the far clip plane with these two attributes. Anything closer to the camera than the value in Near Clip Plane, and anything further from the camera than the value in Far Clip Plane, will not render.
Even though the Auto Render Clip Plane box is checked and Maya will determine the clip planes at render time, you will still see the effect of the values in the near and far clip planes in a panel. Also, if the value of Near Clip Plane is too low, sometimes Maya will have errors when displaying geometry that is close together. To alleviate such display errors, change Near Clip Plane to a higher value.
Film Back
The next set of attributes gives you control over matching your Maya camera to a real-world camera from which you have captured footage. We will cover these attributes in depth in Hour 22, “Working with Film.”
Depth of Field
These attributes control the depth of field, or the focus of an image. When applying depth of field, you should remember that the more blurry an image is, the longer it takes Maya to render it.
Depth of Field
The first check box turns depth of field on or off for this camera. You still have to enable depth of field in Maya’s render settings for it to render correctly.
Focus Distance
This is the distance from the camera that will be in focus. Objects at this distance will be clear and crisp.
F Stop
This attribute is similar to the F Stop on a camera. Because it can be very confusing even to photographers how F Stop relates to exposure, focal length, and the like, we will simplify it for you here. In very general terms, a higher F Stop in Maya means that there will be a large depth of field (that is, more in focus). A low F Stop conversely means that there will be more blurring, and the blurring will encroach even closer to the focus distance.
Focus Region Scale
This attribute scales the focus distance. This attribute and most other scale attributes are normally only useful in cases where you do some scene-wide scaling.
Output Settings
These attributes control the output of the camera. They are commonly kept at their defaults because most of the settings here can be overwritten at render time by the renderer. We will look at these settings more in Hour 21, “Rendering Final Imagery.”
Environment
These attributes control the “background” of the camera’s rendered image. Changing these settings does not actually create or adjust an environment in your Maya scene, however.
Background Color
This is the actual color of any “blank” space in your rendered image. If no geometry or image planes are loaded, this color will show. Because of how objects are anti-aliased (the fuzzing of the edges of an object to remove jagged pixelated lines), you should be aware that this color “bleeds” into the periphery of a rendered object.
Caution: Background Color and Premultiplying
In basic terms, “premultiplying” is when a pixel’s brightness value is calculated respective to the background color it is on. This greatly affects the periphery of an object that is rendered against a colored background, even black. In compositing programs, you must normally tell the program what color was used to generate the premultiplied image with an alpha matte. Not doing so, or skipping this step, will mean you will see the color bleeding into the transparent areas, or a halo effect around the perimeter alpha. Again, even black is a color and behaves this way; do not think keeping the background color black means no color is chosen. If you are planning on using a compositing package to put your images together, make note of the background color for setting it correctly when the compositing package asks for the premultiply color.
In general, a background color should be black even if you are planning on using another color later; premultiplying everything with black saves the headache of trying to figure out what colors are bleeding into your transparent objects.
Of course, if you absolutely must use a background color, for whatever purpose, the color slider will give you the result you need.
Image Plane
An image plane is an image or a movie that displays as the background of a rendered camera. We have some experience with image planes, working with them for modeling in Hour 8, “Character Modeling.” We will cover image planes and how to correctly use filmed footage as a background more in Hour 22.
Special Effects
This tab controls some of the more esoteric functions of a camera. However, by default, Maya’s cameras only come with one attribute loaded here.
Shutter Angle
This is the only attribute listed in this tab. It controls the shutter angle for motion blur; essentially, a higher value means increased blurring in your motion blur.
Display Options
This section controls what visual feedback you get from your camera in a panel. These attributes can help you properly frame a shot, for example, or see if an action is falling within the area of screen that you want it to.
Display Film Gate
Essentially, this displays the entire area that is “filmable,” as defined by your camera focal length and film back settings. Think of this as the piece of film in the back of the camera.
Display Resolution
The resolution gate is the actual area that will render at render time. If the film gate is the film in the back of the camera, the resolution gate is a piece of cardboard with a rectangular hole punched in it, at the aspect ratio of your render settings, that is placed in front of the film gate. How the film gate fits within the resolution gate is determined by attributes in the film back settings, which will be covered in Hour 22.
Display Gate Mask
The gate mask blocks the area of the panel that does not fall within the resolution gate and therefore will not render. The default setting is 70% opaque grey, which is adjusted by the two sliders that follow this attribute: Gate Mask Opacity and Gate Mask Color.
Display Field Chart
In traditional animation, fields were units of measurement used to determine the size of a drawing. The field chart in Maya is a remnant of those times and is useful only for matching 2D animation—and even then not very useful.
Display Safe Action
This setting draws a box in your camera panel to indicate where the action of the scene is “safe” to take place within. This is also a remnant of older times to a degree; CRT televisions did not display the same area of the screen from TV to TV, and therefore you might lose some of the action on the edges of the frame. Modern LCD and plasma screens displaying digital signals do not have the same issue.
Display Safe Title
Similar to Safe Action, “Safe Title” was an area even further from the edge of the screen where it was considered safe to write titles, logos, or any other text that was needed onscreen. Although losing pixels is not a problem these days, it is still considered good aesthetics to stay within Safe Title. If you are animating a company’s 3D logo, for instance, normally you will want the final frame to display the logo as large as possible within Safe Title.
Display Film Pivot and Film Origin
Both of these settings have to do with matching very specific film camera specifications and are seldom if ever touched. More on these attributes in Hour 22.
Overscan
This attribute allows you to display more or less of the scene in a camera’s view. It does not affect the render area; it only allows you to view the scene around your resolution gate.
2D Pan/Zoom
It is possible to move the camera view around within a panel, parallel to the camera’s view, in a “2D” way. Applications of this function include wanting to look closely at an area of a camera’s renderable area, but not wanting to change the camera’s position or rotation.
Movement Options
This tab contains some of the options that control how your camera moves in Maya. Specifically, when you are dollying or tracking the camera, the following attributes affect your cameras greatly.
Undoable Movements
In general, you want to keep this option off. Maya has its own undo queue for the camera movements anyway, by pressing the [ and ] keys for undo/redo respectively.
Center of Interest and Tumble Pivot
This is the distance from the camera and the point in world space that the camera will orbit around when you Alt+LMB click in a panel. When you create a camera with an aim object, the aim object is connected to these attributes.
Orthographic Views
To change a camera into an orthographic view, simply click the check box and set the width of the view.
The Different Camera Types
Maya provides a few different camera types to give artists the versatility they need to create complex imagery. Each type lends itself to different uses, but all types are valuable.
Camera
The normal camera type has all of the attributes we just described and is treated like any other object in Maya. That is, it has a shape node and a transform node, is animatable and scalable, and can be connected to other nodes using the Hypergraph, Hypershade, Connection Editor, or the other myriad menus used to do so. This is the most common camera type used.
Camera and Aim
This camera type creates a target object along with the camera shape when you use it. The advantage to this camera type is that you can control the direction a camera is pointing explicitly. The disadvantage is that you have to constantly animate the aim target in order to make the camera seem like it’s tracking freely, as if it’s moving along a dolly track. This can get tiresome.
Camera, Aim, and Up
This camera type adds a control that keeps the camera upright. This is highly useful for complicated movements when the camera is likely to flip over trying to keep pointed at the aim target. Just like Camera and Aim, though, constantly having to animate these extra controls just to get free movement makes this camera type only a good choice for the specific shots that need it.
Stereo Camera and Multi-Stereo Rig
These camera types are used for creating imagery for 3D Stereo display. These cameras are only useful if you are working on a 3D project, so they will not be covered in this book.
Animating Cameras
We have seen the many attributes that a camera contains, and surely the level of control on a camera is impressive. Let’s switch gears and look at a few ways to move cameras through a Maya scene.
Open camera_Anim.ma in this Hour’s files. In this scene file, we have the Sam model with some cameras animated around it.
Keyframing
Let’s keyframe camera1 to get some practice framing a shot. Follow these steps:
![]() Select camera1 and in any panel, click on Panels, Look Through Selected.
Select camera1 and in any panel, click on Panels, Look Through Selected.
![]() Switch a different panel to the perspective camera by clicking on Panels, Perspective, Persp. Your layout should resemble Figure 14.6.
Switch a different panel to the perspective camera by clicking on Panels, Perspective, Persp. Your layout should resemble Figure 14.6.
![]() Play back the animation, and you will see that camera1 moves past the character but that he does not stay in frame.
Play back the animation, and you will see that camera1 moves past the character but that he does not stay in frame.
![]() Set the time to frame 36 by clicking on frame 36 in the Timeline.
Set the time to frame 36 by clicking on frame 36 in the Timeline.
![]() In the Persp panel, select and rotate camera1 so that it is facing Sam on this frame.
In the Persp panel, select and rotate camera1 so that it is facing Sam on this frame.
![]() Set the time to frame 72 and this time use the camera orbit tools inside the camera1 panel to frame Sam in the center, like in Figure 14.7.
Set the time to frame 72 and this time use the camera orbit tools inside the camera1 panel to frame Sam in the center, like in Figure 14.7.

FIGURE 14.7 Sam is framed in the center of the camera view, using the Orbit tool like we are used to.
![]() Remember, however, that using the Orbit tool actually moves the camera as well as rotates it; it orbits the center of interest. It just so happens that this camera has a center of interest that is close to itself, so the amount of translation is small.
Remember, however, that using the Orbit tool actually moves the camera as well as rotates it; it orbits the center of interest. It just so happens that this camera has a center of interest that is close to itself, so the amount of translation is small.
![]() Now select camera2. It has an aim, and we’re going to take advantage of that by turning this camera into a turntable camera.
Now select camera2. It has an aim, and we’re going to take advantage of that by turning this camera into a turntable camera.
![]() Change the camera1 panel to display camera2 instead by clicking on Panels, Look Through Selected.
Change the camera1 panel to display camera2 instead by clicking on Panels, Look Through Selected.
![]() Shift-select the NURBS circle in the scene.
Shift-select the NURBS circle in the scene.
![]() Switch to the Animation menu set by pressing F2.
Switch to the Animation menu set by pressing F2.
![]() Click on Animate, Motion Paths, Attach to Motion Path and then the options box
Click on Animate, Motion Paths, Attach to Motion Path and then the options box ![]() .
.
![]() Uncheck Follow and then click on Attach.
Uncheck Follow and then click on Attach.
![]() Play back the animation. The camera is now following the circular path around Sam, and because the Aim is placed in the center of his mesh, he stays framed neatly in the center of the camera.
Play back the animation. The camera is now following the circular path around Sam, and because the Aim is placed in the center of his mesh, he stays framed neatly in the center of the camera.
Note: Aim Is Rotation
We had to uncheck Follow in the motion path options because a motion path gives rotation information to an object following it, making the front of the object point forward down the path. Remember that an Aim already creates a connection in a camera’s rotation attributes and you cannot connect two outputs to the same input.
Now let’s attach the last camera, camera3, to the crazy path in the scene. This path would surely mess up the rotations of any camera, even one with an Aim. First, we want the camera to always be oriented with the top facing upward, so let’s constrain the Up point object to the movements of the camera. Doing so will make it so that it stays in position above the camera. Do as follows:
![]() Select camera3. Shift-select the Up control that floats above it.
Select camera3. Shift-select the Up control that floats above it.
![]() Click on Constrain, Point and then the options box
Click on Constrain, Point and then the options box ![]() .
.
![]() Check Maintain Offset and then click on Add.
Check Maintain Offset and then click on Add.
![]() Select camera3 and then Shift-select the twisted NURBS curve called “curve1.”
Select camera3 and then Shift-select the twisted NURBS curve called “curve1.”
![]() Click on Animate, Motion Paths, Attach to Motion Path.
Click on Animate, Motion Paths, Attach to Motion Path.
![]() Play back the animation. Although the movement is extremely erratic, the camera stays pointed upright.
Play back the animation. Although the movement is extremely erratic, the camera stays pointed upright.
In general, moving cameras are keyframed, although occasionally they are attached to a path. When they are attached to a path, normally the free camera is parented under a group instead and the group is attached to the motion path. This allows the animator to get the path animation and to animate the camera “on top” of the path. Be careful when animating cameras using the camera movement tools within a panel; orbiting the camera translates and rotates the camera, and the dolly tool is commonly mistaken for “zooming” when in fact it does not change the focal length at all. Cameras with an Aim are great for turntable cameras or for shots where you need to keep the camera focused on a spot. They can be cumbersome to animate if the camera is supposed to feel “free,” though. And adding the Up vector to a “Camera, Aim, and Up” variety camera indeed adds more control, with the tradeoff of yet another control that you must worry about as you create the camera animation.
CG artist and fellow teacher Damon Lavenski has been kind enough to let us include his awesome camera rig in this book. Look in the Bonus folder in this Hour’s files to find the Maya scene. You will immediately see upon loading the file that the level of control and sophistication on this camera rig is outstanding. Feel free to use this rig in all of your projects for fine-tuned camera control.
Summary
We saw how to create the various cameras Maya has to offer, and then went step by step through the many attributes all cameras have. We discussed the specific uses for the different camera types, and then we practiced animating cameras in a way that’s similar to their common uses. In high-end production, most studios use a camera rig that simulates real-world camera movement, with specific controls for panning, dollying, craning, and so on.
Q&A
Q. My camera is flying all over the place when I try to orbit it. Why?
A. After a lot of use in a scene, sometimes the center of interest gets pushed far away from a camera. Just set the Center of Interest value to something small, and it should reset.
Q. How do I change the default attributes of a camera?
A. If you go into the Options for any camera, the settings you choose persist as long as you don’t reset the tool. I make the default focal length for my cameras 50 just because I think a 35mm camera looks amateurish.
Q. Are Persp and normal cameras the same thing?
A. That is very astute of you. Yes, a Persp camera is just a normal camera; it’s just created by default with a Maya scene. In fact, if you create a new Persp camera by clicking Panels, Perspective, New, yet another normal camera will be created named Persp1.
Q. I want a camera with an Up vector but not an Aim. How do I do that?
A. Just parent the Aim to the camera and it will be negated.
Workshop
The workshop contains quiz questions and exercises to help you solidify your understanding of the material covered. Try to answer all questions before looking at the “Answers” section that follows.
Quiz
1. Side, top, and front cameras are what kind of camera?
2. When someone talks about “zoom,” what attribute are they talking about?
3. What is the gate called that shows the renderable area of a camera?
4. Which camera type is most commonly used as a turntable camera?
5. What is the attribute that determines how wide an “orbit” a camera has when the camera-movement tools within a panel are used?
Exercise
Using your new knowledge of cameras, try to reframe all of the animated shots you created in Hour 13, “Animation: Adding Movement to Your Scene,” with more dynamic angles and focal lengths, and even add some camera animation. Experiment with the different camera types to create the right effect you desire. Create a turntable for your Sam model, or hand keyframe an interesting fly-by on your bouncing-ball animation. Remember that in animation, we can create as many cameras as we like and can view a scene from every angle. Use that to your advantage to find new methods of storytelling.
Answers
1. These are “orthographic cameras.” In other words, they have no focal length or perspective.
2. Zoom is controlled by the Focal Length attribute.
3. The resolution gate will show you all of the renderable area of a camera.
4. Although all cameras can be used for turntables, the simplest way to make a camera circle a subject and keep the subject centered in frame is to attach a camera and Aim to a circular path.
5. The Center of Interest attribute determines the point that a camera orbits around when you are using the camera-movement tools within a panel. It is very important to remember that orbiting puts translation and rotation values onto your camera. If you only want to rotate a camera, you should do so by selecting and rotating it in a panel.