
Chapter 17: Automate Azure Virtual Desktop Management Tasks
In this chapter, we take a look at automating Azure Virtual Desktop by taking repeated processes and automating them on a schedule. We will then dive into the automation management of host pools, session hosts, and user sessions using an automation account.
In this chapter, we take a look at the following topics:
- Creating an automation account for Azure Virtual Desktop
- Automating the management of host pools, session hosts, and user sessions using PowerShell
- Implementing autoscaling for host pools
- Scaling plans
Creating an automation account for Azure Virtual Desktop
In this section, we look at creating an automation account for Azure Virtual Desktop. An automation account is used to create runbooks that contain scripts that can automate processes to help you manage your Azure Virtual Desktop environment. Runbooks are extremely useful for automating repetitive tasks and batch processing, which can be quite time-consuming when carrying out such tasks manually.
Let's get started with first creating an automation account:
- Sign in to the Azure portal: https://portal.azure.com/.
- From the top menu, enter Automation in the search bar and click Automation Accounts:
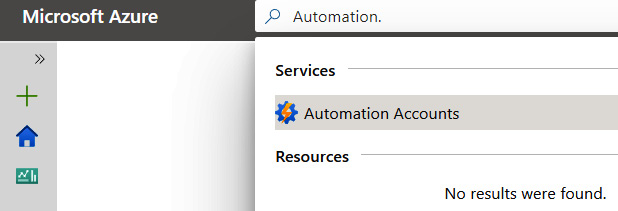
Figure 17.1 – Search result showing Automation Accounts
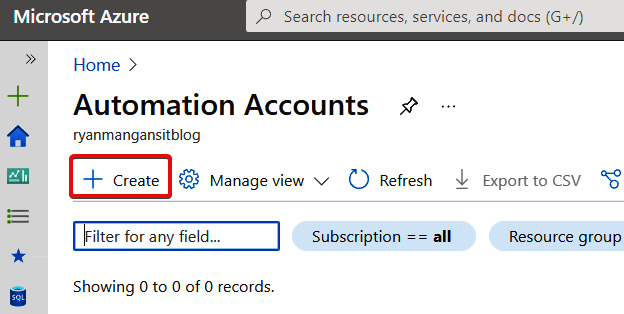
Figure 17.2 – Create button highlighted within Automation Accounts
- Within the Add Automation Account blade, provide a Name, select a Subscription, create a Resource group or select an existing one, and choose a region. Then click Create:
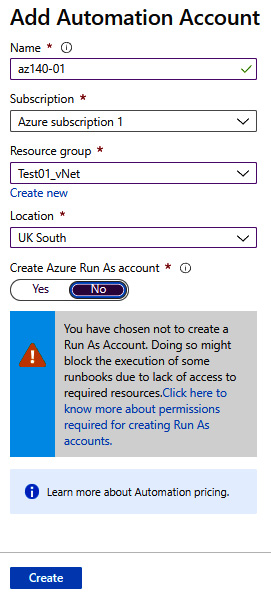
Figure 17.3 – Add Automation Account blade
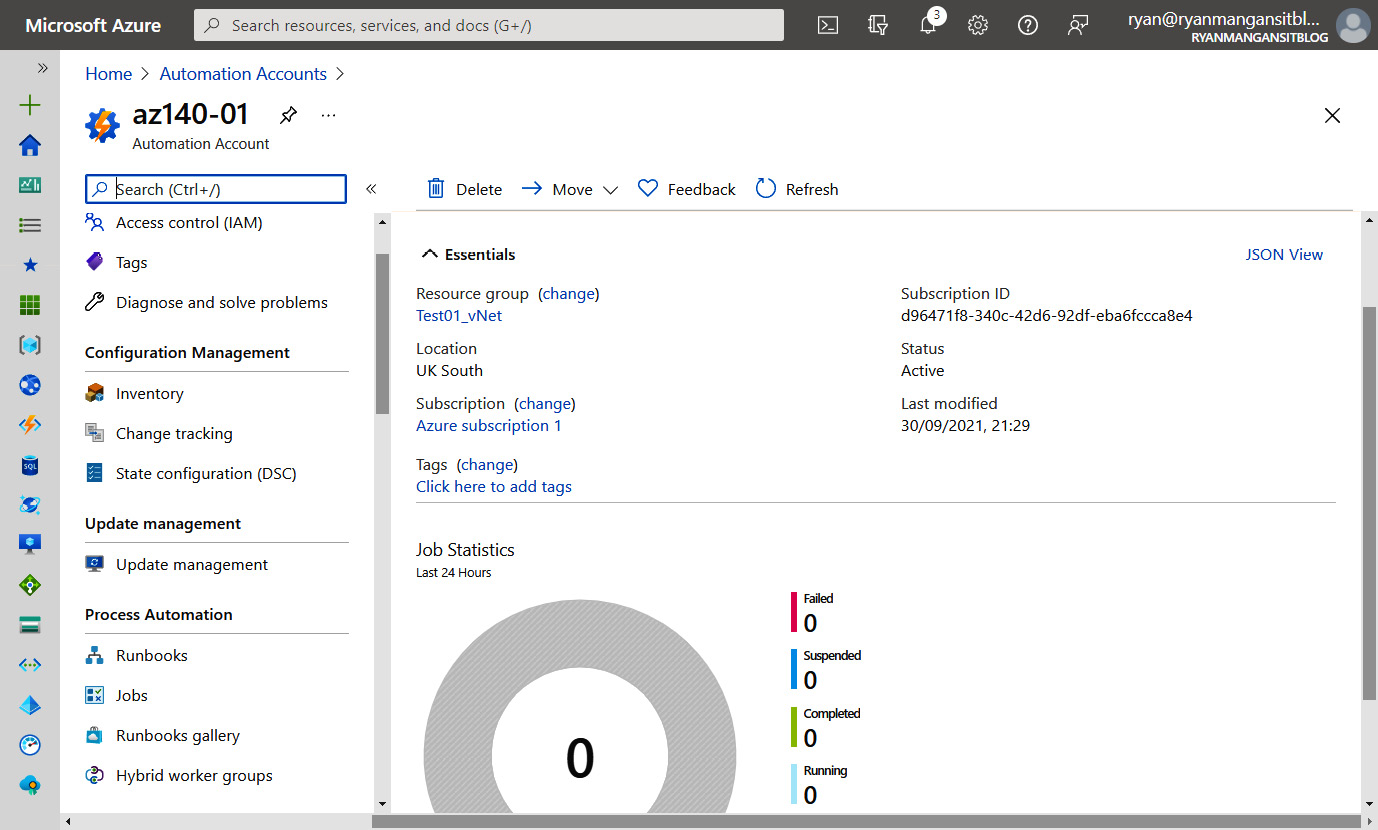
Figure 17.4 – Newly created automation account
There you have it – we have created an Azure automation account ready for use with Azure Virtual Desktop. The next section looks at some of the automation tasks you can use to simplify Azure Virtual Desktop management.
Automating the management of host pools, session hosts, and user sessions using PowerShell
This section looks at using the Azure command-line interface and Azure automation accounts to run repeat tasks and simplify tasks such as logging off multiple users in a batch.
Configuring an Azure automation runbook
This section takes you through creating an Azure automation runbook, configuring the runbook, testing, and configuring a runbook schedule.
Setting up a run as account
This section shows you how to create a simple host pool log-off script using an automation account.
You will need a run as account set up for this example.
You can configure a run as account within the automation account in the Account Settings | Run as accounts | Create Run As account section:
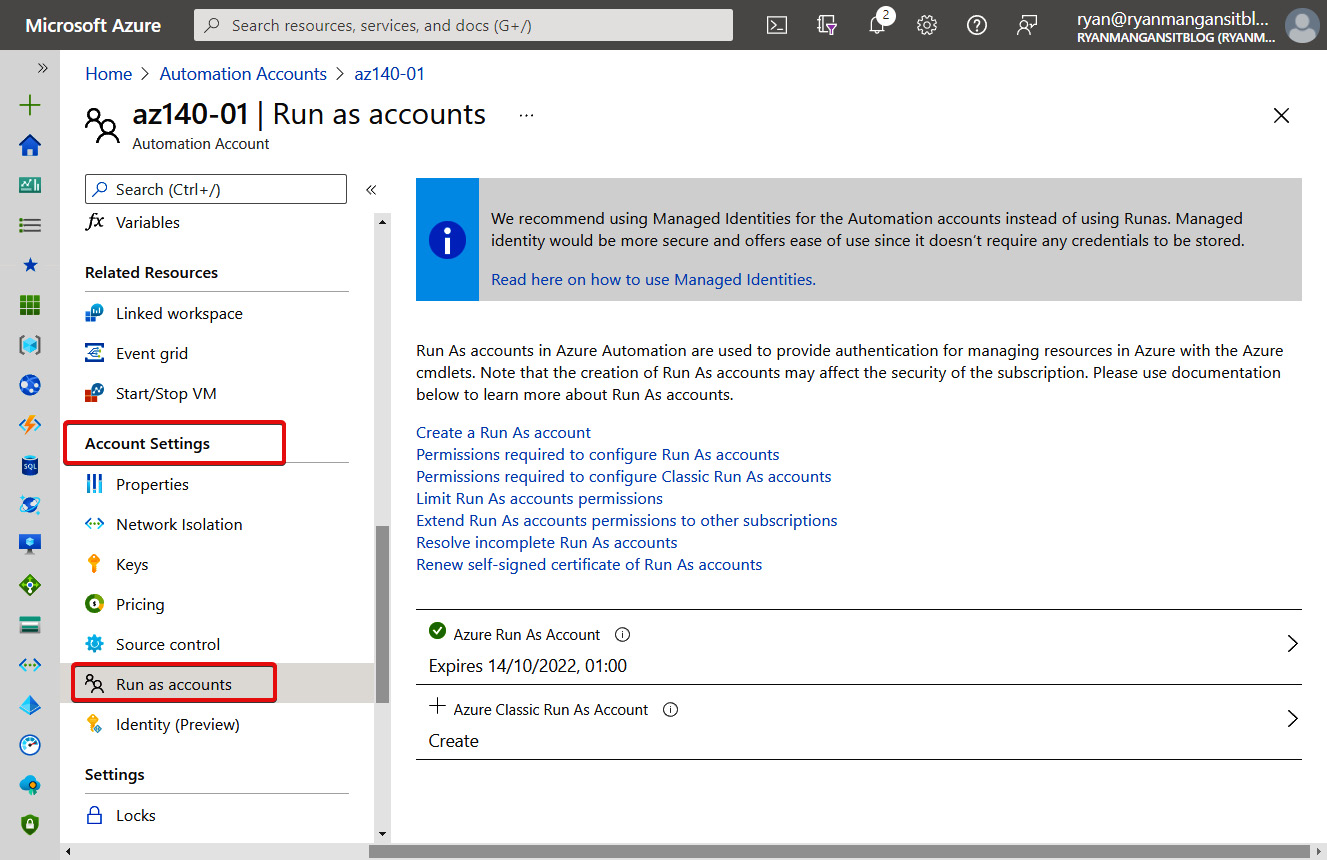
Figure 17.5 – The Run as accounts page within an automation account
Importing PowerShell modules into the automation account
Once you have set up the run as account, you can then progress to preparing the automation account with the correct PowerShell modules, which can be imported using the module gallery.
The following modules need to be imported:
- Nuget
- Az.DesktopVirtualization
- AzureAD
- Az.Accounts
- Az.Resources
The following screenshot shows the automation account's module gallery, where you would add PowerShell modules for use within runbooks:

Figure 17.6 – PowerShell Modules gallery where you would add the required PowerShell modules
Once you have begun importing the modules, you will see the status is Importing. Once importing has finished, you should see the modules shown as available:
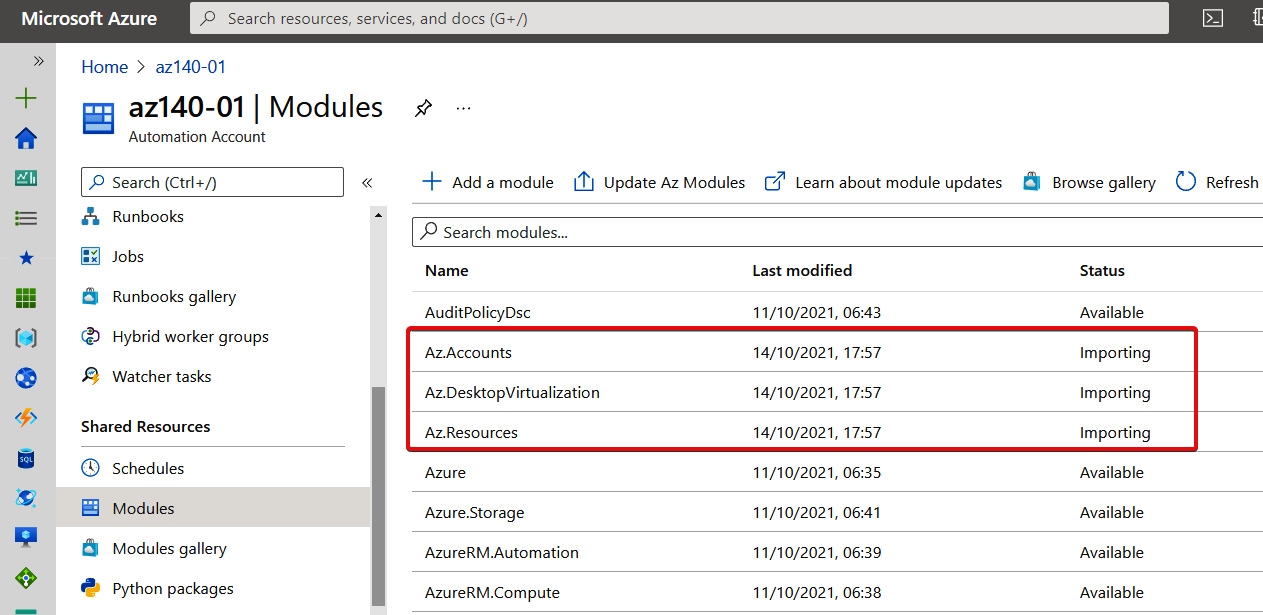
Figure 17.7 – The status of the PowerShell modules in an automation account
The next part of this process is to create a PowerShell runbook within the Azure automation account that we have just created.
Creating a runbook
We'll now take a look at creating a PowerShell runbook within the automation account.
To create a runbook, navigate to the automation account. Under Process Automation, click Runbooks; once on the Runbooks page, click on Create a runbook:

Figure 17.8 – Create a new runbook
You will then see the Create a runbook blade appear. Enter a name for the runbook and select the type – in this case, it's a PowerShell runbook. Provide a description:
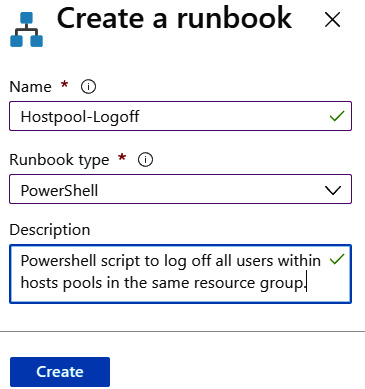
Figure 17.9 – Create a runbook blade
Once the new runbook is created, it will open the runbook page ready for you to start configuring:
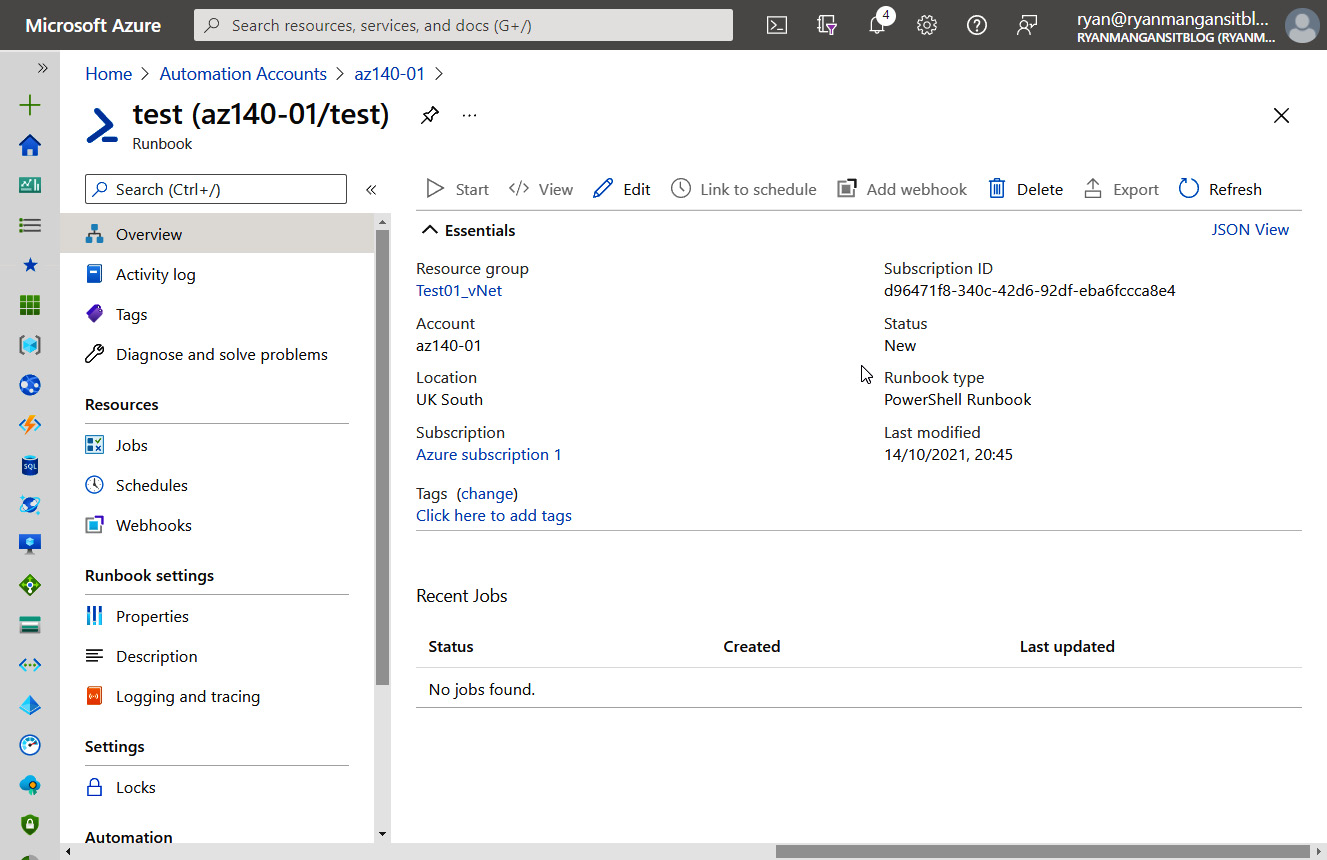
Figure 17.10 – Runbook page after creation
Now that we have created a runbook, we can proceed with configuring it with the required script. In this example, we will be creating a host pool log-off runbook to simplify the logging off of multiple users spread across several session hosts within a host pool.
Adding your PowerShell script to a runbook
Let's take now take a look at adding the PowerShell script to the runbook.
The first thing we need to do is click Edit within the runbook page, as shown in the following screenshot:

Figure 17.11 – Edit runbook option highlighted
You should now see the runbook scripting interface; this is where you need to enter the PowerShell cmdlets:
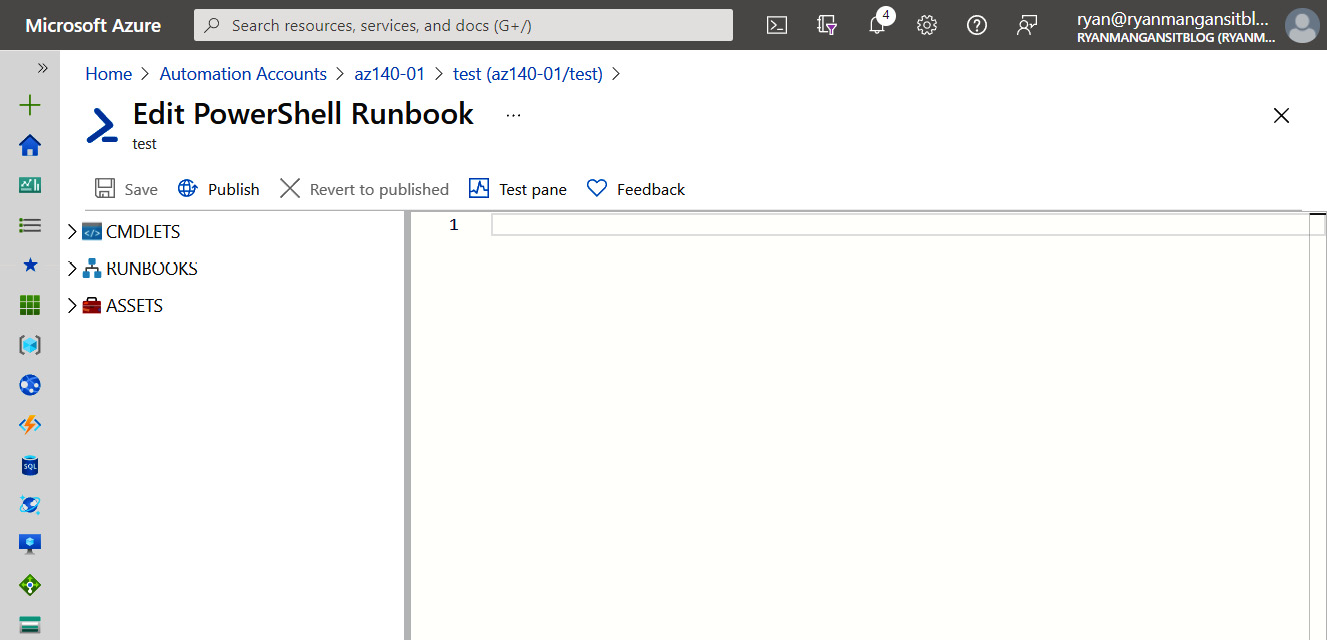
Figure 17.12 – Edit page of the PowerShell runbook
Before entering the scripting and testing, I want to briefly run through the host pool log-off example. This is broken down into multiple sections so that I can discuss the key parts of the script.
The first part of the script is the header, detailing information about the script and any imports you may need for the script:
# Mastering Azure Virtual Desktop Log Off User example
import-module az.DesktopVirtualization
import-module AzureAD
The next part of the script is the authentication piece. This is needed to ensure the runbook can communicate with the tenant. In this example, we are using the Azure Run as connection to authenticate:
# Azure Runbook Auth using RunAsConnection
# Get the connection "AzureRunAsConnection"
$connectionName = "AzureRunAsConnection"
$servicePrincipalConnection = Get-AutomationConnection -Name $connectionName
$logonAttempt = 0
$logonResult = $False
while(!($connectionResult) -And ($logonAttempt -le 10))
{
$LogonAttempt++
#Logging in to Azure...
$connectionResult = Connect-AzAccount '
-ServicePrincipal '
-Tenant $servicePrincipalConnection.TenantId '
-ApplicationId $servicePrincipalConnection.ApplicationId '
-CertificateThumbprint $servicePrincipalConnection.CertificateThumbprint
Start-Sleep -Seconds 30
}
Now that we have authenticated with Azure, the next part of the script will call the log-off function. As you will note, the only area you need to specify is the resource group name. Everything else is taken care of for you. This part essentially reads the resource group for Azure Virtual Desktop host pools. The script then counts the user sessions within the host pool and runs Remove-AzWvdUserSession for each session. This automates the log-off process for host pools, which in turn simplifies the IT admin's effort to carry out maintenance and so on:
# Start AVD Task...
$ResourceGroupName = "avd01-avd" # <<<< enter resource group
$ExistingHostPool = Get-AzResource -ResourceGroupName $ResourceGroupName | Where-Object ResourceType -eq Microsoft.DesktopVirtualization/hostpools
if (($ExistingHostPool).count -gt "0") {
# Process to Log off connected Users
foreach($Hostpool in $ExistingHostPool){
$AVDUserSessions = Get-AzWvdUserSession -HostPoolName $HostPool.Name -ResourceGroupName $ResourceGroupName
$NumberofAVDSessions = ($AVDUserSessions).count # Counts sessions
if ($NumberofAVDSessions -gt "0") {
try {
Write-Host "There are a total of $NumberofAVDSessions logged on, these user sessions now will be logged off" # Admin message
foreach ($AVDUserSession in $AVDUserSessions){
$InputString = $AVDUserSession.Name
$AVDUserArray = $InputString.Split("/")
$AVDUserArray[0]
$AVDUserArray[1]
$AVDUserArray[2]
Remove-AzWvdUserSession -HostPoolName $HostPool.Name -ResourceGroupName $ResourceGroupName -SessionHostName $AVDUserArray[1] -Id $AVDUserArray[2]
}clear # clears PowerShell output
}
catch {
}
}
}
}
You can download the full script here: https://github.com/PacktPublishing/Remote-Productivity-with-Windows-Virtual-Desktop/blob/main/B17392_07/logoff%20AVD%20Users%20Batch.ps1
Now that we have run through the host pool log-off script structure, we will proceed with configuring the runbook and publishing it:

Figure 17.13 – PowerShell scripting added to the PowerShell runbook
Once you have copied the script into the PowerShell runbook, you can proceed with testing by clicking Test pane, as shown in the following screenshot:
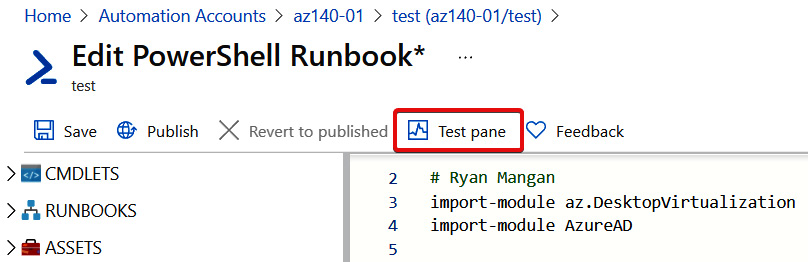
Figure 17.14 – Location of the Test pane button for testing a PowerShell runbook
In the next section, we take a look at testing the script before publishing.
Testing a PowerShell runbook in Azure
This section runs through the basics of using the test pane to test the script we created for logging off Azure Virtual Desktop users within a host pool.
To test the script, all you need to do is click the Start icon as shown in Figure 17.15:
- Click Start on the Test page:
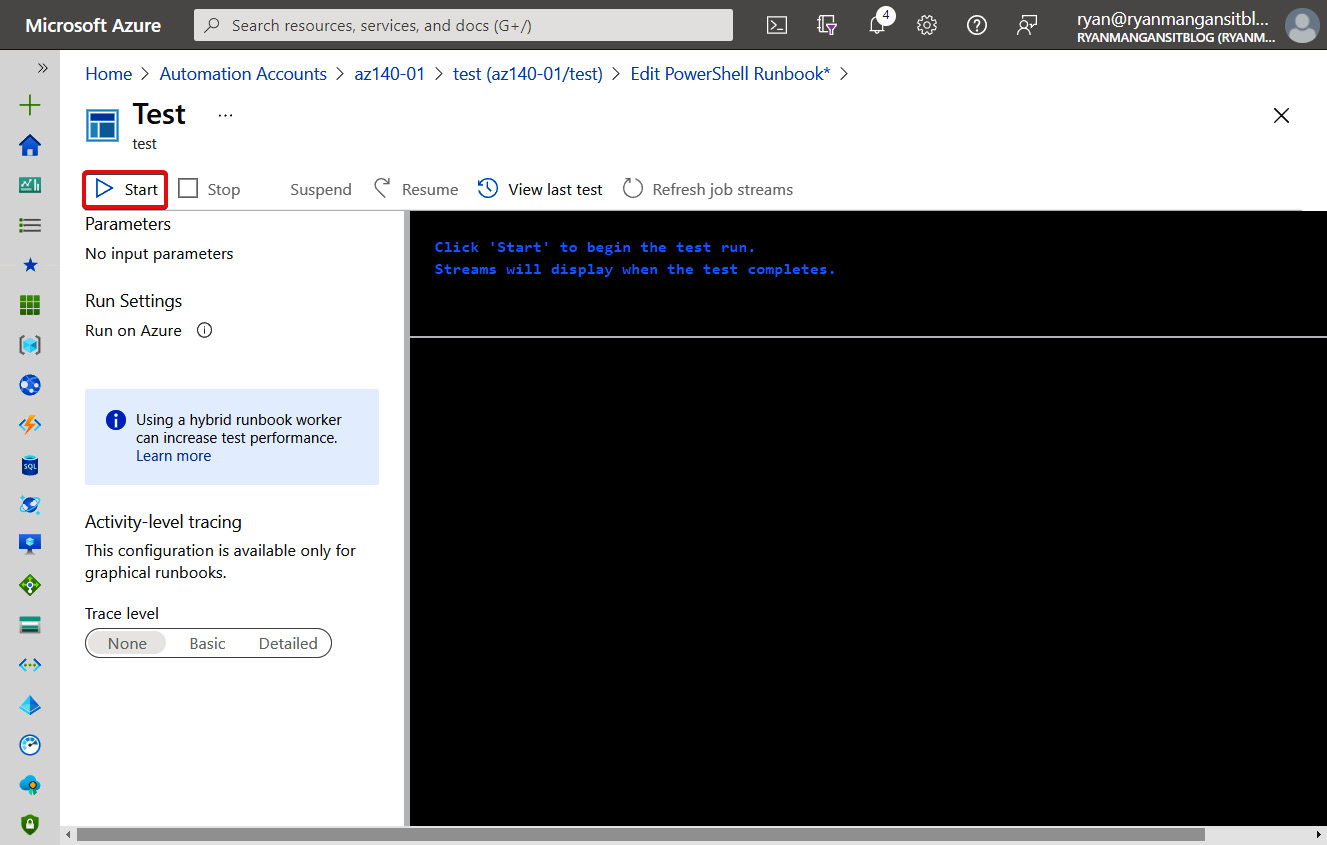
Figure 17.15 – The Test page of a PowerShell runbook
- The black screen shown in the preceding screenshot shows the script's output and any errors that may occur, requiring you to make the appropriate changes if required.
- As you can see from the test results, in the following screenshot, the script worked as required and logged off the two user sessions:
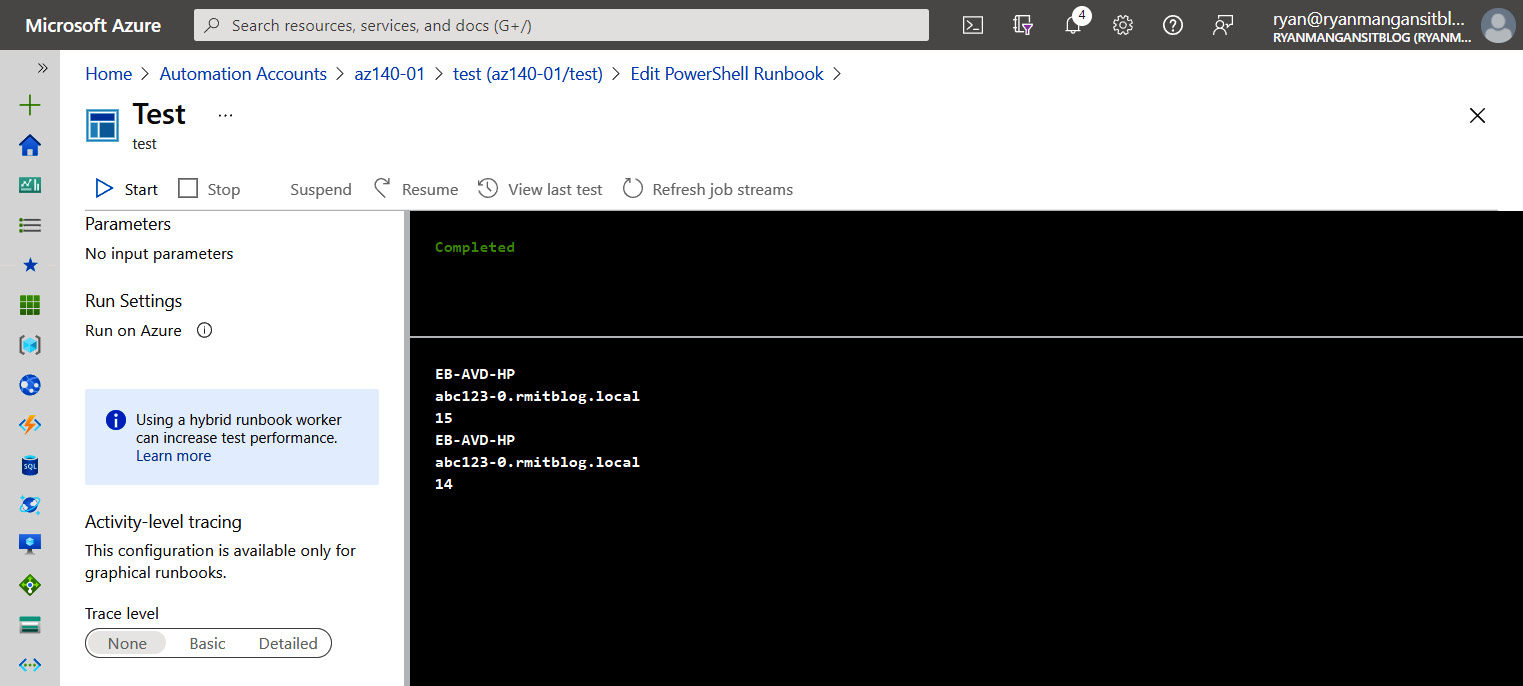
Figure 17.16 – Test complete within a PowerShell runbook
- Once you have finished the test, and you have confirmed the script is working and there are no errors, you can then go ahead and publish the runbook as shown in the following screenshot:
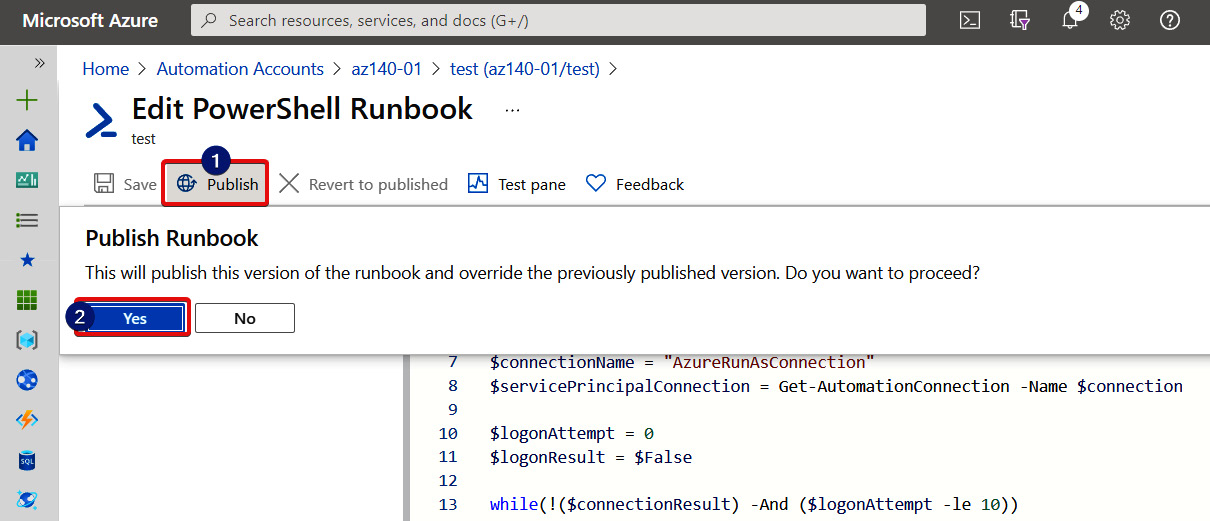
Figure 17.17 – Publish button and confirmation message bar
- Once the runbook has been published, you will see several previously grayed-out options now shown as accessible. You can find them within the menu bar, including Link to schedule, as shown in the following screenshot:

Figure 17.18 – The published runbook
In the next section, we look at creating a schedule and assigning the created runbook to it.
Creating a schedule
Follow these steps to create a schedule:
- Within the runbook, you can create a schedule. First, you would need to navigate down to the section in the left-hand menu called Resources:
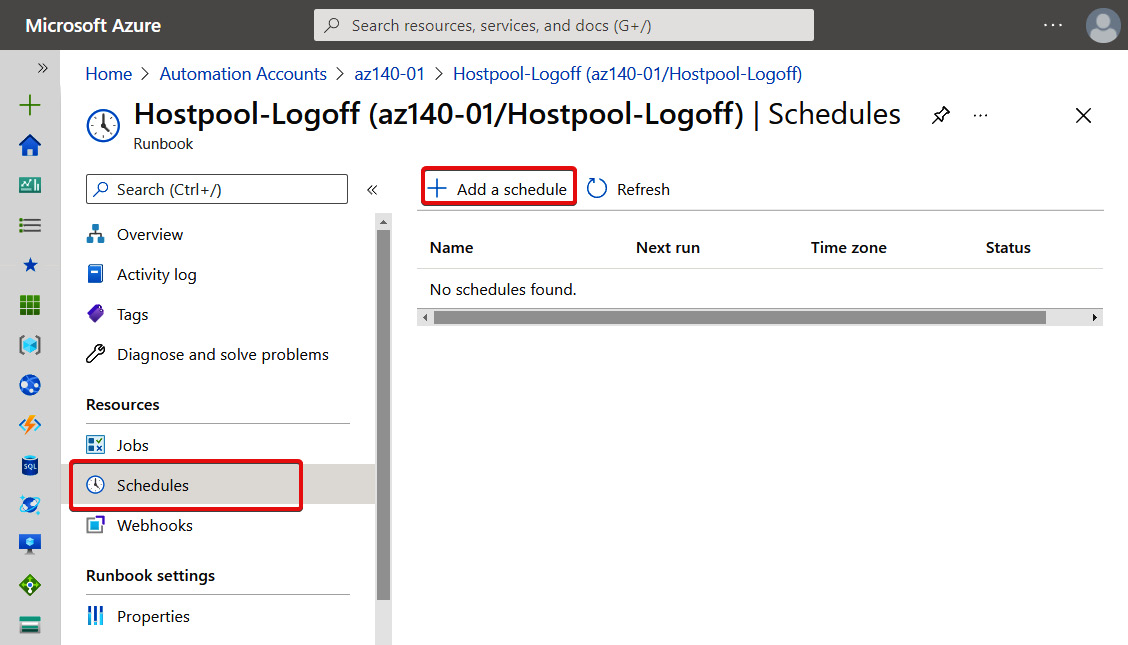
Figure 17.19 – Schedules page within a runbook
- Click on Add a schedule and then click Link a schedule to your runbook:

Figure 17.20 – Schedule Runbook page

Figure 17.21 – Schedules page and New Schedule blade
- Provide a name, description, and the Starts time and date, ensuring you choose the correct recurrence, either Once or Recurring. Once you have entered the required information, click Create.
- You will then see the newly created schedule on the Schedule Runbook page, as shown in the following screenshot:
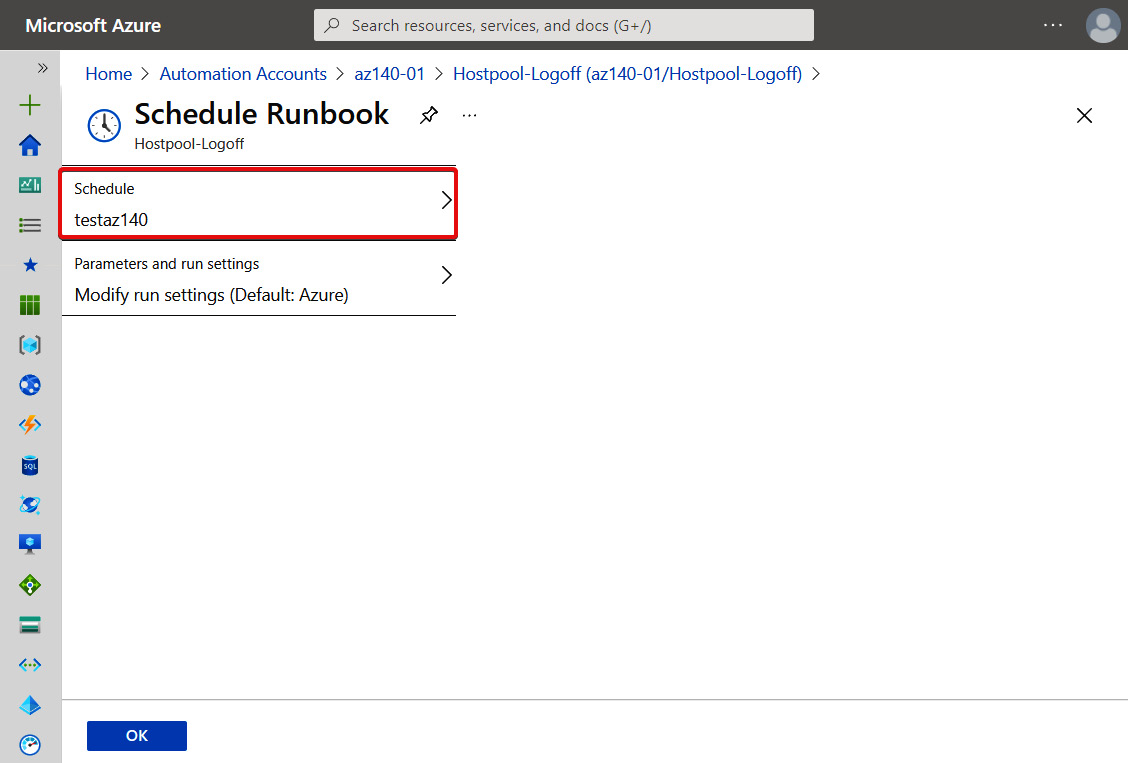
Figure 17.22 – New schedule added to the runbook on the Schedule Runbook page
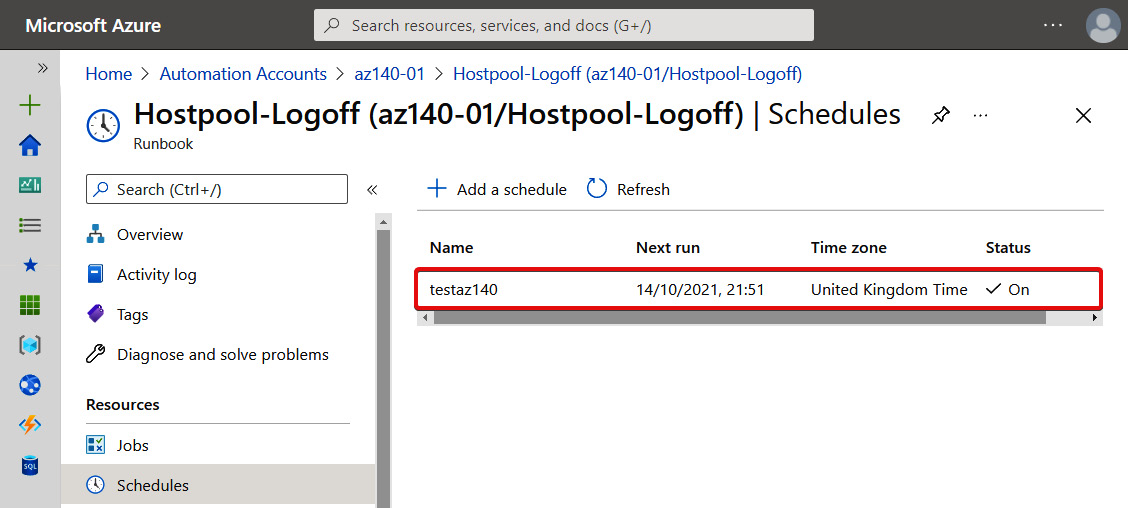
Figure 17.23 – Configured schedule within the runbook under Schedules
In this section, we looked at configuring an Azure automation runbook. First, we covered the setup of a run as account and the importing of required PowerShell modules for an Azure Virtual Desktop PowerShell script to run. We then created the runbook, added the PowerShell script to the runbook, and tested it. We then finished the section by creating an automated schedule for the runbook to run at a specific time.
In the next section, we look at implementing autoscaling in Azure Virtual Desktop using an automation account.
Implementing autoscaling for host pools
In this section, we look at how to configure autoscaling for Azure Virtual Desktop.
The Azure Virtual Desktop autoscale tool optimizes cost and capacity for your Virtual Desktop environment based on time and resource requirements. The tool requires the following Azure components:
- An Azure automation account
- A PowerShell runbook
- A webhook
- Azure Logic Apps
We will take a look at these components in more detail shortly.
The autoscale tool essentially allows you to scale up and scale down resources based on the requirement.
Here are the key features of the autoscale tool:
- Start/stop Virtual Machines (VMs) based on time criteria such as normal business hours and out-of-hours.
- Deploy additional session host VMs (scale out) based on the number of active sessions on a host pool.
- Reduce the number of VMs (scale in) outside normal business hours.
The tool works based on the following scheduling parameters:

The scaling tool works by running a number of jobs to check the current number of user sessions against the total number of VMs running. First, this information is collected, and then a calculation is completed using the parameter SessionThresholdPerCPU. Finally, suppose the current resources cannot support the existing active user sessions. In that case, the autoscale tool will start a job to start additional session host VMs within the host pool.
Important Note
It is important to note that the SessionthresholdPerCPU parameter only determines when new VMs need to be started. It does not restrict the number of user sessions. The restriction of sessions is completed using the MaxSessionLimit parameter.
The out-of-hours usage time, also known as an off-peak job, runs to check how many session host VMs need to be shut down based on the MinimumNumberOfRDSH parameter. Suppose you set the LimitSecondsToForceLogOffUser parameter to a number greater than zero. In that case, the job will enable drain mode on the session host VMs to prevent new sessions from connecting to the hosts. The job to shut down session hosts sends a message to the users notifying them to save their work. However, once the LimitSecondsToForceLogOffUser parameter is reached, all user sessions will be logged off. Once all users have been logged out, the job will then start to shut down the VM. If you leave the LimitSecondsToForceLogOffUser parameter as zero, then the job will take no action to force users off a session host; if no users are on the session host, it will shut down the VM.
Important Note
If a session host is already in drain mode, set manually, the job to shut down will ignore the session host in question. Instead, the job will treat the session host as unavailable, making the job start additional VMs to handle the user session load.
The job considers the host pool's MaxSessionLimit to calculate if the active number of user sessions is more than 90% of the maximum capacity. If it is, the job will start additional VMs (session hosts).
Here are the autoscale tool's limitations:
- You can only use the autoscale tool for multi-session host VMs.
- The autoscale tool works in all regions; however, you must use the same subscription.
- The maximum time for a job is limited to 3 hours only. If the starting or stopping of VMs hangs or takes longer, then the job will fail.
- You need to ensure at least one VM is turned on for the scaling algorithm to work correctly.
- Autoscaling does not support scaling based on the RAM or CPU of a session host.
- Autoscaling will only work with existing VMs configured in a host pool. The tool does not create new session hosts.
Prerequisites
Before we can get started with setting up the autoscaling tool, you need to make sure you have the following ready:
- An Azure Virtual Desktop environment deployed
- A session host pool with VMs registered and communicating with the Azure Virtual Desktop service
- An Azure admin with contributor access on the required subscription
- Windows Powershell 5.1 or later on the machine where you deploy the autoscale tool
Deploying the auto automation account
In this section, we take a look at deploying an Azure Virtual Desktop autoscale automation account:
- In the PowerShell console, run Install-module az and Install-Module Az.DesktopVirtualization:

Figure 17.24 – Install module cmdlets for az and az.desktopvirtualization
- Log in to your Azure account in PowerShell using Login-AzAccount.
- Set the subscription context cmdlet, Set-AzContext -Subscription xxxx-xxxx-xxxx-xxxx.
- Download the required script using the following:
New-Item -ItemType Directory -Path "C:Temp" -Force
Set-Location -Path "C:Temp"
$Uri = "https://raw.githubusercontent.com/Azure/RDS-Templates/master/wvd-templates/wvd-scaling-script/CreateOrUpdateAzAutoAccount.ps1"
# Download the script
Invoke-WebRequest -Uri $Uri -OutFile ".CreateOrUpdateAzAutoAccount.ps1"
- Run the script:

Figure 17.25 – Script for downloading the creation of an autoscale automation account
- Now you have downloaded the required script, you will need to use the configuration script shown in the following screenshot to deploy the automation account:

Figure 17.26 – Script for deploying the Azure Virtual Desktop autoscale automation account
You can download the configuration script here: https://github.com/PacktPublishing/Remote-Productivity-with-Windows-Virtual-Desktop/blob/main/B17392_07/Automation%20account%20config%20script.ps1.
The following table shows the different parameters you will need to configure for the configuration script:

The following screenshot shows the finished output from PowerShell:
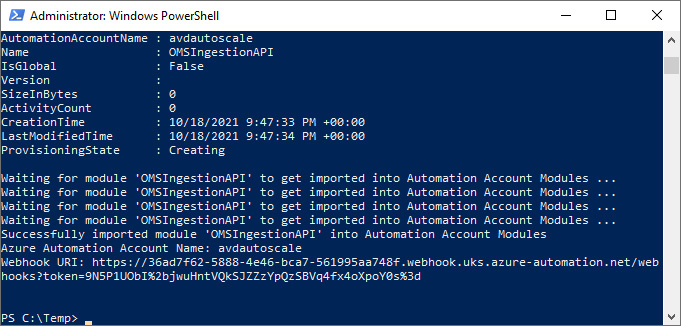
Figure 17.27 – The process of creating the automation account for autoscale complete
Once the script has finished and your new automation account has been created, you will see the WVDAutoScaleRunbook runbook within the automation account.
Important Note
Make sure you configure the run as account as shown in the Setting up a run as account section before proceeding to the next section.
Now that we have the required automation account and runbook deployed, we can move on to the final stage of deployment by creating an Azure Logic Apps account and setting the schedule.
Creating an Azure logic app and setting a schedule
We'll now look at deploying an Azure logic app. Like in the previous section, the logic app is deployed using PowerShell, which first downloads the script, and then we use a configuration script for the schedule.
Let's get started:
- Import the desktop virtualization PowerShell module:

Figure 17.28 – Screenshot showing the import-module cmdlet for Azure Virtual Desktop
- Log in to your Azure account: Login-AzAccount.
- Set the subscription context cmdlet, Set-AzContext -Subscription "xxxx-xxxx-xxxx-xxxx.
- Run the following cmdlets to download the script required for creating the Azure logic app:
New-Item -ItemType Directory -Path "C:Temp" -Force
Set-Location -Path "C:Temp"
$Uri = "https://raw.githubusercontent.com/Azure/RDS-Templates/master/wvd-templates/wvd-scaling-script/CreateOrUpdateAzLogicApp.ps1"
# Download the script
Invoke-WebRequest -Uri $Uri -OutFile ".CreateOrUpdateAzLogicApp.ps1"
The following screenshot shows the preceding script run, which downloads the Createorupdateazlogicapp.ps1 script:

Figure 17.29 – Download of the Azure logic app script for autoscale
Now you have downloaded the script, you will need to configure the configuration script to deploy the logic app. When running the configuration script, you will be asked a series of questions to configure the logic app. Please note you can skip some of the questions as shown in the following table, which has a default setting. You can download the logic app script here: https://github.com/PacktPublishing/Remote-Productivity-with-Windows-Virtual-Desktop/blob/main/B17392_07/Autoscale_logicapp_config.ps1.
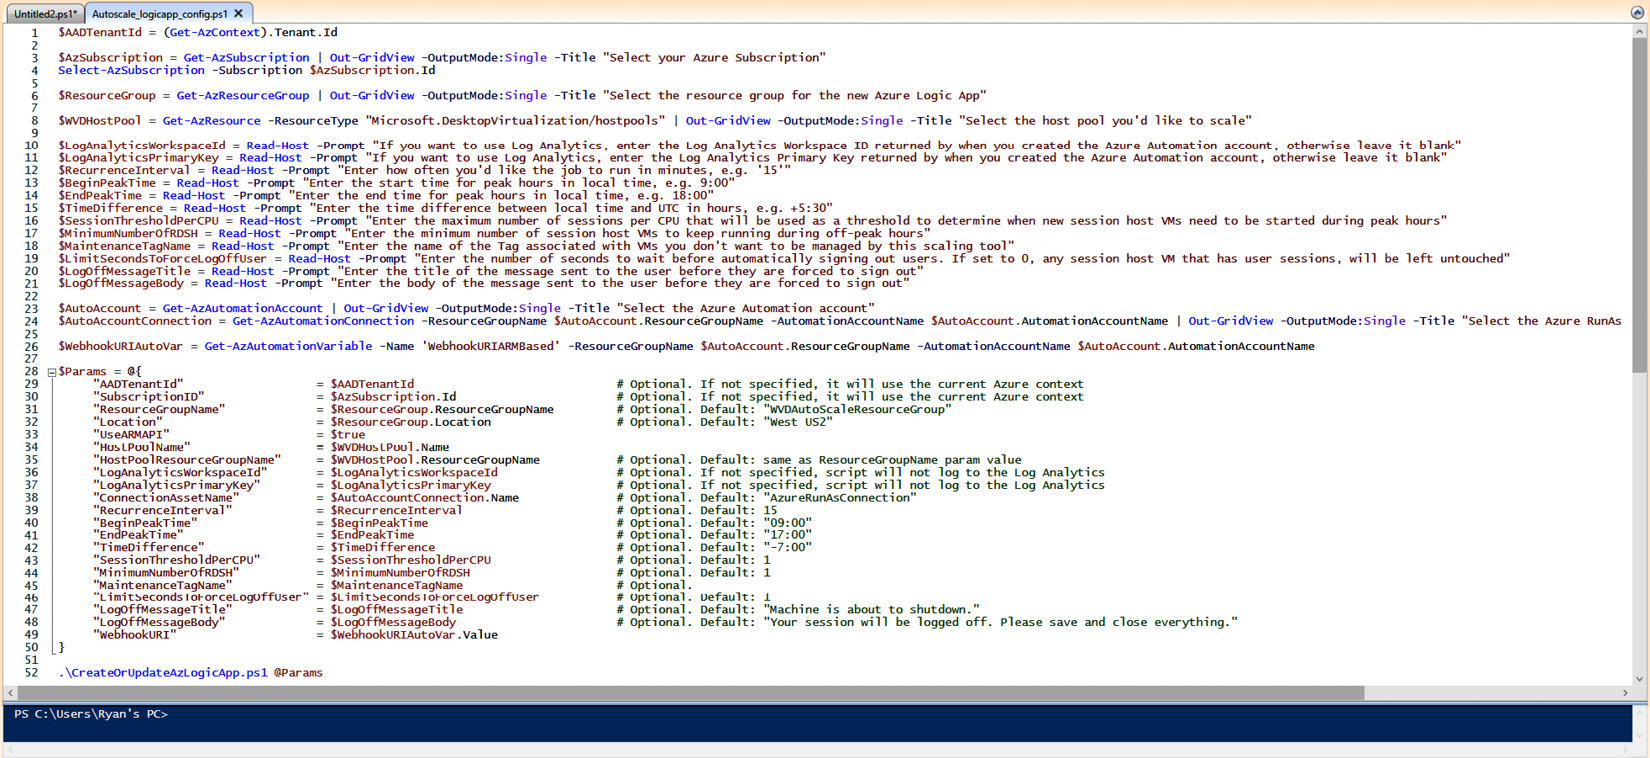
Figure 17.30 – Configuration script for deploying the Azure logic app
Important Note
Make sure you populate all the fields apart from the Log Analytics Workspace ID, as this is optional.
The following table shows the parameters you need to configure to deploy the Azure logic app:

- Once you have configured the script, you can then run this as an administrator within PowerShell, as shown in the following screenshot:

Figure 17.31 – The autoscale deployment successfully completing
Once the deployment has finished, you should now see the Azure logic app appear in the resource group:
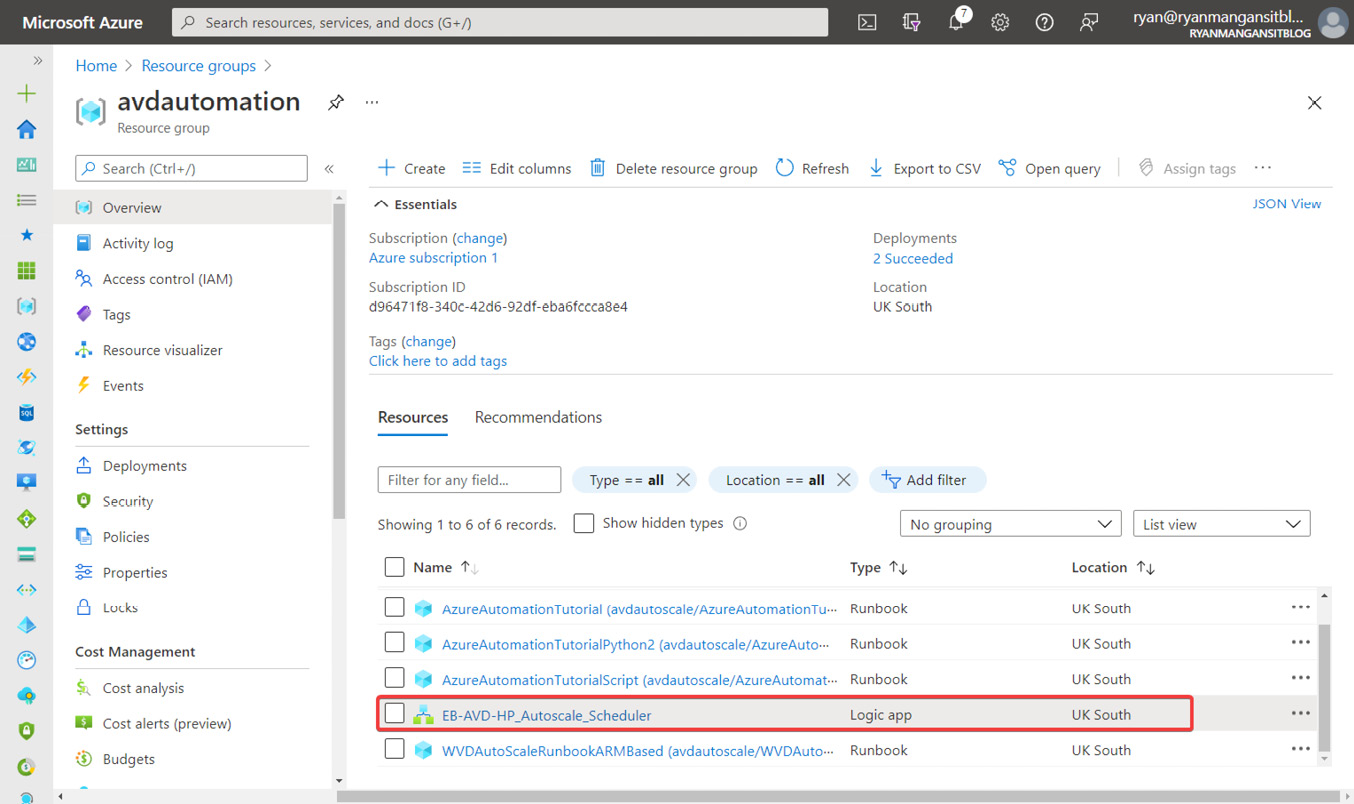
Figure 17.32 – The logic app has been deployed to the resource group
Once complete, you should see the following within the Jobs section of the automation account:
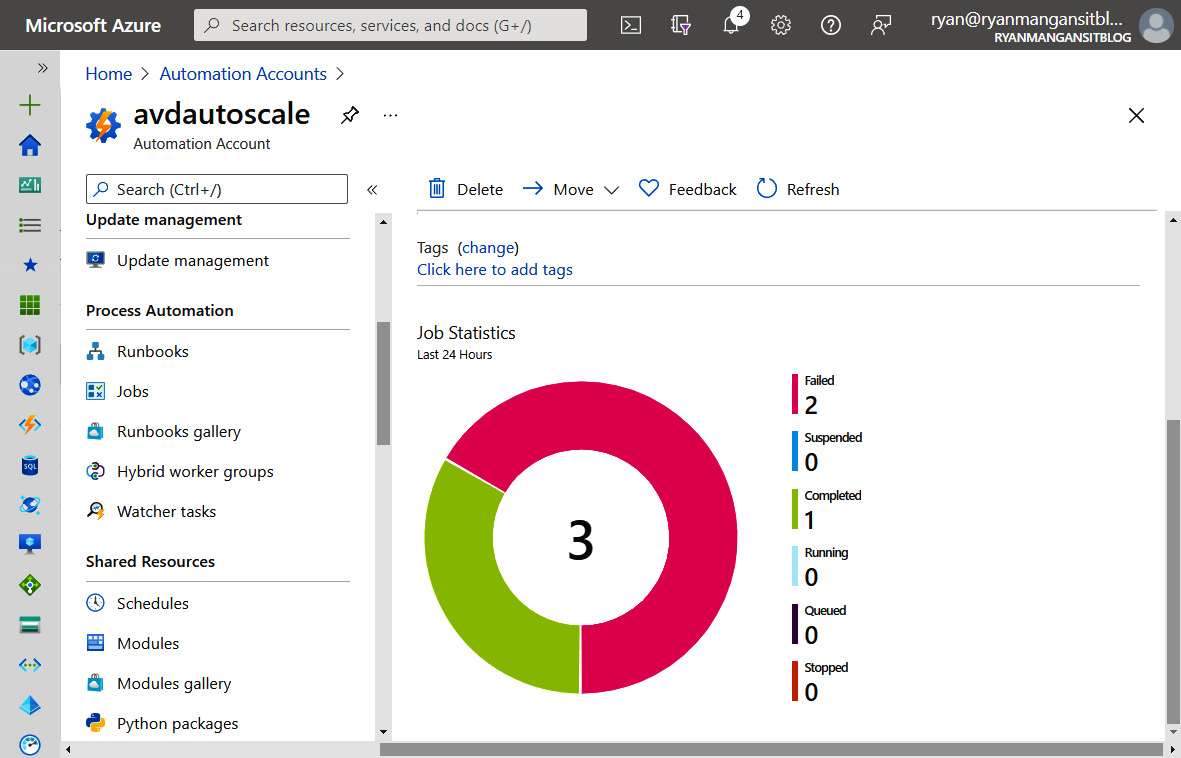
Figure 17.33 – Dashboard view of jobs run in the automation account
The following screenshot shows the jobs under Process Automation:

Figure 17.34 – The jobs that have run in the automation account
We have now configured autoscaling for Azure Virtual Desktop. Microsoft has announced a new feature to simplify this at the time of writing, which is in public preview. Scaling plans simplify the configuration and management of autoscale for Azure Virtual Desktop.
We will now progress to the final section of this chapter, where we deploy scaling plans (public preview) for Azure Virtual Desktop.
Managing and updating the autoscale tool
There are two key components used for the autoscaling tool – the automation account that contains the PowerShell runbook and the Azure logic app, which holds the configuration for the autoscaling to work.
To make changes to the autoscaling tool, open the configured logic app. For example, under the Development Tools section, you would select Logic app designer and expand the HTTP section. Within the HTTP section, you can edit the configuration held in the body section.

Figure 17.35 – Logic app designer page for the autoscale scheduler
To stop the autoscaling jobs from running, you would simply navigate to the Azure logic app and click Disable, located in the logic app page's main menu bar, as shown in the following screenshot:
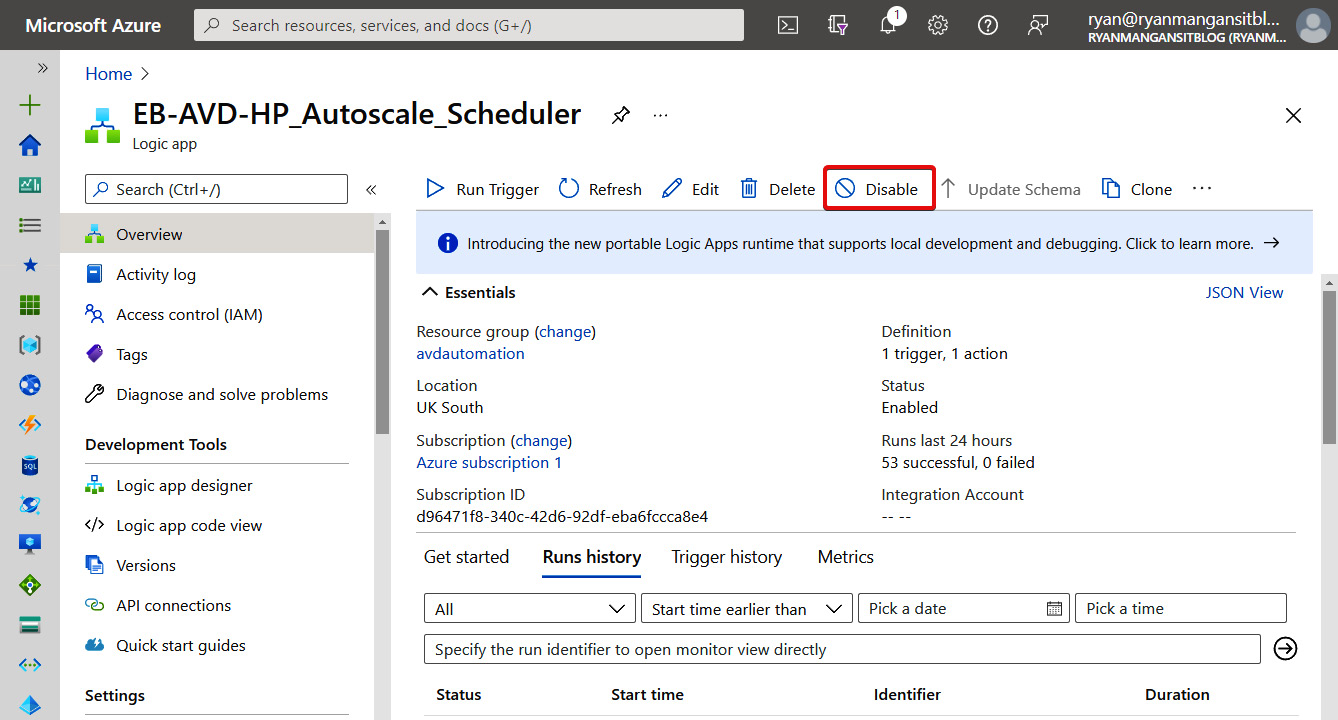
Figure 17.36 – The Disable logic app button
Autoscale – scaling plans
Please note at the time of writing, autoscale within the Azure portal is in public preview.
The built-in autoscale feature with Azure Virtual Desktop simplifies automating scale based on time and session limits per session host. This preview feature is expected to supersede the current autoscale feature, which is deployed using PowerShell. However, it is important to note the scaling plans do not have the same flexibility as the PowerShell version, which can be customized with additional algorithms, settings, and other customisations.
Important Note
Ephemeral disks are not supported when using the autoscale feature for Azure Virtual Desktop.
Creating a custom role for scaling plans
Before we can start configuring a scaling plan, we first need to configure the required custom role in IAM. To simplify this, I have created a pre-configured JSON file with the correct permissions for the custom role:
- You first need to log in to the Azure portal.
- Navigate to the Azure subscription.
- Under Access control (IAM), select Add custom role as shown in the following screenshot:

Figure 17.37 – Add custom role button within Access control on the Subscription page
- Download the custom role JSON file I configured and upload it on the Create a custom role page. You can download the custom role JSON here: https://github.com/PacktPublishing/Remote-Productivity-with-Windows-Virtual-Desktop/blob/main/B17392_07/autoscale_custom_RBAC.json
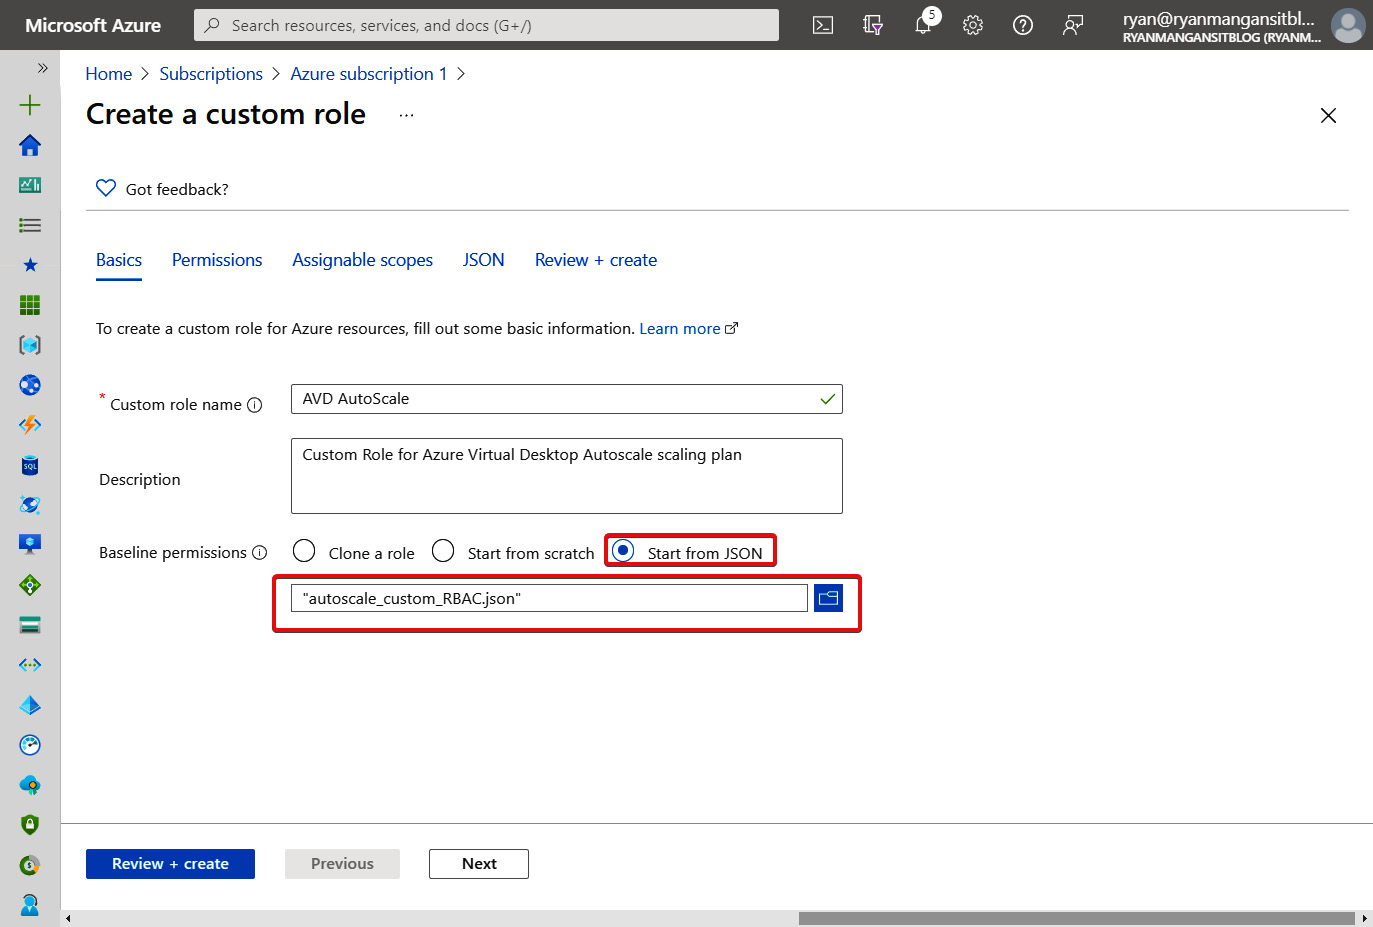
Figure 17.38 – Upload of the Auto_custom_RBAC.json file
- Once you have uploaded the required JSON file, Autoscale_custom_RBAC.json, click Review + create. Check the configuration and create the custom role.
- Now you have created the custom role, navigate to Add Role Assignment within Subscription | Access control (IAM).
- Click Add role assignment and select the custom role AVD AutoScale:

Figure 17.39 – Custom role appearing in Add role assignment

Figure 17.40 – Review + assign page of the Add role assignment page
Once complete, you should see the custom role with the Windows Virtual Desktop app (service) added:
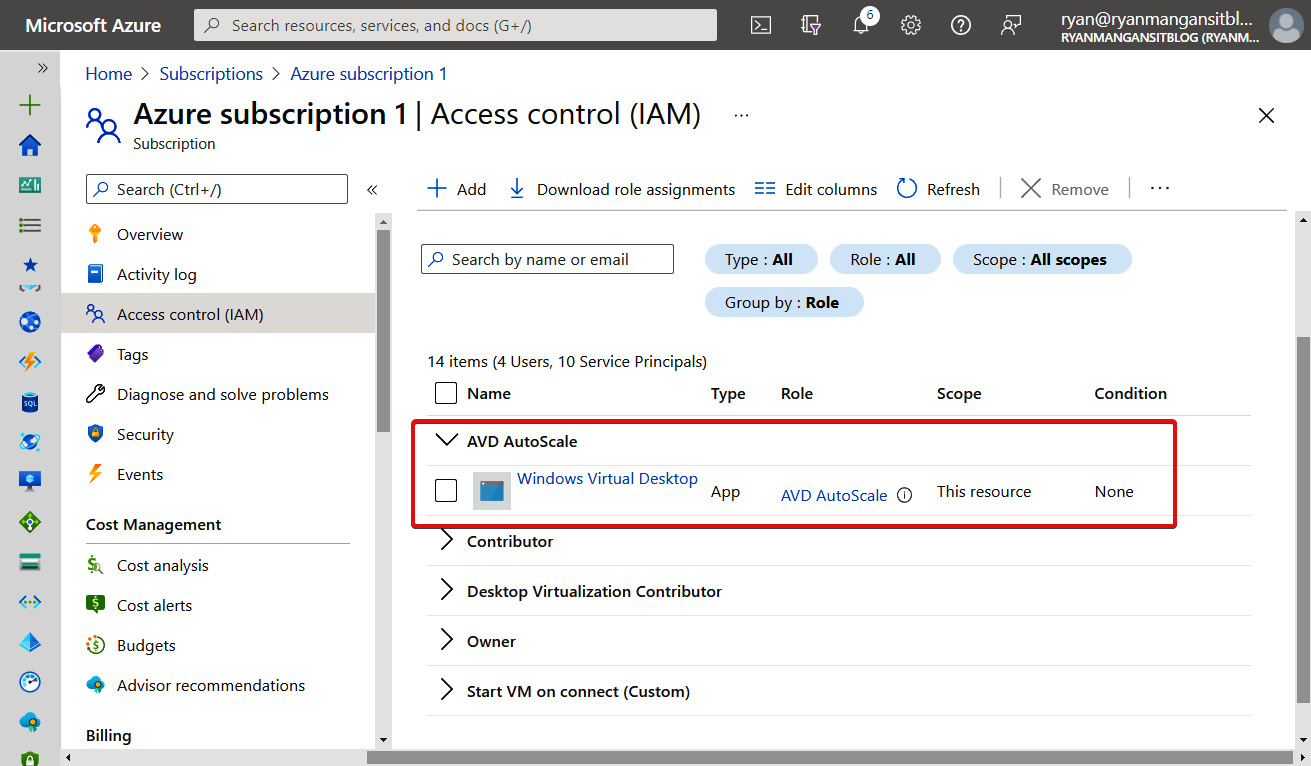
Figure 17.41 – Windows Virtual Desktop service added to the custom AVD autoscale role
Important Note
At the time of writing, the name Windows Virtual Desktop has not changed in some parts of Microsoft Azure. However, this is subject to change, and you should look out for the new Azure Virtual Desktop name.
In this section, we looked at creating a custom role for scaling plans for Azure Virtual Desktop. We can now proceed with looking at creating our first scaling plan.
Creating a scaling plan
Before creating a scaling plan, you first need to ensure you have an existing pooled host pool. All your host pools must have a configured maxSessionLimit parameter.
Important Note
You can update the MaxSessionLimit parameter using the PowerShell cmdlet New-AZWvdHostPool or Update-AZWvdHostPool.
Getting started:
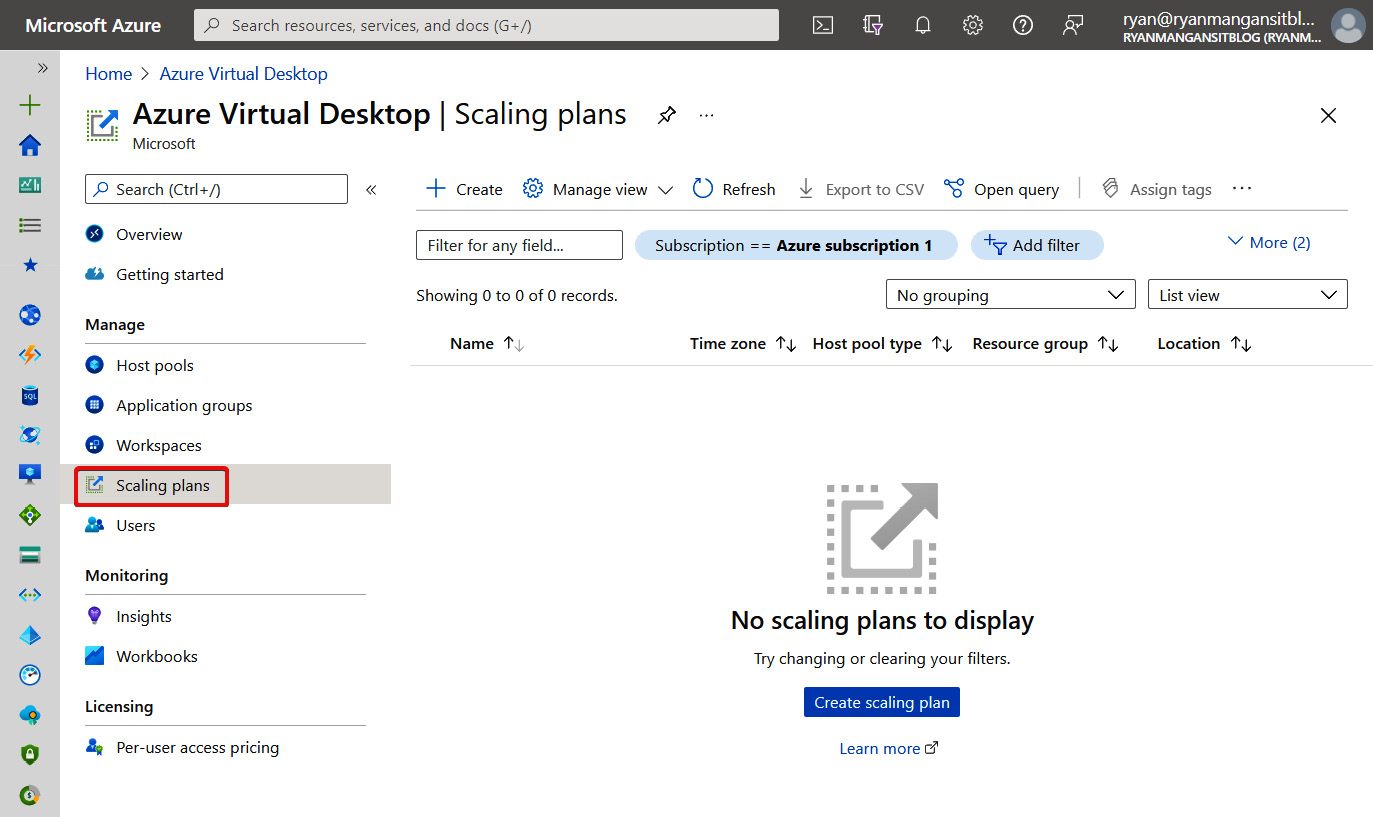
Figure 17.42 – Scaling plans page in Azure Virtual Desktop
- Within Scaling plans, click Create.
- Enter the required resource group or select Create new if required.
- Enter a name for the scaling plan.
- Select the required Azure region for the scaling plan.
- Select the required time zone for the scaling plan.
- Enter a tag for the VMs that you do not want to be included in scaling operations within the Exclusion tag section:
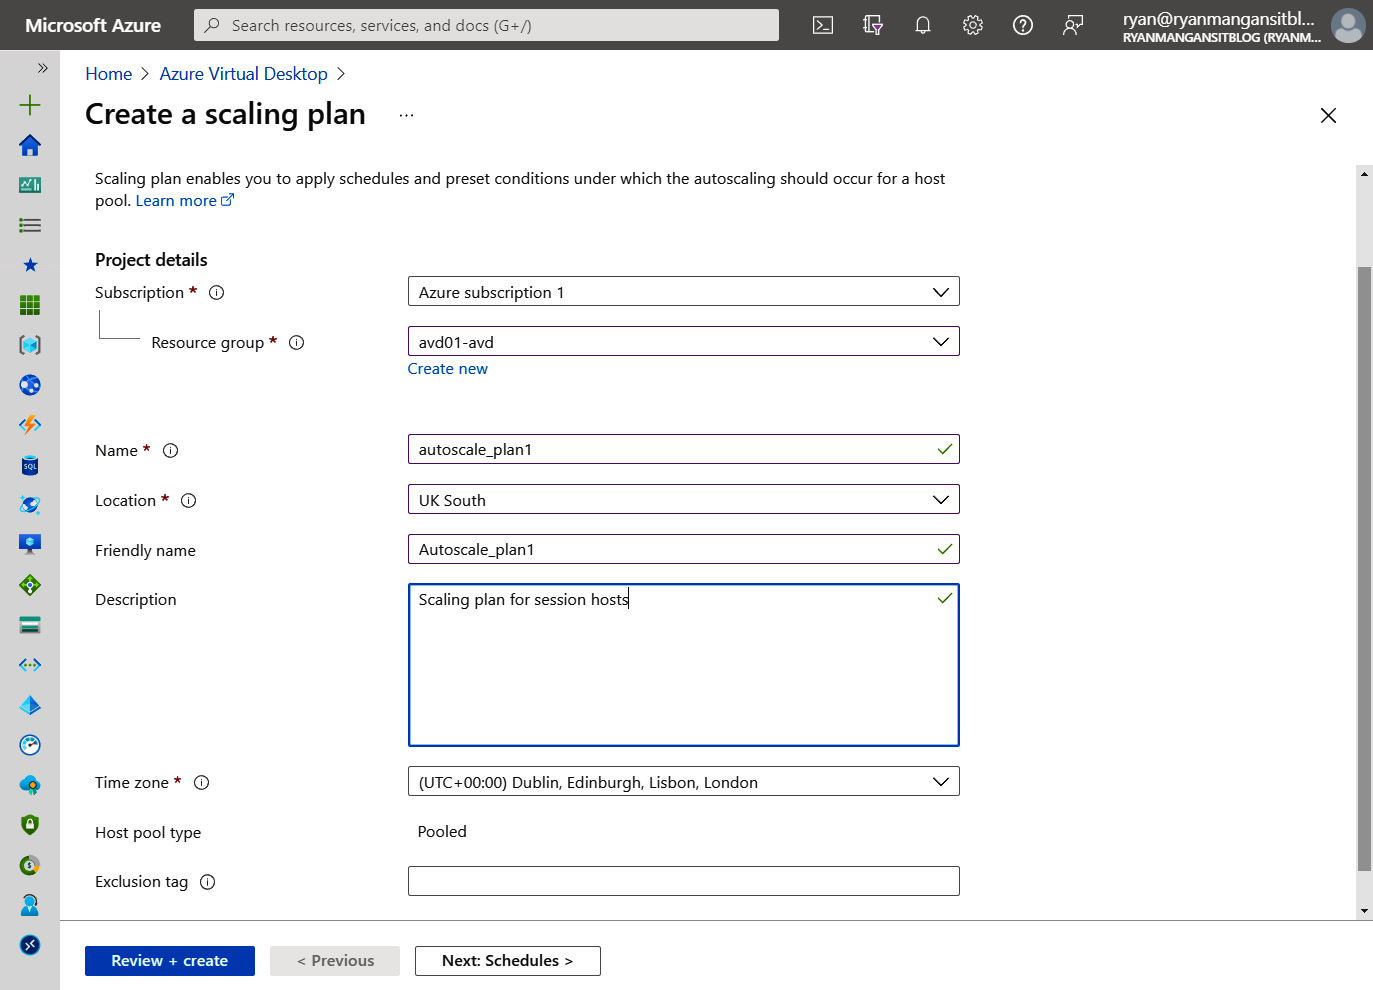
Figure 17.43 – Create a scaling plan page
- Click Next: Schedules.
We'll now move on to look at the configuration of a schedule within a scaling plan.
Configuring a schedule
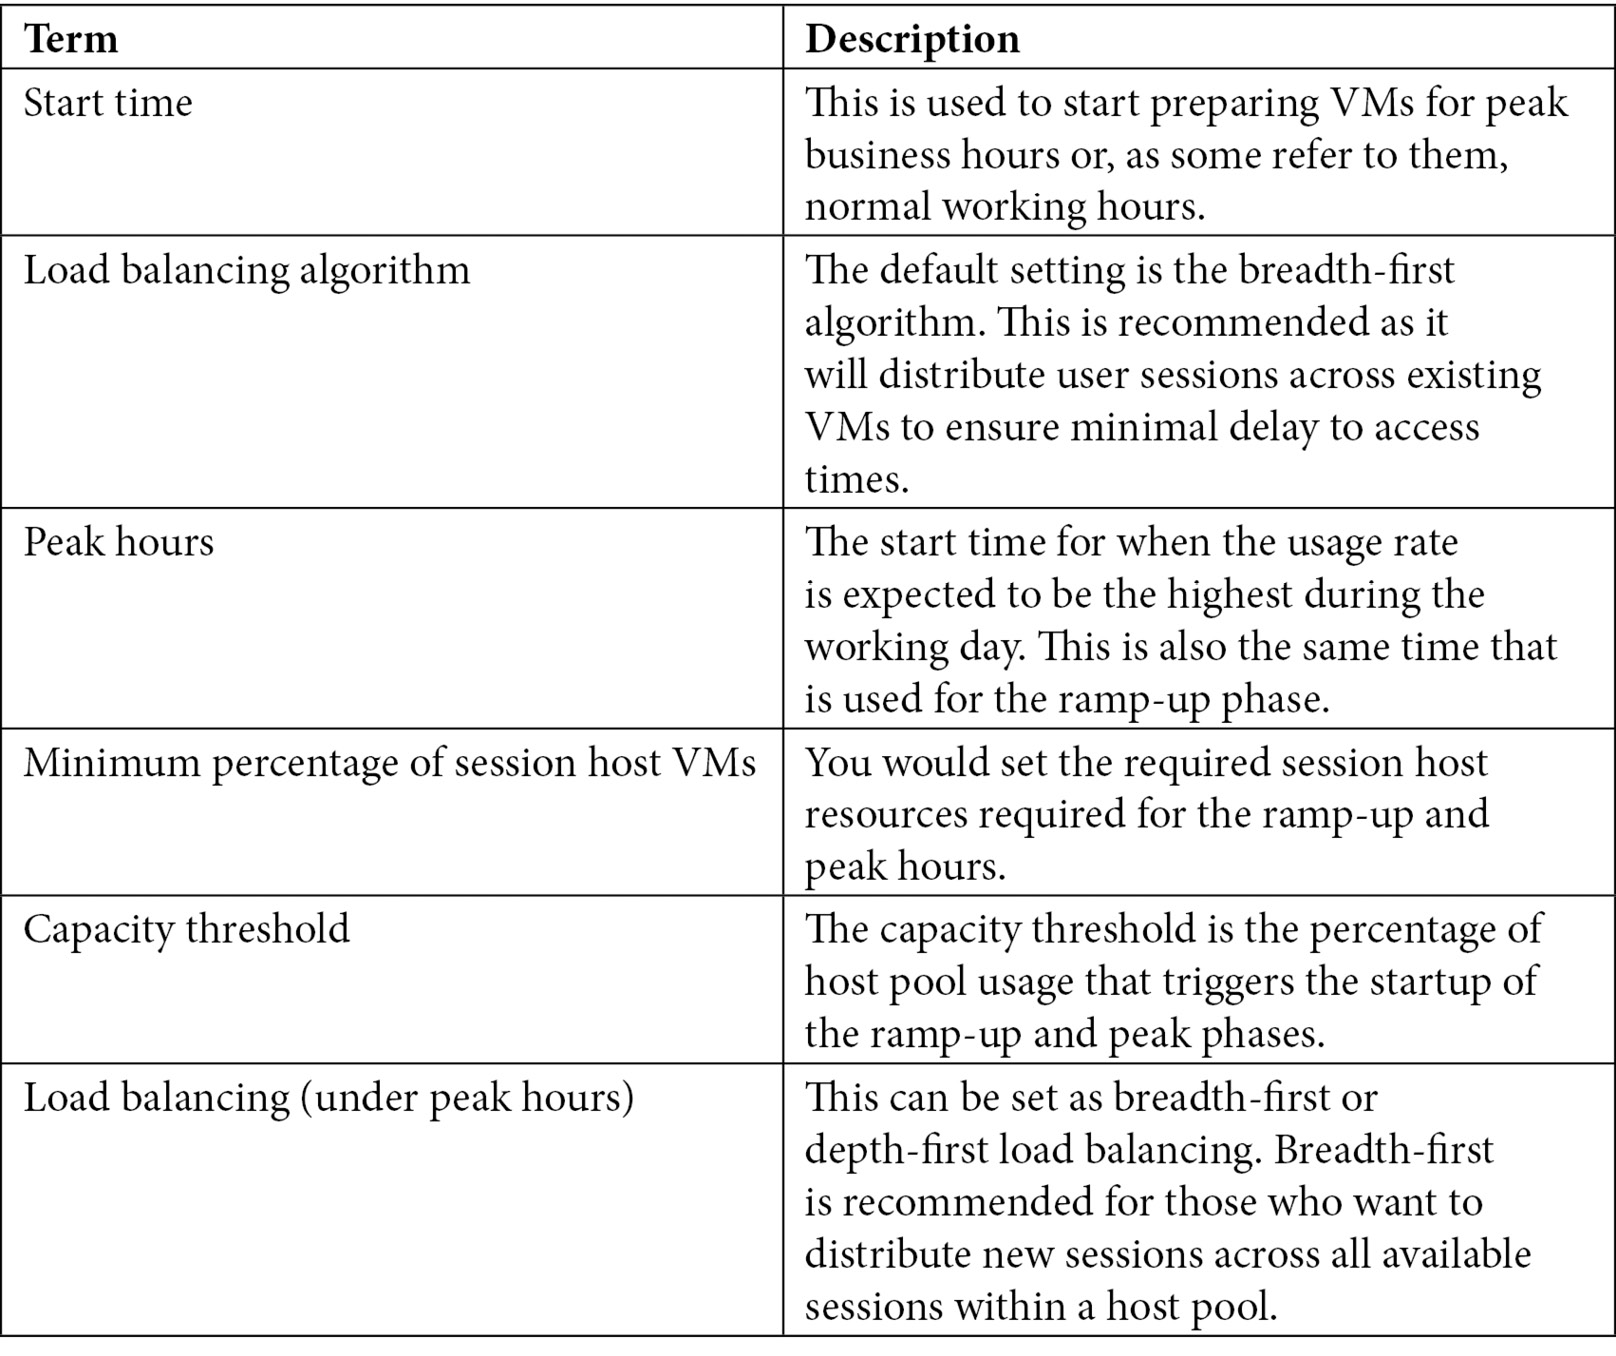
Schedules are essentially the configuration settings for autoscale. This includes the ramp-up and ramp-down modes, which will activate based on schedules throughout the day.
The following table details the different terms and meanings:
To configure or change a schedule, follow these steps:
- Within the Schedules tab, you can add a schedule. Go ahead and click Add schedule:
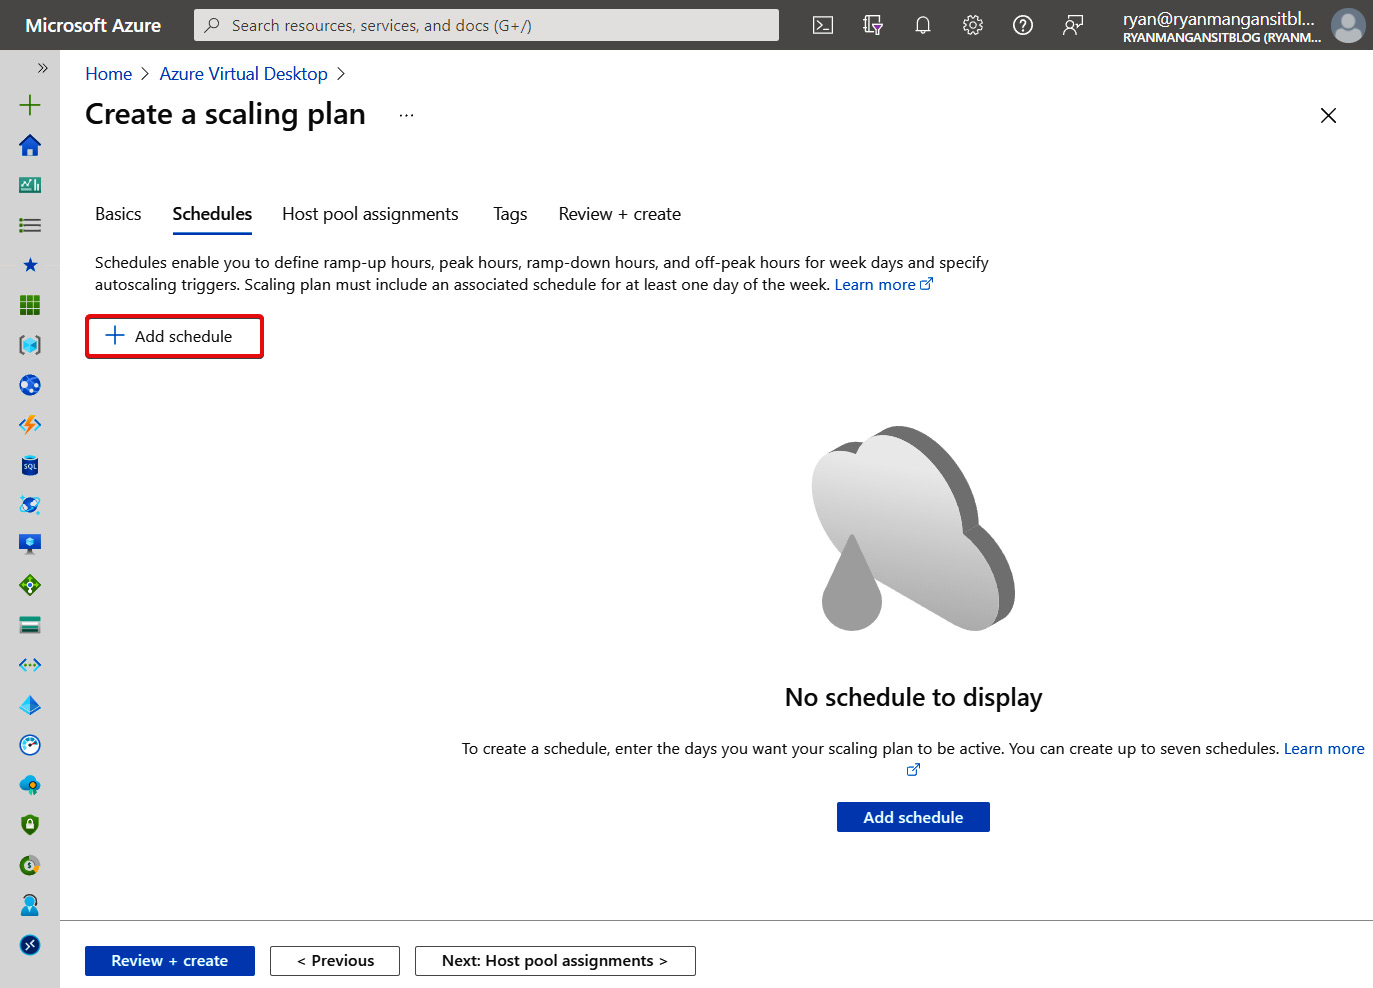
Figure 17.44 – The Schedules tab on the Create a scaling plan page
- You will then see the Add a schedule blade appear with five tabs, including General, Ramp-up, Peak hours, Ramp-down, and Off-peak hours:

Figure 17.45 – General tab under the Add a schedule blade
- Enter the schedule name within the General tab and set the days you want the schedule to repeat. Then click Next.
- You can set the start time, load balancing algorithm, minimum percentage of hosts, and capacity threshold percentage within the Ramp-up tab. Once you have configured the settings you want, click Next:
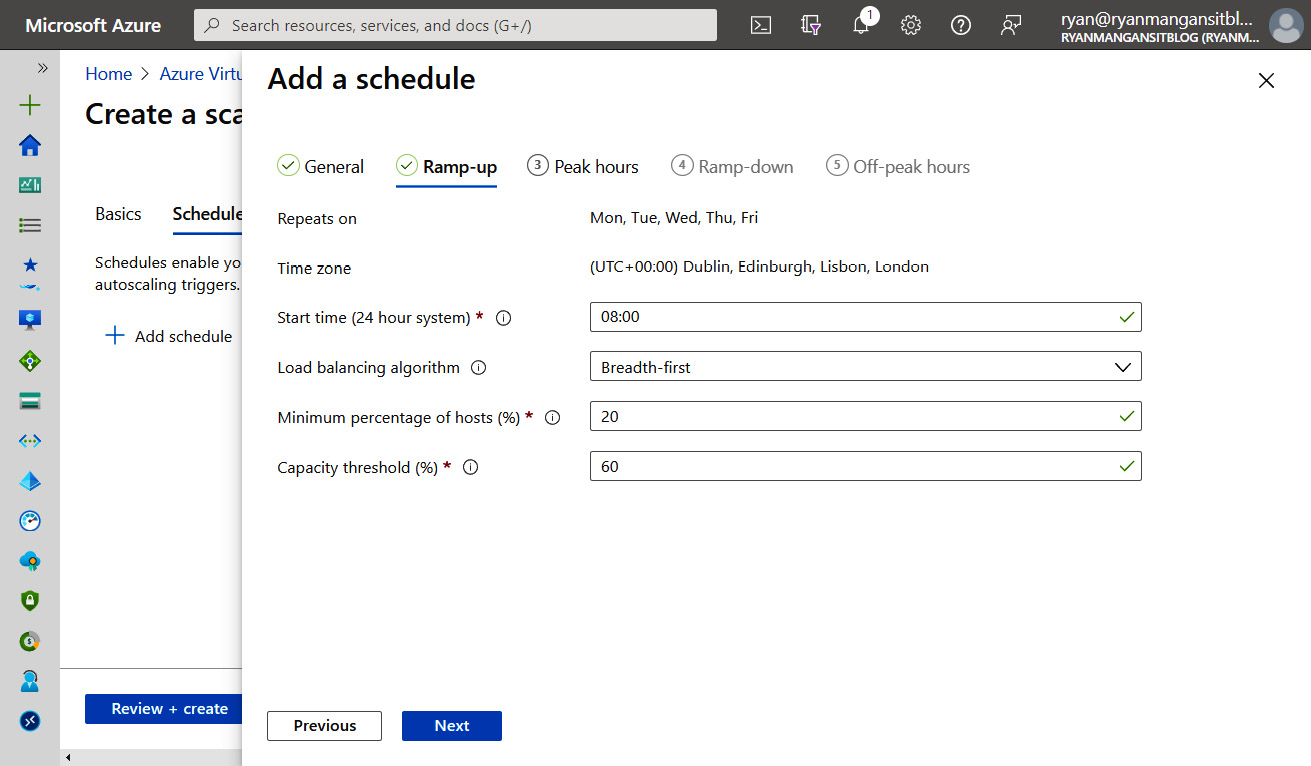
Figure 17.46 – The Ramp-up tab under the Add a schedule blade
- You can set the start time for peak hours and the load balancing algorithm within the Peak hours tab. Once set, click Next:
Important Note
When applying load balancing preferences within a scale plan schedule, you will override the original host pool load balancing setting.
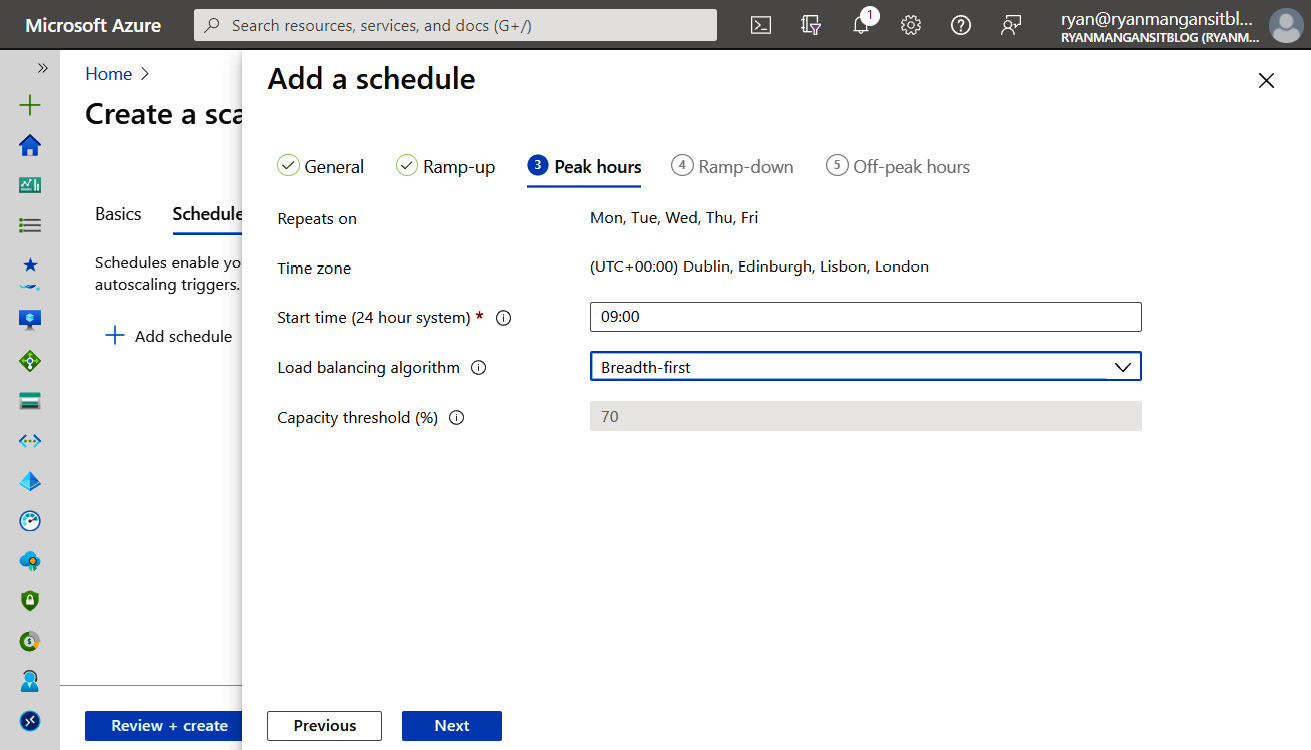
Figure 17.47 – The Peak hours tab under the Add a schedule blade
- Within the Ramp-down tab, you can specify the start time, load balancing algorithm, minimum number of hosts as a percentage, capacity threshold, and the ability to force logoff users and send a message. Once you have configured this tab, click Next.
For Ramp-down, you will see similar values to the Ramp-up section. It is important to note that in this instance, it will be for reduced host pool usage, also known as drop-offs. The Ramp-down section includes the Force logoff users, Delay time before logging out users and shutting down VMs (min), and the ability to send a message to the user before they are logged off:

Figure 17.48 – Ramp-down tab on the Add a schedule blade
- The final tab on the Add a schedule page is Off-peak hours. You would set the time and the load balancing algorithm. Once configured, click Add.
Off-peak hours work in a similar way to peak hours. The difference is that off-peak hours gradually reduce the number of session hosts based on the user sessions on each session host:
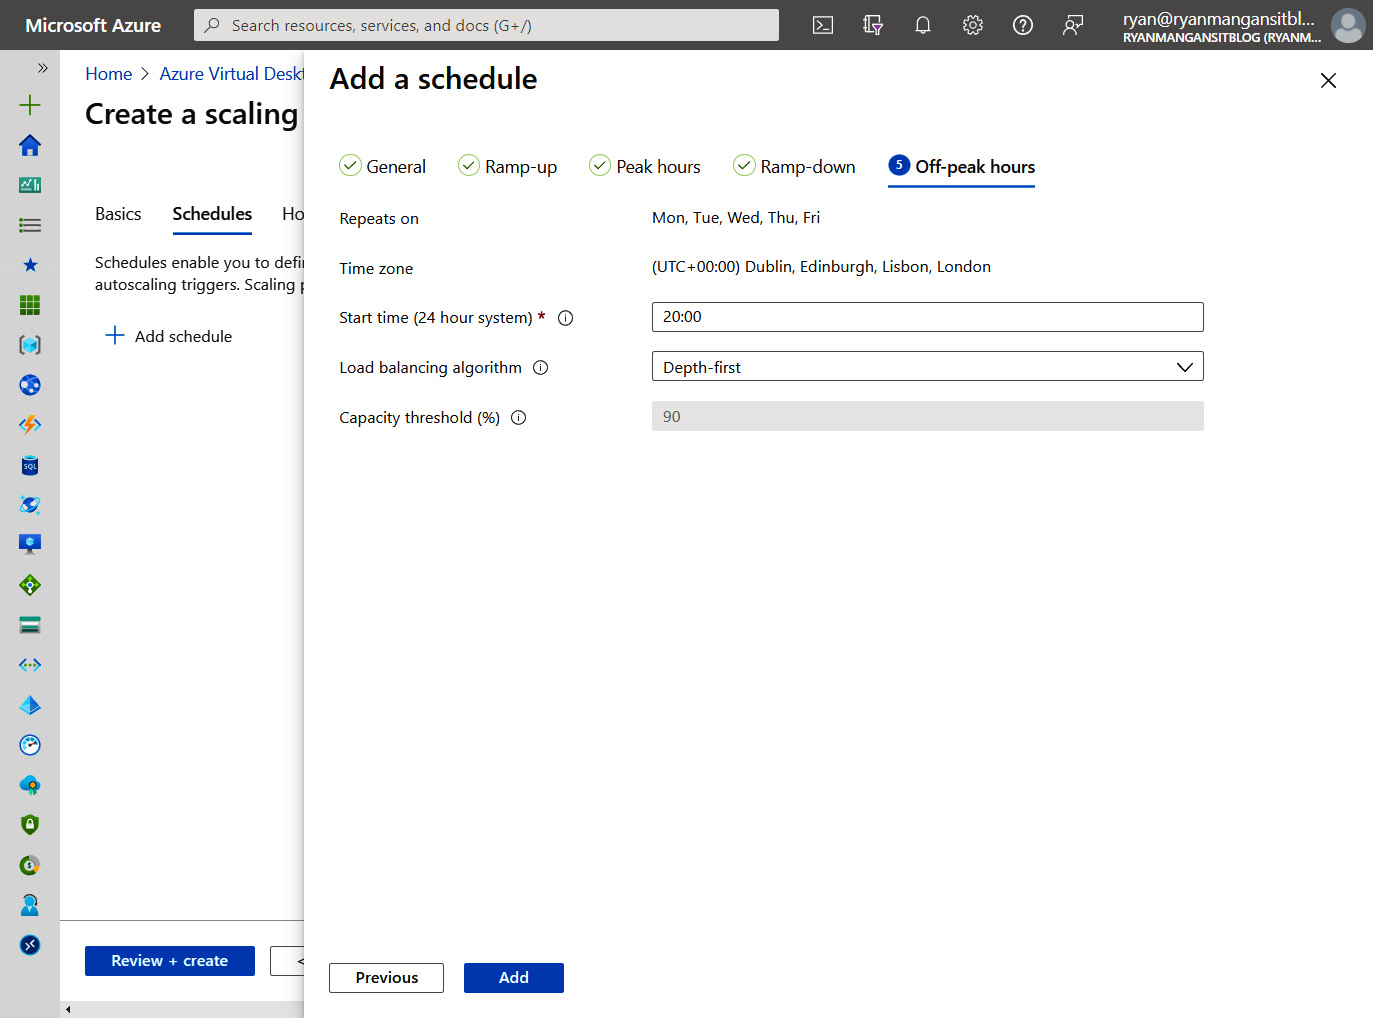
Figure 17.49 – Off-peak hours tab on the Add a schedule blade
Now that we have configured the schedule, we can now assign host pools to the scaling plan.
Assigning host pools
The following steps look at the steps to assign the host pool and complete the creation of the scaling plan:
- Now that we have created the schedule, we can move on to the host pool assignments. This is where you would select the session host pools you want to assign to the scaling plan.
- Select the required host pools within the Host pool assignments tab and ensure Enable autoscale is checked:

Figure 17.50 – Host pool assignments tab on the Create a scaling plan page
- Under the Tags tab, specify any tags you may want to set, then click Next.
- Review your settings and click Create:
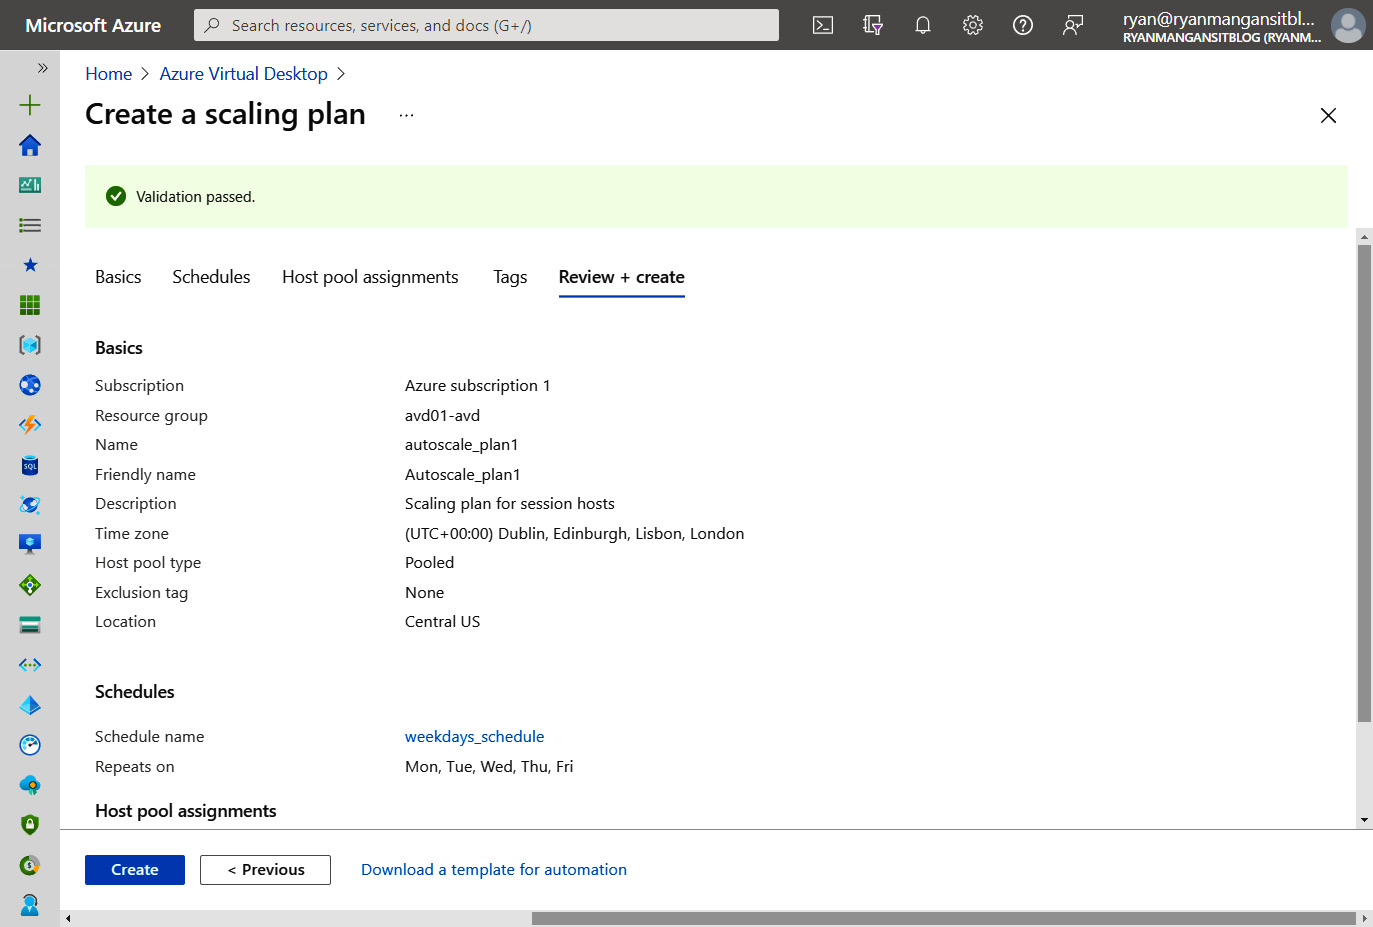
Figure 17.51 – The Review + create tab of the Create a scaling plan page
This concludes the setup process for creating a scaling plan in Azure Virtual Desktop.
There you have it – in this section, we looked at the in-preview Azure portal-based autoscale feature where you can configure scaling plans that meet your specific requirements.
For the latest updates and information on the autoscale tool, see the following Microsoft documentation link: https://docs.microsoft.com/azure/virtual-desktop/autoscale-scaling-plan.
Summary
In this chapter, we started by configuring an Azure automation account and then looked at automating Azure Virtual Desktop tasks such as logging multiple sessions of session hosts within a host pool. We then moved on to take a look at the autoscaling feature of Azure Virtual Desktop, which uses a series of PowerShell scripts for deployment. Then we finished off the chapter by looking at a preview feature (at the time of writing) called scaling plans. Finally, we ran through the setup of a scaling plan, configuring a schedule and assigning host pools to a scaling plan.
In the next chapter, we look at the topic of monitoring and managing the performance and health of an Azure Virtual Desktop environment.
Questions
- You want to automate the logging off of multiple Azure Virtual Desktops users, which Azure service would you use to achieve this objective?
- Before you can create scaling plans, what must you configure?
- For custom autoscaling plans, which Azure service should you use?
Answers
- An Azure Automation Runbook.
- A custom role with the required permissions.
- For custom autoscale features, it's advised that you use the original PowerShell/Logic Apps solution provided by Microsoft, which you can customize to your specific requirements.