
Chapter 5: Authoring the Development Environment with Vagrant
In the previous chapters, we learned how to provision a piece of infrastructure with Terraform, how to install middleware with Ansible, and, finally, how to create Virtual Machine (VM) images with Packer.
One problem that is frequently pointed out by operational teams is the fact that they need to be able to test all of the automation scripts on isolated environments, that is, environments that are not on the local machine. Indeed, writing scripts with Ansible under Linux, for example, is difficult to test on a local Windows machine.
To answer this problem, we can use virtualization systems such as Hyper-V or VirtualBox, which allow you to have VMs with different operating systems that run locally. However, to go even further, we can automate the creation and provisioning of these VMs using the tiers tool from HashiCorp, called Vagrant.
In this chapter, we will learn about the basics of using Vagrant. We will discuss its installation, how to write Vagrant files, and, finally, we will examine its execution to create and provision a Linux VM.
In this chapter, we're going to cover the following main topics:
- Installing Vagrant
- Writing a Vagrant configuration file
- Provisioning a local VM with the Vagrant CLI
Technical requirements
Vagrant can create a VM on any hypervisor. In this chapter, we will use VirtualBox as a local VM hypervisor. You can download and install it from https://www.virtualbox.org/wiki/Downloads.
On Windows, if you have already installed Hyper-V, to use VirtualBox, you need to disable Hyper-V. Please refer to the following documentation:
https://www.vagrantup.com/docs/installation#windows-virtualbox-and-hyper-v
All of the commands executed in this chapter will be executed in a terminal console such as PowerShell or Bash.
The complete source code for this chapter is available here:
https://github.com/PacktPublishing/Learning-DevOps-Second-Edition/tree/main/CHAP05/
Check out the following video to view the Code in Action: https://bit.ly/3s5aO49
Installing Vagrant
Vagrant is a cross-platform tool that can be installed on Windows, Linux, or macOS. Installation can be done in two ways: either manually or via a script in Windows.
Installing manually on Windows
To install Vagrant manually on Windows, perform the following steps:
- Go to the official download page (https://www.vagrantup.com/downloads), click on the Windows tab, and download the MSI package corresponding to your operating system's CPU type (either 32 bits or 64 bits).
- After downloading, click on the downloaded MSI file and select the installation directory (keep the default value):
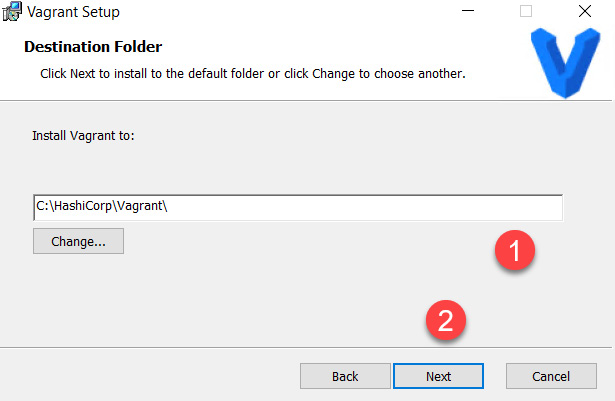
Figure 5.1 – Vagrant Setup folder choice

Figure 5.2 – The Vagrant Setup Install button
You have learned how to install Vagrant manually on a Windows system. In the next section, we will discuss the installation of Vagrant using Chocolatey or a script.
Installing Vagrant by script on Windows
On Windows, we can use Chocolatey, which is a software package manager.
Note
In this chapter, I will not reintroduce Chocolatey, as we have already introduced it in the previous chapters. For additional information about Chocolatey, please read the documentation at https://chocolatey.org/.
Once Chocolatey has been installed, we simply need to run the following command in PowerShell or the CMD tool:
choco install vagrant -y
The following is a screenshot of the Vagrant installation for Windows using Chocolatey:

Figure 5.3 – Vagrant installation with Chocolatey
To finalize the installation of Vagrant, we need to reboot the machine.
Installing Vagrant by script on Linux
On Linux, we can execute the following script to install Vagrant automatically:
sudo apt-get update && sudo apt-get install -y gnupg software-properties-common curl
&& curl -fsSL https://apt.releases.hashicorp.com/gpg | sudo apt-key add -
&& sudo apt-add-repository "deb [arch=amd64] https://apt.releases.hashicorp.com $(lsb_release -cs) main"
&& sudo apt-get update && sudo apt-get install vagrant
This script does the following:
- It adds the apt HashiCorp repository.
- It updates the local repository.
- It downloads and installs the Vagrant CLI.
Note
For additional information about all installations of Vagrant on other operating systems, please refer to the documentation at https://www.vagrantup.com/downloads.
Once Vagrant has been installed, we can test the installation of the Vagrant CLI by running the following command:
vagrant --version
The preceding command displays the version of Vagrant that has been installed, and the following screenshot shows the execution of this command:

Figure 5.4 – Displaying the installed version of Vagrant
We have just learned the manual installation procedure for Vagrant and how to install it using a script on Linux.
Now, we will expose some main Vagrant artifacts and write a Vagrant template configuration to create a basic Linux VM locally and configure it with Ansible to test Ansible scripts.
Writing a Vagrant configuration file
Before we discuss how to write the Vagrant configuration file, it is important to mention a few artifacts of Vagrant.
The important elements of Vagrant are the following:
- The Vagrant binary (CLI): We learned how to download and install this in the previous section, Installing Vagrant.
- The base image of the VM, called Vagrant Boxes, will be used and mentioned in the configuration file. This image can be either public, that is, published in the Vagrant cloud, or local on the machine.
- The configuration file defines the composition of our VM that we want to create locally.
Now that we have looked at the different elements of Vagrant, we are going to write the configuration file of our VM. To begin, we are going to check which base machine we are going to use.
Using Vagrant Cloud for Vagrant Boxes
To use basic Vagrant images, HashiCorp has set up a portal that allows you to publish and publicly share images of VMs that are compatible with Vagrant.
To gain access to these images, called boxes, you can navigate to the site at https://app.vagrantup.com/boxes/search and then perform a search on the specific box that interests you according to the following criteria:
- The operating system (Windows or Linux)
- The supported hypervisor
- The middleware that has already been installed
- The publisher
The following screenshot shows an example of how to search on Vagrant Cloud:
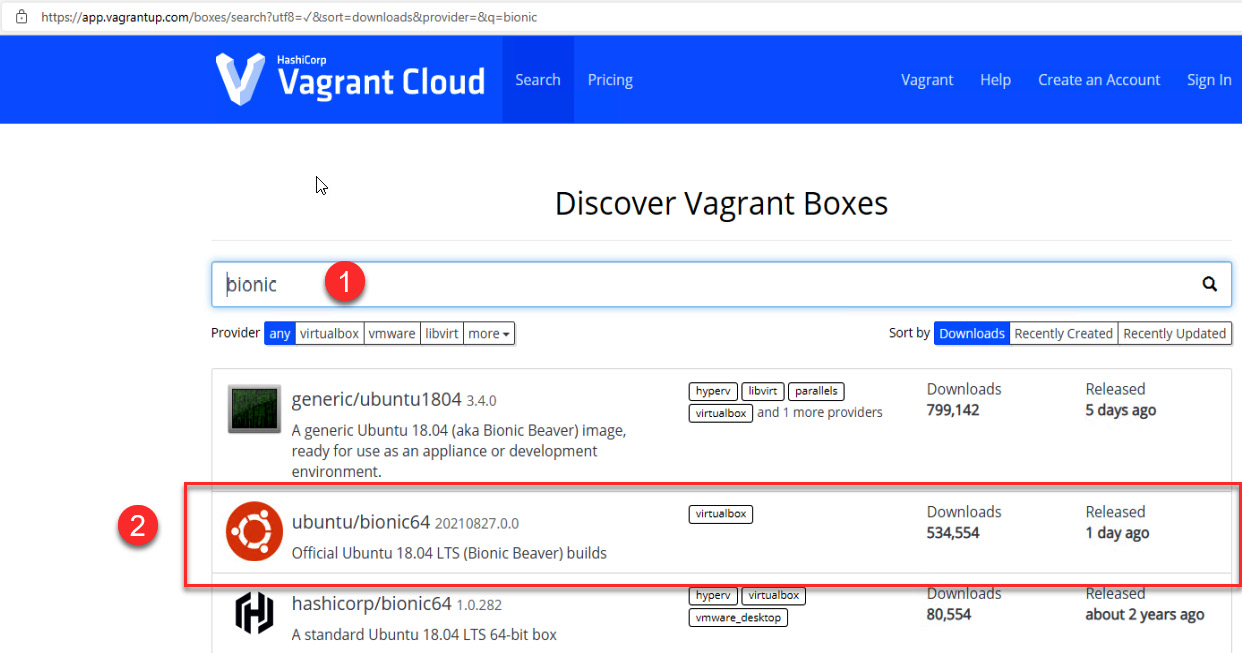
Figure 5.5 – The Vagrant Cloud search box
In this example, we are searching for a basic Bionic box. In the list of results, we find the official ubuntu/bionic64 box, which is compatible with the VirtualBox hypervisor.
By clicking on the desired box, the portal displays more information, such as the configuration details and the changelog of the box:

Figure 5.6 – The Vagrant Cloud box details
Note
For more information about Vagrant Cloud and how to create and publish your custom boxes, I suggest you refer to the official documentation at https://www.vagrantup.com/vagrant-cloud.
Now that we have chosen our base box, we will write the Vagrant configuration file for our VM.
Writing the Vagrant configuration file
To create a local VM using Vagrant, we need to write the configuration of the VM in the configuration file.
This configuration will contain information about the VM, such as the following:
- The box to use
- The hardware configuration such as the RAM and CPU
- The network configuration
- The scripts to use to provision and configure the VM
- The local folder to share with the VM
In this section, we will learn how to create a basic Vagrant configuration file that creates a local VM that contains an Ansible binary already installed.
To create a Vagrant configuration, perform the following steps:
- Create a folder called VagrantFiles.
- Inside this folder, open a new terminal console and run the vagrant init command with the name of the box, as follows:
vagrant init ubuntu/bionic64
The following screenshot shows the execution of this command:

Figure 5.7 – The init Vagrant file
The preceding command creates a new Vagrantfile file with the basic configuration for a bionic VM with the following code:
Vagrant.configure("2") do |config|
config.vm.box = "ubuntu/bionic64"
end
Next, we will add scripts to install Ansible during the provisioning of this VM.
- In this VagrantFiles folder, create a new folder called scripts and then create a new file script, called ansible.sh, using the following content:
apt-get update
sudo apt-get --assume-yes install software-properties-common
sudo apt-add-repository --yes --update ppa:ansible/ansible
sudo apt-get --assume-yes install ansible
- In the Vagrantfile file, update the configuration with the following lines:
Vagrant.configure("2") do |config|
config.vm.box = "ubuntu/bionic64"
config.vm.provision "shell", path: "scripts/ansible.sh"
end
- To test the local Ansible playbook, we can share the local directory with the VM by adding the following lines to the configuration file:
Vagrant.configure("2") do |config|
config.vm.box = "ubuntu/bionic64" config.vm.provision "shell", path: "scripts/ansible.sh"
config.vm.synced_folder "C:\<path>\CHAP03\devopsansible", "/learningdevops"
end
In the preceding configuration, we shared the local c:\...Chap03devopsansible folder (this is an example of a local folder) between the local machine and the /learningdevops folder in the VM.
Note
For more details about this Vagrant configuration file, please refer to the complete documentation at https://www.vagrantup.com/docs/vagrantfile.
- The final step is to validate this configuration file by running the following command:
vagrant validate
The output of this command is shown in the following screenshot:

Figure 5.8 – Validating the Vagrant configuration
Note
In this section, we learned how to create a VM using a Vagrant configuration file. If you wish to create multiple VMs in the same configuration file, please refer to the official documentation at https://www.vagrantup.com/docs/multi-machine.
We have just discussed how to choose a Vagrant box and how to write a Vagrant configuration file. Now, in the next section, we will learn how to use the Vagrant CLI and the configuration file to create a VM locally.
Creating a local VM using the Vagrant CLI
Now that we have written the configuration file, we can create our VM locally.
To perform this, we will use several Vagrant CLI commands. To display all of the available commands, we will run the vagrant --help command:

Figure 5.9 – Displaying the Vagrant commands
Note
All details about the Vagrant CLI commands are documented at https://www.vagrantup.com/docs/cli.
In the next section we will learn how to create the VM, then we will connect to this VM, and finally we will perform some scripts.
Creating the VM
To create the VM, navigate to the folder in which we created the Vagrantfile file, and run the following command:
vagrant up
The output is shown in the following screenshot:

Figure 5.10 – The Vagrant up execution workflow
The execution of the preceding command performs the following steps:
- Import the box from Vagrant Cloud.
- Create a new VM in the hypervisor (in our case, this is VirtualBox).
- Create an SSH connection with SSH keys (Vagrant creates private/public SSH keys).
- Mount the shared folder.
- Apply the provisioning Ansible script.
After the provisioning of the VM, we can view this VM in the hypervisor here in VirtualBox.
Now that the VM is up and has been provisioned, we can connect it.
Connecting to the VM
To connect the VM with SSH, we can use the default SSH command dedicated to Vagrant (in administrator mode):
vagrant ssh
The output is shown in the following screenshot:

Figure 5.11 – Connecting SSH to the Vagrant VM
The execution of this command means that Vagrant automatically connects the SSH credential to the VM, and we can run any commands or scripts inside the VM.
For example, we can run the ansible -version command to display the installed version of Ansible:

Figure 5.12 – Executing commands inside the VM
After running the desired tests, if we wish to destroy this VM to remake it, we can run the vagrant destroy command:

Figure 5.13 – Destroying the Vagrant VM
In this section, we learned how to create a VM and connect to it using the Vagrant CLI.
Summary
In this chapter, we learned that it was possible to create VMs locally using Vagrant from HashiCorp in order to have an isolated development environment.
We discussed how to download and install it. Then, we learned how to write a Vagrant configuration file using a Bionic box, an ansible install script, and a locally shared folder.
Finally, we learned how to execute the Vagrant command lines in order to create this VM and connect to it for testing purposes.
In the next chapter, we will start a new topic, which is the implementation of CI/CD, and we will learn how to use Git to source your code.
Questions
- What is the role of Vagrant?
- What is the Vagrant command to create a VM?
- What is the Vagrant command to connect SSH to a VM?
Further reading
If you want to know more about Vagrant, please take a look at the following resources:
- The official Vagrant documentation : https://www.vagrantup.com/docs/index
- The official Vagrant Cloud documentation: https://www.vagrantup.com/vagrant-cloud