Chapter 1
Playing on the Web
In This Chapter
![]() Introducing HTML5
Introducing HTML5
![]() Building a basic game with only HTML
Building a basic game with only HTML
![]() Designing an adventure game
Designing an adventure game
![]() Incorporating media into your pages
Incorporating media into your pages
Two particular flavors of programming have always appealed to me: game development and web programming. These have historically been very different kinds of programming, with vastly different tools and techniques.
With the advent of HTML5 and its related technologies, these two formerly different forms of programming are finally one. In this book, I show you how to build basic video games entirely with free web technologies.
Soon enough you’ll be building games with moving elements, animated characters, and realistic physics. You’ll discover a number of interesting web technologies as the book progresses, but they all build on two basic and related technologies: HTML and CSS. Web-based games are web pages first, so you need to have a basic grasp of web development before you move on to the more elaborate game development.
HTML has been around for a long time. Although the latest version (HTML5) has a lot of new features, it’s still very similar to older versions. HTML is a markup language, which means it’s designed to help you determine the types of elements in a page. In this chapter, you find out how to build a web page in HTML5. I don’t cover all the details, but enough so you can make any basic page.
HTML is about what things mean, but another language, Cascading Style Sheets (CSS), is about how things look. Typically, CSS and HTML are used together to build a page and style it. In this chapter, you also learn enough CSS to add basic style to your pages. You’ll be able to add colors, change where things are positioned, and make basic changes to fonts.
Of course, this is a game development book, so you develop a game even in the very first chapter. You learn how to build a simple “choose your own adventure” game. It’s a pretty fun way to practice your web development skills.
Web-based game development has a number of interesting aspects:
![]() The technology is freely available. If you have a reasonably modern computer, you already have everything you need to get started. You don’t need to buy anything at all, although you probably will want to download a few free tools.
The technology is freely available. If you have a reasonably modern computer, you already have everything you need to get started. You don’t need to buy anything at all, although you probably will want to download a few free tools.
![]() It can be easier. Game programming is well known to be one of the more difficult forms of programming. This is especially true when you use one of the traditional programming languages, like C++. The languages used in this book are quite a bit more friendly for beginners.
It can be easier. Game programming is well known to be one of the more difficult forms of programming. This is especially true when you use one of the traditional programming languages, like C++. The languages used in this book are quite a bit more friendly for beginners.
![]() You can reach a huge audience. Anybody with a modern web browser can play your games instantly. They won’t need to install plug-ins like Flash, and they won’t need to download your game, as it appears immediately in the browser.
You can reach a huge audience. Anybody with a modern web browser can play your games instantly. They won’t need to install plug-ins like Flash, and they won’t need to download your game, as it appears immediately in the browser.
![]() You can write mobile games. Mobile gaming is very hot. The traditional approach to writing mobile games is to use native application development tools. The web approach I use is much simpler than the native tools and bypasses app stores for much easier distribution.
You can write mobile games. Mobile gaming is very hot. The traditional approach to writing mobile games is to use native application development tools. The web approach I use is much simpler than the native tools and bypasses app stores for much easier distribution.
![]() It’s fun. Game development is a hoot. You get to build your own world, set up a story for the player to interact with, and see what happens.
It’s fun. Game development is a hoot. You get to build your own world, set up a story for the player to interact with, and see what happens.
![]() It’s a great start to more “serious” programming. Games are cool, but some people think they aren’t really serious. Even if you’re not aiming for a career in the gaming industry, the skills you learn in this book help you learn web development and programming. If you work through the exercises in the entire book, you’ll learn advanced programming techniques such as object-oriented programming (OOP), local data storage, and animation loops.
It’s a great start to more “serious” programming. Games are cool, but some people think they aren’t really serious. Even if you’re not aiming for a career in the gaming industry, the skills you learn in this book help you learn web development and programming. If you work through the exercises in the entire book, you’ll learn advanced programming techniques such as object-oriented programming (OOP), local data storage, and animation loops.
Building the Framework
Game development with web technologies has been attempted for years, but the new technologies change everything. For this book, I’m using a number of technologies as a foundation:
![]() HTML5: HTML5 is the newest version of HTML (the primary language of the web). It offers many new capabilities. All of the other new technologies are built from the HTML5 foundation.
HTML5: HTML5 is the newest version of HTML (the primary language of the web). It offers many new capabilities. All of the other new technologies are built from the HTML5 foundation.
![]() CSS3: CSS (Cascading Style Sheets) is a language that applies formatting to the structure determined with HTML. The new version of CSS adds some new features that allow great gaming options. For the first time, you can easily scale and rotate web elements, as well as animate and add shadows.
CSS3: CSS (Cascading Style Sheets) is a language that applies formatting to the structure determined with HTML. The new version of CSS adds some new features that allow great gaming options. For the first time, you can easily scale and rotate web elements, as well as animate and add shadows.
![]() JavaScript: JavaScript is a full-blown programming language. If you want your game to really do anything interesting, you need to learn how to program. Don’t worry. JavaScript is a reasonably easy language to use, and modern implementations have more than enough power.
JavaScript: JavaScript is a full-blown programming language. If you want your game to really do anything interesting, you need to learn how to program. Don’t worry. JavaScript is a reasonably easy language to use, and modern implementations have more than enough power.
![]() Canvas: In the past, it was very difficult for the user or programmer to draw dynamically on a web page. The new
Canvas: In the past, it was very difficult for the user or programmer to draw dynamically on a web page. The new canvas tag adds this ability to web pages, making it much easier to build a game and add it to your page.
![]() SimpleGame: Although HTML5 and its related tools do make it possible to build games, there are a number of advanced techniques to learn. I show you everything you need to build games on your own, but to speed things up, I provide a game engine called
SimpleGame: Although HTML5 and its related tools do make it possible to build games, there are a number of advanced techniques to learn. I show you everything you need to build games on your own, but to speed things up, I provide a game engine called simpleGame that simplifies this process. This tool allows you to create powerful Flash-style games after only a few chapters!
![]() Multimedia tools: Games are truly multimedia applications, so you’ll need some media assets to work with. I introduce my favorite tools for building games, including free tools for developing sketches, graphic images, 3D models, and audio.
Multimedia tools: Games are truly multimedia applications, so you’ll need some media assets to work with. I introduce my favorite tools for building games, including free tools for developing sketches, graphic images, 3D models, and audio.
Setting Up Your Workshop
You won’t need a lot to get started, but a number of tools are helpful. All are free and work on every major platform (Windows, Mac OS X, and Linux).
Web browsers
All the games created in this book require a modern version of HTML and related technologies. To run the programs, you need a modern browser. Here are the browsers I check the programs with:
![]() Google Chrome 13+: The Chrome browser by Google has become a favorite of HTML5 developers. It has very good support for HTML5 standards, and it has one of the speediest JavaScript engines around. It is available for all major desktop operating systems.
Google Chrome 13+: The Chrome browser by Google has become a favorite of HTML5 developers. It has very good support for HTML5 standards, and it has one of the speediest JavaScript engines around. It is available for all major desktop operating systems.
![]() Mozilla Firefox 6+: Firefox is one of the most popular browsers. It has very good support for HTML5 features. It has a strong add-on system that allows you to add extensions. The Firebug add-on turns Firefox into a high-powered programmer’s tool.
Mozilla Firefox 6+: Firefox is one of the most popular browsers. It has very good support for HTML5 features. It has a strong add-on system that allows you to add extensions. The Firebug add-on turns Firefox into a high-powered programmer’s tool.
![]() Apple Safari: The Safari browser is standard on all Apple products, although it’s also available for other systems. Safari and Chrome use the same underlying engine (so they have similar behavior) but they are not identical. The iPad and iPhone devices have a form of Safari built in.
Apple Safari: The Safari browser is standard on all Apple products, although it’s also available for other systems. Safari and Chrome use the same underlying engine (so they have similar behavior) but they are not identical. The iPad and iPhone devices have a form of Safari built in.
![]() Opera: The Opera browser is popular among some developers because it has very good support for standards. It offers versions for the Wii and some mobile devices.
Opera: The Opera browser is popular among some developers because it has very good support for standards. It offers versions for the Wii and some mobile devices.
![]() Internet Explorer 10: Microsoft has long frustrated web developers by choosing not to follow the standards completely. Internet Explorer 10 finally supports most of the tools you need for game development, but sadly, it’s not available unless the user is running Windows 7 or greater. Fortunately, all of the other browsers are available on any version of Windows.
Internet Explorer 10: Microsoft has long frustrated web developers by choosing not to follow the standards completely. Internet Explorer 10 finally supports most of the tools you need for game development, but sadly, it’s not available unless the user is running Windows 7 or greater. Fortunately, all of the other browsers are available on any version of Windows.
A programmer’s editor
You’ll need some type of text editor to work with all the various files. Most operating systems come with a default editor, but these often do not have enough power for a programmer’s needs:
![]() Notepad: If you use Windows, you’re familiar with the ubiquitous notepad program. It does the job, but it’s very simplistic. When you start to get serious, you’ll want features like line numbers, support for multiple files, and syntax highlighting. Notepad doesn’t have any of these features, but it’s fine if you’re just getting started.
Notepad: If you use Windows, you’re familiar with the ubiquitous notepad program. It does the job, but it’s very simplistic. When you start to get serious, you’ll want features like line numbers, support for multiple files, and syntax highlighting. Notepad doesn’t have any of these features, but it’s fine if you’re just getting started.
![]() TextEdit: If you’re using a Mac, you know TextEdit. It is much more powerful than its Windows counterpart, but it still has some problems. Be sure to save all text in plain text format (TEXT – Save as Text) or your programs won’t work correctly.
TextEdit: If you’re using a Mac, you know TextEdit. It is much more powerful than its Windows counterpart, but it still has some problems. Be sure to save all text in plain text format (TEXT – Save as Text) or your programs won’t work correctly.
![]() Gedit: If you’re a Linux user, you’re probably using something like gedit. It’s probably the best of the default text editors, but it still doesn’t have every feature you might want.
Gedit: If you’re a Linux user, you’re probably using something like gedit. It’s probably the best of the default text editors, but it still doesn’t have every feature you might want.
![]() Word: Don’t use it. Word processing is different than text editing. All the fancy stuff that Word does for you (fonts, spacing, paragraph formatting, and so on) are ignored in programming and will just cause problems.
Word: Don’t use it. Word processing is different than text editing. All the fancy stuff that Word does for you (fonts, spacing, paragraph formatting, and so on) are ignored in programming and will just cause problems.
So if none of these programs are ideal, what should you use? I think a programmer’s editor should have the following features:
![]() Syntax highlighting: Some editors can recognize what kind of code you’re writing and add color hints so you can see what’s going on. For example, all comments might be blue. This is incredibly helpful when you’re programming.
Syntax highlighting: Some editors can recognize what kind of code you’re writing and add color hints so you can see what’s going on. For example, all comments might be blue. This is incredibly helpful when you’re programming.
![]() Line numbers: Sounds like a simple thing, but it’s often really important to know what line a certain error is on, and many basic editors do not have this feature.
Line numbers: Sounds like a simple thing, but it’s often really important to know what line a certain error is on, and many basic editors do not have this feature.
![]() Multi-file support: Often a program like a game consists of more than one file. It’s nice to have some sort of tab system that allows you to edit multiple files at once.
Multi-file support: Often a program like a game consists of more than one file. It’s nice to have some sort of tab system that allows you to edit multiple files at once.
![]() Code completion: A number of editors help you write code by guessing as you type. This works surprisingly well and can really help you remember syntax.
Code completion: A number of editors help you write code by guessing as you type. This works surprisingly well and can really help you remember syntax.
![]() Remote file management: Sometimes you have files out on a web server somewhere. A number of editors allow you to work on remote files as if they were on your machine.
Remote file management: Sometimes you have files out on a web server somewhere. A number of editors allow you to work on remote files as if they were on your machine.
My current favorite editor is Komodo Edit. It does all of these things, works the same on all major operating systems, and is totally free. If you don’t already have a favorite text editor, I recommend trying this one. Check my website www.aharrisbooks.net for a link to the current version (7 as of this writing).
Graphics tools
Most games involve some form of graphics. You may be able to find everything you need, but usually you’ll need to modify or create your own graphics images. The most popular graphic editor on the planet is Adobe Photoshop. It’s very capable, but it can be expensive. I prefer Gimp, which does everything you need, and is free. Look at Chapter 11 for help and resources on using Gimp to create game graphics.
 Modern browsers (finally) support another type of graphics called vector graphics. This style of graphics can be easier for building game characters than programs like Gimp or Photoshop. My favorite vector editor is Inkscape, which is also described in Chapter 11. I used both Inkscape and Gimp to generate the graphics shown in this chapter and throughout the book.
Users often expect 3D graphics, but 3D games are much more difficult to build. If you’re interested in making your game look like a 3D game, you can use a 3D modeling tool like Blender to build your graphics and then produce 2D images for the game. Blender is also discussed in Chapter 11.
Links to all these tools are available on my website at www.aharrisbooks.net.
Audio tools
Modern games also require audio. You’ll definitely want to include sound effects. You’ll need a tool that can record and manipulate sounds. Audacity is a wonderful free tool that helps you with this process. Like all other tools, I’ve provided a link to this program on my website at www.aharrisbooks.net. You can learn more about editing sound for your games in Chapter 11.
Building Your First Game
Enough background. Let’s make a game!
The first game will be a simple take on the old “Choose your own adventure” genre. This game uses nothing but HTML and CSS and can get as simple or complicated as you want. This game highlights the adventures of an aspiring game programmer. I create it in a cartoon style (mainly because I’ve got no artistic talent). Figure 1-1 shows the first screen in the game.

Figure 1-1: The first page of my epic adventure game.
On each page, you are given a situation. Most situations involve making a choice, which takes you to a new situation.
The overall plan for the game is shown in Figure 1-2.

Figure 1-2: This diagram illustrates the overall game design.
Adventure games have a particular pattern (which computer scientists would call a finite state machine, but everyone knows gamers have more fun than computer scientists). Each situation could be considered a node, and in each node, the player has to make some sort of decision. The decision determines which node the player travels to next.
Of course, the question is how to generate the various nodes. There are many solutions, but one of the easiest is to simply build a web page for each node. That’s exactly how I do it in this chapter.
Building a Basic Page
Here’s the great thing. You can learn how to build web pages at the same time you learn how to build a node for an adventure game. If you already know how to make pages, you should still follow along because I use a new fancy-dancy form of web development in this book. Old versions of HTML were pretty limited, but the latest version (HTML5) is a fully capable game programming platform.
The basic web page is nothing but a text file. Figure 1-3 shows one example.

Figure 1-3: A basic web page.
To make this page, all you need to do is open a text editor (see “A programmer’s editor” earlier in this chapter for my suggestions on which editor to use). Then type the following code:
<!DOCTYPE HTML>
<html lang=”en-US”>
<head> <meta charset=”UTF-8”>
<title>Adventures of Goo Goo</title>
</head>
<body>
<h1>Adventures of Goo Goo</h1>
<p>
You are Goo Goo, an intrepid adventurer.
Your goal is to become a game developer.
Best of luck to you as you begin.
</p>
</body>
</html>
Although this isn’t the fanciest page on the Internet, it provides a pretty good foundation for everything I do in this book. Before you look at the details, note the following:
![]() It’s written in plain text. Even with fancy editors, web pages are really nothing more than plain old text.
It’s written in plain text. Even with fancy editors, web pages are really nothing more than plain old text.
![]() There are some funky
There are some funky <> things in there. The angle braces indicate tags. A tag is like instructions to the browser. The various tags indicate how the browser should treat the various parts of the document.
![]() Most tags are containers. Most of the tags seem to happen in pairs, for example,
Most tags are containers. Most of the tags seem to happen in pairs, for example, <head> and </head> or <p> and </p>. That’s because tags usually contain other things (like text and other tags, for example).
![]() This page is written in HTML5. If you know something about web development, you may have seen different forms of HTML (HTML4 or XHTML, most likely). This book uses HTML5, which is a bit more capable than the earlier versions. Fortunately, it’s also actually easier to use.
This page is written in HTML5. If you know something about web development, you may have seen different forms of HTML (HTML4 or XHTML, most likely). This book uses HTML5, which is a bit more capable than the earlier versions. Fortunately, it’s also actually easier to use.
![]() The code is indented. Although web browsers don’t really care how code is formatted, programmers do care about such things. Typically, I indent every time I begin a new structure, so I won’t forget to end every container. If you look carefully at the code, it’s pretty easy to see through the indentation that everything has a beginning and an end.
The code is indented. Although web browsers don’t really care how code is formatted, programmers do care about such things. Typically, I indent every time I begin a new structure, so I won’t forget to end every container. If you look carefully at the code, it’s pretty easy to see through the indentation that everything has a beginning and an end.
![]() The code doesn’t look exactly like the page. What the user sees in the web browser isn’t exactly what was written in the text editor. This is deliberate. Unlike a word-processing program, web pages are designed as code that is interpreted by the browser.
The code doesn’t look exactly like the page. What the user sees in the web browser isn’t exactly what was written in the text editor. This is deliberate. Unlike a word-processing program, web pages are designed as code that is interpreted by the browser.
Even before you understand all the details of the code, you can probably guess a lot about what’s going on. HTML is pretty easy to follow most of the time. The key to understanding HTML is to know what the various tags mean. Here are the tags used in this page:
![]()
<!DOCTYPE>: This special tag is used to indicate what kind of document is being built. The exclamation point indicates it is a special tag meant to send a message to the browser. <!DOCTYPE HTML> means the page will be built in HTML5.
![]()
<html lang = “en”>: The html tag is a container for the entire document. Web pages begin with <html> and end with </html>. In HTML5, the html tag specifies the language. I build my websites in English, so lang = “en” indicates that.
![]()
<head>: The head of a document is a lot like the engine compartment of a car. A lot of important stuff happens here, but it’s not where the users usually go. For now, the head is relatively empty, but as you write more complex games, much of your programming code will go here.
![]()
<meta charset = “utf-8”>: The meta tag provides information about the document. There are many different types of meta tags, but the most commonly used in HTML5 sets the character set. The utf-8 character set is the one usually used with English.
![]()
<title>: Each web page has a title. The title traditionally appears in the browser’s header bar (but this is not always the case). The title is also shown when a user searches for a page with a search engine. It’s important that the title describes the page.
![]()
<body>: If the head is the engine compartment, the body is where the driver and passengers go. All the content the user typically sees is described in the body section of the page.
![]()
<h1>: This tag indicates a level-one headline. An h1 tag is the most important headline on your page (so typically you’ll only have one). Subsections of your page may have level two headlines (signified by <h2>). Headlines go all the way to level six (<h6>), but it’s unusual to go much deeper than level three. (Even in a book this size, I rarely use level three.)
![]()
<p>: The p tag marks a paragraph. Paragraphs are the most important units in writing, and they are the foundation of web pages as well. Most of the text in your pages is contained inside a paragraph. You can have as many paragraphs as you want.
It’s tempting to think that using HTML is just like working in a word processor, but that’s not completely true. Most modern word processors use a technique called WYSIWYG (What You See Is What You Get). In the print world, this makes sense because the end result of a word-processed document is a print document, and printers can be controlled very precisely. The web doesn’t work that way. You web page may be viewed on a huge projector, on a big desktop monitor, on a smaller notebook, on an iPad, on a smart phone, and on a tiny feature phone screen. Each of these devices determines exactly how the page looks.
In HTML, we don’t exactly control how things look. Instead, HTML code describes what things mean. It’s a crucial difference. You’ll still get to suggest how things look with a technology called CSS, and these suggestions will usually be followed. Web coding is about trading precise control for amazing flexibility. All in all, it’s a good trade.
I’m covering HTML pretty quickly here, and it’s actually a bit more complex than I’m making it out to be. If you want a more complete introduction to HTML and CSS (and a bunch of other technologies) please check out one of my other books, HTML, XHTML, & CSS All-In-One For Dummies, published by John Wiley & Sons. It’s chock-full of information.
Dressing up the page
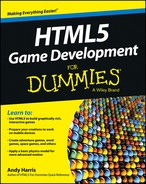
I’ve created the first page of my game, but it isn’t very exciting. It would be nice to dress it up. There are many ways to do this. The first way is to provide an image. Take a look at Figure 1-4.
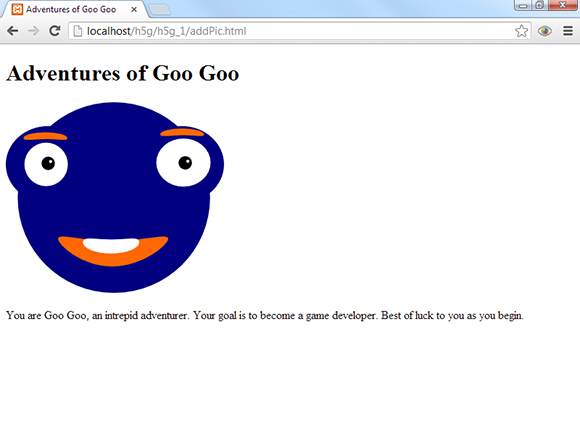
Figure 1-4: Now the page has a picture.
Adding a picture really spices up the page. It’s not the world’s greatest game yet, but at least it’s a bit more interesting than it was. Here’s the new code. (Note that I bolded the part that was added.)
<!DOCTYPE HTML>
<html lang=”en-US”>
<head>
<meta charset=”UTF-8”>
<title>Adventures of Goo Goo</title>
</head>
<body>
<h1>Adventures of Goo Goo</h1>
<p>
<img src = “GooGoo1.png”
alt = “Goo Goo makes a game!” />
</p>
<p>
You are Goo Goo, an intrepid adventurer.
Your goal is to become a game developer.
Best of luck to you as you begin.
</p>
</body>
</html>
The key to adding images is a tag called (cleverly enough) <img>. The img tag allows you to add images to your page. Here’s what you need to do to add an image to a page:
1. Obtain a picture.
This seems obvious, I suppose, but it’s true. In order to display a picture, you need to have one. You can use an image editor to create or modify a picture or grab a picture you already have.
2. Put the picture in the right format.
On the web, only a few image formats are universal. Most web images are in .png, .jpg, or .gif format. The best format for a simple line drawing like my image is .png. You may need to use your image editor to modify the image type if it’s not already in the right format.
3. Put the image file in the right place.
Typically, you’ll move the image file to the same directory as the web page itself. (I’m not a fan of a separate images directory unless there are a large number of images in a document. Things get complex enough without adding another layer.)
4. Create a container for the image.
An image is considered an inline element. That means it is meant to be placed inside some sort of container. The most common container is a paragraph, so I place the image in its own paragraph. (You can combine an image with text in the same paragraph, but the formatting becomes trickier, so I’m just making a paragraph with a single image in it.)
5. Add the <img> tag to the document.
The <img> tag tells the browser how to retrieve and display the image. It needs a little more information to do its job, so it has a couple of special elements called attributes.
6. Use the src attribute to indicate where the image is.
The src attribute is used to tell the browser where it will find the image file. If the image file is in the same directory as the HTML page, all you need to do is list the name of the image file. (Note that capitalization matters — the filename on the page must be exactly like the one in the operating system.) The filename must be enclosed within double quotes.
7. Use the alt attribute to describe the image.
It’s possible the image will not display. If there is a problem downloading the image, or the user has a visual disability, the alt tag is used to describe the image. The alt tag is also used by search engines to determine the contents of an image. Like all attributes, it is enclosed in double quotes.
8. End with a slash.
Because the <img> tag won’t contain any text content, it isn’t considered a container, and it doesn’t have a closing tag. Indicate the end of the tag with a slash character.
Providing a link
Right now, your game has a single page. That’s not much of a game, but you’re gonna fix that. One of the biggest features of HTML is how it allows you to link pages. This linking mechanism is a perfect way to make an adventure game because you can build a page for each node, and link all the nodes together to make the game. For the first link, modify the page you’re working on so it leads to the first decision. Figure 1-5 shows the newest version of the first page of your adventure. Note the link in the bottom left of the screen.
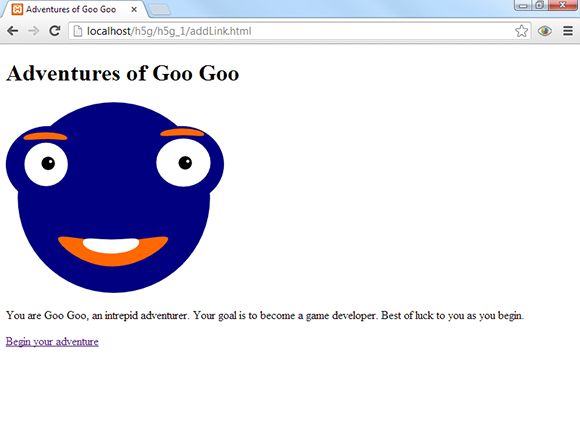
Figure 1-5: The page now has a link to the first decision.
This page is starting to look pretty good. It has a heading, an image, some text, and a link. The link looks something like ordinary text, except it is blue and underlined. If you click on it, presumably your browser will go to a new page.
The code for the new version of the page (addLink.html) builds on the previous examples. As usual, I’ve bolded the new part.
<!DOCTYPE HTML>
<html lang=”en-US”>
<head>
<meta charset=”UTF-8”>
<title>Adventures of Goo Goo</title>
</head>
<body>
<h1>Adventures of Goo Goo</h1>
<p>
<img src = “GooGoo1.png”
alt = “Goo Goo makes a game!” />
</p>
<p>
You are Goo Goo, an intrepid adventurer.
Your goal is to become a game developer.
Best of luck to you as you begin.
</p>
<p>
<a href = “chooseTool.html”>Begin your adventure</a>
</p>
</body>
</html>
The only new section is a paragraph containing a link. Here’s how you add a link:
1. Create a paragraph or other container.
A link is an inline tag (like the img tag). It cannot stand on its own, but needs to be inside a container. The paragraph is a great container, so just build a paragraph with the <p></p> set.
2. Use the <a> tag to create an anchor.
The links in a web page are called anchors and are generated by the <a> tag.
3. Add the href attribute.
The href attribute stands for hypertext reference and it indicates the file the browser navigates to when the user clicks the button.
4. Include the name of the new file.
You need a filename so the browser knows where to go when the link is clicked. You haven’t built the file yet, but that’s okay. From the diagram listed in Figure 1-2, you know that the first decision point will be “choose tool,” so call the next page “chooseTool.html”.
5. Add the text of the link.
The next text (“Begin your adventure”) appears on the web page as a link. Any text that is placed between the <a> and </a> tags is a clickable link.
6. End the anchor with </a>.
The </a> tag ends the anchor and subsequent text looks like ordinary text.
Of course, you should look at the code in your browser to see how it looks.
 If you are looking at my example online, it indeed goes to another page, but if you’re writing your own version, you’ll get an error when you click on the link. That’s exactly what you should expect because the page you’re linking to doesn’t exist yet. Just stay with me and it will all make sense soon.
Beautifying the page
The first page of your adventure works pretty well, but it sure is ugly. HTML does not produce beautiful pages, but there’s another tool that can help a lot. CSS (Cascading Style Sheets) is a technology that allows you to add visual appeal to a page described in HTML. Figure 1-6 illustrates the page with a little CSS dress-up.
CSS code is a special language that allows you to modify the visual appearance of a page. CSS and HTML work together to give you a great deal of control of your page’s appearance. There is a lot you can do with CSS, but this example adds the following features:
![]() The background of the page is yellow. You can change the background color of most elements, including the page itself. (I know you can’t see yellow in this black-and-white book, but you really should be playing along on the website.)
The background of the page is yellow. You can change the background color of most elements, including the page itself. (I know you can’t see yellow in this black-and-white book, but you really should be playing along on the website.)
![]() The headline is centered. You can also modify the alignment of text. I think headlines look better centered.
The headline is centered. You can also modify the alignment of text. I think headlines look better centered.
![]() Paragraphs are centered. I want to center each paragraph.
Paragraphs are centered. I want to center each paragraph.
![]() The anchor is black instead of the default blue. The default blue color of a link didn’t seem to fit with my color scheme, so I changed the anchor to black.
The anchor is black instead of the default blue. The default blue color of a link didn’t seem to fit with my color scheme, so I changed the anchor to black.
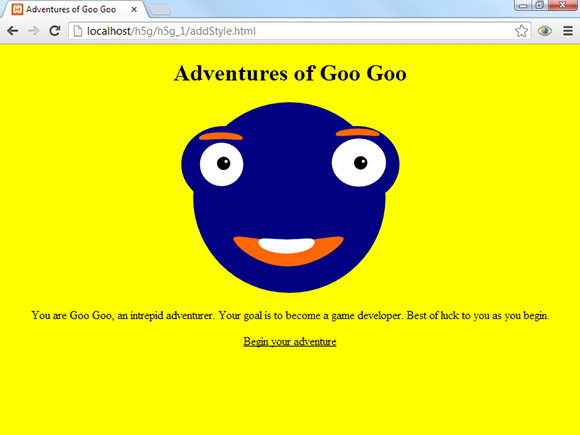
Figure 1-6: With CSS, the page looks nicer.
All of these changes are possible through CSS. Take a look at this version of the code, and you can see how I’ve added the style instructions:
<!DOCTYPE HTML>
<html lang=”en-US”>
<head>
<meta charset=”UTF-8”>
<title>Adventures of Goo Goo</title>
<style type=”text/css”>
body {
background-color: yellow;
}
p {
text-align: center;
}
h1 {
text-align: center;
}
a {
color: black;
}
</style>
</head>
<body>
<h1>Adventures of Goo Goo</h1>
<p>
<img src = “GooGoo1.png”
alt = “Goo Goo makes a game!” />
</p>
<p>
You are Goo Goo, an intrepid adventurer.
Your goal is to become a game developer.
Best of luck to you as you begin.
</p>
<p>
<a href = “chooseTool.html”>Begin your adventure</a>
</p>
</body>
</html>
As usual, I’ve bolded the interesting part. I didn’t actually change anything in the body of the page. Instead, I added a new element to the head, called a style.
The <style></style> tag is special because all code inside the style is interpreted as CSS rather than HTML code. CSS works by defining certain elements and then describing various attributes of these elements. Each type of tag in the page can have its own style rules defined. For example, look at this portion of the CSS style:
body {
background-color: yellow;
}
A number of interesting things are happening in this passage:
![]() Part of the page is specified for modification. Any part of the page that has a tag can be modified through CSS (although it doesn’t make sense to modify things the user cannot see, such as the head). This particular style segment applies to the body. Any styles applied to the body influence the entire page.
Part of the page is specified for modification. Any part of the page that has a tag can be modified through CSS (although it doesn’t make sense to modify things the user cannot see, such as the head). This particular style segment applies to the body. Any styles applied to the body influence the entire page.
![]() A list of rules will be enclosed in braces (
A list of rules will be enclosed in braces ({}). After you indicate the part of the page you want to change, you can start listing rules. The braces indicate the beginning and end of the rule sets. It’s traditional (though not absolutely necessary) to indent all the content in braces.
![]() Each rule is an attribute/value pair. CSS defines a bunch of properties or characteristics of a page element. Most of the properties can be applied to any element. Assign a value to a property to determine how the element changes.
Each rule is an attribute/value pair. CSS defines a bunch of properties or characteristics of a page element. Most of the properties can be applied to any element. Assign a value to a property to determine how the element changes.
![]() Change the
Change the background-color property. The property names are usually pretty easy to understand. They are technically a single word, so you’ll sometimes see a dash, as in background-property.
![]() Add a colon (
Add a colon (:). After you describe the property you want to change, add a colon to indicate you’re about to provide a value.
![]() Set the background color. You can then indicate a color. There are many ways to do this, but for a simple color like yellow, you can simply type the color name.
Set the background color. You can then indicate a color. There are many ways to do this, but for a simple color like yellow, you can simply type the color name.
![]() End the rule with a semicolon (
End the rule with a semicolon (;). Each rule ends with a semicolon. This is a common rule in programming languages.
![]() Repeat with more properties if you wish. I applied only one rule to the body, but you can add as many rules as you wish.
Repeat with more properties if you wish. I applied only one rule to the body, but you can add as many rules as you wish.
There are many style rules, but I needed only a few for this example. Here are the rules I used in this page:
![]()
background-color: This indicates the background color of the element. You can either indicate the color with a color name or use hex values like #FF00CC (if you know how to use them).
![]()
text-align: The text-align attribute indicates how text lines up inside the element. You can set text alignment to left, center, right, or justify.
![]()
color: The color attribute describes the foreground color of an element. As with background-color, you can often simply type a color name.
I’m showing you a small tip of the CSS iceberg here. There is much more to know about how to modify elements. If this is all new to you, I recommend my much larger book HTML, XHTML & CSS All-In-One For Dummies, published by John Wiley & Sons. I’ve also added a more complete bonus chapter on CSS on the website for this book if you need a more complete introduction.
Making a style reusable
This game will consist of many pages, and all should use the same style, so I’m going to pull out a really amazing CSS trick. You can devise a single style and reuse it among many pages. Take a look at the code for externCSS.html:
<!DOCTYPE HTML>
<html lang=”en-US”>
<head>
<meta charset=”UTF-8”>
<title>Adventures of Goo Goo</title>
<link rel = “stylesheet”
type = “text/css”
href = “gooGoo.css” />
</head>
<body>
<h1>Adventures of Goo Goo</h1>
<p>
<img src = “GooGoo1.png”
alt = “Goo Goo makes a game!” />
</p>
<p>
You are Goo Goo, an intrepid adventurer.
Your goal is to become a game developer.
Best of luck to you as you begin.
</p>
<p>
<a href = “chooseTool.html”>Begin your adventure</a>
</p>
</body>
</html>
The neat thing about this program is what’s missing: The style code is not there. Instead, you find this mysterious-looking code:
<link rel = “stylesheet”
type = “text/css”
href = “gooGoo.css” />
This little code snippet indicates that the CSS code is in another file. Essentially, it tells the browser, “Go find a file called gooGoo.css, and you’ll see the CSS code you need there.”
Of course I’ve created such a file. Look it over, and you’ll find it eerily familiar:
body {
background-color: yellow;
}
p {
text-align: center;
font-size: 200%;
}
h1 {
text-align: center;
}
a {
color: black;
}
Of course you’ve seen this before. It’s exactly the same code I used to have inside the style tags. Now, however, it’s in its own file.
This doesn’t seem like a big deal, but it’s really useful when you start building systems (like this adventure game) with multiple pages that use the same style. I put the same link code in every page, and then I can change the style of every page in the system by changing a single file. Genius!
Building the next node
That’s enough work for the first page. The good news is that the groundwork is entirely laid. The next page is easy to build. Figure 1-7 shows how it looks.

Figure 1-7: The first decision.
This second page is much like the first, except there are a few differences:
![]() The headline defines the node. Use a heading to encapsulate the current situation.
The headline defines the node. Use a heading to encapsulate the current situation.
![]() A small text segment describes the new problem. Most nodes are really decision points, so use a small text segment to illustrate the situation the adventurer currently faces.
A small text segment describes the new problem. Most nodes are really decision points, so use a small text segment to illustrate the situation the adventurer currently faces.
![]() This page has three images. I’ve created a picture to illustrate each of the two options that the user currently faces.
This page has three images. I’ve created a picture to illustrate each of the two options that the user currently faces.
![]() Two of the pictures are also links. If the user clicks either of these images (the book or the software), she is taken to the corresponding page of the game.
Two of the pictures are also links. If the user clicks either of these images (the book or the software), she is taken to the corresponding page of the game.
Look over the code for chooseTool.html, and you’ll see most of it is really familiar:
<!DOCTYPE HTML>
<html lang=”en-US”>
<head>
<meta charset=”UTF-8”>
<title>Choose your tool</title>
<link rel = ”stylesheet”
type = ”text/css”
href = ”gooGoo.css” />
</head>
<body>
<h1>Choose your tool</h1>
<p>
Will you use an expensive software tool or will you use a book to learn how to build your own games?
</p>
<p>
<a href = ”software.html”>
<img src = ”MEGPE.png”
alt = ”Expensive Game Software” />
</a>
<img src = ”GooGooConfused.png”
alt = ”confused Goo Goo”/>
<a href = ”book.html”>
<img src = ”Dummies.png”
alt = ”Dummies book” />
</a>
</p>
</body>
</html>
Building this type of node (with a choice) is pretty easy.
1. Begin with a standard HTML5 page.
Use the same framework as the first page. All the standard HTML stuff goes in there, like a head, body, h1, and a paragraph or two.
2. Add a link to the external style sheet.
Here’s where building the external style sheet pays off. Now you can simply link to the existing sheet without having to rewrite everything. Better yet, if you decide to change something, one sheet rules them all.
3. Describe the problem.
Use a standard paragraph to describe the problem.
4. Make an image for each choice.
I just drew a (bad) image for each of the options. Use the standard img tag to display the images. Remember that images belong in a paragraph. Because these images are typically displayed side by side, I put them in the same paragraph.
5. Two images are links.
The <a> tag turns text into a link, but if you surround an image with an anchor, the image becomes a link. Use the original diagram to determine what page should be displayed when the user clicks on the image.
Adding a sound effect
If the user chooses the expensive software, she is taken to a page that looks like Figure 1-8.

Figure 1-8: This page has a funny sound effect.
Most of the page is built like the other pages in this project, but it does have a new feature. Note there is a little bar under the image with a Play button. This indicates an audio sample that can be played. If the user clicks the Play button, he hears Goo Goo’s anguished cries of pain and frustration. (Seriously, you’ve got to go to the website. A book just can’t do this corny sound effect justice.)
You might wonder why the user has to click the Play button. Couldn’t I make the sound play automatically when the user gets to the page? Yes, I could, but it’s generally considered bad form to have a web page automatically play a sound without the user’s permission. It’s not a big deal in a game, though, and this particular application is somewhere between a game and a web page. Look ahead to Chapter 6 for information on how to add sound effects to your games.
Sound has long been one of the biggest headaches for web-based gaming. Web browsers could never agree on a good way to handle sound, which is one reason Flash became the de facto standard for web-based gaming.
However, HTML5 provides native audio support, so there’s finally a good way to get sound effects working in any modern browser. Look at the code for software.html, and you’ll see how it works:
<!DOCTYPE HTML>
<html lang=”en-US”>
<head>
<meta charset=”UTF-8”>
<title>Software</title>
<link rel = ”stylesheet”
type = ”text/css”
href = ”gooGoo.css” />
</head>
<body>
<h1>Software</h1>
<p>
<img src = “mad.png”
alt = “mad” /> <br />
<audio controls = ”controls”>
<source src = ”mad.ogg”
type = ”audio/ogg” />
<source src = ”mad.mp3”
type = ”audio/mp3” />
<a href = ”mad.mp3”>play sound</a>
</audio>
</p>
<p>
You chose the software, but now you have no money,
and you can’t figure out how to use it anyway.
</p>
<h2>You Lose!</h2>
<p>
<a href = “begin.html”>Try again?</a>
</p>
</body>
</html>
The new tag is called audio. It is designed to make it easy to incorporate audio clips into your web pages. Here’s how to add audio to an HTML5 web page:
1. Obtain your audio clip.
The cleanest approach is to build your own audio samples. I love Audacity, a free recording tool available for every major operating system. A link to Audacity (as well as an add-on library you’ll need for recording MP3 files) is available on the website for this book. See this book’s Introduction for more on the website and Chapter 11 for a bit more about Audacity.
2. Store MP3 and Ogg versions of your sound.
Although every modern browser supports the audio tag, they don’t all agree on the format. Some prefer MP3, and some prefer Ogg. Store both formats for the best results. (You can use the export command in Audacity to easily export files to Ogg and MP3 format.)
3. Create the <audio> tag.
The <audio> tag is a relatively new HTML5 tag. You can either place it on its own or inside a paragraph or other container. I placed mine in a paragraph because I thought it looked better. I also used a special tag called <br /> to force a line break so the audio controls show up on their own line.
4. Designate whether controls will be displayed.
Because you’re going to be polite and not automatically play the sound effect, you should let the user control the audio directly. The controls = controls attribute (defined by the department of redundancy department) does the trick.
5. Add a source element for each format.
For maximum effectiveness, I ship both an Ogg and an MP3 version of each sound effect. The source element inside the audio element allows me to define as many audio source files as I want. The browser goes through the list of sources until it finds one that works.
6. For each source, indicate the audio type.
The audio types are self-explanatory: audio/ogg or audio/mp3.
7. Include a fallback anchor.
If the user has a really old browser, you can provide a link (with an ordinary anchor tag) that plays the sound in an external window. It’s not very satisfying, but at least it works.
Add another page for a victory
Because this chapter is getting long, I simply add one more page that displays when the user makes the right choice. The final page looks like Figure 1-9.
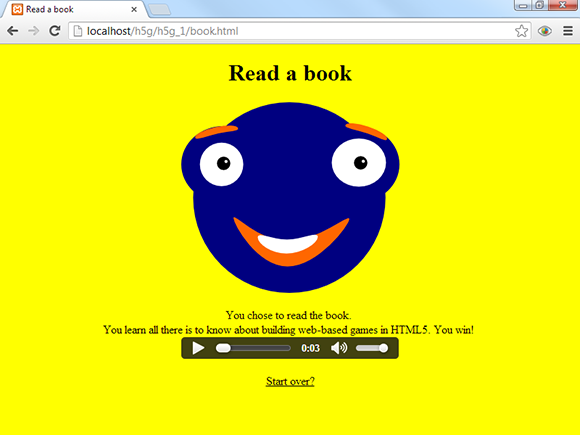
Figure 1-9: Choosing the right answer has incredible rewards.
Though you can’t tell from the screen shot, this page features another silly sound effect. You really have to look at this project on the website.
There is really nothing new about this final page. It uses the same techniques as the other pages.
Here’s the code for the book.html page:
<!DOCTYPE HTML>
<html lang=”en-US”>
<head>
<meta charset=”UTF-8”>
<title>Read a book</title>
<link rel=”stylesheet”
type=”text/css”
href=”gooGoo.css” />
</head>
<body>
<h1>Read a book</h1>
<p>
<img src = ”gooGooHappy.png”
alt = ”Happy Goo Goo” />
</p>
<p>
You chose to read the book. <br />
You learn all there is to know about building
web-based games in HTML5. You win! <br />
<audio controls = ”controls”>
<source src = ”whooHoo.mp3”
type = ”audio/mp3” />
<source src = ”whooHoo.ogg”
type = ”audio/ogg” />
<a href = ”whooHoo.mp3”>WooHoo</a>
</audio>
</p>
<p>
<a href = ”begin.html”>Start over?</a>
</p>
</body>
</html>
This simple page has all the same features as the other pages.
Making it your own
Of course, this adventure game is pretty short. It needs several more nodes. However, you know everything you need to make your own. Try designing your own game. Then use HTML5 to create each node, use CSS to design the pages, and add links to connect the nodes.