Chapter 6
Creating Game Elements
In This Chapter
![]() Creating your own sprite objects
Creating your own sprite objects
![]() Adding properties and methods to custom objects
Adding properties and methods to custom objects
![]() Incorporating sound effects
Incorporating sound effects
![]() Detecting collisions between sprites
Detecting collisions between sprites
![]() Setting up a basic timer
Setting up a basic timer
Games have things moving around, crashing into each other, and making noise. Obviously, to have a game, you’ll need these elements. You can build objects with the Sprite element built into the simpleGame library (refer to Chapter 5 if you need a review of building simple games with this library).
Building Your Own Sprite Objects
To make very powerful games, you’ll want to be able to build your own sprites that do exactly what you want them to do.
In this chapter, you find out how to build your own new types of objects based on existing objects. After you make an object, you can give it characteristics and behavior.
Making a stock sprite object
To get started, take a look at this simple object:
<!DOCTYPE HTML>
<html lang=”en-US”>
<head>
<meta charset=”UTF-8”>
<title>critter</title>
<script type=”text/javascript”
src = ”simpleGame.js”>
</script>
<script type=”text/javascript”>
var game;
var critter;
function init(){
game = new Scene();
critter = new Sprite(game, ”critter.gif”, 30,30);
critter.setSpeed(0);
game.start();
}
function update(){
game.clear();
critter.update();
}
</script>
</head>
<body onload = ”init()”>
</body>
</html>
This is an extremely simple program. It creates a scene and a single sprite called critter. Right now, the critter doesn’t do much. Figure 6-1 shows what it looks like, but it’s just an object that sits there and does nothing.
Building your own sprite
Sprite objects are great, but wouldn’t it be awesome if the critter itself were an object and even better if it were a new object based on the sprite? It could start with all the basic features of the sprite, but you could add new capabilities to differentiate critters from other sprites.

Figure 6-1: This is a sprite right out of the box with no modifications.
Take a look at CritterConstructor.html to see a way to do so:
<!DOCTYPE HTML>
<html lang=”en-US”>
<head>
<meta charset=”UTF-8”>
<title>critter</title>
<script type=”text/javascript”
src = ”simpleGame.js”>
</script>
<script type=”text/javascript”>
var game;
var critter;
function Critter(){
tCritter = new Sprite(game, ”critter.gif”, 30, 30);
tCritter.setSpeed(0);
return tCritter;
}
function init(){
game = new Scene();
critter = new Critter();
game.start();
}
function update(){
game.clear();
critter.update();
}
</script>
</head>
<body onload = ”init()”>
</body>
</html>
This program works exactly like the last one, but it’s organized a bit differently.
![]() There is a function called
There is a function called Critter(). It’s important that the function is the name of an object and it’s also capitalized. This is a very special function, because it’s used to define a Critter() object.
![]() The
The Critter() function creates a temporary sprite object. Inside the Critter() function, you see a temporary sprite object called tCritter(). This is a new sprite.
![]() Modify the temporary sprite as much as you want. To make a new type of object in JavaScript, you essentially make a new object and then modify it to get exactly the behavior you want. In this case, I set the critter’s default speed.
Modify the temporary sprite as much as you want. To make a new type of object in JavaScript, you essentially make a new object and then modify it to get exactly the behavior you want. In this case, I set the critter’s default speed.
![]() Return the temporary
Return the temporary Critter object. The end of the special Critter() function returns the sprite, but now it’s not just a sprite, but a critter.
The point of this mechanism is to have new kinds of objects available. The Critter is much like a Sprite, but it can have new behavior and characteristics. This is an incredibly powerful feature.
 The technical term for making a sprite act like it’s descended from another sprite is inheritance. JavaScript’s inheritance model is usually done in a different way (using a mechanism called prototyping). After much consideration, I chose to use this simpler approach to inheritance for this book. It is not the way formal JavaScript inheritance is done, but the mechanism shown here is easier to understand than the “right” way, and it’s similar to how inheritance is done in many other languages. There is nothing at all wrong with this approach, but you’ll sometimes see other approaches to inheritance in JavaScript.
Using your new critter
The Critter() function gives you the ability to create new critter objects. This changes the way you write your init() function:
function init(){
game = new Scene();
critter = new Critter();
game.start();
}
The only thing that’s really new is the way the critter is created. Now that you have a Critter() function, you can use it to build new critters. This special type of function (one that’s designed to return a new class) is called a constructor. When there’s only one critter to build, this may not seem like a big deal, but building objects with constructors is the key to building large and complex games with many kinds of interrelated objects.
Note that critter and Critter (watch the capitalization) are different things. Object definitions are normally written with the first letter shown in uppercase (the term is capitalized), and variables normally begin with a lowercase letter. In this situation, you’re creating a variable called critter that is of the new type Critter. When you’ve got only one copy of a custom type, you often use this lower-upper trick for naming.
If you already know something about object-oriented programming (OOP) in another language, like C++ or Java, you’re probably pretty confused. JavaScript seems to be object-oriented, but not in a way you’re familiar with. That’s true. JavaScript does have a form of OOP, but the mechanisms are different. Don’t get too hung up on the details. The important ideas (inheritance, encapsulation, and polymorphism) are all there, but it may not look exactly like what you’ve already seen. Don’t panic, and see if it all falls together as the examples become more involved.
Adding a property to your critter
One of the most interesting things about objects is that they are variables that can contain other variables. When a variable exists in the context of an object, the variable is called a property. Properties are the characteristics of an object, such as its speed or its size. As an example, please look at the following variation of the critter code:
<!DOCTYPE HTML>
<html lang=”en-US”>
<head>
<meta charset=”UTF-8”>
<title>critterSpeed.html</title>
<script type=”text/javascript”
src = ”simpleGame.js”>
</script>
<script type=”text/javascript”>
var game;
var critter;
function Critter(){
tCritter = new Sprite(game, ”critter.gif”, 30, 30);
tCritter.speed = 3;
tCritter.setSpeed(tCritter.speed);
return tCritter;
}
function init(){
game = new Scene();
critter = new Critter();
game.start();
}
function update(){
game.clear();
critter.update();
}
</script>
</head>
<body onload = “init()”>
</body>
</html>
A property is simply a special variable associated with an object. Normally, you use object.property to designate that a particular property is associated with a particular object. For this example, I added a speed property to the Critter object.
1. Build a property by referring to it.
In JavaScript, you can simply refer to a variable, and it will be created. This is also true in objects. Simply make a reference to Critter.speed, and the Critter object magically has a speed property.
2. Create properties in the constructor.
You can technically create or refer to a property anywhere, but normally they’re created in the constructor.
3. Use the property like any other variable.
The property acts like any other variable, so you can use it to actually change the speed of the object.
Yes, I know this is more work than you need here because you could simply pass a number or ordinary variable to the setSpeed() method. However, I’m setting up the next example, which creates a custom behavior for the Critter class.
Adding methods to classes
If properties describe the characteristics of an object, methods describe the behavior. A method is a function associated with an object. You build methods very much like creating a property, but rather than adding a simple value, you assign an entire function to a name.
For example, the next version of the critter has a changeSpeed() method. When the user presses the up arrow, the critter will speed up, and when the user presses the down arrow, the critter will slow down (and eventually go the other direction). Here’s the code for the critter with its new method in place:
<!DOCTYPE HTML>
<html lang=”en-US”>
<head>
<meta charset=”UTF-8”>
<title>critterChangeSpeed.html</title>
<script type=”text/javascript”
src = ”simpleGame.js”>
</script>
<script type=”text/javascript”>
var game;
var critter;
function Critter(){
tCritter = new Sprite(game, ”critter.gif”, 30, 30);
tCritter.speed = 0;
tCritter.checkKeys = function(){
if (keysDown[K_RIGHT]){
this.speed++;
}
if (keysDown[K_LEFT]){
this.speed--;
}
tCritter.setSpeed(this.speed);
} // end method
return tCritter;
}
function init(){
game = new Scene();
critter = new Critter();
game.start();
}
function update(){
game.clear();
critter.checkKeys();
critter.update();
}
</script>
</head>
<body onload = “init()”>
</body>
</html>
Note that I’m not showing a screen shot of this program because it looks exactly like the previous critter programs, except that it moves when the user presses the keys. For this and most examples, a static image will not be enough to help you see what’s going on. You really need to see this program in action on my website: www.aharrisbooks.net.
In this new version of the program, the Critter object has a new behavior identified. Essentially, a method is nothing more than a function defined inside a class (which is also a function — my head is hurting here). Don’t panic. It’s really not that difficult to figure out. You’re telling the system what to do if the user ever asks the Critter object to change speed.
1. Create a new property called checkKeys.
In JavaScript, a property and a method are exactly the same thing. If you attach a regular variable to an object, it’s a property. If you attach a function to it, it’s a method. (Property names are normally nouns. Method names are normally verbs or verb phrases.)
2. Build a new method to contain the behavior.
changeSpeed isn’t an ordinary property, but a method, so you’ll attach a function to it. (For the Computer Science majors out there, building an anonymous function on the fly like this is an example of a lambda function. Watch for it on the midterm exam!)
3. Check for keyboard input.
Use the mechanism described in Chapter 5 to check to see whether the user presses the left or right arrow. The only difference is this: When you make a Critter object, it will already know how to look for its own key presses.
4. Change the speed based on keyboard input.
If the user presses right, increase the speed (at the default direction, positive speeds move the sprite to the right). If the user presses left, decrease the speed.
5. Use the setSpeed() method to change the actual speed.
The Sprite object that provides the blueprint for critter already has a setSpeed() method. Use this method to make the object move at the indicated speed.
6. Inside a method, use the this keyword.
When you create a method inside a constructor, the computer can get a bit confused about the names of things. For the most part, you’re adding stuff to a temporary critter called tCritter. However, when you’re done, the actual critter you create will normally be called something else. To eliminate confusion, if you need to refer to other properties or methods of the object you’re modifying, use the general keyword this rather than the actual name of the object (which will probably change by the time the method is being called).
7. Modify the update() function so the critter checks the keyboard.
Remember, the main update() function happens once per frame. Anything you want to happen once per frame should be called in update(). Add a call to critter.checkKeys(). This will remind the critter to check the keyboard every frame and change its speed as needed.
Sound Programming Principles
Sound effects have long been one of the biggest weaknesses of the web as a gaming platform. Web browsers had very inconsistent and troublesome audio capabilities. Fortunately, HTML5 solves the sound issue (at least at some level).
The simpleGame library makes it very easy to build new sounds by adding a Sound object. Here’s a very simple program that plays a sound effect:
<!DOCTYPE HTML>
<html lang=”en-US”>
<head>
<meta charset=”UTF-8”>
<title>sound.html</title>
<script type=”text/javascript”
src = ”simpleGame.js”></script>
<script type=”text/javascript”>
var scene;
var ribbit;
function init(){
scene = new Scene();
owMP3 = new Sound(“ow.mp3”);
owOgg = new Sound(“ow.ogg”);
scene.start();
} // end init
function update(){
if (keysDown[K_SPACE]){
owMP3.play();
owOgg.play();
} // end if
} // end update
</script>
</head>
<body onload = “init()”>
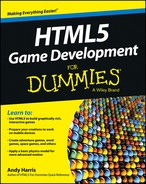
<div>DO NOT press the space bar!!</div>
</body>
</html>
Sound effects are easy to manage with the simpleGame library:
1. Create your sound effect.
Look over Chapter 11 for information on building and modifying sound effects, or find an audio file. The best formats are mp3 and ogg. Put your audio file in the same directory as your program.
To maximize browser compatibility, continue to Step 2.
2. Make a variable to hold your sound effect.
Like every game asset, you’ll have a variable containing your sound. Define the variable outside any functions.
3. Build a Sound object to initialize your sound effect.
The simpleGame library has a Sound object. Create an instance of this object to build your sound. The object requires one parameter: the name of the file containing your sound effect. Normally, you’ll do this in the init() function of your game.
4. Play the sound with the play() method.
Once you’ve defined a sound effect, you can play it back easily with the sound object’s play() method.
This program is shown in Figure 6-2, but understandably, it won’t be very interesting in the book. You really need to view it at www.aharrisbooks.net to get the full effect.
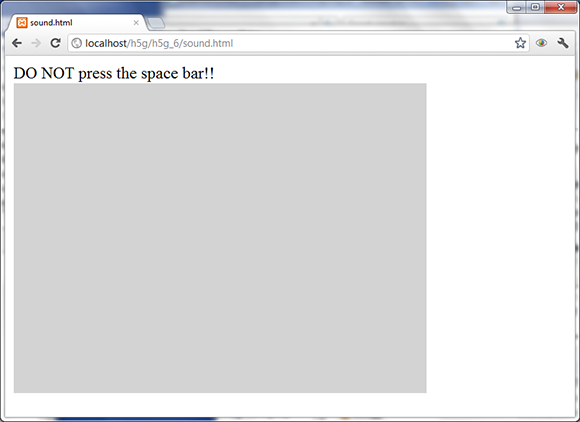
Figure 6-2: Press the spacebar to hear the sound.
Game Programming’s Greatest Hits!
The most interesting things in video games happen when sprites conk into each other. Game engines normally have some sort of tool for testing whether two sprites are overlapping. This is called collision detection, and it can be done a number of ways. For this example, I’ll use the standard bounding rectangle scheme. It’s not perfect, but it’s very easy to implement and is commonly used.
Setting up bounding rectangle collisions
Take a look at colTest.html as shown in Figure 6-3, and you’ll see a simple example.

Figure 6-3: A Collision message appears when the critter collides with the box.
In the colTest.html example, the user moves the critter with the mouse, and you’ll get a message when the critter is touching the box in the middle of the screen.
<!DOCTYPE HTML>
<html lang=”en-US”>
<head>
<meta charset=”UTF-8”>
<title>colTest.html</title>
<script type=”text/javascript”
src = ”simpleGame.js”></script>
<script type=”text/javascript”>
var game;
var box;
var critter;
var output;
function init(){
game = new Scene();
game.hideCursor();
box = new Sprite(game, ”simpleBox.png”, 50, 50);
critter = new Sprite(game, ”critter.gif”, 50, 50);
output = document.getElementById(”output”);
//give box fixed position
box.setPosition(200, 150);
box.setSpeed(0);
//critter controlled by mouse
critter.setPosition(100, 100);
critter.setSpeed(0);
critter.followMouse = function(){
this.setX(document.mouseX);
this.setY(document.mouseY);
} // end followMouse
game.start();
} // end init
function update(){
game.clear();
critter.followMouse();
checkCollisions();
box.update();
critter.update();
} // end update;
function checkCollisions(){
if (box.collidesWith(critter)){
output.innerHTML = “Collision”;
} else {
output.innerHTML = “No collision”;
} // end if
} // end checkCollisions
</script>
</head>
<body onload = “init()”>
<div id = “output”>empty</div>
</body>
</html>
A number of interesting things are happening in this code:
1. Hide the normal mouse cursor.
When you’re going to have some other object follow the mouse, you normally want to hide the normal arrow cursor. In simpleGame, use the game.hideCursor() method to hide the mouse cursor inside the game screen.
2. Create more than one sprite.
It takes two to tango, or collide. In this example, I have a box that will remain stationary, and a critter that follows the mouse.
3. Give the critter a followMouse() method.
In this example, you have the critter follow the mouse. Begin by creating a followMouse() method.
4. Determine the mouse’s position.
The mouse position is determined (in simpleGame.js) with the document.mouseX and document.mouseY properties.
5. Copy the mouse position to the critter position.
Use the mouse’s x position to set the critter’s x position, and repeat with y.
6. Call the critter’s followMouse() method every frame.
As usual, the update() function is where you put code that should happen repeatedly.
If you play around with the colTest.html page, you’ll probably notice that the collisions are not exact. It’s possible to have a collision register even when the critter isn’t actually touching the box. This is important because simple Game uses a scheme called bounding box collisions. This means you’re not actually checking to see whether the images collide but whether the rectangles around the images collide. In this example, the difference is minor, but you’ll sometimes see significant errors with this mechanism, especially with elements that are long and thin. Figure 6-4 illustrates the problem with bounding rectangles. As a sprite rotates, the size of the bounding rectangle can change.
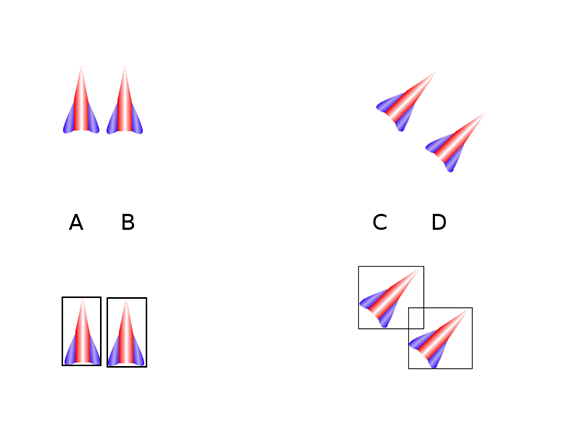
Figure 6-4: A and B are not colliding, but C and D are!
Distance-based collisions
An alternative form of collision detection, called bounding circle collisions, is available. With this mechanism, you simply calculate the distance between the center of two sprites, and if that value is smaller than some threshold, you consider it a collision. This approach has two advantages:
![]() The collision distance is constant.The distance between image centers will not change when images are rotated, even if the images change size.
The collision distance is constant.The distance between image centers will not change when images are rotated, even if the images change size.
![]() The collision threshold can be varied. You can set any sensitivity you want. Set a large collision radius for easy collisions and a smaller one when you want collisions to be triggered only when the sprites are very close to each other.
The collision threshold can be varied. You can set any sensitivity you want. Set a large collision radius for easy collisions and a smaller one when you want collisions to be triggered only when the sprites are very close to each other.
The simpleGame library Sprite object has a distanceTo() method, which calculates the distance from one sprite to another. You can see an example of this code in the distance.html example:
<!DOCTYPE HTML>
<html lang=”en-US”>
<head>
<meta charset=”UTF-8”>
<title>distance.html</title>
<script type=”text/javascript”
src = ”simpleGame.js”></script>
<script type=”text/javascript”>
var game;
var box;
var critter;
var output;
function init(){
game = new Scene();
game.hideCursor();
box = new Sprite(game, ”simpleBox.png”, 50, 50);
critter = new Sprite(game, ”critter.gif”, 50, 50);
output = document.getElementById(”output”);
//give box fixed position
box.setPosition(200, 150);
box.setSpeed(0);
critter.setPosition(100, 100);
critter.setSpeed(0);
//critter controlled by mouse
critter.followMouse = function(){
this.setX(document.mouseX);
this.setY(document.mouseY);
} // end followMouse
game.start();
} // end init
function update(){
game.clear();
critter.followMouse();
checkDistance();
box.update();
critter.update();
} // end update;
function checkDistance(){
dist = box.distanceTo(critter);
if (dist < 50){
output.innerHTML = “Collision: “ + dist;
} else {
output.innerHTML = “No collision: “ + dist;
} // end if
} // end checkDistance
</script>
</head>
<body onload = “init()”>
<div id = “output”>empty</div>
</body>
</html>
The distance-based collision method is very similar to the bounding-rectangle version. Create a checkDistance() function that will act just like the old checkCollisions(). Here are the steps for what happens in checkDistance:
1. Find the distance between the two sprites.
Use the sprite’s distanceTo() method to determine the distance between the two sprites.
2. If the distance is less than some threshold, count it as a collision.
Generally I use the width of the smaller sprite as a starting point for a collision threshold, but you can adjust this to make collisions more or less likely.
3. Report the collision status.
In this example, I simply print “collision” or “no collision,” but in a real game, collisions are triggers for other actions: increasing the score, decreasing the number of lives, changing the speed or position of the collided elements, or whatever. (Hopefully, it involves explosions.)
I’m not showing a screen capture of the distance-based collision program because to the user it looks exactly like the earlier collision routine. Please run it in your own browser to see how these collision schemes compare.
It’s All About Timing . . .
Often the passage of time will be an element in your games. Racing games are all about speed, or you may have a time limit for performing some task. The simpleGame library includes a very handy timer object that allows you to manage time easily. The Timer object is created like any other JavaScript object. It has three methods:
![]()
reset(): This function initializes the timer and starts the elapsed time counter.
![]()
getCurrentTime(): This function returns the current system time at the moment it’s called. (Note that the time is in a special integer format, and it will not be recognizable by human readers.)
![]()
getElapsedTime(): Returns the number of seconds since the timer was created or the last reset (whichever is more recent).
In JavaScript and most other languages, date and time information is generally stored in a special integer format. Time is actually counted as a huge integer showing the number of milliseconds since midnight January 1, 1970. Although this may seem like a really complicated scheme, it’s actually perfect for your use because what you really want to know is how much time has elapsed between two events. If you want to actually get the current date and time in a human-readable format, look up the JavaScript Date object. I actually used this object to create the Timer object in the simpleGame library.
For an example of timing, look at timerDemo.html:
<!DOCTYPE HTML>
<html lang=”en-US”>
<head>
<meta charset=”UTF-8”>
<title>timerDemo</title>
<script type=”text/javascript”
src = ”simpleGame.js”></script>
<script type=”text/javascript”>
var timer;
var output;
var game;
function init(){
game = new Scene();
output = document.getElementById(”output”);
timer = new Timer();
timer.reset();
game.start();
} // end init
function update(){
game.hide();
currentTime = timer.getElapsedTime();
output.innerHTML = currentTime;
} // end update
function reset(){
timer.reset();
} // end reset
</script>
</head>
<body onload = “init()”>
<div id=”output”>empty</div>
<button onclick = “reset()”>
reset timer
</button>
</body>
</html>
This example (illustrated in Figure 6-5) demonstrates a simple timer. It displays the number of seconds the page has been running. The timer can be reset with the (cleverly named) Reset Timer button.
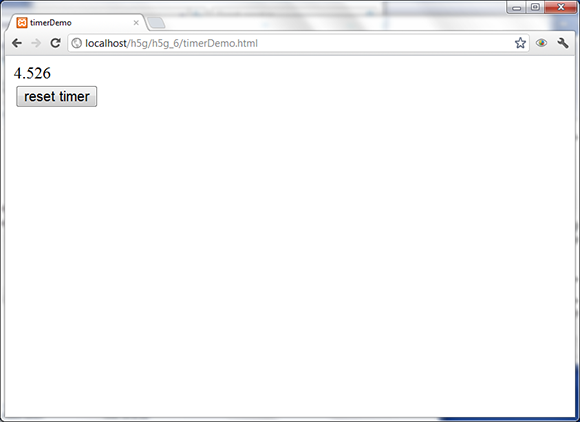
Figure 6-5: This page has a simple timer.
This program is relatively simple, but it illustrates some very powerful ideas. Use this process to build your own time-sensing game:
1. Create a variable for the timer.
This should be getting familiar. All the interesting elements are objects, and the timer is no exception. Create a variable called timer that will be an object of type Timer.
2. Reset the timer.
Be sure the timer starts out at zero.
3. Get the elapsed time in every frame.
In the update() function, call the timer’s getElapsedTime() method to find out how much time has passed and copy this value to the output area.
4. Reset the timer when the user presses the button.
When the user presses the reset button, call the timer’s reset() method to reset the elapsed time back to zero.
5. Hide the main scene.
This program uses the main loop from simpleGame, but it doesn’t really need to display the scene. For this reason, the Scene object has a hide() method. You can also display the scene later with its show() method.