Chapter 8
Motion and Animation
In This Chapter
![]() Understanding the basic physics principles used in gaming
Understanding the basic physics principles used in gaming
![]() Adding a force vector to your sprites
Adding a force vector to your sprites
![]() Using a force vector for space simulation
Using a force vector for space simulation
![]() Adding drag and skidding behavior
Adding drag and skidding behavior
![]() Working with gravity
Working with gravity
![]() Building multi-image animations
Building multi-image animations
Sprites move around on the screen. That’s the central part of most games. But if you’ve looked at Chapters 6 and 7, you’ve seen that the sprite motion was somewhat simplistic in those chapters. Now you find out how to add more zip to your sprites. You make sprites accelerate smoothly, slow down with drag, skid around corners, and fall off cliffs.
All of these fun effects are made possible by understanding a little about how things move in the real world. In school, they called that physics class. Don’t worry, though. This will be the most fun you’ve ever had with physics. We make missiles.
Physics — Even More Fun Than You Remember
In prior chapters, I explain how to build a game, how sprites and scenes work together, and how to use sprites to make all your game elements. The simpleGame.js library supports a nice form of motion using speed and direction, but often you will want more direct control of motion. When you understand a little more about how objects move in the real world, you will have a head start on making more interesting motion in your games. Understanding how real objects move will give you access to realistic acceleration, skidding, space-based motion, and gravity effects. These can add a great deal of interest to your games.
Newton without all the figs
Sir Isaac Newton would have been a terrific game programmer. He came up with a number of observations about how things move. These observations have become immortalized as Newton’s Laws of Motion. Newton’s laws do a pretty good job of describing how things move, and if you understand them, you can create a reasonable approximation of real-world motion. Of course, being an eighteenth-century scholar, Newton was a bit stuffy. I present my own version of Newton’s laws of motion:
![]() If it’s moving, it’s moving. If it ain’t, it ain’t.
If it’s moving, it’s moving. If it ain’t, it ain’t.
A more official version of Newton’s first law goes like this: “An object in motion stays in motion, and an object at rest stays at rest.” If an object is not moving, it won’t start until some kind of force causes it to move. If it’s currently moving, it will stay moving unless some kind of force stops it. If a ball is rolling, it will continue rolling, but (at least on earth) it will eventually stop because it will encounter wind resistance and rolling resistance. In a game, we’re constantly making things start and stop moving, but so far it’s been done in an unrealistic manner. Newton’s first law explains that you need force to get motion.
![]() If you want it to go farther, kick it harder.
If you want it to go farther, kick it harder.
My version has a certain style, but Newton expressed this idea in a math formula (f = ma). What it really means is that there is a simple mathematical relationship between the mass (m) of an object, the force (f) applied to that object, and the acceleration (a) of the object. If you know any two variables, you can do a little algebraic magic to find the third. This second law tells how much force you need to get the motion you want (or how much motion you’ll get with a given amount of force).
![]() When you throw a ball, the ball throws you.
When you throw a ball, the ball throws you.
Newton’s third law is really useful for engineers because it explains how to apply a force. His original version goes something like this: “For every action, there’s an equal and opposite reaction.” Imagine you’re in an art museum standing on a skateboard and holding a bowling ball. (I don’t know how you got into this situation. Just go with me here.) If you throw the bowling ball from the front of the skateboard, a number of interesting things will happen. The ball will move forward, but you and the skateboard will move backward. Mayhem will ensue until the big guys with no sense of humor make you leave the museum. Newton predicted that applying a force in one direction automatically applies a force in the opposite direction. Presumably he did not destroy any art galleries in the process. This is useful to game programmers because it helps us see the relationship between applying a force and seeing the results.
Phuzzy physics
Don’t panic. I’m not going to make you start doing all kinds of calculations. The main thing to get here is how physics relates to the gaming world. In the simpleGame library, I’ve provided a simple kind of motion that’s really easy to understand. If you’ve gone through some of the earlier chapters, you’ve already used this basic mechanism. Every object can have a position, a speed, and a direction. This is easy to work with, but it’s a little simplistic. A lot of motion doesn’t work like that: Cars skid sideways, gravity pulls helicopters downward, and spacecraft often travel backward. You don’t have to get all the math exactly right, but you need to understand the big ideas.
In a game, you can set an object’s position to whatever you want. It’s perfectly reasonable to set an object’s position directly, and the setPosition() method does exactly that. However, it isn’t satisfying.
In the real world, you can never actually set the position of anything. Instead, the object has a position, which is modified by a motion vector. The motion vector is the combination of speed and direction that determines how an object is currently moving. In the simpleGame library, you can also manage the motion vector. The setSpeed() and setAngle() methods directly set the speed and angle.
But this is also unrealistic. In the real world, you can’t directly change the motion, either. Instead, you have to apply a force vector. A force vector influences the motion vector, which in turn influences the position. To get more realistic motion, you don’t directly set position or motion; instead, you use force vectors to indirectly change the motion, which will change the position.
All of the interesting motion techniques in this chapter use this technique. Rather than changing the speed and direction directly, they apply a force vector to the sprite, which changes the sprite’s motion. It’s a really powerful idea.
The Sprite object has a function called addVector(degrees, speed).
This function adds a force vector to the current object in the specified direction and speed. The addVector() function is the secret to all the interesting motion effects. It expects an angle in degrees and a force in pixels per frame as parameters.
Lost in Space
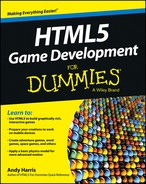
Take a look at space.html. This simple game (shown in Figure 8-1) utilizes the control scheme made famous in the classic games Asteroids and Spacewar! (Though Asteroids is better-known, Spacewar! is by far the earlier and more influential game.)
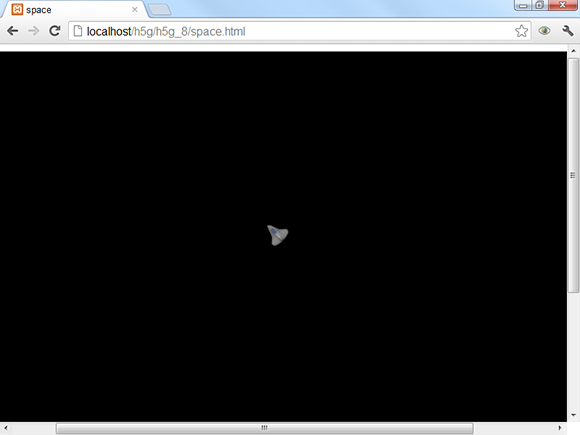
Figure 8-1: The spaceship moves following Newton’s laws.
Like all the examples in this chapter, the motion of the objects is the interesting thing, so a static screen shot is simply not adequate. You’ll need to see the example on my website (www.aharrisbooks.net) to get the full experience.
Becoming a space cadet
The ship is controlled by the arrow keys, but Newton’s effect is easier to see in space than on the ground (no pesky drag forces to get in the way). The left- and right-arrow keys rotate the ship, but they do not affect the ship’s motion. The up arrow fires a rocket, which adds a force vector in the direction the ship is currently facing.
Here’s the code:
<!DOCTYPE HTML>
<html lang=”en-US”>
<head>
<meta charset=”UTF-8”>
<title>space</title>
<script type=”text/javascript”
src = “simpleGame.js”></script>
<script type=”text/javascript”>
var ship;
var game;
function Ship(){
tShip = new Sprite(game, “ship.png”, 25, 25);
tShip.setSpeed(3);
tShip.checkKeys = function(){
if (keysDown[K_LEFT]){
this.changeImgAngleBy(-5);
}
if (keysDown[K_RIGHT]){
this.changeImgAngleBy(5);
}
if (keysDown[K_UP]){
this.addVector(this.getImgAngle(), .1);
}
} // end function
return tShip;
} // object definition
function init(){
game = new Scene();
ship = new Ship();
game.setBG(“black”);
game.start();
} // end init
function update(){
game.clear();
ship.checkKeys();
ship.update();
} // end update
</script>
</head>
<body onload = “init()”>
</body>
</html>
Building the space simulation
This example is similar to motion examples described in Chapters 6 and 7. Here’s the rundown:
1. Begin the example in the normal way.
Like most simpleGame demos, begin with a sprite and a scene. Because the ship will have a custom method, you make it a unique object. Check Chapter 6 if you need a refresher on how to build a custom object.
2. Give the ship a checkKeys() method.
The checkKeys() method looks for key presses and changes the ship’s behavior accordingly.
3. Change the image angle.
A sprite actually has two distinct angles. It can have an angle that it’s pointing (called the imgAngle in simpleGame) and the angle it’s moving (called the moveAngle). When you change the angle (as you do in many examples throughout the book), you’re changing both the movement and the image angles on the assumption that the object will simply travel in the direction it’s facing. For simple examples this is fine, but many kinds of motion require decoupling the image and motion angles. The changeImgAngleBy() method allows you to change the direction the image is pointing without changing the motion angle. (There is a changeMotionAngle() method, too, but it isn’t used very often.)
4. Add a force vector to simulate thrust.
When the user presses the up arrow, the ship fires its main rockets. This adds a small force vector in the direction the ship is currently facing. Use the getImgAngle() method to determine the direction the ship is currently facing, and use this value to specify where the force should be added. Because this code is happening in the animation loop and is amplified as the arrow key is held down, only a very small force is needed.
Don’t Be a Drag — Adding Drag Effects
The vector addition principle can be useful in other ways. For one, it can lead to more accurate land-vehicle behavior. Imagine my car is stuck in a bad neighborhood in the middle of the night (again). I can’t simply change the position of the car directly. I can’t even change its motion. What I have to do instead is add a force. When I add force (by pushing the car while murmuring affectionately to this unreliable piece of transportation), I slowly add to the motion vector. Eventually, the car starts moving. If I stop applying force, it will eventually stop as wind resistance and rolling resistance slow the car down.
Drag racing
The drag.html example illustrated in Figure 8-2 shows a realistic car that accelerates slowly and slows to a stop as the accelerator (in this case, the up arrow) is released.
As before, you’ll really need to see the program in action to appreciate its behavior.

Figure 8-2: This car has smooth acceleration and coasts to a stop.
Again, the code is probably familiar from Chapters 6 and 7:
<!DOCTYPE HTML>
<html lang=”en-US”>
<head>
<meta charset=”UTF-8”>
<title>Drag</title>
<script type = ”text/javascript”
src = ”simpleGame.js”></script>
<script type=”text/javascript”>
var game;
var boat;
function Car(){
tCar = new Sprite(game, ”car.png”, 100, 50);
tCar.checkKeys = function(){
console.log(this.speed);
if (keysDown[K_LEFT]){
this.changeImgAngleBy(-5);
}
if (keysDown[K_RIGHT]){
this.changeImgAngleBy(5);
}
if (keysDown[K_UP]){
this.addVector(this.imgAngle, 2);
}
//move in the current direction
this.addVector(this.imgAngle, 2);
} // end checkKeys
tCar.checkDrag = function(){
speed = this.getSpeed();
speed *= .95;
this.setSpeed(speed);
} // end checkDrag
return tCar;
} // end car def
function init(){
game = new Scene();
game.setBG(“#666666”);
car = new Car();
game.start();
} // end init
function update(){
game.clear();
car.checkKeys();
car.checkDrag();
car.update();
} // end update
</script>
</head>
<body onload = “init()”>
</body>
</html>
Implementing drag
This example is similar to the critter app illustrated in Chapter 6, but this version uses a more realistic force-based motion. When the user presses the up arrow, the car builds up speed. If the user leaves the up arrow pressed, the car reaches a top speed naturally. When the user releases the up arrow, the car gradually slows and eventually stops. Force vectors are the key.
Here’s how it works:
1. Build a basic vehicle.
The starting place for this type of motion is very familiar if you’ve examined the other examples in this chapter. Create a custom sprite with a checkKeys() method, and check for all the normal arrow keys. The code for checking left and right arrows is exactly what you expect.
2. Move forward with a force vector.
The code for moving forward is slightly different. Rather than simply modifying the speed directly, apply a force in the car’s current direction. Use the sprite’s getImgAngle() method to determine which direction the car is pointing, and add a small force in that direction.
3. Create a checkDrag() method.
Cars don’t just keep going without power. Wind and ground resistance will slow them down, and eventually they will stop. Simulate the various drag forces by adding a checkDrag() method to your object.
4. Multiply the speed by a drag factor.
For this example, the various drag forces will rob the car of 5 percent of its speed every frame. Remember that the game is running at 20 frames per second, so the drag force is quite substantial. You can achieve the drag effect in many ways (add a force vector opposite the car’s direction, for example), but the easiest way is to multiply the car’s speed by some value smaller than 1.
5. No brakes!
You can add brakes, but I didn’t bother. What self-respecting arcade car has brakes? Seriously, you might want to add a down-arrow input, but it shouldn’t be necessary because the car will slow down on its own.
6. Season to taste.
This example provides a rough outline, but you can modify a number of values to get exactly the car performance you want. You can simulate a more powerful engine (or a smaller mass) by increasing the force vector when you press the accelerator. You can simulate a more responsive suspension by altering the turning rate if the user presses the right or left arrows. You can also simulate a more or less efficient car by modifying the drag ratio. Right now, the car turns at any speed, but you can prevent left- and right-arrow inputs if the car is below a certain speed.
Do You Catch My Drift?
You can use force vectors in another interesting way. Many racing games include skidding or drifting mechanisms. Getting this behavior exactly right requires very sophisticated mathematics, but you can make a reasonable approximation of this behavior without too much effort. Take a look at drift.html, shown in Figure 8-3.
I’ve said it for every example in this chapter: This image is not enough. You really need to see this as a working program because it’s really cool. As you move the boat around on the screen, the boat drifts and skids. It’s really fun to play with.
Burning virtual rubber
To get a simple drifting behavior, simply add a small force vector (I started with 5 percent of the boat’s current speed) in the boat’s current direction regardless of whether the user is currently pressing the accelerator.
Figure 8-3: This boat has a realistic drifting mechanism.
This technique is a compromise between the space-based motion (where the force vector is added only when the accelerator is pressed) and standard car behavior (where the direction of travel is always following the vehicle’s nose). Each frame has a little of each behavior.
Here’s the code:
<!DOCTYPE HTML>
<html lang=”en-US”>
<head>
<meta charset=”UTF-8”>
<title>drift.html</title>
<script type = ”text/javascript”
src = ”simpleGame.js”></script>
<script type=”text/javascript”>
var game;
var boat;
function Boat(){
tBoat = new Sprite(game, ”boat.png”, 100, 50);
tBoat.checkKeys = function(){
console.log(this.speed);
if (keysDown[K_LEFT]){
this.changeImgAngleBy(-5);
}
if (keysDown[K_RIGHT]){
this.changeImgAngleBy(5);
}
if (keysDown[K_UP]){
this.addVector(this.getImgAngle(), 2);
}
this.addVector(this.getImgAngle(), (this.speed / 20));
} // end checkKeys
tBoat.checkDrag = function(){
speed = this.getSpeed();
speed *= .95;
this.setSpeed(speed);
}
return tBoat;
}
function init(){
game = new Scene();
game.setBG(“#000066”);
boat = new Boat();
game.start();
} // end init
function update(){
game.clear();
boat.checkKeys();
boat.checkDrag();
boat.update();
}
</script>
</head>
<body onload = “init()”>
</body>
</html>
Adding drift to your sprites
There’s really only one new line here. Most of the code is familiar from the other examples in this chapter.
1. Build a standard vehicle model.
This time I made a boat, just to be different. The code is really the same as the car from the last example.
2. Use a force vector for acceleration.
Again, you’re manually controlling the speed, so the addVector() mechanism gives you great power. The acceleration force vector (used in the up-arrow key press) can be a literal value, but it doesn’t need to be huge. Because you’re actually going to be adding a second force vector, you might want to tone down the acceleration vector — but I didn’t. More power!!! Muhaahaa!
3. Add a small force vector every frame.
The primary force vector happens only when you accelerate, but a secondary smaller vector is added every frame. This vector goes in the direction the boat is currently facing. This small motion vector will simulate momentum. It’s important that this force vector be a percentage of the speed rather than a literal value. If you always move forward one pixel, for example, the boat will never stop.
Recognizing the Gravity of the Situation
Yet another use of force vectors involves gravity. Gravity calculations have been a part of video games from the very beginning. There are actually two kinds of gravity to consider. In platform-style games, the player is close to a planet, and all gravity appears to pull everything straight down. (You calculate gravity differently in space, but that’s covered in the section Houston, We’ve Achieved Orbit later in this chapter.)
When you know how to add acceleration vectors, platform-style gravity is actually easy to work with. Think of gravity as a constant force always pulling down a small amount every frame. To illustrate, take a look at hoverCar.html shown in Figure 8-4.
You know what I’m going to say. This example is no fun as an image in a book. You need to play with the example to see what’s going on.
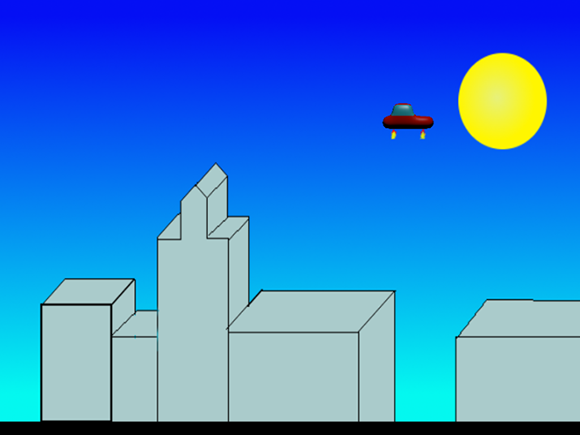
Figure 8-4: If you press the up arrow, the car will fire rocket boosters and hover.
Adding rockets to your ride
This example has one other interesting feature. When you press the up arrow, the car image is changed to another image with flames. (I wish my car had booster rockets.)
The code for the hoverCar example is shown here in its entirety:
<!DOCTYPE HTML>
<html lang=”en-US”>
<head>
<meta charset=”UTF-8”>
<title>hoverCar.html</title>
<script type=”text/javascript”
src = ”simpleGame.js”></script>
<script type=”text/javascript”>
var car;
var city;
var game;
function Car(){
tCar = new Sprite(game, ”hoverCar.png”, 70, 50);
tCar.setSpeed(0);
tCar.hSpeed = 0
tCar.checkKeys = function(){
tCar.changeImage(“hoverCar.png”);
if (keysDown[K_LEFT]){
this.hSpeed -= 1
}
if (keysDown[K_RIGHT]){
this.hSpeed += 1
}
if (keysDown[K_UP]){
this.addVector(0, .5);
this.changeImage(“hoverCarThrust.png”);
}
this.changeXby(this.hSpeed);
} // end checkKeys
tCar.checkGravity = function(){
if (this.y > 580){
this.setPosition(this.x, 580);
} else {
this.addVector(180, .1);
} // end if
} // end checkGravity
return tCar;
} // end car def
function init(){
game = new Scene();
car = new Car();
city = new Sprite(game, “city.png”, 800, 600);
city.setSpeed(0);
city.setPosition(400, 300);
game.start();
} // end init
function update(){
game.clear();
city.update();
car.checkKeys();
car.checkGravity();
car.update();
} // end update
</script>
</head>
<body onload = “init()”>
</body>
</html>
Use the force (vector), Luke
Gravity is actually pretty straightforward. It’s simply a force vector. The other interesting parts of this example involve changing the horizontal motion without changing the car’s image angle and adjusting the image to indicate the thruster. Here are the steps:
1. Build two different images.
Use your image editor to build two different versions of the image. My two images are identical, except one has flames for the retro-rockets and the other does not.
2. Build an ordinary sprite.
Like most vehicle sprites, you need a checkKeys() method. This one is set up in the ordinary way, but the behavior is a bit different.
3. Set the image to default.
The default image has no thrusters. Use the changeImage() method to make this the default image. When the thrusters are turned on, the image will be changed.
4. Use a variable to control horizontal speed.
I created the hSpeed variable to manage the horizontal speed of the car. I found this gave the performance I was looking for (easy forward and back motion with a lot of momentum).
5. Set the left and right arrows to modify hSpeed.
The left and right arrow keys modify the hSpeed variable.
6. Use changeXby to set the horizontal speed.
After checking all the keys, change the x value of the car to the current value of hSpeed.
7. The up arrow adds a vector upward.
Use the now-infamous addVector() function to add a small force vector upward when the user presses the up arrow. Remember that 0 degrees is up. Play around with this value to get the amount of thrust you want for your game.
8. Show the thrusters when the up arrow is pressed.
If the user is pressing the up arrow, you need to show the thrusters. Use the changeImage() method to set the sprite’s image to the one with rocket thrusters.
9. Build a checkGravity() method.
This method will be called every frame to compensate for gravity.
10. Check to see if you’re on the ground.
In this example, the ground is defined as a y value larger than 580.
11. If you’re not on the ground, add a gravity force vector.
Because it will accumulate, the gravity force vector needs to be pretty small. You’ll need to balance the force of the gravity and the thrusters to get the behavior you want. If gravity is too strong, the thrusters won’t work. If thrusters are too strong, the car simply flies into space.
Houston, We’ve Achieved Orbit
The kind of gravity described in the hoverCar example is fine when you’re really close to a planet because when tiny things like people, cars, or buildings are interacting with huge things like planets, the world seems flat, and gravity always seems to be pulling down.
However, when you get into space, things become more complicated. A planet has a large gravitational pull that influences the smaller things moving around that planet.
Round and round she goes . . .
Play around with orbit.html (see Figure 8-5) to confirm that the orbit shown in this example acts like real-world orbits.
Orbits may seem difficult to program because they follow a very specific set of rules. Any orbit should have the following characteristics:
![]() An orbit is actually an ellipse. Orbits aren’t perfect circles but are ellipses.
An orbit is actually an ellipse. Orbits aren’t perfect circles but are ellipses.
![]() The planet is one focus of the ellipse. As you may remember from math class, an ellipse is defined as a constant sum of radii from two points, called foci.
The planet is one focus of the ellipse. As you may remember from math class, an ellipse is defined as a constant sum of radii from two points, called foci.
![]() The distance from the planet predicts the speed. When the ship is closer to the planet, it will move more quickly.
The distance from the planet predicts the speed. When the ship is closer to the planet, it will move more quickly.
![]() Accelerate on one side to influence the other. Firing your thrusters in the current direction of travel moves the opposite side of the ellipse away from the planet. Firing against the direction of travel moves the opposite side of the ellipse closer to the planet.
Accelerate on one side to influence the other. Firing your thrusters in the current direction of travel moves the opposite side of the ellipse away from the planet. Firing against the direction of travel moves the opposite side of the ellipse closer to the planet.
![]() Smaller orbits are faster than larger orbits. This is an odd fact of space travel, but to speed up in orbit, you typically fire backward, bringing yourself into a tighter orbit that moves more quickly!
Smaller orbits are faster than larger orbits. This is an odd fact of space travel, but to speed up in orbit, you typically fire backward, bringing yourself into a tighter orbit that moves more quickly!
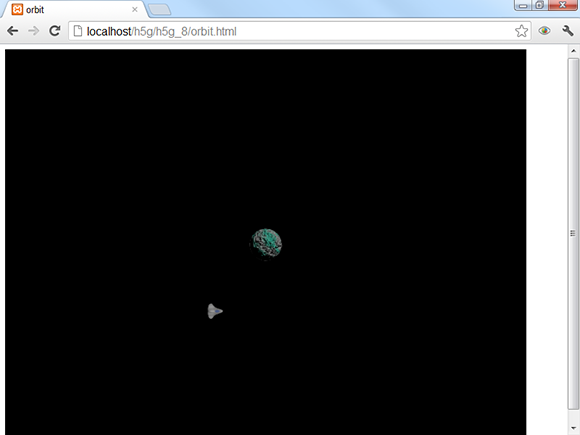
Figure 8-5: Orbits follow very specific rules.
This may seem like a lot of rules that will be difficult to program, but it turns out to be really easy to generate a realistic orbit. Newton (there’s that guy again; I told you he’d be an amazing game programmer) predicted exactly how it works in his famous law of universal gravitation. Newton’s law is summarized in a somewhat dizzying formula, as shown in Figure 8-6.

Figure 8-6: Newton’s law of universal gravitation.
Decoding the alphabet soup
Newton’s law can look a bit daunting, I know, but it’s really easy to follow when you have the secret decoder ring that explains what all the variables mean. Here’s what’s happening:
![]() It describes the length of a force vector. Any two objects will exert some kind of gravitational force on each other. It is an attractive force, so the direction is simply the direction between the centers of the objects. The formula describes the strength of the force.
It describes the length of a force vector. Any two objects will exert some kind of gravitational force on each other. It is an attractive force, so the direction is simply the direction between the centers of the objects. The formula describes the strength of the force.
![]() f is the force magnitude. That is, it’s the amount of force between the two objects.
f is the force magnitude. That is, it’s the amount of force between the two objects.
![]() m1 is the mass of the first object. For this example, the first object will be the planet. It will have a really big mass.
m1 is the mass of the first object. For this example, the first object will be the planet. It will have a really big mass.
![]() m2 is the mass of the second object. The second object is the spaceship, which will have a much smaller mass.
m2 is the mass of the second object. The second object is the spaceship, which will have a much smaller mass.
![]() d is the distance between the objects. It doesn’t matter exactly how you measure the distance as long as you’re consistent. Here, pixels are used.
d is the distance between the objects. It doesn’t matter exactly how you measure the distance as long as you’re consistent. Here, pixels are used.
![]() G is a universal gravitational constant. If you were doing real calculations, you would modify by a universal constant.
G is a universal gravitational constant. If you were doing real calculations, you would modify by a universal constant.
![]() Divide the product of the masses by the distance squared. The basic calculation is simply the product of the masses divided by the distance between the centers squared, and the whole thing is multiplied by the gravitational constant.
Divide the product of the masses by the distance squared. The basic calculation is simply the product of the masses divided by the distance between the centers squared, and the whole thing is multiplied by the gravitational constant.
This isn’t rocket science
Okay, it is, sort of, but it’s really simplified. You should really take a genuine physics course to learn more about this fascinating topic. For the purposes of game programming, I’m going to simplify Newton’s law in a couple of ways:
![]() Mass is measured in an arbitrary unit. It really doesn’t matter exactly what the masses are as long as the planet is a lot heavier than the spaceship. I’m going with a mass of 1000 units for the planet and one unit for the ship. That gives pretty good behavior, but you can modify these values if you want.
Mass is measured in an arbitrary unit. It really doesn’t matter exactly what the masses are as long as the planet is a lot heavier than the spaceship. I’m going with a mass of 1000 units for the planet and one unit for the ship. That gives pretty good behavior, but you can modify these values if you want.
![]() Distance is measured in pixels. This isn’t genuine unit of distance measure, either. It doesn’t matter how much space a real pixel represents as long as the simulation acts like you want it to.
Distance is measured in pixels. This isn’t genuine unit of distance measure, either. It doesn’t matter how much space a real pixel represents as long as the simulation acts like you want it to.
![]() You can skip G. Because the mass and distance are already somewhat arbitrary, you don’t really need to worry about G because you can just wrap that into the already-arbitrary masses without any problems.
You can skip G. Because the mass and distance are already somewhat arbitrary, you don’t really need to worry about G because you can just wrap that into the already-arbitrary masses without any problems.
![]() Calculate in only one direction. It’s true that each object will exert a force on the other, but the ship’s pull on the planet is immeasurably small, so you can just skip it in your code.
Calculate in only one direction. It’s true that each object will exert a force on the other, but the ship’s pull on the planet is immeasurably small, so you can just skip it in your code.
Writing the orbit code
Now you’re ready to see some code. After you know what’s going on, you’ll be surprised at how easy the code is:
<!DOCTYPE HTML>
<html lang=”en-US”>
<head>
<meta charset=”UTF-8”>
<title>orbit</title>
<script type=”text/javascript”
src = ”simpleGame.js”></script>
<script type=”text/javascript”>
var ship;
var planet;
var game;
function Ship(){
tShip = new Sprite(game, ”ship.png”, 25, 25);
tShip.setSpeed(3);
tShip.setBoundAction(CONTINUE);
tShip.setPosition(400, 200);
tShip.checkKeys = function(){
if (keysDown[K_LEFT]){
this.changeImgAngleBy(-5);
}
if (keysDown[K_RIGHT]){
this.changeImgAngleBy(5);
}
if (keysDown[K_UP]){
this.addVector(this.getImgAngle(), .1);
}
} // end function
return tShip;
} // end object definition
function init(){
game = new Scene();
ship = new Ship();
planet = new Sprite(game, ”planet.png”, 50, 50);
planet.setSpeed(0);
planet.setPosition(400, 300);
game.setBG(”black”);
game.start();
} // end init
function update(){
game.clear();
ship.checkKeys();
checkGravity();
planet.update();
ship.update();
} // end update
function checkGravity(){
//checks gravity pull of planet on ship
PLANET_MASS = 1000;
SHIP_MASS = 1;
dist = ship.distanceTo(planet);
dir = planet.angleTo(ship);
force = (PLANET_MASS * SHIP_MASS) / (dist * dist)
ship.addVector(dir, force);
} // end checkGravity
</script>
</head>
<body onload = “init()”>
</body>
</html>
This example begins with space.html. In fact, I copied that program and used it as a starting place for this one because the basic behavior is the same. Here’s how I modified the space program to account for orbital gravity:
1. Change the ship’s boundAction to CONTINUE.
The default wrap behavior will be weird when you’re looking at orbits. This is a good place to allow the ship to wander on forever. You might lose your ship altogether, but space travel is a lonely business.
2. Add a planet sprite.
This is a pretty simple sprite. It’s just a picture of a planet, with speed set to zero.
3. Create a checkGravity function.
This function will calculate the planet’s gravitational pull on the ship.
4. Determine the masses of the two objects.
Through careful scientific measurement, I totally made up the mass of my planet and my ship. I stored the masses in capitalized variables to indicate they should be considered constant values.
5. Calculate the distance between the objects.
Fortunately, simpleGame provides a really handy distanceTo() method for exactly this purpose.
6. Determine the direction between the two objects.
Once again, simpleGame makes this easy because each sprite has an angleTo() method. Note that if the ship seems to be thrown away from the planet, you may have the wrong order. Determine the direction from the planet to the ship.
7. Calculate the force magnitude.
Use the handy-dandy formula to figure out how strong the force pulling the ship to the planet is.
8. Add a force vector to the ship.
Now just use the addVector() method to add the calculated force vector to the ship.
That’s all there is to it. Amazingly enough, this simple calculation does all the real work, and you’ll find that the orbits are strikingly realistic.
 Although the math is simplified, there is still a lot of math going on here. If you want to be a game programmer, this is just the beginning of the math you’ll need. For example, you may wonder how I figured the distance between the objects in
 simpleGame (I used the Pythagorean theorem) or how I calculated the angle between them (I used the arc-tangent from trigonometry).
The simpleGame library takes care of a lot of the math for you (you’re welcome), but eventually you’ll need to be able to do it yourself. If you’ve ever asked your math teacher when you would ever use math, I’ve got an answer. Today’s a good day to start. You can’t make games without math, but our math is fun because we blow virtual stuff up.
Does This Car Come with a Missile Launcher?
Normal car dealerships are touchy about installing weaponry in your ride, but that’s exactly why we became game programmers. If I want missiles in my mini-van, I’ll have missiles (at least in the virtual minivan). Lots of video games involve shooting, and that’s a pretty easy effect to add. The missile.html example illustrated in Figure 8-7 shows how it works.
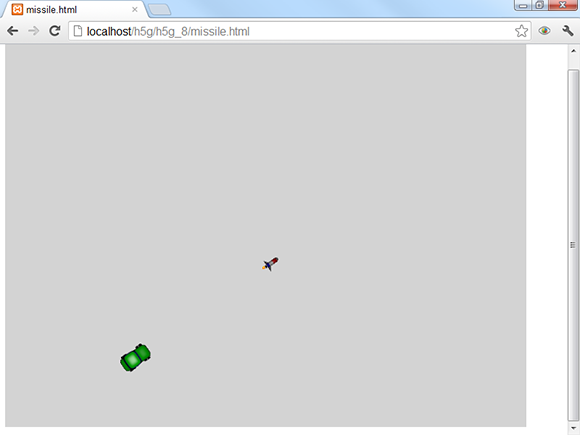
Figure 8-7: Now my car fires missiles. It’s about time.
Projectiles in a nutshell
Missiles, bullets, and other projectiles are pretty easy to work with. Here are a few ideas to keep in mind:
![]() The projectile is a sprite. Make a new sprite for the projectile. You can make it a simple dot, or (as I did) draw a complete missile.
The projectile is a sprite. Make a new sprite for the projectile. You can make it a simple dot, or (as I did) draw a complete missile.
![]() Make a custom sprite for the missile. The missile will need some methods, so you might as well make it a custom sprite.
Make a custom sprite for the missile. The missile will need some methods, so you might as well make it a custom sprite.
![]() Missiles die when they leave the screen. The easiest way to get this behavior is to set the missile’s
Missiles die when they leave the screen. The easiest way to get this behavior is to set the missile’s boundAction to DIE.
![]() Add a
Add a fire() method. The fire() method will activate when the missile is fired.
![]() Reuse the same missile over and over. Old missiles never die. They are just hidden and reused when the user shoots again. When a missile hits something, hide the missile. That will make it invisible and impervious to collisions.
Reuse the same missile over and over. Old missiles never die. They are just hidden and reused when the user shoots again. When a missile hits something, hide the missile. That will make it invisible and impervious to collisions.
It’s time to launch the missiles
The code for missile.html is like much of the standard car code you’ve seen:
<!DOCTYPE HTML>
<html lang=”en-US”>
<head>
<meta charset=”UTF-8”>
<title>missile.html</title>
<script type=”text/javascript”
src = ”simpleGame.js”></script>
<script type=”text/javascript”>
var game;
var car;
var missile;
function Car(){
tCar = new Sprite(game, ”car.png”, 50, 30);
tCar.setSpeed(3);
tCar.setAngle(135);
tCar.checkKeys = function(){
if (keysDown[K_LEFT]){
this.turnBy(-5);
}
if (keysDown[K_RIGHT]){
this.turnBy(5);
}
if (keysDown[K_SPACE]){
missile.fire();
}
} // end checkKeys
return tCar;
} // end car def
function Missile(){
tMissile = new Sprite(game, ”missile.png”, 30,20);
tMissile.hide();
tMissile.fire = function(){
this.show();
tMissile.setSpeed(15);
this.setBoundAction(DIE);
this.setPosition(car.x, car.y);
this.setAngle(car.getImgAngle());
this.setImage(“missile.png”);
this.setSpeed(15);
} // end fire
return tMissile;
} // end missile def
function init(){
game = new Scene();
car = new Car();
missile = new Missile();
game.start();
} // end init
function update(){
game.clear();
car.checkKeys();
car.update();
missile.update();
} // end update
</script>
</head>
<body onload = “init()”>
</body>
</html>
Projectiles are lots of fun to build, and they aren’t very difficult, as shown here:
1. Build a normal sprite to launch the projectile.
This isn’t absolutely necessary, but normally a bullet will be fired from a gun, an arrow will be fired from a bow, and a nuclear banana rocket will be fired from whatever vehicle has that sort of thing. (I want one.)
2. The projectile will be its own sprite.
The projectile works just like an ordinary sprite, but it will be created and destroyed dynamically.
3. Add a trigger to fire the missile.
In my game, the spacebar fires the missile. Because my car will launch the missile, I put the trigger code in the car’s checkKeys method.
4. Set the missile to be hidden by default.
The missile is always around, but it’s hidden offstage when it isn’t needed. If you invoke a sprite’s hide() method, that sprite will still be in memory, but it won’t be drawn, and it won’t trigger any collisions.
5. Create a fire() method for the missile.
The missile is sitting around waiting to be activated. The fire() method springs the missile into action.
6. Make the projectile visible.
The show() method is the opposite of hide(). It causes a sprite to be visible and trigger collisions.
7. Give the missile a quick initial speed.
As you know, missiles are normally fast.
8. Hide the missile when it hits the edge.
When the missile hits the edge of the screen, it needs to be hidden. Setting the missile’s boundAction to DIE will make this behavior automatic.
9. Hide the missile if it hits anything else.
This simple example doesn’t have any other objects, but if the missile collides with something else, invoke its hide() method to simulate the missile being destroyed on contact.
After you have the ordinary missile behavior working, you can try a number of interesting variations:
![]() Add gravity to the missiles. If it’s a side scroller, add a gravitational force to your missiles for a worm-like effect. See the
Add gravity to the missiles. If it’s a side scroller, add a gravitational force to your missiles for a worm-like effect. See the hoverCar.html example earlier in this chapter for details.
![]() Add other physics to missiles. You can make the missiles have drag like any other sprite. See the
Add other physics to missiles. You can make the missiles have drag like any other sprite. See the drag.html example earlier in this chapter for more details.
![]() Make a smart missile. Use the
Make a smart missile. Use the angleTo method to determine the angle between a missile and a target, and turn the missile toward the target on every frame. This will simulate a smart missile that never misses. (A great power-up, but it makes the game too easy if you have too many.)
![]() Make a not-so-smart missile. If the enemy is firing a missile at the player, you don’t want it quite so smart. You can do so in a few ways. First, make the missile as smart as you want but slow enough that it can be outrun. Second, put barriers that can destroy the missile in the way. Third, make the missile smart only once in a while so that it only checks for the position of the target once every five or ten frames. Use your imagination!
Make a not-so-smart missile. If the enemy is firing a missile at the player, you don’t want it quite so smart. You can do so in a few ways. First, make the missile as smart as you want but slow enough that it can be outrun. Second, put barriers that can destroy the missile in the way. Third, make the missile smart only once in a while so that it only checks for the position of the target once every five or ten frames. Use your imagination!
Building a Multi-State Animation
With all this motion going on, you’re sure to want more sophisticated animations. You can use the changeImage() or setImage() function (they’re two different names for the same thing) to change the image associated with a sprite any time. Sometimes, though, you want much more sophisticated animations. Take a look at walkAnim.html shown in Figure 8-8.

Figure 8-8: When you press the arrows, the character walks with a realistic animation.
Like all examples in this chapter (indeed in the entire book), you really need to see it on my website and play with it to get a feel for what this example is doing.
There’s a whole lot of image-swapping going on here. The walking animation is actually a series of eight different images rapidly swapped to give the illusion of walking. There are 4 different animations (one for each of the cardinal directions), so that’s a total of 32 different images. However, if you look over the code, you’ll see that the character sprite contains only one image. That image is pretty special, as you can see in Figure 8-9.

Figure 8-9: This file has all the needed images combined into one!
This image is a composite animation. Each row represents a direction, and each row contains a cycle, or a series of images, meant to be repeated.
The rpg_sprite_walk.png image was created by Franck Dupont. He generously posted this image on the OpenGameArt.org site (http://open gameart.org), where he is known as “Arikel.” He released his work under a special license called “Attribution — Share Alike.” This means people can use or remix his work for free, as long as they attribute the original author. The background image is by an author named Hyptosis, who released images under the public domain on the same site. Talented and thoughtful contributors like Franck and Hyptosis are the key to the thriving creative community. Feel free to look over the open game art site for more great artwork to use in your games, but be sure to thank and attribute the authors as they deserve.
The simpleGame.js library contains a feature for making multi-image animations quite easily. Look over the code for walkAnim.html to see how it works:
<!DOCTYPE HTML>
<html lang=”en-US”>
<head>
<meta charset=”UTF-8”>
<title>walkAnim.html</title>
<script type = ”text/javascript”
src = ”simpleGame.js”></script>
<script type = ”text/javascript”>
var game;
var background;
var character;
function init(){
game = new Scene();
background = new Sprite(game, “rpgMap.png”, 800, 600);
background.setSpeed(0,0);
background.setPosition(400, 300);
character = new Sprite(game, “rpg_sprite_walk.png”, 192, 128);
character.loadAnimation(192, 128, 24, 32);
character.generateAnimationCycles();
character.renameCycles(new Array(“down”, “up”, “left”, “right”));
character.setAnimationSpeed(500);
//start paused
character.setPosition(440, 380);
character.setSpeed(0);
character.pauseAnimation();
character.setCurrentCycle(“down”);
game.start();
} // end init
function update(){
game.clear();
checkKeys();
background.update();
character.update();
} // end update
function checkKeys(){
if (keysDown[K_LEFT]){
character.setSpeed(1);
character.playAnimation()
character.setMoveAngle(270);
character.setCurrentCycle(“left”);
}
if (keysDown[K_RIGHT]){
character.setSpeed(1);
character.playAnimation()
character.setMoveAngle(90);
character.setCurrentCycle(“right”);
}
if (keysDown[K_UP]){
character.setSpeed(1);
character.playAnimation()
character.setMoveAngle(0);
character.setCurrentCycle(“up”);
}
if (keysDown[K_DOWN]){
character.setSpeed(1);
character.playAnimation()
character.setMoveAngle(180);
character.setCurrentCycle(“down”);
}
if (keysDown[K_SPACE]){
character.setSpeed(0);
character.pauseAnimation();
character.setCurrentCycle(“down”);
}
}
</script>
</head>
<body onload = “init()”>
</body>
</html>
You need to take a few new steps to build an animation, but the results are completely worth the effort.
1. Obtain an animation image.
You can either create an image yourself, or look at the excellent resources like OpenGameArt.org to find work that others have done. Of course, you have a responsibility to respect other’s work, but there is some great work available in very permissive licenses today. Be sure the image is organized in rows and columns and that each sub-image is exactly the same size. You may have to mess with your image editor to ensure that the image is in the right format and that you know the size of each sub-image.
2. Attach the animation image to your sprite.
You’ll be attaching the entire image to your sprite, but just displaying a small part of it at any one time. This is easier than working with a bunch of images, and it’s also more efficient.
3. Create an animation object with the loadAnimation() method.
When you invoke the loadAnimation() method of an object, you’re creating an animation tool that helps manage the animation. The first two parameters are the size of the entire image (width and height), and the second two parameters are the width and height of each sub-image. If you get these values wrong, the animation will appear to scroll. Keep playing until you get these values right:
character.loadAnimation(192, 128, 24, 32);
4. Build the animation cycles.
Each row will be turned into an animation cycle. The default version (without any parameters) works fine in most situations. Look up the documentation for the more advanced usages of this tool:
character.generateAnimationCycles();
5. Rename the cycles.
The animations created with the buildAnimationCycles() command have default names, but it’s almost always better to attach your own, more meaningful names. Add an array with a name indicating what each row represents:
character.renameCycles(new Array(“down”, “up”, “left”, “right”));
6. Set the animation speed.
The animation speed indicates how fast the animation will run. A value of 500 seems right for most applications, but you can adjust this value so the character’s walk cycle looks like it’s actually propelling the character:
character.setAnimationSpeed(500);
7. Set which cycle you intend to display.
The setCurrentCycle() method allows you to choose the cycle with one of the names you indicated in the renameAnimationCycles() step:
character.setCurrentCycle(“down”);
8. Use the pauseAnimation() command to pause the animation.
In my example, I want the character to begin standing still, looking toward the user. The pauseAnimation() command makes the animation temporarily stop.
9. Use playAnimation() to begin the animation.
This method will continuously loop the current animation cycle.
As you can see, animation adds a huge amount of fun to gaming and opens up the whole realm of role-playing games to your repertoire.