
Lesson 9. How to Save Your Work So You Can Use It Again Later
Time
This lesson takes approximately 10 minutes to complete.
Goals
To set up a system for saving your work so you’ll not only be able to find your saved files with ease, but also protect your work from accidental loss.
So far, the applications we’ve been using all automatically save the changes you’ve made since the last time you opened the application. For example, if you imported songs from a music CD into iTunes, those songs are still there the next time you open iTunes, right? Right. Same thing with iCal—it saves all your appointments when you quit iCal. Even if you don’t open iCal again for weeks, all your stuff is still there. However, most other applications will require you to save your work before you’re done. (For example, remember that fictitious list of people you were going to invite to your next party? Well, once you created your list, you’d have to give it a name and save it.) But there’s a little more to saving files than just clicking the Save button, because you have a decision to make: where to save the files on your hard disk. I know what you’re thinking: “Since Mac OS X Tiger has Spotlight, why do I even care?” (You were thinking that, weren’t you?) Well, here’s the thing: Spotlight is great if you can’t remember where you saved your files, but if you plan ahead and save your files in an easy-to-find place on your hard disk, then you won’t even need Spotlight—you’ll be able to go directly to your files. In fact, you’ll only need Spotlight when you can’t remember where you saved a file. In this lesson, we’ll look at how and when to save your files, where to save them, and how to keep your hard disk neat and tidy so everything is right at your fingertips.

STEP ONE (Launching TextEdit):
Until now, we’ve just been using applications that already appear in the Dock at the bottom of your screen (or launch automatically like iPhoto), but Mac OS X Tiger ships with a number of other applications as well (they’re all found in your Applications folder, which we’ll get to in a moment). To learn how to create and save documents on your own, we’re going to use an application called TextEdit, which is a very, very simple word processor (you can use it for basic letter writing, note taking, etc.). TextEdit is found in your Applications folder, and the quickest way to get there is to first click on the Finder icon in the Dock at the bottom of your screen (which should bring up a window onscreen). Then, press-and-hold these three keys on your keyboard at the same time: Shift-Command-A (just in case you missed it earlier, the Command key is the one with the Apple logo on it). This reveals all your installed applications in the window onscreen. By default, they’re listed in alphabetical order, so if you don’t see TextEdit right off the bat, it’s probably because you have to scroll down the window to see it. Using your mouse, click-and-hold on the blue gel-like button on the right side of the window and drag it downward so you can see the other applications in this window. Keep dragging until you see TextEdit (if you pass it, drag that blue button upward again). Once you find it (its icon looks like a piece of paper with a pen resting on it), double-click on it to launch TextEdit.
STEP TWO (Creating Your First Document—a Letter):
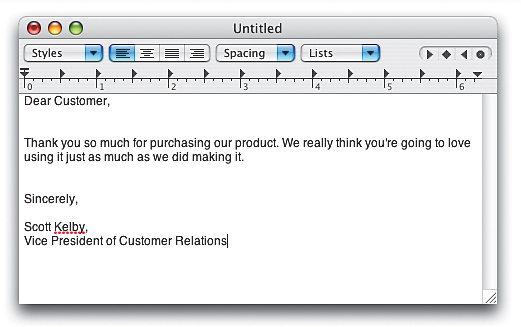
When TextEdit appears (it opens in about two seconds, which is one reason I love TextEdit), it opens a brand new blank document, ready for you to start typing (that’s what that blinking thin black line is telling you—it’s ready for you to start typing). For the sake of our example, we (and by we, I mean you) are going to create a simple business letter using TextEdit, so start typing the standard ol’ “Dear Customer,” salutation, then press the Return key on your keyboard three times (to move down a few lines). Type some friendly text (if you can’t think of what to write, try this: “Thank you so much for purchasing our product. We really think you’re going to love using it just as much as we did making it.”). Press the Return key three more times and type “Sincerely,” then press Return two more times and type your name. Press Return just once, and then type your title (which is “Vice President of Customer Relations” by the way—congratulations on having such a cool job). Okay, that’s it. You’ve created your first document.

STEP THREE (To Save or Not to Save?):
It’s decision time: You’ve created this letter and now you have to decide if this is a letter you want to save or not. If you decide that you don’t want to save the letter, then take your mouse and click on the little round red button that appears in the upper-left corner of your TextEdit document (that’s the Close button). Once you click the Close button, a little window will pop down with three choices on it (as shown above). If you didn’t want to save this document, you’d click once on the Don’t Save button on the left (don’t actually click on it, I’m just telling you what to do if you didn’t want to save your letter, but in this case, we do, so don’t click any buttons yet). If indeed you had clicked the Don’t Save button, the document would immediately close—it would not be saved anywhere, and it would just vanish as if it had never existed at all. So again, don’t click the Don’t Save button unless you really intend to never see that document again. Instead, click on the Cancel button in the window.

STEP FOUR (Naming Your File Before You Save It):
Okay, now we have the other decision: to save the letter (so you can open it again at a later time, maybe to make changes, print it out, etc.). We use a slightly different method when saving files (even though technically we could use that “click-the-Close-button” technique we learned in the previous step, because the window that pops down contains a Save button, but that method requires more steps). To save your letter, press-and-hold the Command key on your keyboard, and then press the S key (that’s the shortcut for Save: Command-S). A little window will pop down from the top of your TextEdit letter. The first thing it wants you to do is give this file (your letter) a name in the Save As field (it’s already highlighted the default name in the field, so all you have to do is start typing). I strongly recommend giving your letter a brief, yet descriptive name so it’s easier to find later when you’re looking for it. An example of a good name might be something like “Customer Thanks Letter,” so go ahead and type that for the sake of our example. Of course, you can choose any name you like when you’re working on your own files, but you’ll find that the more descriptive the name, the easier your life will be down the road. You can type up to 256 characters if absolutely necessary, but brief, simple names are easier to remember (don’t click Save yet).

STEP FIVE (Where to Save Your File):
Apple has done something (on your behalf) to help you quickly find the files you create. If you look in that Save window (see the previous step), you’ll see the word “Where” with a pop-up menu next to it. By default, Apple saves all the documents you create in a folder called “Documents.” This folder is similar to one you’d use in a traditional filing cabinet. For example, in a traditional filing cabinet, you don’t just open the drawer, drop another sheet in, and close the drawer, right? Instead you sort everything into separate, named folders. Well, your Mac works the same way. It puts all your documents into a folder named “Documents.” That way, when you ask yourself the question, “Where did I save that letter?” you’ll know that it was saved in your Documents folder (we’ll look at how to find things in your Documents folder in a few moments). So, basically, this Documents folder is where you want to save documents. Apple has created other folders for saving other sorts of files. For example, there’s a Pictures folder for saving your photos, a Music folder for saving music, and a Movies folder for saving movies. Note: I wasn’t going to mention this (because doing what I’m about to tell you may cause utter chaos), but if you don’t want to save your file in the Documents folder, you can choose a different folder from the Where pop-up menu. Now forget I told you that, as your life will be so much simpler if you keep your documents in the Documents folder. Another note: If you want to see exactly where the file is being saved on your hard disk, click on the down-facing arrow to the far right of the Save As field. This will show you a folder-by-folder breakdown of your hard disk.
STEP SIX (Actually Saving Your File):
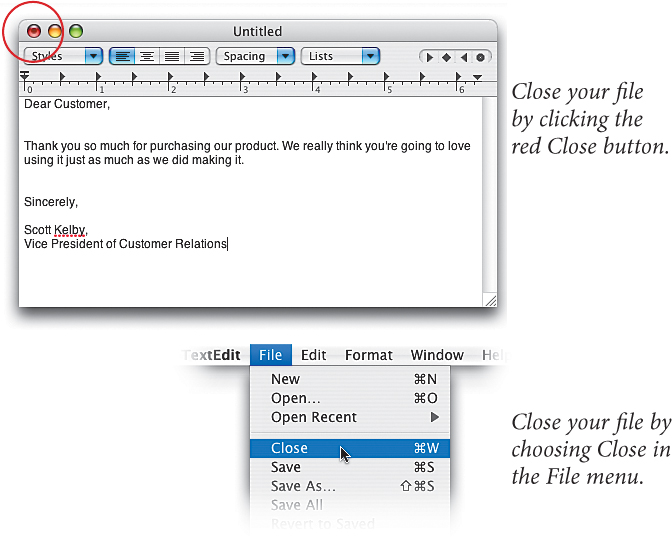
Ah, the time has come at last to save your letter. By now you’ve named it and you know it’s going to be saved into the Documents folder, so all that’s left to do is click on the blue Save button. When you do this, your document will still remain open, but the name you just gave your letter will appear at the top center of the document’s window. With your letter safely saved, you can either click the tiny red Close button in the top-left corner of the TextEdit window or you can click on the word “File” (at the top of your screen in the menu bar) and with your mouse move down the menu to the word “Close,” then click once.
STEP SEVEN (Finding the Documents Folder):
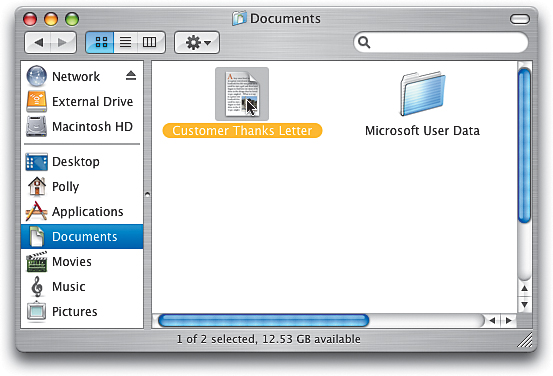
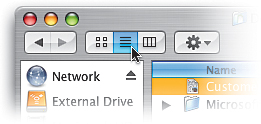
Okay, you saved and closed your letter. Now, how do you get it back? Since it’s a document, you know to look in your Documents folder. To get to it, take your mouse and click once on any empty desktop space to activate the Finder application, then press-and-hold these three keys: Shift-Command-H. Your Home window will appear onscreen (this is kind of your home base, where you’ll have access to all your stuff). In this window you’ll see the Documents folder. To look inside that folder, just double-click directly on its icon, and all the documents you’ve saved (including your letter) will be there (much like if you went to a traditional filing cabinet in your office, pulled out the drawer, and pulled out a folder named “Documents”). Depending on how many documents you have in your folder, you may have to do some scrolling (up or down by dragging the blue gel-like button on the far-right side of the window), but if this letter is the first thing you’ve saved, you won’t have much trouble finding it. To open it, just double-click on the document’s icon, then TextEdit will launch and your document will open. Okay, so what happens when you do start saving a lot of files? You’re about to find out.

STEP EIGHT (Organizing Your Documents Folder):
Let’s say that business is great, and you wind up writing quite a few letters. Before you know it, you’ve got dozens of letters in your Documents folder, along with dozens of other documents. The way to keep them organized is by (are you ready for this?) creating folders that live inside your Documents folder. Don’t let this throw you, because just like a traditional filing cabinet, you’d have more than one folder in there, right? And there are probably some really thick folders in there that have some other folders inside, right? Well, that’s all you’re doing here (if you do this once, it will make more sense). So, let’s create a folder called “Customer Thank-You Letters,” into which we’ll drag all those thank-you letters that are cluttering up your Documents folder. Now, you already have your Documents window open (from the previous step) so just take your mouse and click directly on the word “File” at the top left of your screen, and when the menu appears, move your mouse down to New Folder and click once. A new folder will appear in your Documents window and its name “untitled folder” will already be highlighted. All you have to do is type a new name, “Customer Thank-You Letters,” and then press the Return key on your keyboard. Now, any customer service letters you see loose in the Documents folder need to go in this new folder, so click-and-hold on a letter’s icon, drag it onto your new folder (when your letter moves over the folder, the folder will highlight), and release the mouse button to drop it right in.
STEP NINE (Deleting Files):
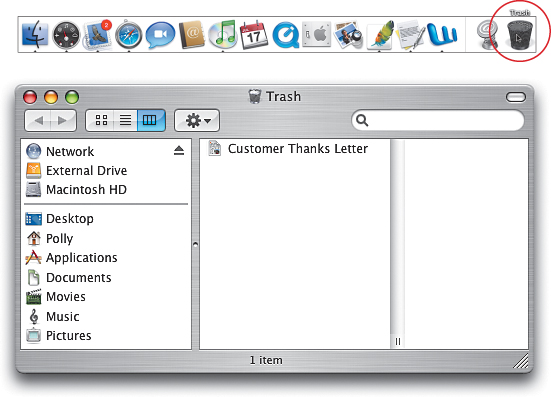
So far, we’ve only been concerned with saving your documents, but what if you want to delete a document from your Mac? Just look in your Documents folder for the document you want to delete, then click-and-hold directly on that document’s icon and drag it into the Trash icon that appears on the far-right side of the Dock at the bottom of your screen. Think of the Trash icon on your Mac much like a trash can in your kitchen. You put things in there, but they’re not really “gone” until you take that can to the street and it’s picked up by the local sanitation company. Anytime until that point, you can just reach into the garbage can in your kitchen and pull something out (like a half-eaten éclair). Your Mac’s Trash is pretty much like that. You put things in there that you want thrown away, but they’re not really gone until you choose Empty Trash (which is your Mac’s equivalent of the sanitation truck pulling up and emptying the garbage [you’ll learn how to empty the Trash in the next step]). Before you choose Empty Trash, just like in your kitchen, you can pull something back out of your Mac’s Trash. You do that by clicking once on the Trash icon in the Dock. The Trash’s window will appear onscreen, showing you all the stuff you’ve put in there (that’s right—stuff). If you see a document you wish you hadn’t trashed, just click-and-drag it out of the Trash onto your Mac’s desktop. If you wipe it clean with a moist towel, you can still probably eat it (okay, that was really lame—sorry).

STEP TEN (Deleting Files for Good by Emptying the Trash):
Once something is in your Trash, you can empty the Trash by first clicking anywhere on your empty desktop to make the Finder application active. Then, click once on the word “Finder” in the menu bar at the top of your screen. When the menu appears, move your mouse down to Empty Trash and click on it once. You’ll get a warning dialog that asks: “Are you sure you want to remove the items in the Trash permanently?” If you click the OK button, they’re gone for good, so make sure that’s what you really want to do.