
Lesson 5. Email and the Internet
Time
This lesson takes approximately 15 minutes to complete.
Goals
To configure your Mac to give you email access and Web access, so you can send and receive email and search the World Wide Web.
My guess is that the ability to send email and get on the Internet are two of the main reasons why you bought a Mac in the first place. (Okay, they’re probably the reasons why you bought a computer—but you bought a Macintosh computer because it’s more fun, easier to use, more reliable, and you wanted to avoid all those icky things that PC users wrestle with every day, like viruses and spyware. Right? Right.) Well, my friends, you did the right thing, and you’ll know that for sure, because in just a few minutes, you’ll be doing both of those things: sending and receiving email and surfing the Web (even though the term “surfing” as it relates to the Web is so overplayed that we don’t really use it anymore. We’ll just say we’re “on the Web” and leave it at that). Now, the first step to getting on the Web (and sending email) happens before you even start up your Mac. Basically, you need to find a provider (usually your phone company, your local cable TV provider, or an Internet service like AOL or Earthlink) that will allow you access to the Internet, so you’ll need to do that first, before you even start this lesson. If you can get high-speed Internet access, do it—you will love it—everything happens so quickly. It makes the Internet an entirely different experience, as opposed to the otherwise slow and sometimes frustrating world of using your regular phone line (called “dial up”) to access the Internet. But the important thing is that you get access to the Internet (basically a user name and a password) before you go any further. Once you have those handy, you’re ready to get “on the Web.”

STEP ONE (Setting Up Your Email Account):
We’ll start with setting up your email account. Mac OS X Tiger comes with a wonderful application for sending, receiving, and managing your email. It’s called (are you ready for this?) Mail. Okay, it’s not a particularly cool name, but the program itself is actually very cool, and very well designed. To launch Mail, go ahead and click on the Mail icon in the Dock (its icon looks like a blue postage stamp with a bird on it). The first time you launch Mail, a window pops up to take you through the process of setting up your email account (basically, this is where you’ll enter the user name, password, and other settings provided by your Internet Service Provider [we call it your ISP]).
STEP TWO (Entering Some General Information):
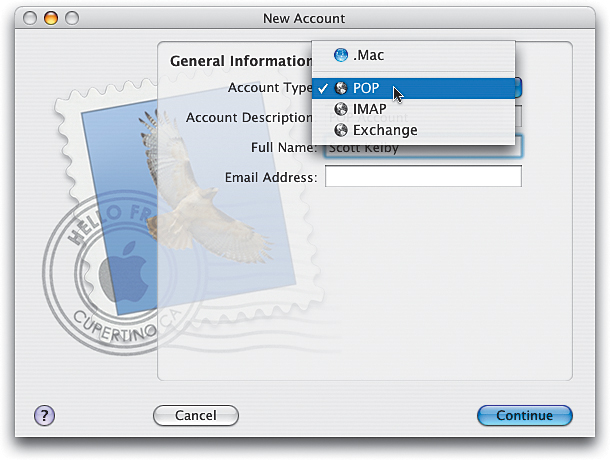
Once you click the Continue button in the first screen (the Welcome screen), it asks for general information about your email account. If you’ve signed up for Apple’s handy .Mac service, you’ll get a .Mac email address, and you can enter that information here. You enter your user name and password in the User Name and Password fields (I know, that was kind of obvious), and you’re pretty much done. However, if you don’t have a .Mac account, meaning your Internet Service Provider set you up with an email account, you’ve got a little work to do. First, you’ll need to choose your type of account. Click on the down-facing arrow to the right of the words “Account Type” and a pop-up menu will appear (it shows .Mac by default). This is where it asks the first question I mentioned in the TIP on the facing page, and that is do you have a POP account or an IMAP account? Choose the one you were told you had from this pop-up menu (chances are it’s a POP account, so we’ll continue along those lines). Where it says Account Description, you can use any description you like (such as AOL Internet, Earthlink Account, etc.). Where it says Full Name, type your name. Where it says Email Address (do I even have to tell you this one?). Okay, that’s the first screen, now click the blue Continue button.

STEP THREE (Getting Your Email Set Up):
The next screen asks you for information on your Incoming Mail Server. Again, this is one of those “five important things” that I mentioned earlier that you’ll need to find out from your ISP when you set up your account. Type that information in the Incoming Mail Server field (see, I told you you’d be asked for this stuff—that’s why it pays to have it handy before you start setting up the Mail application). Once you’ve entered the Incoming Mail Server info, press the Tab key on your keyboard to jump to the User Name field. Again, enter the user name given to you by your ISP, then press the Tab key once more to jump to the Password field and enter your password. Now click the blue Continue button.

STEP FOUR (Setting Up Your Mail Server):
The next setup screen is the Incoming Mail Security screen, which requires a password for authentication of your incoming email. That’s fine for now, so just click the blue Continue button to move on to the next screen, which is the Outgoing Mail Server. Again, here you’ll enter more info given to you by your Internet Service Provider. The Outgoing Mail Server info is sometimes referred to as “SMTP info.” Look on your list of things you asked your ISP, and enter the SMTP information in the first field. For now, you can skip the section for using authentication for outgoing mail, so click the blue Continue button.

STEP FIVE (Reviewing Your Information):
You can also skip the Outgoing Mail Security screen that appears next, so click the Continue button again. The next screen that appears is just a summary of the information you’ve already entered (as shown above), so you can look that over and just click the Continue button one more time. That’s it—you’ve created a new email account, so click the blue Done button that appears on the final screen. You’re now ready to send and receive email.
STEP SIX (Sending an Email):
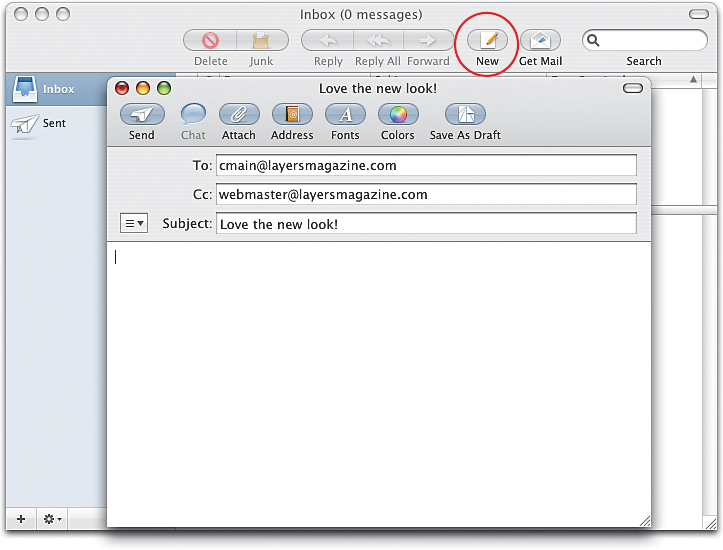
Now that you’ve completed the setup, the Mail application opens automatically. We’ll start by sending an email, so click the New button, which appears along the top of the Mail window (it’s just right of center). When you click this button, a new email message window appears. In the To field, type the email address of the person you want to receive this email. If you want to send a carbon copy of this email to someone else, press the Tab key on your keyboard to jump to the Cc field, and then type his or her email address. Press the Tab key to jump to the Subject field. This field is important, because when your friend receives your email, what’s written in this Subject field is what he’ll see in his email application, so type a subject. Now press the Tab key one more time so your cursor is in the message area.

STEP SEVEN (Customizing Your Text):
Now you can start typing your message, just like you would a regular letter. You can choose the font (typeface) your email message will appear in by clicking on the Fonts button in the top center of the New Message window. This brings up the Font dialog, in which you can choose the font, style (bold, italic, etc.), and size you want. To change the color of one or more words, just click-and-drag your cursor over the words that you want to colorize to highlight them, then click the Colors button (to the right of the Fonts button). When the Colors dialog appears, click on the color you want in the color wheel, then click on the first round button in the top left of the Colors dialog to close it.

STEP EIGHT (Sending Your Email):
When you’re done typing your message, all you have to do to send the email to your friend is click the Send button at the top of the New Message window (it’s the first button from the left). In a few moments you’ll hear a swoosh sound (that’s a technical term) to let you know that your email has been sent.

STEP NINE (Getting Email):
Once you give out your email address to friends, family, co-workers, etc., it won’t be long before you start getting email yourself. When you launch Mail, it automatically checks for any new mail, but you can check manually anytime by clicking the Get Mail button located at the top of the interface, just to the right of the New button. When mail arrives for you, it will appear in the Mail window with a blue dot to the left of it (that blue dot indicates that this email has not been read yet). You’ll also see the name of the person who sent the mail, the email’s subject, and when this email was received. To read an email, just click on it once and the email message will be displayed in the lower portion of Mail’s main window.
STEP TEN (Replying to Email):
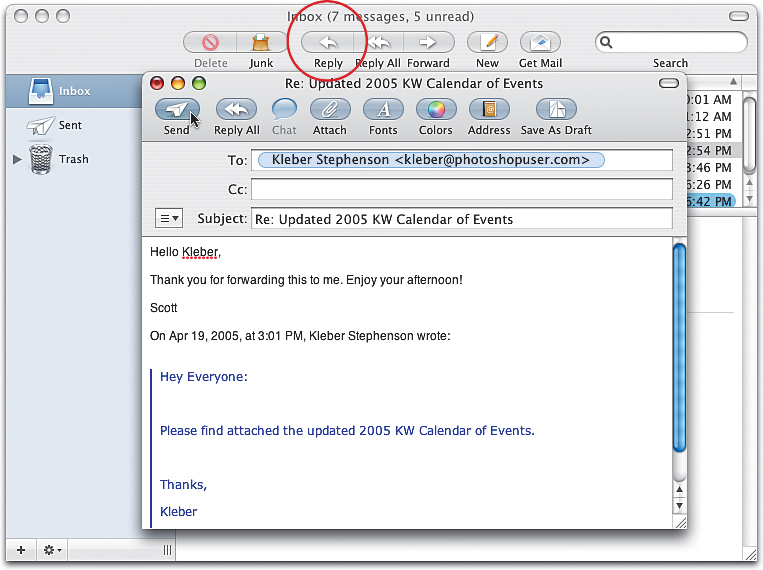
Once you’ve read an email, if you decide you want to respond to the person who emailed you, just click the Reply button at the top center of the Mail interface (its icon is a left-facing arrow). This automatically puts the email address of the person who emailed you into the To field, and it adds the word “Re:” in front of the subject line, so the person who gets this email reply from you knows that you’re referring to the original email sent to you (in other words, the person will instantly know it’s your reply). Another benefit of clicking the Reply button is Mail includes the original email directly below where you’re going to type your response, so the person doesn’t have to remember exactly what he wrote you—instead he can scroll down to see the original email below your reply. Again, you have the same control here over fonts and colors as you do with a regular email message. When you’re done typing your reply, just click the Send button in the top-left corner of the New Message window, and your reply will be sent.
©SCOTT KELBY
STEP ELEVEN (Emailing Photos):
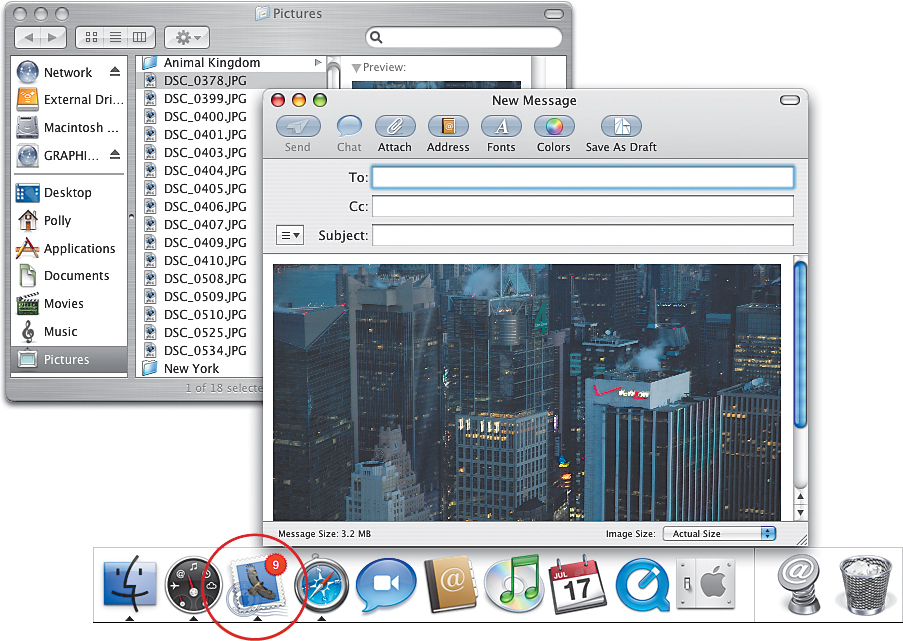
Besides just emailing text, you can attach a file to your email as well, and photos are one of the most popular files to attach to an email. Luckily, emailing a photo is a breeze in Mac OS X Tiger. Start by clicking on any empty space on your desktop to switch to the Finder (any empty space surrounding the Mail interface will do). Now double-click directly on your Macintosh HD icon to display a window showing the contents of your Mac’s hard disk. Click once on the Pictures folder that appears along the left side of that window. Clicking on that icon displays the photos that are stored in your Pictures folder. Find the photo you want to include with your email, then click-and-drag that photo directly onto the Mail icon down in the Dock. Mail will open a New Message window for you, and you’ll see your photo appear in the body of the email message.

STEP TWELVE (Sending Text with Your Photo):
Now all you have to do is enter the email address of the person you want to send the photo to in the To field and enter a topic in the Subject field. If you want to include an email note with your photo, click once to the right of your photo, press the Return key two times, then press the Up Arrow key on your keyboard twice. Now, start typing your note. When you’re done with your message, click the Send button in the top-left corner of the New Message window, and your email, along with the photo, will be sent. By the way, you can attach more than one photo to an email—just press-and-hold the Command key (the one with the Apple logo on it) and click on all the photos you want to email. Then, click-and-drag any one to the Mail icon in the Dock and all the others will come along with it, but don’t send too many photos (not more than 5 megabytes) or your recipient’s email account might reject your email for being too large.
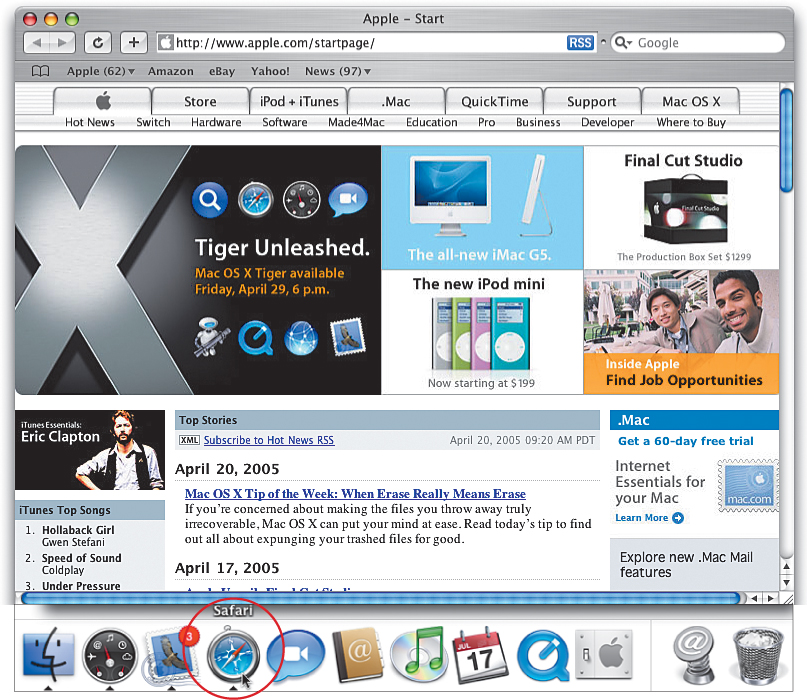
STEP THIRTEEN (Getting “on the Web”):
Now that you’ve sent some email, it’s time to explore the Web, which is your online destination for everything from news, weather, and sports to online shopping, research, entertainment, and just plain fun. To get on the Web, you first have to be connected to the Internet, so go ahead and connect to the Internet using the method recommended by your Internet Service Provider (probably with a cable modem, DSL, or dial up using a telephone line and your internal modem). Once you’re connected, to visit a website you’ll use Safari, Apple’s Web browser, so click on the Safari icon in the Dock to launch it (its icon looks like a blue compass). This opens your Web browser and takes you to a startup page created by Apple.
STEP FOURTEEN (Navigating Websites):
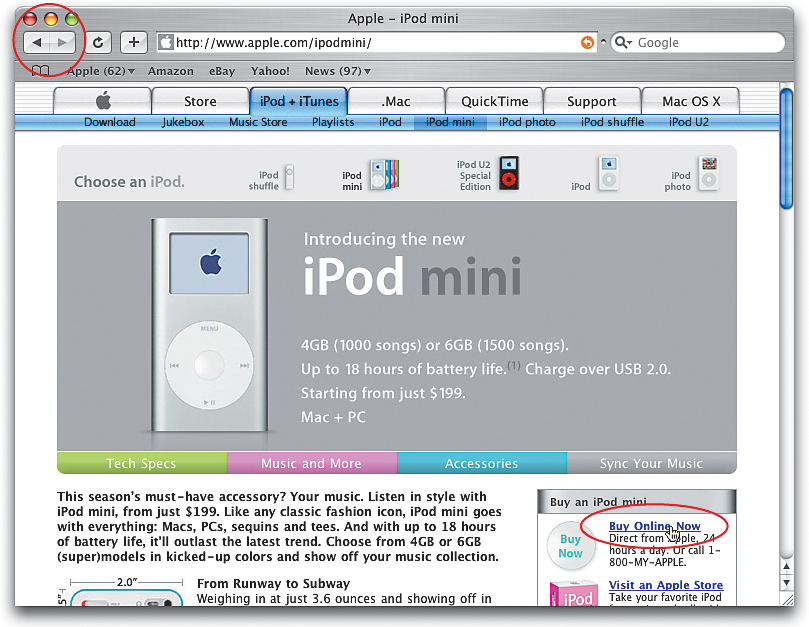
On websites (like this one, for example), you can learn more about anything you see on the page by either: (a) clicking on any text underlined in blue (called a link), or (b) clicking on any photo that has a link embedded. For example, if you see a photo of Apple’s iPod somewhere on the page, and you click on the photo, it will likely take you to a page with information on the iPod. Although most photos on websites are live “links” to other webpages, you can easily find out which photos (and text) have links by simply moving your mouse over a particular photo (or text). If your cursor changes from a black arrow to a hand pointing upward—that’s a link; so if you click your mouse when your cursor shows the pointing hand, your browser will jump to that page. To get back to the previous page (the page where you originally clicked), click the Back button (which is the left-facing arrow in the top-left corner of your browser window). To get to a subsequent page, click the Next button (it’s the right-facing arrow in the top-left corner).

STEP FIFTEEN (Finding Things on the Web):
Okay, so you found Apple’s webpage, but how do you find other websites? You search for them, and you can do that right within Safari, as there’s a search field in the top right-hand corner of Safari’s window that lets you search using the hottest Web search engine on the planet—Google. To search for a site, you just have to click your mouse once in the Google field, and type the word you’re searching for. For example, if you want to find webpages that have information on Nikon cameras, just type the word “Nikon” in the Google field, then press the Return key on your keyboard. In just seconds, Google gives you a list of all the sites it found that contain information about Nikon, and they’re listed by order of relevance, so naturally the first link it lists is Nikon’s own website. To jump directly to that site, just click on the blue underlined link that reads “Nikon USA.” Other sites are listed below where you can learn more or buy Nikon cameras (the site links listed on the right side of the window are paid links, so these are usually sites that sell products).
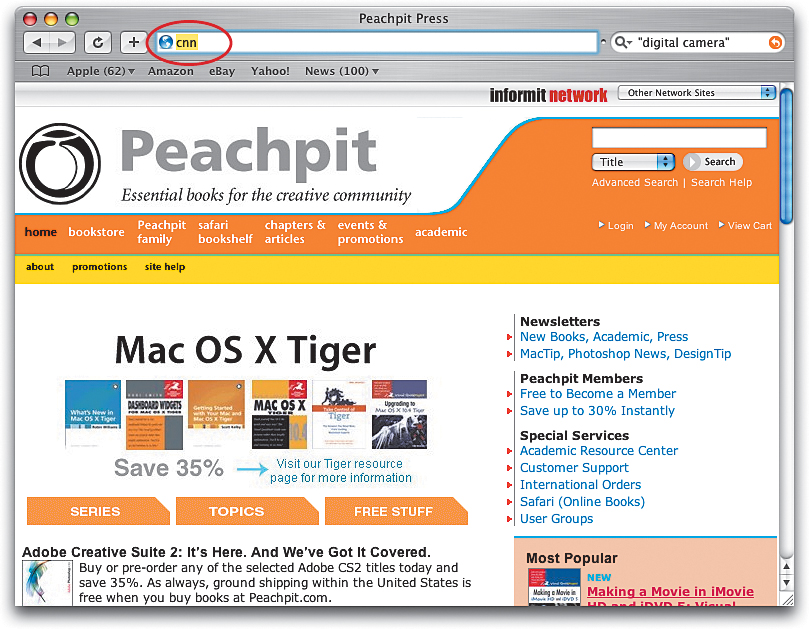
STEP SIXTEEN (If You Know Where You Want to Go):
If you know the name of the website you want to visit, all you have to do is click three times in the long, center field at the top of the browser to highlight all the text that’s already there, then type the Web address you want to go to. For example, if you wanted to visit the website for the publisher of this book (which is Peachpit Press), you can just type the word “Peachpit” in the main address window that runs across the top of your browser window and press the Return key (technically, Peachpit’s Web address is www.peachpit.com, but if you just type in a single name like this, Safari assumes that it’s a “.com” so it adds that information for you automatically. Another example: If you want to visit CNN.com, you can just type “CNN” (without the quotes). You don’t need to type “www” or that “http://” thing—just type “CNN,” press Return, and in a second or two, you’re there.
STEP SEVENTEEN (Getting Back to Places You’ve Been):
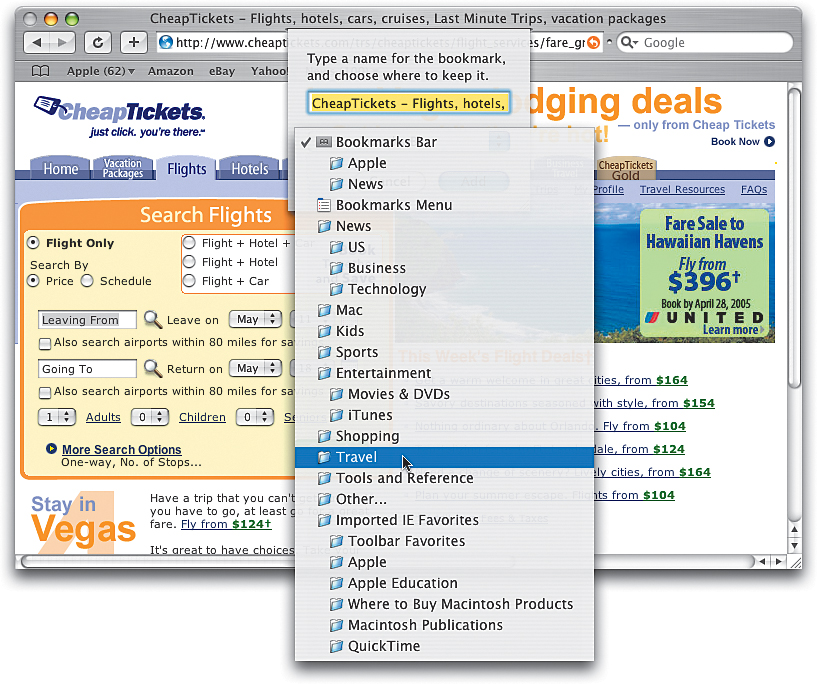
Okay, so let’s say you found a website you really like (maybe it’s a site that offers airline discounts), and you want to be able to visit here again when it’s time for your next trip. You don’t have to memorize or write down the location of this website, instead you can “bookmark it” so you can jump right back there anytime with just one click. Here’s how: When you’re at that travel site, go under the Bookmarks menu (at the very top of your screen) and choose Add Bookmark. This brings up a small window asking you to name your bookmark (you can use the name already provided by the site, but if it’s too long, you might want to create your own). Then, click once on the words “Bookmarks Bar” and you’ll see a list of categories in which you can save this bookmark. Apple has already created a folder called Travel, and by saving your airline discount site into this folder, you’ll know exactly where to look for it next time. So click on the Travel folder to choose that as the location to save your site. Then, click the blue Add button to “bookmark” this site.
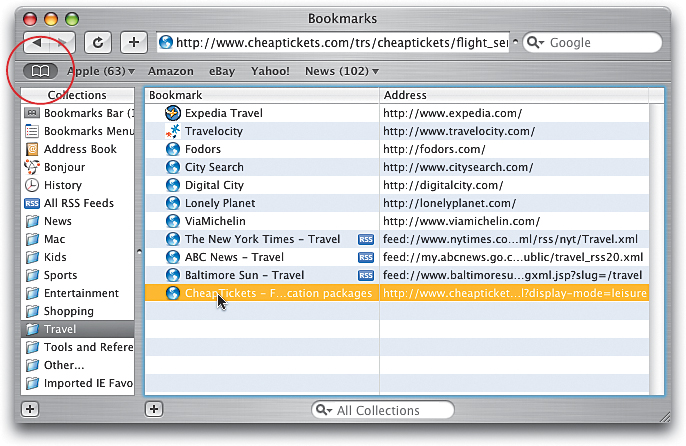
STEP EIGHTEEN (Finding Your Bookmarks):
When you later want to find a website that you’ve bookmarked (such as our airline discounts site), just click on the Bookmarks icon that appears near the top-left corner of the browser window (to the left of the word Apple) to reveal your collection of bookmarks. Then click on the Travel folder along the left side of the window and all the travel sites Apple already picked for you will be listed there, and at the bottom of the list will be your airline discount site. To visit that site, just double-click on it.

STEP NINETEEN (Using Wireless Internet Access):
If you have a PowerBook or iBook, you’re going to want to know how to jump on a Wireless network, since they’re popping up everywhere, from McDonald’s to Starbucks, from most every airport departure gate to Internet cafes. All you need is an Apple AirPort card. (Note: AirPort is Apple’s name for their wireless Internet connection device. Your PowerBook or iBook may have come with an AirPort card built right in. To find out if yours has a built-in AirPort card, go under the Apple menu and choose About This Mac. When the About This Mac window appears, click on the More Info button. In a few seconds another window will appear with info about your particular Macintosh model. On the left side you’ll see a list of contents. Look in the Network section, and if you see the words “AirPort Card,” you’re in luck. If it’s not listed there, you don’t have one, but you can buy one from Apple.com or your local Apple store in the mall.) To jump on a wireless network, first click on any empty space on your desktop (or click on the Finder icon in your Dock). Then, up in the menu bar at the top of your screen, you’ll see a tiny icon that looks like a pie slice along the right side (it’s supposed to be a radar icon, but face it—it’s a pie slice). Click once on that icon, then with your mouse move down to Turn AirPort On and click on it once. If it finds a nearby wireless network, you’ll see the pie slice fill with bands (now it looks more like radar), and if you click once on the radar (pie slice) icon, you’ll see a list of the wireless networks it has found. To join one, just click on it, then launch the Safari Web browser, and you’re on the Web.