
Lesson 3. Playing Music on Your Mac (and Your iPod)
Time
This lesson takes approximately 20 minutes to complete.
Goals
To import music into your Mac, download music from the Internet, and create a library of music. Then, organize your music into playlists and import this music into an Apple iPod MP3 player.
One of the coolest things about the Mac is how it handles music, especially when using your Mac with an Apple iPod MP3 player. The seamless way these two work together is just a beautiful thing to behold (and putting together and sorting your music collection is really a lot of fun. In fact, it’s so much fun that compiling your library of songs can almost become a hobby of its own). The software we use to download, import, and organize music on a Mac is called iTunes. As powerful as iTunes is, it’s amazingly easy to use, and having it sync with your iPod is even easier (the whole process is really pretty brilliant). iTunes lets you do three very important things: (1) It lets you import music from audio CDs (the same ones you buy at the record store in the mall); (2) it lets you buy and download music from the iTunes Music Store, which is the world’s largest collection of legally downloadable music, with more than a million songs to choose from; and (3) it lets you organize all your music (no matter where it came from) into playlists that you create. Plus, if you have an iPod, a fourth iTunes feature appears, because when you connect an iPod to your Mac, iTunes copies your music playlists onto your iPod for you automatically. It all comes together to create one of the absolute most fun, most satisfying, and most exciting things about owning a Mac. Let’s get to it!
STEP ONE (Setting Up iTunes):
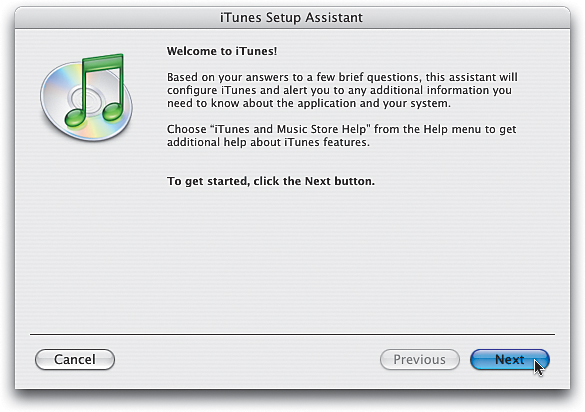
Click once on the iTunes icon in the Dock on your desktop (its icon looks like a CD with a green music note on it). The first time you click on iTunes, the iTunes assistant window appears. It’s going to ask you a few questions about how you want to set up iTunes. You can read each window and try to decide what to do, but for now I recommend just clicking the Next button in each window, which will basically leave all the settings as Apple recommends. Once you click Next three times, you’re done, so click the Done button to close the iTunes assistant. When it closes, iTunes opens.

STEP TWO (Playing a Music CD, Part 1):
iTunes is essentially a music player, so to hear any music, you first have to get some music into it. You generally do this in one of two ways: (1) You import songs from a music CD, or (2) you download music from the Web (like from the iTunes Music Store, where you can legally buy and download music). We’ll start with importing from a CD, so go grab a music CD and pop it in your Mac’s CD (or DVD SuperDrive) drive. (I know, all your CDs are in your car. That’s okay, I’ll wait till you get back.) Okay, got a CD? Good. Pop it in the CD drive. In a few moments, this CD will appear in the Source list on the left side of the iTunes window.

STEP THREE (Playing a Music CD, Part 2):
The songs on your CD will appear in the main window. (In fact, if you’re connected to the Internet when you insert your CD, iTunes will quickly go to the Internet, find the names of the songs on your CD, and display the actual track names. If it can’t find info on that particular CD, it will display the tracks as “Track 1,” “Track 2,” etc.) Well, although you technically haven’t imported these songs into iTunes yet, you can play them (after all, iTunes is a music player, right?).
To play a song, press on it (in the main window), then click the Play button in the upper left-hand corner of the iTunes window. To stop the song from playing, click the Pause button (which switches from the Play button when a song is playing). You can also start or stop a song by pressing the Spacebar on your keyboard. To skip to the next song in the list, click the Next Song button (to the right of the Play button). To hear the previous track, click the Previous Song button (to the left of the Play button). To adjust the volume, drag the Volume slider (found directly below the Play button). Note: Even though you have a song selected, that doesn’t mean it’s the song that’s playing. The small speaker icon to the left of the song name shows you which song is playing in the list. If you want to play a song that you have selected instead of the one that’s playing now, just double-click on your selected song.

STEP FOUR (Importing Songs from Your CD):
You can play your CD in iTunes, but when you eject the CD, those songs are ejected right along with it. (By the way, to eject a CD, just click the little Eject icon that appears to the immediate right of the CD’s name in the Source list. Don’t do that now—I’m just mentioning it so you’ll know how to later.)
So, before you eject the CD, you’ll want to import those songs into iTunes. You do that by clicking the Import button in the top-right corner of the iTunes window. That’s all you have to do—just click that button, and iTunes starts importing all the songs on that CD (actually, it imports all the songs that have a checkmark beside the name, so if there’s a song you don’t want to import, just click the checkmark to deselect it). If you look up at the status display in the top center of the iTunes window, it will read “Importing ‘Name of Song.’” After a couple of minutes of importing, it will automatically start playing the imported songs starting with the first track (just in case you get bored waiting for all the songs to import). Once all the songs are imported (you’ll know that they’re imported because a green checkmark will appear beside the track number in the first column of each song, plus iTunes will alert you with a quick “dinging” sound), you can then eject the CD (by clicking that little icon I told you about earlier). Now you can take your CD and put it back in your car. Oh yeah, one more thing: Did you notice that when you ejected the CD the music keeps playing? That’s because the music is now saved on your computer, playing in iTunes.

STEP FIVE (Accessing the iTunes Music Store):
Now that you know how to import songs from a CD, you’re ready to download songs from the iTunes Music Store (it’s simple, because there’s a direct link between iTunes and the iTunes Music Store, so the process is pretty seamless). To visit the iTunes Music Store, you first have to be connected to the Internet, so make sure you’re “online.” (By the way, if you’re not sure how to get online, check out Lesson 5 “Email and the Internet.”) Once you’re online, click on the words “Music Store” in the Source list (along the left side of the iTunes window). The home page of the iTunes Music Store will appear in your main window. You’ll see lots of albums mentioned, and you can click on any of them to jump right to that album (almost everything you see is “clickable”), but instead of clicking on one of those, let’s use one of my favorite features—the search (we’ll actually do the searching in the next step).

STEP SIX (Finding Songs in the iTunes Music Store):
Let’s start by searching for songs by the band U2. You do that by going to the Search Music Store field in the top-right corner of the iTunes window, typing “U2” in the field, and then pressing the Return key on your keyboard to begin the search. In just a few seconds, all the U2 songs available for download will be displayed. To hear a 30-second preview of any song, just double-click on it in the list (go ahead and double-click on one, like “Beautiful Day” or “Vertigo,” which was used in one of Apple’s TV ads for the iPod and the iTunes Music Store).

STEP SEVEN (Buying Songs):
If you decide you want to buy one of U2’s songs, click the Buy Song button that appears to the far right of each song in the list (the price is listed to the left of the button. So far, songs sell for 99¢ each, but make sure you give the price a quick look in case it goes up or down in the future). When you click the Buy Song button, it asks you to sign in. If you already have an Apple account, you’ll need to enter your Apple ID and Password. My guess is that you don’t have one yet, but getting one is easy—just click the Create New Account button at the top of the window. It will take you through a sign-up process and form that’s pretty much like every other sign-up form on the Web. You’ll create a user name and password, and then you’ll enter your name, address, etc., and info for the credit card you want to use for your song purchases. Once you’ve completed the form and gone through the process, you’ll be automatically logged in, meaning you can start buying more songs (you won’t have to fill out the form again—you now have an account).

STEP EIGHT (Viewing Your Downloaded Music):
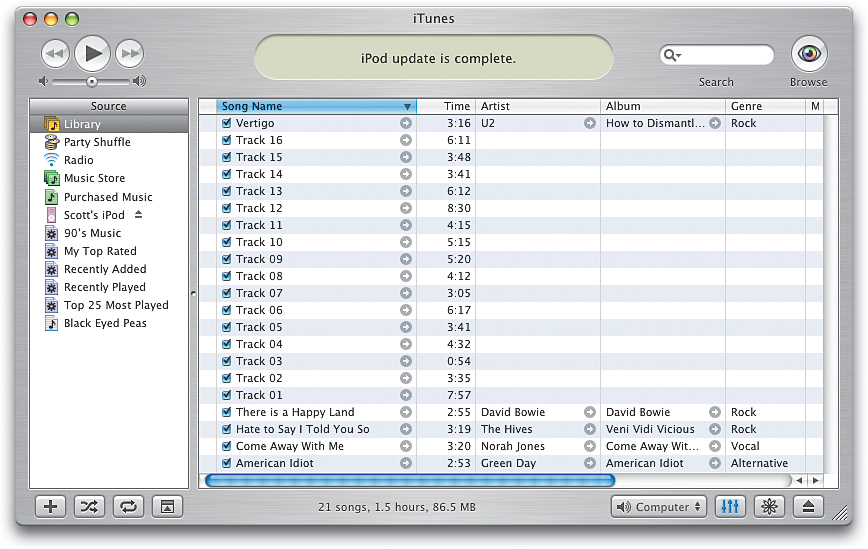
Any songs you buy will appear in your song Library. To see the songs in your Library (which at this point are the songs you imported from the CD and any songs you bought from the iTunes Music Store), just click on Library in the Source list on the far left of the iTunes window. Now comes the fun part: sorting your music. You see, right now all your songs are listed in your Library (which is where your complete collection of songs—your library of music—is found). They’re not grouped together or separated in any way—they’re all just lumped together in one big list. So let’s say the CD you imported was by the Black Eyed Peas. But let’s say you also purchased songs (from the iTunes Music Store) by U2, David Bowie, The Hives, Green Day, and Norah Jones. These songs are all mixed in with your Black Eyed Peas songs in your Library. Well, I’m going to show you how to organize your songs in the next step.

STEP NINE (Organizing Your Music):
You can create order from this musical chaos by making playlists. For example, you could create one for just your Black Eyed Peas songs, or for dance music, or classic rock, etc. So, let’s go ahead and create a playlist for the CD you imported earlier. Click on the plus sign (+) button that appears at the bottom-left corner of the iTunes window. This adds a new blank playlist to the bottom of your Source list that’s highlighted and ready for you to name. So, type a name (use the name of the band whose songs you imported from the CD) and press the Return key.

STEP TEN (Creating Playlists):
If you can’t see your songs in the main window, click on Library in the Source list (so you can see your complete list of songs). Click on any one of the songs you imported from the CD, then press-and-hold the Command key on your keyboard (it’s the key with the Apple logo on it) and click on each of the songs you imported from that album (or if the songs are contiguous, press-and-hold the Shift key and click on the first and last song from your CD in the list). When you get to the last song from your CD, release the Command (or Shift) key, and then click-and-hold—don’t just click—on that last song and drag-and-drop it onto the new playlist you created in the Source list. As you drag, all the other songs you selected will come right along with the song you’re dragging. As your cursor moves over your playlist, a little green plus sign (+) icon will appear below your cursor, which lets you know that you’re adding songs to this playlist. Now release the mouse button and just those songs will appear in that playlist. If you want to add another song from your Library, just click on it, then drag-and-drop it onto that playlist. In the Source list, click on your new playlist and you’ll see that it contains only the songs you selected. You can now start creating playlists and sorting your songs just the way you want them. By the way, to remove a song from a playlist, just click on it and press the Delete key on your keyboard (which removes the song from the playlist, not from your hard disk. To remove a song from your hard disk, click on it in your Library and press the Delete key).
STEP ELEVEN (Getting Music on Your iPod):
If you own an Apple iPod, it’s time to take the show on the road. Once you’ve imported all the songs you want from your CDs and downloaded some music from the iTunes Music Store, you can easily transfer your songs (and your playlists) directly to your iPod, so you can listen to your songs wherever you go. All you have to do is connect your iPod to your Mac using the connector cable that came with your iPod. Depending on which iPod you own, you’ll either have a USB or FireWire connector. (If you have an iPod Shuffle, just remove the cap from the bottom of the Shuffle and plug it directly into your Mac’s USB port.) To connect your iPod, plug one end of the connector into the bottom of your iPod and the other end into the matching slot on your Mac. Then, iTunes will automatically transfer your playlists and songs to your iPod. You don’t have to do anything—it’s completely automatic—just connect your iPod and iTunes does the rest. (Note: That sounds too easy, eh? Well, the only other thing you have to do is make sure your iPod’s software is already installed on your computer and it’s up to date. So, you may need to go to Apple.com and download the latest iPod software.) When the all songs are transferred to your iPod, you can remove your iPod, plug in your earphones, and hear the music from your playlists. If you download new songs, import new songs, create new playlists, etc., everything will automatically be updated to reflect your changes when you reconnect your iPod. Sweet!