
Lesson 2. How to Set Up Your Calendar
Time
This lesson takes approximately 30 minutes to complete.
Goals
To organize and track your appointments for home and work; to create a custom calendar; and to use iCal’s visual tools to keep everything instantly accessible and easy to use.
You’re going to set up your calendar (it’s just like a regular calendar, where you can view holidays or note appointments, birthdays, work stuff, etc.). The idea behind iCal is to give you a simple way to differentiate all your various appointments with just a quick glance at your calendar. You do this by color coding your appointments. For example, you can have all your work appointments appear in one color (let’s say green, for example), and all your home appointments appear in another color (let’s say blue). That way, you can see exactly which appointments are which. But to take it a step further, you can turn off these sets of appointments, so you can see just your work appointments, or just your home appointments, or just holidays, or just...well, whatever you want because creating these individual color-coded calendars is simple.
STEP ONE (Accessing iCal):
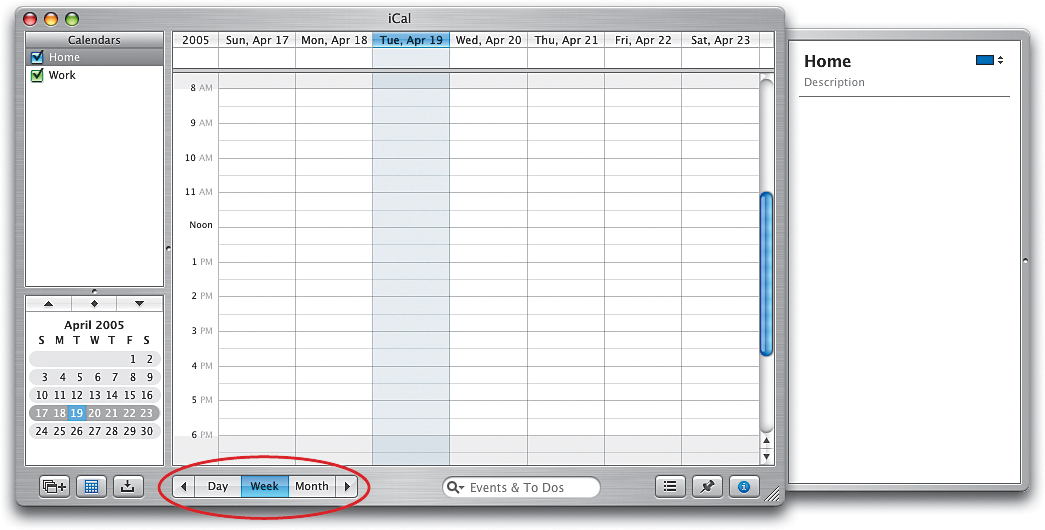
To open the iCal calendar program, click once on the iCal icon in the Dock at the bottom of your computer screen (looks like a desk calendar with a red bar across the top and the number 17 below). The first time you launch iCal, it opens in Week view, and you’ll see today’s date highlighted in light blue. By the way, you can see just today’s appointments by clicking on the Day button in the bottom-left side of the iCal window, or to view the entire month, click the Month button.
STEP TWO (Preparing Your Home Calendar):
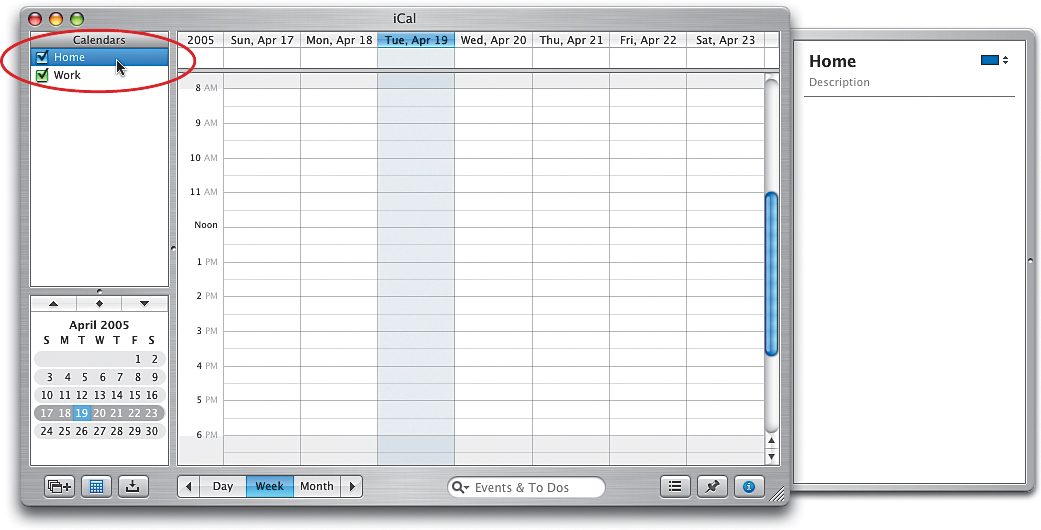
If you look in the top-left side of the iCal window, you’ll see a Calendars panel, and listed in that panel are two views: Home (in blue) and Work (in green). They’re different colors to help you visually keep track of which appointments are for your personal life (Home) and which are for work (you guessed it, Work). So, if you see an entry in green, you instantly know it’s for work. But first, we’re going to start by adding some appointments to your Home calendar, so in the Calendars list, click on Home (a blue highlight bar will appear over the word “Home” to let you know you’re adding things to your Home calendar).
STEP THREE (Changing Months):
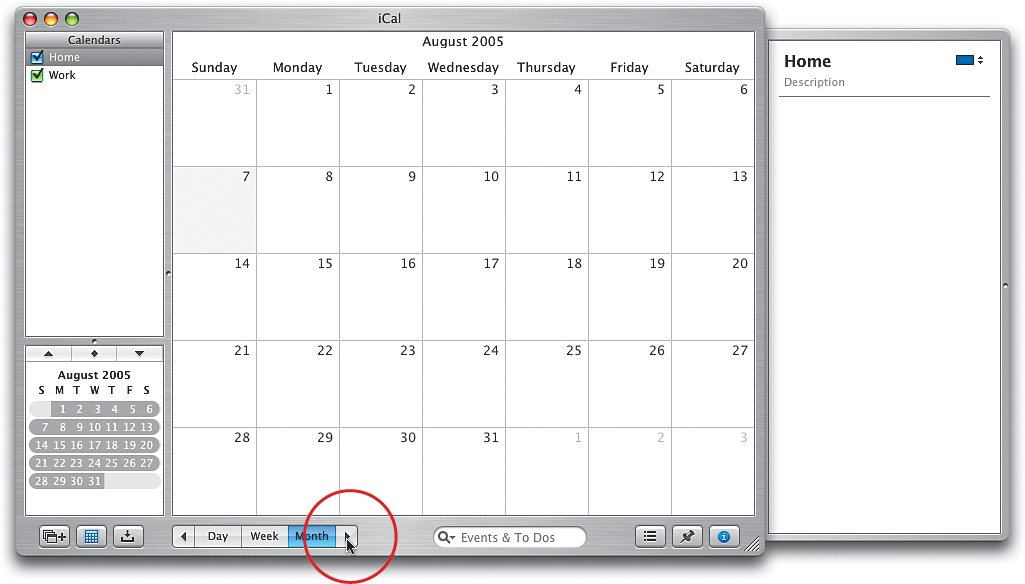
Because you’re going to add a number of different appointments (called “Events”) on different days of the month, it’ll be easier to do this in the Month view. To switch to Month view, click on the Month button at the bottom of the iCal window, then click on the right-facing arrow button that appears just to the right of the Month button until August appears at the top of the window. (Why August? Because that’s when the NFL preseason starts. What bearing does that have on this tutorial? None. I just like football.)
STEP FOUR (Adding a New Event):
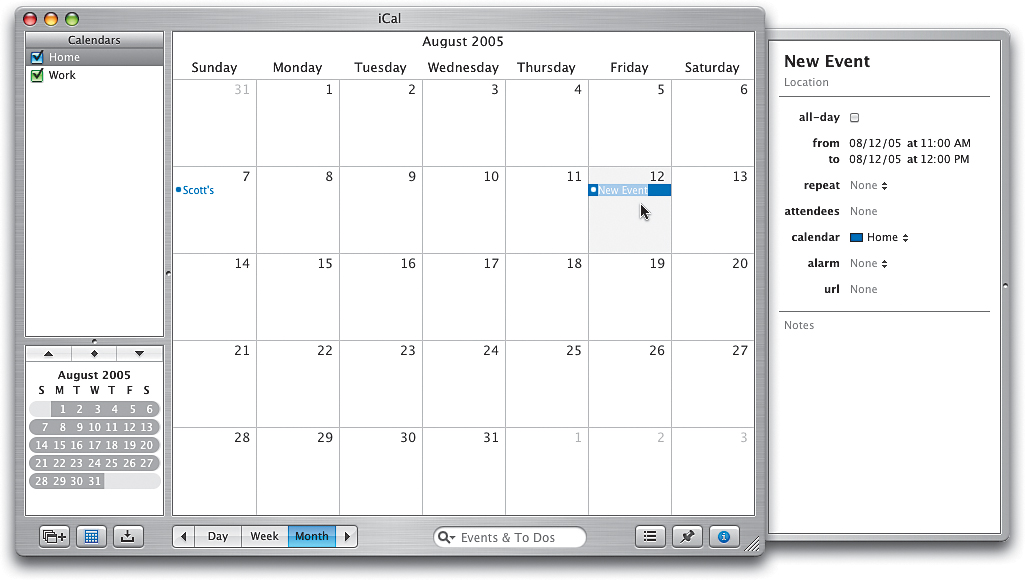
Double-click in the white space in the center of the 7th day and a “New Event” (in blue) will appear. It’s highlighted and ready for you to type a name for the event, so type “Scott’s birthday,” then press the Return key when you’re done. (By the way, that’s not my birthday, but it easily could’ve been if I were born a month later than I was.) Now, double-click in the white space on the 12th and add “Register Michael for school.” (Note: Double-click on the white space to add an event; don’t double-click on the date itself or iCal will switch to Day view.) On the 17th add “Meet repairman at house,” and on the 22nd add “Dentist appt. at 2 p.m.” This is pretty typical stuff that you might add to your calendar, especially if your son is named Michael, you’ve got a broken appliance, and you’re coping with gingivitis.
STEP FIVE (Creating Events for a Work Calendar):
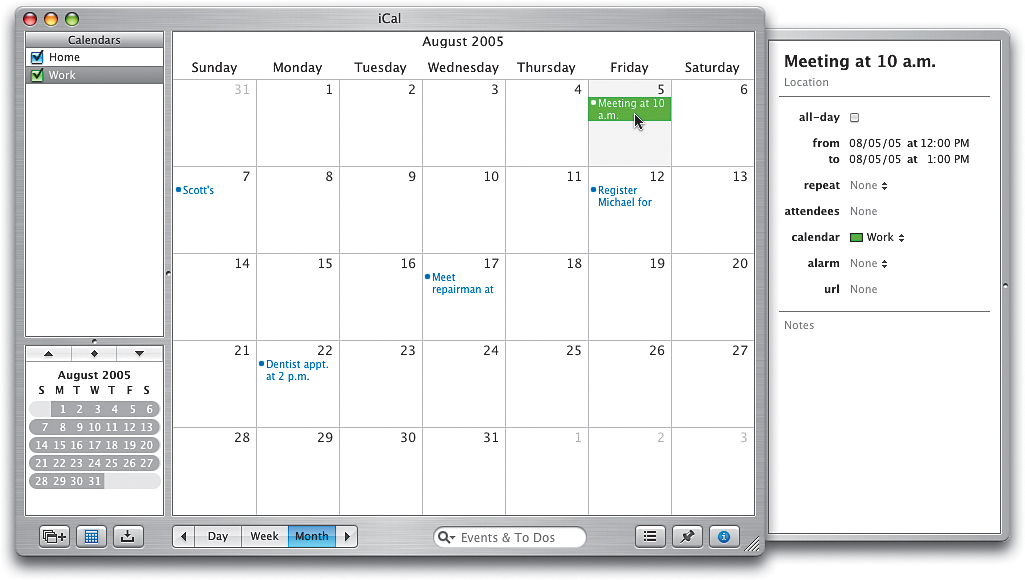
Now we’ll add some business-related appointments in August, so in the Calendars list on the left side of iCal, click on the word “Work” (so your appointments will be added to the Work calendar). Double-click in the white space on the 5th and type “Meeting at 10 a.m.”, then press the Return key to set that appointment. (You’ll notice that this entry appears in green—the same color as your Work calendar.) On the 11th double-click and type “Second Quarter financials due,” and on the 22nd add “Flight to Detroit at 7:30 p.m.” (You already have an entry on the 22nd—on your Home calendar—so to add this, double-click in the white space below your Home appointment.)
STEP SIX (Easily View Specific Calendars):
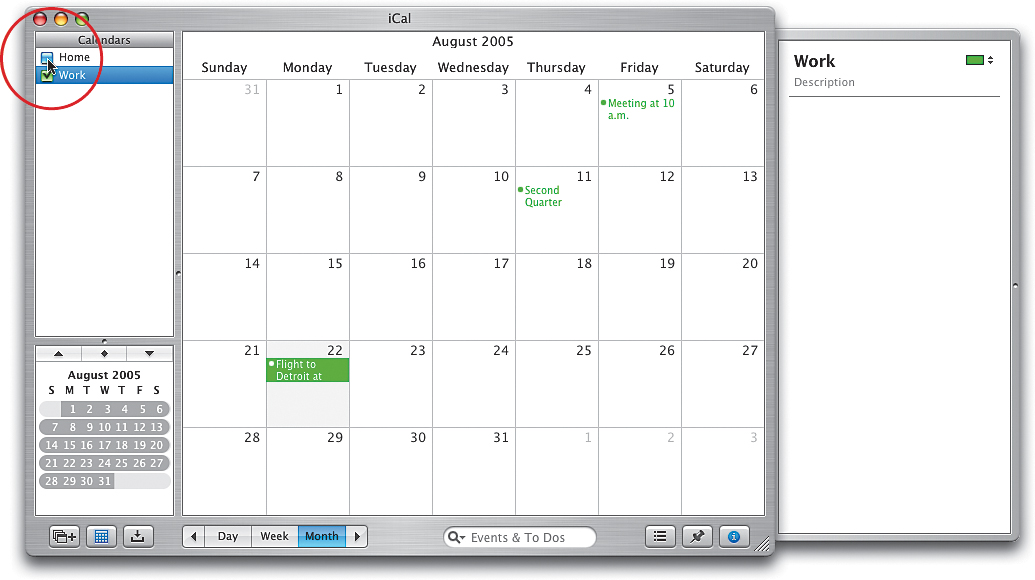
Now that you’ve added events to both your Home and Work calendars, things can start to look a bit crowded, but that’s where iCal shines. To see just your Work appointments instantly, go to your Calendars list (on the left side of the iCal window) and hide your Home appointments by turning off the checkbox to the left of Home. Now only your Work appointments are visible, so it’s pretty easy to see—with just a glance—what’s coming up for work. Note: To see your Home calendar again, just click in the Home checkbox.
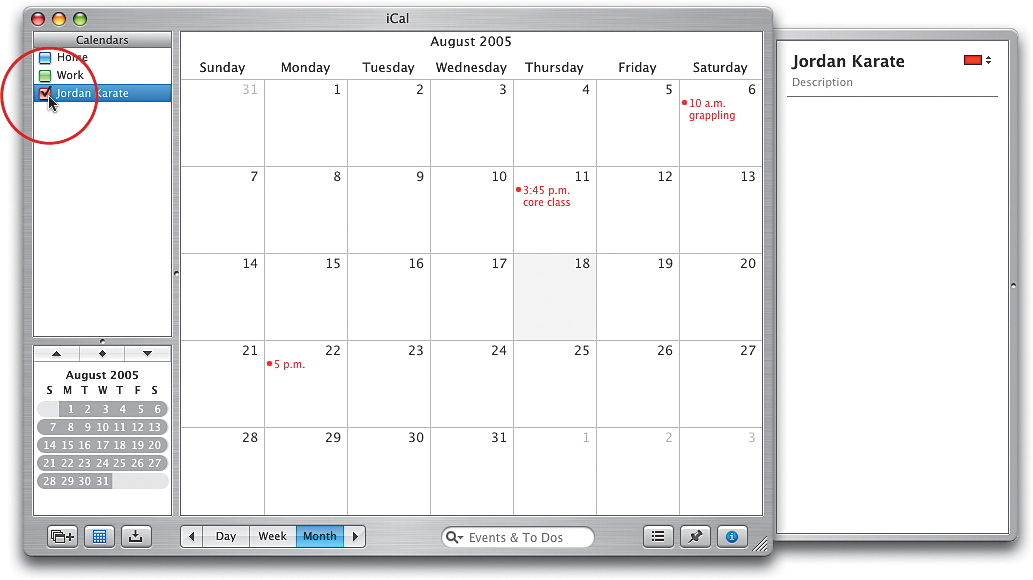
STEP SEVEN (Making Custom Calendars):
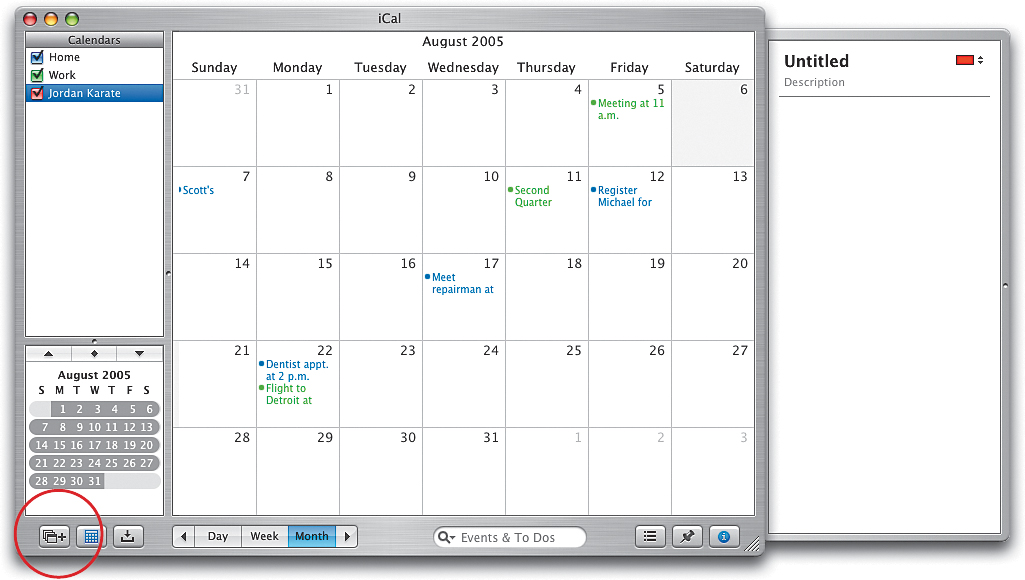
iCal gets really fun once you start adding your own custom calendars (other than the preset Home and Work calendars), so we’re going to add another one. To add your own custom calendar, go under File and choose New Calendar. You can also click on the plus sign (+) in the bottom-left corner of the iCal window (it’s technically called the Add a New Calendar button). When the new calendar appears in the Calendars list, type “Jordan Karate,” then press the Return key. You’ll notice the new calendar appears in red (the different colors help you keep track of your different calendars). You can add as many of these custom calendars as you’d like—just click on the plus sign button.
STEP EIGHT (Scheduling Events for a Custom Calendar):
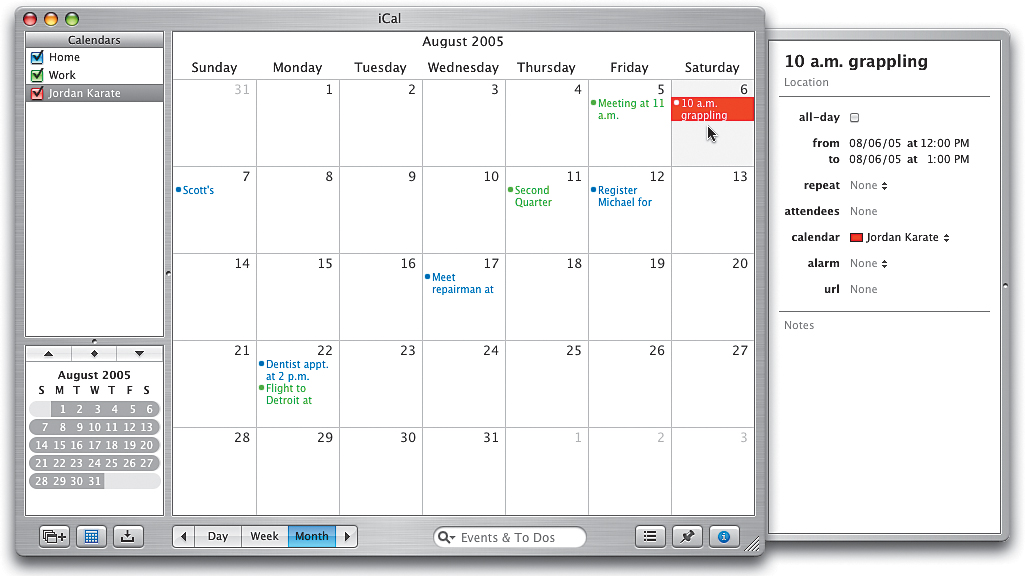
Now, let’s add Jordan’s schedule for his karate classes to your calendar. Double-click in the white space on the 6th, type “10 a.m. grappling,” and press the Return key (you’ll notice that this entry also appears in red). On the 11th double-click and add “3:45 p.m. core class,” and on the 22nd add “5 p.m. sparring” (you already have entries on those dates from other calendars, so double-click below all the other appointments to add new entries).
STEP NINE (Viewing Only Your Custom Calendar):
If you just want to see your son’s karate schedule, in the Calendars list on the left side of the iCal window, Option-Command click on the checkbox to the left of the calendar’s name, and you’ll instantly see when your son’s karate classes are, as all other calendars are temporarily hidden from view. (Note: To view all the calendars again, Command-click on any unselected checkbox to the left of a calendar that’s hidden.)
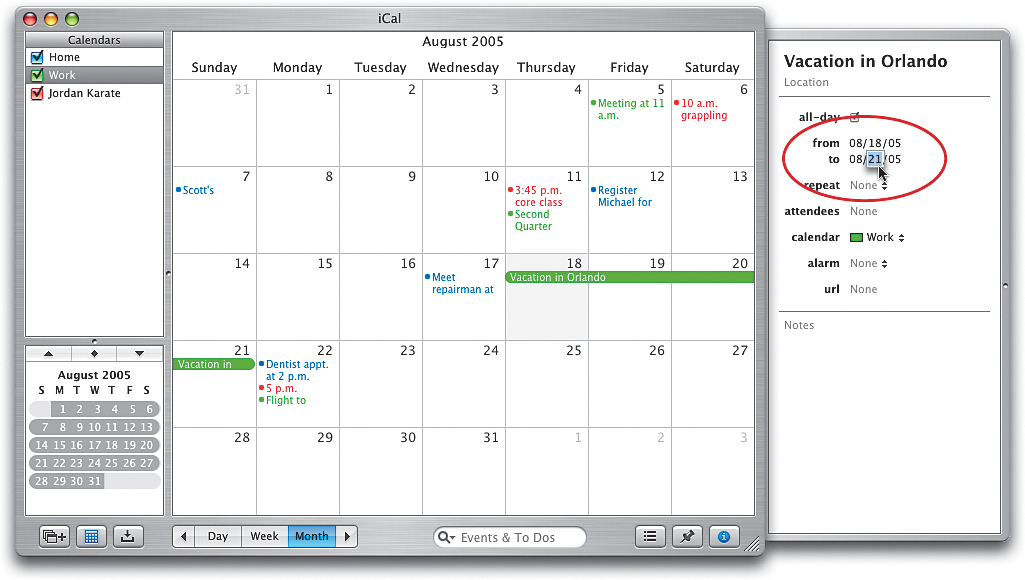
STEP TEN (Setting a Duration for an Event):
So far, we’ve been adding events that start at a certain time, but have no ending time. So, let’s add one that has a set duration. In the Calendars list, click on Work, and then double-click in the white space on the 18th, type this event: “Vacation in Orlando,” and press Return. Then, in the Info pane on the right side, click on the All-Day checkbox. (Note: If the Info pane isn’t visible, press Command-I to toggle it on and off.) Where it says “From” and “To,” go under the To section and click on the date, which will highlight. Now, type the date that you’ll be coming back (in this case, you’re coming back on Sunday the 21st, so type “21,” then press the Return key). You’ll see that a color bar now spans the length of your vacation, which is a great visual reminder not to plan something while you’re on vacation.
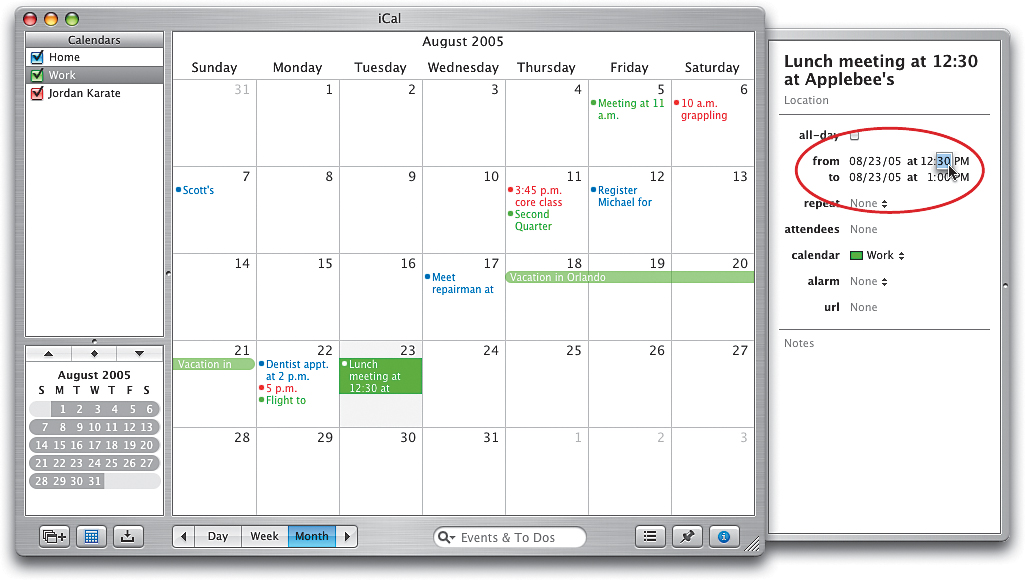
STEP ELEVEN (Setting a Specific Event Time):
This works for hour durations as well (rather than just days), so double-click in the white space on the 23rd and add this event: “Lunch meeting at 12:30 at Applebee’s.” In the Info pane on the right, click once on the From time and type “12” for the hour, press Return, and type “30” for the minutes. Then, click once on the To time and type “3” for the hour, press Return, and type “00” for the minutes (hey, you’re the boss—take a long lunch). Now click on the Day button at the bottom of the iCal window, and you can see how this appointment extends from 12:30 to 3 p.m., which helps you not to schedule anything else during that block of time.

STEP TWELVE (Setting an Alarm):
Back in Step 5, we added a 10 a.m. appointment on the 5th (and later changed it to 11 a.m.), right? To make sure you remember that appointment, we’re going to set an alarm to remind you. First, repeat Step 11 to set your appointment to a specific time (from 11 a.m. to 12 p.m.). Then, click directly on that appointment on the 5th in your calendar. In the Info pane about halfway down, you’ll see the word “Alarm.” To set a reminder alarm, click once directly on the word “None,” which appears to the right of the word “Alarm,” and a pop-up menu of alarms will appear. You have a number of different choices, including having a message window pop up onscreen, having it pop up onscreen and sound a warning alert, or having iCal email you a reminder (among other things). For now, choose Message with Sound, and eventually a message window will appear onscreen to remind you, plus a sound will play to get your attention. Now, exactly when will this happen? That’s up to you.

STEP THIRTEEN (Choosing Options for Your Alarm):
Once you choose an alarm, additional options will appear under the Alarm category. For example, when you choose Message with Sound, a pop-up menu appears in which you can choose a specific sound. Below that there’s a pop-up menu for how many minutes, hours, or days before (or after) the event the message will appear. Click on the pop-up menus and choose your preferences.