CHAPTER 2
Create and manage Compute Resources
Microsoft Azure offers many features and services that can be used to create inventive solutions for almost any IT problem. Two of the most common services for designing these solutions are Microsoft Azure Virtual Machines (VM) and VM Scale Sets. Virtual machines are one of the key compute options for deploying workloads in Microsoft Azure. Virtual machines can provide the on-ramp for migrating workloads from on-premises (or other cloud providers) to Azure, because they are usually the most compatible with existing solutions. The flexibility of virtual machines makes them a key scenario for many workloads. For example, you have a choice of server operating systems, with various supported versions of Windows and Linux distributions. Azure virtual machines also provide you full control over the operating system, along with advanced configuration options for networking and storage. VM Scale Sets provide similar capabilities to VMs, and provide the ability to scale out certain types of workloads to handle large processing problems, or to just optimize cost by only running instances when needed. The third option covered in this module is Azure Container Service (ACS). Azure Container Service optimizes the configuration of popular open source tools and technologies, specifically for Azure. ACS provides a solution that offers portability for both container-based workloads and application configuration. You select the size, number of hosts, and choice of orchestrator tools and ACS handles everything else.
Skills covered in this chapter
Skill 2.1: Deploy workloads on Azure Resource Manager (ARM) virtual
machines (VMs)Skill 2.7: Manage containers with Azure Container Service (ACS)
Skill 2.1: Deploy workloads on Azure Resource Manager (ARM) virtual machines (VMs)
Microsoft Azure Virtual Machines is a flexible and powerful option for deploying workloads into the cloud. The support of both Windows and Linux-based operating systems allows for the deployment of a wide variety of workloads that traditionally run in an on-premises environment.
This skill covers how to:
Identify and run workloads in VMs
Create virtual machines
Connect to virtual machines
Identify and run workloads in VMs
Due to the flexible nature of virtual machines, they are the most common deployment target for workloads that are not explicitly designed with the cloud in mind. Azure virtual machines are based on Windows Server Hyper-V. However, not all features within Hyper-V are directly supported because much of the underlying networking and storage infrastructure is much different than a traditional Hyper-V deployment.
With that in mind, it should not come as a total surprise that all workloads from Microsoft (including roles and features of Windows Server itself) are not supported when running within Azure Virtual Machines. Microsoft Azure supports running all 64-bit versions of Windows Server starting with Windows Server 2003 and on. In the event the operating system itself is not supported like Windows Server 2003, this support is limited to issues that don’t require operating system-level troubleshooting or patches). Beyond Windows Server, much of the Microsoft server software portfolio is directly supported on Azure VMs, such as Exchange, CRM, System Center, and so on.
The best way to keep track of what is, and is not supported, is through the Microsoft support article at http://support.microsoft.com/kb/2721672. This article details which Microsoft workloads are supported within Azure. Also, the article is kept up-to-date as new workloads are brought online, or the support policy changes when new capabilities within Azure enhance what is supported.
There are several distributions of Linux that are endorsed and officially supported to run in Microsoft Azure Virtual Machines. At the time of this writing, the following distributions have been tested with the Microsoft Azure Linux Agent and have pre-defined images in the Azure Marketplace with the agent pre-configured. Table 2-1 shows the current endorsed Linux distributions.
TABLE 2-1 Endorsed Linux distributions for Azure VMs
Distribution |
Version |
CentOS |
CentOS 6.3+, 7.0+ |
CoreOS |
494.4.0+ |
Debian |
Debian 7.9+, 8.2+ |
Oracle Linux |
6.4+, 7.0+ |
Red Hat Enterprise Linux |
RHEL 6.7+, 7.1+ |
SUSE Linux Enterprise |
SLES/SLES for SAP 11 SP4 12 SP1+ |
openSUSE |
openSUSE Leap 42.1+ |
Ubuntu |
Ubuntu 12.04, 14.04, 16.04, 16.10 |
This list is updated as new versions and distributions are on-boarded and can be accessed online at https://docs.microsoft.com/en-us/azure/virtual-machines/linux/endorsed-distros.
You can also bring your own custom version of Linux if you deploy the Microsoft Azure Linux agent to it. You should be aware that the Microsoft Azure support team offers various levels of support for open source technologies including custom distributions of Linux. For more details see https://support.microsoft.com/en-us/help/2941892/support-for-linux-and-open-source-technology-in-azure.
Running Linux on Microsoft Azure Virtual Machines requires an additional piece of software known as the Microsoft Azure Linux Agent (waagent). This software agent provides much of the base functionality for provisioning and communicating with the Azure Fabric Controller including the following:
Image provisioning
Creation of a user account
Configuring SSH authentication types
Deployment of SSH public keys and key pairs
Setting the host name
Publishing the host name to the platform DNS
Reporting SSH host key fingerprint to the platform
Resource disk management
Formatting and mounting the resource disk
Configuring swap space
Networking
Manages routes to improve compatibility with platform DHCP servers
Ensures the stability of the network interface name
Kernel
Configures virtual NUMA (disable for kernel <2.6.37)
Consumes Hyper-V entropy for /dev/random
Configures SCSI timeouts for the root device (which could be remote)
Diagnostics
Console redirection to the serial port
SCVMM deployments
Detects and bootstraps the VMM agent for Linux when running in a System Center Virtual Machine Manager 2012 R2 environment
Manages virtual machine extensions to inject component authored by Microsoft and Partners into Linux VM (IaaS) to enable software and configuration automation
VM Extension reference implementation at https://github.com/Azure/azure-linux-extensions
The Azure Fabric Controller communicates to this agent in two ways:
A boot-time attached DVD for IaaS deployments. This DVD includes an OVF-compliant configuration file that includes all provisioning information other than the actual SSH keypairs.
A TCP endpoint exposing a REST API used to obtain deployment and topology configuration.
MORE INFO MICROSOFT LINUX AGENT
For more information on how the Microsoft Azure Linux agent works and how to enable it on a Linux distribution see https://docs.microsoft.com/en-us/azure/virtual-machines/linux/agent-user-guide.
Create virtual machines
There are multiple ways to create virtual machines depending on your intended use. The easiest way to create an individual virtual machine is to use the Azure portal. If you have a need for automated provisioning (or you just enjoy the command line) the Azure PowerShell cmdlets and the Azure cross-platform command-line tools (CLI) are a good fit. For more advanced automation that could even include orchestration of multiple virtual machines Azure Resource Manager templates could also be used. Each method brings with its own capabilities and tradeoffs, and it is important to understand which tool should be used in the right scenario.
To create a virtual machine using the Azure portal, you first click the new button and you can then either search for an image or solution or you can browse by clicking Compute, as shown in Figure 2-1. Within the Compute category you will see the featured images, and if one of those images is not appropriate you can click the See all option to view a larger selection.

FIGURE 2-1 The Azure Marketplace view for virtual machines
Create an Azure VM (Azure portal)
The Azure portal allows you to provision virtual machines from a wide variety of virtual machine images, and pre-defined templates for entire solutions such as SQL Server Always On, or even a complete SharePoint farm using just your web browser. For individual virtual machines you can specify some, but not all, configuration options at creation time. Some options, such as configuring the load balancer, and specifying additional storage configuration such as adding data disks, are not available at creation time but can be set after the virtual machine is created. Using the Azure portal, you can create virtual machines individually or you can deploy an ARM template that can deploy many virtual machines (including other Azure resources as well). You can even use the Azure portal to export an ARM template from an existing deployed resource. Through the integrated Azure Cloud Shell, you can also execute commands from the command line that can also be used to provision virtual machines. After an image is selected, you navigate through several screens to configure the virtual machine.
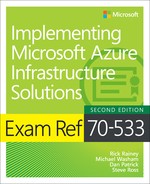
The first blade to complete is the Basics blade, as shown in Figure 2-2. The basics blade allows you to set the following configuration options:
The name of the virtual machine.
Standard hard disk drive storage (HDD) or Premium solid-state disk (SSD) based storage.
The administrator credentials.
User name and password for Windows and Linux.
Optionally an SSH key for Linux VMs.
The Azure subscription to create the VM in (if you have more than one).
The resource group name to deploy the virtual machine and its related resources in, such as network interface, public IP, etc.
The Azure region the virtual machine is created in.
If you already have licenses for Windows Server you can take advantage by using them in Azure. This is known as the Hybrid Use Benefit and can cut your bill significantly.
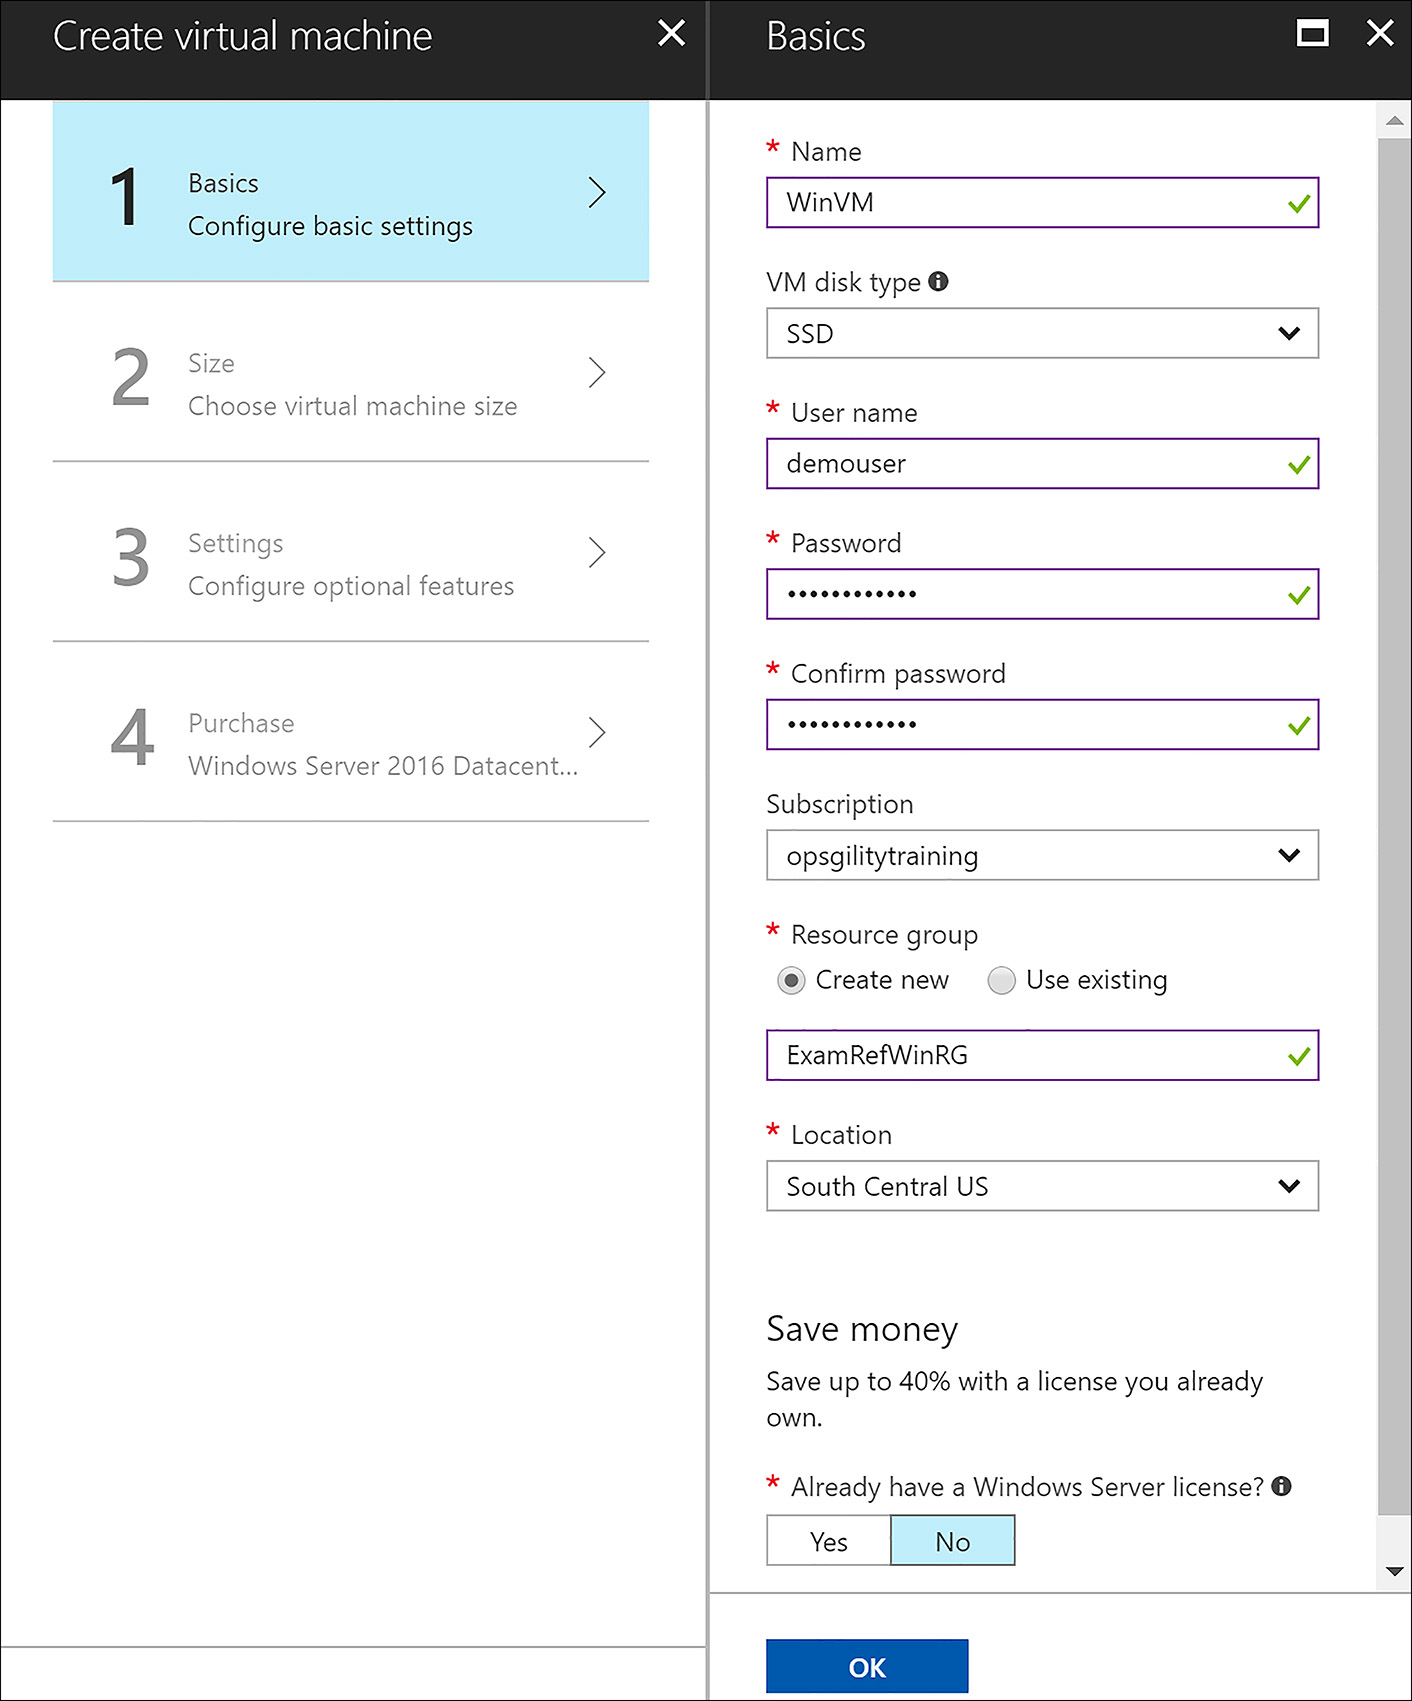
FIGURE 2-2 The Basics blade of the portal creation process for a Windows-based virtual machine
You can specify an existing SSH public key or a password when creating a Linux VM. If the SSH public key option is selected you must paste in the public key for your SSH certificate. You can create the SSH certificate using the following command:
ssh-keygen -t rsa -b 2048
To retrieve the public key for your new certificate, run the following command:
cat ~/.ssh/id_rsa.pub
From there, copy all the data starting with ssh-rsa and ending with the last character on the screen and paste it into the SSH public key box, as shown in Figure 2-3. Ensure you don’t include any extra spaces.

FIGURE 2-3 The Basics blade of the portal creation process for a Linux-based virtual machine
After setting the basic configuration for a virtual machine you then specify the virtual machine size, as show in Figure 2-4. The portal gives you the option of filtering the available instance sizes by specifying the minimum number of virtual CPUs (vCPUs) and the minimum amount of memory, as well as whether the instance size supports solid state disks (SSD) or only traditional hard disk drives (HDD).

FIGURE 2-4 Setting the size of the virtual machine
The Settings blade, shown in Figure 2-5, allows you to set the following configuration
options:
Whether the virtual machine is part of an availability set
Whether to use managed or unmanaged disks
What virtual network and subnet the network interface should use
What public IP (if any) should be used
What network security group (if any) should be used (you can specify new rules here as well)
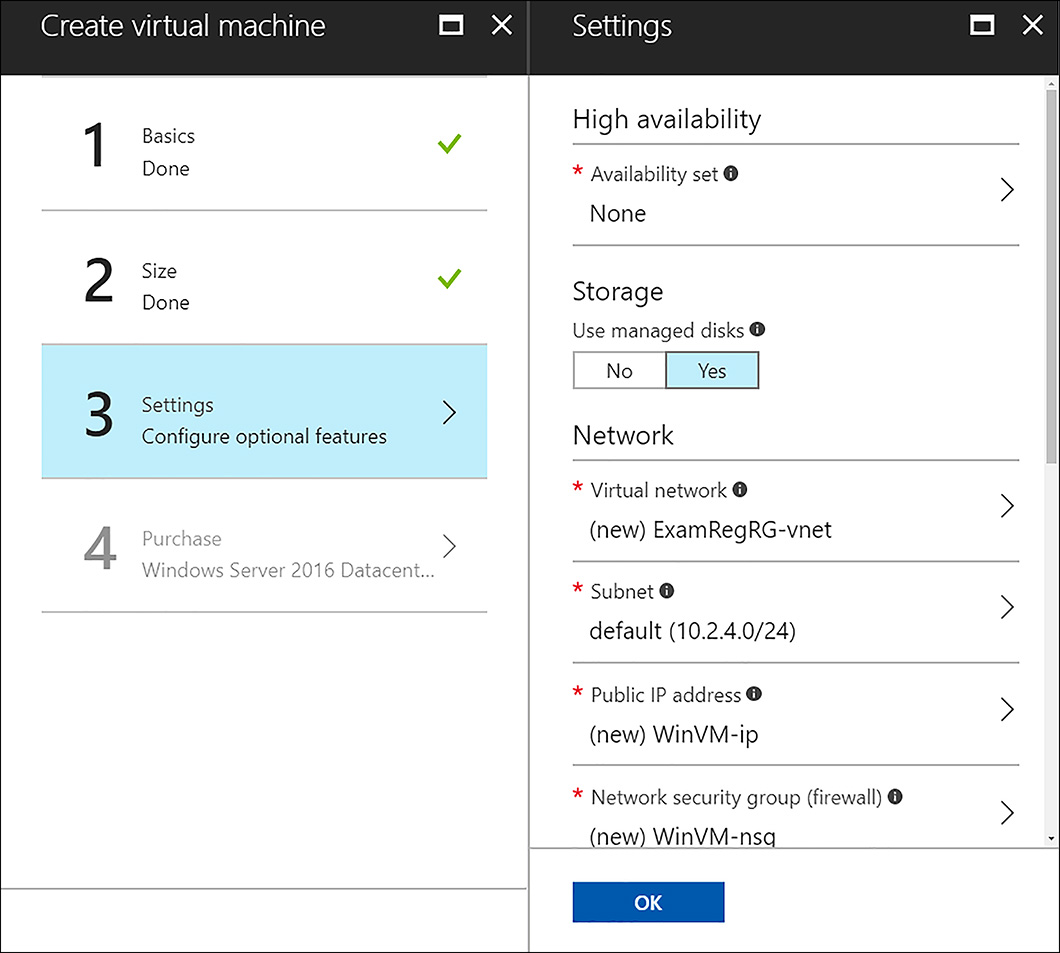
FIGURE 2-5 Specifying virtual machine configuration settings
The last step to create a virtual machine using the Azure portal is to read through and agree to the terms of use and click the purchase button, as shown in Figure 2-6. From there, the portal performs some initial validation of your template, as well as checks many of the resources against policies in place on the subscription and resource group you are targeting. If there are no validation errors the template is deployed.

FIGURE 2-6 Accepting the terms of use and purchasing
 EXAM TIP
The link next to the purchase button allows you to download an Azure Resource Manager template and parameters file for the virtual machine you just configured in the portal. You can customize this template and use it for future automated deployments.
Create an Azure VM (PowerShell)
The PowerShell cmdlets are commonly used for automating common tasks such as stopping and starting virtual machines, deploying ARM templates, or for making configuration settings on a vast number of resources at the same time. Using the Azure PowerShell cmdlets, you can also create virtual machines programmatically. Let’s walk through creating a similar virtual machine to what was shown in the previous section using PowerShell.
The approach we’ll use is to programmatically create the resources needed for the virtual machine such as storage, networking, availability sets and so on, and then associate them with the virtual machine at creation time.
Before you can create or manage any resources in your Azure subscription using the Azure PowerShell cmdlets you must login by executing the Login-AzureRmAccount cmdlet (which is an alias to the Add-AzureRmAccount cmdlet).
Login-AzureRmAccount
A virtual machine and all its related resources such as network interfaces, disks, and so on must be created inside of an Azure Resource Group. Using PowerShell, you can create a new resource group with the New-AzureRmResourceGroup cmdlet.
$rgName     = "Contoso"
$location   = "West US"
New-AzureRmResourceGroup -Name $rgName -Location $location
This cmdlet requires you to specify the resource group name, and the name of the Azure region. These values are defined in the variables $rgName, and $location. You can use the Get-AzureRmResourceGroup cmdlet to see if the resource group already exists or not, and you can use the Get-AzureRmLocation cmdlet to view the list of available regions.
Azure virtual machines must be created inside of a virtual network. Like the portal, using PowerShell, you can specify an existing virtual network or you can create a new one. In the code example below, the New-AzureRmVirtualNetworkSubnetConfig cmdlet is used to create two local objects that represent two subnets in the virtual network. The virtual network is actually created within the call to New-AzureRmVirtualNetwork. It is passed in the address space of 10.0.0.0/16, and you could also pass in multiple address spaces similar to how the subnets were passed in using an array.
$subnets = @()
$subnet1Name = "Subnet-1"
$subnet2Name = "Subnet-2"
$subnet1AddressPrefix = "10.0.0.0/24"
$subnet2AddressPrefix = "10.0.1.0/24"
$vnetAddresssSpace = "10.0.0.0/16"
$VNETName = "ExamRefVNET-PS"
$subnets += New-AzureRmVirtualNetworkSubnetConfig -Name $subnet1Name `
                                    -AddressPrefix $subnet1AddressPrefix
$subnets += New-AzureRmVirtualNetworkSubnetConfig -Name $subnet2Name `
                                    -AddressPrefix $subnet2AddressPrefix
$vnet = New-AzureRmVirtualNetwork -Name $VNETName `
                          -ResourceGroupName $rgName `
                          -Location $location `
                          -AddressPrefix $vnetAddresssSpace `
                          -Subnet $subnets
Virtual Machines store their virtual hard disk (VHD) files in an Azure storage account. If you are using managed disks (see more in Skill 2.3) Azure manages the storage account for you. This example uses unmanaged disks so the code creates a new storage account to contain the VHD files. You can use an existing storage account for storage or create a new storage account. The PowerShell cmdlet Get-AzureRmStorageAccount returns an existing storage account. To create a new one, use the New-AzureRmStorageAccount cmdlet, as the following example shows.
$saName     = "examrefstoragew123123"
$storageAcc = New-AzureRmStorageAccount -ResourceGroupName $rgName `
                                        -Name $saName `
                                        -Location $location `
                                        -SkuName Standard_LRS
$blobEndpoint = $storageAcc.PrimaryEndpoints.Blob.ToString()
The $blobEndpoint variable is used in a later code snippet to specify the location of where the VMs disks are created.
Use the New-AzureRmAvailabilitySet cmdlet to create a new availability set, or to retrieve an existing one use Get-AzureRmAvailabilitySet.
$avSet = New-AzureRmAvailabilitySet -ResourceGroupName $rgName `
                                    -Name $avSet `
                                    -Location $location
To connect to the virtual machine remotely create a public IP address resource.
$pip = New-AzureRmPublicIpAddress -Name $ipName `
                                -ResourceGroupName $rgName `
                                -Location $location `
                                -AllocationMethod Dynamic `
                                -DomainNameLabel $dnsName
By default, adding a public IP to a VM’s network interface will allow in all traffic regardless of the destination port. To control this, create a network security group and only open the ports you will use. The example below creates an array that will be used for the rules and populates the array with the New-AzureRmNetworkSecurityRuleConfig cmdlet.
# Add a rule to the network security group to allow RDP in
$nsgRules = @()
$nsgRules += New-AzureRmNetworkSecurityRuleConfig -Name "RDP" `
                                     -Description "RemoteDesktop" `
                                     -Protocol Tcp `
                                     -SourcePortRange "*" `
                                     -DestinationPortRange "3389" `
                                     -SourceAddressPrefix "*" `
                                     -DestinationAddressPrefix "*" `
                                     -Access Allow `
                                     -Priority 110 `
                                     -Direction Inbound
The New-AzureRmNetworkSecurityGroup cmdlet creates the network security group. The rules are passed in using the SecurityRules parameter.
$nsgName    = "ExamRefNSG"
$nsg = New-AzureRmNetworkSecurityGroup -ResourceGroupName $rgName `
                                -Name $nsgName `
                                -SecurityRules $nsgRules `
                                -Location $location
Now that the public IP and the network security group are created, use the New-AzureRmNetworkInterface cmdlet to create the network interface for the VM. This cmdlet accepts the unique ID for the subnet, public IP, and the network security group for configuration.
$nicName    = "ExamRefVM-NIC"
$nic = New-AzureRmNetworkInterface -Name $nicName `
                                 -ResourceGroupName $rgName `
                                 -Location $location `
                                 -SubnetId $vnet.Subnets[0].Id `
                                 -PublicIpAddressId $pip.Id `
                                 -NetworkSecurityGroupId $nsg.ID
Now that all the resources are created that the virtual machine requires, use the New-AzureRmVMConfig cmdlet to instantiate a local configuration object that represents a virtual machine to associate them together. The virtual machine’s size and the availability set are specified during this call.
$vmSize     = "Standard_DS1_V2"
$vm = New-AzureRmVMConfig -VMName $vmName -VMSize $vmSize `
                          -AvailabilitySetId $avSet.Id
After the virtual machine configuration object is created there are several configuration options that must be set. This example shows how to set the operating system and the credentials using the Set-AzureRmVMOperatingSystem cmdlet. The operating system is specified by using either the Windows or the Linux parameter. The ProvisionVMAgent parameter tells Azure to automatically install the VM agent on the virtual machine when it is provisioned. The Credential parameter specifies the local administrator username and password with the values passed to the $cred object.
$cred = Get-Credential
Set-AzureRmVMOperatingSystem -Windows `
                             -ComputerName $vmName `
                             -Credential $cred `
                             -ProvisionVMAgent `
                             -VM $vm
The operating system image (or existing VHD) must be specified for the VM to boot. Setting the image is accomplished by calling the Set-AzureRmVMSourceImage cmdlet and specifying the Image publisher, offer, and SKU. These values can be retrieved by calling the cmdlets Get-AzureRmVMImagePublisher, Get-AzureRmVMImageOffer, and Get-AzureRmVMImageSku.
$pubName    = "MicrosoftWindowsServer"
$offerName  = "WindowsServer"
$skuName    = "2016-Datacenter"
Set-AzureRmVMSourceImage -PublisherName $pubName `
                         -Offer $offerName `
                         -Skus $skuName `
                         -Version "latest" `
                         -VM $vm
$osDiskName = "ExamRefVM-osdisk"
$osDiskUri    = $blobEndpoint + "vhds/" + $osDiskName  + ".vhd"
Set-AzureRmVMOSDisk -Name $osDiskName `
                    -VhdUri $osDiskUri `
                    -CreateOption fromImage `
                    -VM $vm
The final step is to provision the virtual machine by calling the New-AzureRmVMConfig cmdlet. This cmdlet requires you to specify the resource group name to create the virtual machine in and the virtual machine configuration, which is in the $vm variable.
New-AzureRmVM -ResourceGroupName $rgName -Location $location -VM $vm
EXAM TIP
In addition to knowing how to provision a virtual machine from an image, it is good to understand how to create from an existing disk using the Set-AzureRmVMOSDisk -CreateOption attach parameter (for more information see https://docs.microsoft.com/en-us/powershell/module/azurerm.compute/set-azurermvmosdisk) or using an existing managed operating system disk (for more information see https://docs.microsoft.com/en-us/azure/virtual-machines/windows/create-vm-specialized).
Create an Azure VM (CLI)
The Azure CLI tools are used in a similar fashion to the PowerShell cmdlets. They are built to run cross platform on Windows, Mac, or Linux. The syntax of the CLI tools is designed to be familiar to users of a Bash scripting environment. Let’s walk through an example that creates the same resources as the previous PowerShell example, except creating a Linux-based virtual machine instead.
Like the PowerShell cmdlets, you first must login to access Azure using the CLI tools. The approach is slightly different, after executing the command az login, the tools provide you with a link to navigate to in the browser, and a code to enter. After entering the code and your credentials you are logged in to the command line.
az login
Create a new resource group by executing the az group create command and specifying a unique name and the region.
#!/bin/bash
rgName="Contoso"
location="WestUS"
az group create --name $rgName --location $location
The following command can be used to identify available regions that you can create resources and resource groups in.
az account list-locations
From here you have two options. You can create a virtual machine with a very simple syntax that generates much of the underlying configuration for you such as a virtual network, public IP address, storage account, and so on, or you can create and configure each resource and link to the virtual machine at creation time. Here is an example of the syntax to create a simple stand-alone virtual machine:
# Creating a simple virtual machine

vmName="myUbuntuVM"
imageName="UbuntuLTS"
az vm create --resource-group $rgName --name $vmName --image $imageName
 --generate-ssh-keys
EXAM TIP
The generate-ssh-keys parameter dynamically generates keys to connect to the Linux virtual machine for you if they are missing. The new keys are stored in ~/.ssh. You can also specify a user name and password using the admin-username and admin-password parameters if you set the authentication-type parameter to password (default is ssh).
To create all the resources from scratch, as shown in the section on creating a virtual machine using the PowerShell cmdlets, you can start with the virtual network. Use the az network vnet create command to create the virtual network. This command requires the name of the virtual network, a list of address prefixes, and the location to create the virtual network in.
vnetName="ExamRefVNET-CLI"
vnetAddressPrefix="10.0.0.0/16"
az network vnet create --resource-group $rgName -n ExamRefVNET-CLI
--address-prefixes $vnetAddressPrefix -l $location
The az network vnet subnet create command is used to add additional subnets to the virtual network. This command requires the resource group name, the name of the virtual network, the subnet name, and the address prefix for the subnet to create.
Subnet1Name="Subnet-1"
Subnet2Name="Subnet-2"
Subnet1Prefix="10.0.1.0/24"
Subnet2Prefix="10.0.2.0/24"
az network vnet subnet create --resource-group $rgName --vnet-name $vnetName -n
 $Subnet1Name --address-prefix $Subnet1Prefix
az network vnet subnet create --resource-group $rgName --vnet-name $vnetName -n
 $Subnet2Name --address-prefix $Subnet2Prefix
The az storage account create command is used to create a new storage account. In this example, the code uses the new storage account to store the VHD files for the Linux VM created later.
storageAccountName="examrefstoragew124124"
az storage account create -n $storageAccountName --sku Standard_LRS -l $location
--kind Storage --resource-group $rgName
The az vm availability-set create command is used to create a new availability set.
avSetName="WebAVSET"
az vm availability-set create -n $avSetName -g $rgName --platform-fault-domain-count
3 --platform-update-domain-count 5 --unmanaged -l $location
The az network public-ip create command is used to create a public IP resource. The allocation-method parameter can be set to dynamic or static.
dnsRecord="examrefdns123123"
ipName="ExamRefCLI-IP"
az network public-ip create -n $ipName -g $rgName --allocation-method Dynamic
--dns-name $dnsRecord -l $location
The az network nsg create command is used to create a network security group.
nsgName="webnsg"
az network nsg create -n $nsgName -g $rgName -l $location
After the network security group is created, use the az network rule create command to add rules. In this example, the rule allows inbound connections on port 22 for SSH and another rule is created to allow in HTTP port 80.
# Create a rule to allow in SSH
az network nsg rule create -n SSH --nsg-name $nsgName --priority 100 -g $rgName --access Allow --description "SSH Access" --direction Inbound --protocol Tcp --destination-address-prefix "*" --destination-port-range 22 --source-address-prefix "*" --source-port-range "*"

# Create a rule to allow in HTTP
az network nsg rule create -n HTTP --nsg-name webnsg --priority 101 -g $rgName --access Allow --description "Web Access" --direction Inbound --protocol Tcp --destination-address-prefix "*" --destination-port-range 80 --source-address-prefix "*" --source-port-range "*"
The network interface for the virtual machine is created using the az network nic create command.
nicname="WebVMNic1"
az network nic create -n $nicname -g $rgName --subnet $Subnet1Name --network-security-
group $nsgName --vnet-name $vnetName --public-ip-address $ipName -l $location
To create a virtual machine, you must specify whether it will boot from a custom image, a marketplace image, or an existing VHD. You can retrieve a list of marketplace images by executing the following command:
az vm image list
The command az image list is used to retrieve any of your own custom images you have captured.
Another important piece of metadata needed to create a virtual machine is the VM size. You can retrieve the available form factors that can be created in each region by executing the following command:
az vm list-sizes --location $location
The last step is to use the az vm create command to create the virtual machine. This command allows you to pass the name of the availability set, the virtual machine size, the image the virtual machine should boot from, and other configuration data such as the username and password, and the storage configuration.
imageName="Canonical:UbuntuServer:17.04:latest"
vmSize="Standard_DS1_V2"
containerName=vhds
user=demouser
vmName="WebVM"
osDiskName="WEBVM1-OSDISK.vhd"
az vm create -n $vmName -g $rgName -l $location --size $vmSize --availability-set
 $avSetName --nics $nicname --image $imageName --use-unmanaged-disk --os-disk-name
 $osDiskName --storage-account $storageAccountName --storage-container-name
 $containerName --generate-ssh-keys
MORE INFO AZURE POWERSHELL CMDLETS AND CLI TOOL
The Azure PowerShell cmdlets and CLI tools can be downloaded and installed at https://azure.microsoft.com/en-us/downloads/. Scroll down to the Command-Line Tools section for installation links and documentation.
The Azure Cloud Shell, shown in Figure 2-7, is a feature of the Azure portal that provides access to an Azure command line (CLI or PowerShell) using the user credentials you are already logged into without the need to install additional tools on your computer.
FIGURE 2-7 Starting the Cloud Shell
EXAM TIP
Stopping a virtual machine from the Azure portal, Windows PowerShell with the Stop-AzureRmVM cmdlet, or the az vm deallocate command puts the virtual machine in the Stopped (deallocated) state (az vm stop puts the VM in the Stopped state). It is important to understand the difference between Stopped (deallocated) and just Stopped. In the Stopped state a virtual machine is still allocated in Azure, and the operating system is simply shut down. You will still be billed for the compute time for a virtual machine in this state. A virtual machine in the Stopped (deallocated) state is no longer occupying physical hardware in the Azure region, and you will not be billed for the compute time (you are still billed for the underlying storage).
Creating an Azure VM from an ARM template
Azure Resource Manager (ARM) templates provide the ability to define the configuration of resources like virtual machines, storage accounts, and so on in a declarative manner. ARM templates go beyond just providing the ability to create the resources; some resources such as virtual machines also allow you to customize them and create dependencies between them. This allows you to create templates that have capabilities for orchestrated deployments of completely functional solutions. Chapter 5, “Design and deploy ARM templates” goes in-depth on authoring templates. Let’s start with learning how to deploy them.
The Azure team maintains a list of ARM templates with examples for most resources. This list is located at https://azure.microsoft.com/en-us/resources/templates/, and is backed by a source code repository in GitHub. If you want to go directly to the source to file a bug or any other reason you can access it at https://github.com/Azure/azure-quickstart-templates.
You can deploy ARM templates using the portal, the command line tools, or directly using the REST API. Let’s start with deploying a template that creates virtual machines using the portal. To deploy a template from the portal, click the NEW button and search for Template Deployment, as shown in Figure 2-8, and select the Template Deployment name from the search results, and then click Create.

FIGURE 2-8 The Template Deployment option
From there, you have the option to build your own template using the portal’s editor (you can paste your own template in or upload from a file using this option too), or choose from one of the most common templates. Last of all, you can search the existing samples in the quickstart samples repository and choose one of them as a starting point. Figure 2-9 shows the various options after clicking the template deployment search result.
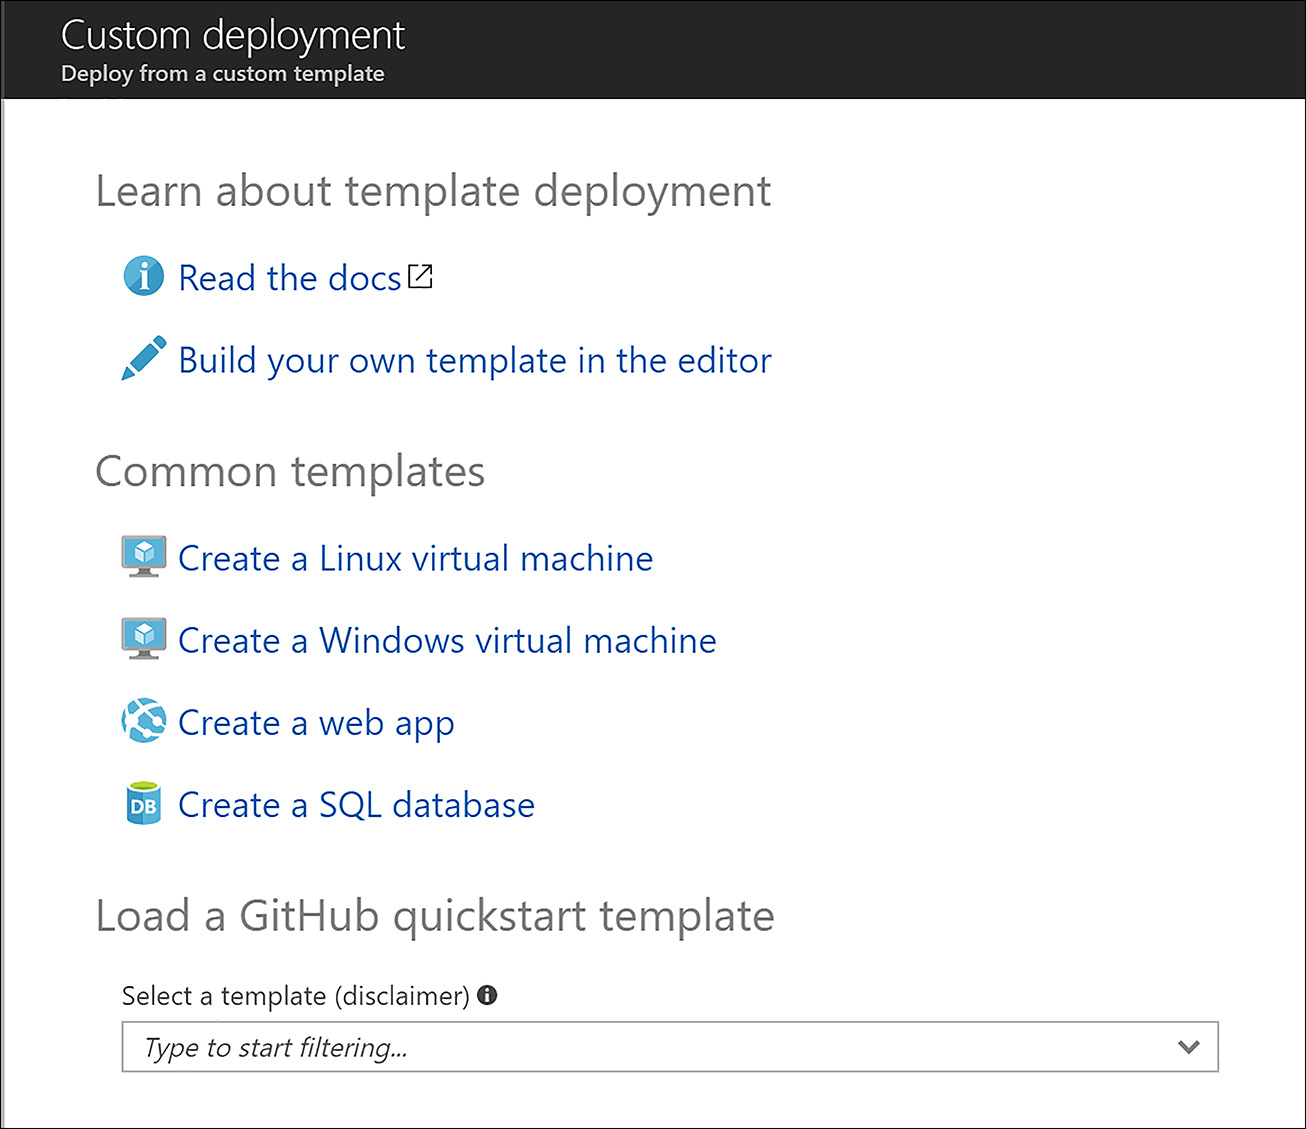
FIGURE 2-9 Options for configuring a template deployment
Choosing one of the common templates links opens the next screen, which gives you the options for deploying the template. A template deployment requires you to specify a subscription and resource group, along with any parameters that the template requires. In figure 2-10 the Admin Username, Admin Password, DNS Label Prefix, and Windows operating system version values are all parameters defined in the template.
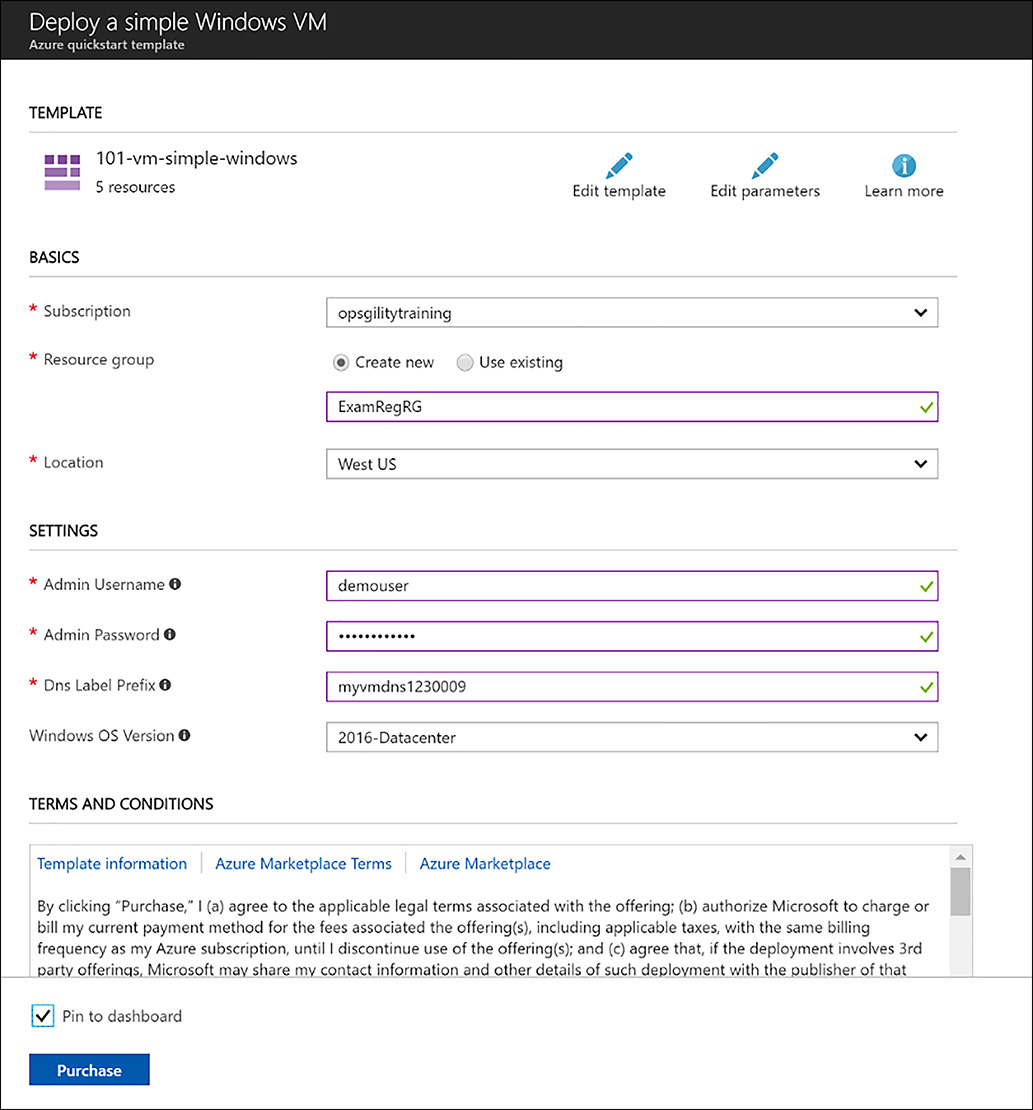
FIGURE 2-10 Deploying a template
Clicking the Edit Template button opens the editor shown in Figure 2-11, where you can continue modifying the template. On the left navigation, you can see the parameters section that defines the four parameters shown in the previous screen, as well as the resource list, which defines the resources that the template will create. In this example, the template defines a storage account, public IP address, virtual network, network interface, and the virtual machine.
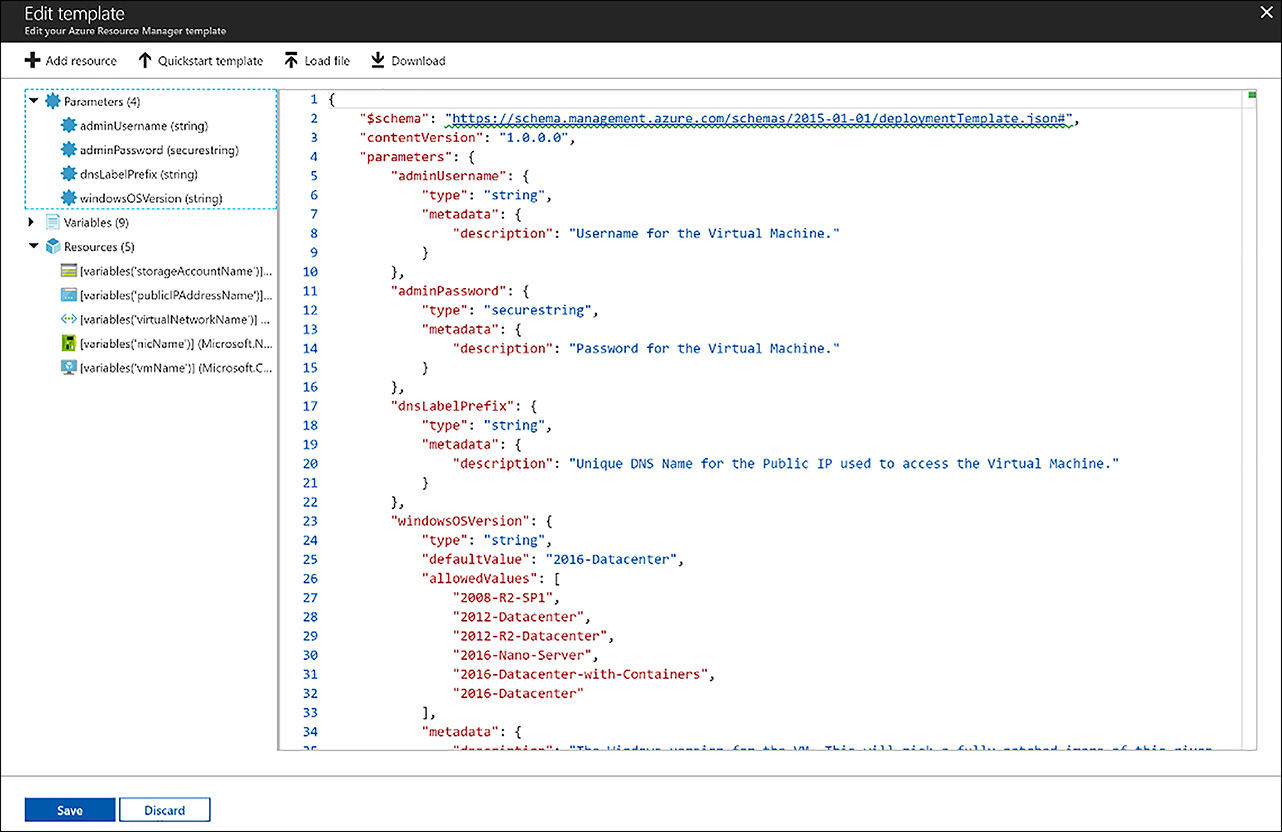
FIGURE 2-11 The template editor view
The editor also allows you to download the template as a JavaScript Object Notation (.json) file for further modification or for deployment using an alternative method.
The Edit Parameters button allows you to edit a JSON view of the parameters for the template, as shown in Figure 2-12. This file can also be downloaded and is used to provide different behaviors for the template at deployment time without modifying the entire template.

FIGURE 2-12 Editing template parameters using the Azure portal
Common examples of using a parameters file:
Defining different instance sizes or SKUs for resources based on the intended usage (small instances for test environments for example)
Defining different number of instances
Different regions
Different credentials
The last step to creating an ARM template using the portal is to click the Purchase button after reviewing and agreeing to the terms and conditions on the screen.
The Azure command line tools can also deploy ARM templates. The template files can be located locally on your file system or accessed via HTTP/HTTPs. Common deployment models have the templates deployed into a source code repository or an Azure storage account to make it easy for others to deploy the template.
This example uses the Azure PowerShell cmdlets to create a new resource group, specify the location and then deploy a template by specifying the URL from the Azure QuickStart GitHub repository.
# Create a Resource Group
$rgName   = "Contoso"
$location = "WestUs"
New-AzureRmResourceGroup -Name $rgName -Location $location

# Deploy a Template from GitHub
$deploymentName = "simpleVMDeployment"

$templateUri = "https://raw.githubusercontent.com/Azure/azure-quickstart-templates/master/101-vm-simple-windows/azuredeploy.json"
New-AzureRmResourceGroupDeployment -Name $deploymentName `
                                   -ResourceGroupName $rgName `
                                   -TemplateUri $templateUri
If the template requires parameters without default values, the cmdlet will prompt you to input their values.
EXAM TIP
The parameters to a template can be passed to the New-AzureRmResourceGroupDeployment cmdlet using the TemplateParameterObject parameter for values that are defined directly in the script as .json. The TemplateParameterFile parameter can be used for values stored in a local .json file. The TemplateParameterUri parameter for values that are stored in a .json file at an HTTP endpoint.
The following example uses the Azure CLI tools to accomplish the same task.
#!/bin/bash
# Create the resource group
rgName="Contoso"
location="WestUS"
az group create --name $rgName --location $location
# Deploy the specified template to the resource group
deploymentName="simpleVMDeployment"
templateUri="https://raw.githubusercontent.com/Azure/azure-quickstart-templates/master/101-vm-simple-linux/azuredeploy.json"
az group deployment create --name $deploymentName  --resource-group $rgName --template-uri $templateUri
EXAM TIP
The parameters to a template can be passed to the az group deployment create command using the parameters parameter for values that are defined directly in the script as .json. The template-file parameter can be used for values stored in a local .json file. The template-uri parameter for values that are stored in a .json file at an HTTP endpoint.
Connecting to virtual machines
There are many ways to connect to virtual machines. You should consider options such as connecting to VMs using their public IP addresses and protecting them with network security groups, and allowing only the port for the service you are connecting to. You should also understand how to connect to a VM on its private IP address. This introduces additional connectivity requirements such as ExpressRoute, Site-to-Site, or Point-to-Site to put your client on the same network as your VMs. These technologies are discussed in Chapter 4, “Implement Virtual Networks.” In this section we’ll review the most common tools to connect and manage your VMs.
Connecting to a Windows VM with remote desktop
The default connectivity option for a Windows-based virtual machine is to use the remote desktop protocol (RDP) and a client such as mstsc.exe. This service listens on TCP port 3389 and provides full access to the Windows desktop. This service is enabled by default on all Windows-based VMs. The Azure portal provides a connect button that will appear enabled for virtual machines that have a public IP address associated with them, as shown in Figure 2-13.
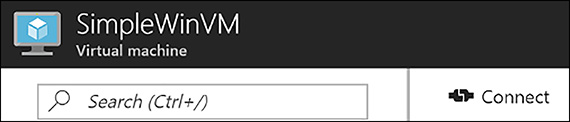
FIGURE 2-13 The Connect button for an Azure VM
You can launch a remote desktop session from Windows PowerShell by using the Get-AzureRmRemoteDesktopFile cmdlet. The Get-AzureRmRemoteDesktopFile cmdlet performs the same validation as the Azure portal. The API it calls validates that a public IP address is associated with the virtual machine’s network interface. If a public IP exists, it generates an .rdp file consumable with a Remote Desktop client. The .rdp file will have the IP address of the VIP and public port (3389) of the virtual machine specified embedded. There are two parameters that alter the behavior of what happens with the generated file.
Use the Launch parameter to retrieve the .rdp file and immediately open it with a Remote Desktop client. The following example launches the Mstsc.exe (Remote Desktop client), and the client prompts you to initiate the connection.
Get-AzureRmRemoteDesktopFile -ResourceGroupName $rgName -Name $vmName -Launch
The second behavior is specifying the LocalPath parameter, as the following example shows. Use this parameter to save the .rdp file locally for later use.
Get-AzureRmRemoteDesktopFile -ResourceGroupName $serviceName -Name $vmName -LocalPath $path
Connecting to a Windows VM with PowerShell remoting
It is also possible to connect to a Windows-based virtual machine using Windows Remote Management (WinRM), or more commonly known as Windows PowerShell remoting. The Set-AzureRmVMOperatingSystem supports two parameters that define the behavior of WinRM on a virtual machine at provision time.
WinRMHttps Enables connectivity over SSL using port 5986. If you connect to your virtual machine over the public internet, ensure this option is used to avoid man-in-the-middle attacks.
WinRMHttp Enables connectivity using 5985 (no SSL required). Enable this option if you want to connect to your virtual machines using PowerShell remoting from other virtual machines on the same private network.
To ensure your virtual machine is secure from man-in-the-middle attacks you must deploy a self-signed SSL certificate that your local computer trusts and that the virtual machine trusts. This is accomplished by creating the certificate using the New-SelfSignedCertificate cmdlet, or makecert.exe. After the certificate is created, it must be added to an Azure Key Vault to secure it as a secret.
During provisioning you reference the secret using the WinRMCertificateUrl parameter of the Set-AzureRmVMOperatingSystem cmdlet if you are creating the virtual machine PowerShell, or if you are using a template you can specify the sourceVault and certificate information directly as part of the secrets configuration stored in the osProfile section.
      "secrets": [
        {
          "sourceVault": {
            "id": "<resource id of the Key Vault containing the secret>"
          },
          "vaultCertificates": [
            {
              "certificateUrl": "<URL for the certificate>",
              "certificateStore": "<Name of the certificate store on the VM>"
            }
          ]
        }
      ],
MORE INFO CONFIGURING WINRM ON WINDOWS-BASED VIRTUAL MACHINES
For more information on enabling WinRM on your Windows-based virtual machines a complete walk through is available at: https://docs.microsoft.com/en-us/azure/virtual-machines/windows/winrm.
Connecting to a Linux virtual machine using SSH
The default connectivity option for a Linux-based virtual machine is to use the secure shell (SSH) protocol. This service listens on TCP port 22 and provides full access to a command line shell. This service is enabled by default on all Linux-based VMs. When you click the Connect button on a Linux-based virtual machine with a public IP associated with it you see a dialog, like the one shown in Figure 2-14, advising you to use SSH to connect.

FIGURE 2-14 The connect dialog advising how to connect to a Linux VM using SSH
Use the following command to connect to a Linux VM using the SSH bash client.
ssh username@ipaddress
If the virtual machine is configured for password access, SSH then prompts you for the password for the user you specified. If you specified the public key for an SSH certificate during the creation of the virtual machine it attempts to use the certificate from the ~/.ssh folder.
There are many options for SSH users from a Windows machine. For example, if you install the Linux subsystem for Windows 10, you will also install an SSH client that can be accessed from the bash command line. You can also install one of many GUI-based SSH clients like PuTTy. The Azure Cloud Shell shown in Figure 2-15 also provides an SSH client. So regardless of which operating system you are on, if you have a modern browser and can access the Azure portal you can connect to your Linux VMs.
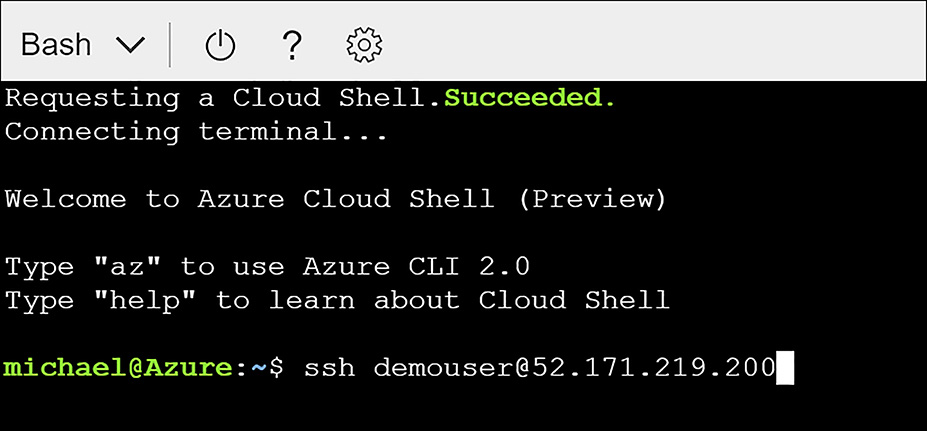
FIGURE 2-15 Connecting to a Linux VM using SSH from within the Azure Cloud Shell
MORE INFO OPTIONS FOR USING SSH FROM WINDOWS
There are plenty of options to connect to your Linux-based virtual machines from Windows. The following link has more detail on SSH certificate management and some available clients at https://docs.microsoft.com/en-us/azure/virtual-machines/linux/ssh-from-windows.
Skill 2.2: Perform configuration management
Azure virtual machines have a variety of built-in extensions that can enable configuration management as well as a variety of other operations such as installing software agents and even enabling remote debugging for live troubleshooting purposes. The two most common extensions for configuration management are the Windows PowerShell Desired State Configuration (DSC) extension and the more generic Custom Script Extension. Both extensions can be executed at provisioning time or after the virtual machine has already been started. The Windows PowerShell DSC Extension allows you to define the state of a virtual machine using the PowerShell Desired State Configuration language and apply it as well as perform continuous updates when integrated with the Azure Automation DSC service. The custom script extension can be used to execute an arbitrary command such as a batch file, regular PowerShell script, or a bash script. In addition to these extensions there are also more specific extensions that allow you to configure your virtual machines to use open source configuration management utilities such as Chef or Puppet and many others.
This skill covers how to:
Automate configuration management by using PowerShell Desired State
Configuration (DSC) and VM Agent (custom script extensions)Enable remote debugging
EXAM TIP
To use virtual machine extensions like Windows PowerShell DSC, Custom Script Extension, Puppet, and Chef on Windows, the Azure virtual machine agent must be installed on the virtual machine. By default, the agent is installed on virtual machines created after February 2014 (when the feature was added). But, it’s also possible to not install the agent on Windows-based virtual machines by not passing the ProvisionVMAgent parameter of the Set-AzureRmVMOperatingSystem cmdlet in PowerShell. If the agent is not installed at provisioning time, or if you have migrated a virtual hard disk from on-premises, you can manually install the agent on these virtual machines by downloading and installing the agent from Microsoft at http://go.microsoft.com/fwlink/?LinkID=394789&clcid=0x409.
PowerShell Desired State Configuration
PowerShell Desired State Configuration (DSC) allows you to declaratively configure the state of the virtual machine. Using built-in resource providers or custom providers with a DSC script enables you to declaratively configure settings such as roles and features, registry settings, files and directories, firewall rules, and most settings available to Windows. One of the compelling features of DSC is that, instead of writing logic to detect and correct the state of the machine, the providers do that work for you and make the system state as defined in the script.
For example, the following DSC script declares that the Web-Server role should be installed, along with the Web-Asp-Net45 feature. The WindowsFeature code block represents a DSC resource. The resource has a property named Ensure that can be set to Present or Absent. In this example, the WindowsFeature resource verifies whether the Web-Server role is present on the target machine and if it is not, the resource installs it. It repeats the process for the Web-Asp-Net45 feature.
Configuration ContosoSimple
{
    Node "localhost"
    {
       #Install the IIS Role
       WindowsFeature IIS
       {
         Ensure = "Present"
         Name = "Web-Server"
       }
       #Install ASP.NET 4.5
       WindowsFeature AspNet45
       {
         Ensure = "Present"
         Name = "Web-Asp-Net45"
       }
   }
}
In addition to the default DSC resources included by default with PowerShell DSC, there is an open source DSC resource kit hosted in GitHub that has many more resources that are maintained and updated by the Windows PowerShell engineering, and of course you can write your own. To install a custom resource, download it and unzip it into the C:Program FilesWindowsPowerShellModules folder. To learn about and download the latest DSC resource kit from Microsoft see the following GitHub repo at: https://github.com/PowerShell/DscResources.
The example uses the xPSDesiredStateConfiguration module from the DSC resource kit to download a .zip file that contains the website content. This module can be installed using
PowerShellGet by executing the following commands from an elevated command prompt:
Install-Module -Name xPSDesiredStateConfiguration
# ContosoWeb.ps1
configuration Main
{
    # Import the module that defines custom resources
    Import-DscResource -Module xPSDesiredStateConfiguration
    Node "localhost"
    {
       # Install the IIS role
       WindowsFeature IIS
       {
           Ensure          = "Present"
           Name            = "Web-Server"
        }
        # Install the ASP .NET 4.5 role
       WindowsFeature AspNet45
       {
           Ensure          = "Present"
           Name            = "Web-Asp-Net45"
       }
       # Download the website content
       xRemoteFile WebContent
       {
           Uri             = "https://cs7993fe12db3abx4d25xab6.blob.core.windows.net/public/website.zip"
           DestinationPath = "C:inetpubwwwroot"
           DependsOn       = "[WindowsFeature]IIS"
       }
       Archive ArchiveExample
       {
            Ensure          = "Present"
            Path            = "C:inetpubwwwrootwebsite.zip"
            Destination     = "C:inetpubwwwroot"
            DependsOn       = "[xRemoteFile]WebContent"
       }
     }
}
Before the DSC script can be applied to a virtual machine, you must use the Publish-AzureRmVMDscConfiguration cmdlet to package the script into a .zip file. This cmdlet also import any dependent DSC modules such as xPSDesiredStateConfiguration into the .zip.
Publish-AzureRmVMDscConfiguration -ConfigurationPath .ContosoWeb.ps1 -OutputArchivePath
 .ContosoWeb.zip
The DSC configuration can then be applied to a virtual machine in several ways such as using the Azure portal, as shown in Figure 2-16.

FIGURE 2-16 Adding a VM extension
The Configuration Modules Or Script field expects the .zip file created by the call to the Publish-AzureRmVMDscConfiguration. The Module-Qualified Name Of Configuration field expects the name of the script file (with the .ps1 extension) concatenated with the name of the configuration in the script, which in the example shown in Figure 2-17 is ContosoWeb.ps1Main.

FIGURE 2-17 Configuring a VM extension
One of the powerful features of PowerShell DSC is the ability to parameterize the configuration. This means you can create a single configuration that can exhibit different behaviors based on the parameters passed. The Configuration Data PSD1 file field is where you can specify these parameters in the form of a hashtable. You can learn more about how to separate configuration from environment data at https://docs.microsoft.com/en-us/powershell/dsc/separatingenvdata.
The PowerShell DSC extension also allows you to specify whether to use the latest version of the Windows Management Framework (WMF) and to specify the specific version of the DSC extension to use, and whether to automatically upgrade the minor version or not.
MORE INFO AZURE POWERSHELL DSC EXTENSION VERSIONS
You can find more about the DSC extension versions at https://blogs.msdn.microsoft.com/powershell/2014/11/20/release-history-for-the-azure-dsc-extension/. This blog post is actively maintained with new versions. PowerShell DSC configurations can also be applied programmatically during a PowerShell deployment by using the Set-AzureRmVmDscExtension cmdlet. In the example below, the Publish-AzureRmVMDscConfiguration cmdlet is used to publish the packaged script to an existing Azure storage account before applying the configuration using the Set-AzureRmVMDscExtension cmdlet on an existing virtual machine.
$rgName = "Contoso"
$location = "westus"
$vmName = "DSCVM"
$storageName = "erstorage"
$configurationName = "ContosoWeb"
$archiveBlob = "ContosoWeb.ps1.zip"
$configurationPath = ".ContosoWeb.ps1"
#Publish the configuration script into Azure storage
Publish-AzureRmVMDscConfiguration -ConfigurationPath $configurationPath `
                                 -ResourceGroupName $rgName `
                                 -StorageAccountName $storageName
#Set the VM to run the DSC configuration
Set-AzureRmVmDscExtension -Version 2.26 `
                         -ResourceGroupName $resourceGroup `
                     -VMName $vmName `
                      -ArchiveStorageAccountName $storageName `
                      -ArchiveBlobName $archiveBlob `
                      -AutoUpdate:$false `
                           -ConfigurationName $configurationName
The PowerShell DSC extension can also be applied to a virtual machine created through an ARM template by extending and adding the resource configuration in the virtual machine’s resource section of the template. You learn more about authoring ARM templates in Chapter 5.
    {
      "name": "Microsoft.Powershell.DSC",
      "type": "extensions",
      "location": "[resourceGroup().location]",
      "apiVersion": "2016-03-30",
      "dependsOn": [
        "[resourceId('Microsoft.Compute/virtualMachines', parameters('WebVMName'))]"
      ],
      "tags": {
        "displayName": "WebDSC"
      },
      "properties": {
        "publisher": "Microsoft.Powershell",
        "type": "DSC",
        "typeHandlerVersion": "2.26",
        "autoUpgradeMinorVersion": false,
        "settings": {
          "configuration": {
            "url": "[parameters('DSCUri'))]",
            "script": "ContosoWeb.ps1",
            "function": "Main"
          },
          "configurationArguments": {
            "nodeName": "[parameters('WebVMName')]"
          }
        },
        "protectedSettings": {
          "configurationUrlSasToken": "[parameters('SasToken')]"
        }
      }
    }
The previous examples apply the PowerShell DSC configuration only when the extension is executed. If the configuration of the virtual machine changes after the extension is applied, the configuration can drift from the state defined in the DSC configuration. The Azure Automation DSC service allows you to manage all your DSC configurations, resources, and target nodes from the Azure portal or from PowerShell. It also provides a built-in pull server so your virtual machines will automatically check on a scheduled basis for new configuration changes, or to compare the current configuration against the desired state and update accordingly.
MORE INFO AZURE AUTOMATION DSC
For more information on how to automatically apply PowerShell DSC configurations to your virtual machines see https://docs.microsoft.com/en-us/azure/automation/automation-dsc-overview.
Using the custom script extension
The Azure custom script extension is supported on Windows and Linux-based virtual machines, and is ideal for bootstrapping a virtual machine to an initial configuration. To use the Azure custom script extension your script must be accessible via a URI such as an Azure storage account, and either accessed anonymously or passed with a shared access signature (SAS URL). The custom script extension takes as parameters the URI and the command to execute including any parameters to pass to the script. You can execute the script at any time the virtual machine is running.
Using the custom script extension (Azure portal)
To add the custom script extension to an existing virtual machine, open the virtual machine in the portal, click the Extensions link on the left, and choose the Custom Script Extension option. The script file is specified as well as any arguments passed to the script. Figure 2-18 shows how to enable this extension using the Azure portal.
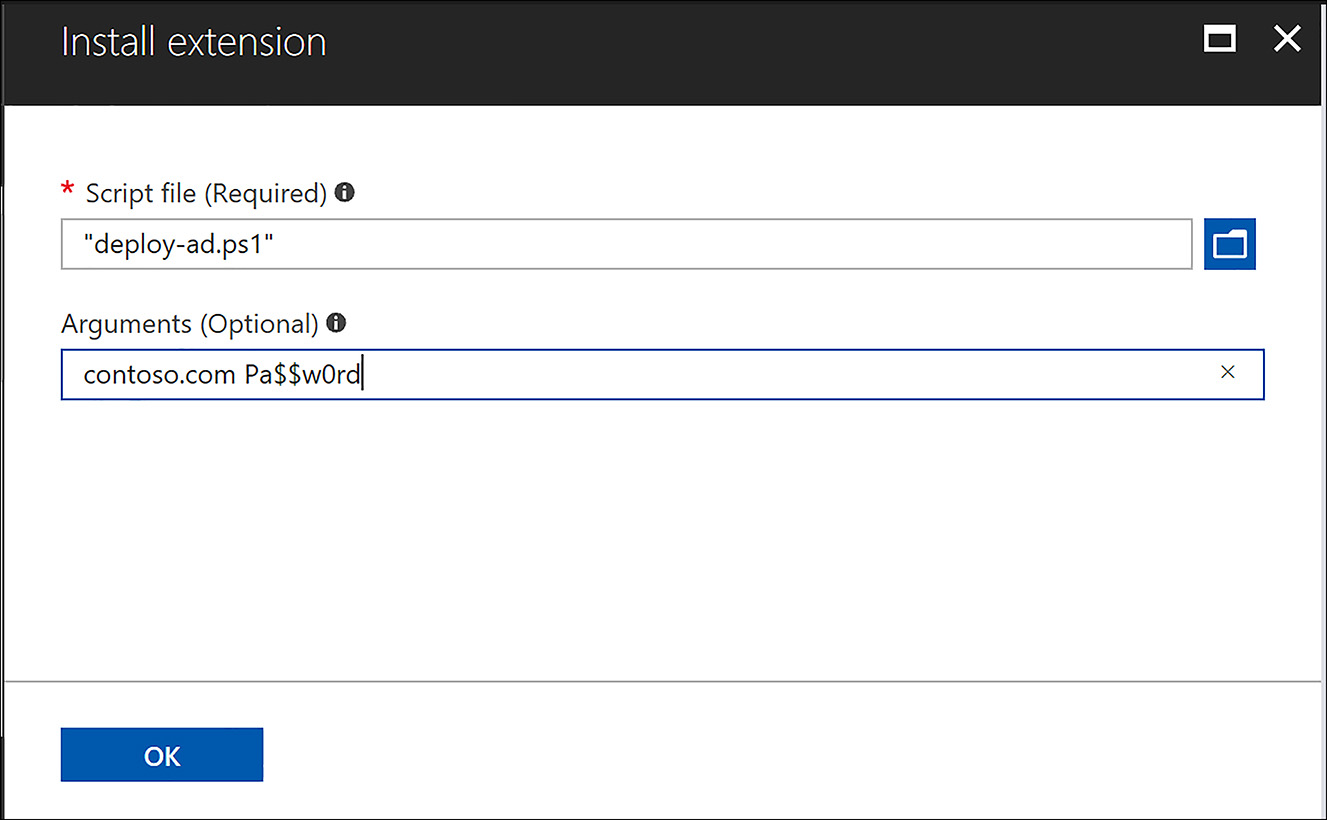
FIGURE 2-18 Specifying the custom script extension configuration
Using the custom script extension (PowerShell)
Both the Azure PowerShell cmdlets and the Azure CLI tools can be used to execute scripts using the custom script extension. Starting with PowerShell, the following script deploys the Active Directory Domain Services role. It accepts two parameters: one is for the domain name and the other is for the administrator password.
#deployad.ps1
param(
  $domain,
  $password
)
$smPassword = (ConvertTo-SecureString $password -AsPlainText -Force)
Install-WindowsFeature -Name "AD-Domain-Services" `
                       -IncludeManagementTools `
                       -IncludeAllSubFeature
Install-ADDSForest -DomainName $domain `
                   -DomainMode Win2012 `
                   -ForestMode Win2012 `
                   -Force `
                   -SafeModeAdministratorPassword $smPassword
You can use the Set-AzureRmVMCustomScriptExtension cmdlet to run this script on an Azure virtual machine. This scenario can be used for installing roles or any other type of iterative script you want to run on the virtual machine.
$rgName     = "Contoso"
$scriptName = "deploy-ad.ps1"
$scriptUri = http://$storageAccount.blob.core.windows.net/scripts/$scriptName
$scriptArgument = "contoso.com $password"
Set-AzureRmVMCustomScriptExtension -ResourceGroupName $rgName `
                                   -VMName $vmName `
                                   -FileUri $scriptUri `
                                   -Argument "$domain $password" `
                                   -Run $scriptName
The FileUri parameter of the Set-AzureRmVMCustomScriptExtension cmdlet, accepts the URI to the script, and the Run parameter tells the cmdlet the name of the script to run on the virtual machine. The script can also be specified using the StorageAccountName, StorageAcountKey, ContainerName, and FileName parameters that qualify its location in an Azure storage account.
Using the custom script extension (CLI)
You can also use the custom script extension for Linux-based virtual machines. The following example demonstrates a simple bash script that installs Apache and PHP. The script would need to be uploaded to an accessible HTTP location such as an Azure storage account or a GitHub repository for the custom script extension to access it and apply it to the virtual machine.
#!/bin/bash
#install-apache.sh
apt-get update
apt-get -y install apache2 php7.0 libapache2-mod-php7.0
apt-get -y install php-mysql
sudo a2enmod php7.0
apachectl restart
The following code example shows how this script can be applied to an Azure Virtual Machine named LinuxWebServer in the ExamRefRG-CLI resource group.
rgName="Contoso"
vmName="LinuxWebServer"
az vm extension set --resource-group $rgName --vm-name $vmName --name
$scriptName --publisher Microsoft.Azure.Extensions --settings ./cseconfig.json
The az vm extension set command can take the script to execute as a .json based configuration file as the previous example demonstrates. The contents of this .json file are shown for reference:
{
  "fileUris": [ "https://examplestorageaccount.blob.core.windows.net/scripts/apache.sh" ],
  "commandToExecute": "./apache.sh"
}
EXAM TIP
There are many other ways of configuring and executing the custom script extension using the Azure CLI tools. The following article has several relevant examples that might be used in an exam, which you can find at https://docs.microsoft.com/en-us/azure/virtual-machines/linux/extensions-customscript.
Like the PowerShell DSC extension, the custom script extension can be added to the resources section of an Azure Resource Manager template. The following example shows how to execute the same script using an ARM template instead of the CLI tools.
{
    "name": "apache",
    "type": "extensions",
    "location": "[resourceGroup().location]",
    "apiVersion": "2015-06-15",
    "dependsOn": [
        "[concat('Microsoft.Compute/virtualMachines/', parameters('scriptextensionName'))]"
    ],
    "tags": {
        "displayName": "installApache"
    },
    "properties": {
        "publisher": "Microsoft.Azure.Extensions",
        "type": "CustomScript",
        "typeHandlerVersion": "2.0",
        "autoUpgradeMinorVersion": true,
      "settings": {
        "fileUris": [
          " https://examplestorageaccount.blob.core.windows.net/scripts/apache.sh "
        ],
        "commandToExecute": "sh apache.sh"
      }
    }
}
MORE INFO TROUBLESHOOTING USING VIRTUAL MACHINE EXTENSION LOGS
In the event your custom script extension fails to execute it’s a good idea to review the log files. On Windows the logs are located at: C:WindowsAzureLogsPluginsMicrosoft.Compute.CustomScriptExtension. On Linux at /var/log/azure/Microsoft.Azure.Extensions.CustomScript.
Enable remote debugging
Sometimes a problem with an application cannot be reproduced on a developer’s computer and only happens in a deployed environment. Azure Virtual Machines provides the ability to enable a developer using Visual Studio 2015 or above to attach a debugger directly to the offending process on the virtual machine and debug the problem as it happens.
To enable debugging, you should deploy a debug version of your application to the virtual machine, and then you can use the Visual Studio Cloud Explorer to find the virtual machine, right-click its name, and select the Enable Debugging option, as shown in Figure 2-19.

FIGURE 2-19 Enabling debugging with Visual Studio
This step opens the necessary port on the network security group for your virtual machine, and then enables the virtual machine extension for remote debugging. After both tasks have completed, right-click the virtual machine once more and click the attach debugger option, as shown in Figure 2-20.
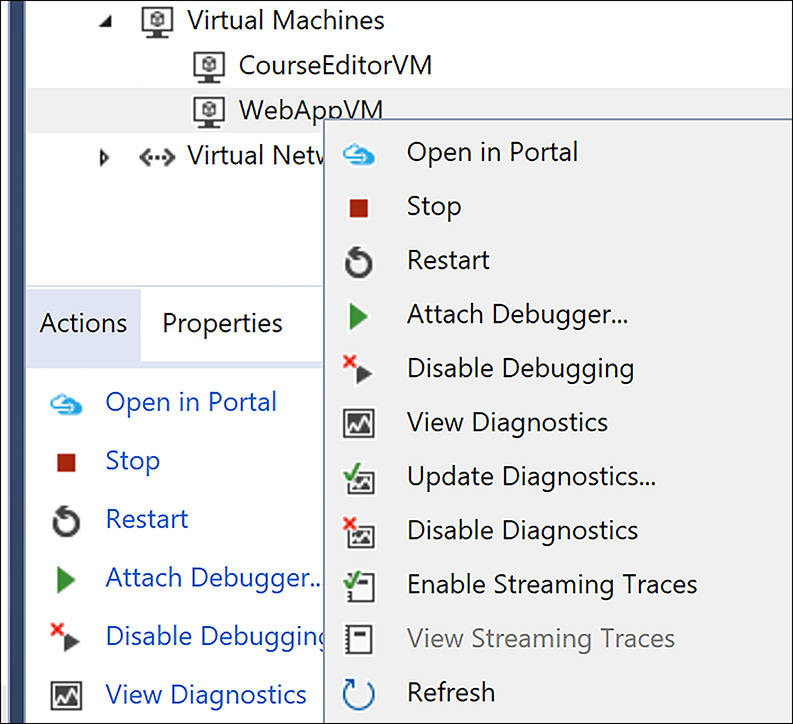
FIGURE 2-20 Attaching the debugger
Visual Studio will prompt you to attach the process on the virtual machine to debug, as shown in figure 2-21. Select the process and click the Attach button. You are then able to set one or more breakpoints in the application and debug the problem directly on the offending virtual machine.
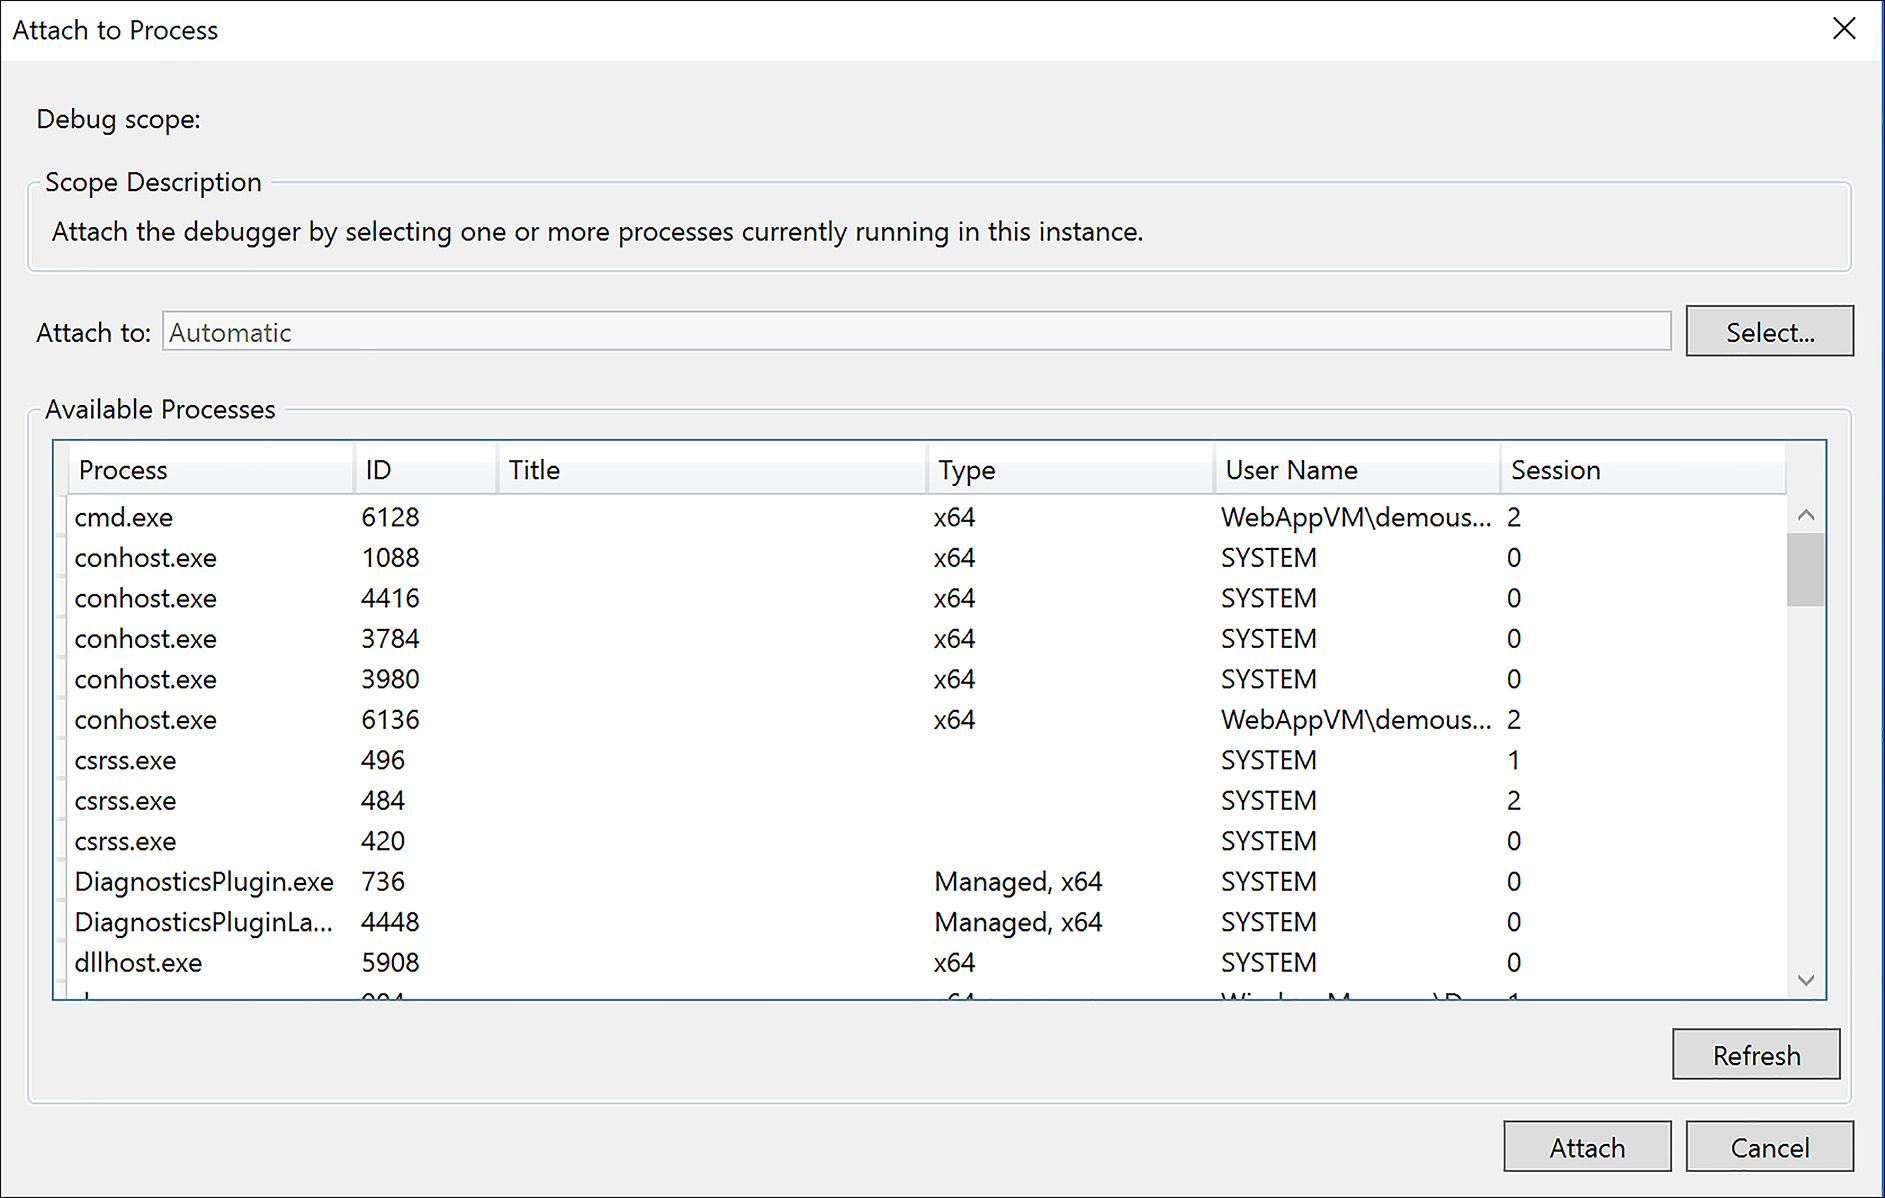
FIGURE 2-21 Selecting the process to debug
Skill 2.3: Design and implement VM Storage
There are many options to consider when designing a storage subsystem for your virtual machine infrastructure. Core requirements such as performance, durability, availability, security, and capacity must be considered, as well as what the requirements are for accessing the data from applications. Microsoft Azure offers a broad set of features and capabilities that solve each of these problems in their own way.
This skill covers how to:
Configure disk caching
Plan storage capacity
Configure operating system disk redundancy
Configure shared storage using Azure File service
Configure geo-replication
Encrypt disks
Implement ARM VMs with Standard and Premium storage
Virtual machine storage overview
It’s important to understand that there are many features and capabilities to plan and design for when implementing virtual machines in Microsoft Azure. In this section we summarize some of these features and terms before we go deeper with how to put the pieces together to create a storage solution for your virtual machine infrastructure.
Storage accounts and blob types
All persistent disks for an Azure Virtual Machine are stored in blob storage of an Azure Storage account. There are three types of blob files:
Block blobs are used to hold ordinary files up to about 4.7 TB.
Page blobs are used to hold random access files up to 8 TB in size. These are used for the VHD files that back VMs.
Append blobs are made up of blocks like the block blobs, but are optimized for append operations. These are used for things like logging information to the same blob from multiple VMs.
An Azure Storage account can be one of three types:
Standard The most widely used storage accounts are Standard storage accounts, which can be used for all types of data. Standard storage accounts use magnetic media to store data.
Premium Premium storage provides high-performance storage for page blobs, which are primarily used for VHD files. Premium storage accounts use SSD to store data. Microsoft recommends using Premium Storage for all your VMs.
Blob The Blob Storage account is a specialized storage account used to store block blobs and append blobs. You can’t store page blobs in these accounts; therefore you can’t store VHD files. These accounts allow you to set an access tier to Hot or Cool; the tier can be changed at any time. The hot access tier is used for files that are accessed frequently—you pay a higher cost for storage, but the cost of accessing the blobs is much lower. For blobs stored in the cool access tier, you pay a higher cost for accessing the blobs, but the cost of storage is much lower.
Table 2-2 provides a mapping of what services are available and which blobs are supported by the storage account type.
TABLE 2-2 Services by Azure storage account type
Account Type |
General-purpose Standard |
General-purpose Premium |
Blob storage, hot and cool access tiers |
Services |
Blob, File, Queue Services |
Blob Service |
Blob Service |
Types of blobs |
Block blobs, page blobs, and append blobs |
Page blobs |
Block blobs and append blobs |
Storage account replication
Each Azure storage account has built in replication to ensure the durability of its data. Depending on the storage account type these replication options can be changed for different types of behaviors.
Locally redundant storage (LRS) Each blob has three copies in the data center
Geo-redundant storage (GRS) Each blob has three copies in the data center, and is asynchronously replicated to a second region for a total of six copies. In the event of a failure at the primary region, Azure Storage fails over to the secondary region.
Read-access geo-redundant storage (RA-GRS) The same as (GRS), except you can access the replicated data (read only) regardless of whether a failover has occurred.
Zone redundant storage (ZRS) Each blob has three copies in the data center, and is asynchronously replicated to a second data center in the same region for a total of six copies. Note that ZRS is only available for block blobs (no VM disks) in general-purpose storage accounts. Also, once you have created your storage account and selected ZRS, you cannot convert it to use to any other type of replication, or vice versa.
Azure disks
Azure VMs use three types of disks:
Operating System Disk (OS Disk) The C drive in Windows or /dev/sda on Linux. This disk is registered as an SATA drive and has a maximum capacity of 2048 gigabytes (GB). This disk is persistent and is stored in Azure storage.
Temporary Disk The D drive in Windows or /dev/sdb on Linux. This disk is used for short term storage for applications or the system. Data on this drive can be lost in during a maintenance event, or if the VM is moved to a different host because the data is stored on the local disk.
Data Disk Registered as a SCSI drive. These disks can be attached to a virtual machine, the number of which depends on the VM instance size. Data disks have a maximum capacity of 4095 gigabytes (GB). These disks are persistent and stored in Azure Storage.
There are two types of disks in Azure: Managed or Unmanaged.
Unmanaged disks With unmanaged disks you are responsible for ensuring for the correct distribution of your VM disks in storage accounts for capacity planning as well as availability. An unmanaged disk is also not a separate manageable entity. This means that you cannot take advantage of features like role based access control (RBAC) or resource locks at the disk level.
Managed disks Managed disks handle storage for you by automatically distributing your disks in storage accounts for capacity and by integrating with Azure Availability Sets to provide isolation for your storage just like availability sets do for virtual machines. Managed disks also makes it easy to change between Standard and Premium storage (HDD to SSD) without the need to write conversion scripts.
MORE INFO DISKS AND VHDS
See the following for more information on Disks and VHDs https://docs.microsoft.com/en-us/azure/virtual-machines/windows/about-disks-and-vhds.
Operating system images
In addition to using the VM images from the Azure marketplace, Azure also provides the ability to upload your own image or create a custom image directly in the cloud.
VM images are captured from an existing VM that has been prepared using the Windows program sysprep.exe or the Microsoft Azure Linux Agent (waagent) to make the operating system generalized. Generalized means that VM specific settings such as hostname, user accounts, domain join information, and so on are removed from the operating system so it is in a state to be provisioned on a new VM. Generalization does not remove customizations such as installation of software, patches, additional files, and folders. This capability is what makes VM images a great solution for providing pre-configured and tested solutions for VMs or VM Scale Sets.
Like Azure disks, there are managed and unmanaged images. Prior to the launch of Azure Managed Disks, unmanaged images were your only option. The primary problem that managed images solves over unmanaged images is storage account management. With unmanaged images, you can only create a new VM in the same storage account that the image resides in. This means if you wanted to use the image in another storage account you would have to use one of the storage tools to copy it to the new storage account first and then create the VM from it. Managed images solve this problem for the most part. Once a managed image exists you can create a VM from it using managed disks without worrying about the storage account configuration. This applies only to VMs created in the same region. If you want to create the VM in a remote region you must still copy the managed image to the remote region first.
To create a VM image you first generalize the operating system. In Windows this is using the sysprep.exe tool as shown in Figure 2-22. After this tool has completed execution the VM is in a generalized state and shut down.

FIGURE 2-22 Using the System Preparation tool to generalize a Windows VM
The command to generalize a Linux VM using the waagent program is shown here:
sudo waagent -deprovision+user
After the VM is generalized, you then deallocate the VM, set its status to generalized, and then use the Save-AzureRmVMImage cmdlet to capture the VM (including operating system disks) into a container in the same storage account. This cmdlet saves the disk configuration (including URIs to the VHDs) in a .json file on your local file system.
Creating an unmanaged VM image (PowerShell)
The following example shows how to use the Azure PowerShell cmdlets to save an umanaged image using the Save-AzureRmVMImage cmdlet.
# Deallocate the VM
$rgName = "Contoso"
$vmName = "ImageVM"
Stop-AzureRmVM -ResourceGroupName $rgName -Name $vmName
# Set the status of the virtual machine to Generalized
Set-AzureRmVm -ResourceGroupName $rgName -Name $vmName -Generalized

$containerName = "vmimage"
$vhdPrefix     = "img"
$localPath     = "C:LocalImageConfig"
Save-AzureRmVMImage -ResourceGroupName $rgName -Name $vmName `
    -DestinationContainerName $containerName -VHDNamePrefix $vhdPrefix `
    -Path $localPath
Creating a managed VM image (PowerShell)
This example shows how to create a managed VM image using PowerShell. This snippet uses the New-AzureRmImageConfig and New-AzureRmImage cmdlets.
# Deallocate the VM
# Deallocate the VM
$rgName = "Contoso"
$vmName = "ImageVM"
Stop-AzureRmVM -ResourceGroupName $rgName -Name $vmName
# Set the status of the virtual machine to Generalized
Set-AzureRmVm -ResourceGroupName $rgName -Name $vmName -Generalized
# Create a managed VM from a VM
$imageName = "WinVMImage"
$vm = Get-AzureRmVM -ResourceGroupName $rgName -Name $vmName
$image = New-AzureRmImageConfig -Location $location -SourceVirtualMachineId $vm.ID
New-AzureRmImage -Image $image -ImageName $imageName -ResourceGroupName $rgName
Creating an managed VM image (CLI)
This example uses the az vm generalize and az image commands from the CLI tools to create a managed VM image.
# Create a Managed Image
rgName="Contoso"
vmName="ImageVM"
imageName="LinuxImage"
# Deallocate the VM
az vm deallocate --resource-group $rgName --name $vmName
# Set the status of the virtual machine to Generalized
az vm generalize --resource-group $rgName --name $vmName
az image create --resource-group $rgName --name $imageName --source $vmName
Creating a VM from an image
Creating a VM from an image is very similar to creating an image using an Azure Marketplace image. There are differences depending on if you start with an unmanaged image or a managed image. For example, using an unmanaged image you must ensure that the destination operating system and data disk URIs for your VM references the same storage account that your image resides in and then you reference the operating system image by its URI in the storage account.
To specify an image using PowerShell, set the -SourceImageUri parameter of the Set-AzureRmOsDisk cmdlet.
$vm = Set-AzureRmVMOSDisk -VM $vm -Name $osDiskName -VhdUri $osDiskUri `
        -CreateOption fromImage -SourceImageUri $imageURI -Windows
Using the CLI tools, specify the URI using the image parameter of the az vm create command.
az vm create --resource-group $rgName --name $vmName --image $osDiskUri
--generate-ssh-keys
To create using a manage image with PowerShell, you first retrieve the image ID and pass it to Set-AzureRmVMOSDisk instead.
$image = Get-AzureRmImage -ImageName $imageName -ResourceGroupName $rgName
$vmConfig = Set-AzureRmVMSourceImage -VM $vmConfig -Id $image.Id
Using the CLI tools saves a step because it retrieves the image ID for you, you just need to specify the name of your managed image.
az vm create -g $rgName -n $vmName --image $imageName
EXAM TIP
Image management is an incredibly important topic and having a solid understanding of the various options and techniques is undoubtedly valuable for passing the exam. Understanding how to create VMs from images, URIs, attach data disks, and copying disks from storage account to storage account will certainly not hurt your chances. You can learn more about managing images using the CLI tools at https://docs.microsoft.com/en-us/azure/virtual-machines/linux/capture-image and using PowerShell at https://docs.microsoft.com/en-us/azure/virtual-machines/windows/capture-image-resource.
Virtual machine disk caching
Azure disks (operating system and data) have configurable cache settings that you should be aware of when designing systems for durability and performance. The caching behavior differs whether you are using Standard storage or Premium storage.
Caching works on Standard storage by buffering the reads and write on the local physical disk on the host server the virtual machine is running on. Virtual machines that use Azure Premium Storage have a multi-tier caching technology called BlobCache. BlobCache uses a combination of the Virtual Machine RAM and local SSD for caching. This cache is available for the Premium Storage persistent disks and the VM local disks. By default, this cache setting is set to Read/Write for operating system disks and Read Only for data disks hosted on Premium storage. With disk caching enabled on the Premium storage disks, virtual machines can achieve extremely high levels of performance that exceed the underlying disk performance.
There are three settings that can be applied to your disks (Standard and Premium):
None Configure host-cache as None for write-only and write-heavy disks.
Read Only Configure host-cache as ReadOnly for read-only and read-write disks.
Read Write Configure host-cache as ReadWrite only if your application properly handles writing cached data to persistent disks when needed.
You can set the host caching setting at any time, but understand that when the cache setting is changed that the disk will be unattached and then reattached to the virtual machine. For best practice, you should ensure that none of your applications are actively using the disk when you change the cache setting. Changing the operating system disk’s host cache setting results in the virtual machine being rebooted.
The host cache setting can be modified for a disk by using the Azure portal as shown in Figure 2-23, the command line tools, an ARM template, or via a call to the REST API.

FIGURE 2-23 Setting the Host Caching options
With PowerShell, use the Set-AzureRmVMDataDisk cmdlet to modify the cache setting of a disk. In the following example, an existing virtual machine configuration is returned using the Get-AzureRmVM cmdlet, the disk configuration is modified using Set-AzureRmVMDataDisk, and then the virtual machine is updated using the Update-AzureRmVM cmdlet. You would use the Set-AzureRmVMOSDisk cmdlet instead to update the operating system disk. The Set-AzureRmVMDataDisk cmdlet also supports a Name parameter if you would rather update the disk by name instead of using the LUN.
$rgName = "StorageRG"
$vmName = "StandardVM"
$vm = Get-AzureRmVM -ResourceGroupName $rgName -Name $vmName
Set-AzureRmVMDataDisk -VM $vm -Lun 0 -Caching ReadOnly
Update-AzureRmVM -ResourceGroupName $rgName -VM $vm
Using the Azure CLI, there are two commands to use depending on whether the virtual machine is an unmanaged or a managed disk. Also, the host cache setting can only be specified when attaching a disk using the az vm unmanaged-disk for unmanaged disks, or az vm disk attach for managed and specifying the caching parameter. This means you would need to detach and then attach an existing VHD to modify the cache setting or you can specify during the creation of a new disk as the following example demonstrates.
rgName="StorageRG"
vmName="StandardVM"
diskName="ManagedDisk"
az vm disk attach --vm-name $vmName --resource-group $rgName --size-gb 128 --disk
 $diskName --caching ReadWrite –new
To configure the disk cache setting using an ARM template specify the caching property of the OSDisk, or each disk in the dataDisks collection of the virtual machine’s OSProfile configuration. The following example shows how to set the cache setting on a data disk.
"dataDisks": [
  {
    "name": "datadisk1",
    "diskSizeGB": "1023",
    "lun": 0,
    "caching": "ReadOnly",
    "vhd": { "uri": "[variables('DISKURI')]" },
    "createOption": "Empty"
  }
]
Planning for storage capacity
Planning for storage capacity is a key exercise when you are deploying a new workload or migrating an existing workload. In Azure Storage, there are several considerations to be aware of. The first is the size of the disks themselves. For an Azure virtual machine, the maximum capacity of a disk is 4095 GB (4 TB). Currently, the maximum number of data disks you can attach to a single virtual machine are 64 with the G5/GS5 instance size for a total storage capacity of 64 TB.
In addition to the size limitations, it is important to understand that capacity planning differs if you are using Standard or Premium storage, or if you are using Managed or Unmanaged disks. From a capacity planning perspective, the primary difference between Managed and Unmanaged disks is that Unmanaged disks must include the capacity of the storage accounts you are creating in with your planning, and with Managed disks you do not.
Capacity planning with Standard storage
A Standard Azure Storage account supports a maximum of 20,000 IOPS. A Standard Tier Azure Virtual Machine using Standard storage supports 500 IOPS per disk and basic tier supports 300 IOPS per disk. If the disks are used at maximum capacity, a single Azure Storage account could handle 40 disks hosted on standard virtual machines, or 66 disks on basic virtual machines. Storage accounts also have a maximum storage capacity of 500 TB per Azure Storage account. When performing capacity planning, the number of Azure Storage accounts per the number of virtual machines can be derived from these numbers.
TABLE 2-3 Standard unmanaged virtual machine disks
VM Tier |
Basic Tier VM |
Standard Tier VM |
Disk size |
4095 GB |
4095 GB |
Max 8 KB IOPS per persistent disk |
300 |
500 |
Max number of disks performing max IOPS (per storage account) |
66 |
40 |
Table 2-4 shows the disk sizes, IOPS, and throughput per disk for standard managed disks.
TABLE 2-4 Standard managed virtual machine disks
Standard Disk Type |
S4 |
S6 |
S10 |
S20 |
Disk size |
32 GB |
64 GB |
128 GB |
512 GB |
IOPS per disk |
500 |
500 |
500 |
500 |
Throughput per disk |
60 MB/sec |
60 MB/sec |
60 MB/sec |
60 MB/sec |
Standard Disk Type |
S30 |
S40 |
S50 |
|
Disk size |
1024 GB (1 TB) |
2048 GB (2TB) |
4095 GB (4 TB) |
|
IOPS per disk |
500 |
500 |
500 |
|
Throughput per disk |
60 MB/sec |
60 MB/sec |
60 MB/sec |
|
Capacity planning with Premium storage
For workloads that require a high number of IOPs or low latency I/O Premium storage is an ideal solution. For capacity planning purposes, know that Premium storage supports DS-series, DSv2-series, GS-series, Ls-series, and Fs-series VMs. You can use Standard and Premium storage disks with these virtual machine types. A Premium Azure Storage account supports a maximum of 35 TB of total disk capacity, with up to 10 TB of capacity for snapshots. The maximum bandwidth per account (ingress + egress) is <= 50 Gbps.
TABLE 2-5 Premium unmanaged virtual machine disks: per account limits
Resource |
Default Limit |
Total disk capacity per account |
35 TB |
Total snapshot capacity per account |
10 TB |
Max bandwidth per account (ingress + egress1) |
<=50 Gbps |
This means that just like when using Standard storage, you must carefully plan how many disks you create in each storage account as well as consider the maximum throughput per Premium disk type because each type has a different max throughput, which affects the overall max throughput for the storage account (see Table 2-6).
TABLE 2-6 Premium unmanaged virtual machine disks: per disk limits
Premium Storage Disk Type |
P10 |
P20 |
P30 |
P40 |
P50 |
Disk size |
128 GiB |
512 GiB |
1024 GiB (1 TB) |
2048 GiB (2 TB) |
4095 GiB (4 TB) |
Max IOPS per disk |
500 |
2300 |
5000 |
7500 |
7500 |
Max throughput per disk |
100 MB/s |
150 MB/s |
200 MB/s |
250 MB/s |
250 MB/s |
Max number of disks per storage account |
280 |
70 |
35 |
17 |
8 |
Table 2-7 shows the disk sizes, IOPS, and throughput per disk for premium managed disks.
TABLE 2-7 Premium managed virtual machine disks: per disk limits
Premium Disks Type |
P4 |
P6 |
P10 |
P20 |
Disk size |
32 GB |
64 GB |
128 GB |
512 GB |
IOPS per disk |
120 |
240 |
500 |
2300 |
Throughput per disk |
25 MB/sec |
50 MB/sec |
100 MB/sec |
150 MB/sec |
Premium Disks Type |
P30 |
P40 |
P50 |
|
Disk size |
1024 GB (1 TB) |
2048 GB (2 TB) |
4095 GB (4 TB) |
|
IOPS per disk |
5000 |
7500 |
7500 |
|
Throughput per disk |
200 MB/sec |
250 MB/sec |
250 MB/sec |
|
Each Premium storage-supported virtual machine size has scale limits and performance specifications for IOPS, bandwidth, and the number of disks that can be attached per VM. When you use Premium storage disks with VMs, make sure that there is sufficient IOPS and bandwidth on your VM to drive disk traffic.
MORE INFO VIRTUAL MACHINE SCALE LIMITS FOR STORAGE
For the most up-to-date information about maximum IOPS and throughput (bandwidth) for Premium storage-supported VMs, see Windows VM sizes at: https://docs.microsoft.com/en-us/azure/virtual-machines/windows/sizes or Linux VM sizes: https://docs.microsoft.com/en-us/azure/virtual-machines/linux/sizes.
Implementing disk redundancy for performance
If your workload throughput requirements exceed the maximum IOPS capabilities of a single standard disk (500 IOPS on Standard or 500 IOPS (P10) to 7500 IOPS (P30 and P50) for Premium), or your storage requirements are greater than 4 TB per disk, you do have options. The first option is to add multiple data disks (depending on the virtual machine size) and implement RAID 0 disk striping, and create one or more volumes with multiple data disks. This provides increased capacity (up to 4 TB times the maximum number of disks for the virtual machine size) and increased throughput.
If your virtual machine is hosted on Server 2012 or above, you can use storage pools. You can use storage pools to virtualize storage by grouping industry-standard disks into pools, and then create virtual disks called Storage Spaces from the available capacity in the storage pools. You can then configure these virtual disks to provide striping capabilities across all disks in the pool, combining good performance characteristics. Storage pools make it easy to grow or shrink volumes depending on your needs (and the capacity of the Azure data disks you have attached).
This example creates a new storage pool named VMStoragePool with all the available data disks configured as part of the pool. The code identifies the available data disks using the Get-PhysicalDisk cmdlet and creates the virtual disk using the New-VirtualDisk cmdlet.
# Create a new storage pool using all available disks
New-StoragePool -FriendlyName "VMStoragePool" `
          -StorageSubsystemFriendlyName "Windows Storage*" `
          -PhysicalDisks (Get-PhysicalDisk -CanPool $True)
# Return all disks in the new pool
$disks = Get-StoragePool -FriendlyName "VMStoragePool" `
               -IsPrimordial $false |
               Get-PhysicalDisk
# Create a new virtual disk
New-VirtualDisk -FriendlyName "DataDisk" `
          -ResiliencySettingName Simple `
          -NumberOfColumns $disks.Count `
          -UseMaximumSize -Interleave 256KB `
          -StoragePoolFriendlyName "VMStoragePool"
The NumberOfColumns parameter of New-VirtualDisk should be set to the number of data disks utilized to create the underlying storage pool. This allows IO requests to be evenly distributed against all data disks in the pool. The Interleave parameter enables you to specify the number of bytes written in each underlying data disk in a virtual disk. Microsoft recommends that you use 256 KB for all workloads. After the virtual disk is created, the disk must be initialized, formatted, and mounted to a drive letter or mount point just like any other disk.
MORE INFO STRIPING DISKS FOR PERFORMANCE ON LINUX
The previous example shows how to combine disks on Windows for increased throughput and capacity. You can do the same thing on Linux as well. See the following to learn more at https://docs.microsoft.com/en-us/azure/virtual-machines/linux/configure-raid.
EXAM TIP
Mounting data disks may come up on the exam. It is important to remember that on Windows, the drive D is mapped to the local resource disk, which is only for temporary data because it is backed by the local physical disk on the host server. The resource disk will be mounted on the /Dev/sdb1 device on Linux with the actual mount point varying by Linux distribution.
Disk encryption
Protecting data is critical whether your workloads are deployed on-premises or in the cloud. Microsoft Azure provides several options for encrypting your Azure Virtual Machine disks to ensure that they cannot be read by unauthorized users.
Azure Storage Service Encryption for files and disks
Azure Storage Service Encryption offers the ability to automatically encrypt blobs and files within an Azure storage account. This capability can be enabled on ARM based Standard or Premium storage accounts and automatically encrypts all new files and disks created within the storage account. This is important because if you enable encryption after you have placed files or disks in the storage account, that data will not be encrypted. All Managed disks and snapshots are automatically encrypted. Because they are managed you do not see the underlying storage account. Note that the keys for Azure Storage Service Encryption are managed by Microsoft and are not directly accessible to you. Figure 2-24 shows how to enable Azure Storage Service Encryption on an Azure storage account.
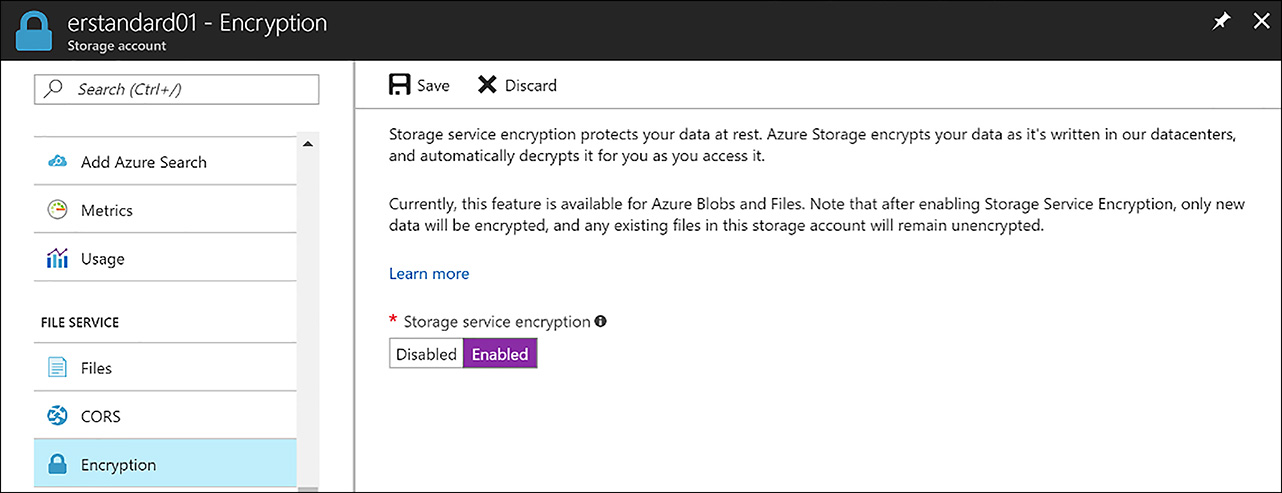
FIGURE 2-24 Enabling Azure Storage Service Encryption on a storage account
MORE INFO AZURE STORAGE SERVICE ENCRYPTION
For more information on how the Microsoft Azure Storage Service Encryption feature works visit https://docs.microsoft.com/en-us/azure/storage/common/storage-service-encryption.
Azure Disk Encryption
You can also take direct control of key management by enabling disk-level encryption directly on your Windows and Linux VMs. Azure Disk Encryption leverages the industry standard BitLocker feature of Windows, and the DM-Crypt feature of Linux to provide volume encryption for the operating system and the data disks. The solution is integrated with Azure Key Vault and Azure Active Directory to help you control and manage the disk-encryption keys and secrets in your key vault subscription.
Encryption can be enabled using PowerShell or the Azure CLI tools:
See the following walkthrough to enable disk encryption on a Windows VM with PowerShell at https://docs.microsoft.com/en-us/azure/virtual-machines/windows/encrypt-disks.
See the following walkthrough to enable disk encryption on a Linux VM with CLI at https://docs.microsoft.com/en-us/azure/virtual-machines/linux/encrypt-disks.
EXAM TIP
One of the key differences between Azure Disk Encryption and Storage Service Encryption is with Storage Service Encryption Microsoft owns and manages the keys, and with Azure Disk Encryption you do. Understanding this difference could come up on an exam.
MORE INFO AZURE DISK ENCRYPTION
Like many other solutions in Azure, the Azure Disk Encryption feature is constantly changing with new capabilities added and new scenarios opening to make it easier to protect your data. Ensure you read the following guide to stay up-to-date on supported and unsupported scenarios at https://docs.microsoft.com/en-us/azure/security/azure-security-disk-encryption.
Using the Azure File Service
Azure File Service is a fully managed file share service that offers endpoints for the Server Messaging Block (SMB) protocol, also known as Common internet File System or CIFS 2.1 and 3.0. This allows you to create one or more file shares in the cloud (up to 5 TB per share) and use the share for similar uses as a regular Windows File Server, such as shared storage or for new uses such as part of a lift and shift migration strategy.
Common use cases for using Azure Files are:
Replace or supplement on-premises file servers In some cases Azure files can be used to completely replace an existing file server. Azure File shares can also be replicated with Azure File Sync to Windows Servers, either on-premises or in the cloud, for performant and distributed caching of the data where it’s being used.
“Lift and shift” migrations In many cases migrating all workloads that use data on an existing on-premises file share to Azure File Service at the same time is not a viable option. Azure File Service with File Sync makes it easy to replicate the data on-premises and in the Azure File Service so it is easily accessible to both on-premises and cloud workloads without the need to reconfigure the on-premises systems until they are migrated.
Simplify cloud development and management Storing common configuration files, installation media and tools, as well as a central repository for application logging are all great use cases for Azure File Service.
Creating an Azure File Share (Azure portal)
To create a new Azure File using the Azure portal, open a Standard Azure storage account (Premium is not supported), click the Files link, and then click the + File Share Button. On the dialog shown in Figure 2-25, you must provide the file share name and the quota size. The quota size can be up to 5120 GB.
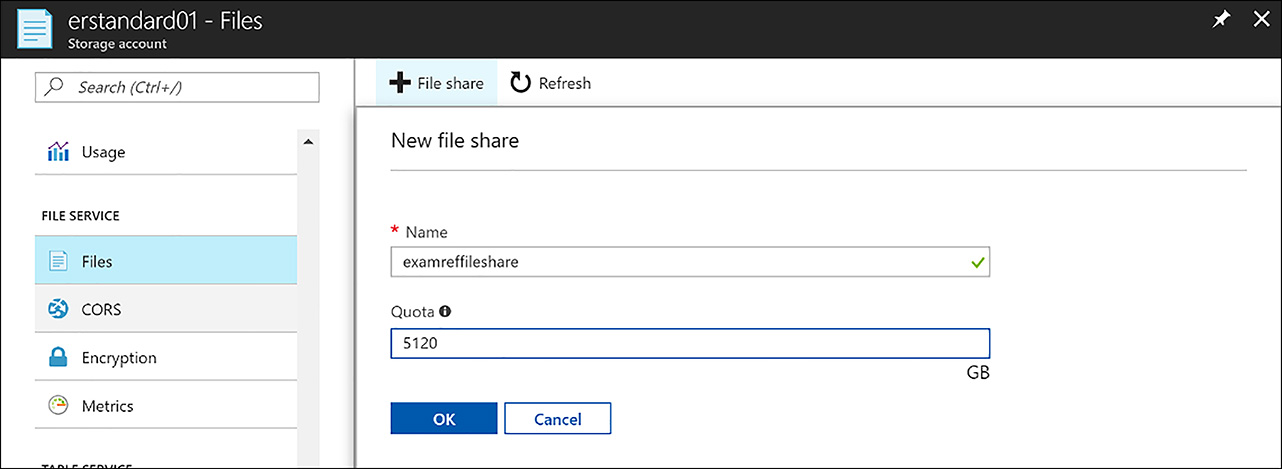
FIGURE 2-25 Creating a new Azure File Share
Creating an Azure File Share (PowerShell)
To create a share, first create an Azure Storage context object using the New-AzureStorageContext cmdlet. This cmdlet requires the name of the storage key, and the access key for the storage account which is retrieved by calling the Get-AzureRmStoragerAccountKey cmdlet or copying it from the Azure portal. Pass the context object to the New-AzureStorageShare cmdlet along with the name of the share to create, as the next example shows.
# Create a storage context to authenticate
$rgName = "StorageRG"
$storageName = "erstandard01"
$storageKey = (Get-AzureRmStorageAccountKey -ResourceGroupName $rgName -Name $storageName).Value[0]
$storageContext = New-AzureStorageContext $storageAccountName $storageKey
# Create a new storage share
$shareName = "logs"
$share = New-AzureStorageShare $shareName -Context $storageContext
Creating an Azure File Share (CLI)
To create an Azure File Share using the CLI first retrieve the connection string using the az show connection string command, and pass that value to the az storage share create command as the following example demonstrates.
# Retrieve the connection string for the storage account
rgName="StorageRG"
storageName="erstandard01"
current_env_conn_string=$(az storage account show-connection-string -n $storageName
-g $rgName --query 'connectionString' -o tsv)

# Create the share
shareName="logscli"
az storage share create --name files --quota 2048 --connection-string
 $current_env_conn_string
Connecting to Azure File Service outside of Azure
Because Azure File Service provides support for SMB 3.0 it is possible to connect directly to an Azure File Share from a computer running outside of Azure. In this case, remember to open outbound TCP port 445 in your local network. Some internet service providers may block port 445 so check with your service provider for details if you have problems connecting.
Connect and mount with Windows Explorer
There are several ways to mount an Azure File Share from Windows. The first is to use the Map network drive feature within Windows File Explorer. Open File Explorer, and find the This PC node in the explorer view. Right-click This PC, and you can then click the Map Network Drive option, as shown in Figure 2-26.

FIGURE 2-26 The Map Network Drive option from This PC
When the dialog opens, specify the following configuration options, as shown in Figure 2-27:
Folder: \[name of storage account].files.core.windows.net[name of share]
Connect using different credentials: Checked

FIGURE 2-27 Mapping a Network Drive to an Azure File Share
When you click finish, you see another dialog like the one shown in Figure 2-28 requesting the user name and password to access the file share. The user name should be in the following format: Azure[name of storage account], and the password should be the access key for the Azure storage account.

FIGURE 2-28 Specifying credentials to the Azure File Share
Connect and mount with the net use command
You can also mount the Azure File Share using the Windows net use command as the following example demonstrates.
net use x \erstandard01.file.core.windows.netlogs  /u:AZUREerstandard01
r21Dk4qgY1HpcbriySWrBxnXnbedZLmnRK3N49PfaiL1t3ragpQaIB7FqK5zbez/sMnDEzEu/dgA9Nq/W7IF4A==
Connect and mount with PowerShell
You can connect and mount an Azure File using the Azure PowerShell cmdlets. In this example, the storage account key is retrieved using the Get-AzureRmStorageAccountKey cmdlet. The account key is the password to the ConvertTo-SecureString cmdlet to create a secure string, which is required for the PSCredential object. From there, the credentials are passed to the New-PSDrive cmdlet, which maps the drive.
$rgName = "StorageRG"
$storageName = "erstandard01"
$storageKey = (Get-AzureRmStorageAccountKey -ResourceGroupName $rgName -Name $storageName).Value[0]
$acctKey = ConvertTo-SecureString -String "$storageKey" -AsPlainText -Force
$credential = New-Object System.Management.Automation.PSCredential -ArgumentList "Azure$storageName", $acctKey
New-PSDrive -Name "Z" -PSProvider FileSystem -Root "\$storageName.file.core.windows.net$shareName" -Credential $credential
Automatically reconnect after reboot in Windows
To make the file share automatically reconnect and map to the drive after Windows is rebooted using the following command (ensuring you replace the place holder values):
cmdkey /add:<storage-account-name>.file.core.windows.net /user:AZURE<storage-account-
name> /pass:<storage-account-key>
Connect and mount from Linux
Use the mount command (elevated with sudo) to mount an Azure File Share on a Linux virtual machine. In this example, the logs file share would be mapped to the /logs mount point.
sudo mount -t cifs //<storage-account-name>.file.core.windows.net/logs /logs -o
vers=3.0,username=<storage-account-name>.,password=<storage-account-
key>,dir_mode=0777,file_mode=0777,sec=ntlmssp
Skill 2.4: Monitor ARM VMs
Azure offers several configuration options to monitor the health of your virtual machines. In this skill, we’ll review how to configure monitoring and alerts as well as how to setup storage for diagnostics information.
This skill covers how to:
Configure ARM VM monitoring
Configure alerts
Configure diagnostic and monitoring storage location
Monitoring options in Azure
There are several tools and services in Azure designed to help you monitor different aspects of an application or deployed infrastructure. In addition to the built-in tools, you also can monitor your virtual machines using existing monitoring solutions such as Systems Center Operations Manager, or many other third-party solutions. Let’s review at a high level some of the options that are available before going deeper into virtual machine specific monitoring.
Azure Monitor
This tool allows you to get base-level infrastructure metrics and logs across your Azure subscription including alerts, metrics, subscription activity, and Service Health information. The Azure Monitor landing page provides a jumping off point to configure other more specific monitoring services such as Application Insights, Network Watcher, Log Analytics, Management Solutions, and so on. You can learn more about Azure Monitor at https://docs.microsoft.com/en-us/azure/monitoring-and-diagnostics/monitoring-overview-azure-monitor.
Application Insights
Application Insights is used for development and as a production monitoring solution. It works by installing a package into your app, which can provide a more internal view of what’s going on with your code. Its data includes response times of dependencies, exception traces, debugging snapshots, and execution profiles. It provides powerful smart tools for analyzing all this telemetry both to help you debug an app and to help you understand what users are doing with it. You can tell whether a spike in response times is due to something in an app, or some external resourcing issue. If you use Visual Studio and the app is at fault, you can be taken right to the problem line(s) of code so you can fix it. Application Insights provides significantly more value when your application is instrumented to emit custom events and exception information. You can learn more about Application Insights including samples for emitting custom telemetry at https://docs.microsoft.com/en-us/azure/application-insights/.
Network Watcher
The Network Watcher service provides the ability to monitor and diagnose networking issues without logging in to your virtual machines (VMs). You can trigger packet capture by setting alerts, and gain access to real-time performance information at the packet level. When you see an issue, you can investigate in detail for better diagnoses. This service is ideal for troubleshooting network connectivity or performance issues.
Azure Log Analytics
Log Analytics is a service in that monitors your cloud and on-premises environments to maintain their availability and performance. It collects data generated by resources in your cloud and on-premises environments and from other monitoring tools to provide analysis across multiple sources. Log Analytics provides rich tools to analyze data across multiple sources, allows complex queries across all logs, and can proactively alert you on specified conditions. You can even collect custom data into its central repository so you can query and visualize it. You can learn more about Log Analytics at https://docs.microsoft.com/en-us/azure/log-analytics/log-analytics-overview, as well as in Chapter 7.
Azure Diagnostics Extension
The Azure Diagnostics Extension is responsible for installing and configuring the Azure Diagnostics agent on both Windows and Linux VMs to provide a richer set of diagnostics data. On Windows, this agent can collect a comprehensive set of performance counter data, event and IIS log files, and even crash dumps. It also provides the ability to automatically transfer this data to Azure Storage as well as surfacing telemetry to the Azure portal for visualization and alerts. The capabilities on Linux are more limited, but they still expose a broad range of performance telemetry to act on for reporting and alerts.
Configuring Azure diagnostics
There are two levels of VM diagnostics: host and guest. With host diagnostics you can view and act on the data surfaced from the hypervisor hosting your virtual machine. This data is limited to high-level metrics involving the CPU, Disk, and Network. Enabling guest-level diagnostics involves having an agent running on the virtual machine that can collect a richer subset of data.
Enabling and configuring diagnostics (Windows)
During the creation of a VM, you can enable both guest operating system diagnostics and boot diagnostics. During this time, you need to select a Standard storage account that the diagnostics agent will use to store the diagnostics data like shown in Figure 2-29.
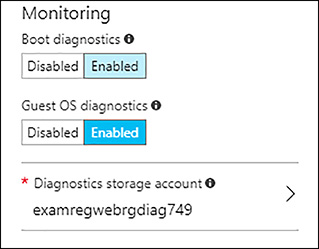
FIGURE 2-29 Enabling boot and guest operating system diagnostics during VM creation
You can also enable diagnostics on a VM after it is created. Figure 2-30 shows what it looks like to enable the diagnostic extension on a Windows VM.
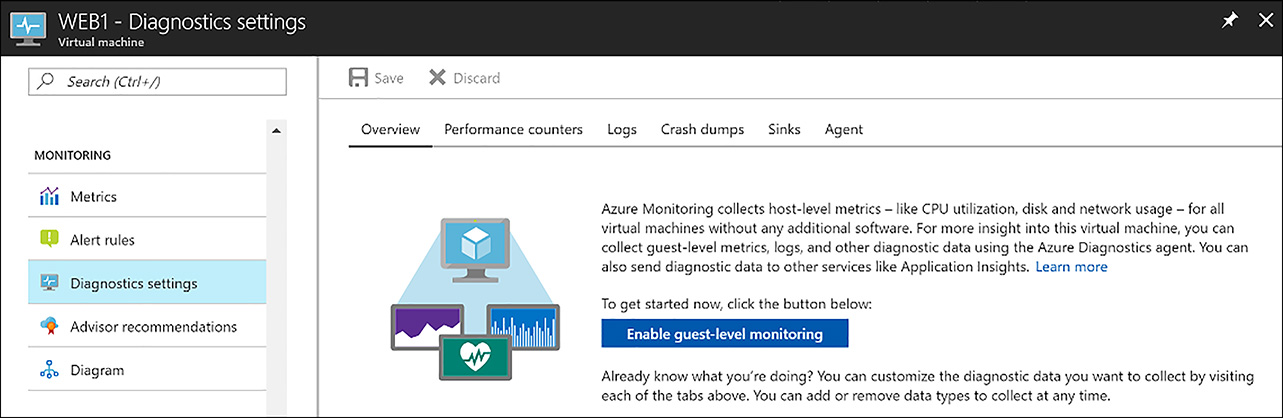
FIGURE 2-30 Enabling diagnostics on a Windows VM
After the diagnostics extension is enabled, you can then capture performance counter data. Using the portal, you can select basic sets of counters by category, as Figure 2-31 shows.

FIGURE 2-31 Configuring the capture of performance counters
You can also configure diagnostics at a granular level by specifying exactly which counters to sample and capture including custom counters, as Figure 2-32 shows.
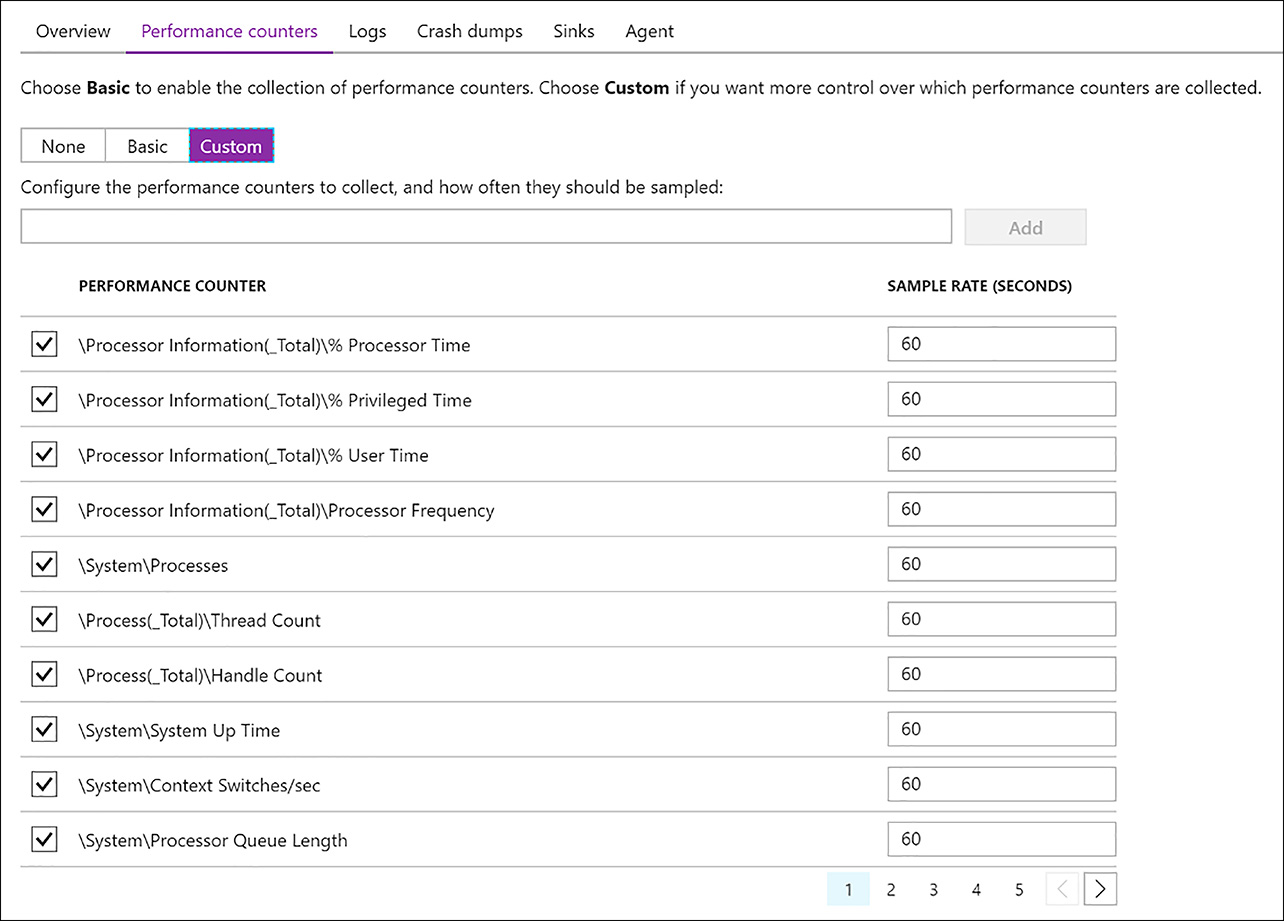
FIGURE 2-32 Specifying a custom performance counter configuration
The Azure portal allows you to configure the agent to transfer IIS logs and failed request logs to Azure storage automatically, as Figure 2-33 demonstrates. The agent can also be configured to transfer files from any directory on the VM. However, the portal does not surface this functionality, and it must be configured through a diagnostics configuration file.
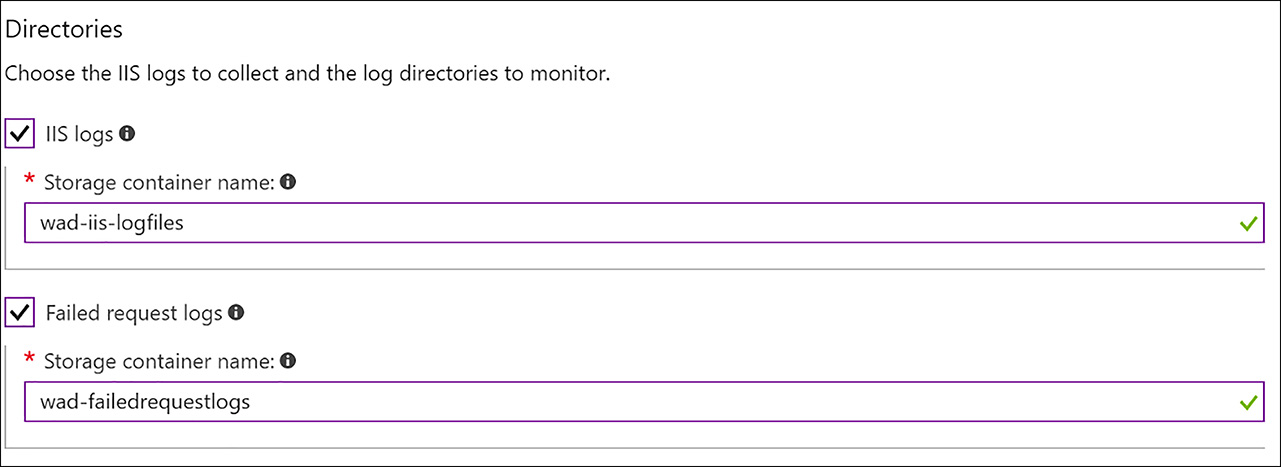
FIGURE 2-33 Configuring the storage container location for IIS and failed request logs
Like capturing performance counters, the diagnostics extension provides the option of collecting basic event log data, as Figure 2-34 shows. The custom view for capturing event logs supports a custom syntax to filter on certain events by their event source or the value.
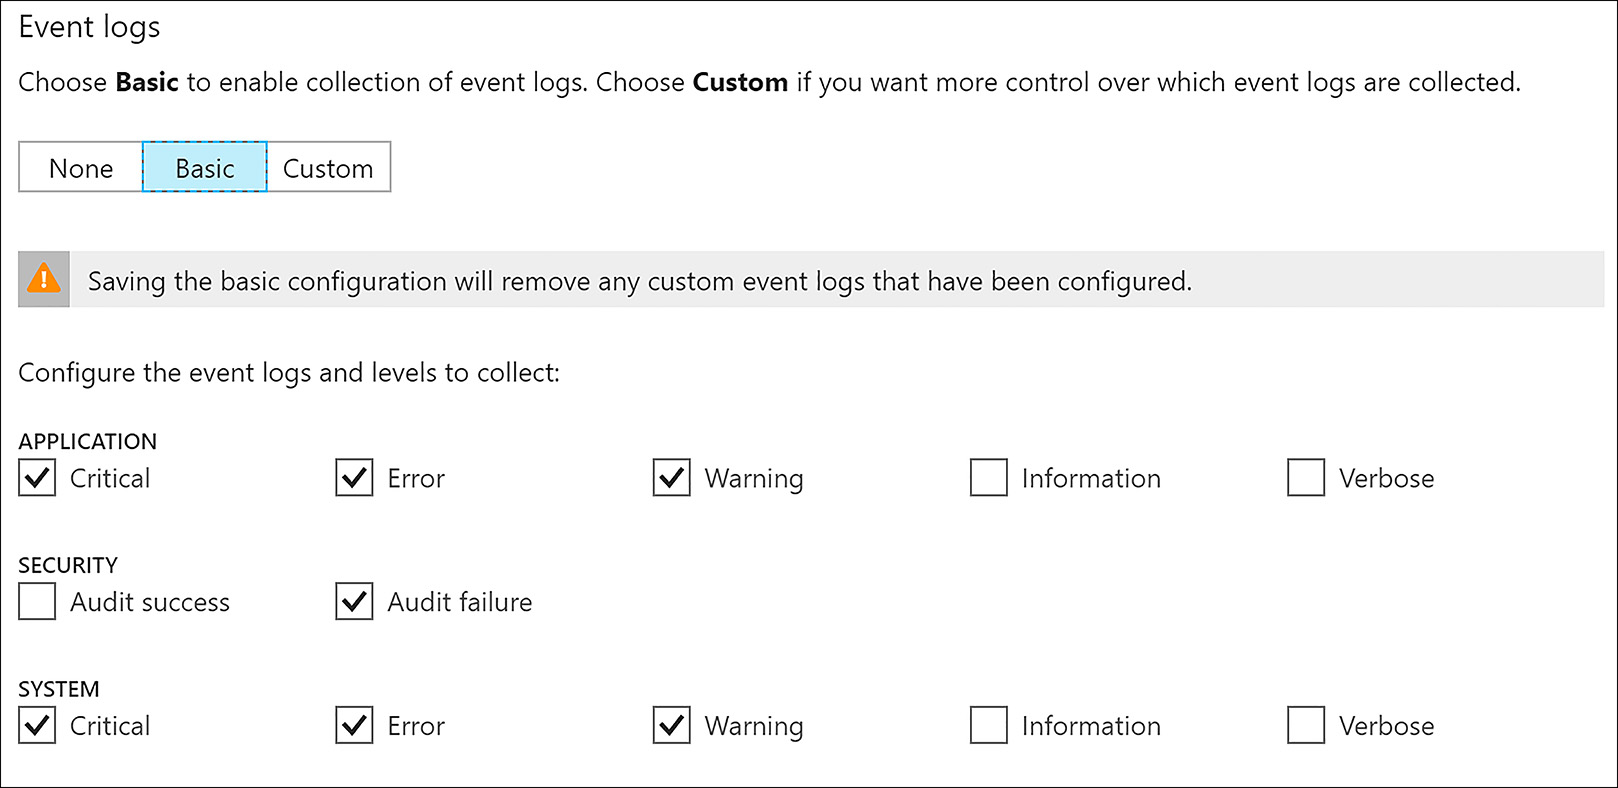
FIGURE 2-34 Capturing event logs and levels to capture
For .NET applications that emit trace data, the extension can also capture this data and filter by the following log levels: All, Critical, Error, Warning, Information, and Verbose, as Figure 2-35 shows.
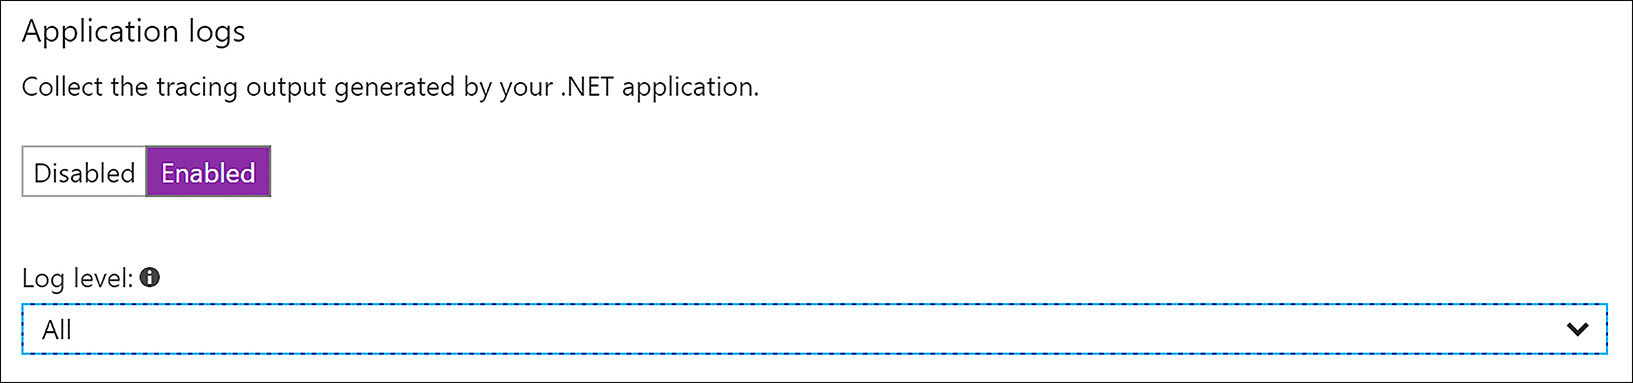
FIGURE 2-35 Specifying the log level for application logs
Event Tracing for Windows (ETW) provides a mechanism to trace and log events that are raised by user-mode applications and kernel-mode drivers. ETW is implemented in the Windows operating system and provides developers a fast, reliable, and versatile set of event tracing features. Figure 2-36 demonstrates how to configure the diagnostics extension to capture ETW data from specific sources.

FIGURE 2-36 Collecting Event Tracing for Windows (ETW)
Figure 2-37 demonstrates the portal UI that allows you to specify which processes to monitor for unhandled exceptions, and the container in Azure storage to move the crash dump (mini or full) to after it is captured.

FIGURE 2-37 Configuring processes to capture for crash dump
The agent optionally allows you to send diagnostic data to Application Insights, as Figure 2-38 shows. This is especially helpful if you have other parts of an application that use Application Insights natively so you have a single location to view diagnostics data for your application.

FIGURE 2-38 Sending diagnostics data to Application Insights
The final diagnostics data to mention is boot diagnostics. If enabled, the Azure Diagnostics Agent captures a screenshot to a specific storage account of what the console looks like on the last boot. This helps you understand the problem if your VM does not start. Figure 2-39 shows a VM with boot diagnostics enabled.
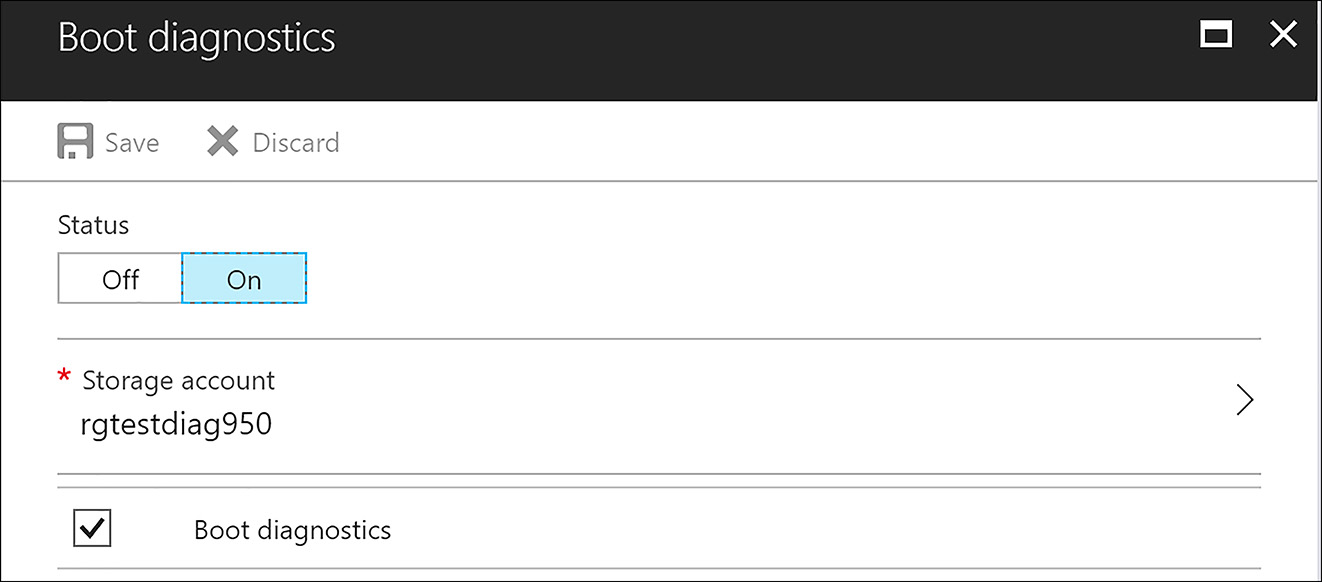
FIGURE 2-39 Configuring boot diagnostics
Clicking the Boot Diagnostics link in the portal shows you the last captured screen shot of your VM, as Figure 2-40 shows.

FIGURE 2-40 The screen shot from the last boot for a Windows VM with boot diagnostics configured
Enabling and configuring diagnostics (Linux)
The diagnostics agent on Linux does not support the same rich functionality that the Azure Diagnostics Agent for Windows does, so the blade for enabling and configuring the diagnostics extension for Linux is much simpler, as Figure 2-41 shows.

FIGURE 2-41 Enabling diagnostics on a Linux VM
The output for boot diagnostics on Linux is different than the Windows output. In this case you get the log data in text form, as Figure 2-42 demonstrates. This is useful for downloading and searching output.
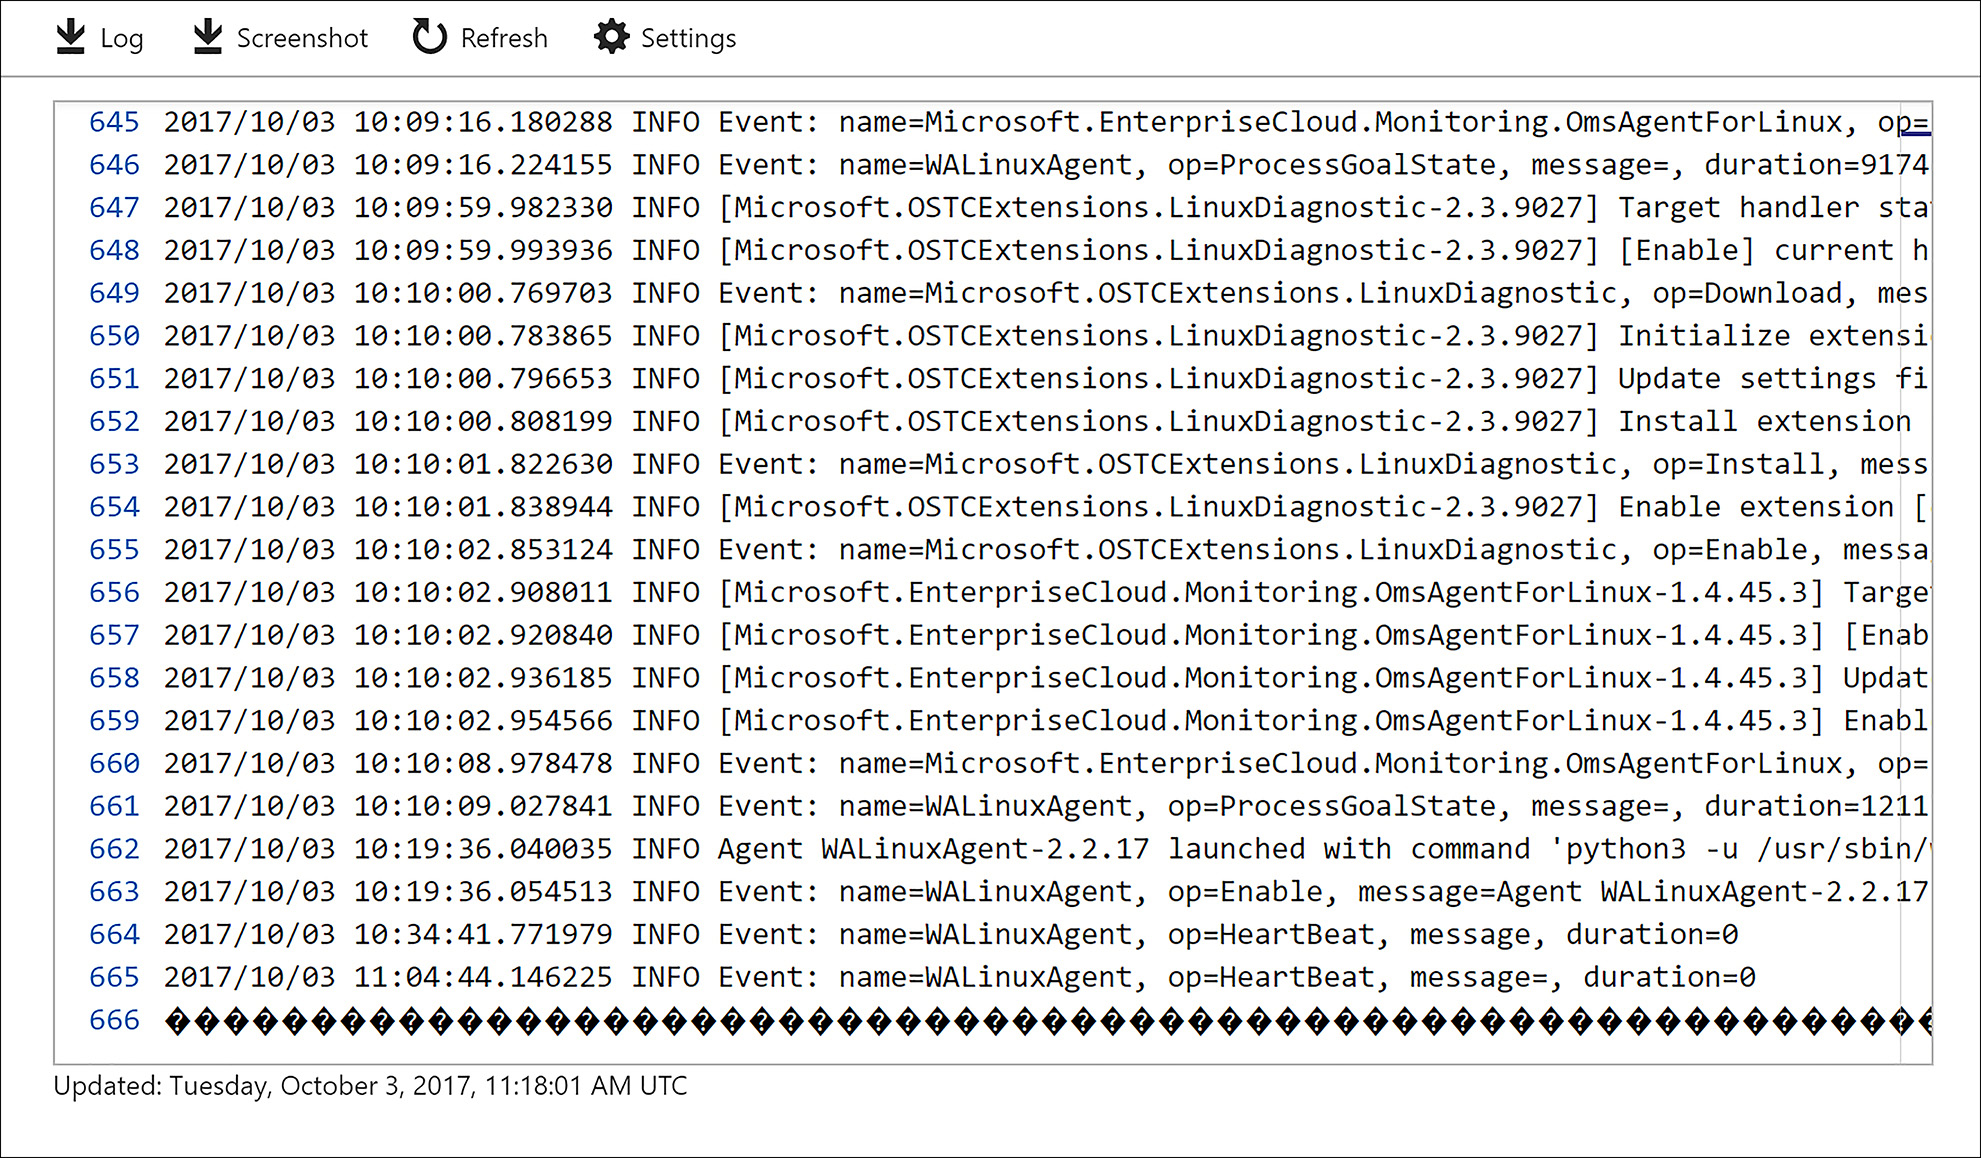
FIGURE 2-42 Boot diagnostics logs for a Linux VM
EXAM TIP
The Azure Diagnostics agent can also be configured through ARM templates and the command line tools by specifying a configuration file. For the exam you should be aware of the schema of this configuration and how to apply it using automated tools. You can learn more about the diagnostics schema at https://docs.microsoft.com/en-us/azure/monitoring-and-diagnostics/azure-diagnostics-schema.
Configuring alerts
You can configure and receive two types of alerts.
Metric alerts This type of alert triggers when the value of a specified metric crosses a threshold you assign in either direction. That is, it triggers both when the condition is first met and then afterwards when that condition is no longer being met.
Activity log alerts This type of event occurs when a new activity log event occurs that matches the conditions specified in the alert. These alerts are Azure resources, so they can be created by using an Azure Resource Manager template. They also can be created, updated, or deleted in the Azure portal.
Creating a metric alert
You create a metric alert by clicking Alert Rules, and then Add metric alert on a VM in the Azure Portal, as shown in Figure 2-43.

FIGURE 2-43 Adding a metric alert to a VM
On the new dialog, you specify the name, description, and the criteria for the alert. Figure 2-44 shows the name and description for a new rule.
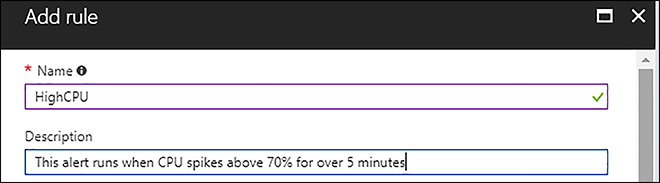
FIGURE 2-44 Configuring the criteria for an alert
The next step is to configure the alert criteria. This is the metric to use, the condition, threshold, and the period. The alert shown in Figure 2-45 will trigger an alert when the Percentage CPU metric exceeds 70 percent over a five-minute period.

FIGURE 2-45 The configuration of the alert
When an alert is triggered there are several actions that can be taken to either trigger further notifications, or to remediate the alert. These range from simply emailing users in the owners, contributors, and reader roles, or sending emails to designated administrator email addresses. Alerts can also call a webhook, run an Azure Automation runbook, or even execute a logic app for more advanced actions.
Webhooks allow you to route an Azure alert notification to other systems for post-processing or custom actions. For example, you can use a webhook on an alert to route it to services that send text messages, log bugs, notify a team via chat/messaging services, or do any number of other actions. You can learn more about sending alert information to webhooks at https://docs.microsoft.com/en-us/azure/monitoring-and-diagnostics/insights-webhooks-alerts.
A runbook is a set of PowerShell code that runs in the Azure Automation Service. See the following to learn more about using Runbooks to remediate alerts at https://azure.microsoft.com/en-us/blog/automatically-remediate-azure-vm-alerts-with-automation-runbooks/.
Logic Apps provides a visual designer to model and automate your process as a series of steps known as a workflow. There are many connectors across the cloud and on-premises to quickly integrate across services and protocols. When an alert is triggered the logic app can take the notification data and use it with any of the connectors to remediate the alert or start other services. To learn more about Azure Logic Apps visit https://docs.microsoft.com/en-us/azure/logic-apps/logic-apps-what-are-logic-apps. Figure 2-46 shows the various actions that can take place when an alert is triggered.

FIGURE 2-46 Configuring notifications for an alert
Creating an activity log alert
You create an activity alert by clicking Alert Rules, and then Add Activity Log Alert on a VM in the Azure portal, as shown in Figure 2-47.

FIGURE 2-47 Creating an activity log alert
On the creation dialog, you must specify the resource group to create the new alert in, and then configure the criteria starting with the event category. The event category contains the following categories that expose different types of event sources.
Administrative
Security
Security Health
Recommendation
Policy
Autoscale
MORE INFO EVENT CATEGORIES
For a detailed review of what events are contained in each category see: https://docs.microsoft.com/en-us/azure/monitoring-and-diagnostics/monitoring-overview-activity-logs.
After the event category is specified, you can filter to a specific resource group or resource as well as the specific operation. In Figure 2-48, the alert will trigger anytime the LinuxVM virtual machine is updated.
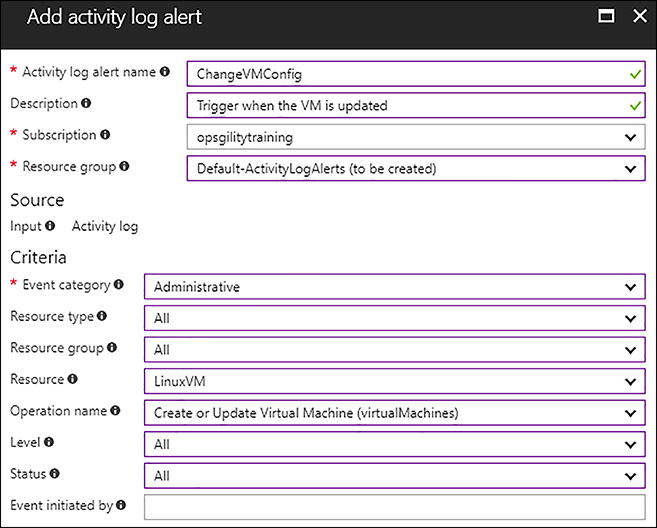
FIGURE 2-48 Configuring an activity log alert
After the criteria is established, you define the actions that take place. Like the alerts, these are actual resources created in the resource group. You can add one or more actions from the following available options: Email, SMS, Webhook, or ITSM. Figure 2-49 demonstrates how to configure an Email action type.
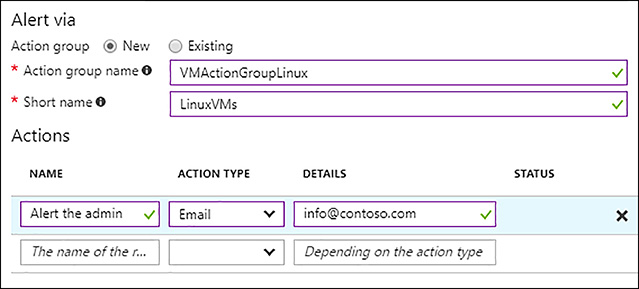
FIGURE 2-49 Specifying the actions for an activity log alert
Skill 2.5: Manage ARM VM availability
Resiliency is a critical part of any application architecture, whether the servers are physical or virtual Azure provides several features and capabilities to make virtual machine deployments resilient. The platform helps you to avoid single point of failure at the physical hardware level, and provides techniques to avoid downtime during host updates. Using features like availability zones, availability sets, and load balancers provides you the capabilities to build highly resilient and available systems.
This skill covers how to:
Configure availability zones
Configure availability sets
Configure each application tier into separate availability sets
Combine the load balancer with availability sets
Configure availability zones
Availability zones is a feature that at the time of this writing is in preview and is only available in a limited number of regions. Over time this feature will become more prevalent and will likely be integrated into the exam. At a high level, availability zones help to protect you from datacenter-level failures. They are located inside an Azure region, and each one has its own independent power source, network, and cooling. To ensure resiliency, there’s a minimum of three separate zones in all enabled regions. The physical and logical separation of availability zones within a region protects applications and data from zone-level failures. Availability zones are expected to provide a 99.99 percent SLA once it is out of preview.
To deploy a VM to an availability zone, select the zone you want to use on the Settings blade of the virtual machine creation dialog, as shown in Figure 2-50. If you choose an availability zone, you cannot join an availability set.

FIGURE 2-50 Specifying the availability zone for a VM
At the time of this writing the following services are supported with availability zones:
Linux virtual machines
Windows virtual machines
Zonal virtual machine scale sets
Managed disks
Load balancer
Supported virtual machine size families:
Av2
Dv2
DSv2
Configure availability sets
Availability sets are used to control availability for multiple virtual machines in the same application tier. To provide redundancy for your virtual machines, it is recommended to have at least two virtual machines in an availability set. This configuration ensures that at least one virtual machine is available in the event of a host update, or a problem with the physical hardware the virtual machines are hosted on. Having at least two virtual machines in an availability set is a requirement for the service level agreement (SLA) for virtual machines of 99.95 percent.
Virtual machines should be deployed into availability sets according to their workload or application tier. For instance, if you are deploying a three-tier solution that consists of web servers, a middle tier, and a database tier, each tier would have its own availability set, as Figure 2-51 demonstrates.

FIGURE 2-51 Availability set configurations for a multi-tier solution
Each virtual machine in your availability set is assigned a fault domain and an update domain. Each availability set has up to 20 update domains available, which indicates the groups of virtual machines and the underlying physical hardware that can be rebooted at the same time for host updates. Each availability set is also comprised of up to three fault domains. Fault domains represent which virtual machines will be on separate physical racks in the datacenter for redundancy. This limits the impact of physical hardware failures such as server, network, or power interruptions. It is important to understand that the availability set must be set at creation time of the virtual machine.
Alignment with Managed disks
For VMs that use Azure Managed Disks, VMs are aligned with managed disk fault domains when using an aligned availability set, as shown in Figure 2-52. This alignment ensures that all the managed disks attached to a VM are within the same managed disk fault domain. Only VMs with managed disks can be created in a managed availability set. The number of managed disk fault domains varies by region, either two or three managed disk fault domains per region.

FIGURE 2-52 Aligning managed disks with an availability set
MORE INFO UNDERSTANDING AVAILABILITY IN AZURE VMS
You can learn more about update and fault domains and how to manage availability of your Azure VMs here: https://docs.microsoft.com/en-us/azure/virtual-machines/windows/manage-availability.
Create an availability set (Azure portal)
To create an availability set, specify a name for the availability set that is not in use by any other availability sets within the resource group, the number of fault and updates domains, as well as whether you will use managed disks with the availability set or not. Figure 2-53 demonstrates the Create Availability Set blade in the portal.

FIGURE 2-53 Creating an Availability Set
Create an availability set (PowerShell)
The New-AzureRmAvailabilitySet cmdlet is used to create an availability set in PowerShell. The PlatformUpdateDomainCount and PlatformFaultDomainCount parameters control the number of fault domains and upgrade domains. The Sku parameter should be set to Aligned if you intend to deploy VMs that use managed disks.
# Create an availability set

$rgName    = "ExamRefRG"
$avSetName = "WebAVSet"
$location  = "West US"
New-AzureRmAvailabilitySet -ResourceGroupName $rgName `
                           -Name $avSetName `
                           -Location $location `
                           -PlatformUpdateDomainCount 10 `
                           -PlatformFaultDomainCount 3 `
                           -Sku "Aligned"
Create an availability set (CLI)
The az vm availability-set create command is used to create an availability set using the CLI tools. The platform-update-domain-count and platform-fault-domain-count parameters are used to control the number of fault and upgrade domains. By default an availability set is created as aligned unless you pass the parameter unmanaged.
# Create an availability set
rgName="ExamRefRGCLI"
avSetName="WebAVSet"
location="WestUS"
az vm availability-set create --name $avSetName --resource-group $rgName --platform-
fault-domain-count 3 --platform-update-domain-count 10
Managing availability with the Azure Load Balancer
The Azure Load Balancer provides availability for workloads by distributing requests across multiple virtual machines that perform the same task such as serving web pages. The Azure Load Balancer provides a feature called health probes that can automatically detect if a VM is problematic and removes it from the pool if it is. The load balancer is discussed in-depth in Chapter 4.
Each load balancer can be configured to have a TCP or HTTP based load balancer probe. The default probe behavior is for a TCP probe to make a socket connect on the port specified as the probe port. If the socket connect receives a TCP acknowledgement (ACK), the virtual machine continues receiving traffic in the load balancer rotation. If the probe does not receive a response (two failures, 15 seconds each by default), the load balancer takes the virtual machine in question out of the load balancer rotation. The load balancer does continue to probe, and if the service starts to respond, the virtual machine will be put back into rotation.
An HTTP probe works in a similar manner, except instead of looking for a TCP ACK, the HTTP probe is looking for a successful response from HTTP (HTTP 200 OK). This option allows you to specify the probe path, which is a relative path to an HTTP endpoint that responds with the code. For example, you could write custom code that responds on the relative path of /Healthcheck.aspx that checks whether the application on the virtual machine is functional (database connectivity and queue access). This allows a much deeper inspection of your application, and programmatic control over whether the virtual machine should be in rotation or not.
When you configure the backend pool of a load balancer you can associate it with the network interfaces of the virtual machines in your availability set, as shown in Figure 2-54.

FIGURE 2-54 Creating the backend pool of the load balancer using VMs from an availability set
Skill 2.6 Scale ARM VMs
One of the more compelling benefits of Azure VMs is the ability to apply elasticity to any workload by providing the capability to flexibly scale up or out quickly. With Azure VMs there are two key ways to take advantage of this elasticity. The first is to change the size of your VMs as needed (up or down), and the second option is to use the virtual machine scale set (VMSS) feature to allow Azure to automatically add and remove instances as needed by your workload. In this skill we’ll review these two techniques.
This skill covers how to:
Changing VM sizes
Deploy and configure VM scale sets (VMSS)
Change VM sizes
There are many situations where the amount of compute processing a workload needs varies dramatically from day to day or even hour to hour. For example, in many organizations line of business (LOB) applications are heavily utilized during the workweek, but on the weekends, they see little to any actual usage. Other examples are workloads that require more processing time due to scheduled events such as backups or maintenance windows where having more compute time may make it faster to complete these tasks. Azure Resource Manager based VMs make it relatively easy to change the size of a virtual machine even after it has been deployed. There are a few things to consider with this approach.
The first consideration is to ensure that the region your VM is deployed to supports the instance size that you want to change the VM to. In most cases this is not an issue, but if you have a use case where the desired size isn’t in the region the existing VM is deployed to, your only options are to either wait for the size to be supported in the region, or to move the existing VM to a region that already supports it.
The second consideration is if the new size is supported in the current hardware cluster your VM is deployed to. This can be determined by clicking the Size link in the virtual machine configuration blade in the Azure portal of a running virtual machine, as Figure 2-55 demonstrates. If the size is available you can select it. Changing the size reboots the virtual machine.

FIGURE 2-55 Creating the backend pool of the load balancer using VMs from an availability set
If the size is not available, it means either the size is not available in the region or the current hardware cluster. You can view the available sizes by region at https://azure.microsoft.com/en-us/regions/services/. In the event you need to change to a different hardware cluster you must first stop the virtual machine, and if it is part of an availability set you must stop all instances of the availability set at the same time. After all, when the VMs are stopped you can change the size, which moves all of the VMs to the new hardware cluster where they are resized and started. The reason all VMs in the availability set must be stopped before performing the resize operation to a size that requires different hardware. is that all running VMs in the availability set must use the same physical hardware cluster. Therefore, if a change of physical hardware cluster is required to change the VM size, all VMs must be first stopped and then restarted one-by-one to a different physical hardware cluster.
A third consideration is the form factor of the new size compared to the old size. Consider scaling from a DS3_V2 to a DS2_V2. A DS3_V2 supports up to eight data disks and up to four network interfaces. A DS2_V2 supports up to four data disks and up to two network interfaces. If the VM you are sizing from (DS3_V2) is using more disks or network interfaces then the target size, the resize operation will fail.
Resizing a VM (PowerShell)
Use the Get-AzureRmVMSize cmdlet and pass the name of the region to the location parameter to view all the available sizes in your region to ensure the new size is available. If you specify the resource group and the VM name, it returns the available sizes in the current hardware cluster.
# View available sizes
$location = "WestUS"
Get-AzureRmVMSize -Location $location
After you have identified the available size, use the following code to change the VM to the new size.
$rgName = "EXAMREGWEBRG"
$vmName = "Web1"
$size = "Standard_DS2_V2"
$vm = Get-AzureRmVM -ResourceGroupName $rgName -VMName $vmName
$vm.HardwareProfile.VmSize = $size
Update-AzureRmVM -VM $vm -ResourceGroupName $rgName
If the virtual machine(s) are part of an availability set, the following code can be used to shut them all down at the same time and restart them using the new size.
$rgName = "ExamRefRG"
$vmName = "Web1"
$size = "Standard_DS2_V2"
$avSet = "WebAVSet"
Resizing a VM (CLI)
The az vm list-vm-resize-options command can be used to see which VM sizes are available in the current hardware cluster.
rgName="ExamRefRG"
vmName="Web1"
az vm list-vm-resize-options --resource-group $rgName --name $vmName --output table
The az vm list-sizes command is used to view all sizes in the region.
az vm list-sizes --location westus
The az vm resize command is used to change the size of an individual VM.
az vm resize --resource-group $rgName --name $vmName --size Standard_DS3_v2
Deploy and configure VM scale sets (VMSS)
For workloads that support the ability to dynamically add and remove instances to handle increased or decreased demand VM scale sets (VMSS) should be considered. A VMSS is a compute resource that you can use to deploy and manage a set of identical virtual machines.
By default, a VMSS supports up to 100 instances. However, it is possible to create a scale set up to 1000 instances if they are deployed with the property singlePlacementGroup set to false. A placement group is a construct like an Azure availability set, with its own fault domains and upgrade domains. By default, a scale set consists of a single placement group with a maximum size of 100 VMs. If the scale set property called singlePlacementGroup is set to false, the scale set can be composed of multiple placement groups and has a range of 0-1,000 VMs. When set to the default value of true, a scale set is composed of a single placement group, and has a range of 0-100 VMs.
Using multiple placement groups is commonly referred to as a large scale set. The singlePlacementGroup property can be set using ARM templates, the command line tools, or during portal creation.) Working with large scale sets does have a few conditions to be aware of. If you are using a custom image instead of a gallery image, your scale set supports up to 300 instances instead of 1000. Another scalability factor for consideration is the Azure Load Balancer. The basic SKU of the Azure Load Balancer can scale up to 100 instances. For a large scale set (> 100 instances) you should use the Standard SKU or the Azure Application Gateway.
Creating a virtual machine scale set (Azure portal)
Figure 2-56 shows a portion of the creation dialog for creating a new VM scale set using the Azure portal. Like other Azure resources, you must specify a name and the resource group to deploy to. All instances of the VMSS will use the same operating system disk image specified here.
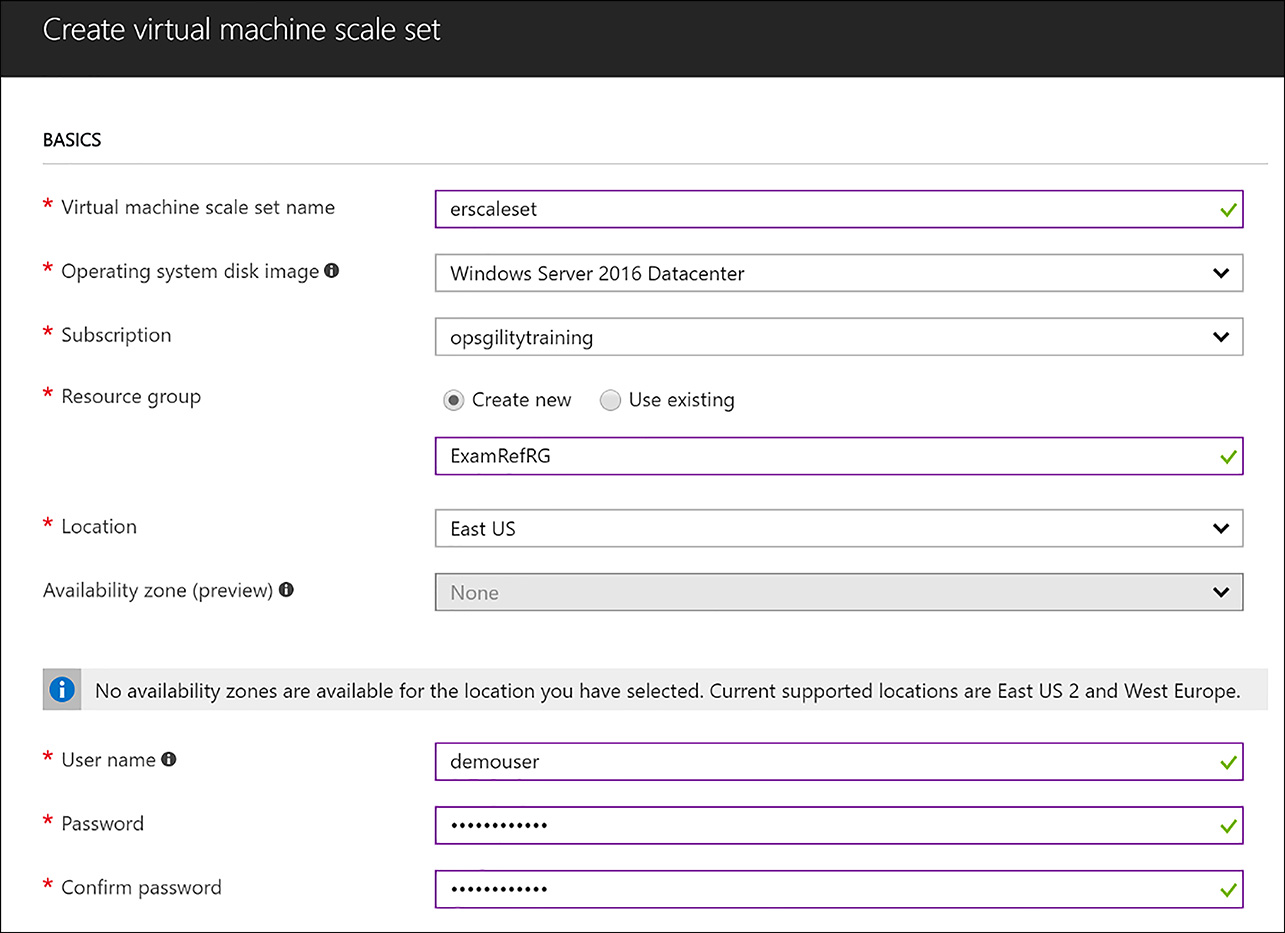
FIGURE 2-56 Creating a VM scale set
Further down the page is where you specify the initial instance count, and instance size, as shown in figure 2-57. You can also choose to use managed or unmanaged disks, assign a public IP, and a DNS label. Creating a VMSS using the Azure portal also creates an instance of the Azure Load Balancer. Choosing Enable scaling beyond 100 instances creates the VMSS using the singlePlacementGroup property set to false. This change will also not create and associate the Azure Load Balancer with the scale set.
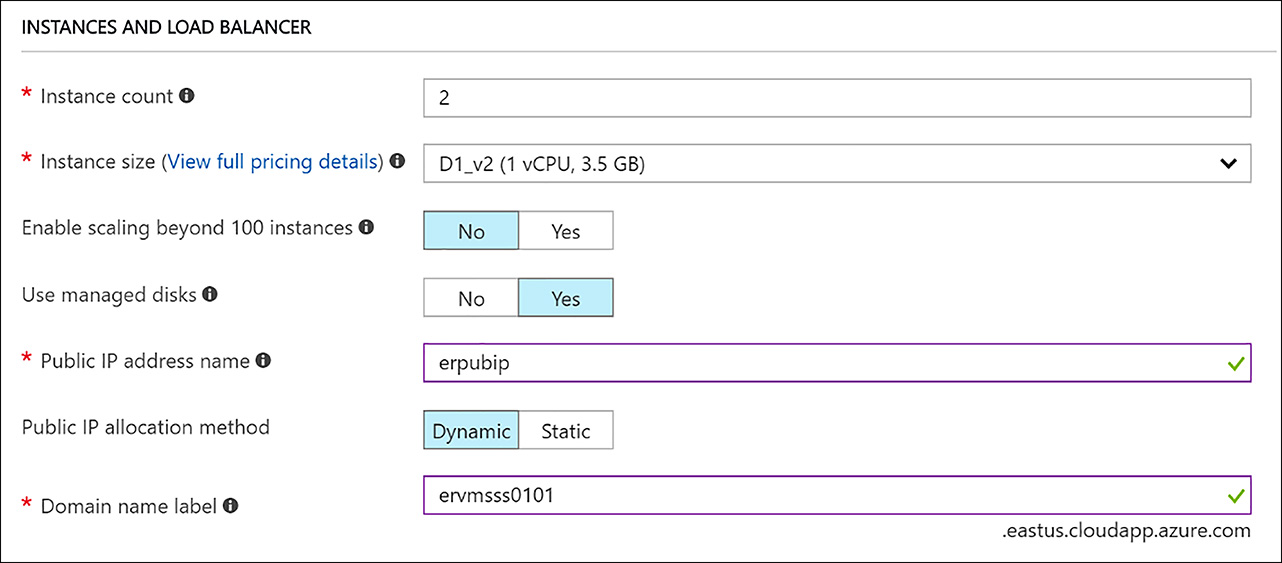
FIGURE 2-57 Configuring the instances and the load balancer for a VM scale set
When Autoscale is enabled you are presented with a set of configuration options for setting the default rules, as shown in figure 2-58. Here you can specify the minimum and maximum number of VMs in the set, as well as the actions to scale out (add more) or to scale in (remove instances).
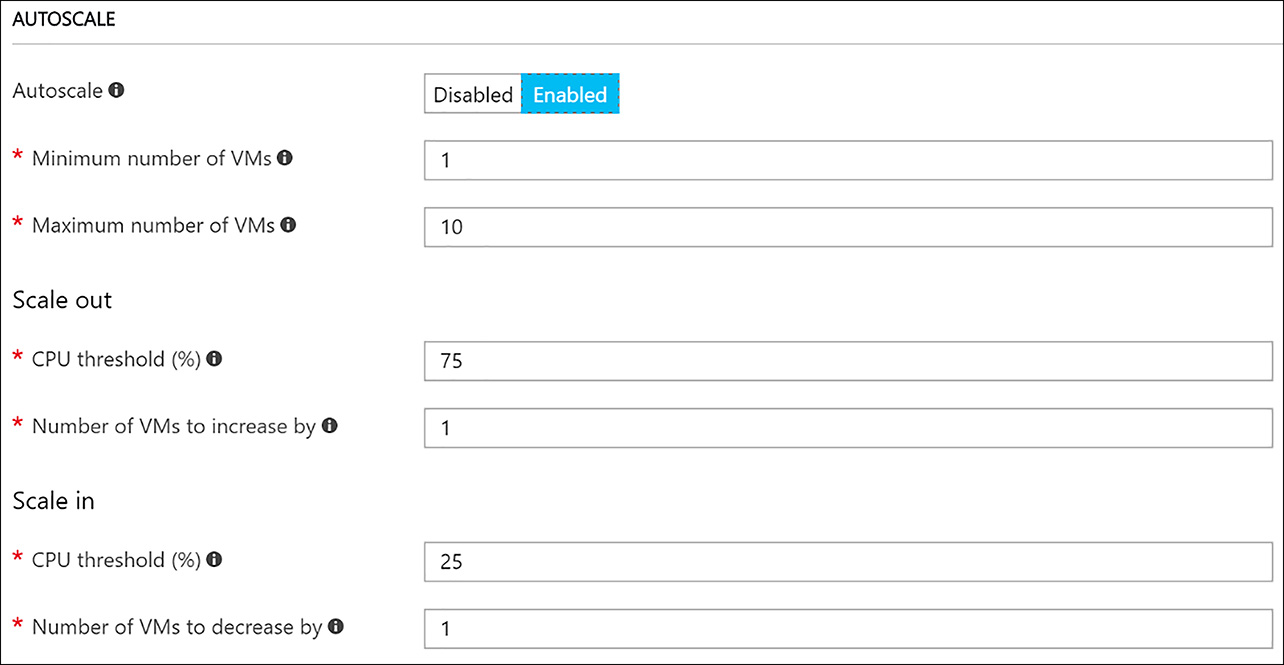
FIGURE 2-58 Configuring auto scale rules for a virtual machine scale set
The Azure portal creation process does not directly support applying configuration management options like VM extensions. However, they can be applied to a VMSS later using the command line tools or an ARM template.
Creating a virtual machine scale set (PowerShell)
Creating a VM scale set using PowerShell is very similar to creating a regular virtual machine. You create a VMSS configuration object using the New-AzureRmVmssConfig cmdlet. From there, you either create or retrieve existing dependent resources and set them on the returned configuration object. Typically, virtual machine scale sets use a VM extension to self-configure themselves during the instance startup. The Add-AzureRmVmssExtension cmdlet is used to specify the extension configuration.
The following example is detailed, and creates all of the resources such as virtual network, load balancer, public IP address, as well as demonstrates how to apply a custom script extension to configure the VM instances on boot.
# Create a virtual machine scale set with IIS installed from a custom script extension
$rgName       = "ExamRefRGPS"
$location     = "WestUS"
$vmSize       = "Standard_DS2_V2"
$capacity     = 2

New-AzureRmResourceGroup -Name $rgName -Location $location

# Create a config object
$vmssConfig = New-AzureRmVmssConfig `
    -Location $location `
    -SkuCapacity $capacity `
    -SkuName $vmSize `
    -UpgradePolicyMode Automatic

# Define the script for your Custom Script Extension to run
$publicSettings = @{
    "fileUris" = (,"https://raw.githubusercontent.com/opsgility/lab-support-public/master/script-extensions/install-iis.ps1");
    "commandToExecute" = "powershell -ExecutionPolicy Unrestricted -File install-iis.ps1"
}

# Use Custom Script Extension to install IIS and configure basic website
Add-AzureRmVmssExtension -VirtualMachineScaleSet $vmssConfig `
    -Name "customScript" `
    -Publisher "Microsoft.Compute" `
    -Type "CustomScriptExtension" `
    -TypeHandlerVersion 1.8 `
    -Setting $publicSettings
$publicIPName = "vmssIP"

# Create a public IP address
$publicIP = New-AzureRmPublicIpAddress `
  -ResourceGroupName $rgName  `
  -Location $location `
  -AllocationMethod Static `
  -Name $publicIPName

# Create a frontend and backend IP pool
$frontEndPoolName = "lbFrontEndPool"
$backendPoolName = "lbBackEndPool"
$frontendIP = New-AzureRmLoadBalancerFrontendIpConfig `
  -Name $frontEndPoolName `
  -PublicIpAddress $publicIP
$backendPool = New-AzureRmLoadBalancerBackendAddressPoolConfig -Name $backendPoolName

# Create the load balancer
$lbName = "vmsslb"
$lb = New-AzureRmLoadBalancer `
  -ResourceGroupName $rgName  `
  -Name $lbName `
  -Location $location `
  -FrontendIpConfiguration $frontendIP `
  -BackendAddressPool $backendPool

# Create a load balancer health probe on port 80
$probeName = "lbprobe"
Add-AzureRmLoadBalancerProbeConfig -Name $probeName `
  -LoadBalancer $lb `
  -Protocol tcp `
  -Port 80 `
  -IntervalInSeconds 15 `
  -ProbeCount 2 `
  -RequestPath "/"
# Create a load balancer rule to distribute traffic on port 80
Add-AzureRmLoadBalancerRuleConfig `
  -Name "lbrule" `
  -LoadBalancer $lb `
  -FrontendIpConfiguration $lb.FrontendIpConfigurations[0] `
  -BackendAddressPool $lb.BackendAddressPools[0] `
  -Protocol Tcp `
  -FrontendPort 80 `
  -BackendPort 80

# Update the load balancer configuration
Set-AzureRmLoadBalancer -LoadBalancer $lb

# Reference a virtual machine image from the gallery
Set-AzureRmVmssStorageProfile $vmssConfig `
  -ImageReferencePublisher MicrosoftWindowsServer `
  -ImageReferenceOffer WindowsServer `
  -ImageReferenceSku 2016-Datacenter `
  -ImageReferenceVersion latest

# Set up information for authenticating with the virtual machine
$userName = "azureuser"
$password = "P@ssword!"
$vmPrefix = "ssVM"
Set-AzureRmVmssOsProfile $vmssConfig `
  -AdminUsername $userName `
  -AdminPassword $password `
  -ComputerNamePrefix $vmPrefix

# Create the virtual network resources
$subnetName = "web"
$subnet = New-AzureRmVirtualNetworkSubnetConfig `
  -Name $subnetName `
  -AddressPrefix 10.0.0.0/24
$ssName = "vmssVNET"
$subnetPrefix = "10.0.0.0/16"
$vnet = New-AzureRmVirtualNetwork `
  -ResourceGroupName $rgName `
  -Name $ssName `
  -Location $location  `
  -AddressPrefix $subnetPrefix `
  -Subnet $subnet
$ipConfig = New-AzureRmVmssIpConfig `
  -Name "vmssIPConfig" `
  -LoadBalancerBackendAddressPoolsId $lb.BackendAddressPools[0].Id `
  -SubnetId $vnet.Subnets[0].Id

# Attach the virtual network to the config object
$netConfigName = "network-config"
Add-AzureRmVmssNetworkInterfaceConfiguration `
  -VirtualMachineScaleSet $vmssConfig `
  -Name $netConfigName `
  -Primary $true `
  -IPConfiguration $ipConfig
$scaleSetName = "erscaleset"
# Create the scale set with the config object (this step might take a few minutes)
New-AzureRmVmss `
  -ResourceGroupName $rgName `
  -Name $scaleSetName `
  -VirtualMachineScaleSet $vmssConfig
Creating a virtual machine scale set (CLI)
The Azure CLI tools takes a different approach than PowerShell by creating resources like load balancers and virtual networks for you as part of the scale set creation.
# Create a VM Scale Set with load balancer, virtual network, and a public IP address
rgName="Contoso"
ssName="erscaleset"
userName="azureuser"
password="P@ssword!"
vmPrefix="ssVM"
az vmss create --resource-group $rgName --name $ssName --image UbuntuLTS
--authentication-type password --admin-username $userName --admin-password $password
The az vmss create command allows you to reference existing resources instead of creating them automatically by specifying the resources as parameters if you want to differ from the default behavior. Applying a vm extension is like what was seen in Skill 2.2. For a VMSS use the az vmss extension set command as shown in the following example.
#settings.json
{
  "fileUris": [
    "https://raw.githubusercontent.com/Azure/azure-quickstart-templates/master/
201-vmss-bottle-autoscale/installserver.sh"
  ],
  "commandToExecute": "bash installserver.sh"
}
az vmss extension set --publisher Microsoft.Compute --version 1.8 --name
CustomScriptExtension --resource-group $rgName --vmss-name $ssName --settings
@settings.json
Upgrading a virtual machine scale set
During the lifecycle of running a virtual machine scale set you undoubtedly need to deploy an update to the operating system. The VMSS resource property upgradePolicy can be set to either the value manual or automatic. If automatic, when an operating system update is available all instances are updated at the same time, which causes downtime. If the property is set to manual, it is up to you to programmatically step through and update each instance using PowerShell with the Update-AzureRmVmssInstance cmdlet or the Azure CLI tools az vmss update-instances command.
MORE INFO UPGRADING A VIRTUAL MACHINE SCALE SET
You can learn more about upgrading virtual machine scale sets at https://docs.microsoft.com/en-us/azure/virtual-machine-scale-sets/virtual-machine-scale-sets-upgrade-scale-set.
Skill 2.7 Manage containers with Azure Container Services (ACS)
Azure Container Service (ACS) is used to provision and manage hosted container environments. ACS provides a cluster of virtual machines that are preconfigured to run the orchestrator of your choice: Docker Swarm, DC/OS, or Kubernetes. These orchestrators make the running of containerized applications at scale possible.
There are many different Azure resources that are deployed to make the cluster function. These include VMs, VM scale sets, load balancers, public IP addresses, VNets, and other supporting resources such as storage. By creating and connecting these resources ACS removes the need for previous container orchestration expertise required to run containers on Azure. This makes it very quick and easy to deploy and manage containerized applications.
ACS also removes the burden of operations and maintenance by provisioning, upgrading, and scaling resources on demand. Applications never need to go offline to scale up, down, or out.
This skill explores how to use ACS to provision, manage, and monitor your container deployments on Azure.
This skill covers how to:
Configure for open-source tooling
Create and manage container images
Implement Azure Container Registry
Deploy a Kubernetes cluster in ACS
Manage containers with Azure Container Services (ACS)
Scale applications using Docker Swarm, DC/OS, or Kubernetes
Migrate container workloads to and from Azure
Monitor Kubernetes by using Microsoft Operations Management Suite (OMS)
Configure for open-source tooling
Microsoft has put major effort into making sure that Azure is an open cloud. This is evident in the ability to use open-source tools with ACS. All ACS clusters can be provisioned and managed using the open-source tools either created by Microsoft or supported on the Azure platform.
For example, Microsoft exposes the standard Kubernetes API endpoints. By using these standard endpoints, you can leverage any software that can connect to a Kubernetes cluster. Also supported are tools such as kubectl, helm, or even the docker command from within the Azure portal using the Azure Cloud Shell, as seen in Figure 2-59.
FIGURE 2-59 Kubernetes kubectl command line tool running in the Azure Cloud Shell
Create and manage container images
Container images are simply packages of applications and their components needed to run them. A container image is a stand-alone, executable package of an application that includes everything required to run. This could include the code, runtime (Java or .NET), system tools, system libraries, and settings.
When you start a container the first action that is taken is to locate the image. Images are always run locally, but often the image is in a container registry (see the topic on Implementing Azure Container Registry in this chapter).
MORE INFORMATION CONTAINER IMAGES
To learn the basics of working with container images Microsoft recommends this tutorial from Docker at https://docs.docker.com/get-started/. To work with containers, you need both Git for source control management, and Docker installed on your PC. In this example, you will use a sample provided by the Azure team to work with Azure Container Service (ACS). You need to have also installed Git for source control management and Docker on your PC.
The process to create the container image follows three steps:
Clone the application source from GitHub.
Create a container image from the application source.
Test the application with Docker locally.
To clone the application source provided by Microsoft, open your command line and run the following command.
git clone https://github.com/Azure-Samples/azure-voting-app-redis.git
Once this is cloned, move to the directory azure-voting-app-redis by running this command.
cd azure-voting-app-redis
Run the dir or ls command to see the files that located in the source code directory, as seen in Figure 2-60. Notice that there is a docker-compose.yaml file. This file has the required information that allows you to create the container.

FIGURE 2-60 Azure Sample Source Code after being cloned
Next, use the docker-compose command to create the container image referencing the docker-compose.yaml file that is in the directory. Figure 2-60 shows this command after it has executed.
docker-compose up -d
FIGURE 2-61 Container created using the docker-compose command
IMPORTANT CREATING THE CONTAINER
To create the container, you must have Docker installed and running on your machine. This is what is being used to create the container. If you are running Docker for Windows you must have it set to run Linux containers at the time of creating and running this image because it uses Linux.
Once this command is completed, you can list the images that are now local to your PC by running this command. Figure 2-62 shows the images that are located on the PC.
docker images

FIGURE 2-62 Local Docker images
To see the running containers, run the following command. In Figure 2-63, notice that the application is now running on your local machine on port 8080.
docker ps

FIGURE 2-63 Running containers listed using the docker ps command
As seen in Figure 2-64, open your local web browser and see the Azure voting application up and running using the container image that you just created. Make sure to reference the port 8080 where the container is running on your local PC.

FIGURE 2-64 Azure Voting App running locally as a Docker container
Once you have verified that applications functions using this container image you can stop it running the containers and remove them. You don’t want to remove the image because this will be used again.
docker-compose stop
docker-compose down
Implement Azure Container Registry
Azure Container Registry (ACR) is an Azure-based, private registry for Docker container images. A container registry is important for container deploys because you can store all the images for your applications in one location. These are the gold images for your application, so it is critical to leverage a registry. As containers are created, they are pulled from this location.
The steps required to upload your image to ACR include:
Deploying an Azure Container Registry (ACR) instance
Tagging a container image for ACR
Uploading the image to ACR
Deploying and working with the ACR from your local PC requires that you use the Azure CLI 2.0. This must be installed and running on your PC. Once this is completed, use the following commands to work with ACR and your image.
Login to Azure using the Azure CLI using the following command.
az login
Open the Azure Cloud Shell and first create a Resource group.
az group create --name ContainersRG --location westus2
Next, create the Azure Container Registry located in the Resource group you just created.
az acr create --resource-group ContainersRG --name ExamRefRegistry --sku Basic
--admin-enabled true
After the ACR has been created you can then login to the registry using the az acr login command.
az acr login --name ExamRefRegistry --username ExamRefRegistry --password <password
 found in azure portal>
List the name of your ACR Server using the following command, as seen in Figure 2-65. Make note that this must be a globally unique name.
az acr list --resource-group ContainersRG --query "[].{acrLoginServer:loginServer}"
--output table

FIGURE 2-65 The Azure Container Service Server
Run the following command to list the images that are local on your PC. These should be there based on the images you already created, as seen in Figure 2-66.
docker images

FIGURE 2-66 Docker images command run on local PC
These images need to be tagged with the loginServer name of the registry. The tag is used for routing when pushing container images to the ACR. Run the following command to tag the azure-vote-front image referencing the ACR Server name. Notice that the v-1 is added to the end, which provides a version number. This is important for production deployments because it allows multiple versions of the same image to be stored and used.
docker tag azure-vote-front examrefregistry.azurecr.io/azure-vote-front:redis-v1
As seen in Figure 2-67, run the docker images command again and notice that a new image has been added with the TAG added.

FIGURE 2-67 Tag added to azure-vote-front image
Now it’s time to push this image up to the ACR. Use the following command, as seen in Figure 2-68, and make sure that the ACR server is correct.
docker push examrefregistry.azurecr.io/azure-vote-front:redis-v1

FIGURE 2-68 Image pushed to the Azure Container Service
When you push your image to the ACR it appears in the Azure portal as a Repository. Open the Azure Portal and locate your ACR, then move to the Repository section. In Figure 2-69, notice that azure-vote-front is the image that you created and is now in Azure.

FIGURE 2-69 Azure Container Services in the Azure Portal showing the image
If you click through the azure-vote-front you see the tag that you added as redis-v1, as seen in Figure 2-70.

FIGURE 2-70 Azure-vote-front Image Tag in the Azure portal
Deploy a Kubernetes cluster in ACS
Deploying a Kubernetes cluster using ACS can be accomplished using either the Azure portal, PowerShell or the Azure CLI. The focus from Microsoft for these types of open source tools is on the command line, and as such that is the focus of this skill. The primary tools used for working with Kubernetes are the Azure CLI az command and the Kubernetes CLI kubectl command.
MORE INFORMATION AZURE CONTAINER SERVICES
Azure Container Services can be deployed using PowerShell using the New-AzureRMContainerService cmdlet. Review the following article to learn its usage: https://docs.microsoft.com/en-us/powershell/module/azurerm.compute/?view=azurermps-5.0.0#container_service.
To use the Azure CLI to create the Kubernetes cluster (K8s), you execute just one command. This command simplifies the entire creation of the cluster to only one line. Notice the agent count parameter; this is the number of nodes that will be available to your applications. This of course could be changed if you wish to have more than one node to your cluster. For this example, all the commands will be run from the Azure Cloud Shell.
az acs create --orchestrator-type kubernetes --resource-group ContainersRG
--name ExamRefK8sCluster --generate-ssh-keys --agent-count 1
Once the cluster has been created you need to gain access by issuing a command to get the credentials. This command configures the kubectl, which is the K8s cluster that was just created in ACS. This is done using the following command.
az acs kubernetes get-credentials --resource-group=ContainersRG --name=ExamRefK8sCluster
Verify your connection to the cluster by listing the nodes, as seen in Figure 2-71.
kubectl get nodes

FIGURE 2-71 Kubernetes clusters nodes running Azure
Manage containers with Azure Container Services (ACS)
Once you have built a cluster, the next natural step is to deploy applications using your container images. Each of the components will now come together to provide an application experience for your users. The Azure Container Registry (ACR), where the image is stored will be accessed to download the image to the Kubernetes cluster running in Azure Container Services (ACS), which will provide the power and management to run the Azure voting sample application.
First you need to update a Docker compose file to reference your image that was uploaded to the ACR. From your local PC you need to use an editor to make a change to the image reference in the azure-vote-all-in-line-redis.yaml file in your git repo, as seen in Figure 2-72. The image should reference the server name of your ACR. To find the server name you can run the following command:
az acr list --resource-group ContainersRG --query "[].{acrLoginServer:loginServer}"
 --output table
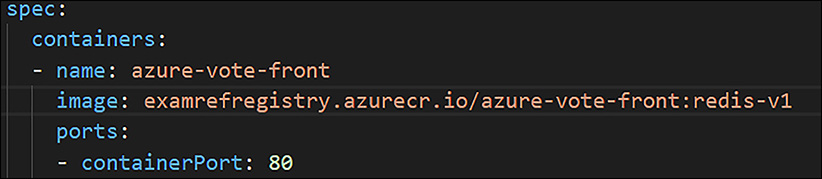
FIGURE 2-72 Azure Container Registry Server name updated
Once this file has been updated it should be pushed to the ACR again because this change is only found on your local PC currently. Use the following command to push the image to the registry.
docker push examrefregistry.azurecr.io/azure-vote-front:redis-v1
Next, you deploy the application to Kubernetes using the kubectl command from your local PC. First you need to install the kubectl command line. If you are using Windows this can be done by opening a cmd prompt as administrator and running the following command.
az acs kubernetes install-cli
Now that the kubectl is installed locally, you need to configure it to use your K8s Cluster in Azure. Run the following command to configure kubectl for this purpose. You need to reference your RSA key for this cluster, which can be found in the .ssh folder of your cloud shell.
az acs kubernetes get-credentials -n ExamRefK8sCluster -g ContainersRG
--ssh-key-file <name of private key file>
Once you have kubectl configured, a simple command starts the Azure voting application running on the K8s customer in Azure. Figure 2-73 shows the feedback from the command line after successfully starting the application on the K8s cluster.
kubectl create -f azure-vote-all-in-one-redis.yml

FIGURE 2-73 Azure voting application sample running on Kubernetes in Azure
Once the application has been started you can run the following command to watch because Kubernetes and Azure configure it for use. In Figure 2-74, notice how it moves from having a pending Public IP address to an address as shown.
Kubectl get service azure-vote-front --watch

FIGURE 2-74 Kubectl watching the azure-vote-front application running in Azure
Once the application has moved to having an external IP this means that you can now connect to the application with a web browser, as seen in Figure 2-75.
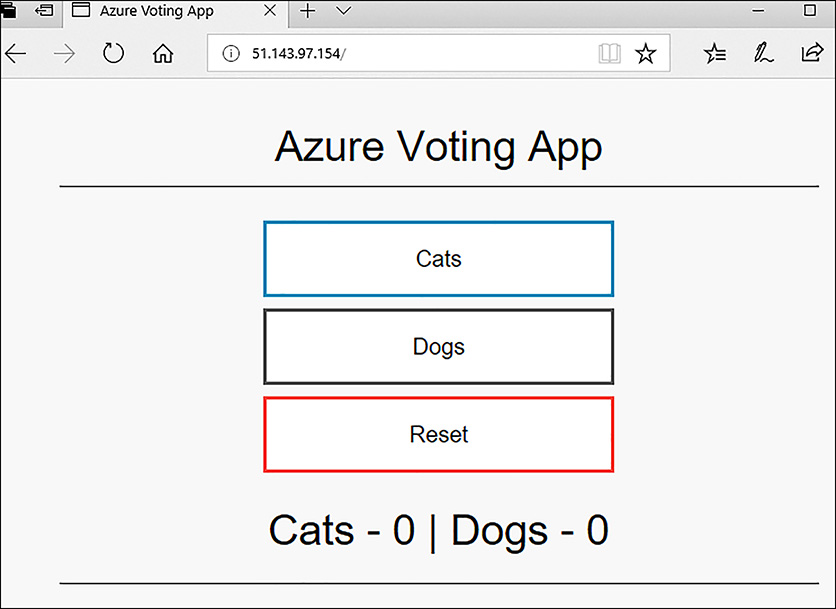
FIGURE 2-75 Connected to the sample application running on a Kubernetes cluster in Azure
Scale applications using Docker Swarm, DC/OS, or Kubernetes
There are two methods for scaling applications running in Azure Container Services:
Scaling the Azure infrastructure
Leveraging the orchestrator for allocation of resources
Azure is unaware of your applications running on your cluster. It is only aware of the infrastructure that was provisioned for the orchestrator to provide the compute, storage, and networking. The Azure infrastructure that provides compute to the cluster is via virtual machine scale sets. These can scale up and down based on your needs. This can be done using the az command line tool or the Azure portal.
To scale a Kubernetes cluster, you would run a command, such as the following:
az acs scale --resource-group=ContainersRG --name= ExamRefK8sCluster --new-agent-count 3
After this command completes you can run the kubectl get nodes command again to see that the nodes have been added to the cluster, as seen in Figure 2-76.

FIGURE 2-76 Kubernetes clusters nodes running Azure
Within the orchestrator itself you can make a change to resources that are being leveraged for the service. In the case of Kubernetes, you might want to scale your pods. Pods are like instances of your application. To do this manually you would use the command line using kubectl. First run a command to see the number of pods, as seen in Figure 2-77.
kubectl get pods

FIGURE 2-77 Kubernetes pods hosting the sample application
Next, run the following command to scale the frontend of the application. Figure 2-78 shows the pods after they have been scaled.
kubectl scale --replicas=5 deployment/azure-vote-front
FIGURE 2-78 Kubernetes pods scaled horizontally
Kubernetes also supports the ability to scale pods horizontally using auto-scaling. For example, you can configure based on the CPU utilization. Defining the limits in your deployment file does this. Here is an example of a command using kubectl to autoscale the azure-vote-front deployment.
kubectl autoscale deployment azure-vote-front --cpu-percent=50 --min=3 --max=10
Migrate container workloads to and from Azure
The magic of containers is that they can be leveraged on almost any platform without any change to the application or the containers. Migrating container workloads is made easier by leveraging the Azure Container Registry (ACR). Moving images into or out of ACR is simple and provides the means for these migrations.
Once the containers are moved into Azure then it is more a function of starting the containers and managing them with an ACS cluster. The cluster manages the complexities of scaling and connecting the applications together by providing service discovery inside of the cluster.
Some code might be updated depending upon the service that is deployed and run in Azure. For example, if a large website would be migrated to Azure you may want to update the code to reference image and large data files in the HTML code as hosted in Azure Storage. This would offload the loading of images to the Azure Storage service rather than relying on those calls to come through to the containers. By doing this the containers focus on the logic of the application and heavy lifting of providing downloads can be service by the Azure platform.
Monitor Kubernetes by using Microsoft Operations Management Suite (OMS)
The Containers Monitoring Solution makes monitoring Kubernetes on Azure possible, which is a part of Log Analytics. Figure 2-79 shows that the Container Monitoring Solution allows you to view and manage your container hosts from a single location.

FIGURE 2-79 Container Management Solution running in the Azure portal
You can view which containers are running, what container image they’re running, and where those containers are running. You can also view detailed audit information showing commands used with containers.
Troubleshooting containers can be complex because there are many of them. The Container Management Solution simplifies these tasks by allowing you to search centralized logs without having to remotely connect to hosts. You are also able to search the data as one pool of information rather than having those logs isolated on each machine.
Finding containers that may be using excess resources on a host is also easy. You can view centralized CPU, memory, storage, and network usage and performance information for containers. The solution supports the following container orchestrators:
Docker Swarm
DC/OS
Kubernetes
Service Fabric
Red Hat OpenShift
MORE INFORMATION MONITOR A CLUSTER
To monitor a cluster a manifest file is created and then started on the K8s cluster using the kubeclt command line tool. To learn how to create a monitoring manifest file to monitor a K8s cluster review https://docs.microsoft.com/en-us/azure/acs/tutorial-kubernetes-monitor.
Though experiment
In this thought experiment, apply what you have learned about in this Chapter. You can find answers to these questions in the next section.
You are the IT administrator for Contoso and you are tasked with migrating an existing web farm and database to Microsoft Azure. The web application is written in PHP and is deployed across 20 physical servers running RedHat for the operating system and Apache for the web server. The backend consists of two physical servers running MySQL in an active/passive configuration.
The solution must provide the ability to scale to at least as many web servers as the existing solution and ideally the number of web server instances should automatically adjust based on the demand. All the servers must be reachable on the same network so the administrator can easily connect to them using SSH from a jump box to administer the VMs.
Answer the following questions for your manager:
Which compute option would be ideal for the web servers?
Should all of the servers be deployed into the same availability set, or should they be deployed in their own?
What would be the recommended storage configuration for the web servers? What about the database servers?
What feature could be used to ensure that traffic to the VMs only goes to the appropriate services (Apache, MySQL, and SSH)?
Thought experiment answers
This section contains the answers to the thought experiment for this chapter.
The web servers are best served by deploying them into a virtual machine scale set (VMSS). Autoscale should be configured on the VMSS to address the requirement of automatically scaling up/down the number of instances based on the demand (CPU) used on the web servers.
No, the web servers should be deployed into their own availability set, which is provided by a VMSS, and the database tier should be deployed into its own scale set.
The web servers will likely not be I/O intensive so Standard storage may be appropriate. The database servers will likely be I/O intensive so Premium storage is the recommended approach. To minimize management overhead and to ensure that storage capacity planning is done correctly managed disks should be used in both cases.
Use Network Security Groups (NSGs) to ensure that only traffic destined for allowed services can communicate to the VMs.
Chapter summary
This chapter covered a broad range of topics ranging from which workloads are supported in Azure VMs, to creating and configuring virtual machines and monitoring them. This chapter also discussed containers and using Azure Container Services to manage and monitor container based workloads. Here are some of the key takeaways from this chapter:
Most workloads can run exceedingly well in Azure VMs; however, it is important to understand that there are some limitations such as not being able to run 32-bit operating systems, or low level network services such as hosting your own DHCP server.
Each compute family is optimized for either general or specific workloads. You should optimize your VM by choosing the most appropriate size.
You can create VMs from the portal, PowerShell, the CLI tools, and Azure Resource Manager templates. You should understand when to use which tool and how to configure the virtual machine resource during provisioning and after provisioning. For example, availability sets can only be set at provisioning time, but data disks can be added at any time.
You can connect to Azure VMs using a public IP address or a private IP address with RDP, SSH, or even PowerShell. To connect to a VM using a private IP you must also enable connectivity such as site-to-site, point-to-site, or ExpressRoute.
The Custom Script Extension is commonly used to execute scripts on Windows or Linux-based VMs. The PowerShell DSC extension is used to apply desired state configurations to Windows-based VMs.
To troubleshoot a problem that only occurs when an application is deployed you can deploy a debug version of your app, and enable remote debugging on Windows-based VMs.
VM storage comes in standard and Premium storage. For I/O intensive workloads or workloads that require low latency on storage you should use Premium storage.
There are unmanaged and managed disks and images. The key difference between the two is with unmanaged disks or images it is up to you to manage the storage account. With managed disks, Azure takes care of this for you so it greatly simplifies managing images and disks.
On Windows-based VMs you can enable the Azure Diagnostics Agent to capture performance data, files and folders, crash dumps, event logs, application logs, and events from ETW and have that data automatically transfer to an Azure Storage account. On Linux VMs you can only capture and transfer performance data.
You can configure alerts based on metric alerts (captured from Azure Diagnostics) to Activity Log alerts that can notify by email, web hook, SMS, Logic Apps, or even an Azure Automation Runbook.
Azure Fault Domains provide high availability at the data center level. Azure Availability Sets provide high availability within a data center, and a properly designed multi-region solution that takes advantage of regional pairing provides availability at the Azure region level.
Managed disks provide additional availability over unmanaged disks by aligning with availability sets and providing storage in redundant storage units.
Virtual Machine Scale Sets (VMSS), can scale up to 1000 instances. You need to ensure that you create the VMSS configured for large scale sets if you intend to go above 100 instances. There are several other limits to consider too. Using a custom image, you can only create up to 300 instances. To scale above 100 instances you must use the Standard SKU of the Azure Load Balancer or the Azure App Gateway.