Your Author Website: Home Central
“I enjoy the Web site a lot and I like being able to talk to my readers. I’ve always had a very close relationship with them.”
—Anne Rice, best-selling author
AUTHORS WHO HAVE ANY SHRED of resistance to connecting with readers via platform-building, please consider these words of Rick Riordan, best-selling fiction author: “My goal is always to create life-long readers.” And the words of Felix Dennis, best-selling nonfiction author: “Everything I publish is for my readers.” These sentiments are echoed time and again by top-selling authors like Barbara Kingsolver, Ann Rule, Ann Lamott, W. H. Auden, and many more. John Cheever pointed out the impossibility of successful writing without an audience: “I can’t write without a reader. It’s precisely like a kiss—you can’t do it alone.”
As a literary agent who has worked with thousands of author clients over many years, I work daily to overcome any and all author resistance to platform building. Once I’ve chipped away objections, the questions I hear repeatedly are, “With no degree in marketing, promotion, or advertising, how does an author reach out to build an audience? Isn’t that the publisher’s job?”
It’s true that the publisher will market your books, including catalogs, publisher websites, in-store promotions, news releases, and more. As an example, BenBella has done a fantastic job of creating our book website; making our book postcards; listing our book on Amazon.com, in catalogs, and on their website; setting up speaking engagements and signings; setting up online events for us; and much more. In fact, the reservoir of knowledge and experience at BenBella connects us to every author success story in their history, which boosts our own visibility. The problem is that it’s close to impossible for an author to get a publishing contract in the first place without an author platform showing guaranteed audience following. In other words, an author platform—including an author website, social media network, and traditional media presence—demonstrates to a publisher that you already have a following that can be converted and grown into an audience for your book. It’s also impossible for authors to understand and deliver content to their audience needs and preferences without directly interacting with their readers. Your author website is the place to centralize all of your platform elements, connecting these under one roof for your readers to see your depth, breadth, and influence.
The web is a crowded place, and a strong author website that effectively targets and communicates with your audience is essential. As of this writing, more than 2.4 billion people use the Internet for everything from email, file transfers, and Skype to instant messaging. Close to a billion sites already exist on the World Wide Web since the digitally enabled world makes it simple to connect with an online audience via websites. And fortunately, Internet audiences search for real and tangible information, so that the more authentic the information an author shares, the more meaningful the communication becomes between you and your potential audience.
Why Your Author Website Is a Must
Many authors mistakenly skip building their author website—an essential and central element of the author platform—or even worse, allow their presence to be controlled by other entities, then regretfully find that their Internet presence becomes fragmented and confusing for their audience. If your audience can’t easily find you or your book in the crowd of websites, your book sales suffer.
Here are the main reasons to create your author site as soon as possible if you don’t already have one:
- Findability: Readers find authors and books through websites by searching their names. If you have a scattered presence across multiple websites, you force potential readers to guess where to find “the real you.” When confused, potential readers are likely to give up and look elsewhere.
- Consolidation: Combining the 14 steps of your author platform in a central location makes it easier for your readers to connect with you and raises your profile in all web search engines.
- Control: You own your website and maintain your author brand, content, format, and message. If your web presence is only on social networks owned by others, the rules that govern your presence may change on a whim. Don’t give away the keys to your online presence when you are fully able to own your website.
- Mailing list creation: Your site allows you to collect names and addresses of your readers. Creating a custom electronic newsletter is by far the best way to announce your books and future events to an audience that has already expressed interest in your work.
- Growth capability: You alone determine the future of your site. If you want to add future webinars, links to YouTube channels, and the like, you don’t have to wait for someone else to add a feature or change a policy.
- Blog home: In Chapter 2 (Step 2 of the program), we’ll show you how to keep your website freshly loaded with new blog posts. Fresh content raises your profile with the search engines and keeps your audience returning to your website.
Your author website is your home base, so tie all of your online locations to this central hub for all of your author branding. Incoming links to your author website count, even from your other online locations. It’s easy to create, and it’s one of your best tools for tying all the steps of your platform together.
Plan Your Author Website Strategy
The time you spend now in setting up your site will influence and reward every segment of your author platform. Your optimum author strategy is to identify your unique, consistent, identifiable author brand. Create and present your brand and lead your audience to visit your site, where they can subscribe to your newsletter, follow your publications, favorably review your books, return for more and tell their friends, and, most importantly, buy your books.
So now take a deep breath, carve out a little time, relax, and give some deep thought to who you are as an author. Ask your friends and associates for words that describe you and then pick out the best ones. What value do you offer to your audience? Who are your readers? What are their terms and their vocabulary? When you start to record your planning into a workbook, you’ll begin to see the component parts emerge into your author brand. Summarize your unique value addition to an audience you understand well. The solid definition of your author brand identity will help you coordinate your content on your site and will reverberate to all parts of your author presence and presentations. Don’t allow your author presence to become a collection of online fragments! Follow these steps to plan your home central author website.
Before you can reach any audience or motivate anyone to buy your book, it’s imperative to understand what your audience likes, enjoys, and, above all, what they need. A surprisingly common mistake many authors make when trying to pitch to me as an agent, or when pitching to a publisher directly, is not really knowing or understanding who they’re writing for! Every publisher’s book proposal form requires a thorough audience definition by priority, starting with primary audience definition, then secondary and even tertiary group categories. It helps to further detail each segment by creating “personas,” that is, embody each audience segment in a single person whose characteristics you can pinpoint.
At the very minimum, start with a basic definition of your audience first and foremost:
- Who are the primary, secondary, and tertiary audiences of your book?
- What are the problems and concerns of each?
- What is your audience’s point of view?
- Embody your audience in one “persona” for each segment of readers.
It’s simply easier to define and understand an audience segment through a single reader or customer who you already communicate or work with. Define what draws that person into your community of readers. The more details you can add, the better you will be able to speak directly to your readers to create an audience-centric experience that leads to author platform success. If you don’t already understand your audience in depth, a quick way to find out is by interacting with your audience through blog comment areas. You can also check out the blogs of others who write for your audience; read those comments for valuable insight about where they are coming from. Some best-selling authors like Ann Rule even complete manuscripts dictated by audience ideas and reactions, gathered from blog comments, polls, or direct emails. The bottom line is that the more you understand your readers, the more enabled you are to talk with them. Direct communication is a path to building an audience that returns to your author website, social media profiles, and every other aspect of your author platform.
Plan Your Website Self-Introduction
So take time to think through who you are as an author and why your experience is of value to your readers, and then write out this description as a guideline for how you present your author brand.
- Develop your own brand tagline. Keep it short and memorable. For example, my tagline at Jelen Publishing is “Hi, I’m Carole Jelen, Literary Agent/Author, Publishing Veteran.” Why? Because this is what authors have told me that they are most interested in.
- Choose a welcoming author photo that you use consistently for recognition (more on these elements later). The photo counts because it’s the first impression you leave for readers to “meet” you. It’s a good idea to get second opinions on which photo to use from people whose opinions you trust.
- Keep your online and live persona cohesive so your audience will be able to identify you, recognize you, and then connect with you from multiple locations. Authors who reach out a friendly hand to introduce themselves front and center have the highest chance of connecting with their audience quickly and successfully. Introducing yourself online, much like introducing yourself in person, leads to more interest in you. The online click that brings a browser to meeting you on the page is a first step leading to a first impression that grows into a lasting relationship.
Plan Your Site Landing Page to Keep Your Audience
Over half of us leave websites within seconds of getting there! We’ve become skimmers on the Internet, sifting through massive amounts of information. Give your audience at first glance the ability to find what it needs, in their vocabulary, with their problems, issues, and their interests addressed. People resonate with simple elegance in your message on your landing page: They want to see you, your book, your unique value addition front and center with ease of navigation to where they can read more. For example, my site at jelenpub.com shows three easy-to-grasp segments: my photo and tagline with friendly greeting, our book cover and its tagline connecting to our book website, and evidence of my following, which people can read more about and easily join. On the side are critical social buttons for more information, a link to my blog page, and a newsletter signup.
Plan Your Tabs and Component Parts of Each Page
Stay simple and well-organized; an easy-to-grasp, easy-to-use website holds a viewer more efficiently and longer than a site with too much information. The essential author website tabs are listed later in this chapter.
Plan the Static Text of Your Author Website
The static (unchanging) content of your site needs to be potent, so boil down your message to contain its essence, using keywords you know your audience uses. If you follow our advice to keep your blog on your own website, covered in Chapter 2, you automatically gain the changing, updating text that keeps your author site rich in content as you add posts and blog comments to form your community. You’ll see more reasons in the next chapter why it’s far better to blog on your author website than at another URL.
All the static content on your author website pages needs to be precise, well written and well edited, and aligned with your audience’s interests. For models, review the websites of the authors featured in the success stories at the end of each chapter in this book, then customize to your needs.
Whether you are creating a new site or updating an existing site with more interactive content and efficient tools, make sure your brand and added value, described in audience-friendly terms, show up front and center.
People tend to gravitate to a simple, consistent approach: quality content, delivered to meet audience needs, plus consistent clear style, simplicity, and minimal design. Over time, these elements have proven to be attractive and compelling to readers, whether in book, magazine, or website format. Here are the steps we recommend in the initial stages of author website creation:
Find a model site and customize. Save time by scouring the web to find simple, quality author websites that resonate with you. In Chapter 11 we include a list of author sites we like. It’s better to forget about sites that divert attention with bells and whistles, shapes and colors, and fancy moving objects! Choose an author website because you quickly see and resonate with who the author is and what that author offers you. Identify sites where you find the easiest, most familiar route to get the information you need and where you can interact with that author.
Review as many author websites as you can, whether or not they are best-selling authors like Stephen King and Dan Brown, and choose one or two that come closest to your purpose. Start a list of the website components that work best, then integrate and customize these to craft your own site.
Take careful note of your competition. As you browse, it’s important to collect information on authors and sites who you consider to be your competitors. This will teach you about your own uniqueness as an author. In every book proposal form, publishers require authors to list the top three competing titles, indicating why your book would sell instead of, or in addition to, that title. It’s worth the time to think through this step: evaluate your own value addition as a publisher would, and you’ll be better positioned to grow your audience of book buyers. Look at what your competition is doing, define your value as different and unique to you, and enhance your website with that information.
Plan Essential Author Website Pages
While I was working on The NeXT Book (Addison-Wesley) I was able to watch the way Steve Jobs built his business; I was instilled with great respect for the universal appeal and power of simple, elegant design and equally clear, simple messages. We encourage you to keep to this philosophy of presenting simple elegance by including only the most necessary web pages on your author website. Here are the key author site pages to include.
- Landing page: The initial page people land on when they click to your author website. First impressions are powerful! On this page, your readers should immediately “meet you” and see why they should take an interest in you and your book. We recommend that you use these first few seconds of your audience’s attention to present the following elements:
- Your photo: As you review author photos on a site like LinkedIn or on author websites and back covers of books, you will see that the professional-looking, straightforward full-face shots with shoulders work best as an introductory photo to your audience. Take a look at top author photos like Stephen King’s. A clean, clear, confident, professional-looking shot works best, whether it’s taken by a friend with talent or a pro photographer like Karen Sterling in New York who created Carole’s photo.
- Greeting: A “hello” type of greeting and a one-line tagline that tells in a nutshell who you are and what you’re up to. Welcome readers with a type of “Hi, I’m … and I’m a …” or just four memorable words about you in large type. Add a “Read More” phrase to go to an About page to tell all about you.
- Contact info: Now readers need to feel they can talk directly to you, so it’s best to show them how to reach you, on the footers of every page of your site and/or on a Contact page.
- Book cover photo: Include a few quick bullet points about the book’s value and a Read More link. For examples, take a look at the author sites listed in Chapter 11. Mike’s website includes the value points for WordPress in Depth (Que) such as “Become a smarter WordPress user!” and “Advice on choosing themes and plugins!” Then use the beauty of linking to get more information elsewhere; when readers click the photo image of your book, it should link immediately to your book website (Chapter 11) or to an About the Book page for more information, and include the all-important Buy Now button to take the user to Amazon or another website to purchase your book.
- Navigation tabs: Links that lead to your other website pages, listed below.
- Social networking buttons: Small buttons leading to your presence on Facebook, Twitter, Google+, LinkedIn, and all other social media networks where you can be found. These buttons demonstrate your social influence and allow your audience added interactivity.
- Blog page: Covered in Chapter 2, your blog is the heartbeat of your author website. Your blog is your own online magazine, where you can spark engagement, interact, and build your author community. As an added plus, your blog builds new content to increase your findability, a big win all the way around. Keep your blog on your own author site; that way, you can keep your audience right where you want them.
- Events page: This can also be called a Coming Soon page and includes a calendar of your author events online and in person, articles, current and future books, appearances, training, speaking engagements, podcast or video releases, webinar information, etc. When you keep your appearances and writing announcements under one roof, your audience can get a complete picture. Authors get boosted in visibility by making it easier for readers to find you and easier to follow you.
- About the Author/Praise page: Start this page with biographical information. Tell your readers who you are and why you’re qualified to write about your topic. Once you’ve begun to gather an audience, then add your audience’s positive comments about you. After your book comes out, create a separate Praise page. Use comments from all social networks for this section, along with other positive reviews. There are many ways to collect praise, but if you don’t have a few positive comments already, wait to create and publish this page until you do. In the interim, find just one single positive quote from a satisfied reader or colleague to include on your home page. A single positive quote is powerful so you might want to keep one on your home page after you’ve created your Praise/Reviews page.
- About the Book(s): (Optional) More information about your book if you are not planning to create a book website. As time goes on, you can include a catalog of your earlier work, too.
Create Your Author Site with WordPress
Now we come to the technical side of building your website. In this section, we’ll give you the basics of putting initial content on your author website and publishing your site to the Internet.
Select and Register a Domain Name
Every website on the World Wide Web has a unique identifier, a uniform resource locator (URL). One of the best ideas of the web pioneers was to create the domain name system (DNS), which allows those URLs to have human-readable names like MyCoolSite.com. The thing is, that name also has to be unique, which, 30 years into the Web’s history, can be a problem. But given that humans haven’t run out of names for their children after tens of thousands of years, we’re confident you can find a unique domain name for your author website.
Here are some ideas:
- Your own name: Use your own name—versus the name of your business or niche—if you have plans to write in more than one niche or genre. Using your own name is also helpful in establishing authorship, which in turn helps web search engines find you. Understand that you have to be first to register your name. Mike is always grateful that the former chief executive of Humana Inc. did not register MichaelMcCallister.com before he did, but suspects that some of his visitors come away disappointed. You can always use a middle initial, or Author<yourname> as alternatives.
- Your business name: If you do freelance projects or have other business interests separate from your authoring niche, you may want to use a business name as your domain name.
- Your niche: If you’ve carefully defined the subject matter that you’re expert in, you can register your niche as your domain name. This has the added benefit of coming up in “serendipity searches,” when a user looking for advice on solar-powered lawn mowers types in those words without spaces—solarpoweredlawnmowers—and finds your site without consulting a search engine.
As time goes on, you may decide you have the need for more than one website—or, when you really hit the big time, your publisher may decide to establish sites named for your individual books. But for now, focus your energy on developing your author website.
Most hosting companies will register your domain as part of your hosting fee, but before you agree to that, read the fine print and confirm that the domain is registered in your name (not the hosting company’s). If you don’t own the domain you select, you cannot change hosts and keep the domain.
You can also register your domain directly with an accredited registrar. GoDaddy, ENom, and Network Solutions are among the more popular U.S-based registrars, but comparison-shop rates and inclusions before committing; you can find a comprehensive list of registrars at internic.net/regist.html. Typically, domain name registration costs $10–$30 per year, and once you sign up you’re often offered incentives for renewing early or for multiple years.
Theoretically any computer on the Internet can be a host, serving up web pages to any browser that “asks” for them. In fact, we’ll be showing you how to set up a web server on your home computer later in this chapter. But if you don’t want to host your website on the same home computer as your financial records, works-in-progress, and other personal information, you’ll want to find a different host computer that will store your website, make it available to the public 24/7, and protect it from bad guys who try to take advantage of the openness of the web.
There are lots of companies out there who will provide hosting services, some more reputable than others. Many of these companies offer “free hosting” accounts, but if the server your site lives on goes down for whatever reason, you may have trouble getting help. Paying customers always come first.
Your Internet service provider (ISP) may offer you free or low-cost web hosting, and that may be the right thing for you.
Three things should factor into your choice of web host:
- Amount of disk space: When you shop for a computer, you probably look at the amount of space that computer has to store your data. It’s the same for a web host. Fortunately, the text files that account for most of the content of a website are fairly small. Where you can run into storage problems are with graphics and audio and video files. Even so, with most sites, you can easily get by with three gigabytes (3GB) of space.
- Bandwidth: This is the size of the “pipe” that brings data to and from your site. What you use in bandwidth depends on the size of your files and the popularity of your site. As with disk space, audio and video files take up the most space, and if you’re Stephen King or Stephen Hawking, millions will quickly download every bit of audiovisual material they can suck up. Hosting companies generally offer 25GB to 75GB of bandwidth every month. Some offer “unlimited bandwidth,” and if you pursue this option ask them how they handle sudden spikes in traffic (as when someone with millions of Twitter followers posts a link to your site). You don’t want the best day for your blog traffic to be the worst day for your bank account due to hidden charges or downtime as a result of a traffic surge.
- Support for third-party software: Many hosts offer automatic installs of popular web content management systems like WordPress and Joomla. If you use one of these systems (this book will focus on using WordPress for your website management needs), you will also need support for the PHP scripting language and MySQL database management system. If you want to install WordPress yourself, you need to make sure that your host supports PHP and allows you to create and manage at least one database.
If you’re not sure where to start looking for a web host, the WordPress site offers a few recommendations at wordpress.org/hosting. These hosts handle a variety of website types (not just WordPress-based sites) at a reasonable price.
If you want special attention to WordPress issues and want a host that can easily handle large amounts of traffic, you might consider a hosting site like WPEngine that only hosts WordPress-based websites.
WordPress started out as another tool for blogging but has increasingly become a go-to platform for all kinds of websites. It really makes it possible for even the nontechiest of writers to create a professional-looking site, with zillions of choices available to you. Once you have your domain registered, a hosting contract agreed to, and some content ready to publish, you can have your WordPress site on the web and attracting visitors within an hour or two.
The fastest way to create a stable environment for your WordPress site is to select a host with an automatic, one-click WordPress installation tool. Many of the bigger hosting companies have this option. The trade-off for the convenience of having WordPress installed for you may be a lack of control. The host may limit the number of themes or plugins you have access to, or otherwise limit your ability to manage your site. Check into this before signing a contract.
In this section, we will show you how to set up WordPress on your host site; you won’t have to wonder how much control you have, and it won’t cost you a dime. If the very idea of setting up a database scares you, you may want to skip ahead to the section titled “Choose a Design Theme.” But we mean it when we say the technical stuff can be done in about an hour. Give it a shot!
Before you set up your site on the host’s computer, you will need to download some software to your own computer:
- You need a program to upload your files to your host. FileZilla is a bit of free software that can handle that. Download it at filezilla-project.org.
- You need the latest version of WordPress. Download it at wordpress.org/download. This will be a Zip archive, which you will need to extract into a separate folder on your computer.
WordPress stores much of the content of your site in a MySQL database. Before installing WordPress on your host site, you need to create a database that WordPress can access. Go to your web hosting site to manage this.
The following instructions are for the popular cPanel web administration application. Your hosting company may use a different application, but the process should be pretty similar:
- Click MySQL Databases from the main screen. Under Create New Database, type in a name for your database. Technically, you can name it anything. While it’s common to name this database “wordpress,” you run a security risk in doing so. It’s best to use a name that you won’t forget on those rare occasions when you have to change a database configuration setting, but hard for evildoers to guess.
- Click Create to add your database. Write this name down, as you will need it during the WordPress installation.
- Under Create New MySQL User, use the drop-down menu to select your newly created database.
- Add a name under MySQL User and type in the password twice. Make sure you use a very strong password, one that’s easy for you to remember but hard for others to discover. All the Privileges should be checked.
- Click Add. Write down the name and password of the new user, as in Step 2.
Your database is now set up. You can now upload your WordPress files.
FileZilla is a simple FTP client application that connects to your web host and uploads your WordPress files with just a few setup steps. When you signed up with your host, most likely you received information about uploading files to the host’s FTP server. Given its cross-platform character and its lack of cost, you might even find that your host has step-by-step instructions for setting up FTP with FileZilla.
After downloading and installing FileZilla, follow these steps to set up the file transfer between your computer and your web host:
- Launch FileZilla.
- Go to File > Site Manager (or click the first icon on the left in the toolbar). A dialogue box appears.
- Click New Site to enter your information.
- Insert the connection information you received from your host. This includes the following:
- Host: This is usually the same as your domain name, with ftp in front, for example, ftp.myWPblog.com.
- Server Type: This should always be FTP.
- Logon Type: For your website, this should usually be set to Normal. You use anonymous FTP when you visit a software download site, where the keepers don’t really care who you are. The Normal setting requires a password to get to.
- User: Your host should give you a username to access your files. Type this here.
- Password: This is the place where you supply your password. It is usually identical to your site password.
Your host might have you fill in the Account line, and you can add information in the Comments section.
- Click the Transfer Settings tab. Then select the Passive button. In passive mode, the client sets up all the data flow. This is more secure, especially if your firewall stops any data trying to pass through it from outside the network.
- Click the Advanced tab. Your host might want you to set a Default Remote Directory. This is the directory at the host server that appears when you log in. If you don’t set this option, you will likely enter a directory with your username at login time. You could set up a WordPress directory as the default, too. Similarly, you might want to set your local WordPress directory as the default local directory.
- Click Connect at the bottom of the screen. If your settings are entered correctly, you should now be connected to your host server, and you can upload files by dragging them on the screen from the source folder to the destination folder. (When you’re ready to disconnect from the server, press Ctrl+D in Windows, Command+D on a Mac.)
- Point the Local Site section of FileZilla to the location of the WordPress files on your own computer. Connect to your host (Remote Site) on the right side and navigate to the directory where you want to store WordPress. If you’re ready to transfer all the WordPress files, press Ctrl+A (Windows) or Command+A (Mac) to select them; then drag them over to the right side to begin the transfer.
Now you’re ready to install WordPress!
THE FAMOUS 5-MINUTE WORDPRESS INSTALLATION
Let’s do the famous five-minute WordPress installation!
- Go to http://<yourdomainname>. If you did everything correctly in the last set of steps, you should see a mostly empty screen with a Create a Configuration File button. Click it.
- Some more introductory language appears, with a Let’s Go! button. Click that button.
- Enter the information we advised you to write down in the previous section:
- Database name
- Database username (which should be the same as the database)
- The database user’s password
- The database host (you shouldn’t have to change this from localhost)
- Table prefix (you can leave this as the default wp_)
- Click the Submit button. If all has gone well, you’ll see the “All right Sparky!” screen. If all has not gone well, you will get an error message. Most often it will complain about an “Error establishing a database connection.” If this happens, make sure that you entered the right information about your database. Remember these details about your database:
- The database name should be spelled exactly the same in the WordPress Installation Wizard as it is in phpMyAdmin. Spelling counts everywhere else, too!
- The database username should be the same as the database name.
- The database password is case-sensitive.
- The database host information is localhost.
Get all of these items right, and you’ll be all right, Sparky! Note that when you are filling out this form in your browser, you are actually editing the WordPress configuration file, wp-config.php, so go through the steps carefully. Once you’ve got the database connection finished, now comes the fun part:
- Click the Run the Install button.
- Fill in the three items on this screen:
- Name your site. Since it’s on your computer, you can be as creative as you’d like, or you could just choose something as boring as “My Test Site.” You can change this anytime.
- Give WordPress an email address for communication purposes.
- Check the Allow My Blog to Appear in Search Engines Like Google and Technorati check box.
- Click the Install WordPress button. WordPress creates the admin user and generates an initial login password for that user. This user differs from the WordPress database user you created in the previous section in that you will be logging into this account on a regular basis to administer your WordPress settings. Write this default password down or copy it to the Clipboard or a text file. You will need it to log in the first time. This information is also emailed to the address you listed on the Install screen.
- Click the Login button. The standard WordPress login screen appears.
- Type in admin for the username and the generated password from Step 3. Leave the Remember Me box unchecked. The admin account should only be used when you have specific administrative changes to make to your blog. You’ll create a separate user account for your everyday content needs in a few minutes. Click the Login button.
- Your administrative dashboard appears. The first time you log in, WordPress reminds you that you used the autogenerated password and asks if you want to change it. The advantage of keeping the autogenerated password is that it is more secure, and using it makes it less likely that someone will steal your admin password and wreak havoc on your site. The disadvantage is that it’s usually harder to remember.
The installation is complete. You’ve got a content management system! Celebrate!
If you’re going to skip all the other aspects of setting up and installing your WordPress site, the one part you’ll likely want to have a hand in is probably the most fun, which is choosing your website’s design theme.
WordPress and its amazing community of programmers makes it easy to define a standard look for your site. A theme uses a web standard called cascading style sheets (CSS) to define the general look and feel of your site, promoting consistency from page to page. Themes often provide additional functionality beyond just how your site looks, and an array of options to give you more control over your site’s appearance just by checking boxes or clicking buttons.
WordPress includes a default theme with your installation and updates it every year. You’ll see the theme listed on your dashboard. Click the link to visit the Theme Management page. You should see a place to install new themes. On this page, you can access the WordPress Free Themes Directory and install new themes from among the thousands available. You can also find the theme directory at wordpress.org/extend/themes.
Click the links at the top to view featured themes highlighted by WordPress developers, along with the newest or most recently updated themes. Use the search box to find themes you may have heard of or that have particular keywords in their theme descriptions. The Feature Filter lets you check a box to find a theme with a feature set you want to have.
Once you find a theme you like, click Install Theme, and in seconds the theme will be available for your use. Click Activate to turn it on.
You can read more about WordPress themes in Chapter 2.
The new rules of website creation demand interactivity. You will be left behind if you don’t include social media buttons and use them to your advantage. These include the Facebook Like button, Twitter share button, the Google+ share button, and the LinkedIn profile button. Ideally, these buttons will appear on all the pages of your website—and in the case of Facebook, Twitter, and Google+ will be easily clickable on every post you write; your readers are far more likely to share your content through social media platforms if you make it easy for them.
Some themes incorporate social buttons like this or will require you to download and install such WordPress plugins as Social. Let’s walk through installing Social, which connects your WordPress site with your Twitter and Facebook accounts.
To install Social from the Add New plugin page, type social in the search box. This is a popular keyword, so you’ll see a lot of listings, but you’ll see this plugin at or near the top. Click Install Now. WordPress will download Social and install its files in the appropriate location. WordPress will then ask you to activate the plugin to turn it on. That’s it!
Build Your Audience Through a Regular Newsletter
One of your primary goals should be to turn your site’s visitors into your readers, and readers into fans. One of the better ways of cementing that writer-reader relationship is to correspond with them regularly. Your website should allow visitors to sign up for a newsletter to learn more about you and your activities. This chore has become a lot easier with the rise of mass email providers that don’t deliver piles of spam into every available email box. Instead, after taking a reader’s email address and later giving them a way to back out, you can deliver solid information about your writing, your events, and whatever else interests you.
Several companies offer mass email services, but we’ve gotten very comfortable with MailChimp. Besides allowing you to maintain a list of up to 2,000 subscribers at no charge, they offer simple integration with your WordPress site.
Signing up for a MailChimp account is pretty straightforward. Go to mailchimp.com and click the Sign Up Free button. Give them an email address, a user name, and a password. After you sign up, MailChimp will email you a confirmation link at the address you gave them. You then get to prove you’re not a spambot by entering a batch of stylized letters. Then log in with your username and password.
When you’ve set up your account, go to your website and pick up the free MailChimp for WP plugin by Danny van Kooten. This plugin creates a Subscribe form on your site and allows you to add a Subscribe link to comment and registration forms.
Check out the Getting Started with MailChimp page for information on setting up your lists, forms, and “campaigns” (that is, your newsletter).
You aren’t required to put out a newsletter on any schedule. If you blog regularly and want everyone on your list to see each post, you can email your list with every post. You can also simply write when something is worth passing on, like a release date for a new book. If you’re giving a reading, or going on tour, MailChimp lets you create sublists based on geography.
Optimize Your Theme for the Mobile Web
In the past, all you had to worry about when creating a website was how fast it loaded and how it looked on a square monitor attached to a desktop computer. Today, people access the web from traditional desktop PCs, laptops, tablets, and smartphones. Your website will potentially appear on screen sizes ranging from two-inch phone screens to 100-plus-inch big-screen TV monitors.
To cope with all these changes and simplify both the maintenance issues and the user experience, the movement for “responsive” web design—that is, a design that will automatically provide the best user experience no matter what type of device you’re using—has moved to the fore among the people who make the web. WordPress is no exception.
When you’re looking for a WordPress design theme, look for responsive themes, as they will give you the best experience for less effort. Searching the WordPress theme directory for “responsive” generates a list of more than 200 themes, so there’s no shortage of options. We recommend installing a theme you like and opening the site with a phone or tablet to see how your site looks. We’ve seen good results with the Responsive and Custom Community themes, along with the default WordPress themes. Depending on the theme, you may be able to adjust settings to get a better result. If you find a theme you really like that is not specifically responsive, you can also use plugins to achieve a better mobile experience. WPTouch works well for this.
Keep in mind … WordPress, Blogger, TypePad, and Tumblr all have mobile clients for viewing and posting to your site on the go. Check your phone/tablet app store to locate and install them.
Adding Widgets and More Plugins
All themes in WordPress enable you to install widgets in the web page sidebars that run alongside the main content on your page. Some themes support one sidebar, others two. To experiment with populating your sidebars with widgets, go to the Appearance area and find Widgets. You’ll see a list of available items, ranging from a calendar that helps your readers find your blog posts chronologically, to lists of recent posts and recent comments, to a tag cloud that offers a graphical assessment of the topics you cover. Just drag a widget from the list to the sidebar to add a widget to your site.
Don’t confuse widgets and plugins. Widgets almost always relate to the aforementioned kinds of features you add to your sidebars. Plugins, such as the social ones described above, often work behind the scenes of your blog and can provide a nearly endless supply of search engine optimization (SEO) tools, spam fighters, event calendars, and contact forms.
WordPress provides two plugins by default. The first is a toy called Hello Dolly. Click Activate and you’ll see a random lyric from the musical Hello Dolly appear on your administrative page. The other is more important: Akismet, a comment-spam fighter that is perhaps the biggest “must-have” plugin. Don’t set this up on your test site, but be sure it’s turned on for your live site. Akismet is free for personal use, and business licenses are inexpensive and worth every penny.
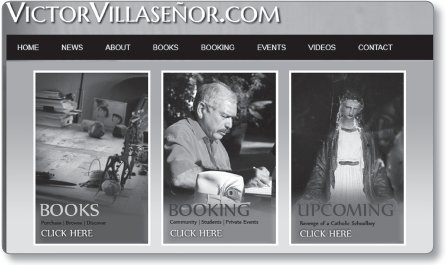
Website for author client Victor Villaseñor, author of the New York Times bestseller Rain of Gold.
Adding new plugins is very similar to the process for adding themes described earlier. From the plugin management page, click Add New to gain access to the free plugin directory at wordpress.org/extend/plugins.
While there are tens of thousands of free plugins in the WordPress plugin directory, the popularity of WordPress as a web content management system means that commercial developers have produced hundreds more premium plugins, offering more complex functionality.
Some of our favorite plugins are listed on our companion website, buildauthorplatform.com.
Best Practices for Website Content
In setting up your author website, remember to optimize these two kinds of content:
- Static content is any content on your website that doesn’t change or changes very little over time, such as your author bio, contact information, and what your book is about. The section you are reading here addresses your static content.
- Dynamic content changes frequently or is interactive and is great for searchability purposes. All you need is your blog entries and audience comments to form the dynamic content of your site. One beauty of keeping your blog on your site is that it reduces the necessity of bolstering your site with static pages; the dynamic blog keeps your site ever-fresh and highly indexable with Google and other search engines.
According to author client George Plumley, author of WordPress 24-Hour Trainer (Wrox, 2nd edition 2011), a key to maximizing WordPress content (and the same can be said of blog content created in non-WordPress sites, too) is to “keep your content split into the smallest possible pieces. That’s also part of what makes blogs highly effective: Break up content into individual pieces for easy managing.”
Website content works best when paragraphs and sentences are short and clear. Website usability guru Jakob Nielsen performed a study showing that usability increased by 58% by editing out extra words. Website viewers move quickly, so the value of your message must be condensed into the span of a glance. Since there is so much content on the web competing for our attention, we scan by habit, and web users tend to scan down the left side and read only a few lines to the right. If you understand the short attention span of viewers, you can appeal to this kind of speed reading in chunks. Here are the guidelines for creating effective author website content:
Get attention with your first words. Like a good speech, the opening impression of your website has to catch the readers attention and convince them to stay on the site, read more, and interact.
Get attention with attention-grabbing short subheads. Your viewers scan the headlines first, and many of them never get beyond reading the topmost half of the page.
Use lists. They help cut words and keep content scannable for the viewer.
Use only one single, readable font.
Leave enough horizontal space between sentences.
Keep ample margins on both sides. Remember to facilitate ease of viewing and reading. The reactive theme mentioned earlier in this chapter allows clear website readability on all sizes of mobile device screens.
Edit your content. Make sure your text is clear, jargon-free, and error-free.
Add an incentive to interact, such as an invitation to offer feedback, enter a contest or sweepstakes, or get something for free, like a sample chapter or excerpt from your book.
These techniques help lead your audience to an easy path to take action, that is, read your blog, engage and interact with you via your blog, look at the rest of your site, subscribe to your newsletter, and, ultimately, buy your book.
Use Keywords and Tags and Measure Results
When you identify your strategy and tie together the 14 steps of your author platform efficiently, your site continues to attract visitors for many years to come. The first nine months of your site’s life are the most critical to establishing your presence, so ensure that your website is working as efficiently as possible during this initial stage. Test-drive your own links regularly to make sure they are working, that the site as a whole is functioning well, and that the interactivity that you set up on your site initially can work on autopilot in the future. After your site is established, it won’t require spending as much time maintaining or refreshing the content.
Keywords: If you identify and use the same keywords your audience uses to search the Internet, they will find you in the crowded space of the web and you will get a higher SEO ranking and higher numbers of visitors. Ideally you want to be in the number-one slot or close to it when a user types that keyword into the search bar.
Metadata: Learn to create compelling metadata, which is the line or two of text that shows up next to your website name when it’s found by the browser. If your metadata does not compel users to click that link to your website, then the best site in the world will be lost. By default, your search results display the first 156 characters on the page they searched. The Yoast WordPress SEO plugin allows you to write a 156-character meta description for every page and post on your site, giving you complete control over what appears in your search results. Use this option well! Be sure you describe what your readers are looking for to lead them to your site instead of a weak line or two such as “Like what you see? Please subscribe to my newsletter!” every time your site comes up in search results. Test this out when your website is complete: Google your keywords, find your website, and adjust your metadata to get the most powerful impact in searches.
GETTING HARD NUMBERS: GOOGLE ANALYTICS
Through the Jetpack plugin, WordPress gives you wonderful numbers showing you how many visits your site is getting, where your visitors are located geographically, and what pages and articles they visit while surfing there. Your web host also probably gives you a separate set of data. The gold standard for free information about your site’s visitors remains the company that relies on such data to drive its advertising-based business strategy: Google.
You might be a little intimidated, but signing up for and using Google Analytics is pretty painless, even for the technophobe. All you need to know beforehand is the address (URL) of your website and how to copy and paste material from one part of the Internet to another.
Go to google.com/analytics (you’ll have to log in to your Google account, which you already have if you use Gmail, YouTube, or any other Google property). Click the Admin tab, and look for +New Account. The new account screen appears.
You want to track a “website.” Read over the features you’ll get with Analytics, then scroll down to Setting up your web property. Tell Google the name of your site and the web address. Choose an Industry Category, such as Books & Literature, and select your Time Zone. Choose an Account Name, and choose who can see your analytics data.
When you’ve filled out the form, click Get Tracking ID. Google will generate a code that must be copied and pasted into the home page code of your website. The Google Analytics for WordPress plugin will simplify this process, so you’ll want to install that.
Analytics is a very important measure of the size and reach of your author website. It’s the best tool to show you how many people have viewed your site and to quantify your website subscribers, social media activity, and other data. Google Analytics also shows you search results for keywords and most-used phrases, responders to your contact forms, and more information that will help you target your audience further as you grow your site.
Your author website is your own online real estate, your central location to link to and plug in many pieces of growing media and networks, and your central place to tie your platform locations together. Don’t miss out! Start creating or updating, and enjoy the draw of your author website.
Checklist, Step 1: Author Website
![]() Know your audience needs and your own value and plan your author site accordingly.
Know your audience needs and your own value and plan your author site accordingly.
![]() Choose an existing author site model to customize for your needs.
Choose an existing author site model to customize for your needs.
![]() Map out your landing-page site strategy.
Map out your landing-page site strategy.
![]() List site pages and create a tab for each.
List site pages and create a tab for each.
![]() Write static content for each page.
Write static content for each page.
![]() Determine your website design.
Determine your website design.
![]() Publish your website—go live.
Publish your website—go live.
![]() Track and measure the users of your website.
Track and measure the users of your website.
![]() Include your live website URL in all networks, comments, articles, and every email signature.
Include your live website URL in all networks, comments, articles, and every email signature.
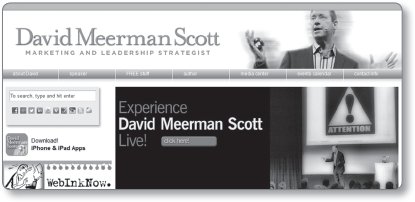
Success Spotlight: Waterside Client David Meerman Scott (davidmeermanscott.com)
- 8 books
- 30 languages
- 1,000,000 sold, including university sales
- The New Rules of Marketing and PR became a New York Times bestseller with 300,000 copies sold
Beginnings: Starting out as a student at Kenyon College, Ohio, as a liberal arts/economics major, David became a bond trader on Wall Street. He worked in Tokyo for six years, then held executive positions in the electronic news division of Knight-Ridder, at the time one of the world’s largest newspaper companies. In 1995 David joined Desktop Data, which became NewsEdge Corporation, and then became vice president of marketing at NewsEdge until the business was sold to Thomson Corporation in 2002.
In our interview, David said, “I didn’t plan on becoming a marketing strategist…. I came upon it accidentally.” At NewsEdge, he and his team found that do-it-yourself programs based on creating useful content and publishing it online at virtually no cost consistently generated more interest from qualified buyers than expensive professional public relations programs.
How he came up with his best-selling book idea: David said that when he encountered Web 2.0, he started to see that thinking like a publisher was what seemed most helpful for people to understand it. He felt that it was important to share with others that online marketing is more like online publishing than traditional marketing, and that in order to be successful, traditional marketing thinking had to change. He felt that publishers:
- Know how to create and promote content;
- See patterns that others don’t see; and
- Use the big picture for business.
The New Rules of Marketing and PR came together around the ideas forming in his head: Success on Web 2.0 is about content, about blogging, and about a great content-driven website.
Platform: As an author, David has successfully created his fantastic author platform covering all 14 steps outlined in this book, including:
- Getting reciprocal links on other websites
- Giving free info in the form of PDFs
- Maintaining his blog
- Making videos available on his site
- Using social networks
- Speaking, and much more
David went on to share another important finding: that his blog posts increased in popularity when he included things beyond his book topic, including links to related posts. In fact, David maintains, “That’s when my sales doubled.” He also placed his insightful articles on Huffington Post, which gained even more visibility for him and his books.
Every day, David said, he thought about how he could sell ten books with these questions in his mind: Where? How? And when? And never stopping. David believes that every single blog post he creates is another opportunity that can (and does) compel ten more people to buy his book.
David was sought after as a paid speaker before his book came out; he shared in our interview that later, when his book was out, he asked people to buy the book rather than taking a speaking fee. David continues to speak and teach seminars on marketing, and he constantly keeps his eye on how he can find opportunities to sell more copies of his books through these venues.
David’s advice to authors: Have a vision/idea and articulate it; talk about things related to what you do, not just the book itself; and, most importantly, get out there and don’t stop promoting!
David Meerman Scott’s final word on author platform building: Now anybody can earn attention by publishing their way, using the tools of social media such as blogs, podcasts, online news releases, online video, viral marketing, and online media.