The most important part of a penetration testing service is the quality of the deliverable to the customer. We have seen very talented testers lose business to low quality, yet more professional, service providers purely on the basis of the customer's reaction to the final report. This is due to the way the message is delivered considering the target audience, how sensitive they are to bad news, as well as the level of details provided. The best way to customize the message for a potential customer is to leverage a mix of standardized reports as well as imagine how they would read the material. For example, calling an individual a potential weakness would probably be a bad idea if that person has influence over the budget for this and other services.
Developing reports is not just documenting your findings. You need to capture the entire scenario including the environment prior to the penetration test, what information was provided upfront, assumptions about the current conditions, steps used when the services was being provided, and the results from each step. You might find that administrators patch holes prior to the completion of your report, so it's critical to document the time and date of each step. You can learn more about best practices for developing reports by using creditable sources such as OWASP's testing guide at https://www.owasp.org/index.php/Testing_Guide_Introduction.
Let's look at some tools that you can use to help build professional reports.
The Kali Linux ARM has limited functions to keep the operating system thin. One simple concept that can be tedious to execute is capturing screenshots of results for reporting purposes. Let's look at a command-line- and GUI-based tool that can simplify this process.
ImageMagick is a tool that can be downloaded and executed from a terminal to launch a screenshot. To download it, type the sudo apt-get install imagemagick command.
Once installed, you can type the import screenshot.png command to launch a screenshot. ImageMagick will change your mouse icon to a box representing that it is ready to capture something. Click on the part of the screen you want to capture and a screenshot will be saved as a .png file in your root. If you click on a window, ImageMagick will just capture that particular window. You can type the eog screenshot.png command to view your screenshot.
To capture the entire Raspberry Pi screen while introducing a delay, type the sleep 10; import –window root screenshot.png command. This is useful for including things that require interaction, such as opening a menu while performing a screen capture. The number after sleep will give you the delay time before the screenshot will be taken. The import –window root command tells ImageMagick to take a screenshot of the entire screen. The last part of the command is the name of your screenshot. The following screenshot shows the command to capture the screenshot:
Another image capturing tool is Shutter. Once again, you need to download it using the apt-get install shutter command. Once installed, you can find it under the applications dropdown or just type shutter in a terminal window. Shutter has a popup that will inform you that it is updating its plugins prior to fully launching for the first time.
The following screenshot shows a Session-Shutter window:
Shutter will show a window with options. To take a screenshot, you can click on the arrow or scissors image depending on the version. This will change the screen and ask you to draw a rectangle where you want to take a screenshot. Once you do this, you will draw a rectangle around your desired image and your screenshot will appear in the shutter window. From here, you can edit your image and save it for your report. The following example shows a screenshot taken by me of a part of the website www.thesecurityblogger.com:

The other option is to take a screenshot of the entire desktop by clicking the square labeled desktop or various ways to capture part of a window by clicking one of the options to the right of the desktop capture image. Once you have an image, you can click on the paintbrush to bring up the editing features, as shown in the following screenshot. You can crop, adjust the size, and so on prior to saving your final image. You can also upload images using the computer image button and edit those images using the paintbrush.
If you compromise a system or network, at some point you will probably want to insert or remove data. Data can be large, which means it can take a while to send it over the network. This can be a problem if you only have limited time on the compromised system. Also, moving large files off a network can trigger security defenses such as the Data Loss Prevention (DLP) technology.
The best practice is to compress and break files into smaller sizes to speed up the download/upload process as well as hide the sending/receiving action. Let's look at a command-line and GUI tool that you can use to accomplish these goals.
One simple to use command-line-based compression application is Zip. This program let's you shrink files on the Raspberry Pi so that you can send them to the C&C server to expand back to their normal form. Zip does not come preinstalled on the ARM image, so you will need to use the apt-get install zip command to install it.
Once installed, use the zip "zip file name" "file to be zipped" command, where "zip file name" is what the output will be called and "file to be zipped" is the file to compress. A .zip extension will be added to the compressed file, meaning this example will be data.zip after being compressed. The following screenshot shows the compressing of the VictimData file to the Stolen.zip file:
Use
unzip Stolen.zip to open the ZIP file back in its normal form, that is VictimData. You can also specify a particular file to be extracted, for example unzip Stolen.zip VictimData.doc. The following screenshot shows the unzipping of Stolen.zip:

If you are looking for a GUI-based compression program that can read various formats, File Roller could meet your needs. Just like Zip, you can open and compress files using a simple GUI. File Roller is not included with the Kali Linux ARM image, so you will need to use the apt-get install file-roller command to install it. Once installed, type file roller in the terminal and the GUI will open up. The following screenshot shows the VictimData file after I dragged and dropped the Stolen.zip file in File Roller. You can also click on the Open button to open the compressed files.

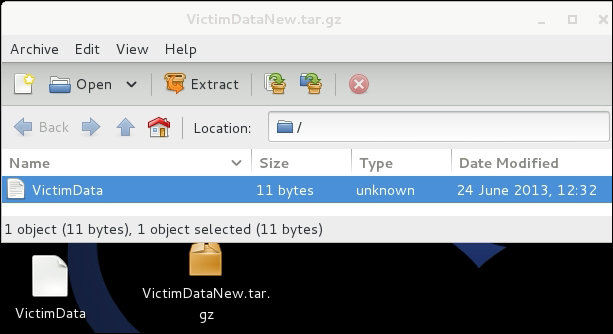
To compress files, you can drag the file into the window and File Roller will ask you whether you want to create a new compressed file. Here is an example in the following screenshot of dropping the VictimData file into File Roller and creating a new compressed file called VictimDataNew.tar.gz. At the file prompt, I told File Roller to call my new file VictimDataNew and it added the .tar.gz extension once the file was compressed:
To further reduce a file, you can split it into multiple parts before sending it over the wire. One simple utility to accomplish this is split. To split a file, type split "size of each file" "file to be split" "name of split files". The next example in the following screenshot shows splitting a file called VictimData into smaller 50 MB files called Breakup. Each 50 MB file will have the name Breakup followed by letters starting with aa. So, our example created three files called Breakupaa, Breakupab, and Breakupac.
To reassemble our three files, we can use the cat "fileaa fileab fileac" > "final file name". So, for our example, we'll assemble the VictimData file using the files Breakupaa, Breakupab, and Breakupac. We can also use the cat Breakupa[a-c] > VictimData command, as shown in the following screenshot, since the beginning character is the same in the number sequence: