
Hacking into networks can be fun when it's taking place in your personal lab. At some point, however, you might need to take it to a real environment. When that time comes, it is critical that you make sure you conclude things properly. For people providing penetration testing as a service, you must show evidence to justify your findings or you won't demonstrate enough value for future business. This means documenting everything and not leaving behind possible problems caused by your services. For attackers, you will want to remove your footprint so that the authorities can't track you back through a forensic investigation.
When it comes to reporting identified network weaknesses as a paid service, people don't like when their child is called ugly, and will probably challenge your findings. It is important to document the entire process so that it is repeatable, assuming that the network is in the same state as when the penetration test was performed. Documentation needs to be tailored for both technical and non-technical reviewers since both types of people probably have a stake in funding the service engagement. You should also note the beginning state of the exercise, including any information provided upfront by your customer. You can learn more about the starting state of penetration testing by researching white box, black box, and grey box penetration testing.
Another key element of ending a penetration test is being aware of the footprint that you created during the assignment. Many exploits can impact the functionality of systems and cause downtime that most customers will not be happy about. This and other types of behaviors could tip off those watching out for your presence, which might push them to adjust their security measures. This will make it much tougher to accomplish your original task, and will also not provide a true penetration testing simulation as real attackers might not be sloppy and get identified. Administrators might also fix any identified vulnerabilities before they are reported, thereby deflating the value of your final report. This is why everything you attempt on a target should be stealthy unless the service engagement is completely in the clear, meaning all the parties know that you are providing the service against specific systems.
The following topics will be covered in this chapter:
- Covering your tracks
- Wiping logs
- Masking your network footprints
- Proxychains
- Resetting the Raspberry Pi back to factory settings
- Remotely corrupting Kali Linux
- Developing reports
- Creating screenshots
- Compressing files
Note
You should have approval from the proper parties prior to executing any penetration testing assignment. This approval should be reviewed by a legal representative and signed in ink to avoid the risk of being made responsible for any negative results caused by an authorized penetration test. If you are an unauthorized hacker, don't get caught.
One of the key tasks in which penetration testers as well as criminals tend to fail is cleaning up after they breach a system. Forensic evidence can be anything from the digital network footprint (the IP address, type of network traffic seen on the wire, and so on) to the logs on a compromised endpoint. There is also evidence on the used tools, such as those used when using a Raspberry Pi to do something malicious. An example is running more ~/.bash_history on a Raspberry Pi to see the entire history of the commands that were used.
The good news for Raspberry Pi hackers is that they don't have to worry about storage elements such as ROM since the only storage to consider is the microSD card. This means attackers just need to reflash the microSD card to erase evidence that the Raspberry Pi was used. Before doing that, let's work our way through the clean up process starting from the compromised system to the last step of reimaging your Raspberry Pi.
Note
You can use the SD Format tool we covered in Chapter 1, Raspberry Pi and Kali Linux Basics, for this purpose. You can also use the steps covered in Chapter 1, Raspberry Pi and Kali Linux, Basics to back up your image before performing a penetration test and resetting your Raspberry Pi back to that image to hide how it was used prior to reimaging it.
The first step you should perform to cover your tracks is clean any event logs from the compromised system that you accessed. For Windows systems, Kali Linux has a tool within Metasploit called clearev that does this for you in an automated fashion. Clearev is designed to access a Windows system and wipe the logs. An overzealous administrator might notice the changes when you clean the logs. However, most administrators will never notice the changes. Also, since the logs are wiped, the worst that could happen is that an administrator might identify that their systems have been breached, but the logs containing your access information would have been removed.
Clearev comes with the Metasploit arsenal. To use clearev once you have breached a Windows system with a Meterpreter, type meterpreter > clearev. There are no configurations once it is run, which means it just wipes the logs upon execution.
The following screenshot shows the launch of the preceding command:

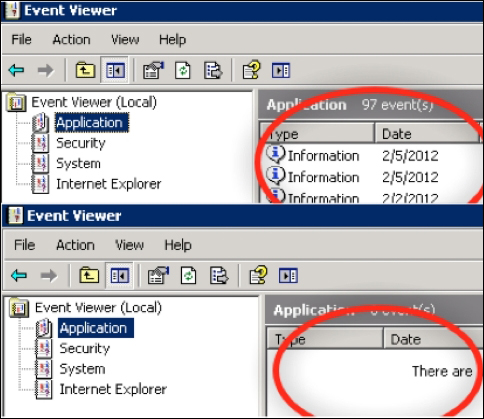
Here is an example of the logs before they are wiped on a Windows system:
Another way to wipe off logs from a compromised Windows system is by installing a Windows log cleaning program. There are many options available to download, such as ClearLogs found at http://ntsecurity.nu/toolbox/clearlogs/. Programs such as these are simple to use, meaning you just install and run it on a target once you are finished with your penetration test. You can also just delete the logs manually using the C: del %WINDR%* .log /a/s/q/f command. This command directs all logs using /a including subfolders /s, disables any queries so you don't get prompted, and /f forces this action.
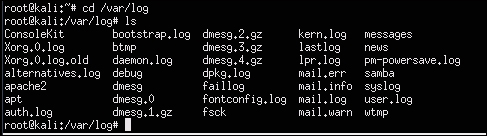
For Linux systems, you need to get access to the /var/log folder to find the log files. Once you have access to the log files, simply open them and remove all entries. The following screenshot shows an example of my Raspberry Pi's log folder:
You can just delete the files using the remove command, rm, such as rm FILE.txt or delete the entire folder; however, this wouldn't be as stealthy as wiping existing files clean of your footprint. Another option is in Bash. One can simply type > /path/to/file to empty the contents of a file, without removing it necessarily. This approach has some stealth benefits.
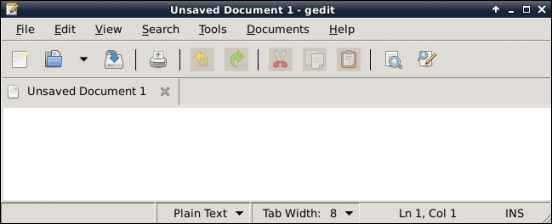
Kali Linux does not have a GUI-based text editor, so one easy-to-use tool that you can install is gedit. Use apt-get install gedit to download it. Once installed, you can find gedit under the application dropdown or just type gedit in the terminal window. As you can see from the following screenshot, it looks like many common text file editors. Click on File and select files from the log folder to modify them.
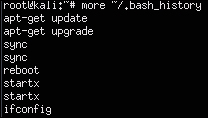
You also need to erase the command history since the Bash shell saves the last 500 commands. This forensic evidence can be accessed by typing the more ~/.bash_history command. The following screenshot shows the first of the hundreds of commands I recently ran on my Raspberry Pi:
To verify the number of stored commands in the history file, type the echo $HISTSIZE command. To erase this history, type export HISTSIZE=0. From this point, the shell will not store any command history, that is, if you press the up arrow key, it will not show the last command.
The following screenshot shows that I have verified if my last 500 commands are stored. It also shows what happens after I erase them:

Note
It is a best practice to set this command prior to using any commands on a compromised system, so that nothing is stored upfront. You could log out and log back in once the export HISTSIZE=0 command is set to clear your history as well. You should also do this on your C&C server once you conclude your penetration test if you have any concerns of being investigated.
A more aggressive and quicker way to remove your history file on a Linux system is to shred it with the shred –zu /root/.bash_history command. This command overwrites the history file with zeros and then deletes the log files. Verify this using the less /root/.bash_history command to see if there is anything left in your history file, as shown in the following screenshot: