Up to now your main tools for dealing with script errors have been the careful review of error messages and the careful review of the statements that make up your script files. Given that this book has provided you with explicit instruction on how to create and execute all of its examples and game scripts, these tools have hopefully been all you needed. However, as you venture out on your own and as your scripts become more complex, your script errors will become more difficult to track down. The purpose of this chapter is to provide you with additional instruction on how to track down and deal with script errors. You will learn how to add error-handling logic to your Ruby scripts. You will also learn how to work with Ruby’s built-in debugger to debug and test the execution of your script files. On top of all this, you will learn how to create a new Ruby script, the Ruby Tic-Tac-Toe game.
Specifically, you will learn:
About syntax, runtime, and logical errors
How to create error handlers that react to and handle errors
How to track the logical execution flow of statements within your script files
How to use Ruby’s debugger to run and monitor the execution of Ruby scripts
In this chapter, you will learn how to create a new computer script called the Ruby Tic-Tac-Toe game. This Ruby script is designed to bring together all of the programming concepts presented throughout the book. The game begins by displaying a welcome screen, as shown in Figure 10.1.

Next, the players are prompted for permission to begin a new round of play, as demonstrated in Figure 10.2.

Once the players have decided to play, the instructions shown in Figure 10.3 are displayed, outlining the rules for playing the game.

Moves are made by entering the coordinates of a Tic-Tac-Toe game board square. As Figure 10.4 shows, Player X always goes first.

As game play progresses, letters identifying each player’s moves are displayed on the Tic-Tac-Toe game board, as demonstrated in Figure 10.5.

After each move, the game examines the game board looking for a winner. To win, a player must line up three squares in a row, vertically, horizontally, or diagonally. Figure 10.6 shows an example of a game that has been won by Player X.

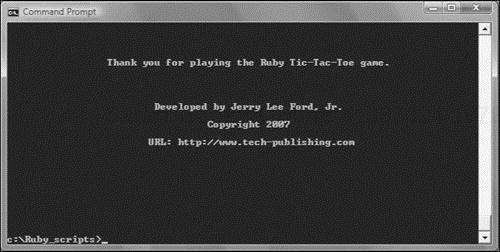
At the end of each game, the players are prompted for permission to start another game. Once the players have had enough and decide to quit playing, the screen shown in Figure 10.7 displays.
Undoubtedly, you have run into your fair share of errors as you have made your way though this book. You may have made a few typos when testing some of the many examples presented in this book or you may have accidentally skipped a step or two when creating the book’s game scripts. That’s okay. Even the most experienced programmers run into errors. Dealing with programming errors, sometimes referred to as bugs, is simply a part of every programmer’s life. The trick is learning how to identify and fix bugs when they occur, which is the focus of this chapter.
Errors can occur for a number of reasons. One category of errors that you should be familiar with is syntax errors. Syntax errors are errors that occur if you do not correctly follow Ruby’s syntactical rules when writing your script statements. A syntax error will occur if you mistype a Ruby keyword or if you fail to add matching quotation marks or parentheses as required by your statements.
Ruby checks scripts for syntax errors before executing them. As such, any script that contains a syntax error will not compile and execute until the error has been corrected. Generally, all you need to track down and fix most syntax errors is the information provided by Ruby’s error messages.
Another category of errors that you need to be aware of is runtime errors. These errors occur when a script attempts to perform an illegal action. For example, a runtime error will occur if you attempt to divide a number by zero, as demonstrated here:
puts 10 / 0
When executed, this statement produces the following error and then terminates the execution of the script.
C:/Ruby_scripts/Test.rb:2:in '/': divided by 0 (ZeroDivisionError)
        from C:/Ruby_scripts/Test.rb:2
Runtime errors can sometimes be buried deep inside seldom-used methods and may not make their presence known until a particular set of circumstances occurs. As a result, it is extremely important that you thoroughly test your Ruby scripts, ensuring that every part of every method works as expected.
Unfortunately, runtime errors can also occur for a host of reasons that are completely outside of your control. For example, if your script needs to access a network drive and the drive or network crashes, your script will experience a runtime error when it tries to access the drive. In these types of situations, the best you may be able to do is try to gracefully handle the situation, perhaps by displaying a more user-friendly error message, which you can do using the error handling techniques discussed later in this chapter.
A final type of error that you need to be familiar with is logical errors. A logical error is an error that occurs because of a mistake made in the formulation of the logic used to accomplish a particular task. For example, a logical error would occur if you wrote a statement that you intended to use to multiply two numbers together but instead you accidentally divided one number by the other. As a result, your script’s output would clearly be different from what you wanted.
The best way to avoid logical errors is to carefully plan out the design of your scripts before you start writing them. However, even the most experienced programmers sometimes make logical errors. Using the debugging techniques discussed in this chapter, you will be able to monitor the execution of your Ruby scripts to track down and correct logical errors.
Any time an error occurs within a Ruby script, an exception is generated. When an exception occurs, the interpreter displays an error message and forces the immediate termination of the script. Sometimes the error messages that are reported are rather cryptic and even downright confusing. Rather than accept this default behavior, Ruby allows you to handle exceptions when they occur, giving you the ability to deal with the error.
Dealing with errors may mean displaying friendly and more useful error messages. Dealing with errors may also mean finding ways of allowing scripts to continue execution without the user even knowing anything went wrong. For example, you might include additional logic within a script to retry a given operation a number of times. Alternatively, suppose you had a script that needed to access a file on a network drive and that network drive became unavailable while the script was executing. Instead of displaying an error and terminating, you might add an error handler to the script that allows the script to use default data instead.
When an exception is generated, it is said to be raised. Whenever an exception is raised, Ruby looks for an exception handler capable of handling the exception. If it finds one, control is transferred to the handler. Otherwise, an error message is displayed and the script terminates. For example, suppose you created a script made up of the following statement.
puts x
When executed, the following error would be reported.
Test.rb:2: undefined local variable or method 'x' for main:Object (NameError)
As you can see, the error occurred because the script attempted to reference an undefined variable.
To define an error handler, you need to first identify a location within your Ruby script where you think an error may be able to occur and then precede it with the begin keyword. Next, place the rescue keyword after the location and then add any statements intended to deal with the exception immediately after the rescue keyword. Finally, add the end keyword. If you want, you could prevent the previous error from terminating the script by developing an exception handler for it as shown here:
begin
  puts x
rescue
  #No actions defined
end
As you can see, the statement with the error in it has been placed between the begin and rescue keywords. As a result, when the error occurs, the error handler traps it. Since there are no statements included between the rescue and end keywords, the error is simply disregarded. As such, if there were any statements remaining in the script, the script would continue running allowing those statements to execute.
Exceptions that occur within Ruby scripts are managed as objects that come from the Exception class and its family of subclasses. Using the => operator, you can access information about an exception and use it as demonstrated here:
begin
  puts x
rescue => e
  puts "

Sorry. An error has occurred. Please report the following"
  puts "error information to the help desk.

"
  puts "ERROR CLASS: " + e.class.to_s
  puts "ERROR MESSAGE: " + e
end
In this example, a user-friendly error message is displayed in place of the default error message. The user-friendly message identifies both the class and text of the error and requests that the user inform the help desk of the error, as demonstrated here:
Sorry. An error has occurred. Please report the following
error information to the help desk.
ERROR CLASS: NameError
ERROR MESSAGE: undefined local variable or method 'x' for main:Object
The previous error handler represents a generic error handler in that it will catch any type of error that occurs. If you want, you can create error handlers designed to handle specific types of errors, as demonstrated here:
begin
  puts x
rescue NameError
  puts "A name error has occurred!"
rescue ArgumentError
  puts "Incorrect use of arguments!"
rescue RangeError
  puts "A range error has occurred!"
rescue
  puts "Unexpected error!"
end
Here, separate rescue statements have been defined, each of which is designed to handle a different type of error. The first three rescue statements trap specific types of errors. The last rescue statement will trap any error that does not match up against the three previously defined error types.
Sometimes the contents of Ruby’s error messages leave something to be desired, and as a result, errors can be a bit tricky to track down. One way of determining what is happening in a script is to strategically embed print and puts statements throughout the script that identify when specified methods are executed and display the contents of variables whose values you suspect may not be getting set correctly. To demonstrate how you might apply this advice, take a look at the following method (a modified version of a method borrowed from Chapter 9’s Ruby Blackjack game).
def play_game

  puts "Method play_game starting execution."

  Console_Screen.cls

  playerHand = get_new_card
  dealerHand = get_new_card

  puts "Initial value of playerHand = " + playerHand
  puts "Initial value of dealerHand = " + dealerHand

  playerHand = complete_player_hand(playerHand, dealerHand)

  puts "Updated value of playerHand = " + playerHand

  if playerHand <= 21 then
    dealerHand = play_dealer_hand(dealerHand)
    puts "Updated value of dealerHand = " + dealerHand
  end

  determine_winner(playerHand, dealerHand)
  puts "Calling determine_winner"

  puts "Method play_game has complete execution."

end
By embedding puts statements throughout your script as demonstrated in this method, you can monitor the execution of your script file, monitoring when each method executes while also keeping an eye on the values assigned to variables during script execution. Once you are confident that your script is working as expected, you can either remove the extra puts statements or comment them out, but keep them available should you later need to conduct further testing.
The use of print and puts statements as a debugging tool is fine for small scripts. However, as your Ruby scripts grow larger and more complex, this approach becomes too difficult and time consuming to implement. To monitor and debug larger Ruby scripts, you need to learn how to work with Ruby’s built-in debugger. The debugger allows you to monitor and control the execution of your scripts on a statement-by-statement basis, pausing whenever necessary to check on the value of variables.
Ruby’s debugger is a built-in component. As such, it is always ready and available for use. Ruby’s debugger provides you with an alternative environment for executing your scripts. However, before you can use the debugger to run a Ruby script, the script must be syntax error free. Once you have tracked down and fixed all syntax errors, you can use the debugger to run and monitor your Ruby script. To use the debugger, you must start it using the following syntax.
ruby -r debug [options] [script] [arguments]
As you can see, the debugger is loaded by starting the Ruby interpreter with the -r debug option. If necessary, you may include any other needed Ruby options followed by the name of the script that you want to debug and any arguments that you may need to pass to that script.
The best way to learn how to work with Ruby’s debugger is to just start using it. Of course, to use it, you must have a Ruby script that you want to monitor and debug. For the rest of the discussion in this section, the following Ruby script will be used to demonstrate how to work with the debugger.
x = 1
loop do
  puts x
  x += 1
  puts "We are half way there!" if x == 3
  break if x == 5
end
If you were to run this script normally, without invoking the debugger, it would generate the following output.
1
2
We are half way there!
3
4
Now let’s load the script and execute it using the Ruby debugger. To do so, execute the following command at the operating system command prompt.
ruby -r debug test.rb
In response, Ruby will load your script in the debugger and generate the following output.
Debug.rb
Emacs support available.

test.rb:1:x = 1
(rdb:1)
The first several lines indicate that the debugger is active. The third line identifies the line number of the next statement in the script that is about to run. Since the script has only just been loaded into the debugger, this statement in the script has yet to execute. The last line displays the debugger’s command prompt.
To give you a good understanding of how to work with the debugger, let’s use it to run the Test.rb script. If you have not done so, create and save your own version of the Test.rb script and then start its execution in the debugger, as shown here:
ruby -r debug test.rb
In response, the debugger loads and prepares to execute the script, as shown here:
Debug.rb
Emacs support available.

test.rb:1:x = 1
(rdb:1)
Let’s allow the first script statement to be executed. This is accomplished by executing the step command, as shown here:
(rdb:1) step
test.rb:2:loop do
(rdb:1)
As you can see, the debugger now shows that script statement 2 is ready for execution. Before executing it, let’s check on the value assigned to the x variable now that the first statement has been run. One way of doing this is to simply type the name of the variable at the debugger prompt, as demonstrated here:
(rdb:1) x
1
(rdb:1)
As you can see, x has been assigned a value of 1. Another way of examining the value assigned to x is to type var local and press Enter, as shown here:
(rdb:1) var local
  x => 1
(rdb:1)
The var local command tells the debugger to list all local variables within the current scope. (Type var global to view global variables and var instance to view instance variables.)
As you work your way through your script, it is easy to lose track of exactly where you are. To get your bearings, you can enter the list command and in response, the debugger will display the next statement to be executed as well as a number of statements that surround it, as demonstrated here:
(rdb:1) list
[-3, 6] in test.rb
   1 x = 1
=> 2 loop do
   3   puts x
   4   x += 1
   5   puts "We are half way there!" if x == 3
   6   break if x == 5
(rdb:1)
Rather than stepping through a script line by line, you may instead want to set a breakpoint. A breakpoint is a marker placed in a script that pauses script execution when it is reached. Once paused, you can execute any debugger commands.
To set up a breakpoint, you use the break command, passing the line number where you want to set the break as an argument. Let’s set up a break point for the fourth line in the script file, as shown here:
(rdb:1) break 4
Set breakpoint 1 at test.rb:4
(rdb:1)
Now that the breakpoint has been set, type the cont command at the debugger prompt, as shown here:
(rdb:1) cont
1
Breakpoint 1, toplevel at test.rb:4
test.rb:4: x += 1
(rdb:1)
The cont command runs the program without any stepping, stopping execution when a breakpoint is reached or the scripts ends. As you can see, after the cont command was executed, the script executed the second and third statements and then paused before executing the fourth statement (where the breakpoint was set).
Next, let’s step through the fourth statement and then check on the value assigned to x, as shown here:
(rdb:1) step
test.rb:5: puts "We are half way there!" if x == 3
(rdb:1) x
2
(rdb:1)
The value of x is now set equal to 2. Now, let’s remove the breakpoint that you just set by either typing del and the number that was previously assigned to the breakpoint or by telling del to delete all breakpoints, as demonstrated here:
(rdb:1) del
Clear all breakpoints? (y/n) y
(rdb:1)
Trick
You can type in the word break all by itself to generate a list of all currently set breakpoints and to see the line number associated with each breakpoint.
Now that the breakpoint has been removed, let’s set a conditional breakpoint and then allow the script to run without stepping through it. The watch command is used to set conditional breakpoints, as shown here:
(rdb:1) watch x = 3
Set watchpoint 4
(rdb:1) cont
Watchpoint 4, toplevel at test.rb:5
test.rb:5: puts "We are half way there!" if x == 3
(rdb:1)
Here, the conditional breakpoint has been set up to execute once the value assigned to x is set equal to 3. Then the cont command was used to continue script execution, pausing again when the value of x has become 3.
Now, let’s display and then remove the conditional breakpoint, as shown here:
(rdb:1) break
Breakpoints:

Watchpoints:
  4 x = 3

(rdb:1) del
Clear all breakpoints? (y/n) y
(rdb:1) break
Breakpoints:

Watchpoints:

(rdb:1)
Let’s wrap up the current debug session by telling the debugger to terminate, as shown here:
(rdb:1) quit
Really quit? (y/n) y
As you can see, the quit command instructs the Ruby debugger to terminate, returning you to the operating system’s command prompt. By executing debugger commands, you can exercise detailed control over the execution of a Ruby script. You can control when statements execute and keep track of the order in which things are occurring. In addition, you can inspect the values assigned to variables to ensure that they are being appropriately set. As a result, by carefully stepping through the execution of a Ruby script and monitoring its activity, you can spot places where things are not working as you expect them to. Once you have identified the source of your script errors, you can make changes to your scripts and test them again.
Okay, now it is time to turn your attention back to the development of this chapter’s game project, the Ruby Tic-Tac-Toe game. As you work on this script take note of the manner in which variables are used. In particular, keep an eye on the global variables that are used to represent each of the game board’s nine squares. While the rest of the variables used in the script are all local variables and are passed when necessary as arguments to methods, the variables representing the game board squares have been made global because there are so many of them and because they are used extensively throughout this script.
The development of the Ruby Tic-Tac-Toe game will be completed in 16 steps, as outlined here:
Open your text or script editor and create a new file.
Add comment statements to the beginning of the script file to document the script and its purpose.
Define a class representing the terminal window.
Define a class representing the Tic-Tac-Toe game.
Define the
display_greetingmethod.Define the
display_instructionsmethod.Define the
display_game_boardmethod.Define the
validate_player_movemethod.Define the
play_gamemethod.Define the
clear_game_boardmethod.Define the
check_resultsmethod.Define the
display_game_resultsmethod.Define the
display_creditsmethod.Instantiate custom script objects.
Get the player’s permission to begin game play.
Control high-level game play.
The first step in the development of the Ruby Tic-Tac-Toe game is to open your favorite text or script editor and create a new Ruby script file named TicTacToe.rb, storing it in the same folder as your other Ruby game scripts.
Now that you have created your new script file, let’s add the following comments to it. These statements provide documentation about the game and its purpose.
#--------------------------------------------------------------------------
#
# Script Name: TicTacToe.rb
# Version:     1.0
# Author:      Jerry Lee Ford, Jr.
# Date:        October 2007
#
# Description: This Ruby script is a 2–player version of the popular
#              Tic-Tac-Toe game in which players try to out
#              maneuver one another in an effort to line up three game
#              board squares in a row (horizontally, vertically, or
#              diagonally).
#
#--------------------------------------------------------------------------
The Ruby Tic-Tac-Toe game utilizes two custom classes. These classes provide the script with a set of methods that control interaction with the user and the game. The code statements for the script’s first class, the Screen class, are shown next and should be added to the end of the script file.
# Define custom classes ---------------------------------------------------

#Define a class representing the console window
class Screen

  def cls  #Define a method that clears the display area
    puts ("
" * 25)  #Scroll the screen 25 times
    puts "a"   #Make a little noise to get the player's attention
end

  def pause    #Define a method that pauses the display area
    STDIN.gets  #Execute the STDIN class's gets method to pause script
                #execution until the player presses the Enter key
  end

end
The Screen class is made up of two methods. The first method is named cls and when executed, will write 25 blank lines to the console window to clear the screen. In addition, a beep sound is played each time the screen is cleared. The pause method uses the STDIN class’s gets method to pause the execution of the script until the player presses the Enter key.
The statements that define the Game class are shown next and should be added to the end of the script file. This method contains nine methods. To begin the creation of the Game class, add the following statements to the end of the script file.
#Define a class representing the Ruby Tic-Tac-Toe game
class Game

end
The first method to be defined in the Game class is the display_greeting method. This method is responsible for displaying the game’s welcome screen. The statements that make up this method are shown next and should be inserted into the Game class.
#This method displays the game's opening message
def display_greeting

  Console_Screen.cls  #Clear the display area

  #Display the game's welcome screen
  puts "			Welcome to the Ruby Tic-Tac-Toe Game!


"
  puts "			              |       |"
  puts "			          X   |       |"
  puts "			              |       |"
  puts "			          ---------------------"
  puts "			              |       |"
  puts "			          0   |  X    |    0"
  puts "			              |       |"
  puts "			          ---------------------"
  puts "			              |       |"
  puts "			              |       |    X"
  puts "			              |       |"
  print "


Press Enter to continue. "

  Console_Screen.pause       #Pause the game

end
The next method to be added to the Game class is the display_instructions method. The script statements that make up this method are shown next and should be added to the game class definition, immediately after the display_greeting method.
#Define a method to be used to display game instructions
def display_instructions

  Console_Screen.cls       #Clear the display area

  puts "INSTRUCTIONS:

"  #Display a heading

  #Display the game's instructions
  puts "This is a 2-player Tic-Tac-Toe game in which Player X and"
  puts "Player O are challenged to out maneuver one another in"
  puts "an effort to line up three squares in a row (horizontally,"
  puts "vertically, or diagonally). Player X always goes first. Game play"
  puts "ends when either player manages to line up three squares in a"
  puts "row or when all nine game board squares have been selected"
  puts "without either player managing to win."
  puts "


"
  print "Press Enter to continue. "

  Console_Screen.pause       #Pause the game

end
The next method to be added to the Game class is the display_game_board method. The script statements that make up this method are provided next and should be added to the game class definition, immediately after the display_instructions method.
#Define a method to display the game board and collect player moves
def display_game_board(player)

  move = ""  #Assign a default value

  loop do  #Loop forever

    Console_Screen.cls  #Clear the display area

    #Display the game board
    puts "			Welcome to the Ruby Tic-Tac-Toe Game!


"
    puts "			          1       2       3
"
    puts "			             |       |"
    puts "			    A    #{$A1}   |   #{$A2}   |   #{$A3}"
    puts "			             |       |"
    puts "			       ---------------------"
    puts "			             |       |"
    puts "			    B   #{$B1}    |   #{$B2}   |   #{$B3}"
    puts "			             |       |"
    puts "			       ---------------------"
    puts "			             |       |"
    puts "			    C   #{$C1}    |   #{$C2}   |   #{$C3}"
    puts "			             |       |"

    #Prompt the player to enter a move
    print "


Player " + player + " turn. Please enter your move: "

    move = STDIN.gets  #Collect the player's move
    move.chop!  #Remove any extra characters appended to the string
    move = move.upcase  #Convert to uppercase

    #Terminate the loop if a valid move was entered
    if move.length == 2 then  #Must be at 2 character long
      if move =~ /[A-C][1-3]/i  #Must be A1, A2, A3, B1, B2, B3, C1, C2, C3
        #Call method responsible for determining if the board square was
        #available
        validMove = validate_player_move(move)
        if validMove == true  #The move was valid
          break  #Terminate the execution of the loop
        end
      end
    end

 end

 return move  #Return the player's move back to the calling statement

end
This method is controlled by a loop that has been set up to run forever. Each time the loop repeats, it displays the Tic-Tac-Toe game board. Embedded within the game board is a series of variable references. These variable references are filled in using variable interpolation during game play. After displaying the game board, the method displays a message prompting the current player, as specified by the value assigned to the player variable, to enter a move.
The player’s input is converted to all uppercase and checked to see if it is two characters long. If it is, a regular expression is then used to further validate the player’s input, ensuring that the first character is an A, B, or C and that the second character is a 1, 2, or 3. If the player’s input passes these validation checks, it is passed as an argument to the validate_player_move method, which checks to see if the game board square selected by the player is available for selection (i.e., that it has not already been assigned). If the value returned by the validate_player_move method is equal to true, a break command is executed and the player’s move is returned to the statement that called upon the method to execute. Otherwise, the player is prompted to make a different selection.
The next method to be added to the Game class is the validate_player_move method. This method is responsible for ensuring that the game board square specified by the player is available for selection. The script statements that make up this method are provided next and should be added to the Game class definition, immediately after the display_game_board method.
#Define a method that determines if the square selected by the player
#is still available
def validate_player_move(move)

  #Return a value of false if the square has already been selected
  return false if move == "A1" && $A1 != " "
  return false if move == "B1" && $B1 != " "
  return false if move == "C1" && $C1 != " "
  return false if move == "A2" && $A2 != " "
  return false if move == "B2" && $B2 != " "
  return false if move == "C2" && $C2 != " "
  return false if move == "A3" && $A3 != " "
  return false if move == "B3" && $B3 != " "
  return false if move == "C3" && $C3 != " "

  #Return a value of true if the square is available
  return true

end
When called, this method checks to see if the player’s move, passed to the method as an argument, is available. This is accomplished by checking to see if the value assigned to the game board square is a blank space, which means the square is available.
A value of false is returned if the specified game board square is not available. Otherwise, a value of true is returned.
The next method to be added to the Game class is the play_game method. This method is responsible for managing an individual round of play. The method’s statements are shown next and should be added to the end of the class definition, immediately after the validate_player_move method.
#Define a method to control game play
def play_game

  player = "X"  #Make Player X the default player for each new game

  noOfMoves = 0  #Reset the value of the variable used to keep track
                 #of the total number of moves made in a game

  #Clear out the game board to get it ready for a new game
  clear_game_board

  loop do  #Loop forever

    Console_Screen.cls       #Clear the display area

    #Call on the method that displays the game board and collects player
    #moves
    square = display_game_board(player)

    #Assign the selected game board square to the player that selected it
    $A1 = player if square == "A1"
    $A2 = player if square == "A2"
    $A3 = player if square == "A3"
    $B1 = player if square == "B1"
    $B2 = player if square == "B2"
    $B3 = player if square == "B3"
    $C1 = player if square == "C1"
    $C2 = player if square == "C2"
    $C3 = player if square == "C3"

    #Keep count of the total number of moves that have been made
    noOfMoves += 1

    #Call on the method that is responsible for determining if the game has
    #been won
    winner = check_results(player)

    #See if player X has won
    if winner == "X" then
      #Call on the method that displays the game's final results
      display_game_results("Player X Wins!")
      break  #Terminate the execution of the loop
    end

    #See if player O has won
    if winner == "O" then
      #Call on the method that displays the game's final results
      display_game_results("Player O Wins!")
      break  #Terminate the execution of the loop
   end

   #See if the game has ended in a tie
   if noOfMoves == 9 then
     #Call on the method that displays the game's final results
     display_game_results("Tie")
     break  #Terminate the execution of the loop
   end

   #If the game has not ended, switch player turns and keep playing
   if player == "X" then
    player = "O"
    else
      player = "X"
    end

  end

end
This method begins by assigning a value of X to a variable named player and a value of 0 to a variable named noOfMoves. The value assigned to player specifies the game’s starting player. noOfMoves will be used to keep track of the total number of moves made by both players during game play.
Next, the clear_game_board method is called, resetting all of the game board’s embedded variables to “ ”, thus readying the game for a new round of play. The rest of the method is controlled by a loop. Each time the loop repeats, the display_game_board method is called and passed the value assigned to the player variable. The display_game_board method returns a value representing the game board square selected by the player. A game board square is then assigned to the player based on the square that was selected, and the value of noOfMoves is incremented to keep track of the number of moves that have been made by both players.
Next, the check_results method is called. This method checks to see if the current player has won the game, returning a value of "X" or "O" if one of the players has won. If this is the case, the display_game_results method is called and a break command is executed, terminating the loop and ending the play_game method. If neither player has won the game, the value of noOfMoves is checked to see if it is equal to 9, in which case every game board square has been selected without either player winning the game.
If neither player has won the game and a tie has not occurred, the last thing the loop does before the loop repeats is switch the current player’s turn from X to O or from O to X as appropriate.
The next method to be added to the Game class is the clear game method. This method is responsible for resetting the value of each variable embedded in the Tic-Tac-Toe game’s game board. The method’s statements are shown next and should be added to the end of the class definition, immediately after the play_game method.
#Define a method that is responsible for clearing out the game board
def clear_game_board
  #Assign a blank space to each game board square
  $A1 = " "
  $A2 = " "
  $A3 = " "
  $B1 = " "
  $B2 = " "
  $B3 = " "
  $C1 = " "
  $C2 = " "
  $C3 = " "

end
When called, this method assigns each of the game board’s nine embedded variables a value of “ ”, visually clearing each square and making it available for selection in the next round of play.
The next method to be added to the Game class is the check_results method. This method is responsible for examining the squares on the game board to determine if the current player, passed to the method as an argument, has managed to line up three squares in a row. This method’s statements are shown next and should be added to the end of the class definition, immediately after the clear_game_board method.
#Define a method to examine the game board and determine if the current
#player has won the game
def check_results(player)


  winner = ""  #Assign a default value

  #Check vertically
  winner = player if $A1 == player && $A2 == player && $A3 == player
  winner = player if $B1 == player && $B2 == player && $B3 == player
  winner = player if $C1 == player && $C2 == player && $C3 == player

  #Check horizontally
  winner = player if $A1 == player && $B1 == player && $C1 == player
  winner = player if $A2 == player && $B2 == player && $C2 == player
  winner = player if $A3 == player && $B3 == player && $C3 == player
  #check diagonally
  winner = player if $A1 == player && $B2 == player && $C3 == player
  winner = player if $A3 == player && $B2 == player && $C1 == player

  return winner  #Return the result back to the calling statement

end
The method checks vertically, horizontally, and diagonally for a winner. If a winner is identified, the method returns a letter representing the winning player (X or O). Otherwise an empty string is returned to the calling statement.
The next method to be added to the Game class is the display_game_results method. This method is responsible for displaying the results of the current round of play when called at the end of each round of play. The method’s statements are shown next and should be added to the end of the class definition, immediately after the check_results method.
#Define a method that will be used to display the game's final result
def display_game_results(message)

    Console_Screen.cls  #Clear the display area

    #Display the results of the game
    puts "


"
    puts "			     Game Over: " + message + "


"
    puts "			          1       2       3
"
    puts "			              |       |"
    puts "			     A    #{$A1}  |    #{$A2}   |   #{$A3}"
    puts "			              |       |"
    puts "			        ---------------------"
    puts "			              |       |"
    puts "			     B    #{$B1}  |    #{$B2}   |   #{$B3}"
    puts "			              |       |"
    puts "			        ---------------------"
    puts "			              |       |"
    puts "			     C   #{$C1}   |    #{$C2}   |   #{$C3}"
    puts "			              |       |"
    print "


Press Enter to continue. "
    Console_Screen.pause     #Pause the game

end
As you can see, this method displays a message passed to it as an argument followed by a copy of the game’s Tic-Tac-Toe board.
The last of the Game class’s methods is the display_credits method, which when called will display the game’s credits, including the author’s URL. The statements that make up this method are shown next and should be added to the end of the Game class.
#This method displays information about the Ruby Tic-Tac-Toe game
def display_credits

  Console_Screen.cls  #Clear the display area

  #Thank the player and display game information
  puts "		     Thank you for playing the Ruby Tic-Tac-Toe game.


"
  puts "
			 Developed by Jerry Lee Ford, Jr.

"
  puts "				  Copyright 2007

"
  puts "			URL: http://www.tech-publishing.com


"

end
Now that both of the custom classes have been defined, it is time to initialize objects based on these classes. This is done by appending the following statements to the end of the script file.
# Main Script Logic -------------------------------------------------------

Console_Screen = Screen.new  #Instantiate a new Screen object
TTT = Game.new  #Instantiate a new Game object

#Execute the Game class's display_greeting method
TTT.display_greeting

#Execute the Game class's clear_game_board method
TTT.clear_game_board

answer = ""  #Initialize variable and assign it an empty string
In addition to instantiating the Console_Screen and TTT objects, these statements also execute the Game class’s display_greeting method and define a variable named answer, which will be used to manage the execution of a loop that prompts the player for permission to begin a new round of play.
The following statements are responsible for prompting the player for permission to start a new round of play and should be appended to the end of the script file.
#Loop until the player enters y or n and do not accept any other input
loop do

  Console_Screen.cls  #Clear the display area

  #Prompt the player for permission to start the game
  print "Are you ready to play Ruby Tic-Tac-Toe? (y/n): "

  answer = STDIN.gets  #Collect the player's answer
  answer.chop!  #Remove any extra characters appended to the string

  #Terminate the loop if valid input was provided
  break if answer =~ /y|n/i

end
These statements are controlled by a loop. Every time the loop iterates, the player is prompted to enter a value of y or n, to instruct the game whether to start a new round of play or to terminate the execution of the game. Any input other than a y or n is rejected. Once valid input is provided, a break command is executed, terminating the loop and allowing the script to continue running.
The script’s remaining statements are shown next. These statements are responsible for controlling the overall execution of the game.
#Analyze the player's answer
if answer == "n"  #See if the player wants to quit

  Console_Screen.cls  #Clear the display area

  #Invite the player to return and play the game some other time
  puts "Okay, perhaps another time.

"

else  #The player wants to play the game

  #Execute the Game class's display_instructions method
  TTT.display_instructions

  playAgain = ""  #Initialize variable and assign it an empty string

  loop do  #Loop forever

    #Execute the Game class's play_game method
    TTT.play_game

    loop do  #Loop forever

      Console_Screen.cls  #Clear the display area
      #Find out if the player wants to play another round
      print "Would you like to play another round? (y/n): "

      playAgain = STDIN.gets  #Collect the player's response
      playAgain.chop!  #Remove any extra characters appended to the string

      #Terminate the loop if valid input was provided
      break if playAgain =~ /n|y/i

   end

   #Terminate the loop if valid input was provided
   break if playAgain =~ /n/i

end

  #Call upon the Game class's determine_credits method
  TTT.display_credits

end
The execution of these statements is controlled by an if statement code block. If the player decides not to play, a message is displayed encouraging the player to return and play another time and the game terminates. If the player decides to play, the Game class’s display_instructions method is run. A loop then repeatedly executes the Game class’s play_game method, allowing the players to play as many times as they want. The loop continues to iterate until the players decide to quit, at which time a break command is executed, terminating the loop and allowing the display_credits method to execute.
All right! Time to save and execute the Ruby Tic-Tac-Toe script and see how things go. As long as you followed along carefully and did not skip any steps or make any typos, everything should work as expected. If, however, you run into errors, read the resulting error messages carefully to ascertain what went wrong and, if necessary, crank up Ruby’s debugger and use it to debug your script. In fact, even if your script runs just fine, you might want to go ahead and run it in the debugger anyway, just to get some additional experience working with the debugger.
In this chapter, you learned how to debug your scripts using Ruby’s built-in debugger. You learned how to set up error handlers to deal with errors when they occur. You learned about the differences among logical, syntax, and runtime errors. This chapter also introduced you to a number of debugger commands and demonstrated how to use them to set breakpoints, view variable values, and control the execution of your Ruby scripts.
Now, before you put down this book, I suggest you set aside one last block of time to make a few improvements to the Ruby Tic-Tac-Toe game by implementing the following list of challenges.