In Chapter 3, you learned a number of elementary object-oriented programming concepts, including how to define new classes and instantiate objects based on those classes. You learned how to define properties and methods within those classes and to interact with these properties and methods once you instantiated objects based on these classes. In subsequent chapters you learned how to work with an assortment of predefined Ruby classes, include the string, numeric, array, and hash classes. In this chapter, you will learn more object-oriented programming concepts, including how to initialize objects upon instantiation, restrict access to object variables using different variable scopes, overwrite class methods, and restrict access to class methods. On top of all this, you will learn how to create a new Ruby script, the Ruby Rock, Paper, Scissors game.
Specifically, you will learn:
How to pass data to new objects as they are instantiated
How to work with instance and class variables
About abstraction, encapsulation, inheritance, and polymorphism
How to override Ruby’s built-in classes
This chapter’s script project is the Ruby Rock, Paper, Scissors game. This Ruby game is a computerized version of the classic Rock, Paper, Scissors game but pits the player against the computer. There are three possible moves that the player and the computer can make: rock, paper, or scissors. After both the computer and the player have selected their moves, the results are analyzed based on the following rules.
Rock crushes scissors to win
Paper covers rock to win
Scissors cut paper to win
Matching moves result in a tie
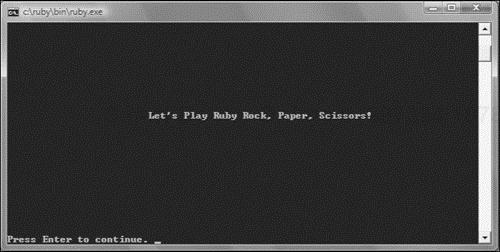
The Ruby Rock, Paper, Scissors game begins by displaying the message shown in Figure 8.1.
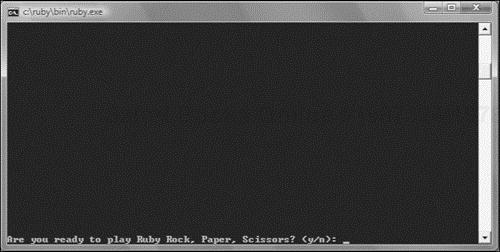
After dismissing the opening screen, the player is prompted for permission to start a new round of play, as shown in Figure 8.2.
If the player decides to play, the instructions shown in Figure 8.3 display. The instructions provide a brief overview of the rules of the game.

Once the player presses the Enter key to dismiss the game’s instructions, the screen shown in Figure 8.4 displays, prompting the player to specify a move.

As soon as the player selects a move, the game randomly selects a move on behalf of the computer. The player’s move is then compared to the computer’s move to determine the result, as demonstrated in Figure 8.5.

At the end of each round of play, the game prompts the player for permission to play again, as shown in Figure 8.6.

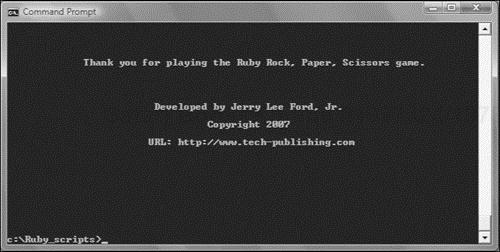
Once the player has had her fill and decides to stop playing, the screen shown in Figure 8.7 displays and the game ends.
Object-oriented programming is a key feature of Ruby. As has been stated, in object-oriented programming, data and code are stored together as objects. In Ruby, objects are created from classes. A class provides a template that specifies properties, methods, and data that are available for interacting with and controlling an object.
You have worked extensively with classes throughout this book. Ruby provides you with access to a huge collection of predefined classes. For example, you have already learned how to work with various methods belonging to the String class and various types of numeric classes to manipulate text and perform mathematic calculations. Every time you have used the puts or print method to display text, you have worked with methods belonging to the Kernel class. Arrays and hashes have their own classes as well, both of which are packed full of helpful methods.
Object-oriented programming helps to simplify the coding process by promoting code reuse, allowing you to define classes from which you can then generate any number of objects. Object-oriented programming also provides a number of other key features, including abstraction, encapsulation, inheritance, and polymorphism.
Abstraction is a term that refers to the process of organizing program code into classes. This includes the specification of both properties and methods. Using the class as a template, you can create instances of objects, as demonstrated here.
class Automobile

  attr_accessor :color

  def drive
     puts "Vroom!!!"
  end

end
Here, a class named Automobile has been defined and assigned one property and one method. Once defined, a new object can be created from this class, as shown here.
myCar = Automobile.new
Once created, you can assign a value to the object’s color property, as shown here.
myCar.color = "Blue"
Once set, you can access the object’s color property whenever you need to. You can also execute the object’s drive method, as shown here.
puts "I love to drive my little " + myCar.color + " car."
myCar.drive
When executed, these two statements display the following results.
I love to drive my little Blue car.
Vroom!!!
Another key feature of object-oriented programming is encapsulation. Encapsulation is a programming technique that restricts access to one or more of the properties and methods defined within a class. Encapsulation helps to make script code more reliable by restricting which parts of a script can access class properties and methods. Encapsulation also supports data protection by allowing you to include additional program code that validates data passed to methods (to ensure that it meets expected criteria).
By default, any properties and methods that you add to a class are public, meaning that they can be accessed from outside of the class. To control access to the properties and methods within a class, you can insert any of the following keywords within the class.
public.Makes any properties or methods that follow publicly available throughout the script.private.Restricts access to any properties or methods that follow to just within the object itself.protected.Restricts access to any properties or methods that follow to just objects of the same class or objects of subclasses of the class.
Access to any properties or methods that are defined after the occurrence of one of these words is governed by that keyword, which remains in effect until either the end of the class is reached or a different level of encapsulation is specified. For an example of how to restrict access to a method located in a custom class, look at the following Ruby script, which prompts the user to enter the name of a superhero. In response, the script displays that hero’s secret identity (if it is known).
class Hero

  def initialize(name)
    secret_identity(name)
  end

  def display_identity
    puts "

This hero's secret identity is " + @identity + "

"
    print "Press Enter to continue."
  end

  private

  def secret_identity(name)

    if name =~ /Superman/i then
      @identity = "Clark Kent"
    elsif name =~ /Batman/i then
      @identity = "Bruce Wayne"
    elsif name =~ /Spiderman/i then
      @identity = "Peter Parker"
    else
      @identity = "Unknown"
    end

  end

end

loop do

  puts ("
" * 25)
  puts "

Welcome to the superhero identity tracker!

"
  print "Enter a superhero's name or type Q to quit: "

  input = STDIN.gets
  input.chop!

  break if input =~ /q/i

  puts ("
" * 25)
  myHero = Hero.new(input)
  myHero.display_identity

  STDIN.gets

end
Here, a class named Hero has been defined. Within the class three methods have been set up. The first method is named initialize. It executes as soon as an object is instantiated using this class. This method accepts as an argument a string representing a superhero’s name. When the method executes, it calls upon the class’s third method, passing it the superhero’s name. The second method in the class is the display_identity method, which prompts the user to type in the name of a hero. When it is called upon to execute, it displays a text string that contains a variable named @identity, which is populated with data supplied by the third method.
The third method is the secret_identity method. It is preceded by the private keyword, preventing it from being directly accessed from outside of the class. Within the method, an if code block is executed that analyzes the value of the superhero’s name to see if it matches one of several known superhero names. If a match occurs, the value of @identity is assigned a text string containing the superhero’s secret identity. If no match is found, a value of "Unknown" is assigned instead.
The rest of the script is made up of a loop that has been set up to run forever. Each time the loop repeats, it prompts the player to either enter a superhero’s name or a q, thereby terminating the execution of the script. Figure 8.8 shows the initial screen that is displayed when this example is run. As you can see, the user is prompted to enter the name of a superhero to see if the script has the hero’s secret identity on record.

After entering a name, the output shown in Figure 8.9 displays. Depending on whether the script is able to determine the hero’s secret identity, either the hero’s real name is displayed or the user is told that the hero’s identity is currently unknown.

As you learned in Chapter 3, inheritance is also a key feature of object-oriented programming. Inheritance occurs when one class is derived from another class. The derived class, sometimes referred to as the child class, inherits all of the properties and methods of the parent class. In addition, you can modify any inherited properties and methods or even add new ones to customize the child class.
With inheritance, it is possible to build an entire family of classes consisting of parents, children, siblings, grandchildren, and so on. When defining classes using inheritance, programmers place properties and methods common to all classes in the top-most class, thus allowing all classes derived from this class to inherit them and place properties and methods specific to individual classes within those classes. The advantage of this approach is that it not only allows you to customize classes as you see fit but it also helps to simplify the development and maintenance of Ruby scripts. As a result, if you need to make a change to a method that is a common method, all you have to do is change it in the parent class and all classes derived from that class will automatically inherit that change.
As a demonstration of how inheritance works, take a look at the following script.
class Hero

  attr_accessor :power, :weakness

  def catch_phrase
   print "Halt in the name of the law! "
  end

end

class UnderDog < Hero

  def bark
    puts "Woof!"
  end

end

class Superman < Hero
  attr_accessor :cape
end

class Batman < Hero
  attr_accessor :mask
end

UD = UnderDog.new
SM = Superman.new
BM = Batman.new

SM.power = "Flight"
SM.weakness = "Kryptonite"
SM.cape = "red"

SM.catch_phrase
puts "Or I will fly over there in my " + SM.cape + " cape and capture you!"
Here, a class named Hero has been created that defines two properties and a method. Next, a new class named UnderDog has been defined as a child class of the Hero class. The UnderDog class is then assigned an additional method. Two additional classes are then created that, like the UnderDog class, inherit all of the properties and methods from the Hero class. Unique properties have been included in the definitions for both of these classes.
Finally, three objects are instantiated, one from each class, and the object based on the Superman class is then assigned various property assignments, after which its catch_phrase method is executed, resulting in the following output.
Halt in the name of the law! Or I will fly over there in my red cape and
capture you!
Yet another object-oriented programming feature is polymorphism. Polymorphism is the ability to define something in different forms. One way that this is implemented within Ruby is in Ruby’s ability to execute the same method on many different types of objects and to get results that are appropriate for each type of object. An excellent example of this type of behavior is provided by Ruby’s + method. When used to work with two strings, the + method concatenates the two strings together, as demonstrated here.
puts "Once upon " + "a time in a far away land..."
When executed, this statement displays the following output.
Once upon a time in a far away land...
When used with two numbers, the + method adds them together, as demonstrated here:
puts 5 + 4
When executed, this statement displays a value of 9.
When used with two arrays, the + method merges them together to create a new array, as demonstrated here:
x = [1, 2, 3] + [4, 5, 6]
puts x.inspect
When executed, this statement displays the following output.
[1, 2, 3, 4, 5, 6]
Should you have a need to use it, this type of polymorphic programming can be easily replicated in your own custom methods, as demonstrated here:
class Hero
  attr_accessor :power, :weakness
  def catch_phrase
    puts "Here I come to save the day!"
  end
end

class UnderDog < Hero
end

class Superman < Hero
  def catch_phrase
    puts "Up, up and away!"
  end
end

class Batman < Hero
  def catch_phrase
    puts "Quick, to the batcave!"
  end
end
Here, a class named Hero has been defined and assigned two properties and one method named catch_phrase. Next, three child classes are created based on the Hero class. The first child class is name UnderDog and it simply inherits the properties and methods of its parent class. The next two classes inherit these same features but then overwrite the catch_phrase method with their own custom version of the method. As a result, if you instantiate objects based on each of the three child objects, and then execute their catch_phrase methods, you will see different results.
UD = UnderDog.new
SM = Superman.new
BM = Batman.new

UD.catch_phrase
SM.catch_phrase
BM.catch_phrase
When executed this example displays the following output.
Here I come to save the day!
Up, up and away!
Quick, to the batcave!
If you want, you can instantiate an object and initialize one or more object properties in one single step. To do so, Ruby provides you with access to a special method named initialize. When included inside a class definition, the initialize method is automatically executed any time an object is instantiated. By including an initialize method in a class definition, you can pass arguments to the class when you instantiate it, and these arguments will automatically be passed to the initialize method, where they are then mapped to variables, as demonstrated in the following example.
class Noise

  def initialize(occurrences)
    @occurrences = occurrences
  end

  def make_sound
    @occurrences.times {print "a"}
  end

end
Here, a class named Noise has been set up that contains two methods. The first method is named initialize. It has been set up to process a single argument, which it then assigns to a variable named @occurrences. The second method is named make_sound. When called, it plays a beep sound a specified number of times, as determined by the value assigned to @occurrences.
Hint

@occurrences is an example of an instance variable. It restricts variable access to the object in which it resides. You’ll learn more about instance variables a little later in this chapter.
Like any class, you may instantiate as many object instances of it as you want. The following statements instantiate two objects based on the Noise class.
shortSound = Noise.new(1)
longSound = Noise.new(10)
The first statement creates an object named shortSound, using the new method to create a new instance of the Noise object. Note that a value of 1 has been passed as an argument. As a result, when the new object is created, @occurrences is assigned a value of 1, and the times method, located in the make_sound method, will play the beep sound one time.
The second statement creates a variable named longSound. The only difference between this object and the shortSound object is that the longSound object will play the beep sound 10 times when the make_sound method is called. Once both objects have been instantiated, you can call upon them to execute, as shown here.
shortSound.make_sound
STDIN.gets
longSound.make_sound
Here, the shortSound object’s make_sound method is executed, playing a single beep sound after which the script pauses until the Enter key is pressed. At this time the longSound object’s make_sound method is executed, playing 10 consecutive beep sounds.
As you learned back in Chapter 3, Ruby supports four different types of variables: local, global, instance, and class. Each of these variables is capable of storing a single instance of any type of object supported by Ruby. The difference between them is the scope within which they can be accessed.
You have worked with local variables in numerous instances. A local variable is one that can be accessed only within the scope in which it is created. For example, the following example defines a class named Greeting, which contains a method named display_msg.
class Greeting

  def display_msg
    puts "Hello " + myName
  end

end
As a local variable, myName can only be accessed in the method in which it has been defined. Therefore, if you specify the use of a variable named myName, as demonstrated next, outside of the method, Ruby will regard that variable reference as being a totally different variable with its own scope.
Msg = Greeting.new
myName = "Jerry Ford"
Msg.display_msg
When executed, this example results in an Undefined local variable or method error because even though the value of myName was set in the previous statement, it remains unassigned in the Greeting class.
One way around the problem shown in the previous example is to use a global variable. Global variables are accessible throughout a Ruby script and have an unlimited scope. To create a global variable, all you have to do is precede its name with the $ character, as demonstrated in the following example.
class Greeting

  def display_msg
    puts "Hello " + $myName
  end

end

Msg = Greeting.new
$myName = "Jerry Ford"

Msg.display_msg
Since the myName variable has been changed from a local to a global variable, no errors will occur if the display_msg method is called when the following statements are executed.
Msg = Greeting.new
myName = "Jerry Ford"
Msg.display_msg
Instead, the following output is displayed.
Hello Jerry Ford
Hint
The problem with using global variables is that they go against object-oriented programming principles. Specifically, they expose data located in different parts of a script file, opening up the possibility that it might be accidentally changed from a different part of the script file. Instead, it is much better to isolate different parts of a script file from one another, limiting access to variables to just the parts of the script that need to access them. Following this practice results in more modular code that is less prone to error and easier to maintain. Instead of using global variables to make the previous example work, it is a better idea to use local variables and to pass any values needed in different parts of a script as arguments, as demonstrated here:
class Greeting

  def display_msg(userName)
    puts "Hello " + userName
  end

end

Msg = Greeting.new
name = "Jerry Ford"

Msg.display_msg(name)
Here, a value is assigned to a variable called name, which is then passed an argument to the display_msg method. This method then uses userName, which is local to the method, to display the following output.
Hello Jerry Ford
When working with variables that are defined within different methods belonging to the same class definition, it can sometimes be helpful to increase variable scope of variables to allow them to be referenced by all methods residing inside the class definition. This approach still keeps pretty tight control over variable scope while making it easier to work with variables within objects instantiated from those classes. For example, earlier in this chapter you looked at a class named Noise, which contains two methods, initialize and make-sound. These two methods needed to share access to an argument passed during object instantiation. To accommodate this requirement, an instance variable was used, as shown here:
class Noise

  def initialize(occurrences)
    @occurrences = occurrences
  end

  def make_sound
    @occurrences.times {print "a"}
  end

end
Instance variables begin with the @ character, global variables begin with the $ character, and local variables begin with a letter or underscore character.
The last type of variable supported by Ruby is the class variable. Class variables are similar to instance variables except that whereas the scope of instance variables is limited to the object they are defined in, class variables are accessible to all instances of the same class.
Class variable names are easily identified because they begin with the @@ characters, as demonstrated in the following example.
class Superman

  def initialize

    if defined?(@@myHero) then
        puts "Error: Only one instance of Superman is permitted at a time."
    else
        @@myHero = "Is alive"
        puts "Up, up and away!"
    end

   end

end
Here, a class named Superman has been defined. The class contains a single method named initialize, which automatically executes when an object is created using this class. The following statement creates an object based on the Superman class.
clarkKent = Superman.new
When executed, the clarkKent object creates a class variable named @@myHero and assigns it a value. If an attempt is made to create a second object based on the Superman class, as demonstrated next, an error message will be displayed.
louisLane = Superman.new
The error message is displayed because of the @@myHero variable, which is accessible to any objects created from the Superman class and is found using the defined? operator.
Ruby is a true object-oriented programming language. Everything is viewed as an object, even strings and numbers. For example, using the class method, you can display the object type for any object, as demonstrated here:
irb(main):001:0> puts "Hello".class
String
Likewise, you can use the class method to display the object type for different types of numeric objects, as demonstrated here:
irb(main):002:0> puts 1.class
Fixnum

irb(main):003:0> puts 1.1.class
Float
When you create objects that match up against a predefined Ruby class, such as a string, number, array, or hash, you instantly get access to all of the predefined methods that Ruby defines for those objects because your objects automatically inherit the properties and methods belonging to these classes. As a result, your programming experience is significantly simplified because you do not have to reinvent the wheel with every new Ruby script you write. For example, since every array automatically has access to all the methods defined by the Array class, you can sort the contents of an array by calling on the Array class’s sort method. As such, you have instant access to reliable source code that works without errors. Best of all, you didn’t have to take the time required to write your own custom sort method. You can even chain together different object’s methods to pass one method’s output to another method as input, as demonstrated here:
myArray = [2, 8, 3, 5, 1]
puts myArray.sort.reverse.inspect
Here, the first statement creates an array object named myArray and assigns it a collection of numbers in no particular order. The second statement chains together a series of array methods that sorts the contents of the array, reverses their order, and then displays them as a string.
[8, 5, 3, 2, 1]
The advantage of chaining together methods in this manner is that you can perform power actions with a minimal amount of programming code. The less code you have to write, the lower the chances you’ll make an error, and the easier your Ruby scripts are to maintain. You can also include your own custom functions as part of a chain.
Ruby is an exceptionally flexible programming language, so much so that you can even modify its parts by removing, redefining, or adding to them. Ruby unleashes you from a strict set of limits, allowing you to customize the language to suit your own preferences and needs. For example, you can add more operator methods to Ruby’s Numeric class. In Ruby, mathematical calculations are typically performed by defining an expression like the one shown here:
x = 1 + 3
Here, a variable named x is assigned the value returned by the expression of 1+ 3. The following statement demonstrates another way of formulating the previous example.
x = 1.+ 3
Here, a value of 4 is assigned to x using an expression that uses dot notation to execute the Numeric class’s + method, adding 1 and 3 together. If you want to, you can add new methods to the Numeric class that you can use in place of Ruby’s +, –, *, , and other related methods, as demonstrated here:
class Numeric
  def add(x)
    self.+(x)
  end
end
Hint
Take note of the use of the word self in the previous example. Self is used here as a shorthand way of referring to the current object.
Here, a custom class named Numeric has been defined, which contains a single method named add. By adding this class to a Ruby script, you can use the newly defined add method in place of the + method to perform addition, as demonstrated here:
x = 1.add 3
When executed, this statement will set x equal to 4.
If you want, you can expand the custom Numeric class to include a range of additional common mathematical operators that use English names, as shown here:
class Numeric

  def add(x)
    self.+(x)
  end

  def subtract(x)
    self.-(x)
  end

  def multiply(x)
    self.*(x)
  end

  def divide(x)
    self./(x)
  end


endOkay, now it is time to turn your attention back to the development of this chapter’s game project, the Ruby Rock, Paper, Scissors game. This game is a computerized version of the classic Rock, Paper, Scissors game in which the player is challenged to go head-to-head against the computer.
As with all of the game projects covered so far in this book, the development of the Ruby Rock, Paper, Scissors game will follow a specific series of steps, as outlined here.
Open your text or script editor and create a new file.
Add comment statements to the beginning of the script file to document the script and its purpose.
Define a class representing the Rock, Paper, Scissors game.
Define the
display_greetingmethod.Define the
display_instructionsmethod.Define the
play_gamemethod.Define the
get_player_movemethod.Define the
get_computer_movemethod.Define the
analyze_resultsmethod.Define the
display_resultsmethod.Define the
display_creditsmethod.Initialize script objects.
Get permission to start the game.
Control overall game play.
As you follow along, make sure that you do not skip a step and that you look out for typos.
The first step in the development of the Ruby Rock, Paper, Scissors game is to open your favorite text or script editor and create and save a new Ruby script file. Name this file RPS.rb and store it in the same folder as the rest of your Ruby script files.
The next step in the development of the Ruby Rock, Paper, Scissors game is to add the following comment statements to the beginning of the file. These statements provide high-level documentation about the script and its author.
#--------------------------------------------------------------------------
#
# Script Name: RPS.rb
# Version:     1.0
# Author:      Jerry Lee Ford, Jr.
# Date:        October 2007
#
# Description: This Ruby game is a computerized version of the classic
#              Rock, Paper, Scissors game in which the player
#              goes head-to-head against the computer.
#
#--------------------------------------------------------------------------
The Ruby Rock, Paper, Scissors game will make use of two custom classes. These classes will provide access to a collection of methods that are required to control the game and interact with the player. Next are the script statements for the first of these two classes.
# Define custom classes ---------------------------------------------------

#Define a class representing the console window
class Screen

  def cls  #Define a method that clears the display area
    puts ("
" * 25)  #Scroll the screen 25 times
    puts "a"   #Make a little noise to get the player's attention
  end

  def pause     #Define a method that pauses the display area
    STDIN.gets   #Execute the STDIN class's gets method to pause script
                 #execution until the player presses the Enter key
  end

end
These statements make up the Screen class, which is responsible for providing methods that control the clearing of the console screen and the pausing of the game.
The script’s second custom class is the Game class. It contains eight methods that provide access to an assortment of functionality. To begin the development of the Game class, you will need to append the following statements to the end of the script file.
#Define a class representing the Ruby Rock, Paper, Scissors game
class Game

end
The first of the Game class’s methods is the display_greeting method. This method is responsible for displaying the game’s opening welcome message. The statements that make up this method are listed next and should be inserted between the class’s opening and closing statements.
#This method displays the game's opening message
def display_greeting

  Console_Screen.cls  #Clear the display area

  #Display welcome message
  print "			Let's Play Ruby Rock, Paper, Scissors!" +
  "


Press Enter to " +
              "continue. "

  Console_Screen.pause       #Pause the game

endThe next method that is defined within the Game class is the display_instructions method. Its statements are shown next and should be inserted into the Game class, immediately after the display_greeting method.
#Define a method to be used to present game instructions
def display_instructions

  Console_Screen.cls       #Clear the display area
  puts "INSTRUCTIONS:

"  #Display a heading

  #Display the game's instructions
  puts "This game pits the player against the computer. To play, you must"
  puts "enter one of the following moves when prompted: Rock, Paper, or"
  puts "Scissors.

"
  puts "The game will then randomly select a move for the computer and "
  puts "the result of the game will be analyzed according to the following"
  puts "rules.

"
  puts "* Rock crushes Scissors, Rock equals Rock, and Rock is covered by"
  puts "  Paper

"
  puts "* Paper covers Rock, Paper equals Paper, and Paper is cut by"
  puts "  Scissors

"
  puts "* Scissors cut Paper, Scissors equals Scissors, and Scissors are"
  puts "  crushed by Rock.


"
  puts "Good luck!


"
  print "Press Enter to continue. "
  Console_Screen.pause       #Pause the game


end
As you can see, this method displays the game’s instructions using a series of puts statements.
The third of the Game class’s methods is the play_game method. The statements that make up this method are shown next and should be inserted into the Game class, immediately after the display_instructions method.
#Define a method to control game play
def play_game

  Console_Screen.cls       #Clear the display area

  #Call on the method responsible for collecting the player's move
  playerMove = get_player_move

  #Call on the method responsible for generating the computer's move
  computerMove = get_computer_move

  #Call on the method responsible for determining the results of the game
  result = analyze_results(playerMove, computerMove)

  #Call on the method responsible for displaying the results of the game
  display_results(playerMove, computerMove, result)

end
The statements that make up this method are responsible for managing the overall execution of an individual round of play. As you can see, this is accomplished through a series of calls to other methods. The calls to the playerMove and computerMove methods retrieve the player’s and the computer’s moves, which are then passed to the analyze_results method. This method determines the winner of the current round of play and passes back its result. This result is then passed to the display_results method, which informs the player of the result.
The next method defined within the Game class is the get_player_move method. The statements that make up this method are shown next and should be inserted into the Game class, immediately after the play_game method.
#Define the method responsible for collecting the player's move
def get_player_move

  Console_Screen.cls       #Clear the display area

  loop do  #Loop forever

    Console_Screen.cls  #Clear the display area

    #Prompt the player to select a move
    puts "Enter a move and press Enter:

"
    print "[Rock] [Paper] [Scissors]: "

    @choice = STDIN.gets  #Collect the player's answer
    @choice.chop!  #Remove any extra characters appended to
                          #the string

    #Terminate the loop if valid input was provided
    break if @choice  =~ /Rock|Paper|Scissors/i

  end

  #Convert the player move to uppercase and return it to the calling
  #statement
  return @choice.upcase

end
This method is responsible for collecting the player’s move. It does so using a loop that runs forever. Each time the loop repeats, it displays a prompt that instructs the player to respond by entering a move (Rock, Paper, or Scissors). The player’s input is analyzed using a regular expression. If the player’s input matches one of the three words listed in the regular expression, the break command is executed, terminating the loop and allowing the game to continue. If, on the other hand, the player fails to provide valid input, the break command is not executed and the loop repeats, prompting the player to try again.
The next method defined within the Game class is the get_computer_move method. The statements that make up this method are shown next and should be inserted into the Game class, immediately after the get_player_move method.
#Define the method responsible for making the computer's move
def get_computer_move

  #Define an array containing a list of three possible moves
  moves = ["ROCK", "PAPER", "SCISSORS"]

  #Generate and return a random number between 0 and 2
  randomNo = rand(3)

  #Return a randomly selected move to the calling statement
  return moves[randomNo]

end
This method is responsible for generating a move on behalf of the computer. This is accomplished using the rand method to generate a random number between 0 and 2. This number is then used to retrieve one of three moves stored in an array named moves. Once a move has been selected, it is returned to the statement that called upon the get_computer_move method.
The next method defined within the Game class is the analyze_results method. This method is responsible for comparing the player’s move and the computer’s move, passed to the method as arguments, to determine the results of the current round of play. The statements that make up this method are shown next and should be inserted into the Game class, immediately after the get_computer_move method.
#Define the method responsible for analyzing and returning the result of
#the game
def analyze_results(player, computer)

  #Analyze the results of the game when the player selects ROCK
  if player == "ROCK" then
    return "Player wins!" if computer == "SCISSORS"
    return "Tie!" if computer == "ROCK"
    return "Computer wins!" if computer == "PAPER"
  end

  #Analyze the results of the game when the player selects PAPER
  if player == "PAPER" then
    return "Player wins!" if computer == "ROCK"
    return "Tie!" if computer == "PAPER"
    return "Computer wins!" if computer == "SCISSORS"
  end

  #Analyze the results of the game when the player selects SCISSORS
  if player == "SCISSORS" then
    return "Player wins!" if computer == "PAPER"
    return "Tie!" if computer == "SCISSORS"
    return "Computer wins!" if computer == "ROCK"
  end


end
As you can see, this method consists of three conditional tests that evaluate the player’s and computer’s moves to determine whether the game was won, lost, or tied. Based on the result of this analysis, a text string is returned back to the statement that called upon the method to execute.
The next method defined within the Game class is the display_results method. This method is responsible for displaying the results of the game, as passed to it as an argument, along with the player’s and the computer’s moves. The statements that make up this method are shown next and should be inserted into the Game class, immediately after the analyze_results method.
#Define the method responsible for displaying the result of the game
def display_results(player, computer, result)

  #Display arguments passed to the method using the following template
  Console_Screen.cls       #Clear the display area
  puts "

			RESULTS:"
  puts "

			============================="
  puts "

			Your move:      " + player
  puts "

			Computer move:  " + computer
  puts "

			Result:         " + result
  puts "

			============================="
  puts "


"
  print "Press Enter to continue. "
  Console_Screen.pause       #Pause the game

end
The last method defined within the Game class is the display_credits method. This method displays additional information about the game, including the developer’s URL. The statements that make up this method are shown next and should be appended to the end of the Game class, just before its closing end statement.
#This method displays information about the Ruby Rock, Paper, Scissors game
def display_credits

  Console_Screen.cls  #Clear the display area

  #Thank the player and display game information
  puts "	    Thank you for playing the Ruby Rock, Paper, Scissors game."
  puts "


"
  puts "
			 Developed by Jerry Lee Ford, Jr.

"
  puts "				  Copyright 2007

"
  puts "			URL: http://www.tech-publishing.com


"

end
Now that both of the script’s custom classes have been defined and populated with their respective methods, it is time to instantiate instances of both classes. This is accomplished by appending the following statements to the end of the script file.
# Main Script Logic -------------------------------------------------------

Console_Screen = Screen.new  #Instantiate a new Screen object
RPS = Game.new                    #Instantiate a new Game object

#Execute the Game class's display_greeting method
RPS.display_greeting

answer = ""  #Initialize variable and assign it an empty string
In addition to instantiating the Console_Screen and RPS objects, these statements define a variable named answer and assign it an empty string as an initial value. This variable will be used to control the execution of the loop defined in the next section.
The script statements responsible for prompting the player for permission to start a new round of play are outlined here:
#Loop until the player enters y or n and do not accept any other input
loop do

  Console_Screen.cls  #Clear the display area

  #Prompt the player for permission to start the game
  print "Are you ready to play Ruby Rock, Paper, Scissors? (y/n): "

  answer = STDIN.gets  #Collect the player's answer
  answer.chop!  #Remove any extra characters appended to the string

  #Terminate the loop if valid input was provided
  break if answer =~ /y|n/i

end
As you can see, a loop has been set up to control the execution of statements that prompt the player for permission to start a round of play. At the end of each iteration of the loop, a regular expression is used to evaluate the player’s input, executing the break command if that input is valid.
The rest of the Ruby Rock, Paper, Scissors script is made up of the statements shown here. These statements are responsible for managing the overall execution of the game.
#Analyze the player's answer
if answer == "n"  #See if the player wants to quit

  Console_Screen.cls  #Clear the display area
  #Invite the player to return and play the game some other time
  puts "Okay, perhaps another time.

"

else  #The player wants to play the game

    #Execute the Game class's display_instructions method
    RPS.display_instructions

  playAgain = ""

  loop do  #Loop forever

    #Execute the Game class's play_game method
    RPS.play_game

    loop do  #Loop forever

      Console_Screen.cls  #Clear the display area
      #Find out if the player wants to play another round
      print "Would you like to play again? (y/n): "

      playAgain = STDIN.gets  #Collect the player's response
      playAgain.chop!  #Remove any extra characters appended to the string

      #Terminate the loop if valid input was provided
      break if playAgain =~ /n|y/i

    end

    #Terminate the loop if valid input was provided
    break if playAgain =~ /n/i

  end

  #Call upon the Game class's determine_credits method
  RPS.display_credits

end
As you can see, these statements are controlled by an if code block. If the player elects not to play the game, a message is displayed that invites the player to return and play another time. If instead the player decides to play, the Game class’s display_instructions method is called on to execute. Next a loop is set up to control the overall execution of the game. Within the loop the Game class’s play_game method is called, starting a new round of play. Once the play_game method has finished, the loop resumes execution and prompts the player to play again. Once the player decides to stop playing, the break command is executed, terminating the loop. This allows the display_credits method to execute after which the game ends.
All right, you now have everything you need to complete the development of the Ruby Rock, Paper, Scissors game. If you have not done so yet, save your new Ruby script. As long as you have followed along carefully with each of the previously discussed steps, and you didn’t make any inadvertent typing errors along the way, your new scripts should be ready for testing. As you test the Ruby Rock, Paper, Scissors game, begin by playing it exactly as the game should be played. Once you are confident that everything is working correctly, try playing the game the wrong way, feeding in inappropriate input to ensure that the game handles it appropriately.
In this chapter, you learned a lot more about Ruby’s support for object-oriented programming. This included learning about programming concepts such as abstraction, inheritance, encapsulation, and polymorphism. You learned how to initialize objects upon instantiation and how to work with instance and class variables. You also learned how to modify Ruby by developing your own version of various Ruby class methods.
Now, before you move on to Chapter 9, “File and Folder Administration,” I suggest you set aside a little extra time to make a few improvements to the Ruby Rock, Paper, Scissors game by implementing the following list of challenges.