One of the features most requested by the Silverlight community has been client-side printing support. Silverlight 4 includes a new printing API that allows developers to enable client printing from a Silverlight application. In this chapter, we will explore the new printing API and run through some exercises to see printing in action.
The primary class that controls printing from a Silverlight application is the PrintDocument class. Let's take a look at the PrintDocument class and its members.
The action of opening the print dialog box and printing is initiated by the Print method. This method triggers three events in the following order: The BeginPrint event is fired when the print dialog box displays successfully and the user selects print. Once the printing process begins, the PrintPage event is fired as each page prints. The EndPrint event is fired when the printing process is complete or when the printing job has been cancelled by the user. If there was an error while printing, the Error property of the EndPrintEventArgs can be inspected.
When the PrintPage event fires, what will be printed is determined by the PrintPageEventArgs.PageVisual property. You can either set the PageVisual property to a UIElement contained within your XAML content, or you can construct your own XAML content dynamically and set that content to the PageVisual. Let's walk through two exercises, one for each of these options.
In this example we'll create a very simple Silverlight application with a DataGrid that displays contacts, and we'll add printing functionality.
Create a new Silverlight application in Visual Studio 2010. Name it
SimplePrintingand allow Visual Studio to create an ASP.NET web application calledSimplePrinting.Web.When the project is created, you should be looking at the
MainPage.xamlfile. Change theLayoutRootitem to be aStackPanel, add aTextBlockwith theTextproperty set to "Contacts," and set theFontWeightproperty toBold. Next, add aDataGridnamedContactGrid. Note that for theDataGridyou must have a reference to the Silverlight SDK as explained in Chapter 5. Below theDataGridadd a nested horizontalStackPanelcontaining two buttons. The content should be "Print As-Is" for the first button and "Print Formatted" for the second.<StackPanel x:Name="LayoutRoot" Background="White"><TextBlock Text="Contacts" FontWeight="Bold" /><sdk:DataGrid Name="ContactGrid" /><StackPanel Orientation="Horizontal"><Button Content="Print As-Is" /><Button Content="Print Formatted" /></StackPanel></StackPanel>Next let's add some styles to improve the look of the application. We will add three implicit styles (as discussed in Chapter 12).
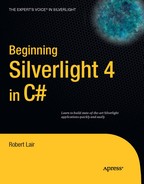
<UserControl x:Class="SimplePrinting.MainPage" xmlns="http://schemas.microsoft.com/winfx/2006/xaml/presentation" xmlns:x="http://schemas.microsoft.com/winfx/2006/xaml" xmlns:d="http://schemas.microsoft.com/expression/blend/2008" xmlns:mc="http://schemas.openxmlformats.org/markup-compatibility/2006" xmlns:sdk="http://schemas.microsoft.com/winfx/2006/xaml/presentation/sdk" mc:Ignorable="d" d:DesignHeight="300" d:DesignWidth="400"><UserControl.Resources><Style TargetType="Button"><Setter Property="Margin" Value="5" /></Style><Style TargetType="sdk:DataGrid"><Setter Property="Margin" Value="5" /></Style><Style TargetType="TextBlock"><Setter Property="Margin" Value="5" /><Setter Property="FontSize" Value="18" /></Style></UserControl.Resources><StackPanel x:Name="LayoutRoot" Background="White"> <TextBlock Text="Contacts" FontWeight="Bold" /> <sdk:DataGrid Name="ContactGrid" /> <StackPanel Orientation="Horizontal"> <Button Content="Print As-Is" /> <Button Content="Print Formatted" /> </StackPanel> </StackPanel> </UserControl>At this point, the application should look like what's shown in Figure 15-1.
Next we need to wire up an event handler for each button's
Clickevent. First we'll set theClickevent in the XAML. We will name the delegatesPrintAsIsandPrintFormatted.<StackPanel x:Name="LayoutRoot" Background="White"> <TextBlock Text="Contacts" FontWeight="Bold" /> <sdk:DataGrid Name="ContactGrid" /> <StackPanel Orientation="Horizontal"> <Button Content="Print As-Is" Click="PrintAsIs" /> <Button Content="Print Formatted" Click="PrintFormatted" /> </StackPanel> </StackPanel>Next we'll make certain the two event handlers are present in the code behind.
public partial class MainPage : UserControl { public MainPage() { InitializeComponent(); } private void Button_Click(object sender, RoutedEventArgs e) { }private void PrintAsIs(object sender, RoutedEventArgs e){}private void PrintFormatted(object sender, RoutedEventArgs e){}}Now we need to define the data that we'll bind to our
ContactGrid. First, create a simple class calledContactthat contains four simple string properties:Name, Address, CityStateZip, andPhone.public class Contact { public string Name { get; set; } public string Address{ get; set; } public string CityStateZip{ get; set; } public string Phone{ get; set; } }After the
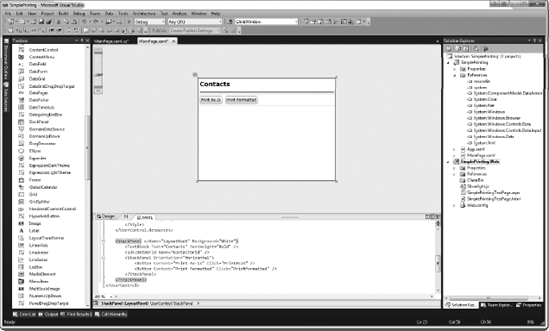
Contactclass has been defined, we need to add the actual data to theDataGrid. We will do this in theLoadedevent, so first we need to create a delegate to handle the event. Then we can add our data.public partial class MainPage : UserControl {List<Contact> Contacts;public MainPage() { InitializeComponent();this.Loaded += new RoutedEventHandler(MainPage_Loaded);}void MainPage_Loaded(object sender, RoutedEventArgs e){Contacts = new List<Contact>();Contacts.Add(new Contact() {Name = "John Doe",Address = "123 Driveway Road",CityStateZip = "SomeCity, OH 12345",Phone = "(123) 456-7890"});Contacts.Add(new Contact(){Name = "Jane Doe",Address = "456 Windy Road",CityStateZip = "Cityville, FL 34566",Phone = "(111) 222-3333"});ContactGrid.ItemsSource = Contacts;}private void Button_Click(object sender, RoutedEventArgs e) { } private void PrintAsIs(object sender, RoutedEventArgs e) { } private void PrintFormatted(object sender, RoutedEventArgs e) { } } public class Contact { public string Name { get; set; } public string Address{ get; set; } public string CityStateZip{ get; set; } public string Phone{ get; set; } }Let's test the application now to make sure we have the data binding properly. Press F5 to debug the application; it should appear as shown in Figure 15-2.
Now we need to add the printing logic to our application. In this example, we'll simply print what we see on the screen by setting the
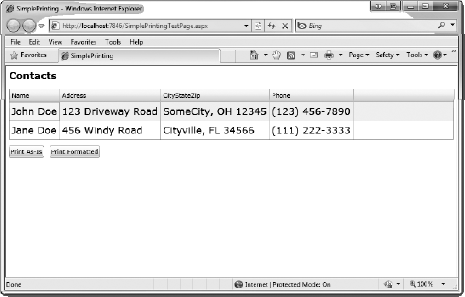
PageVisualto theLayoutRoot. To start, create an instance of thePrintDocumentobject in thePrintAsIsdelegate. ThePrintDocumentobject belongs to theSystem.Windows.Printingnamespace, so you'll need to add theusing System.Windows.Printingstatement to the top of theMainPage.xaml.csfile, as shown in Figure 15-3.Next we'll wire up the
PrintPageevent. We can do this by defining a separate delegate, or we can use a lambda expression to define the delegate logic inline. In this example we'll use the latter.private void PrintAsIs(object sender, RoutedEventArgs e) { PrintDocument doc = new PrintDocument();doc.PrintPage += (s, args) =>{};}After wiring up the
PrintPageevent, call thePrint()method, which essentially calls thePrintPagelogic. ThePrint()method requires a document name be passed, so pass in "As Is" as the name of the printed document.private void PrintAsIs(object sender, RoutedEventArgs e) { PrintDocument doc = new PrintDocument(); doc.PrintPage += (s, args) => { };doc.Print("As Is");}Now we just need to add the logic to our
PrintPagelambda expression. Since we're just printing the content as we see it on the screen, we simply set thePageVisualproperty to theLayoutRootto tell Silverlight to print all of the XAML content contained in the application. ThePageVisualproperty belongs to thePrintPageEventArgsclass and is passed into thePrintPageevent delegate.private void PrintAsIs(object sender, RoutedEventArgs e) { PrintDocument doc = new PrintDocument(); doc.PrintPage += (s, args) => {args.PageVisual = LayoutRoot;}; doc.Print("As Is"); }Press F5 now to test the application. When the application is displayed, press the "Print As-Is" button, which will display the Print dialog as shown in Figure 15-4.
Select the desired printer and press Print. If all goes well, the content that is printed should be just as you see on the screen in Figure 15-5.


It may not always be ideal to print application content just as displayed on the screen. Fortunately, however, you can print custom content. Because you have to set the PageVisual property in order to print, you can simply set that to whatever content you'd like, including dynamically created content.
We will continue working from the
SimplePrintingproject we created in the previous section. In thePrintFormatteddelegate, add a new instance of thePrintDocumentclass, wire up thePrintPageevent, and call thePrintmethod.private void PrintFormatted(object sender, RoutedEventArgs e) {PrintDocument doc = new PrintDocument();doc.PrintPage += (s, args) =>{};doc.Print("Formatted Print");}Within the
PrintPageevent logic, we now need to wire up thePageVisualproperty. In the previous example, we simply set this to theLayoutRootelement, but in this case we want to customize the printed content. To do this we'll dynamically create content to set to thePageVisualproperty. We will create aStackPanelat runtime and add content to thatStackPanelfor eachContactin ourContactscollection.Add an instance of a
StackPanelcalledcustomPrintPaneland then add aforeachstatement that will step through eachContactin theContactscollection. Then, within theforeach, create anotherStackPanelto contain theContactinformation. Now add aMarginof 25 to surround the contact panel to prevent the content from appearing too close to the left margin of the printed page, as well as to keep the contacts from all stacking up together. Next insert the logic to add the contact panel to thecustomPrintPanel.Finally, outside theforeachset thePageVisualto thecustomPrintPanel.private void PrintFormatted(object sender, RoutedEventArgs e) { PrintDocument doc = new PrintDocument(); doc.PrintPage += (s, args) => {StackPanel customPrintPanel = new StackPanel();foreach (Contact c in Contacts){StackPanel contactPanel = new StackPanel();contactPanel.Margin = new Thickness(25);customPrintPanel.Children.Add(contactPanel);}args.PageVisual = customPrintPanel;}; doc.Print("Formatted Print"); }Next we need to add the contact information to the contact panel. In this example, we'll simply add a
TextBlockfor each of the contact attributes to display a plain text value.private void PrintFormatted(object sender, RoutedEventArgs e) { PrintDocument doc = new PrintDocument(); doc.PrintPage += (s, args) => { StackPanel customPrintPanel = new StackPanel();foreach (Contact c in Contacts) { StackPanel contactPanel = new StackPanel(); contactPanel.Margin = new Thickness(25);TextBlock name = new TextBlock();name.Text = c.Name;contactPanel.Children.Add(name);TextBlock address = new TextBlock();address.Text = c.Address;contactPanel.Children.Add(address);TextBlock city = new TextBlock();city.Text = c.CityStateZip;contactPanel.Children.Add(city);TextBlock phone = new TextBlock();phone.Text = c.Phone;contactPanel.Children.Add(phone);customPrintPanel.Children.Add(contactPanel); } args.PageVisual = customPrintPanel; }; doc.Print("Formatted Print"); }Now press F5 to test the application. When the application shows up, press the Print Formatted button; when you see the Print dialog, select your printer and press Print. If all goes well, the printed output should appear as shown in Figure 15-6.

There may be times when you need even more control over the printing process. One such situation would be if you wanted to provide a status notification to the user to indicate when the printing process is taking place, when it completes, and whether it was successful. Earlier in this chapter we discussed two events, BeginPrint and EndPrint. You can use these events to create code that runs before and after the printing process takes place.
We'll continue with the example we've been working with throughout this chapter and add handling for the BeginPrint and EndPrint events in order to display a message to the user about the status of the printing process.
Let's keep working with the
SimplePrintingproject we created earlier. Start by opening the XAML forMainPage.xaml.Add a new
TextBlockto theLayoutRoot StackPanelbelow the panel holding the buttons. Set theForegroundcolor toRedand theFontWeighttoBold. Name theTextBlock PrintStatus.<StackPanel x:Name="LayoutRoot" Background="White"> <TextBlock Text="Contacts" FontWeight="Bold" /> <sdk:DataGrid Name="ContactGrid" /> <StackPanel Orientation="Horizontal"> <Button Content="Print As-Is" Click="PrintAsIs" /> <Button Content="Print Formatted" Click="PrintFormatted" /> </StackPanel><TextBlock Foreground="Red" FontWeight="Bold" Text="" Name="PrintStatus" /></StackPanel>Move to the
MainPage.xaml.csfile. We are going to add to our Print Formatted functionality, so our coding will take place within thePrintFormattedevent (the click event we added to our button). Below thePrintDocumentinstantiation, we'll add two lambda expressions to handle theBeginPrintandEndPrintevents.private void PrintFormatted(object sender, RoutedEventArgs e) { PrintDocument doc = new PrintDocument();doc.BeginPrint += (s, args) =>{};doc.EndPrint += (s, args) =>{};doc.PrintPage += (s, args) => { StackPanel customPrintPanel = new StackPanel(); foreach (Contact c in Contacts) { StackPanel contactPanel = new StackPanel(); contactPanel.Margin = new Thickness(25); TextBlock name = new TextBlock(); name.Text = c.Name; contactPanel.Children.Add(name); TextBlock address = new TextBlock(); address.Text = c.Address; contactPanel.Children.Add(address); TextBlock city = new TextBlock(); city.Text = c.CityStateZip; contactPanel.Children.Add(city);TextBlock phone = new TextBlock(); phone.Text = c.Phone; contactPanel.Children.Add(phone); customPrintPanel.Children.Add(contactPanel); } args.PageVisual = customPrintPanel; }; doc.Print("Formatted Print"); }Next we'll add code to these two lambda expressions. In the
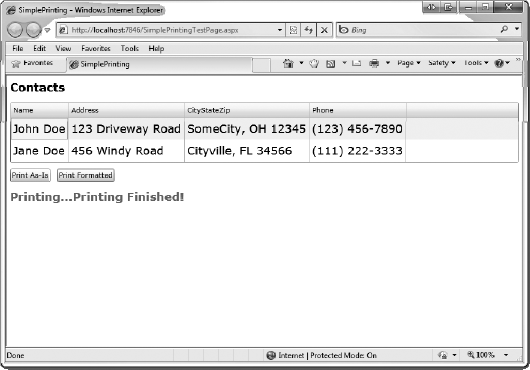
BeginPrintevent we are going to change theTextof thePrintStatus TextBlockwe added to "Printing..." so the user can see when the printing process began. In theEndPrintevent we will concatenate the phrase "Printing Finished!" to the end of thePrintStatus TextBlock. This will tell the user when the printing process is complete.private void PrintFormatted(object sender, RoutedEventArgs e) { PrintDocument doc = new PrintDocument();doc.BeginPrint += (s, args) =>{PrintStatus.Text = "Printing...";};doc.EndPrint += (s, args) =>{PrintStatus.Text += "Printing Finished!";};... }Now press F5 to test the application. When the application opens, click on the Print Formatted button. When the print dialog opens, select your printer and press Print. You'll see the status text displayed as shown in Figure 15-7.
In this chapter, we looked at the Silverlight printing API. We saw how to easily print content as it appears on the screen, as well as how to print custom content. As you saw, the new printing API lets you add rich printing functionality to your Silverlight applications. In the next chapter we will take a look at deploying Silverlight applications.