
Chapter 3: Choosing the Right Settings for Your Camera
This chapter covers the buttons and modes available on your camera. Some options adjust the exposure, focus, drive, and white balance. Your camera has 12 mode options on the dial, and another three are available under Special Scene mode ( ![]() ). The Creative Zone modes are for the more advanced photographer, while the Basic Zone modes were designed for the beginner, or photographers who prefer to point and shoot. Each mode is best for a particular scene or situation, so it is helpful to understand what they do and how they benefit your photographs. Some types of photography look best with a large depth of field, while others require fast shutter speeds. Focus modes help keep your subject in or out of focus. White balance enables you to get the best colors out of a scene. Flash modes help you control the most important element in photography — light.
). The Creative Zone modes are for the more advanced photographer, while the Basic Zone modes were designed for the beginner, or photographers who prefer to point and shoot. Each mode is best for a particular scene or situation, so it is helpful to understand what they do and how they benefit your photographs. Some types of photography look best with a large depth of field, while others require fast shutter speeds. Focus modes help keep your subject in or out of focus. White balance enables you to get the best colors out of a scene. Flash modes help you control the most important element in photography — light.

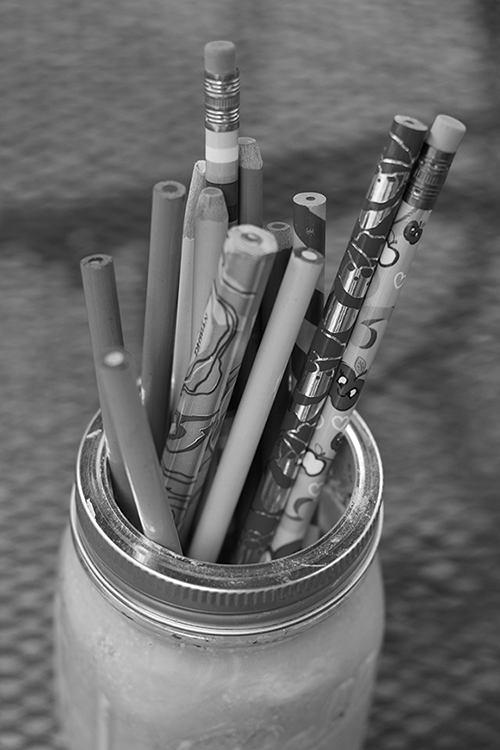
The right camera settings help you accurately capture the world around you.
The Basic Zone Modes
Portraits, landscapes, and sports photography all require different settings to create the best photograph. Your camera has some excellent modes to help you achieve this. The automatic modes are easily identified by their corresponding icons. Each Basic Zone mode allows you to adjust some functions, such as the drive mode. To review which options are available, press the Quick Control/Print button ( ![]() ). The Basic Zone modes are easy to use — just press the shutter button for a proper exposure.
). The Basic Zone modes are easy to use — just press the shutter button for a proper exposure.

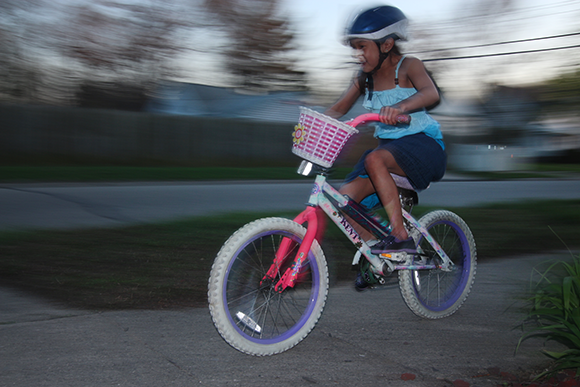
3.1 The Basic Zone modes make it easy for you to take a photo — all you have to do is press the shutter button.
The following are the Basic Zone modes on the Canon T5i/700D:
• Scene Intelligent Auto mode ( ![]() ). This is the ultimate program mode. It analyzes the scene and sets the shutter, aperture, ISO, white balance, and focus modes to take the best photograph. It uses all nine focus zones to focus on the closest object in the frame. If the camera detects a moving subject, it switches to the AI Servo AF mode (
). This is the ultimate program mode. It analyzes the scene and sets the shutter, aperture, ISO, white balance, and focus modes to take the best photograph. It uses all nine focus zones to focus on the closest object in the frame. If the camera detects a moving subject, it switches to the AI Servo AF mode ( ![]() ) to follow focus. Follow focus means that as you follow a moving subject, the camera continues to refocus to keep the subject sharp. The camera uses the flash when necessary, such as when it is dark and in backlit situations. If you want to lock focus, press the shutter button halfway and recompose.
) to follow focus. Follow focus means that as you follow a moving subject, the camera continues to refocus to keep the subject sharp. The camera uses the flash when necessary, such as when it is dark and in backlit situations. If you want to lock focus, press the shutter button halfway and recompose.
When using the pop-up flash, you should stand at least 3.3 feet away from the subject to expose it properly. If you are too close, the bottom of the photo may be dark, especially if you are using a lens hood.
• Flash Off mode ( ![]() ). If you don’t want your flash to turn on at any time, use the Flash Off mode (
). If you don’t want your flash to turn on at any time, use the Flash Off mode ( ![]() ). This mode is the same as the Scene Intelligent Auto shooting mode (
). This mode is the same as the Scene Intelligent Auto shooting mode ( ![]() ) without the flash. It is helpful when shooting in places where flash is distracting or not allowed, such as at a museum. If the shutter speed display is blinking, you may want to consider using a tripod to prevent camera shake, which is common in low-light situations.
) without the flash. It is helpful when shooting in places where flash is distracting or not allowed, such as at a museum. If the shutter speed display is blinking, you may want to consider using a tripod to prevent camera shake, which is common in low-light situations.
• Creative Auto mode ( ![]() ). This setting uses the Scene Intelligent Auto mode (
). This setting uses the Scene Intelligent Auto mode ( ![]() ) as a default setting, but gives you a host of creative options. Press the Quick Control/Print button (
) as a default setting, but gives you a host of creative options. Press the Quick Control/Print button ( ![]() ) to view a screen with the Creative Auto (
) to view a screen with the Creative Auto ( ![]() ) options. From there, make adjustments using the touchscreen or traditional controls. This mode allows you to change the ambience options and control the depth of field with a convenient slider to adjust the amount of blur you want in the background. The Drive mode (
) options. From there, make adjustments using the touchscreen or traditional controls. This mode allows you to change the ambience options and control the depth of field with a convenient slider to adjust the amount of blur you want in the background. The Drive mode ( ![]() ), Self-timer drive mode (
), Self-timer drive mode ( ![]() ), and flash controls are also available.
), and flash controls are also available.
Ambience effects are available in all Basic Zone modes except Scene Intelligent Auto ( ![]() ), Flash Off (
), Flash Off ( ![]() ), and HDR backlight (
), and HDR backlight ( ![]() ).
).
• Portrait mode ( ![]() ). This mode (
). This mode ( ![]() ) sets your aperture to the lowest possible number to create a shallow depth of field. A shallow depth of field blurs the background to separate the subject from it, which keeps the focus on your subject. This mode is for more than portraits, though. Any time you need a shallow depth of field for food, product, or pet photography, use the Portrait mode (
) sets your aperture to the lowest possible number to create a shallow depth of field. A shallow depth of field blurs the background to separate the subject from it, which keeps the focus on your subject. This mode is for more than portraits, though. Any time you need a shallow depth of field for food, product, or pet photography, use the Portrait mode ( ![]() ). Use the Quick Control/Print button (
). Use the Quick Control/Print button ( ![]() ) to adjust ambience settings, color scene filters for white balance, and drive modes. The default drive mode is Continuous shooting (
) to adjust ambience settings, color scene filters for white balance, and drive modes. The default drive mode is Continuous shooting ( ![]() ).
).
If you want to preview what the depth of field looks like, press the Depth-of-Field Preview button ( ![]() ) on the front of your camera.
) on the front of your camera.
• Landscape mode ( ![]() ). The goal of this mode is to give you the largest depth of field possible. It also boosts the blue and green saturation. In this mode, you have control over the ambience setting, color scene filters for white balance, and drive modes. Please note that Tungsten and Fluorescent options are not available in this mode.
). The goal of this mode is to give you the largest depth of field possible. It also boosts the blue and green saturation. In this mode, you have control over the ambience setting, color scene filters for white balance, and drive modes. Please note that Tungsten and Fluorescent options are not available in this mode.
The built-in flash is turned off in Landscape mode ( ![]() ).
).
When shooting landscapes, the shutter speed greatly slows down as the sun sets. Make sure that you use a tripod if the shutter speed goes below 1/30 second.
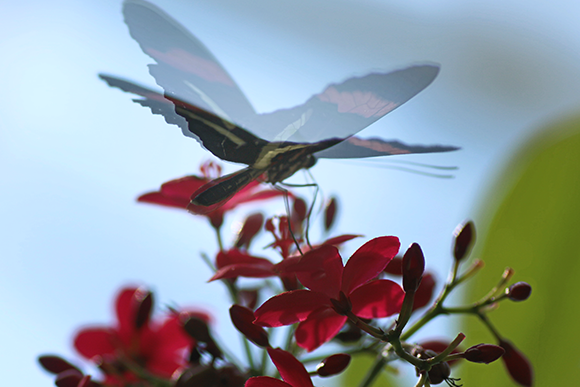
• Close-up mode ( ![]() ). This mode is designed for close-up photography, like the image shown in Figure 3.2. It is designed to strike a balance between a wide depth of field and a fast enough shutter speed to prevent camera shake. In this mode, you have control over the ambience setting, color scene filters for white balance, and shooting modes. If you are too close to your subject for the lens you are using, the Focus Confirmation light will blink.
). This mode is designed for close-up photography, like the image shown in Figure 3.2. It is designed to strike a balance between a wide depth of field and a fast enough shutter speed to prevent camera shake. In this mode, you have control over the ambience setting, color scene filters for white balance, and shooting modes. If you are too close to your subject for the lens you are using, the Focus Confirmation light will blink.

3.2 Use Close-up mode for small subjects like this butterfly. Exposure: ISO 800, f/2.8, 1/500 second, 100mm f/2.8 macro lens.
• Sports mode ( ![]() ).This mode is a good option any time you are shooting fast-moving subjects. Sports photographers like to keep the shutter at the highest speed possible with the fastest frame rate possible. The default drive mode is Continuous (
).This mode is a good option any time you are shooting fast-moving subjects. Sports photographers like to keep the shutter at the highest speed possible with the fastest frame rate possible. The default drive mode is Continuous ( ![]() ), which photographs at a rate of about 5 frames per second. You can also use Sports mode (
), which photographs at a rate of about 5 frames per second. You can also use Sports mode ( ![]() ) to photograph active children. In this mode, you have control over the ambience setting, color scene filters for white balance, and drive modes.
) to photograph active children. In this mode, you have control over the ambience setting, color scene filters for white balance, and drive modes.
• Special Scene mode ( ![]() ). To access the modes available here, press the Quick Control/Print button (
). To access the modes available here, press the Quick Control/Print button ( ![]() ), and then use the Main dial (
), and then use the Main dial ( ![]() ) to scroll through the options. The following three modes are available:
) to scroll through the options. The following three modes are available:
• Night Portrait mode ( ![]() ). This mode combines flash to freeze your subject with a lower shutter speed to expose for available light in the background. In this mode, you have control over the ambience settings and drive modes. Moving your camera while creating an exposure creates a ghosting effect. Ghosting is motion blur that often occurs when the photographer moves the camera while using a slow shutter speed with flash.
). This mode combines flash to freeze your subject with a lower shutter speed to expose for available light in the background. In this mode, you have control over the ambience settings and drive modes. Moving your camera while creating an exposure creates a ghosting effect. Ghosting is motion blur that often occurs when the photographer moves the camera while using a slow shutter speed with flash.
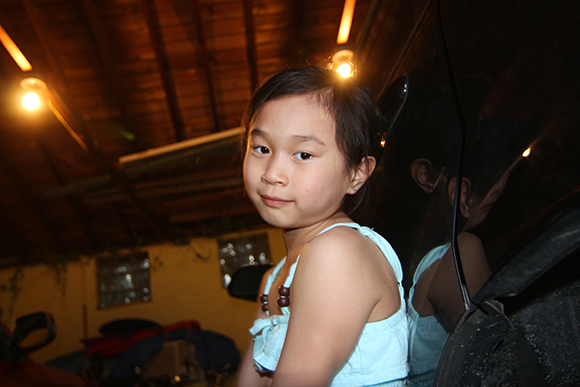
3.3 In Night Portrait mode, the camera slows the shutter speed enough to capture the lights and details in the background. It is a good option for indoor situations. Exposure: ISO 800, f/4.0, 1/25 second, 12-24mm f/4.0 lens at 20mm.
• Handheld Night Scene mode ( ![]() ). It is difficult to shoot at night because there are many dark areas that turn black in images and bright lights that easily blow out. This makes it hard to create a well-exposed image. In most cases, a tripod is necessary. The Canon T5i/700D Handheld Night Scene mode (
). It is difficult to shoot at night because there are many dark areas that turn black in images and bright lights that easily blow out. This makes it hard to create a well-exposed image. In most cases, a tripod is necessary. The Canon T5i/700D Handheld Night Scene mode ( ![]() ) is helpful when shooting at night. When you press the shutter button, the camera takes four consecutive shots. The camera then combines the four photographs to create one image. Perhaps the best part is that you don’t need a tripod. This mode is also useful when photographing city scenes and skylines. The default flash setting in this mode is Flash Off (
) is helpful when shooting at night. When you press the shutter button, the camera takes four consecutive shots. The camera then combines the four photographs to create one image. Perhaps the best part is that you don’t need a tripod. This mode is also useful when photographing city scenes and skylines. The default flash setting in this mode is Flash Off ( ![]() ). If you want to take portraits in this mode, press the Quick Control/Print button (
). If you want to take portraits in this mode, press the Quick Control/Print button ( ![]() ) and turn on the flash. The first exposure triggers the flash, so make sure to tell your subject not to move during the additional three exposures. You also have control of color scene filters and shooting modes.
) and turn on the flash. The first exposure triggers the flash, so make sure to tell your subject not to move during the additional three exposures. You also have control of color scene filters and shooting modes.

3.4 Using the Handheld Night Scene mode, the camera took four quick photos to expose for the bright lights and dark sky. Exposure: Multiple exposures, ISO 8000, 100mm f/2.8 lens.
Although the flash fires only once when it is turned on in the Handheld Night Scene mode ( ![]() ), ask your subject to remain still until the camera takes all four shots.
), ask your subject to remain still until the camera takes all four shots.
• HDR Backlight mode ( ![]() ). High Dynamic Range (HDR) exposes for both highlights and shadow detail by combining multiple photographs at different exposures. The HDR Backlight mode (
). High Dynamic Range (HDR) exposes for both highlights and shadow detail by combining multiple photographs at different exposures. The HDR Backlight mode ( ![]() ) takes three quick exposures and combines them into one image to compensate for any intense light behind your subject. For example, if you’re shooting a statue with the sun behind it and you don’t want to create a silhouette, use the HDR Backlight mode (
) takes three quick exposures and combines them into one image to compensate for any intense light behind your subject. For example, if you’re shooting a statue with the sun behind it and you don’t want to create a silhouette, use the HDR Backlight mode ( ![]() ) to improve both the highlight and shadow detail for a properly exposed photo. This mode doesn’t work in all situations, especially in extreme conditions. For example, using HDR Backlight mode (
) to improve both the highlight and shadow detail for a properly exposed photo. This mode doesn’t work in all situations, especially in extreme conditions. For example, using HDR Backlight mode ( ![]() ) with bright sun behind a dark object may not produce good results.
) with bright sun behind a dark object may not produce good results.

3.5 Three rapid shots were taken in the HDR Backlight mode and combined in the camera to create this image. Exposure: ISO 320, f/2.8, 1/640 second, 100mm f/2.8 lens.
3.6 If you handhold your camera while photographing a moving object in the HDR Backlight mode, the three images may not line up. Exposure: ISO 100, f/3.5, 1/800 second, 100mm f/2.8 lens.
Although you can handhold your camera when using the HDR Backlight mode ( ![]() ), you must remain very still. Consider using a tripod whenever possible. If you move the camera, the three images might not align correctly.
), you must remain very still. Consider using a tripod whenever possible. If you move the camera, the three images might not align correctly.
The Creative Zone Modes
If you are looking for more flexibility, the Creative Zone modes are the place to be. Sometimes, you may want a shallow depth of field for a portrait or a fast shutter speed for sports. This exposure zone gives you the options necessary to control both the shutter and aperture. For times when you are unsure, you have the Program AE mode ( ![]() ), which gives the camera the control, and allows it to use its technology to create a well-exposed photograph. None of the Creative Zone modes automatically set features such as Picture Styles, white balance, focusing modes, or the ISO (
), which gives the camera the control, and allows it to use its technology to create a well-exposed photograph. None of the Creative Zone modes automatically set features such as Picture Styles, white balance, focusing modes, or the ISO ( ![]() ).
).
When you want a little more control over the exposure, use one of the following Creative Zone modes:
• Program AE mode ( ![]() ). When you don’t know what to do or just don’t want to think about the finer points of composition and light, use the Program AE mode (
). When you don’t know what to do or just don’t want to think about the finer points of composition and light, use the Program AE mode ( ![]() ). It gives you the confidence you need to take good photos with a little more control than the automatic Basic Zone modes. Program AE mode (
). It gives you the confidence you need to take good photos with a little more control than the automatic Basic Zone modes. Program AE mode ( ![]() ) sets the shutter speed and aperture for the proper exposure.
) sets the shutter speed and aperture for the proper exposure.

3.7 The Creative Zone modes include Manual, Aperture-priority AE, Shutter-priority AE, and Program AE.
• Aperture-priority AE mode ( ![]() ). Some types of photography, such as landscape and portraiture, require that you control the depth of field. The Aperture-priority AE mode (
). Some types of photography, such as landscape and portraiture, require that you control the depth of field. The Aperture-priority AE mode ( ![]() ) gives you control over the aperture, while the camera controls the shutter. The aperture allows light into the camera, so as you open it, more light hits the sensor. In response, the camera increases the shutter speed to compensate. When you close down the aperture, the camera does the opposite. For example, if you open your aperture from f/8.0 to f/5.6, the camera increases the shutter speed 1 stop, such as from 1/60 second to 1/125 second.
) gives you control over the aperture, while the camera controls the shutter. The aperture allows light into the camera, so as you open it, more light hits the sensor. In response, the camera increases the shutter speed to compensate. When you close down the aperture, the camera does the opposite. For example, if you open your aperture from f/8.0 to f/5.6, the camera increases the shutter speed 1 stop, such as from 1/60 second to 1/125 second.
• Shutter-priority AE mode ( ![]() ). When photographing sports or wildlife, you need a fast shutter speed to freeze the action. When shooting landscapes, you often need a slower shutter speed to achieve a larger depth of field. The Shutter-priority AE mode (
). When photographing sports or wildlife, you need a fast shutter speed to freeze the action. When shooting landscapes, you often need a slower shutter speed to achieve a larger depth of field. The Shutter-priority AE mode ( ![]() ) gives you control of the shutter speed, while the camera controls the aperture. As you increase the shutter speed, such as when trying to capture moving subjects, the camera opens the aperture to allow in more light. When you lower the shutter speed, the camera closes the aperture.
) gives you control of the shutter speed, while the camera controls the aperture. As you increase the shutter speed, such as when trying to capture moving subjects, the camera opens the aperture to allow in more light. When you lower the shutter speed, the camera closes the aperture.
• Manual mode ( ![]() ). When you are comfortable with your camera, you may want to begin using Manual mode (
). When you are comfortable with your camera, you may want to begin using Manual mode ( ![]() ). It’s not for everyone, but there may be times when you disagree with the camera’s automatic settings, and you want to take full control of the shutter speed and aperture. It is especially useful in difficult lighting, such as backlighting or when shooting night scenes. The camera displays how under- or overexposed the image will be based on its exposure meter readings. You can make adjustments based on the camera’s internal light meter information. As you gain more experience, you might decide to ignore the camera’s recommendation.
). It’s not for everyone, but there may be times when you disagree with the camera’s automatic settings, and you want to take full control of the shutter speed and aperture. It is especially useful in difficult lighting, such as backlighting or when shooting night scenes. The camera displays how under- or overexposed the image will be based on its exposure meter readings. You can make adjustments based on the camera’s internal light meter information. As you gain more experience, you might decide to ignore the camera’s recommendation.
Focus Modes
Camera manufacturers are improving autofocus system capabilities all the time. Lenses are faster and much quieter than earlier models (Canon’s STM lenses are a good example). However, how to use these capabilities is often a mystery. The type of photography you plan to do usually determines the best autofocus solution. To change your autofocus mode, press the Autofocus button ( ![]() ), which is located to the right of the Setting button (
), which is located to the right of the Setting button ( ![]() ). Next, select one of the three focus modes. You will know if your subject is in focus if the round focus confirmation light appears in the bottom-right corner of the viewfinder. Autofocus is not perfect — sometimes you just have to use Manual focus (
). Next, select one of the three focus modes. You will know if your subject is in focus if the round focus confirmation light appears in the bottom-right corner of the viewfinder. Autofocus is not perfect — sometimes you just have to use Manual focus ( ![]() ). The Autofocus/Manual focus switch, as shown in Figure 3.8, is on the left side of your lens — don’t be afraid to use it.
). The Autofocus/Manual focus switch, as shown in Figure 3.8, is on the left side of your lens — don’t be afraid to use it.

3.8 The Autofocus/Manual focus switch on a lens.
The following list includes the focusing options available on the Canon T5i/700D:
• Autofocus mode ( ![]() ). If you are using a Basic Zone mode, the optimal focus for that mode is automatically set. For example, in Sports mode (
). If you are using a Basic Zone mode, the optimal focus for that mode is automatically set. For example, in Sports mode ( ![]() ), the camera sets the focus to the AI Servo focusing mode (
), the camera sets the focus to the AI Servo focusing mode ( ![]() ) to follow focus on moving subjects. In the Creative Zone modes, you can change the focus mode or focus points at any time. If you see the round focus confirmation light blinking in the viewfinder, this means that the camera is having trouble focusing, and you may need to try one of the other focus modes.
) to follow focus on moving subjects. In the Creative Zone modes, you can change the focus mode or focus points at any time. If you see the round focus confirmation light blinking in the viewfinder, this means that the camera is having trouble focusing, and you may need to try one of the other focus modes.
• Manual Focus mode ( ![]() ). You will not always agree with your camera’s choice of focus. When using the default automatic AF-point selection, it will focus on the largest object that is closest to the lens. This object is not always what you want to photograph. You can try using individual focus points to force your desired focus point but, in many cases, Manual Focus mode (
). You will not always agree with your camera’s choice of focus. When using the default automatic AF-point selection, it will focus on the largest object that is closest to the lens. This object is not always what you want to photograph. You can try using individual focus points to force your desired focus point but, in many cases, Manual Focus mode ( ![]() ) is your best bet. The following is a list of situations in which you might want to switch to the Manual Focus mode (
) is your best bet. The following is a list of situations in which you might want to switch to the Manual Focus mode ( ![]() ) or select one of the nine focus points:
) or select one of the nine focus points:
• When shooting low-contrast subjects, such as the sky or a gray wall.
• When a subject is in low light.

3.9 Sometimes, your camera has a tough time focusing in low-light situations.
• When shooting repetitive patterns, such as rows of windows on a building.
• When shooting horizontal stripes.
• When shooting water or other reflective subjects.
• When an object is too close to the camera. You may also need to back up or change lenses.
If focus cannot be achieved (because you are too close to the subject or the environment is too dark, for example), the round focus confirmation light blinks.
• When shooting a subject with extreme backlighting, such as a small object with the sun behind it.
• When shooting very small subjects (use a macro lens).
• When a subject is too far away for the camera to detect.
• One-shot autofocus mode ( ![]() ). This is a good mode to use when you are photographing a still subject. Point your camera at the subject, and then press the shutter button halfway. The camera focus locks on the subject. When you see the round focus confirmation light in your viewfinder, you are free to recompose if necessary. If you need to refocus, lift your finger off the shutter button and focus again.
). This is a good mode to use when you are photographing a still subject. Point your camera at the subject, and then press the shutter button halfway. The camera focus locks on the subject. When you see the round focus confirmation light in your viewfinder, you are free to recompose if necessary. If you need to refocus, lift your finger off the shutter button and focus again.
In One-shot autofocus mode ( ![]() ), the camera takes its exposure settings at the same time that you lock focus.
), the camera takes its exposure settings at the same time that you lock focus.
• Al Servo focusing mode ( ![]() ). Photographing moving objects is not easy. The AI Servo focusing mode (
). Photographing moving objects is not easy. The AI Servo focusing mode ( ![]() ) continuously refocuses on your subject until you fully press the shutter button to take a photograph. Pressing the shutter button halfway is a good idea so you can snap your picture quickly, but it doesn’t stop the camera from refocusing as you move your lens or as the subject moves. This option is often used for sports and wildlife photography.
) continuously refocuses on your subject until you fully press the shutter button to take a photograph. Pressing the shutter button halfway is a good idea so you can snap your picture quickly, but it doesn’t stop the camera from refocusing as you move your lens or as the subject moves. This option is often used for sports and wildlife photography.

3.10 I followed this robin in the Al Servo mode to keep it in focus. Exposure: ISO 400, f/2.8, 1/000 second, 100mm f/2.8 lens.
The round focus confirmation light does not blink in the Al Servo focusing mode ( ![]() ), even if the subject is in focus.
), even if the subject is in focus.
• Al focus ( ![]() ). If your subject starts to move while you are photographing in the One-shot autofocus mode (
). If your subject starts to move while you are photographing in the One-shot autofocus mode ( ![]() ), it may be out of focus by the time you press the shutter button. The Al focus mode (
), it may be out of focus by the time you press the shutter button. The Al focus mode ( ![]() ) defaults to the One-shot autofocus mode (
) defaults to the One-shot autofocus mode ( ![]() ), but switches to AI Servo mode (
), but switches to AI Servo mode ( ![]() ) if the subject moves. For example, if you are photographing an animal in the wild, the camera defaults to One-shot autofocus mode (
) if the subject moves. For example, if you are photographing an animal in the wild, the camera defaults to One-shot autofocus mode ( ![]() ) if the subject remains still. If something spooks the creature and it moves, your camera switches to AI Servo mode (
) if the subject remains still. If something spooks the creature and it moves, your camera switches to AI Servo mode ( ![]() ) as you follow the animal. When using the Al focus mode (
) as you follow the animal. When using the Al focus mode ( ![]() ), the default One-shot autofocus mode (
), the default One-shot autofocus mode ( ![]() ) lights up the round focus confirmation light. When it switches to the Al Servo mode (
) lights up the round focus confirmation light. When it switches to the Al Servo mode ( ![]() ) the light shuts off.
) the light shuts off.
• Focus points. Your Canon Rebel T5i/700D uses nine focus points (in Live View shooting mode ( ![]() ) it has up to 31 focus points). If you are shooting in a Basic Zone mode, the camera automatically focuses on the subject closest to the lens using one of these points. If the camera doesn’t focus on the main subject, switch to Manual Focus mode (
) it has up to 31 focus points). If you are shooting in a Basic Zone mode, the camera automatically focuses on the subject closest to the lens using one of these points. If the camera doesn’t focus on the main subject, switch to Manual Focus mode ( ![]() ) if you are using one of the Basic Zone modes. In the Program AE (
) if you are using one of the Basic Zone modes. In the Program AE ( ![]() ), Manual (
), Manual ( ![]() ), Aperture-priority AE (
), Aperture-priority AE ( ![]() ), and Shutter-priority AE (
), and Shutter-priority AE ( ![]() ) modes, you can press the AF-point selection button (
) modes, you can press the AF-point selection button ( ![]() ) and manually select the focus point that you want with the Main dial (
) and manually select the focus point that you want with the Main dial ( ![]() ). It is common to set the middle focus point as the default so that you can point the camera at the subject, lock the focus by pressing the shutter button halfway, and then recompose the scene. When all points of focus are lit, the camera is in AF-point selection mode and chooses the point of focus for you.
). It is common to set the middle focus point as the default so that you can point the camera at the subject, lock the focus by pressing the shutter button halfway, and then recompose the scene. When all points of focus are lit, the camera is in AF-point selection mode and chooses the point of focus for you.
• AF-assist beam ( ![]() ). When light is low, this beam fires to help your camera focus on the subject. The beam is actually emitted from the flash quickly triggering in a rapid cycle. It works automatically in Basic Zone modes and only if the flash is popped up in Creative Zone modes. The AF-assist beam does not function in the Flash Off (
). When light is low, this beam fires to help your camera focus on the subject. The beam is actually emitted from the flash quickly triggering in a rapid cycle. It works automatically in Basic Zone modes and only if the flash is popped up in Creative Zone modes. The AF-assist beam does not function in the Flash Off ( ![]() ), Sports (
), Sports ( ![]() ), or Landscape (
), or Landscape ( ![]() ) modes.
) modes.
Make sure that you warn your subjects not to move if the AF-assist beam fires. It is common for subjects to leave thinking that you already took the photo.
• Tracking modes. Your camera has three tracking modes in the Live View shooting mode ( ![]() ). The first option, Face Tracking mode (
). The first option, Face Tracking mode ( ![]() ), looks for faces. If none are detected, it switches to FlexiZone-Multi AF (
), looks for faces. If none are detected, it switches to FlexiZone-Multi AF ( ![]() ) and tracks whatever you point to on the LCD touchscreen. When the camera detects a face, it switches back to Face Tracking mode (
) and tracks whatever you point to on the LCD touchscreen. When the camera detects a face, it switches back to Face Tracking mode ( ![]() ) and follows it. In the FlexiZone-Multi AF mode (
) and follows it. In the FlexiZone-Multi AF mode ( ![]() ), you have 31 focusing touch zones. If you press the Setting button (
), you have 31 focusing touch zones. If you press the Setting button ( ![]() ), the camera toggles between automatic point selection and zone selection. Use the Cross keys (
), the camera toggles between automatic point selection and zone selection. Use the Cross keys ( ![]() ) for fine adjustments or the touchscreen to select a specific object in your frame. The FlexiZone-Single AF mode (
) for fine adjustments or the touchscreen to select a specific object in your frame. The FlexiZone-Single AF mode ( ![]() ) uses only one autofocus point and does not adjust with the movement of the camera or subject. You may adjust the focus point using the Cross keys (
) uses only one autofocus point and does not adjust with the movement of the camera or subject. You may adjust the focus point using the Cross keys ( ![]() ) or LCD touchscreen.
) or LCD touchscreen.
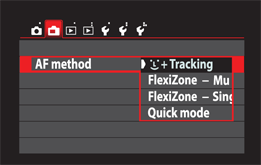
3.11 The AF tracking options in the Live View shooting menu.
If you press the shutter button halfway, even in a tracking mode, the camera refocuses.
• Live View shooting mode ( ![]() ). When your camera is in this mode, you have four focusing options. To get to them, press the Menu button (
). When your camera is in this mode, you have four focusing options. To get to them, press the Menu button ( ![]() ) when the camera is in the Live View shooting mode (
) when the camera is in the Live View shooting mode ( ![]() ), and then select the autofocus method you want to use. You can adjust the focus method by pressing the Quick Control/Print button (
), and then select the autofocus method you want to use. You can adjust the focus method by pressing the Quick Control/Print button ( ![]() ) for options. The Quick focus mode (
) for options. The Quick focus mode ( ![]() ) is a good default because it focuses quickly. If you are in a Basic Zone mode, such as Portrait (
) is a good default because it focuses quickly. If you are in a Basic Zone mode, such as Portrait ( ![]() ), the camera selects the focus points. If you are using a Creative Zone mode, such as Aperture-priority AE (
), the camera selects the focus points. If you are using a Creative Zone mode, such as Aperture-priority AE ( ![]() ), you can select the focus zone via the LCD touchscreen or Cross keys (
), you can select the focus zone via the LCD touchscreen or Cross keys ( ![]() ). Your other options are the slower (but useful) tracking methods of focus.
). Your other options are the slower (but useful) tracking methods of focus.
For more information about the Live View shooting mode ( ![]() ), see Chapter 8.
), see Chapter 8.
Picture Styles
Your camera has seven Picture Style options ( ![]() ), plus three user-defined Picture Styles. Picture Styles can help when you want to optimize your photography for the type of subject you are shooting. For example, some Picture Styles are designed to enhance portraits and landscapes. All Picture Styles, including those that are user-defined, adjust sharpness, contrast, saturation, and color tone.
), plus three user-defined Picture Styles. Picture Styles can help when you want to optimize your photography for the type of subject you are shooting. For example, some Picture Styles are designed to enhance portraits and landscapes. All Picture Styles, including those that are user-defined, adjust sharpness, contrast, saturation, and color tone.
Picture Style options ( ![]() ) only work in the Progam AE (
) only work in the Progam AE ( ![]() ), Manual (
), Manual ( ![]() ), Aperture-priority AE (
), Aperture-priority AE ( ![]() ), and Shutter-priority AE (
), and Shutter-priority AE ( ![]() ) modes. The following Picture Styles are available on the Canon T5i/700D by pressing the Picture Style button (
) modes. The following Picture Styles are available on the Canon T5i/700D by pressing the Picture Style button ( ![]() ):
):
• Auto ( ![]() ). This mode starts out as a neutral setting, but adjusts based on the detected scene. It is a good default if you don’t want any specific adjustments applied to photographs.
). This mode starts out as a neutral setting, but adjusts based on the detected scene. It is a good default if you don’t want any specific adjustments applied to photographs.
• Standard ( ![]() ). This is another good default Picture Style setting. It adds sharpness and produces vivid colors in your scene.
). This is another good default Picture Style setting. It adds sharpness and produces vivid colors in your scene.
• Portrait ( ![]() ). This Picture Style does not sharpen the image as much as others do. The default leaves all of the other tones in neutral settings, but you may want to adjust the skin tone to suit your style or subject. To do so, in the Picture Style menu (
). This Picture Style does not sharpen the image as much as others do. The default leaves all of the other tones in neutral settings, but you may want to adjust the skin tone to suit your style or subject. To do so, in the Picture Style menu ( ![]() ), select Info and four options (Sharpness, Contrast, Saturation, and Color tone) appear. If you select Color tone, your subject looks more red the closer you get to the minus sign. The closer you get to the plus sign, the more yellow it appears.
), select Info and four options (Sharpness, Contrast, Saturation, and Color tone) appear. If you select Color tone, your subject looks more red the closer you get to the minus sign. The closer you get to the plus sign, the more yellow it appears.
• Landscape ( ![]() ). Use this Picture Style to create impressive landscapes. It sharpens, adds contrast, and produces vivid blues and greens.
). Use this Picture Style to create impressive landscapes. It sharpens, adds contrast, and produces vivid blues and greens.
• Neutral ( ![]() ). If you prefer to enhance your photos using software outside the camera, then the Neutral Picture Style (
). If you prefer to enhance your photos using software outside the camera, then the Neutral Picture Style ( ![]() ) is a good choice. It is designed to produce natural-looking colors.
) is a good choice. It is designed to produce natural-looking colors.
• Faithful ( ![]() ). This is another Picture Style that is ideal for post-processing on a computer. Of all of the Picture Styles, it offers the best color representation based on a white light exposure of daylight.
). This is another Picture Style that is ideal for post-processing on a computer. Of all of the Picture Styles, it offers the best color representation based on a white light exposure of daylight.
Kelvin is the temperature measurement of the color of light. Temperatures between 5500K and 6000K are considered neutral (or white) light. Lower Kelvin temperatures produce light that appears warmer, and higher temperatures produce light that looks cooler.
• Monochrome ( ![]() ). Choose the Monochrome Picture Style (
). Choose the Monochrome Picture Style ( ![]() ) if you want to take black-and-white photos, as shown in Figure 3.13. Because the Monochrome Picture Style (
) if you want to take black-and-white photos, as shown in Figure 3.13. Because the Monochrome Picture Style ( ![]() ) doesn’t need saturation or color tone, those options are replaced in the menu with filter and toning effects. The filter effect works like a color filter over black-and-white film, with the following options: None, Yellow, Orange, Red, and Green. Each of these filters absorbs the color it represents. For example, the red filter absorbs the red in an apple, making it appear much lighter. The filters also enhance complimentary colors. For example, a yellow filter will darken a blue sky. Toning effects change the monochromatic color of the image. The options are None, Sepia, Blue, Purple, and Green.
) doesn’t need saturation or color tone, those options are replaced in the menu with filter and toning effects. The filter effect works like a color filter over black-and-white film, with the following options: None, Yellow, Orange, Red, and Green. Each of these filters absorbs the color it represents. For example, the red filter absorbs the red in an apple, making it appear much lighter. The filters also enhance complimentary colors. For example, a yellow filter will darken a blue sky. Toning effects change the monochromatic color of the image. The options are None, Sepia, Blue, Purple, and Green.

3.12 A color image before the Monochrome Picture Style is applied with filters. Exposure: f/3.5, 1/250 second, ISO 200, 50mm f/1.4 lens.
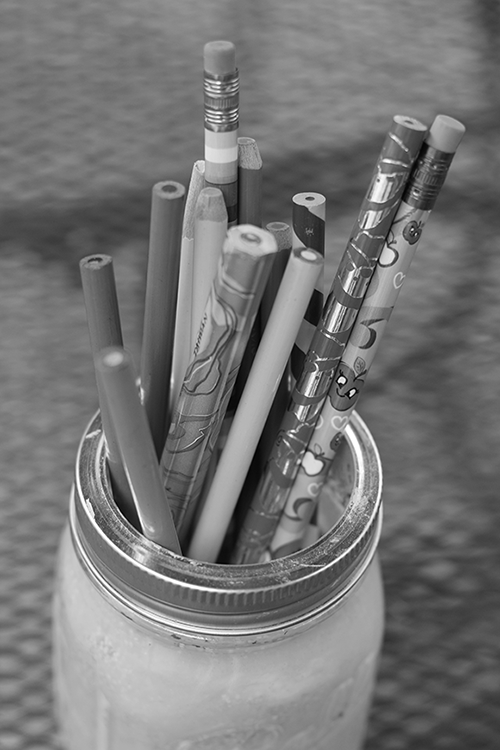
3.13 The Monochrome Picture Style with no filter. Exposure: f/3.5, 1/250 second, ISO 200, 50mm f/1.4 lens.

3.14 The Monochrome Picture Style with a yellow filter. Exposure: f/3.5, 1/250 second, ISO 200, 50mm f/1.4 lens.

3.15 The Monochrome Picture Style with an orange filter. Exposure: f/3.5, 1/250 second, ISO 200, 50mm f/1.4 lens.
If you think that you might want to convert your photograph to a color image later, make sure that you use the RAW setting ( ![]() ). Other image formats, such as JPEG, cannot be converted back to color.
). Other image formats, such as JPEG, cannot be converted back to color.

3.16 The Monochrome Picture Style with a red filter. Exposure: f/3.5, 1/250 second, ISO 200, 50mm f/1.4 lens.
3.17 The Monochrome Picture Style with a green filter. Exposure: f/3.5, 1/250 second, ISO 200, 50mm f/1.4 lens.
• User-defined Picture Styles 1 ( ![]() ), 2 (
), 2 ( ![]() ), and 3 (
), and 3 ( ![]() ). Here, you can create your own Picture Styles. Unused Picture Styles default to the Auto Picture Style (
). Here, you can create your own Picture Styles. Unused Picture Styles default to the Auto Picture Style ( ![]() ). You can use any of the camera’s preset Picture Styles as a starting point to create your own custom styles. The following settings can be adjusted to create a custom style:
). You can use any of the camera’s preset Picture Styles as a starting point to create your own custom styles. The following settings can be adjusted to create a custom style:
• Sharpness. This adjusts the clarity of the image. You can adjust it from 0 (no sharpness) to 7 (sharpest).
• Contrast. Use this setting to increase (+) or decrease (-) the contrast or vividness of the colors in your image. The neutral point is 0. The closer you move toward the minus sign (-), the duller the image; the closer you move to the plus sign (+), the more contrast and vividness the image has.
• Saturation. This enhances the colors in your image. The closer to the minus sign (-) you move this setting, the more muted the colors become. The closer you move toward the plus sign (+), the bolder the colors become. The neutral setting is 0.
• Color tone. Use this setting to adjust skin tones. The closer to the minus sign (-) it is, the more red your subject’s skin tones look. The closer it is to the plus sign (+), the more yellow skin tones appear.
For more information about creating User-defined Picture Styles, see Chapter 9.
Drive Modes
Depending on the type of photography you are doing, you might want to use a different Drive mode ( ![]() ). Your camera has five drive modes and each has its benefits. To adjust the drive mode quickly, press the Drive mode button (
). Your camera has five drive modes and each has its benefits. To adjust the drive mode quickly, press the Drive mode button ( ![]() ) located to the left of the Setting button (
) located to the left of the Setting button ( ![]() ) on the back of your camera.
) on the back of your camera.

3.18 You have five drive modes to choose from, including three Self-timer options.
The following drive modes are available on the Canon T5i/700D:
• Single-shooting mode ( ![]() ). In this mode, the camera takes only one photograph with each press of the shutter button. This is the default setting for most Basic Zone modes.
). In this mode, the camera takes only one photograph with each press of the shutter button. This is the default setting for most Basic Zone modes.
• Continuous drive mode ( ![]() ). This mode is helpful when shooting action, such as sports, children, or wildlife. Use it when you need to take multiple photographs in quick succession — it shoots approximately 5 frames per second (fps). It is also helpful to have your camera on Al Servo (
). This mode is helpful when shooting action, such as sports, children, or wildlife. Use it when you need to take multiple photographs in quick succession — it shoots approximately 5 frames per second (fps). It is also helpful to have your camera on Al Servo ( ![]() ) or Al Focus (
) or Al Focus ( ![]() ) mode if your subject is moving.
) mode if your subject is moving.
If you use flash, the frames-per-second (fps) rate is slower because the flash must recycle.
• Self-timer drive modes ( ![]() ). When you press the Drive mode button (
). When you press the Drive mode button ( ![]() ), you see the following three self-timer options: 10 seconds (
), you see the following three self-timer options: 10 seconds ( ![]() ), 2 seconds (
), 2 seconds ( ![]() ), and a Multi-shot continuous timer (
), and a Multi-shot continuous timer ( ![]() ). The continuous timer starts as a 10-second timer, but takes up to 10 continuous photos. If you are triggering your camera with a remote, use the 10-second self-timer option (
). The continuous timer starts as a 10-second timer, but takes up to 10 continuous photos. If you are triggering your camera with a remote, use the 10-second self-timer option ( ![]() ).
).
White Balance Settings
You can use the white balance settings to adjust how the camera “sees” the color of light in your scene. The White Balance button ( ![]() ) is above the Setting button (
) is above the Setting button ( ![]() ) on the back of your camera. Each light source you encounter produces a different color or temperature. These are measured using the Kelvin scale. White light has a temperature between 5500K and 6000K (Kelvin). The higher the Kelvin temperature, the cooler the appearance. The lower the Kelvin temperature, the warmer the appearance. For example, an incandescent light bulb is around 3000K, which looks yellow. The goal of white balance is to make a white piece of paper (or any subject) look white under any lighting condition. Each white balance setting has a corresponding icon that represents the type of light or situation it is designed to correct.
) on the back of your camera. Each light source you encounter produces a different color or temperature. These are measured using the Kelvin scale. White light has a temperature between 5500K and 6000K (Kelvin). The higher the Kelvin temperature, the cooler the appearance. The lower the Kelvin temperature, the warmer the appearance. For example, an incandescent light bulb is around 3000K, which looks yellow. The goal of white balance is to make a white piece of paper (or any subject) look white under any lighting condition. Each white balance setting has a corresponding icon that represents the type of light or situation it is designed to correct.
You can choose from the following white balance settings:
• Auto ( ![]() ). If you are unsure which white balance mode to use, set your camera to Auto (
). If you are unsure which white balance mode to use, set your camera to Auto ( ![]() ). It’s a good default for almost any scene because the camera adjusts to the light color automatically. If you are shooting in RAW format (
). It’s a good default for almost any scene because the camera adjusts to the light color automatically. If you are shooting in RAW format ( ![]() ), you can make more adjustments in editing software, such as Adobe Photoshop Camera Raw or Lightroom, or the software that came with your camera.
), you can make more adjustments in editing software, such as Adobe Photoshop Camera Raw or Lightroom, or the software that came with your camera.

3.19 The result of the Auto white balance setting. Exposure: ISO 800, f/13, 1/10 second, 50mm f/1.4 lens, tripod.
• Daylight ( ![]() ). You can use this setting on bright days when the sun is high in the sky. It is a more neutral setting than others. Some photographers prefer it to the flash setting when using an on-camera or external flash.
). You can use this setting on bright days when the sun is high in the sky. It is a more neutral setting than others. Some photographers prefer it to the flash setting when using an on-camera or external flash.

3.20 An example of the Daylight white balance setting. Exposure: ISO 800, f/13, 1/10 second, 50mm f/1.4 lens, tripod.
• Shade ( ![]() ). This white balance setting has a higher (bluer) Kelvin temperature, so the camera adjusts the color to make the image warmer. Use this adjustment when you find yourself in dark shade or shadows.
). This white balance setting has a higher (bluer) Kelvin temperature, so the camera adjusts the color to make the image warmer. Use this adjustment when you find yourself in dark shade or shadows.

3.21 The effects of the Shade white balance setting. Exposure: ISO 800, f/13, 1/10 second, 50mm f/1.4 lens, tripod.
• Cloudy ( ![]() ). Like the Shade white balance setting (
). Like the Shade white balance setting ( ![]() ), the Cloudy setting (
), the Cloudy setting ( ![]() ) is based on a higher Kelvin temperature. Your camera is set to adjust a cool scene to make it look warmer. This is useful on cloudy days and in domed buildings where light penetrates the roof, such as a sports arena.
) is based on a higher Kelvin temperature. Your camera is set to adjust a cool scene to make it look warmer. This is useful on cloudy days and in domed buildings where light penetrates the roof, such as a sports arena.

3.22 An example of the Cloudy white balance setting. Exposure: ISO 800, f/13, 1/10 second, 50mm f/1.4 lens, tripod.
• Tungsten (![]() ). Tungsten (the traditional round light bulb) is an artificial light that emits a yellow cast. This white balance setting adjusts light that is around 3200K. Incandescent lights turn more yellow over time, so results vary.
). Tungsten (the traditional round light bulb) is an artificial light that emits a yellow cast. This white balance setting adjusts light that is around 3200K. Incandescent lights turn more yellow over time, so results vary.

3.23 An example of Tungsten white balance setting. Exposure: ISO 800, f/13, 1/10 second, 50mm f/1.4 lens, tripod.
• Fluorescent ( ![]() ). This is a good starting point to adjust fluorescent lights that are around 4000K (results depend on the type of fluorescent light used in your scene). Like incandescent bulbs, these change color over time, and there are many types on the market. If the Fluorescent white balance setting (
). This is a good starting point to adjust fluorescent lights that are around 4000K (results depend on the type of fluorescent light used in your scene). Like incandescent bulbs, these change color over time, and there are many types on the market. If the Fluorescent white balance setting ( ![]() ) doesn’t work to your satisfaction, consider using a Custom white balance setting (
) doesn’t work to your satisfaction, consider using a Custom white balance setting ( ![]() ).
).

3.24 An example of the Fluorescent white balance setting. Exposure: ISO 800, f/13, 1/10 second, 50mm f/1.4 lens, tripod.
• Flash ( ![]() ). This setting is designed for use with on-camera or external flashes. It is set to adjust light at 6000K to warm the cooler flash. If the image is too warm, you may want to consider using the Daylight white balance setting (
). This setting is designed for use with on-camera or external flashes. It is set to adjust light at 6000K to warm the cooler flash. If the image is too warm, you may want to consider using the Daylight white balance setting ( ![]() ).
).

3.25 An example of the Flash white balance setting. Exposure: ISO 800, f/13, 1/10 second, 50mm f/1.4 lens, tripod.
• Custom ( ![]() ). This setting allows you to set your white balance to any temperature for a more precise light-color balance. You should adjust your custom setting under the lighting conditions in which you plan to work.
). This setting allows you to set your white balance to any temperature for a more precise light-color balance. You should adjust your custom setting under the lighting conditions in which you plan to work.

3.26 The Custom white balance set for tungsten correction in a daylight setting. Exposure: ISO 800, f/13, 1/10 second, 50mm f/1.4 lens, tripod.

3.27 An example of the Custom White balance when not adjusted to the new environment. This setting can create fun color effects. Exposure: ISO 800, f/13, 1/10 second, 50mm f/1.4 lens, tripod.

3.28 This image was created indoors using Custom white balance. Exposure: ISO 1600, f/3.5, 1/50 second, 50mm f/1.4 lens, tripod.
• White Balance Auto Bracket-ing ( ![]() ). If you are not sure about the white balance results the camera will deliver, you can use White Balance Auto Bracketing (
). If you are not sure about the white balance results the camera will deliver, you can use White Balance Auto Bracketing ( ![]() ). To do so, press the Menu button (
). To do so, press the Menu button ( ![]() ), select Shooting menu 2 (
), select Shooting menu 2 ( ![]() ), and then select WB shift/bkt. The camera then displays the bracketing options shown in Figure 3.29. With one shot, three images with different color balances are recorded simultaneously.
), and then select WB shift/bkt. The camera then displays the bracketing options shown in Figure 3.29. With one shot, three images with different color balances are recorded simultaneously.

3.29 In the White Balance Auto Bracketing menu, you can choose blue (B) to auburn (A), or green (G) to magenta (M) bracketing depending on your needs.
Flash Modes
These modes are for the built-in, pop-up flash on top of your camera. Red-eye Reduction, fill-flash, and sync modes are useful tools when photographing — especially indoors, where it is often darker. The built-in flash is fine for casual use or when a larger one is not available, but I encourage you to purchase a more powerful flash with additional features for regular use.
More information about flash can be found in Chapter 6.
The following flash modes are available on your camera:
• Auto. Most of the Basic Zone modes use the pop-up flash in low light. It is not used in the Landscape ( ![]() ) or HDR backlight (
) or HDR backlight ( ![]() ) modes.
) modes.
• Red-eye Reduction. The Red-eye Reduction feature is designed to prevent or minimize red-eye in your subjects when you photograph them in a dark or dimly lit environment. The same as the camera’s aperture, pupils dilate in dark environments to let in more light. When this happens, more light from the flash reflects back to your camera. If your flash is close to the lens, your subjects will look like they have red eyes. When you press the shutter button halfway, the Red-eye Reduction lamp emits a light to shut the subject’s pupils down and reduce red-eye when using a flash mode. The light turns off when the shutter button is pressed completely. The Red-eye Reduction setting does not work in the Flash Off ( ![]() ), Landscape (
), Landscape ( ![]() ), Sports (
), Sports ( ![]() ), or HDR backlight (
), or HDR backlight ( ![]() ) modes.
) modes.

3.30 The Red-eye Reduction feature is found in Shooting menu 1 when you are using a Basic Zone mode.
• Slow sync. When using flash, your camera sets the shutter speed between 1/60 second and 1/200 second. If you are in a dark environment, in most cases the background appears black. If you want to see more of the environment or lights in the background, slow down the shutter speed while using flash. To do so, you can use the Shutter-priority AE ( ![]() ) or Manual (
) or Manual ( ![]() ) modes to slow the shutter speed below 1/30 second. The best shutter speed depends on your ISO setting and how much light is in the background. The other option is to use the Night Portrait mode (
) modes to slow the shutter speed below 1/30 second. The best shutter speed depends on your ISO setting and how much light is in the background. The other option is to use the Night Portrait mode ( ![]() ).
).
• Curtain sync. Ghosting leaves movement trails (or lights) in front of or behind your subject, as shown in Figures 3.31 and 3.32. This occurs when you combine flash with a low shutter speed and available light. The flash freezes your subject and the camera records movement with the slow shutter. The default setting on all cameras is that the flash fires at the beginning of the shutter cycle, and then the slow shutter engages after leaving a front-moving trail. This is called using the front curtain. Your camera offers the option of either Front-curtain (first curtain) or Rear-curtain (second curtain) sync. In the Shooting menu 1 ( ![]() ), select Flash control. In that menu, select Built-in flash settings, and then select Shutter sync. Rear-curtain sync means that the slow shutter fires first, and then the flash fires at the end of the cycle. To get to this option, press the Menu button (
), select Flash control. In that menu, select Built-in flash settings, and then select Shutter sync. Rear-curtain sync means that the slow shutter fires first, and then the flash fires at the end of the cycle. To get to this option, press the Menu button ( ![]() ) and look in the first menu. Select flash control at the bottom, and then select Built-in flash settings. Go to Shutter Sync and choose your setting (First or Second curtain).
) and look in the first menu. Select flash control at the bottom, and then select Built-in flash settings. Go to Shutter Sync and choose your setting (First or Second curtain).
3.31 I used Front-curtain sync for this image. The flash fired immediately and the slow shutter speed left a trail moving in front of the subject. Exposure: ISO 100, f/13, 1/16 second, 12-24mm f/4.0 lens at 24mm.

3.32 I used Rear-curtain sync for this image. The flash fired at the end of the slow shutter speed exposure, leaving a trail behind the subject. Exposure: ISO 100, f/14, 1/14 second, 12-24mm f/4.0 lens at 24mm.
• Fill flash. The sun can cast harsh shadows on your subject’s face. You can use fill flash from the camera’s pop-up or external flash to help minimize the shadows. If you place your subject in the shade with a bright background or in a direct backlight situation, use fill flash to prevent your subject from becoming a silhouette. If you are using a Basic Zone mode, your camera activates the built-in flash if it senses the need. When you are using the Creative Zone modes, if fill flash is necessary, press the Flash button ( ![]() ) located below the pop-up flash on the left side of your camera, as shown in Figure 3.33.
) located below the pop-up flash on the left side of your camera, as shown in Figure 3.33.
3.33 The button to activate the pop-up flash is on the front left of the Canon Rebel T5i/700D.
• Wireless. You can use the pop-up flash as a trigger for any external speedlites. To use your speedlite as an off-camera flash, switch it to Slave mode, and then press the Flash button ( ![]() ) on the left side of your camera. For the camera and speedlite to sync, both have to be set to the same channel (speedlites default to channel 1). You have up to four channels from which to choose, but I recommend sticking with channel 1 unless you have a specific reason to switch, such as when using a more complex lighting setup or there is a conflict with another photographer using the same channel.
) on the left side of your camera. For the camera and speedlite to sync, both have to be set to the same channel (speedlites default to channel 1). You have up to four channels from which to choose, but I recommend sticking with channel 1 unless you have a specific reason to switch, such as when using a more complex lighting setup or there is a conflict with another photographer using the same channel.

3.34 The Canon T5i/700D pop-up flash.
For easy wireless flash photographs, press the Quick Control/Print button ( ![]() ) (in the Creative Zone modes only), and then press the Flash button (
) (in the Creative Zone modes only), and then press the Flash button ( ![]() ) on the right side of the LCD screen. Select the Easy Wireless Flash option (
) on the right side of the LCD screen. Select the Easy Wireless Flash option ( ![]() ).
).
• Flash Exposure Compensation. Sometimes, you might disagree with the results that your camera and flash produce, and want your subject to appear a little lighter or darker. The Flash Exposure Compensation button ( ![]() ) lets you make adjustments in plus or minus 1/3-stop increments up to 2 stops. This option is useful in backlit situations. To adjust the Flash Exposure Compensation quickly when the camera is in a Creative Zone mode, press the Quick Control/Print button (
) lets you make adjustments in plus or minus 1/3-stop increments up to 2 stops. This option is useful in backlit situations. To adjust the Flash Exposure Compensation quickly when the camera is in a Creative Zone mode, press the Quick Control/Print button ( ![]() ), and then press the Flash Exposure Compensation button (
), and then press the Flash Exposure Compensation button ( ![]() ) below the ISO setting. This option is not available in the Manual or Basic Zone modes.
) below the ISO setting. This option is not available in the Manual or Basic Zone modes.
If the Auto Light Optimizer is on any setting, photos with a negative stop adjustment may still appear bright.
Don’t forget to set the Flash Exposure Compensation setting ( ![]() ) back to 0 when you finish using it.
) back to 0 when you finish using it.
ISO Settings
Your camera has eight ISO options ranging from ISO 100 to ISO 12800. ISO 25600 is available when Custom Function 2 is engaged. The ISO setting represents the camera sensor’s sensitivity to light. Each step doubles or halves the amount of light sensitivity. For example, ISO 200 to ISO 400 doubles your camera’s light sensitivity. This is the equivalent of adjusting the aperture or shutter 1 full stop. The lower the ISO setting, the more light you need, and the higher the quality and less digital noise will appear in your image. The higher the ISO setting, the less light you need, but your images will have more digital noise. To set the ISO, press the ISO button ( ![]() ) on top of your camera.
) on top of your camera.

3.35 High ISO settings are helpful indoors when flash may not be effective or allowed. Exposure: ISO 6400, f/2.8, 1/500 second, 100mm f/2.8 lens.
The lower ISO settings — ISO 100, ISO 200, and ISO 400 — are good, all-purpose settings for use outside and in bright building interiors. Use ISO 800 and ISO 1600 when shooting in the evening, on overcast days, or indoors without a flash. When shooting at night or in a dark room, use ISO 3200, ISO 6400, ISO 12800, or ISO 25600. You can set the ISO at any point when using a Creative Zone mode. When your camera is set to a Basic Zone mode, the ISO is set automatically.

3.36 When Custom Function 2 is selected, the ISO range extends to ISO 25600.
In Portrait mode ( ![]() ), your camera sets the ISO to 100. In the Bulb shooting mode (
), your camera sets the ISO to 100. In the Bulb shooting mode ( ![]() ), it sets the ISO to 400. The higher the ISO, the further away the camera can be and still make exposures using the dim light provided by the flash.
), it sets the ISO to 400. The higher the ISO, the further away the camera can be and still make exposures using the dim light provided by the flash.
When Auto ISO is set on your camera, it selects the proper setting based on the shooting mode. In this mode, the ISO ranges from ISO 100 to ISO 6400 in most modes. You can limit this range by setting a maximum ISO. To do this, press the Menu button ( ![]() ), choose menu 3 (third from the left), and then select Auto mode.
), choose menu 3 (third from the left), and then select Auto mode.
12 Things to Check After a Shoot
After you use your camera, it’s a good idea to review the settings and make sure it’s ready for your next photographic outing. Photographer Aaron Hockley likes to leave his camera in a known state so that he doesn’t miss a photographic opportunity because his camera was left at an improper setting. The following is Aaron’s list of 12 settings to check after a shoot:
• Reset your ISO setting to your preferred sensitivity, such as ISO 200. It’s no fun realizing you unnecessarily took photographs on a bright, sunny day at ISO 6400.
• Check your exposure mode. Make sure you take your camera off modes you normally don’t use. Place it back on Program AE ( ![]() ) after experimenting on manual, for example.
) after experimenting on manual, for example.
• Review your white balance. If you shoot indoors one day and outside the next, your white balance will not be correct. Place it on Auto or your favorite setting during storage.
• Make sure you clear your Picture Styles and modes that will alter a standard photograph.
• Make sure your drive mode is on Single ( ![]() ) or Continuous (
) or Continuous ( ![]() ). You can lose a good photo opportunity if your self-timer is left on a 10-second countdown.
). You can lose a good photo opportunity if your self-timer is left on a 10-second countdown.
• Return the exposure compensation to zero.
• If you set your camera to Manual focus ( ![]() ) during your shoot, make sure you return it to Autofocus mode (
) during your shoot, make sure you return it to Autofocus mode ( ![]() ).
).
• Return your camera metering setting to your favorite position.
• Check the file size setting. Always place it back to the largest size, such as RAW ( ![]() ). You can always downsize, but you can’t upsize.
). You can always downsize, but you can’t upsize.
• Clear your memory card. You don’t want to risk losing your photos. Photographers lose good images by deleting files from their cards in the field.
• Keep your camera and gear in the same place. If you return your equipment to the same location, you will always know its location.
• Check your support equipment, such as your flash.
It may seem silly to worry about a few camera settings. However, with all the options you have on your Canon T5i/700D, you can waste precious time adjusting it, and that could cost you some fabulous images.
Aaron Hockley is an event, commercial, and portrait photographer from Vancouver, Washington. He shares commentary and information on his website: http://aaronhockley.com/.
The higher the ISO setting, the more noise you see in your images. Noise is the digital equivalent of grain in film. Camera companies, including Canon, have done a good job of limiting noise as they increase the ISO limits in cameras. The Canon T5i/700D is equipped with noise-reduction technology. In Shooting menu 3 ( ![]() ), you can select High ISO noise reduction to help reduce noise when you are photographing at a high ISO setting, such as ISO 12800. Another option in Shooting menu 3 (
), you can select High ISO noise reduction to help reduce noise when you are photographing at a high ISO setting, such as ISO 12800. Another option in Shooting menu 3 ( ![]() ) is Long exp. noise reduction, which is used for exposures over 1 second. If you use this option, though, you will not be able to take another photograph until the noise reduction process is complete. Also, images shot over ISO 1600 may look grainier than normal, so use this feature in combination with lower ISOs.
) is Long exp. noise reduction, which is used for exposures over 1 second. If you use this option, though, you will not be able to take another photograph until the noise reduction process is complete. Also, images shot over ISO 1600 may look grainier than normal, so use this feature in combination with lower ISOs.
Choosing File Quality and Format
The Canon Rebel T5i/700D has two file formats — RAW (one option) and JPEG (8 size/compression options) — and selecting the best one is not always easy. The best rule is to use the highest quality possible because you can always downsize, but you can’t upsize and expect good results without specialized software. Even with good software, your results will vary. Don’t be tempted by the large number of available photographs when you use a smaller file size and/or greater file compression. The number of photographs you can take may be impressive, but they will not be the best quality. If you need to take more images at one time, invest in larger memory cards. For the best quality results, set your camera to RAW ( ![]() ).
).
The maximum camera resolution is approximately 17.9 megapixels, or 5182 × 3456 pixels (based on an aspect ratio of 3:2). This is the equivalent of a 17-1/4 × 11-1/2 photograph at 300 dpi (dots per inch). Your camera offers additional file size options that create file sizes as small as 720 × 480 pixels. Although larger files take up more room on a memory card, I recommend that you use the largest file size possible. It is always better to have the option of downsizing images rather than being stuck with files that are too small.
The RAW ( ![]() ) and Small 3 (
) and Small 3 ( ![]() ) file formats cannot be resized. Also, resized images cannot be made larger later.
) file formats cannot be resized. Also, resized images cannot be made larger later.
Image size and file numbering
Your camera’s multiple image sizes range from 0.35 to 17.9 megapixels. It is best to use the largest size possible. Sometimes, you may want to downsize an image. This can be done in the Canon Digital Photo Professional software (which came with your camera on the EOS Digital Solutions Disk), Photoshop, or with software on the web. You also have the option of adjusting the image size in your camera. To do so, press the Playback button ( ![]() ), find the photograph you want to resize, and then press the Quick Control/Print button (
), find the photograph you want to resize, and then press the Quick Control/Print button ( ![]() ). A menu appears on the left side of your screen and the bottom option is Image resize.
). A menu appears on the left side of your screen and the bottom option is Image resize.
For more information about the Canon Digital Photo Professional software, see Appendix A.
The files in your camera are numbered from 0001 to 9999, and continue in this same order, even if you replace the memory card. If you want the number system to restart, you can set your camera to do so at any point. To select the numbering system, go to Shooting menu 1 ( ![]() ) and select File numbering.
) and select File numbering.
You can create folders for more than one series of photos in Setup menu 1 ( ![]() ).
).
The RAW file format
When you want the highest quality possible, RAW ( ![]() ) is the best choice. However, you need special computer software to work with RAW files. Your camera comes with the EOS Digital Solutions Disk that includes the Canon Digital Photo Professional software. This program can handle RAW images and so can Photoshop, Lightroom, and Aperture.
) is the best choice. However, you need special computer software to work with RAW files. Your camera comes with the EOS Digital Solutions Disk that includes the Canon Digital Photo Professional software. This program can handle RAW images and so can Photoshop, Lightroom, and Aperture.
The good thing about the RAW file setting ( ![]() ) is that it stores the original data collected by your camera before a photograph is compressed into a Large fine (
) is that it stores the original data collected by your camera before a photograph is compressed into a Large fine ( ![]() ) JPEG image. When you make adjustments to compressed files, such as JPEGs, the images lose quality with each adjustment. When you use the RAW format with the proper software to make adjustments, it is like re-exposing your image without losing quality.
) JPEG image. When you make adjustments to compressed files, such as JPEGs, the images lose quality with each adjustment. When you use the RAW format with the proper software to make adjustments, it is like re-exposing your image without losing quality.
The JPEG file format
JPEG (Joint Photographic Experts Group) files are much smaller and easier to work with than RAW image files due to their size. This is the most common image file format used by photographers. One benefit of using JPEGs is the option to adjust the amount of compression applied to your photograph. The more a file is compressed, the smaller it is. However, the smaller a file is, the more information is lost. Your camera is capable of shooting in both the RAW ( ![]() ) and Large fine (
) and Large fine ( ![]() ) JPEG formats at the same time, giving you more options later in postproduction. However, this option also takes up more room on a memory card. If you are going to be shooting an event and taking many photos, JPEG is a good choice because the smaller file size is easier to work with in postproduction.
) JPEG formats at the same time, giving you more options later in postproduction. However, this option also takes up more room on a memory card. If you are going to be shooting an event and taking many photos, JPEG is a good choice because the smaller file size is easier to work with in postproduction.

3.37 You have 10 image quality options; RAW is the highest and S3 is the lowest.
Your Canon Rebel T5i/700D offers the following eight JPEG size and compression options:
• Large fine ( ![]() ). Images at this setting are 17.9 megapixels. This is the highest-quality JPEG file setting your camera offers.
). Images at this setting are 17.9 megapixels. This is the highest-quality JPEG file setting your camera offers.
• Large normal ( ![]() ). These images are also 17.9 megapixels, but as they use additional compression, you can store about double the number of images versus the Large fine (
). These images are also 17.9 megapixels, but as they use additional compression, you can store about double the number of images versus the Large fine ( ![]() ) setting. Please note, though, that compression degrades the quality of an image.
) setting. Please note, though, that compression degrades the quality of an image.
• Medium fine ( ![]() ). Images at this setting are 8 megapixels. This average setting still produces large prints.
). Images at this setting are 8 megapixels. This average setting still produces large prints.
• Medium normal ( ![]() ). These images are also 8 megapixels. However, this setting produces about double the amount of images compared to the Medium fine setting (
). These images are also 8 megapixels. However, this setting produces about double the amount of images compared to the Medium fine setting ( ![]() ) by using additional compression. Remember, though, that compression degrades image quality.
) by using additional compression. Remember, though, that compression degrades image quality.
• Small fine ( ![]() ). Images at this setting are 4.5 megapixels — a very small file size. This setting is useful for photographs created for websites, social media, or small 4 × 6 prints.
). Images at this setting are 4.5 megapixels — a very small file size. This setting is useful for photographs created for websites, social media, or small 4 × 6 prints.
• Small normal ( ![]() ). Images at this setting are also 4.5 megapixels. However, additional compression means that it produces about double the amount of images compared to the Small fine setting (
). Images at this setting are also 4.5 megapixels. However, additional compression means that it produces about double the amount of images compared to the Small fine setting ( ![]() ).
).
• Small 2 ( ![]() ). At 2.5 megapixels, images shot at this very small file size are best used for e-mail or the web.
). At 2.5 megapixels, images shot at this very small file size are best used for e-mail or the web.
• Small 3 ( ![]() ). Images shot at this setting are only 0.35 megapixels and, thus, are not ideal for most photography needs. However, this size is useful for special applications, such as web thumbnails or high-volume documentation.
). Images shot at this setting are only 0.35 megapixels and, thus, are not ideal for most photography needs. However, this size is useful for special applications, such as web thumbnails or high-volume documentation.
Movie Mode
To shoot video, move the power switch to Movie mode ( ![]() ). The Canon T5i/700D is considered a full, High Definition (HD) camera. This means that it has the 1080 vertical pixels (or scanning lines) required for HD. When shooting video, I recommend that you use fast (class 6 or higher), large-capacity memory cards. Slower cards may not write as fast as the video is produced, which could affect the playback quality. When playing videos, connect your camera to a TV or monitor for better viewing.
). The Canon T5i/700D is considered a full, High Definition (HD) camera. This means that it has the 1080 vertical pixels (or scanning lines) required for HD. When shooting video, I recommend that you use fast (class 6 or higher), large-capacity memory cards. Slower cards may not write as fast as the video is produced, which could affect the playback quality. When playing videos, connect your camera to a TV or monitor for better viewing.

3.38 The Movie mode is the top position on the power switch.
See Chapter 9 for more info about how to connect your camera to a television.
Exposing for video
If your camera is set to any of the Basic Zone modes, it defaults to the Scene Intelligent Auto mode ( ![]() ). This means that the camera sets the shutter speed, aperture, and ISO. In Scene Intelligent Auto mode (
). This means that the camera sets the shutter speed, aperture, and ISO. In Scene Intelligent Auto mode ( ![]() ), the camera also applies scene detection filters to enhance the video. The scene filter the camera detects appears on the LCD screen in the upper-left side of the frame. Auto exposure is fine for casual shooting, but when you want higher-quality video, experienced videographers recommend using the Manual shooting mode (
), the camera also applies scene detection filters to enhance the video. The scene filter the camera detects appears on the LCD screen in the upper-left side of the frame. Auto exposure is fine for casual shooting, but when you want higher-quality video, experienced videographers recommend using the Manual shooting mode ( ![]() ). This is because the camera tries to make adjustments as the scene changes in the automatic modes. This may seem convenient but, unfortunately, the results don’t look very professional.
). This is because the camera tries to make adjustments as the scene changes in the automatic modes. This may seem convenient but, unfortunately, the results don’t look very professional.
It is highly recommended that you use the Creative Zone modes when shooting video. The camera treats the Aperture-priority AE ( ![]() ) and Shutter-priority AE (
) and Shutter-priority AE ( ![]() ) modes the same as the Program AE mode (
) modes the same as the Program AE mode ( ![]() ). The Program AE mode (
). The Program AE mode ( ![]() ) sets the camera shutter speed, aperture, and ISO. The biggest difference between the Scene Intelligent Auto (
) sets the camera shutter speed, aperture, and ISO. The biggest difference between the Scene Intelligent Auto ( ![]() ) and Program AE (
) and Program AE ( ![]() ) modes is that Program AE mode (
) modes is that Program AE mode ( ![]() ) does not use scene detection. This means that you have more control over things like exposure compensation.
) does not use scene detection. This means that you have more control over things like exposure compensation.
Manual ( ![]() ) is the best mode for shooting high-quality video because it gives you control over the frame rate, shutter speed, aperture, and ISO. This is important because the other modes change the exposure settings while you are capturing video. If the exposure changes in the middle of a video clip, it is a sign of amateur work. The maximum ISO available for video is ISO 6400. Using Custom Function 1, option 2, you can set the ISO to High, which is the equivalent of ISO 12800. However, I wouldn’t recommend using this setting because it creates a lot of digital noise in your video, and exposure compensation is not available when using the High ISO setting.
) is the best mode for shooting high-quality video because it gives you control over the frame rate, shutter speed, aperture, and ISO. This is important because the other modes change the exposure settings while you are capturing video. If the exposure changes in the middle of a video clip, it is a sign of amateur work. The maximum ISO available for video is ISO 6400. Using Custom Function 1, option 2, you can set the ISO to High, which is the equivalent of ISO 12800. However, I wouldn’t recommend using this setting because it creates a lot of digital noise in your video, and exposure compensation is not available when using the High ISO setting.
For more information about the relationship between shutter speed and frame rate, see Chapter 8.
Setting the file size and focus
The Canon Rebel T5i/700D has the following video size options:
• 1920 × 1080 (30 or 24 fps)
• 1280 × 720 (60 fps)
• 640 × 480 (30 fps)
For more information about the effect frame rate has on your videos, see Chapter 8.
Your camera has a shooting time limit of 29 minutes and 59 seconds. If you use the highest file size (1920 × 1080), you need at least a 16GB memory card to record uninterrupted for the full time available. When you reach 29 minutes and 59 seconds, the camera automatically stops recording. Press the Live View shooting mode button ( ![]() ) and the camera begins recording again using a new video file.
) and the camera begins recording again using a new video file.
Your camera turns on Live View Shooting mode ( ![]() ) for video capture and you have the same tracking options that you do when shooting still photography.
) for video capture and you have the same tracking options that you do when shooting still photography.
The default setting for video focus is Movie-servo AF ( ![]() ). This means that the camera focuses on the subject closest to it. You can turn this off by touching the Movie-servo AF (
). This means that the camera focuses on the subject closest to it. You can turn this off by touching the Movie-servo AF ( ![]() ) icon in the lower-left corner of the LCD screen. When Movie-servo AF mode (
) icon in the lower-left corner of the LCD screen. When Movie-servo AF mode ( ![]() ) is off, your camera focuses once when you press the shutter button halfway. If you are not using a Canon STM lens, the audio of your video will likely include lens focus noise. Consider using Manual focus for higher-level video productions — to do so, select the Manual Focus mode (
) is off, your camera focuses once when you press the shutter button halfway. If you are not using a Canon STM lens, the audio of your video will likely include lens focus noise. Consider using Manual focus for higher-level video productions — to do so, select the Manual Focus mode ( ![]() ) on your lens.
) on your lens.
If you press the shutter button all of the way, your camera takes a photo whether it is recording a movie or not.