
Chapter 2: Don’t Start Coding Just Yet
Once you have a good understanding of your users and what they want, it is tempting to start coding. You probably already have an idea in your head how the app will look and function. But don’t jump into coding just yet! Code is rigid and difficult to change. It is better to use more flexible ways to think about the design first.
The app-building process is a continuum from low-fidelity ideas on paper to high-fidelity designs and working prototypes toward the final product. This chapter introduces some tools and ideas that will help you on the way.
Prototyping
Draw your design ideas on paper first. Getting ideas from your head to paper will make them concrete and much easier to discuss with the rest of the team. This phase of app building is called prototyping. Prototyping is an essential part of the design process. It provides a way to test ideas without having to implement them, therefore giving the team greater creative freedom.
The purpose of a prototype is to simulate the functionality of the app you are building. The simulated functionality will let you experiment and expose problems that you and your team might not have thought about. A prototype can be a low-fidelity paper drawing that doesn’t have any real functionality or a high-fidelity functional prototype that can actually be used and experienced—or anything in between.
Tip: The best place to start prototyping is on paper. Paper is virtually free and paper prototypes can be modified with an eraser and a pencil. Paper and pencil prototypes also aren’t limited by the technology. Go crazy! Don’t let the technical limitations get in your way. Sketch out your ideas and discuss them with the team.
Wireframes
App structure is the big picture of the design. Thinking about what kind of screens are needed and how they relate to each other is a good place to start. Ignore interface details first. You don’t want to be spending time designing visual details or thinking about exact wording of controls before you can be sure that those details will be needed.
Drawing wireframes is a good way to get the app structure on paper. A wireframe is a blueprint of your app. On a wireframe you describe how your app’s screens are composed and how they relate to each other without many details about visuals or content. A wireframe is usually a black-and-white line drawing that contains rough component descriptions, symbols for images, and filler text for text blocks. Figure 2-1 shows an example of a very simple wireframe that has a list of items on one screen and an item details screen.
Wireframes are very fast to build and painless to modify. They are not meant to fully specify the app user interface. They do, however, make ideas more concrete and testable. They also make it easier to discuss ideas with other team members. You have something concrete you can show instead of trying to explain abstract ideas verbally.

Figure 2-1: An example of a wireframe sketch for an app with two screens, a list of items and an item detail screen.
The effortlessness of wireframe drawing also makes it easy to test your ideas. If you have a crazy idea that just might work you probably won’t be able to convince others that it should be used in code without any proof. Building a wireframe is worth the time and effort. You can wireframe and demonstrate your ideas in a relatively short amount of time.
High-fidelity prototypes
Not everything can be prototyped using simple wireframes. Can you be sure that the screen transition you’ve been thinking about will work the way you want it to? Once you are certain that this transition is needed it is time to get coding involved. Building a functional prototype of part of the app makes sense when a concept is complex, and there is uncertainty as to whether it will work in practice.
A high-fidelity prototype might not be a throw-away prototype. Sometimes it is possible to build the prototype using reusable components and implementing functionality that can be utilized in the final product. The reusable components might even save you some time in the implementation phase, but that should not be the priority at this point of the project. The priority should remain strictly in producing the best possible user interface in the final product, and that should guide the decision.
Proof of Concept
Sometimes the technical feasibility of a new design is uncertain. This might be because designers want to use existing components in a way they have not been used before or maybe even use a new component. In this kind of scenario a proof of concept should be built. A proof of concept is a piece of working software implemented with enough details that it can be verified to work in practice. A proof of concept gives the team confidence that the design they are proposing will work in practice or clarifies that the approach is not feasible and should be redesigned. A proof of concept doesn’t need to be a fully functional app but instead concentrate on a single design idea like a novel interaction method on a list or even just to test the effectiveness of certain graphics.
Tools for Design
Paper prototyping is all well and good, but at some point in the process it is useful to start using digital tools. Once the big picture design is clear, digital tools can really help you fine-tune it. Other obvious benefits of using digital tools include easy distribution even when team members are not located in the same physical space.
Whenever people talk about design software, Adobe’s name pops up. They produce multiple tools that are very widely used but are also very expensive. This section introduces a few tools that are maybe less known but also much cheaper. Each of these tools has good support for the Android platform and can be very useful for drawing Android app wireframes.
OmniGraffle and stencils
The OmniGraffle wireframing tool (see Figure 2-2) is my personal favorite. With a great user interface, great Android support, and reasonable price I do wholeheartedly recommend OmniGraffle to anyone who is using a Mac. Unfortunately it is not available for Linux or Windows.
OmniGraffle is also one of the few applications that Google has released the official Android design stencil of (downloadable from Android design guidelines web page). The stencil is very helpful for drawing more detailed user interface designs. It contains all standard Android user interface components and many helpful composite controls like action bar and keyboards.
WireframeSketcher and templates
WireframeSketcher (see Figure 2-3) is a multi-platform wireframing tool that can be installed to Eclipse or as a standalone installation. It is available for Linux, Mac, and Windows. It also has multiple community-provided Android stencils that can be helpful during the wireframing process. This tool, however, is not well suited for detailed user interface design.

Figure 2-2: The OmniGraffle wireframing tool is a great Mac tool.
Source: The Omni Group
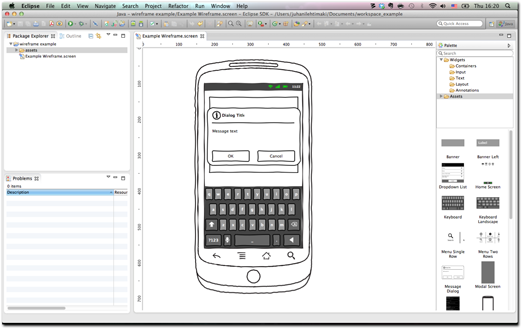
Figure 2-3: WireframeSketcher is a multi-platform wireframing tool.
Source: WireframeSketcher.com
Balsamiq
Balsamiq (see Figure 2-4) is a multi-platform wireframing tool that can run on a browser or as a standalone app on Linux, Mac, or Windows. It also has community-provided stencils for the Android platform.

Figure 2-4: Balsamiq is another great wireframing tool.
Source: Balsamiq Studios, LLC
What Is Eclipse?
For those of you with your heads in the sand, Eclipse is an Open Source IDE that runs on OS X, Linux, and Windows. It is currently the most popular tool for building Java applications. It also has a very good support for third-party plug-ins. It’s no surprise that Google chose Eclipse as the platform for Android tools.
Read more and download it at http://eclipse.org/.
Android Eclipse plug-in GUI builder
Android SDK ships with a user interface builder. Although its primary purpose is user interface development it can also be used for prototyping. The interface builder is constantly getting updated, and it is likely that Figure 2-5 will be outdated by the time you are reading this. Check out http://tools.android.com/ to see what’s new in the Android tools.
Using a development tool for design brings extra challenges, and I would not recommend this approach unless you are already very comfortable with the tool. The obvious benefit of using such a plug-in is, of course, that the resulting prototype can be run on real devices.

Figure 2-5: The Android Eclipse plug-in.
Source: Android SDK
Pencil
Pencil (see Figure 2-6) is a free standalone app or an add-on to the Mozilla Firefox browser. Although some features are missing, the app is free so trying out Pencil is risk free. Community-provided Android stencils are available for Pencil.

Figure 2-6: Pencil helps you quickly draw wireframes.
Source: Evolus
Additional Utilities
Android Design Preview is a handy little utility that allows you to display part of your desktop on any connected Android phone or on the emulator. You can test out designs directly from your computer drawing app on a real device without having to copy anything over to the phone. You can download the Android Design Preview from http://code.google.com/p/android-ui-utils/.
Android Asset Studio is a handy web app that can help you generate different icons for launcher, menu, action bar, tabs, and notifications. You can use graphics or text as the basis, and the web app will generate icons for all required densities and different Android versions. You can download Android Asset Studio from http://android-ui-utils.googlecode.com/hg/asset-studio/dist/index.html.
User Testing
As mentioned in the previous chapter, you are not your app’s users. A typical developer is very bad at guessing how their users will understand the user interface and how they will use it. That’s why actual users should test the design.
In a user test you put your design in front of real users. In a formal user test the users are typically invited to visit the testing facility—maybe your office or some other neutral place, although remote user testing technologies also exist. They are then presented with the prototype or functional app and asked to perform simulated real-world scenarios. The users are asked to think aloud while performing the tasks to get a better understanding of their thought processes. The test is usually videotaped for further review and then observed by a few people.
Although a formal user test is the best tool you have for uncovering usability problems it is not always possible, either due to financial or time limitations. In that case try to find alternative methods for getting feedback about your design. Your coworkers probably aren’t the best source for representative feedback, so it is better to go outside the office. Even testing the design with your family and friends is valuable. Performing a formal testing can be difficult, but asking questions like “How would you send this document via email?” or “What do you think this button does?” can provide you with valuable insight to your design.
User testing has the same philosophy as any other testing. A user test is successful if it uncovers problems. Be aware of the normal tendency of falling in love with your own creations. If you spend a lot of time building something, you want to see it succeed. If the app has problems, they will pop up at some point—either in testing or when the app is published. The sooner the better.
SelectING your participants carefully
Remember the personas discussed in Chapter 1? You should have already chosen whom you are writing your app for. Those are the people who you should try to use during user testing. Of course, you can do dry runs and even additional testing with your friends and coworkers, but you should always give more weight to tests with users from your target group. Use the personas you created in Chapter 1, and seek out people fitting your high-priority personas.
Planning for A user test
Remember what you designed your app to do. Try to formalize the bulk of the user test scenarios based on the core functionality of your app. Go through your user goal definitions and make sure that the high-priority user goals are covered. Follow the same rules when writing the user test scenarios that you did when writing user goals. Do not include technical features in your scenarios, and let users figure out which features they want to use. A bad user test scenario would be something like “Open a document and press Save and add it as an attachment to email,” while a good scenario could sound something like “You remember writing a document about your friends before. You want to refresh your memory about the content of the document and send it to your friend via email.”
Tip: Try to use real data as much as possible. If your app has, for example, contact lists, you should populate them with real-looking data. Don’t use clearly fake data like “contact 1,” “contact 2,” but instead create names that look real. Avoid situations where users have to imagine pieces of the app if possible.
It can be a good idea to write scenarios to test features you’re not sure are going to work. If your team is planning to build something that isn’t typically supplied on the Android platform, for example, you certainly want to test that feature. If none of the test subjects touches on the features you wanted to test, you can add questions to the end of the user test to ask the users how they think the specific features work.
Stay neutral; don’t guide the users
People are naturally reluctant to criticize work done by others they don’t know. The test participants might think that they are offending you and your work. It is some times a good idea to present the app as something that was done by someone else to get more honest feedback.
Be neutral during the testing, and don’t argue with the test subjects. If they don’t understand some user interface paradigm, or they criticize parts of the user interface, don’t try to justify or defend the design. The test subject is always right.
Try also not to lead the users. If the users are lost and are unable to perform a scenario move to next one. Explaining how the user interface works in this situation is not useful. Try to figure out why this happened instead.
Don’t over-correct; are the findings real?
Pay careful attention to all usability problems the test subjects bring up, but note that not all of them require action. Look for patterns and problems that seem to be present with more than one test subject. Not every issue a single test subject encounters is real. The situation in which your app is tested doesn’t correspond fully with reality. The test subjects are under pressure and might encounter problems they wouldn’t if they were trying the app alone.
Five users are enough
Then there is the question of how many users should participate in a usability test before any findings can be seen as meaningful. The fact is that each individual user test is expensive. The optimal number of user test subjects has been studied a lot. Findings from different studies are not unanimous. Probably a safe bet is to test with five people at a time. After five tests the number of new usability problems uncovered starts to drop and the investment is no longer justified. On the other hand fewer than five test subjects is too small a set to tell if the individual problems are problems that will affect a large number of people or just issues that a single user encounters.
Mobile user testing
As this book is about Android and mostly about apps that are used on the go, it is worth mentioning that use context (the environment in which the users are using your app) matters. If you test an app in a quiet office meeting room, the problems you encounter might be very different from the real use context. This is not an easy problem to solve, but it is something you should keep in mind when interpreting the test results.
User Testing with paper prototypes
As already established, paper is the best medium to work in during the early stages of the design process. As it turns out paper prototypes also function very well in user testing. Although it might sound crazy at first, running paper-based user tests is easy, valuable, and fun.
Building a paper prototype that can be used in a user test requires a bit more preparation. You need to be able to simulate app functionality on paper. In practice this requires use of paper, scissors, glue, and imagination. Back to kindergarten!
Once you have set the scenarios you want to be tested, think how they would be performed with your design. Print out or draw the screens those scenarios cover. You might also need to create individual components and component states that can be used to simulate the user interface functionality.
In the testing situation one person will act as the computer and update the paper prototype user interface based on user actions. The users will use the paper prototype the way they would use a real device. After the initial laugh while explaining this to the test subject, the test usually works very well.
Back to THE drawing board
Finding usability problems won’t help your design unless something is done to fix them. You must schedule time to react to the findings after each user testing round. Be prepared to change the user interface. Sometimes, especially in the early phases, the problems are so apparent that even after a few tests it is clear that the user interface must be changed. If you are working with a paper prototype and sometimes even with a functional app you can decide to make changes between tests to try out something new.
Summary
It is very important to try out designs before coding. Do not lock yourself into a design before you are sure that the design works. Work your way up from low-fidelity paper prototypes to a concrete design and finished app.
Remember that you are not your app’s user, and acknowledge that developers are generally very bad at guessing how users see the user interface. Put your design in front of real users. Aim to do formal user testing, but if that is not possible, ask your friends and family to help you evaluate the design. Getting outside views and opinions is very valuable.