
Chapter 15. Collaborate on Documents
Chapter at a Glance

In this chapter, you will learn how to | |
✓ | |
✓ | |
✓ | |
✓ | |
✓ | |
✓ | |
✓ | |
In today’s workplace, many documents are developed collaboratively by a team of people. You might be the lead author of some documents that are reviewed by your colleagues and managers, and you might be a reviewer of other documents. With Microsoft Word 2010, you can collaborate on the development of documents in new and exciting ways. You can also easily attach a document to an e-mail message and send it to colleagues for review.
These days, most documents are reviewed on the screen rather than on paper printouts. With Word, it’s easy to edit documents on-screen without losing track of the original text, and it’s easy to accept or reject changes. You can also make comments, ask questions, and respond to comments made by others. If you send a document out for review and then receive several copies with changes and suggestions back from different people, you can merge the different versions into one file to simplify the process of reviewing and accepting or rejecting changes.
Sometimes you’ll want other people to review a document but not change it. You can prevent other people from making changes to a document by assigning a password to it. You can also specify that only certain people are allowed to make changes, and what types of formatting and content changes are allowed.
In this chapter, we’ll first discuss the new Word coauthoring capabilities., and then you’ll send a document directly from Word. You’ll track changes that you make to a document, and then accept and reject changes. You’ll review, add, delete, and hide comments, and merge three versions of the same document. Finally, you’ll set and remove a password and set up editing and formatting restrictions.
Practice Files
Before you can complete the exercises in this chapter, you need to copy the book’s practice files to your computer. The practice files you’ll use to complete the exercises in this chapter are in the Chapter15 practice file folder. A complete list of practice files is provided in Using the Practice Files at the beginning of this book.
Coauthoring Documents
Whether you work for a large organization or a small business, you might need to collaborate with other people on the development of a document. Or perhaps you are working with a team of students or volunteers on a document that requires input from everyone. No matter what the circumstances, it can be difficult to keep track of different versions of a document produced by different people. With Word 2010, however, it is now possible to store one version of the document that can be worked on by multiple people simultaneously.
To develop a document with other users, you need to save it to a Microsoft SharePoint 2010 site. Display the Save & Send page of the Backstage view, click Save To SharePoint, and then use the settings in the Save As dialog box to save the document to the site. You then continue to work on it from the site. When another contributor begins making changes to the file stored on the site, Word alerts you to that person’s presence. You can display a list of the other people who are actively working on the document and their availability.
As the people working on the document make changes, Word keeps track of them. When you finish working with the document, you save and close it as usual. The next time you open it, you’ll see the changes made by anyone else who has worked on the document. In this way, people can work efficiently on a document whether they are in the same office building, on the other side of town, or in a different time zone.
If your organization has implemented the Word 2010 Web App on a server, team members who travel frequently can review documents while on the road. With the Web App, you can review and edit a document stored on your organization’s server on any computer running Windows Internet Explorer 7 or Internet Explorer 8, FireFox 3.5, or Safari 4 on the Mac.
You can also save a document to a Windows Live SkyDrive space and share it with other people from there. SkyDrive is part of Windows Live Online Services, a suite of useful programs that are available over the Internet from your computer or from mobile devices, such as portable computers or smartphones. You can visit www.windowslive.com/Online/ to learn about these services. All you need to start using them is a Windows Live ID.
You save a document to SkyDrive by displaying the Save & Send page of the Backstage view, clicking Save To Web, and then specifying the location where you want to save the file. You can make the document publicly available by saving it in the Public folder, or you can save it in your My Documents folder and then assign access permissions to specific people. You and colleagues who can access the file can then work on it by using the Word Web App from the site. (At the time of writing, editing capabilities were not yet available.)
If you have a smartphone, you might be able to use the Word 2010 Mobile App to view and edit documents.
More in-depth discussion of the Web App and the Mobile App, which allow you to continue collaborating with your team no matter where you are, is beyond the scope of this book, but if you are a “road warrior,” you will certainly want to research them further.
Sending Documents Directly from Word
After you create a document, you can quickly send it via e-mail from the Save & Send page of the Backstage view, without starting your e-mail program.

Clicking Send As Attachment opens a message window with the current document already attached as a .docx file. All you have to do is enter the e-mail addresses of anyone you want to receive the message and its attachment. If you want, you can modify the subject line, which contains the name of the document you’re sending.
Similarly, you can click Send As PDF or Send As XPS to attach a version of the document saved in the corresponding file format.
In addition to sending a document as an e-mail attachment from within Word, if you have signed up with an Internet fax service provider, you can send the document as a fax. Although the exact terms vary from one provider to another, these services let you send and receive faxes from your computer without needing a fax machine or dedicated fax line. After establishing an Internet fax service account, you can send the current document as a fax by clicking Send As Internet Fax on the Save & Send page. You then follow the procedure specified by your fax service provider.
Tip
If you do not sign up with an Internet fax service provider before clicking Send As Internet Fax, a message box appears. Clicking OK opens a Web page where you can choose a fax service provider.
In this exercise, you’ll attach three documents to an e-mail message so that you can simulate sending them for review.
Set Up
You need the InfoSheetReviewA_start, InfoSheetReviewB_start, and InfoSheetReviewC_start documents located in your Chapter15 practice file folder to complete this exercise. Open each document and save it without _start as part of the file name. Be sure to have an e-mail program installed on your computer and an e-mail account set up before beginning this exercise. Microsoft Outlook 2010 is recommended. You can use another e-mail program, but the steps for attaching and sending a message might vary from those given in this exercise. Then with only the InfoSheetReviewA document open, follow the steps.
Display the Backstage view, and click Save & Send.
With Send Using E-mail selected in the center pane of the Save & Send page, click Send as Attachment.
A message window opens.
In the To box, type your own e-mail address.
In the message content pane, type Please review the attached documents and let me know which title you prefer.
You can format the text of the message in the same way you would the text of a document.
On the Message tab, in the Include group, click the Attach File button.
The Insert File dialog box opens.
Navigate to your Chapter15 practice file folder.
Click InfoSheetReviewB, hold down the Ctrl key, click InfoSheetReviewC, and then click Insert.
In the message window, the Attached box shows that three files are attached to the message.
On the Message tab, in the Tags group, click the High Importance button.
If the message recipient is using Outlook, the message header will display a red exclamation mark to indicate that it is important.
In the message header, click the Send button.
Outlook sends the e-mail message with the attached documents. You’ll receive the message the next time Outlook connects to your mail server.

Adding and Reviewing Comments
When reviewing a document, you can insert notes, called comments, to ask questions, make suggestions, or explain edits. To insert a comment, you select the text to which the comment refers, click the New Comment button in the Comments group on the Review tab, and type what you want to say in the balloon that appears. In Print Layout view, Word highlights the associated text in the document in the same color as the balloon and adds your initials and a sequential number to the balloon itself.
You can work with comments in the following ways:
To display the reviewer’s name and the date and time the comment was inserted, point to either the commented text or the balloon.
To review comments, scroll through the document, or in the case of long documents, click the Next or Previous button in the Comments group to jump from balloon to balloon.
To edit a comment, click the balloon and use normal editing techniques.
To delete a comment, click its balloon and then click the Delete button in the Comments group; or right-click the balloon and then click Delete Comment.
To respond to a comment, simply add text to its existing balloon. You can also click the existing balloon and then click the New Comment button to attach a new balloon to the same text in the document.
If the complete text of a comment isn’t visible in its balloon, view it in its entirety by clicking the Reviewing Pane button to display the Reviewing pane. To change the size of the pane, point to its border, and when the pointer changes to a double-headed arrow, drag the border. To close the Reviewing pane, click its Close button, or click the Reviewing Pane button again.
Turn off the display of comment balloons by clicking the Show Markup button in the Tracking group and then clicking Comments.
If multiple people have reviewed a document and you want to see only the comments of a specific person, click the Show Markup button, click Reviewers, and then click the name of any reviewer whose comments you don’t want to see.
In this exercise, you’ll show and review comments in a document, add and respond to comments, delete one that is no longer needed, and then hide the remaining comments.
Set Up
You need the CompetitiveAnalysisA_start document located in your Chapter15 practice file folder to complete this exercise. Open the CompetitiveAnalysisA_start document, and save it as CompetitiveAnalysisA. Then follow the steps.
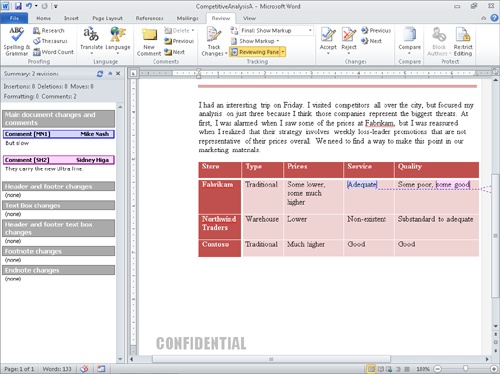
If comments are not visible in the document, click the Review tab, and in the Tracking group, ensure that the Display for Review box displays Final: Show Markup. If comments are still not visible, in the Tracking group, click the Show Markup button, and if Comments does not have a check mark to its left in the list, click it.
On the Review tab, in the Comments group, click the Next button.
In the document, Word highlights the first instance of commented text.
In the Comments group, click the Next button.
Word moves to the next comment.
In the table, point to Adequate.
A ScreenTip displays information about who inserted the comment and when.
In the fifth column of the same row, select the words some good, and then in the Comments group, click the New Comment button.
Word highlights the selection and displays a new balloon in the right margin.
In the comment balloon, type They carry the new Ultra line.
Click the comment balloon associated with the word competitors, and in the Comments group, click the Delete button.
Word deletes the comment and its balloon.
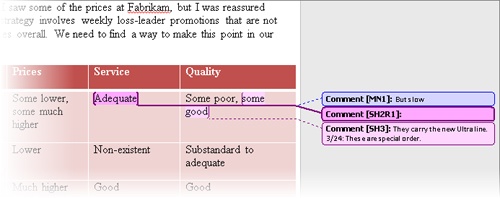
In the Tracking group, click the Reviewing Pane button.
The Reviewing pane opens at the left side of the program window.
In the Reviewing pane, click at the right end of the second comment, press Enter, type the date and a colon (:), press the Spacebar, and then type These are special order.
The new text is added to the same comment in the Reviewing pane.
In the Tracking group, click the Reviewing Pane button to close the pane, and then scroll through the document so that you can see its text.
Click anywhere in the comment balloon associated with Adequate, and then in the Comments group, click the New Comment button.
Word attaches a response comment to the same text in the document.
In the response comment balloon, type If you had been a real customer, would you have left?
In the Tracking group, click the Show Markup button, and then click Comments to hide them.


Tracking and Managing Document Changes
When two or more people collaborate on a document, one person usually creates and “owns” the document and the others review it, adding or revising content to make it more accurate, logical, or readable. In Word, reviewers can turn on the Track Changes feature so that the revisions they make to the document are recorded without the original text being lost. (Note that turning on Track Changes affects only the active document, not any other documents that might also be open.)
To turn on Track Changes, you click the Track Changes button in the Tracking group on the Review tab. You then edit the text as usual.
Tip
If you want to know whether Track Changes is turned on when the Review tab is not displayed, right-click the status bar and then click Track Changes on the Customize Status Bar menu. Word then adds a Track Changes button to the status bar that you can click to turn the feature on and off.
By default, your revisions appear in a different color from the original text, as follows:
Insertions and deletions are inserted in the text in your assigned color and are underlined.
Formatting changes appear in balloons in the right margin.
All changes are marked in the left margin by a vertical line.
You can display deletions in balloons instead of in the text, and you can display formatting changes in the text instead of in balloons. Simply click the Show Markup button in the Tracking group on the Review tab, click Balloons, and then click the options you want.

You can display a ScreenTip identifying the name of the reviewer who made a specific change and when the change was made, by pointing to a revision or balloon. The reviewer name is taken from the user information stored with the user account. You can change the user information by clicking the Track Changes arrow, clicking Change User Name, typing the name and initials you want in the Word Options dialog box, and then clicking OK.
By using the commands available on the Review tab, you can work with revisions in the following ways:
To track changes without showing them on the screen, hide the revisions by clicking the Display For Review arrow in the Tracking group and clicking Final in the list. To display the revisions again, click Final: Show Markup in the Display For Review list. You can also display the original version, with or without revisions.
When revisions are visible in the document, select which types of revisions you want to display from the Show Markup list in the Tracking group—for example, you can display only comments or only insertions and deletions. You can also display or hide the revisions of specific reviewers from this list.
Move forward or backward from one revision or comment to another by clicking the Next or Previous button in the Changes group.
Incorporate a selected change into the document and move to the next change by clicking the Accept button in the Changes group. Click the Reject button to remove the selected change, restore the original text, and move to the next change.
Accept or reject all the changes in a block of text, such as a paragraph, by selecting the block and clicking the Accept or Reject button.
Accept all the changes in the document by clicking the Accept arrow and then clicking Accept All Changes In Document. Reject all the changes at once by clicking the Reject arrow and then clicking Reject All Changes In Document.
Accept or reject only certain types of changes or changes from a specific reviewer by displaying only the changes you want to accept or reject, clicking the Accept or Reject arrow, and then clicking Accept All Changes Shown or Reject All Changes Shown in the list.
In this exercise, you’ll turn on Track Changes, edit the document, and accept and reject changes.
Set Up
You need the CompetitiveAnalysisB_start document located in your Chapter15 practice file folder to complete this exercise. Open the CompetitiveAnalysisB_start document, and save it as CompetitiveAnalysisB. Then follow the steps.
On the Review tab, in the Tracking group, click the Track Changes button.
The active (orange) button indicates that Track Changes is turned on. Any changes that you make now will be indicated in the document as revisions.
To display changes the same way we do in our graphics, in the Tracking group, click the Show Markup button, point to Balloons, and then click Show All Revisions Inline.
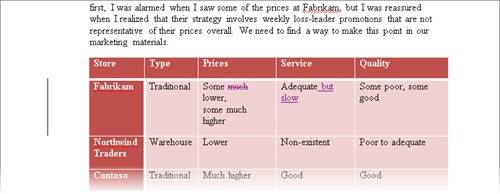
In the table at the end of the document, in Some much lower in the third column, double-click much, and then press the Delete key.
Word changes the font color of the word much and indicates with strikethrough formatting that you deleted it.
In the fourth column of the same row, position the insertion point at the right end of Adequate, press the Spacebar, and then type but slow.
Word inserts the new text in the same color as the deletion.
In the fifth column of the Northwind Traders row, select the word Poor, and then type Substandard.
Word interprets this one change as both a deletion and an insertion.
Point to Substandard.
A ScreenTip appears.
In the Tracking group, click Show Markup, point to Balloons, and then click Show Revisions in Balloons.
Word removes the deletions from the text and displays them in balloons in the right margin.
In the Tracking group, display the Display for Review list, and then click Final.
Word hides the revisions, displaying the document as it would appear if all the changes are accepted.
Display the Display for Review list, and click Final: Show Markup to make the revisions visible again.
Press Ctrl+Home to move to the beginning of the document.
In the Changes group, click the Next button.
Word selects the first change in the document—the deleted word much.
In the Changes group, click the Accept button.
Word accepts the change, removes the revision and associated balloon, and moves to the next change (but slow).
In the Changes group, click the Reject button.
Word removes the inserted text, and because there are no more changes in this row of the table, it also removes the adjacent vertical bar from the left margin. It then moves to the next change (Substandard).
In the Changes group, click the Accept button to implement the deletion, and then click the same button again to implement the insertion.
A message box tells you that there are no more changes in the document.
Click OK to close the message box.
In the Tracking group, click the Track Changes button to stop tracking changes made to the active document.


Comparing and Merging Documents
Sometimes you might want to compare several versions of the same document. For example, if you have sent a document out for review by colleagues, you might want to compare their edited versions with the original document.
Instead of comparing multiple open documents visually, you can tell Word to compare the documents and merge the changes into one document. Even if the changes were not made with Track Changes turned on, they are recorded in the merged document as revisions. From within that one document, you can view all the changes from all the reviewers or view only those from a specific reviewer.
In this exercise, you’ll merge three versions of the same document: your version, a version edited by Chris Preston, and a version edited by Terry Adams. You’ll then evaluate and resolve the differences between the versions.
Set Up
You need the ServiceSH_start, ServiceCP_start, and ServiceTA_start documents located in your Chapter15 practice file folder to complete this exercise. Open each document and save it without _start as part of the file name. Then with only the ServiceSH document open, follow the steps.
On the Review tab, in the Compare group, click the Compare button, and then click Combine.
Tip
Click the Compare option to compare two documents and display the differences between them in a third document. The documents being compared are not changed.
The Combine Documents dialog box opens.
Display the Original document list, and click ServiceSH. Then ensure that Sidney Higa appears in the Label unmarked changes with box.
Display the Revised document list, and click ServiceCP. Then ensure that Chris Preston appears in the Label unmarked changes with box.
In the lower-left corner of the dialog box, click More, and then in the Comparison settings area, verify that all the check boxes are selected.
In the Show changes area, under Show changes in, click Original document, and then click OK.
Troubleshooting
If the documents contain conflicting formatting, you’ll see a message box asking you to confirm which document’s formatting should be used.
Word compares the two documents and marks the differences in the ServiceSH document, which is displayed in the center pane. To the left, it displays the Reviewing pane, and to the right, it displays the two documents being compared.
Troubleshooting
The appearance of buttons and groups on the ribbon changes depending on the width of the program window. For information about changing the appearance of the ribbon to match our screen images, see Modifying the Display of the Ribbon at the beginning of this book.
On the Review tab, in the Compare group, click the Compare button, and then click Combine to display the Combine Documents dialog box.
Display the Original document list, and click ServiceSH. Then display the Revised document list, and click ServiceTA. Ensure that the changes are assigned to Sidney Higa and Terry Adams, respectively. Then with Original document selected, click OK.
The changes from the ServiceTA version of the document are added to those of the other two versions.
In the center pane, scroll through the document to see all the revisions, and then in the Reviewing pane, scroll through the individual revisions.
In the Tracking group, click the Show Markup button, point to Reviewers, and then click Sidney Higa.
The revisions made by Sidney Higa are hidden.
Display the Reviewers list again, and then click All Reviewers to redisplay all the revisions.
Press Ctrl+Home to ensure that the cursor is at the top of the document. Then in the Changes group, click the Accept arrow, and in the list, click Accept All Changes in Document.
All the changes are accepted.
Close the Reviewing pane, and then close the two windows on the right side of the screen.
Tip
The next time you combine documents, the Reviewing pane and the source windows will be closed. You can open the Reviewing pane by clicking the Reviewing Pane button in the Tracking group on the Review tab, and you can open the source windows by clicking Show Source Documents in the Compare list and then clicking the option you want.


Password-Protecting Documents
Sometimes, you might want only certain people to be able to open and change a document. The easiest way to exercise this control is to assign a password to protect the document. Word then requires that the password be entered correctly before it will allow the document to be opened and changed.
Word offers two levels of password protection:
Unencrypted. The document is saved in such a way that only people who know the password can open it, make changes, and save the file. People who don’t know the password can open a read-only version. If they make changes and want to save them, they have to save the document with a different name or in a different location, preserving the original.
Encrypted. The document is saved in such as way that people who do not know the password cannot open it at all.
In this exercise, you’ll set an unencrypted password for a document and then test the document’s security by entering an incorrect password. You’ll open a read-only version of the document and then reopen it with the correct password. You’ll remove the unencrypted password-protection from the document and then set an encrypted password.
Set Up
You need the LoansProtected_start document located in your Chapter15 practice file folder to complete this exercise. Open the LoansProtected_start document, and then follow the steps.
Display the Backstage view, and click Save As.
With your Chapter15 practice file folder displayed in the Save As dialog box, change the name in the File name box to LoansProtected.
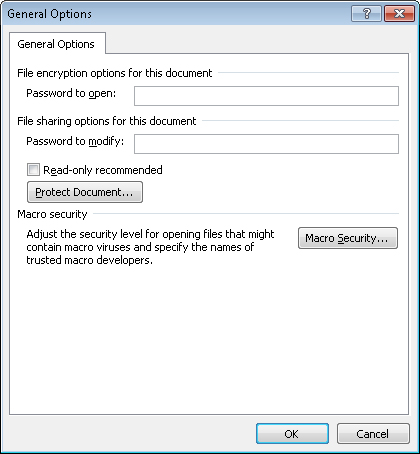
At the bottom of the dialog box, click Tools, and then in the list, click General Options.
The General Options dialog box opens.
Tip
If you want people to be able to read the document’s contents but you don’t expect them to change the document, you can select the Read-Only Recommended check box to tell Word to display a message suggesting that the document be opened as read-only. Then click OK to close the General Options dialog box without assigning a password.
In the Password to modify box, type P@ssword.
As you type the password, dots appear instead of the characters to keep the password confidential.
Click OK.
The Confirm Password dialog box opens.
In the Reenter password to modify box, type P@ssword, and then click OK to set the password.
In the Save As dialog box, click Save.
Word protects the document by assigning the selected password, and then saves it in the Chapter15 folder.
Display the Backstage view, and click Close to close the LoansProtected document.
Display the Backstage view, and on the Recent page, click the LoansProtected document.
Because this document is protected by the password you just set, the Password dialog box opens.
In the Password box, type password, and click OK.
A message tells you that you typed an incorrect password.
In the message box, click OK.
In the Password dialog box, click Read Only.
The LoansProtected document opens as a read-only document, as indicated by (Read-Only) in its title bar.
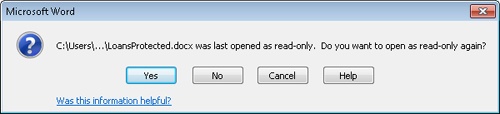
Close the document from the Backstage view, and then reopen it.
Word asks whether you want to open a read-only version of the document again.
Click No. Then when the Password dialog box opens, type P@ssword, and click OK.
Because you typed the correct password, the document opens.
Display the Backstage view, and click Save As. Then click Tools, and click General Options.
In the General Options dialog box, select the contents of the Password to modify box, press Delete, and click OK to close the dialog box.
In the Save As dialog box, click Save. Then click Yes to confirm that you want to replace the existing file.
The document is no longer protected by a password.
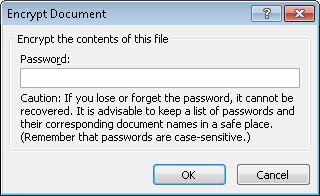
Display the Backstage view, and in the Permissions area of the Info page, click Protect Document. Then click Encrypt with Password.
The Encrypt Document dialog box opens.
In the Password box, type P@ssword, and click OK. Then type the password again in the Confirm Password dialog box, and click OK.
The Info page now reports that a password is required to open the LoansProtected document.
In the Backstage view, click Save. Then redisplay the Backstage view, and close the document.
Test the document’s security by trying to open it with an incorrect password.

Controlling Changes
Sometimes you’ll want people to be able to open and view a document but not make changes to it. Sometimes you’ll want to allow changes, but only of certain types. For example, you can specify that other people can insert comments in the document but not make changes, or you can require that people track their changes.
To prevent anyone from introducing inconsistent formatting into a document, you can limit the styles that can be applied. You can select the styles individually, or you can implement the recommended minimum set, which consists of all the styles needed by Word for features such as tables of contents. (The recommended minimum set doesn’t necessarily include all the styles used in the document.)
To protect a document from unauthorized changes, you display the Restrict Formatting And Editing task pane.

In this exercise, you’ll set editing and formatting restrictions to selectively allow modifications to a document.
Set Up
You need the ProceduresRestricted_start document located in your Chapter15 practice file folder to complete this exercise. Open the ProceduresRestricted_start document, and save it as ProceduresRestricted. Then follow the steps.
On the Review tab, in the Protect group, click the Restrict Editing button.
The Restrict Formatting And Editing task pane opens.
Under Formatting restrictions in the task pane, select the Limit formatting to a selection of styles check box, and then click Settings.
The Formatting Restrictions dialog box opens.
Scroll through the Checked styles are currently allowed list.
The styles reflect those in the template attached to the open document, including styles that are available but not currently in use.
Click Recommended Minimum, and then scroll through the list again.
All the selected styles are designated by the word recommended. The recommended set does not include some of the styles used in the document, so you need to add them.
Toward the top of the list, select the Address check box. Then scroll through the list, and select the BulletList1 and BulletList2 check boxes.
In the Formatting area, select the Block Theme or Scheme switching and the Block Quick Style Set switching check boxes.
Click OK to implement the restricted set of styles.
Word displays a message stating that the document might contain formatting that is not allowed, and asking if you want the formatting to be removed.
In the message box, click Yes.
Under Editing restrictions in the task pane, select the Allow only this type of editing in the document check box. Then click the arrow to the right of the box below, and in the list, click Tracked changes.
Under Start enforcement in the task pane, click Yes, Start Enforcing Protection.
The Start Enforcing Protection dialog box opens.
Without entering a password, click OK.
The Restrict Formatting And Editing task pane indicates that formatting and editing in this document is now restricted.
Close the task pane, and then display the Home tab.
Many of the buttons in the Font and Paragraph groups are now unavailable.
Display the Review tab, and notice that you cannot turn off Track Changes.
In the document title, double-click the word Office, and type Operations.
Your change is marked as a revision. Any edits you make will be recorded, and because the Track Changes button is unavailable, you cannot turn it off.


Key Points
You can send a document for review via e-mail. When you receive the reviewed versions, you can merge them so that all the changes are recorded in one document.
You can insert comments in a document to ask questions or explain suggested edits.
When you collaborate on a document, you can record the revisions you make to the document without losing the original text.
If only specific people should work on a document, you can protect it with a password. You can also restrict what people can do to it.