
IN THIS CHAPTER
Eventually, you'll want to make changes to just a part of your photo. Whitening teeth, swapping backgrounds, or targeting areas of a photo to leave in color even as you turn the rest to black and white are just a few examples of things you can do by selecting a portion of your photo. Knowing the different selection tools that are available to you in Photoshop and how and when to use each is integral to making these types of changes effectively.
When you create a selection in a photo, it allows you to change the area inside the selection without affecting any other part of the photo. You'll sometimes hear selections called selection masks, because they effectively mask the unselected portions of a photo from the changes being made. You also can use selections to create masks and paths, enhancing your selective creativity even more.
Before I show you how each selection tool works, I cover the basics, including the Select menu and the options available. After I show you the ins and outs of all the selection tools, I show you how to put the finishing touches on your selection and finally how to output your selections as masks.
The Select menu, as shown in Figure 9.1, has several options that help you create and use a selection. Some of these options are holdovers from before the powerful selection tools like the Quick Selection tool and Refine Edge dialog box were available. These are options that you won't use very often, if at all. Other options are indispensable, and being familiar with these options gives you more power in utilizing the selections you create.

Select All: Would you like to select everything? This could be a selection around your entire image, or a selection around everything in a selected layer. Ctrl/

Deselect: If you are not familiar with the Deselect option, you have probably been really frustrated more than once at those marching ants that just don't seem to go away. Ctrl/
Reselect: Whoops! Did you use the Deselect option too soon? Choose the Reselect option to bring your selection back. Although you can use the Undo option to bring your selection back immediately, you can use the Reselect option even after you've made other changes to your image in the interim. Although this option brings back the latest selection as long as your document is open, it's certainly not the best option for preserving your selection—make another selection, and the one you want is gone. If you want to preserve a selection for later use, Save Selection is a much better option.
Inverse: Sometimes using the selection tools to select what you don't want selected is much easier than selecting what you do want selected. Blurring the background behind a person in an image is a good example of this; it's much easier to select the person than the entire background. When this is the case, select what you don't want selected; the inverse option reverses the areas that are selected in your image.
All Layers: If you have two or more layers in the Layers panel, click this option to select all of them at once.
Deselect Layers: This deselects any layers that are selected.
Similar Layers: Use this option to select layers that are similar to one another—all text layers or all fill layers, for instance.
Color Range...: This option is similar to the Magic Wand tool, both of which I cover later in this chapter.
Refine Mask...: If a selection is active in your image, this option is actually Refine Edge in the menu. Refining the edges of either a selection or a mask uses the same dialog box and is a similar process for each. It is covered later in this chapter.
Modify: You can modify your selection in several different ways, most of which are similar to using the Refine Edge dialog box:
Border: This is the only Modify option that isn't also found in the Refine Edge dialog box. It allows you to select, rather than entire objects, just the border of that object. After making a selection, click Select


Figure 9.2. Border Selection could be used to create special effects such as this "man in the moon."
Note
You can access the JPEG of the moon as well as the final PSD file used in Figure 9.2 by downloading both versions from the Web site.
Smooth: This reduces the "hills and valleys" in your selection by smoothing the edges of the selection based on the pixel value you enter.
Expand: This increases the overall size of the selection by expanding it the number of pixels indicated.
Contract: This decreases the overall size of the selection by contracting it the number of pixels indicated.
Feather: This makes the specified pixels on the edges of the selection gradually transparent. This allows changes you make to the selection to blend with the surrounding areas, whether you apply an adjustment to the selection or create a mask with the selection.
Grow: This expands your selection based on color. The areas that are adjacent to the selection that fall within the tolerance range specified in the Magic Wand tool (covered later in this chapter) also are selected.
Similar: Like the Grow option, this also expands your selection based on color, but using the entire image rather than just the adjacent areas.
Transform Selection: This allows you to scale and rotate your selection.
Edit in Quick Selection Mask Mode: Quick Mask mode uses a red overlay called a ruby-lith that can be changed using a brush to make precise refinements to your selection. It can be accessed more quickly from the Toolbox. The Quick Selection Mask is covered in greater detail later in this chapter.
Load Selection: This allows you to reload any saved selections.
Save Selection: This option allows you to save the current selection and retrieve it at any time, even after the file is closed and reopened (provided that the file has been saved as a .psd). You can save as many selections as you need to.
There are as many shapes and sizes of potential selections as there are images. In order to make selection as simple and efficient as possible, Photoshop provides several tools, as shown in Figure 9.3, that can be used to make specific types of selections. These tools can be used in conjunction with each other for even more versatility. With the advancements made to the tools, options, and refinements over the last few versions of Photoshop, selection has gone from a tedious process to an enjoyable one.
Note
As I teach you about selection tools in this chapter, keep in mind that some selections are easier to make using a specific color channel rather than the full image. This is a more advanced concept, so you can read about Color Channels in Chapter 11.

The Quick Selection tool is the best selection tool in the Photoshop Toolbox. It's been part of the Photoshop repertoire since CS3, and it easily trumps all the other selection tools. It has a new look in CS5, but it does the same remarkable work.
The Quick Selection tool works by selecting adjacent areas that are similar in color and texture to the area that you are dragging over. It works well for almost anything, because as you drag the selection roughly around the edges of the area you want to select, the tool automatically finds the edges of your selection and creates a more precise selection than you could make freehand.
Because it can be used to fine-tune selections made by the other selection tools, I show you how to use it first.
When you click the Quick Selection tool, the Options bar above the document window displays the available options, as shown in Figure 9.4. Familiarizing yourself with these options before you use the tool helps you to get the most out of this tool's capability.

Tool presets: You can save and retrieve your favorite tool settings using this drop-down list. Click the little black arrow to see a menu of available options.
New selection: When this option is highlighted, every time you drag the selection brush, you create a new selection. As you use the Quick Selection tool, it begins with the Add new selection option and automatically changes to the Add to selection option after your first selection.
Add to selection: With this option highlighted, everything you select is added to the current selection. This makes it easy to zoom in and do the detail work after the initial selection is made.
Subtract from selection: With this option highlighted, you can subtract areas from the current selection.
Brush picker: This sets the size and style of your selection brush. When using the selection tools, size is all that really matters, but it can make a difference in your selection. A larger brush has a larger tolerance and is less likely to find the more detailed edges.
Sample all layers: With this option checked, the Quick Selection tool uses color and textures from all available layers to determine the edges of your selection.
Auto-Enhance: This option smoothes out the edges and reduces the blockiness of your selection, automatically performing some of the refinements so you don't have to, using the Refine Edge dialog box. It is time-consuming and doesn't give you any control, however, so it isn't usually the best option.
Refine Edge: Refining the edge of a selection is the finish work that perfects your selection. This option is covered later in this chapter.
In the photo used in this example, you can see that the background is very distracting, so I am going to select the boy and blur the background so that the boy is clearly the subject of this photo.
See how quickly and easily you can select an area in your photo by following these steps:
Click the Quick Selection tool in the Toolbox, or press W.
Click the Brush Picker and then choose a size and brush style from the Quick Selection options menu at the top of the preview window, as shown in Figure 9.5.
The size and softness of the brush determine the detail of the edge selection. For large, hard edges, your brush can be quite large, making the selection faster. To fine-tune smaller areas, use a smaller brush size.
Tip
Use the brackets ([ and ]) to quickly reduce and expand your brush size.
Drag a rough outline around the area you want to select.
As I drag around the boy in Figure 9.6, the selection outline is adhering to the edges of his body. You don't need to make this selection continuously; you can add to and subtract from the selection as you go.
Note
You can try your hand at creating this selection by downloading Figure 9-6 from the Web site.
Use the Add to Selection and Subtract from Selection tools to fine-tune your selection.
Zoom in on hard-to-define areas and reduce your brush size to make the smaller selections. If you select too much, use the Subtract from Selection to take the extra area out.


That is the beginning of creating a selection with the Quick Selection tool. From beginning to end, it took less than five minutes to select the boy off the background of the sample image.
Nested with the Quick Selection tool is the Magic Wand tool. The Magic Wand tool creates a selection by targeting areas that are the same color. Use this tool if the area you want to select is all a similar color or colors. This works best, of course, if the areas that you don't want selected are a contrasting color.
Before using the Magic Wand tool, you should familiarize yourself with the options displayed above the document window in the Options bar, as shown in Figure 9.7. Familiarizing yourself with these options before you use the tool helps you to get the most out of this tool's capability.

Tool presets: You can save and retrieve your favorite tool settings using this drop-down list. Click the little black arrow to see a menu of available options.
New selection: When this option is highlighted, every time you drag the selection brush, you create a new selection and the old selection disappears.
Add to selection: With this option highlighted, everything you select is added to the current selection. This makes it easy to do the detail work after the initial selection is made.
Subtract from selection: With this option highlighted, you can subtract areas from the current selection.
Intersect with selection: This option selects only those areas that were in the first selection you made, as well as the second, and deselects anything that was selected only once.
Tolerance: The tolerance level determines how many shades of the color you choose with the Magic Wand are selected. A higher tolerance selects more shades; a lower tolerance selects fewer. The level you set depends entirely on your photo.
Contiguous: When this option is on, only the appropriate colors contiguous in the area the Magic Wand is used in are selected. If this option is off, all the color in the document within the tolerance range specified is selected.
Sample all layers: With this options checked, the Quick Selection tool uses color and textures from all available layers to determine the edges of your selection.
Refine Edge: Refining the edge of a selection is the finish work that perfects your selection. This option is covered later in this chapter.
In the photo shown in this example, I want to select the pistils to create a stylistic photo where the pistils are the only element of the lily in color. (I know, I know, none of it's in color as far as you're concerned, but work with me here.)
Using the Magic Wand tool is as easy as following these steps:
Choose the Magic Wand tool from the Toolbox, or press Shift +W.
The Magic Wand tool is nested behind the Quick Selection tool.
Tip
If the Magic Wand tool is hidden behind the Quick Selection tool, pressing W activates the Quick Selection tool. Simply press Shift+ W to toggle to the Magic Wand tool. You also can change your preferences so that you don't need to use the Shift key. Choose Edit
Change the tolerance level.
Because I want to select several different shades of orange in my photo and the surrounding area is cream, I use a high tolerance of 75.
Uncheck Contiguous.
I am choosing several unconnected areas that are all the same color, so I want to sample the entire document.
Click the color in your photo that you want to select.
The Magic Wand tool is different from every other selection tool in that it doesn't require you to click and drag, just click a color. If you want to select several different shades, choose an area that is mid-range between the lightest and darkest shades you want to select. Photoshop selects everything in your photo that is the color you click and uses the tolerance setting to determine the range of other colors that are selected. By choosing a midrange pixel to sample and with a high tolerance on a contrasting background, I got a nearly perfect selection in Figure 9.8.

Figure 9.8. The Magic Wand tool easily selected the bright orange pistils (along with the freckles) on the cream-colored lily.
Note
You can try your hand at creating this selection by downloading Figure 9-8 from the Web site.
Use the Add to Selection or Subtract from Selection tools to add or subtract areas from your selection.
You can choose an entirely different color to add to the selected area than the color you used for the first selection.
The Color Range selector is not a tool in the Toolbox, but rather a dialog box that can be launched from the Select menu. It works similarly to the Magic Wand because it makes selections primarily based on color, but it gives you a little more control over what is selected by letting you customize the settings and preview the results before making the selection.
A unique feature of the Color Range dialog box is that it works within a selection as well as the entire image, so you can make a general selection around the area that you would like to ultimately select color from, and only that area is used in the dialog box, as shown in Figure 9.9. After your selection is made and you click OK in the Color Range dialog box, the original general selection disappears and the selection made by the Color Range dialog box takes its place.
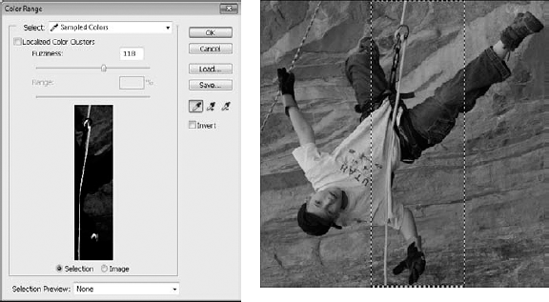
Figure 9.9. The Color Range dialog box is versatile when it comes to selecting color or tonal ranges.
Note
Use the Color Range dialog box to select the orange rope in this photo by downloading Figure 9-9 from the Web site.
The Color Range dialog box has the following options:
Select menu: The Select menu gives you the option to use a sample from the image as a basis for your selection, or from the drop-down menu you can choose to use a specific color, tonal ranges, or out-of-gamut colors.
Localized Color Clusters: Select this option if you are choosing more than one color and you want to restrict the selection to the same general area.
Fuzziness: The Fuzziness slider works much like the tolerance levels of the Magic Wand. The higher the fuzziness, the more varied the colors in your selection are. The best thing about it is that you can preview the selected areas as you move the slider, allowing you to set a precise fuzziness level before creating your selection.
Range: The Range slider works with the Fuzziness slider to determine how large an area in your image to select from. Again, having the preview is priceless.
Selection/Image: You can either preview the selection or the image. The Selection preview is shown as a mask where the selected areas are anything in the upper half of the brightness scale. In Figure 9.9, the rope is the only item in the image that is selected when the Color Range dialog box is closed. The Image preview is shown just as you see it in your document window, with no indication of what has been selected. This option is handy if you are using the Selection Preview option described next.
Selection Preview: This option changes the image in your document window to reflect the areas that are selected. You can choose to display it in several ways: grayscale (which mimics the selection window), black matte, white matte, and quick mask. The option that works best is entirely dependent on the colors in your image and the colors you are selecting.
Save: This option allows you to save your Color Range settings for later use.
Load: This option allows you to load saved Color Range settings.
Eyedropper: This tool is used to select the color. Use it by placing the tip over the color that you want to select and clicking. Every time you do, a new selection is made.
Add to Sample: If you would like to select additional areas after creating an initial selection, you need to use this tool. It adds to your selection rather than replacing it.
Subtract from Sample: This tool subtracts areas from your selection.
Invert: This option is used to create a selection around everything in your image except for the colors that you choose.
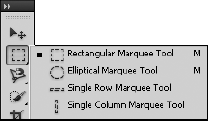
The Rectangular and Elliptical tools allow you to select areas in your photo that are roughly those shapes very quickly. A rectangular building and the sun are just two examples. The Row and Column marquees select a one-pixel row the width or height of your image.
The Marquee tools can be found in the same "drawer" of the Toolbox as shown in Figure 9.10. Click and hold the triangle at the bottom of the Rectangular Marquee to choose between them or press Shift+M to toggle between them.
The Options bar is identical for the Marquee tools, except that some options are grayed out when the Column and Row Marquee tools are selected. These are the options:
Tool presets: You can save and retrieve your favorite tool settings using this drop-down list. Click the little black arrow to see a menu of available options.
New selection: When this option is highlighted, every time you drag the selection brush, you create a new selection and the old selection disappears.
Add to selection: With this option highlighted, everything you select is added to the current selection. This makes it easy to do the detail work after the initial selection is made.
Subtract from selection: With this option highlighted, you can subtract areas from the current selection.
Intersect with selection: This option selects only those areas that were in the first selection you made as well as the second, and deselects anything that was selected only once.
Note
When adding to a selection, subtracting from a selection, or creating an intersection, you can use the tools interchangeably. You can add an ellipse to a rectangle or add a rectangle to a selection made with the Quick Selection tool.
Feather: This makes the specified pixels on the edges of the selection gradually transparent. This allows changes you make to the selection to blend with the surrounding areas, whether you apply an adjustment to the selection or create a mask with the selection. This option is not available with the Row and Column Marquees because you can't feather a single pixel line.
Anti-Alias: This creates a smoother-edged selection. This option is available only for the Elliptical Marquee tool because the other tools have straight-lined selection borders and don't require smoothing.
Style: This allows you to choose Normal to freehand your selection, Fixed Ratio to freehand a selection that is constrained to a certain ratio, or Fixed Size to type in exact values for your selection.
Width and Height: Whether you want to set a ratio or an actual dimension, type the width and height in these boxes. You don't have to use pixels (px); you can type in inches (in) or centimeters (cm).
Refine Edge: Refining the edge of a selection is the finish work that perfects your selection. This option is covered later in this chapter.
The Rectangle Marquee tool can be used to easily select rectangular objects in your image. Of course, it's not very often that you want to select something that's a perfect rectangle in a two-dimensional image; even buildings usually have a skewed shape due to perspective. A more realistic use for the tool is to create a new document from a selected portion of your photo without overwriting the original photo or to select an area of your photo that you want "framed."
To create a rectangular selection, check your options on the Options bar. Do you want the edges of your selection feathered? Perhaps you are creating different print sizes of the same document, so you need to set the width and height for a 5×7 or 8×9 ratio setting. After you have double-checked all your options, click the Rectangle Marquee tool in the Toolbox and drag diagonally across the area of your image that you want to select. Figure 9.11 shows a rectangular selection that was created with a 090 pixel feather. The edges are rounded because of the feather. I turned on the Quick Mask so you could see the effects of the feathered edges.

The Elliptical Marquee tool can be used to select round or oval objects in your image, to copy rounded areas of your image into other documents, or to create a vignette. I often use it when correcting a tough case of red-eye. It's a little trickier to use than the Rectangle Marquee tool, because you have to imagine a box around the oval you want to draw and start at the top corner of that box to get the selection placed just right. It's mostly a matter of practice and trial and error. The good news is that if you get the right size, you can always pick the selection up and move it to the right position.
Tip
Holding down the Shift key while you use either the Rectangle or the Elliptical Marquee tool results in a perfect square or a perfect circle, depending on the tool, of course.
The Lasso Selection tools have been in Photoshop much longer than the Quick Selection tools and in many ways have been superseded by them. Before the Quick Selection tool, the Magnetic Lasso was the best tool in the arsenal for selecting irregular edges that blended into the background; now mine's a bit dusty. The Lasso and the Polygonal Lasso tools can still be very useful, and I show you how to use them.
The options for the Lasso and the Polygonal Lasso tool are identical. They are also very similar to the options for the previous selection tools discussed in this chapter. The Magnetic Lasso tool has the most involved option menu of all the selections tools, so I cover the additional options in the Magnetic Lasso tool section.
Tool presets: You can save and retrieve your favorite tool settings using this drop-down list. Click the little black arrow to see a menu of available options.
New selection: When this option is highlighted, every time you use the Lasso tool, you create a new selection and the old selection disappears.
Add to selection: With this option highlighted, everything you select is added to the current selection. This makes it easy to do the detail work after the initial selection is made.
Subtract from selection: With this option highlighted, you can subtract areas from the current selection.
Intersect with selection: This option selects only those areas that were in the first selection you made as well as the second, and deselects anything that was selected only once.
Feather: This makes the specified pixels on the edges of the selection gradually transparent. This allows changes you make to the selection to blend with the surrounding areas, whether you apply an adjustment to the selection or create a mask with the selection.
Anti-Alias: This creates a smoother-edged selection.
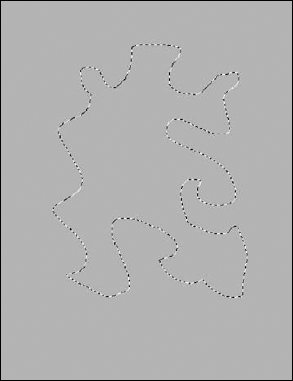
The Lasso tool is an easily understood selection tool. You use it to create a selection by drawing a freehand border around the area you want to select, as shown in Figure 9.12. It can be useful for selecting areas that are easy to freehand or generalized areas for a start in using more specialized selection techniques, such as the Color Range dialog box. You also can use it to touch up other selections.
Warning
As you use the Lasso Selection tool, be sure to close your selection by finishing relatively close to where you started. Photoshop automatically draws a straight line between the beginning point and the end point, and if that line intersects other areas of the selection, you may end up with quite a different selection than you were envisioning.
The Polygonal Lasso tool is useful for selecting areas in your photo that are angular but not rectangular and hard to select with the Quick Selection tool because the colors and textures in the photo are very similar. Even rectangular objects usually are skewed in photographs, making the Polygonal Lasso tool a better choice than the Rectangle Marquee tool for selecting them.
The photo in Figure 9.13 is a good example. The building pictured has several angles that are straightforward, but not easy to select with the Rectangle Marquee. The Quick Selection tool would be tricky to use because of the similarities in color and texture throughout the photo, so the Polygonal Lasso tool is the best choice.
Use the Polygonal Lasso tool to make a selection by following these steps:
Choose the Polygonal Lasso tool by clicking and holding the triangle in the Lasso tool icon and selecting the Polygonal Lasso tool.
The current Lasso tool can be accessed by typing L on your keyboard.
Click the corners of the object you want to select, and the Polygonal Lasso tool locks the selection to each corner you click and selects a straight line between each one, as shown in Figure 9.13.
Close the selection by clicking the corner where you started or by double-clicking to release the Polygonal Lasso Tool.
Your selection is created as seen in Figure 9.14.


The Magnetic Lasso tool is a precursor to the Quick Selection tool, and it works very similarly by looking for edges close to the area where you are dragging and sticking to them. This makes your selection more precise than a freehand selection, but using the Magnetic Lasso is not usually as fast as using the Quick Selection tool.
In addition to the Lasso tool option listed above, the Magnetic Lasso tool has several additional options, as shown in Figure 9.15:
Figure 9.15. The Magnetic Lasso tool has several additional options that allow you to customize it for the best selection.
Width: This determines how many pixels from the pointer the Magnetic Lasso tool searches for edges. This can be a benefit over the Quick Selection tool because the Quick Selection tool samples the entire document looking for similarities in what you are selecting and can sometimes select more than you were anticipating.
Contrast: This allows you to adjust the level of contrast needed for the Magnetic Lasso tool to determine an edge. If the area you are selecting blends into the background, you want to set your contrast low.
Frequency: This sets the frequency of the anchor points that are used.
Use tablet pressure to change pen width: Use this option with a stylus tablet. With this option selected, you can increase the width of your pen by increasing the pressure on your tablet.
Use the Magnetic Lasso tool by clicking once on your beginning point and dragging as close the border of the area you want to select as possible. The Magnetic Lasso looks within a certain radius (set by the Width option) for areas that contrast enough to be considered edges and places anchor points along your selection. As you drag, anchor points are set down to show where the edges of your selection are going to be, as shown in Figure 9.16.
As long as you are making your selection, these anchor points can be changed in one of two ways. If an anchor point isn't set automatically in a place where you need one, click once and an anchor point is added. If anchor points are set in areas where you don't want them, you can use the Delete key to back up your anchor line one point at a time.
Note
You can try your hand at creating this selection by downloading Figure 9-16 from the Web site.
Warning
As you work with the anchors in the Magnetic Lasso tool, remember that the tool itself is still carrying a selection line that leaves a wake of anchors no matter where you take it. If you are not careful, you'll create a selection mess reminiscent of trying to work with hot glue.
Your selection is open and changeable until you close it by either returning to the beginning and clicking the first anchor point or double-clicking to release the selection. After you've done that, the anchor points disappear and your selection is created.
Every once in a while, you have one of those lottery-winning, green-light hitting, pick-the-fastest-checkout-line kind of days. The rest of the time, you have to make adjustments to your selection after the first try. The first step is to actually add and subtract areas to and from your selection that weren't right the first time, and you can do this in lots of different ways. After your selection border is right where you want it, the next step is to refine the edges of your selection so that whatever it is you want to do with that selected area, the changes blend right in.
After you've made your initial selection, chances are good that you need to add areas into the selection or subtract areas from the selection. You can do this in several ways. First, you can use the selection tools. Second, you can transform your selection. Third, you can create and adjust a path. And last, and probably the most precise way, is to use the Quick Mask mode and paint areas in or out of your selection.
As I've already shown you, all the selection tools have the option to either add to or subtract from the selection. It doesn't matter what tool you used to create the original selection, you can use any other selection tool to add to or subtract from that selection. This makes using the selection tools a very versatile process.
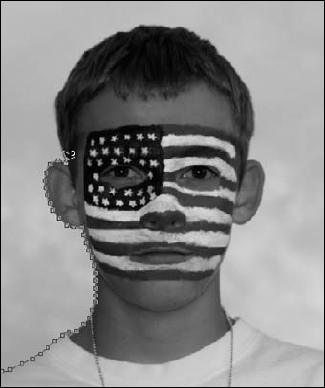
For instance, in Figure 9.17, the Magic Wand did a great job of selecting an almost perfect outline of the snapdragon. Of course, a few spots here and there need to be added to or subtracted from this selection. Adjusting the tolerance levels or trying to add or subtract using the Magic Wand tool is an effort in frustration. Remember that the Magic Wand tool samples colors every time you use it. You could click to add or subtract areas you don't want and end up with even more areas that are wrong.

Figure 9.17. With one click, the Magic Wand can create a nearly perfect selection, but the best way to clean up the selection is to use a different selection tool.
Note
You can try your hand at creating this selection by downloading Figure 9-17 from the Web site.
The better option is to use the Quick Selection tool, or even the Lasso tool, to clean this selection up. Just click the tool of choice, make sure the Add to or Subtract from option is selected, and you have more control to clean up your selection.
You also can change a selection by transforming it. This option is best when you have a selection that is almost the right shape, but just needs a little nudge here and there to get it to fit.
For instance, in Figure 9.18, I used an Elliptical Marquee to select the iris of the eye, but because of the perspective of the shot, the eye isn't an exact symmetrical ellipse. This is a good time for a transformation.
To transform a selection, choose Select
Not enough? Well now that you have the transformation box activated, you can use the Transform tools in the edit menu to skew, warp, or otherwise distort your selection in any way you want to. Choose Edit

Note
If using the Transform tools in the Edit menu is beyond you right now, don't worry; you can get a full run-down in Chapter 20.
The most frustrating thing to me about the Magnetic Lasso tool is all those handles, or anchor points, that disappear the minute the selection is completed. Wouldn't it be much more convenient if they stuck around so you could go back and adjust your selection? You can adjust your selection using handles by turning it into a path.
After you've created a selection, turn it into a path and correct it by following these steps:
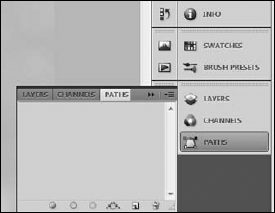
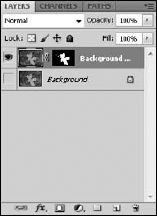
Choose Window
This opens the Paths panel, shown in Figure 9.19.
Click the Paths panel menu, and choose Make Work Path. In the Make Work Path dialog box, set your tolerance to 1 and select OK.
This changes your selection into a path.
Select the Direct Selection tool from the Toolbox, as shown in Figure 9.20.
Use the Direct Selection tool to click an area of the path that needs adjusting.
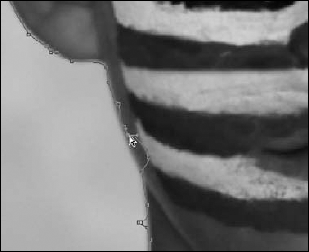
Anchor points appear, and you can adjust the anchor points as needed to correct your selection, as shown in Figure 9.21.
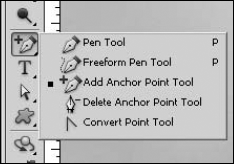
If you need to add anchor points to your path, choose the Add Anchor Point tool from the Toolbox, as shown in Figure 9.22, and click the path to add an anchor point.
When you are finished making adjustments, click the Paths panel menu and choose Make a Selection and use the Make a Selection dialog box to turn your path back into a selection.

Note
To learn all about paths and how and why you should create them, see Chapter 19.
It was unfair to drop you into this exercise before explaining paths a little better, but it's good to know at this point that selections can become paths, and vice versa. You'll probably use this option to create paths from selections more often than using a path to create or adjust a selection because this method of adjusting your selection is time-consuming and in most cases isn't the most efficient option. It can be very precise, however, and it's good to know that it is a possibility.
I am a big fan of the Quick Selection tool. Even if I don't make an initial selection with it, I usually go back to make any needed adjustments with it. Sometimes even the Quick Selection tool fails me, however, and I need a more precise method of adjusting my selection.
The Quick Mask allows you to freehand the adjustments to your selection by painting a mask over the areas that you don't want selected and painting the mask out of areas that you do, or vice versa.
Tip
The Quick Mask is not only a good way to touch up your selection; it's also a good idea to turn it on even if you think your selection is perfect. Many times, you'll see areas of your selection that you missed with the marching ants but are much easier to see with the color overlay.
The Quick Mask icon is found at the very bottom of the Toolbox, as shown in Figure 9.23. It's not really a tool; it's just a shortcut to using the Quick Mask. Click it or press Q to turn on the Quick Mask.

When you've activated the Quick Mask, your image will look like Figure 9.24, with a red color overlay covering the areas of your image that are unselected. This indicates that those areas are protected from any changes you make to the image, much like a stencil.
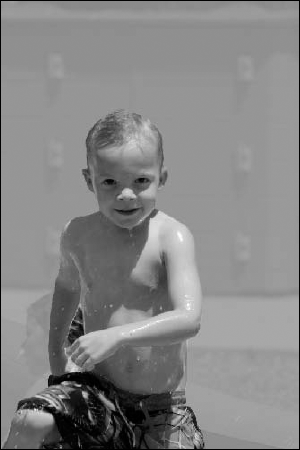
Figure 9.24. It's hard to tell with this grayscale image, but the Quick Mask overlays the entire background of this image.
You can make a few changes to the Quick Mask. Double-click the Quick Mask icon to bring up the Quick Mask Options dialog box, as shown in Figure 9.25. From here, you can double-click the color to bring up the Color Picker and choose an alternative color, change the opacity of the mask, or invert the mask so it covers the selected area rather than the rest of the image.

Figure 9.25. The Quick Mask dialog box allows you to change the color and opacity of the mask or to invert it.
In Figure 9.24, the boy's swimsuit is red (go with me on this one), so it's easier for me to see the border of the Quick Mask if I change the overlay to a different color. A bright green works really well, because there is no other area of green in the photo.
To add to the selected area, you need to erase the Quick Mask; follow these steps:
Click the Eraser tool in the Toolbox, as shown in Figure 9.26.
Set the brush size in the Options bar.
You want your eraser slightly smaller than the area you are painting. (Use the brackets [ and ] to size your eraser or brush quickly.)
Set Opacity to 100% in the Options bar.
You can feather the edges of your selection later.
Erase the Quick Mask from areas that you want selected by dragging it over those areas, as shown in Figure 9.27.


For subtracting areas from the selection, the brush tool is used to paint in the Quick Mask:
Click the Brush tool in the Toolbox, as shown in Figure 9.28.
Set the brush size in the Options bar.
You want your brush slightly smaller than the area you are painting.
Set Opacity to 100% in the Options bar.
Brush the Quick Mask into areas that you don't want selected by dragging it over those areas, as shown in Figure 9.29.
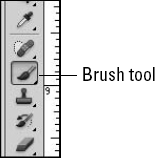
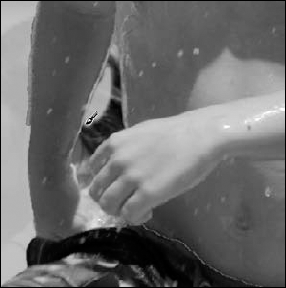
Figure 9.29. By using the Brush tool to add to the Quick Mask, I am subtracting from the selected area.
Note
Of course, these two would be reversed if you were to invert your mask; you would erase areas that you didn't want selected and brush in areas that you did want selected.
After you've made your selection as perfect as you can, it's time to put the finishing touches on it by refining the edges. The Refine Edge dialog box, shown in Figure 9.30, can be accessed by clicking Refine Edge in the Options bar.
The Refine Edge dialog box has changed significantly in Photoshop CS5, adding some useful capabilities, including an edge detection feature that ensures your selection is spot-on and output settings that allow you to create layers, masks, and/or a new document with your selection.
The options found in the Refine Edge dialog box are detailed in the following sections.

View Mode determines how your selection is previewed while working in the Refine Edge dialog box and includes the following options:
Hand tool: The Hand tool works the same here as it does in the Toolbox; you can use it to move your document around in the document window so you can see the desired area.
Zoom tool: This also works just like the Zoom tool in the Toolbox; you can use it to zoom into areas that you are previewing or adjusting. Getting a closer look at the edges as you make changes to them is never a bad idea.
View: The View menu is shown in Figure 9.31 and gives you several different ways to view your selection. You can keep the marching ants, use a color overlay, or use several different ways of alternating black, white, and transparency. How you decide to view your selection is determined in part by your own personal preference, but it is mostly a matter of what works best with your particular image. Take note of the hotkeys that allow you to change views quickly. Changing views as you work and double-checking your edges helps you finish with a more accurate result.
Show Radius: This view works with the Edge Detection options to show your chosen radius. Figure 9.32 shows the On Black view with the radius highlighted.
Show Original: You can see the original document without any selection indicated by checking the Show Original option. This comes in handy when the selection borders get in the way of determining where an edge should be. Simply click Show Original, and you can take a look without the hindrance of a selection border.


Edge Detection works by searching the edges of a selection in a specified radius for edges that are more defined and probably (but not always) more accurate for your selection. The options for edge detection are as follows:
Smart Radius: The Smart Radius automatically sets a radius for edge detection based on the tonal irregularities around the edges of the original selection. You can use this option for a quick, automatic edge detection solution.
Radius: This slider allows you to set your own radius setting for edge detection. If your selection is fairly accurate to begin with, you want to set this to a relatively low setting. Photoshop searches within the radius you set for a better edge for your selection. If it finds a better edge, it moves the edge of the selection. You can preview the area that is being searched by activating the Show Radius option in View Mode, as shown in Figure 9.32. Be sure to get a close-up of your edges as you make changes so you can be sure they are accurate.
Refine Radius tool: After you have set your radius to a good overall setting for your selection, you might discover spots where the radius is too big or too small to find the correct edge. You can fix these individual areas one at a time by using the Refine Radius tool. The Refine Radius tool works like a paintbrush to brush in a larger radius or erase areas of radius. Click the little black triangle on the lower right of the icon to display both tools, as shown in Figure 9.33, and choose the tool you need. Display the radius by clicking the Show Radius option, and use the Refine Radius tool to make your desired changes.

The Adjust Edge settings give you control over the hardness, smoothness, and placement of your selection edge and include these settings:
Smooth: Increasing the smoothness of your selection reduces jagged edges and softens corners. If your selection is mostly rounded edges, increasing the smoothness probably improves it by reducing areas of pixelization. If your selection has sharp corners, however, increasing the smoothness rounds the corners and softens them, so go easy and keep an eye on your corners.
Feather: Feathering the edges of your selection makes them gradually transparent, so that the selection blends better with whatever changes you make to it. It's better to feather your edges here, in the Refine Edge dialog box, than by using the Feather option found in many of the Selection tools. Here you can preview the feathered edges in real time if you have any of the overlay views selected.
Contrast: Increasing the contrast sharpens the edges of your selection and reduces the noise around your selection.
Shift Edge: The Shift Edge option replaces the Contract/Expand option found in earlier versions of Photoshop. Moving the slider to the left expands your selection, and moving it to the right contracts your selection. The slider works with the radius set in the Edge Detection to determine how far to move the selection. If you shift your edge 30 percent, for instance, you are shifting it 30 percent of the radius setting. If your radius is set at 10 pixels, you shift the selection 3 pixels.
The Output settings determine the outcome of your selection. Here are the options you have:
Decontaminate Colors: When you cut a selection out of one image to place into another image or document, you often get a halo or color fringe that is either a reflection of the color around the selection or simply a bleeding of that color. With this simple option, Photoshop has supplied you with a powerful tool to reduce or even eliminate such halos. Select the Decontaminate Colors option, and Photoshop samples the edges of your selection for color values that are different from the selection itself and reduces those colors. When this option is selected, your output choices are limited.
Amount: This slider allows you to adjust how much color is reduced by the Decontaminate Colors option.
Output to: The Refine Edge dialog box in former versions of Photoshop lets you make your changes and exit, leaving you with a refined selection boundary and possibly more steps to create a mask, a new layer, or a new document from that boundary. The new Refine Edge dialog box allows you to output your selection in different formats as you exit, saving you several steps in the process. These are the options for saving your selection:
Selection: This returns you to the marching ants and lets you decide your own changes from there.
Note
Masks are an extension of selections and are really the same concept taken one step further. To understand masks, however, it is important that you understand layers. Masks are covered in Chapter 10.
Layer Mask: This creates a layer mask over the layer you are currently working with. Your deselected areas become transparent.
New Layer: This pastes your selection into its own layer and turns off the visibility of the original layer, so the unselected areas of your image still appear transparent, but your entire image is still available in the original layer.
New Layer with Layer Mask: This creates a new layer containing the entire image with a layer mask placed over the deselected areas and turns off the visibility of the original layer, as shown in Figure 9.34. This has the same visual effect on the image as the previous two options.
New Document: This creates a new document and places the selection in it, leaving the original document unaltered.
New Document with Layer Mask: This creates a new document with the entire image from the original document, but places a layer mask over it so only the selected areas are visible.
Selections are areas of an image that can be modified while leaving the rest of the image untouched. In this chapter, you learned that selections come in many different shapes and sizes, and many selection tools make creating those selections a fun and simple process. After the selection is made, many other tools allow you to change and refine those selections so they can be perfect.
After reading this chapter, you should have the skills to do the following:
Understand the selection menu and use it to optimize your use of the selection tools
Use the Quick Selection tool to make fast selections based on the edges of your image
Use both the Magic Wand and the Color Range dialog box to make selections based on color
Use selection marquees to make selections based on shape
Create several different Lasso selections
Use the Options bar to optimize your selection
Add to or subtract from a selection
Refine the edges of your selection based on several different parameters