
In This Chapter
Fixing iPad issues
Dealing with network problems
Eliminating that sinking feeling when you can't sync
Perusing the Apple Web site and discussion forums
Sending your iPad to an Apple Store
We haven't been able to evaluate our iPads over the long haul, of course. As of this writing, the machines were still pretty much brand-spanking new. But in our experience, Apple's devices based on the iPhone operating system (that is, the iPhone and iPod touch) are generally reliable. So we expect nothing less from the iPad.
In the early going, most users we've talked to report trouble-free operation. Notice our use of the word most. That's because every so often, a good iPad might just go bad. We don't expect it to be a common occurrence, but it does happen. So in this chapter, we look at the types of bad things that can happen, along with suggestions for fixing them.

What kind of bad things are we talking about? Well, we're referring to problems involving
Frozen or dead iPads
Wireless networks
Synchronization, computers (both Mac and PC), or iTunes
After all the troubleshooting, we tell you how to get even more help if nothing we suggest does the trick. Finally, if your iPad is so badly hosed that it needs to go back to the mother ship for repairs, we offer ways to survive the experience with a minimum of stress or fuss.
Our first category of troubleshooting techniques applies to an iPad that's frozen or otherwise acting up. The recommended procedure when this happens is to perform the seven Rs in sequence:
Recharge
Restart
Reset your iPad
Remove your content
Reset settings and content
Restore
Recovery mode
But before you even start those procedures, Apple recommends you take these steps:
Verify that you have the current version of iTunes installed.
You can always download the latest and greatest version here:
www.apple.com/itunes/download.Verify that you are connecting your iPad to your computer using a USB 2.0 port.
Make sure that your iPad software is up to date.
Connect your iPad to your computer, launch iTunes (if necessary), and then click your iPad in the iTunes sidebar. Now click the Summary tab and then click the Check for Update button.
Charge your battery using the 10W USB power adapter that came with the iPad.
Charge it for at least 20 minutes before you attempt further troubleshooting.
If those four easy steps didn't get you back up and running and your iPad is still acting up — if it freezes, doesn't wake up from sleep, doesn't do something it used to do, or in any other way acts improperly — don't panic. The rest of this section describes the things you should try, in the order that we (and Apple) recommend.
If the first technique doesn't do the trick, go on to the second. If the second one doesn't work, try the third. And so on.
If your iPad acts up in any way, shape, or form, the first thing you should try is to give its battery a full recharge before you proceed.
Note
Don't plug the iPad's dock connector–to–USB cable into a USB port on your keyboard, monitor, or USB hub. You need to plug it into one of the USB ports on your computer itself. That's because the USB ports on your computer supply more power than the other ports. While other USB ports may do the trick, you're better off using the built-in ones on your computer.
If your computer is more than a few years old, even your built-in USB ports may not supply enough juice to recharge your iPad. It'll sync just fine; it just won't recharge. If it says Not Charging next to the battery icon at the top of the screen, use the included USB power adapter to recharge your iPad from an AC outlet rather than from a computer.
Tip
If you're in a hurry, charge your iPad for a minimum of 20 minutes. We think a full charge is a better idea, but a 20+ minute charge is better than no charge at all.
If you recharge your iPad and it still misbehaves, the next thing to try is restarting it. Just as restarting a computer often fixes problems, restarting your iPad sometimes works wonders.
Here's how to restart:
Press and hold the Sleep/Wake button.
When the red slider appears, slide it to turn off the iPad and then wait a few seconds.
Press and hold the Sleep/Wake button again until the Apple logo appears on the screen.
If your iPad is still frozen, misbehaves, or doesn't start, press and hold the Home button for 6 to 10 seconds to force any frozen applications to quit.
Repeat Steps 1 to 3 again.
If these steps don't get your iPad back up and running, move on to the third R, resetting your iPad.
To reset your iPad, merely press and hold the Sleep/Wake button and then press and hold the Home button, continuing to press both for at least ten seconds. When you see the Apple logo, release both buttons.
Resetting your iPad is like forcing your computer to restart after a crash. Your data shouldn't be affected by a reset — and in many cases, it cures whatever was ailing your iPad. So don't be shy about giving this technique a try. In many cases, your iPad goes back to normal after you reset it this way.
Tip
Sometimes you have to press and hold the Sleep/Wake button before you press and hold the Home button. That's because if you press both at the same time, you might create a screen shot — a picture of whatever is on your screen at the time — rather than reset your iPad. (This type of screen picture, by the way, is stored in the Photos app's Saved Photos album in its Albums tab. Find out more about this feature at the end of Chapter 18.) A screen shot should only happen if you press and release both buttons at the same time, but sometimes pressing and holding both buttons triggers the screen shot mechanism instead of restarting your iPad.
Unfortunately, sometimes resetting doesn't do the trick. When that's the case, you have to take stronger measures.
If you've been reading along in this chapter, nothing you've done should have taken more than a minute or two. We hate to tell you, but that's about to change, because the next thing you should try is removing some of or all your data to see whether it's causing your troubles.
To do so, you need to sync your iPad and reconfigure it so that some of or all your files are not synchronized (which removes them from the iPad). The problem could be contacts, calendar data, songs, photos, videos, or podcasts. You can apply one of two strategies to this troubleshooting task:
If you suspect a particular data type — for example, you suspect your photos because whenever you tap the Photos icon on the Home screen, your iPad freezes — try removing that data first.
If you have no suspicions, deselect every item and then sync. When you're finished, your iPad should have no data on it.
If that method fixes your iPad, try restoring your data, one type at a time. If the problem returns, you have to keep experimenting to determine which particular data type or file is causing the problem.
If you're still having problems, the next step is to reset your iPad's settings.
Resetting involves two steps: The first one, resetting your iPad settings, resets every iPad setting to its default — the way it was when you took it out of the box. Resetting the iPad's settings doesn't erase any of your data or media. The only downside is that you may have to go back and change some settings afterward — so you can try this step without trepidation. To do it, tap the Settings icon on your Home screen and then tap General
Warning
Be careful not to tap Erase All Content and Settings, at least not yet. Erasing all content takes more time to recover from (because your next sync takes a long time), so try Reset All Settings first.
Now, if resetting all settings didn't cure your iPad, you have to try Erase All Content and Settings. You find it in the same place as Reset All Settings (tap Settings
Warning
The Erase All Content strategy deletes everything from your iPad — all your data, media, and settings. Because all these items are stored on your computer — at least in theory — you should be able to put things back the way they were during your next sync. But you lose any screen shots you've taken, as well as contacts, calendar events, and playlists you've created or modified since your last sync.
After using Erase All Content and Settings, check to see whether your iPad works properly. If it doesn't cure what ails your iPad, the final R, restoring your iPad using iTunes, can help.
Before you give up the ghost on your poor, sick iPad, you can try one more thing. Connect your iPad to your computer as though you were about to sync. But when the iPad appears in the iTunes source list, click the Restore button on the Summary tab. This action erases all your data and media and resets all your settings.
Note
Because all your data and media still exist on your computer (except for photos you've taken, contacts, calendar events, notes, and On-the-Go playlists you've created or modified since your last sync, as noted previously), you shouldn't lose anything by restoring. Your next sync will take longer than usual, and you may have to reset settings you've changed since you got your iPad. But other than those inconveniences, restoring shouldn't cause you any additional trouble.
So, if you've tried all the other steps or you couldn't try some or all of them because your iPad is so messed up, you can try one last thing. It's called Recovery mode. Here's how it works:
Disconnect the USB cable from your iPad, but leave the other end of the cable connected to the USB port on your computer.
Turn off the iPad by pressing and holding the Sleep/Wake button for a few seconds until the red slider appears on-screen, and then slide the slider.
Wait for the iPad to turn off.
Press and hold the Home button while you reconnect the USB cable to your iPad.
When you reconnect the USB cable, your iPad should power on.
Tip
If you see a battery icon with a thin red band and an icon of a wall plug, an arrow, and a lightning bolt, you need to let your iPad charge for at least 10 or 15 minutes. When the battery picture goes away or turns green instead of red, go back to Step 2 and try again.
Continue holding the Home button until you see the Connect to iTunes screen, and then release the Home button.
If you don't see the Connect to iTunes screen on your iPad, try Steps 1–4 again.
If iTunes didn't open automatically already, launch it now. You should see a "recovery mode" alert on your computer screen telling you that your iPad is in Recovery mode and that you must restore it before it can be used with iTunes.
Use iTunes to restore the device as described in the previous section.
Okay. So that's the gamut of things you can do when your iPad acts up. If you tried all this and none of it worked, skim through the rest of this chapter to see whether anything else we recommend looks like it might help. If not, your iPad probably needs to go into the shop for repairs.
Tip
Never fear, gentle reader. Be sure to read the last section in this chapter, "If Nothing We Suggest Helps." Your iPad may be quite sick, but we help ease the pain by sharing some tips on how to minimize the discomfort.
If you're having problems with Wi-Fi or your wireless carrier's data network (Wi-Fi + 3G models only), this section may help. The techniques here are short and sweet — except for the last one, restore. Restore, which we describe in the preceding section, is still inconvenient and time consuming, and it still entails erasing all your data and media and then restoring it.
First, here are some simple steps that may help:
Make sure you have sufficient Wi-Fi or 3G signal strength as shown in Figure 14-1.
Try moving around.
Changing your location by as little as a few feet can sometimes mean the difference between great wireless reception and no wireless reception at all. If you're inside, try going outside. If you're outside, try moving 10 or 20 paces in any direction. Keep an eye on the cell signal or Wi-Fi icon as you move around, and stop when you see more bars than you saw before.
Restart your iPad.
If you've forgotten how, refer to the "Restart" section, earlier in this chapter. As we mention, restarting your iPad is often all it takes to fix whatever was wrong.
If you have a Wi-Fi + 3G iPad, try the following two bullet points.
Make sure that you haven't left your iPad in Airplane mode, as we describe in Chapter 13.
In Airplane mode (Wi-Fi + 3G models only), all network-dependent features are disabled, so you can't send or receive messages or use any of the applications that require a Wi-Fi or data network connection (that is, Mail, Safari, Maps, YouTube, and the iTunes and App Store apps).
Turn on Airplane mode by tapping Settings on the Home screen and then tapping the Airplane mode On/Off switch to turn it on. Wait 15 or 20 seconds, and then turn it off again.
Note
Toggling Airplane mode on and off like this resets both the Wi-Fi and wireless data-network connections. If your network connection was the problem, toggling Airplane mode on and off may correct it.

Tip
Apple offers two very good articles that may help you with Wi-Fi issues. The first offers some general troubleshooting tips and hints; the second discusses potential sources of interference for wireless devices and networks. You can find them here:
http://support.apple.com/kb/TS3237
and here:
http://support.apple.com/kb/HT1365
If none of the preceding suggestions fixes your network issues, try restoring your iPad, as described previously in the "Restore" section.
Warning
Performing a restore deletes everything on your iPad — all your data, media, and settings. You should be able to put things back the way they were with your next sync. If that doesn't happen, for whatever reason, you can't say we didn't warn you.
The last category of troubleshooting techniques in this chapter applies to issues that involve synchronization and computer–iPad relations. If you're having problems syncing or your computer doesn't recognize your iPad when you connect it, here are some things to try.
Once again, we suggest that you try these procedures in the order they're presented here:
Recharge your iPad.
If you didn't try it previously, try it now. Go back to the "Resuscitating an iPad with Issues" section, at the beginning of this chapter, and read what we say about recharging your iPad. Every word there also applies here.
Try a different USB port or a different cable if you have one available.
It doesn't happen often, but occasionally USB ports and cables go bad. When they do, they invariably cause sync and connection problems. Always make sure that a bad USB port or cable isn't to blame.
If you don't remember what we said about using USB ports on your computer rather than the ones on your keyboard, monitor, or hub, we suggest that you reread the "Recharge" section, earlier in this chapter.
Restart your iPad and try to sync again.
We describe restarting in full and loving detail in the "Restart" section, earlier in this chapter.
Reinstall iTunes.
If you try everything we suggest earlier in this chapter and still have problems, don't give up just yet. This section describes a few more places you may find help. We recommend that you check out some or all of them before you throw in the towel and smash your iPad into tiny little pieces (or ship it back to Apple for repairs, as we describe in the next section).
First, Apple offers an excellent set of support resources on its Web site at www.apple.com/support/ipad/getstarted. You can browse support issues by category, search for a problem by keyword, read or download technical manuals, and scan the discussion forums.
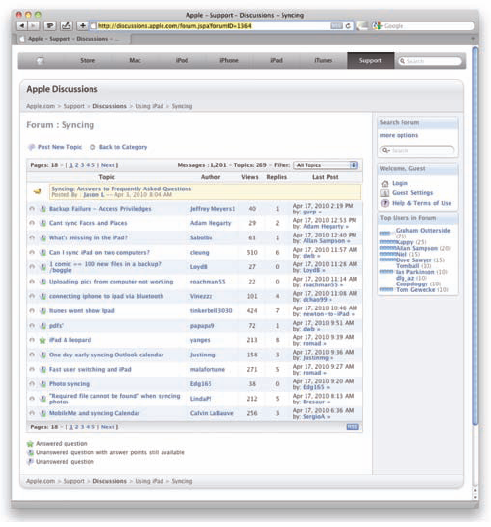
Speaking of the discussion forums, you can go directly to them at http://discussions.apple.com. They're chock-full of useful questions and answers from other iPad users, and our experience has been that if you can't find an answer to a support question elsewhere, you can often find it in these forums. You can browse by category (Syncing, for example, as shown in Figure 14-2) or search by keyword.
Either way, you find thousands of discussions about almost every aspect of using your iPad. Better still, you can frequently find the answer to your question or a helpful suggestion.
Now for the best part: If you can't find a solution by browsing or searching, you can post your question in the appropriate Apple discussion forum. Check back in a few days (or even in a few hours), and some helpful iPad user may well have replied with the answer. If you've never tried this fabulous tool, you're missing out on one of the greatest support resources available anywhere.
Last, but certainly not least, before you throw in the towel, you might want to try a carefully worded Google search. It couldn't hurt, and you might just find the solution you spent hours searching for.
If you tried every trick in the book (this one) and still have a malfunctioning iPad, it's time to consider shipping it off to the iPad hospital (better known as Apple, Inc.). The repair is free if your iPad is still under its one-year limited warranty.
Tip
You can extend your warranty for as long as two years from the original purchase date, if you want. To do so, you need to buy the AppleCare Protection Plan for your iPad. You don't have to do it when you buy your iPad, but you must buy it before your one-year limited warranty expires. The cost is $99.
Here are a few things you should know before you take your iPad in to be repaired:
Your iPad may be erased during its repair, so you should sync your iPad with iTunes before you take it in, if you can. If you can't and you entered data on the iPad since your last sync, such as a contact or an appointment, the data may not be there when you restore your iPad upon its return.
Remove any third-party accessories, such as a case or screen protector.
Tip
Although you may be able to get your iPad serviced by Best Buy or another authorized Apple reseller, we recommend that you take it to your nearest Apple Store, for two reasons:
No one knows your iPad like Apple.
One of the geniuses at the Apple Store may be able to fix whatever is wrong without sending your iPad away for repairs.
The Apple Store will, in some cases, swap out your wonky iPad for a brand new one on the spot.
You can't win if you don't play, which is why we always visit our local Apple Store when something goes wrong (with our iPads, iPhones, iPods, and even our laptops and iMacs).
And that retires the side. If you've done everything we've suggested, we're relatively certain you're now holding an iPad that works flawlessly. Again.