With the EOS 7D, the flash becomes not only a handy built-in accessory, but it serves for the first time as a wireless E-TTL (Evaluative Through the Lens) flash control. With this, the 7D opens the door to creative multiple and wireless flash photography.
You can use the 7D's Integrated Speedlite Trans-mitter as a master control unit to fire up to three groups of wireless slave units with or without having the built-in flash fire. The built-in flash can also be used as a separate flash group with reduced power output.
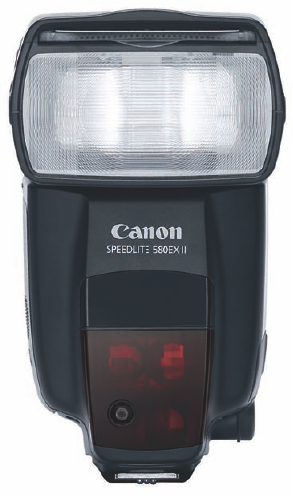
From the camera menu, you can control flash ratios or manually control the output of each group, and control the settings and custom functions for accessory Speedlites including the 580EX II, 430EX II, and the 270X from the 7D's Flash Control menu.

Canon flash units, whether it's the built-in or an accessory EX-series Speedlite, use E-TTL II technology. To make a flash exposure, the flash unit receives information from the camera including the focal length of the lens, distance from the subject, and exposure settings including aperture.
The camera gathers this information from a preflash beam that's fired after the Shutter button is fully pressed Information from this preflash is combined with data from the Evaluative metering system and the lens to analyze and compare existing light exposure values with the amount of light needed to make a good exposure.
The flash also automatically figures in the angle of view for the 7D given its cropped image sensor size. Thus, the built-in and EX-series Speedlites automatically adjust the flash zoom mechanism for the best flash angle and to illuminate only key areas of the scene, which conserves power.

Figure 8.1. This image of water drop action in a glass dish was made with the built-in flash. Exposure: ISO 100, f/8, 1/250 sec.
Note
The built-in flash offers coverage for lenses as wide as 15mm and a recycle time of 3 seconds.
E-TTL II technology also enables high-speed sync flash with accessory Speedlites. High-speed sync flash enables flash synchronization at a shutter speed faster than the camera's flash sync speed of 1/250 second. The advantage is that you can open up the lens to a wide aperture when shooting a backlit subject to create a shallow depth of field to blur to the background while shooting at faster than 1/250 second shutter speeds.
The built-in flash is handy when you need a pop of fill flash for a portrait, or when you are in low light scenes where you might not otherwise be able to get a shot without a flash. The built-in flash offers coverage for lenses as wide as 15mm, sync speeds between 1/250 and 30 seconds, and the flash recycles in approximately 3 seconds. Depending on the shooting mode you choose, Tables 8.1 and 8.2 show what you can expect when you use the built-in flash and the flash range estimates.
Table 8.1. 7D Exposure Settings Using the Built-in Flash
Shooting mode | Shutter Speed | Aperture |
|---|---|---|
Tv | 30 sec to 1/250 sec | You set the shutter speed, and the camera automatically sets the appropriate aperture. If you set a shutter speed faster than 1/250 sec, the camera automatically readjusts it to 1/250 with flash use. |
Av | 30 sec to 1/250 sec | You set the aperture, and the camera automatically sets the shutter speed. The 7D uses slow-speed flash sync in low light so that the flash provides the subject exposure and the existing light registers with the slow shutter speed. You can determine the flash sync speed by setting C.Fn I-7 to either Option 1, 1/250 to 1/60 second, or to Option 2, 1/250 second fixed. If you use slow-speed flash sync, you may need a tripod depending on the shutter speed and whether you're using an IS lens. |
M (Manual) | 30 sec to 1/250 sec | You set both the aperture and the shutter speed. Flash exposure is set automatically based on the aperture. |
P | 1/60 sec to 1/250 sec | Both the aperture and the shutter speed are set automatically by the camera. With flash use, you cannot shift the exposure in P mode. |
B | Exposure continues until you release the Shutter button | You set the aperture. |
The built-in flash features many of the same overrides that you find in EX-series Speedlites including Flash Exposure Compensation (FEC) and Flash Exposure Lock (FE Lock). In addition, flash functions can be set using the Flash Control menu (Shooting 1 menu) when you shoot in P, Tv, Av, M, and B modes.
Flash control options include setting the flash mode, shutter synchronization with either first or second curtain, setting Flash Exposure Compensation, selecting Evaluative or Average metering, and using the Wireless function. You can also turn on Red-eye Reduction on the Shooting 1 menu.
Note
To use the flash in P, Tv, Av, M, and B shooing modes, you have to press the flash popup button.
When you use the built-in flash, be sure to remove the lens hood to prevent obstruction of the flash coverage. And if you use a large telephoto lens, the built-in flash coverage may also be obstructed.
The red appearance in a person's eye is caused when the bright flash reflects off the retina, revealing the blood vessels in the reflection. The Red-eye Reduction function fires a preflash causing the pupils of the subject's eye to contract when the subject looks at the preflash.
You can turn on Red-eye Reduction on the Shooting 1 menu. Just highlight Red-eye On/Off, press the Set button, and then choose On. Then press the Set button to confirm the change.
There are times when the flash output won't produce the image that you envisioned, and there are times when you want a slightly increased or decreased flash exposure, or to avoid a hot spot on the subject. In these situations, you can modify the flash output using either Flash Exposure Compensation or Flash Exposure Lock. Both of these options can be set for both the built-in flash and an accessory Speedlite.
Flash Exposure Compensation enables you to manually adjust the flash output without changing the aperture or the shutter speed. This is a good modification to use when your subject is lighter or darker than middle (18 percent) gray and when the background is very bright or very dark. Flash Exposure Compensation is also useful to balance lighting in unevenly lit scenes and to reduce the dark background shadows that are characteristic with flash exposures.
With Flash Exposure Compensation, you can increase the flash output up to plus/minus 3 stops in 1/3-stop increments. As a result, you can maintain the camera's original E-TTL readings while manually increasing or decreasing the flash output. You can change the increment level to ½ stop using C.Fn I-1, Exposure level increments.
If you use an accessory Speedlite, you can set Flash Exposure Compensation either on the camera or on the Speedlite. However, the compensation that you set on the Speedlite overrides any compensation that you set using the 7D's ISO-Flash exposure compensation button above the LCD panel. The take-away is to set compensation either on the Speedlite or on the camera, but not both.

Figure 8.2. For this image, I used window light to the left and one Speedlite shooting into an umbrella to the right to brighten the subject's face. Exposure: ISO 200, f/2.8, 1/15 sec. using a −1/2 stop compensation.
Flash Exposure Compensation can also be combined with Exposure Compensation. If you shoot a scene where one part of the scene is brightly lit and another part of the scene is much darker — for example, an interior room with a view to the outdoors — then you can set Exposure Compensation to −1 and set the Flash Exposure Compensation to −1 to make the transition between the two differently lit areas more natural.
Note
Auto Lighting Optimizer can mask the effect of Flash Exposure Compensation. If you want to see the effect of the Compensation, turn off Auto Lighting Optimizer by setting it to Disable on the Shooting 2 menu.
To set Flash Exposure Compensation for either the built-in flash or an accessory Speedlite, follow these steps:
Set the camera to P, Tv, Av, M, or B, and then press the ISO-Flash Compensation button above the LCD panel. The Exposure Level indicator meter is activated on the LCD panel.
Turn the Quick Control dial to the left to set negative compensation (lower flash output) or to the right to set positive flash output (increased flash output) in 1/3-stop increments. As you turn the Quick Control dial, a tick mark under the Exposure Level meter moves to indicate the amount of Flash Exposure Compensation. The Flash Exposure Compensation is displayed in the viewfinder and on the LCD panel when you press the Shutter button halfway. The Flash Exposure Compensation you set on the camera remains in effect until you change it.
To remove Flash Exposure Compensation, repeat these steps, but in Step 2, move the tick mark on the Exposure Level meter back to the center point.
Flash Exposure Lock (FE Lock) is a great way to set flash output for any part of the scene or subject—typically an area of critical exposure in the scene. You can also use FE Lock to help compensate for the exposure error that can be caused by reflective surfaces such as mirrors or windows or other highly reflective subjects. Regardless of the approach, FE Lock is a technique that you want to add to your arsenal for flash images. Once you take a preflash reading off a small area of the subject or scene using the Spot meter, the 7D locks the reading long enough for you to recompose the shot and make the image.
Tip
If you are shooting a series of images under unchanging existing light, Flash Exposure Compensation is more efficient and practical than FE Lock.
To set FE Lock, follow these steps:
Set the camera to P, Tv, Av, M, or B mode, and then press the Flash button to raise the built-in flash or mount the accessory Speedlite. The flash icon appears in the viewfinder.
Point the center of the viewfinder over an area that is middle (18 percent) gray or on the area of the subject where you want to lock the flash exposure, and then press the M-Fn button. The camera fires a preflash. FEL is displayed momentarily in the viewfinder, and the flash icon in the viewfinder displays an asterisk beside it to indicate that flash exposure is locked. If the flash icon in the viewfinder blinks, you're beyond the flash range, so move closer and repeat the process.
Move the camera to compose the image, press the Shutter button halfway to focus on the subject, and then completely press the Shutter button to make the image. Ensure that the asterisk is still displayed to the right of the flash icon in the viewfinder before you make the picture. As long as the asterisk is displayed, you can take other images at the same compensation amount.
Many of the onboard and accessory flash settings can be set using the Shooting 1 menu on the 7D. This menu offers an impressive array of adjustments for the built-in flash including the first or second curtain shutter sync and the choice of Evaluative or Average exposure metering.
Note
If you're using an accessory Speedlite, you can use the Shooting 1 menu to set Flash Exposure Compensation and choose between Evaluative or Average metering. This menu also enables you to change the Custom Function (C.Fn) settings for compatible Speedlites such as the 580 EX II.
To change settings for the built-in or compatible accessory EX-series Speedlites, follow these steps:
Set the camera to P, Tv, Av, M, or B mode, press the Menu button, and then turn the Main dial until the Shooting 1 tab is highlighted. If you are using an accessory Speedlite, mount it on the camera and turn it on.
Turn the Quick Control dial to highlight Flash Control, and then press the Set button. The Flash Control screen appears.
Turn the Quick Control dial to highlight the setting that you want, and then press the Set button. Table 8.3 details the Flash Control menu and the options you can choose for both the built-in and/or an accessory Speedlite flash.
Table 8.3. Flash Control Menu Options
Option(s) | Suboptions/Notes | |
|---|---|---|
Flash Firing | Enable, Disable | Turns the flash firing on and off for shooting in P, Tv, Av, M, and B modes. |
Built-in flash func. setting | Flash mode | E-TTL II, Manual flash, MULTI flash. |
Shutter sync | 1st curtain: Flash fires at the beginning of the exposure. Can be used with a slow-sync speed to create light trails in front of the subject. 2nd curtain: Flash fires just before the exposure ends. Can be used with a slow-sync speed to create light trails behind the subject. | |
Flash exp. comp. | Press the Set button to activate the Exposure Level meter, and then turn the Quick Control dial to set up to 3 stops of Flash Exposure Compensation. | |
E-TTL II | Evaluative. This default setting sets the exposure based on an evaluation of the entire scene. Average: Flash exposure is metered and averaged for the entire scene. Results in brighter output on the subject and less balancing of existing background light. | |
Wireless func. | Disable, Speedlite or built-in flash, Speedlite only, or both a Speedlite and the built-in flash. | |
External flash func. setting | Flash mode | E-TTL II, Manual flash, MULTI flash, and depending on the Speedlite, TTL AutoExtFlash, and Man.ExtFlash. Note that the settings may depend on Speedlite settings. |
Shutter sync | 1st curtain: Flash fires immediately after the exposure begins. 2nd curtain: Flash fires just before the exposure ends. Can be used with slow-sync speed to create light trails behind the subject. Hi-speed: enables flash at speeds faster than 1/250 second. However, the flash range is shorter. | |
Zoom | Auto, or turn the Quick Control dial to set the zoom setting from 24mm to 105mm. | |
Wireless func. | Disable or Enable. See the flash manual for details on additional settings. | |
Master flash | Enable to have the external flash control slave flash units. Disable. | |
Channel | Select and turn the Quick Control dial to select the number of channels for multiple wireless flashes. | |
Firing group | A+B+C, A:B, or A:B C | |
Group A output[a] | 1/4, 1/2, or 1/1 | |
A:B fire ratio | 2:1, 1:1, 1:2. Sets the lighting ratio of external flashes. | |
Grp. C exp. compensation | Press the Set button to activate the Exposure Level meter to set +/−3 stops of compensation for the C group of flash units. | |
Custom Functions depend on the Speedlite in use | Press the Set button to display the C.Fn screen for the external Speedlite. | |
Clear ext. flash C.Fn set | Turn the Quick Control dial to select OK, and then press the Set button to clear all Custom Functions for the Speedlite | Press the Set button to display the Clear ext. flash C.Fn set screen where you can clear all Custom Function settings on the Speedlite. |
[a] Additional Group output options are available depending on the number of flash units you are using | ||
In some lowlight scenes, you may not want the built-in or an accessory flash, but the light is too low for the camera to establish focus. This is when you can use the flash unit's autofocus assist beam to help the camera establish focus without actually firing the flash.
To disable flash firing but still allow the camera to use the flash's autofocus assist beam for focusing, follow these steps:
Press the Menu button, and then turn the Main dial to display the Shooting 1 menu.
Turn the Quick Control dial to highlight Flash control, and then press the Set button. The Flash control screen appears.
Turn the Quick Control dial to highlight Flash firing, and then press the Set button. Two options appear.
Turn the Quick Control dial to highlight Disable, and then press the Set button. Neither the built-in flash nor an accessory Speedlite will fire.
Press the flash pop-up button, or mount an accessory EX-series Speedlite.
Half-press the Shutter button to have the flash autofocus assist beam fire to help the camera establish focus.
If these steps do not work, check the settings for C.Fn III-11, AF-assist beam firing. If this function is set to Option 1: Disable, then change it to Option 0: Enable. Also if the Speedlite's Custom Function is set to Disabled, the Speedlite AF-assist beam will not fire until you change the Custom Function on the Speedlite.
Note
For details on Custom Functions, see Chapter 5.

Figure 8.3. For this image, I used wireless flash with the 580EXII and the 580EX Speedlites. One Speedlite was on a stand shooting into a silver umbrella and placed at camera left and at eye level with the mother. The other flash was held at camera right. Exposure: ISO 100, f/4, 1/100 sec. using an EF 24-70mm, f/2.8L USM lens.
The advantage of the built-in flash is that it is available anytime you need a pop of additional light. The scenarios for using the flash in P, Tv, Av, M, and B modes vary from filling shadows in portraits to providing the primary subject illumination in lowlight scenes.
On the 7D, the E-TTL II setting automatically detects when the flash pops up and when the exposure for the existing light in the scene is properly set. In those cases, the camera automatically provides reduced output to fill shadows in a natural-looking way as opposed to a blasted-with-flash rendering.
Tip
In lower light indoor or night outdoor scenes, the flash often illuminates the subject properly, but the background is too dark. In these scenes, switch to Av or Tv shooting mode and use a wide aperture or slow shutter speed respectively to allow more of the existing light to contribute to the exposure.
If one flash is good, it follows that more flash units would be better. While that logic doesn't hold true for everything, in the case of flash units it does. Multiple Speedlites enable you to set up lighting patterns and ratios that are similar to a studio lighting setup. You also have the option of using one or more flash units as either the main or an auxiliary light source to balance existing light with flash to provide even and natural illumination and balance among light sources. Plus, unlike some studio lighting systems, a multiple Speedlite system is lightweight and portable.
Tip
For detailed information on using Canon Speedlites, be sure to check out the Canon Speedlite System Digital Field Guide by J. Dennis Thomas (Wiley).
The 7D is compatible with all EX-series Speedlites. With EX-series Speedlites, you get FP (focal-plane) Flash Sync, Flash Exposure Bracketing, and flash modeling (to preview the flash pattern before the image is made). And you can use the 7D's built-in flash as the Speedlite transmitter to fire multiple Speedlites. You can set up the flash units in groups and control the lighting ratio directly from the Flash Control on the Shooting 1 camera menu.
When I shoot portraits on location, I take three Speedlites with stands, silver umbrellas, a softbox, and multiple reflectors. This setup is a lightweight mobile studio that can either provide the primary lighting for subjects or supplement existing light. And with the 7D, I can leave the Speedlite Transmitter ST-E2 at home because I have the same functionality on the 7D's Flash Control menu.
The 7D enables you to control up to three groups of slave flash units with the built-in flash serving as the fourth group. And if you're working near other photographers using flash units, you can set your flash units to any of four channels and not worry about triggering another photographer's flash units.
While this book cannot provide exhaustive instructions for wireless flash techniques, the following tips will help get you started with multiple wireless flash setups using the 7D as the master transmitter for the flash units. I use the 580EX II as the slave unit(s) for the following example (the 7D settings mentioned are set on the Shooting 1/Flash Control/External flash func. setting screen on the camera):
Set the Speedlite(s) as slave units. On the 580EX II's, hold the Zoom button until the display "on" blinks on the LCD. Turn the Select dial until "SLAVE" blinks, and then press the Set button on the Speedlite.
Set the communication channels. Press the Zoom button until Channel blinks, turn the Select dial to set the channel number, and then press the Set button. Set the 7D and any other flash units to the same channel.
Set the slave unit "group" or ID. If you're using two or more Speedlites, then identify each unit as A, B, C, etc., so that you can set the lighting ratio or flash output for the groups. On the 580EX II, press the Zoom button until "A" blinks. Press the Set button to set the unit to A. Repeat these steps but turn the Select dial to set the next unit to B.
Set the firing group for multiple units. On the 7D, set the Firing group to the setting icon that shows the number of Speedlites you're using, for example, the setting that shows the icon depicting a Speedlite (A:B). You can also press the Picture Styles button to test the flash firing at this point.
Set the lighting ratio for multiple flash units. On the 7D, set the A:B fire ratio or the setting appropriate for the group you are setting up. You can also set Flash Exposure Compensation of you want. You can choose a 2:1, 1:1, or 1:2 ratio. The flash ratio range of 8:1 is equivalent to 3:1 −1:1 −1:3 f-stops by ½-stop increments.
Position the camera and Speedlites. Set up the camera and the Speedlites to get the lighting effect that you want, keeping each unit within its range of coverage. The Speedlite wireless sensors must be set facing the 7D.
Whether you're using one or multiple Speedlites, you'll get pleasing results by using modifiers. I routinely use silver, gold, and shoot-through umbrellas, a small Photoflex LiteDome for strobes, and I also mount the Speedlites on affordable Photoflex LiteStand LS-B2211.
If there is quality existing light, then my approach is to use wireless Speedlights as fill light, but keep the existing light as the main light. For example, if there is nice window light for a portrait, then I may set up a Speedlite on the shadow side of the subject, and one or two flash units to light the background.
If you have a studio lighting system, the 7D performs exceptionally well with studio lighting. The PC terminal on the side of the 7D allows you to use wired strobes or wireless systems. I use a four-strobe Photogenic system with umbrellas, softboxes, and a large silver reflector for studio work. Canon suggests that with studio systems, you use 1/60 or 1/30 second sync speeds with large studio flash units because the flash duration is longer. I have found that for my strobes, a 1/125 second sync speed works well.

Figure 8.4. The 7D is a pleasure to use with studio lighting systems. This image was lit by four Photogenic strobes: two on the background, two to camera left, and a large silver reflector to camera right. Exposure: ISO 100, f/16, 1/80 sec.
Warning
Do not connect a flash unit that requires 250 V or more to the 7D. If you are unsure about the voltage of the flash unit, use a Wein Safe Sync hot shoe PC adapter to protect the camera.
While it is beyond the scope of this book to detail all the lighting options that you can use with one or multiple Speedlites, I will cover some common flash techniques that provide better flash images than using straight-on flash.
One frequently used flash technique is bounce flash, which softens hard flash shadows by diffusing the light from the flash. To bounce the light, turn the flash head so that it points diagonally toward the ceiling or a nearby wall so that the light hits the ceiling or wall and then bounces back to the subject. This technique spreads and softens the flash illumination.
If the ceiling is high, then it may underexpose the image. As an alternative, I often hold a silver or white reflector above the flash to act as a "ceiling." This technique offers the advantage of providing a clean light with no colorcast.
Another frequently used technique is to create a catchlight in the subject's eyes by using the panel that is tucked into the flash head of some Speedlites. Just pull out the translucent flash panel on the Speedlite. At the same time, a white panel comes out; that is what you can use to create catchlights. The translucent panel is called the wide panel and it is used with wide-angle lenses to spread the light. Push the wide panel back in while leaving the white panel out. Point the flash head up, and then take the image. The panel throws light into the eyes, creating catchlights that add a sense of vitality to the eyes. For best results be within 5 feet of the subject.
Tip
If your Speedlite doesn't have a panel, you can tape an index card to the top of the flash to create catchlights as described previously.