
6. Working with Different Users

In this chapter, you find out how to share your computer with other users.
![]() Signing In and Switching Users
Signing In and Switching Users
Chances are you’re not the only person using your computer; it’s likely that you’ll be sharing your PC with your spouse or partner and maybe even your children and grandchildren. Fortunately, you can configure Windows so that different people using your computer sign on with custom settings—and access to their own personal files.
Understanding User Accounts
The best way for multiple people to use a single computer is to assign each person his or her own password-protected user account. For a given person to use the PC and access her own programs and files, she has to sign in to the computer with her personal password. If a person doesn’t have an account or the proper password, she can’t use the computer.
Windows lets you create two different types of user accounts—online and local. The default is the online account, which comes with some unique benefits.
An online account is linked to a new or existing Microsoft account. When you use a Microsoft account on your computer, Windows displays information from other Microsoft sites you use. For example, Windows displays the latest weather conditions in the Weather app, the latest news headlines in the News app, and the latest stock quotes in the Stock app—all based on settings you make when you configure your Microsoft account. Local accounts cannot access this personalized data.
For these reasons, I recommend you create (or use an existing) Microsoft account for any new user you add to your computer.
Adding New Users
You create one user account when you first launch Windows on your new PC. At any time, you can create additional user accounts for other people using your computer.
Add a User with an Existing Microsoft Account
By default, Windows uses an existing Microsoft account to create your new Windows user account. So if you have an Outlook.com, OneDrive, Skype, Xbox Live, or other Microsoft account, you can use that account to sign in to Windows on your computer.
![]() Click the Start button to display the Start menu.
Click the Start button to display the Start menu.
![]() Click Settings to open the Settings tool.
Click Settings to open the Settings tool.

![]() Click Accounts to display the Accounts page.
Click Accounts to display the Accounts page.

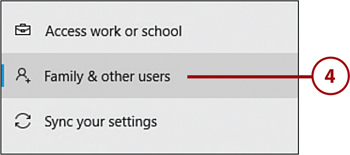
![]() Click to select the Family & Other Users tab.
Click to select the Family & Other Users tab.
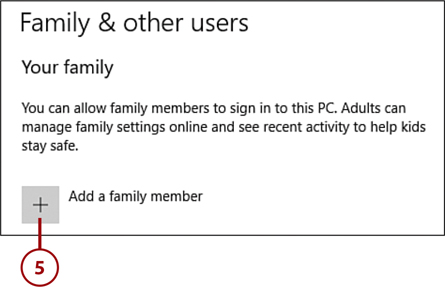
![]() Click Add a Family Member to display the Microsoft Account window.
Click Add a Family Member to display the Microsoft Account window.
![]() Select either Add a Child or Add an Adult.
Select either Add a Child or Add an Adult.
![]() Enter the person’s email address and click Next.
Enter the person’s email address and click Next.

![]() Click Confirm.
Click Confirm.

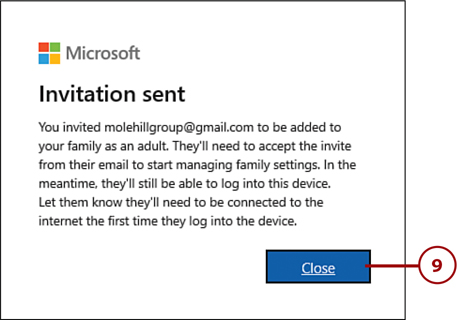
![]() The person you entered is immediately added as a new user to your computer. They will receive an invitation via email to join your family group. Click Close.
The person you entered is immediately added as a new user to your computer. They will receive an invitation via email to join your family group. Click Close.
Create a New User Account
If you’re adding a user to your computer who does not have an existing Microsoft account, you need to create a new Microsoft account for that person. This gives that individual a new Outlook.com email address, which they can use to log into Windows on your PC.
![]() Click the Start button to display the Start menu.
Click the Start button to display the Start menu.
![]() Click Settings to open the Settings tool.
Click Settings to open the Settings tool.

![]() Click Accounts to display the Accounts page.
Click Accounts to display the Accounts page.

![]() Click to select the Family & Other Users tab.
Click to select the Family & Other Users tab.

![]() Click Add a Family Member to display the Microsoft Account window.
Click Add a Family Member to display the Microsoft Account window.

![]() Select either Add a Child or Add an Adult.
Select either Add a Child or Add an Adult.
![]() Click The Person I Want to Add Doesn’t Have an Email Address.
Click The Person I Want to Add Doesn’t Have an Email Address.

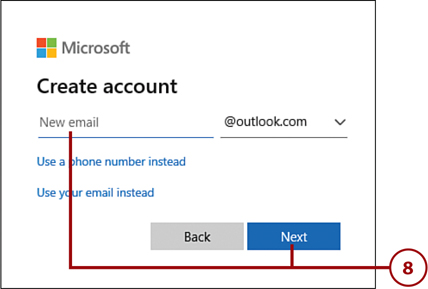
![]() Enter the desired email username into the New Email box and then click Next. (You might have to try several names to get one that isn’t already taken.)
Enter the desired email username into the New Email box and then click Next. (You might have to try several names to get one that isn’t already taken.)
![]() Enter the desired password into the Create a Password box and then click Next.
Enter the desired password into the Create a Password box and then click Next.

![]() Enter the person’s first and last name and then click Next.
Enter the person’s first and last name and then click Next.

![]() Select the region where this person lives.
Select the region where this person lives.
![]() Enter this person’s birthdate.
Enter this person’s birthdate.
![]() Click Next.
Click Next.

![]() Enter the person’s phone number and then click Next. The person receives a code to enter to verify the phone number; enter the code as directed and follow the remaining instructions to create the new account.
Enter the person’s phone number and then click Next. The person receives a code to enter to verify the phone number; enter the code as directed and follow the remaining instructions to create the new account.

Signing In and Switching Users
If other people are using your computer, they’ll want to sign in with their own accounts. Fortunately, it’s relatively easy to sign in and out of different accounts and to switch users.
Set Sign-In Options
There are several different types of security you can employ when users are signing into your PC. A user can sign in with any of the following methods:
Traditional alphanumeric password
Windows Hello PIN (personal identification number)
Windows Hello Face facial recognition (on compatible PCs)
Windows Hello Fingerprint (on compatible PCs)
Security Key (on a USB drive)
Picture password (requires you to sketch a portion of a picture onscreen)
Each user can select which sign-in option they want to use.
![]() Click the Start button to display the Start menu.
Click the Start button to display the Start menu.
![]() Click Settings to open the Settings tool.
Click Settings to open the Settings tool.

![]() Click Accounts to display the Accounts page.
Click Accounts to display the Accounts page.

![]() Click the Sign-In Options tab.
Click the Sign-In Options tab.

![]() Click the sign-in method you want to use and then follow the onscreen instructions to implement that method. (For example, if you choose the Password option, you need to enter the desired password.)
Click the sign-in method you want to use and then follow the onscreen instructions to implement that method. (For example, if you choose the Password option, you need to enter the desired password.)

Passwords and PINs
Most people choose the traditional password or Windows Hello PIN options because they’re easy to set up and less confusing to use. Just enter your password when prompted on the lock screen and you’re good to go!
Sign In with Multiple Users
If you have more than one user assigned to Windows, the sign-in process is slightly different when you start up your computer.
![]() Power up your computer.
Power up your computer.

![]() When the Windows lock screen appears, press any key on your keyboard or click the mouse to display the sign-in screen. All users of this computer are listed here.
When the Windows lock screen appears, press any key on your keyboard or click the mouse to display the sign-in screen. All users of this computer are listed here.
![]() Click your username.
Click your username.
![]() Enter your password and then press the Enter key to display your personal desktop.
Enter your password and then press the Enter key to display your personal desktop.

Switch Users
You can also change users without restarting your PC.
![]() Click the Start button to display the Start menu.
Click the Start button to display the Start menu.
![]() Click your name or picture at the left side of the Start menu to display a list of other users.
Click your name or picture at the left side of the Start menu to display a list of other users.
![]() Click the desired user’s name.
Click the desired user’s name.

![]() When prompted, enter the new user’s password, and then press Enter.
When prompted, enter the new user’s password, and then press Enter.
