6. Working with Symbols and Elements
What You’ll Do
Create an Instance from a Symbol
Modify an Instance from a Symbol
Display Rulers and Guides
Introduction
A symbol is a special asset that allows you to group together elements with its own Timeline, which is independent from the main Timeline for your composition. A symbol is a reusable asset that is turned into an instance, which you can modify and animate, on the Stage and in the Timeline. You can use the instance of a symbol many times as unique elements on the Stage, which you can animate and use separately. Each instance stands on its own, yet can still be changed for all instances in the symbol.
A symbol allows you to reuse elements without having to increase the amount of disk space the asset takes up on your system. When you copy and paste an element, such as an image, it increases the disk space usage for each copy. However, if you need a slightly different element or want to use an element in another composition, then copy and paste or duplicate is the way to go.
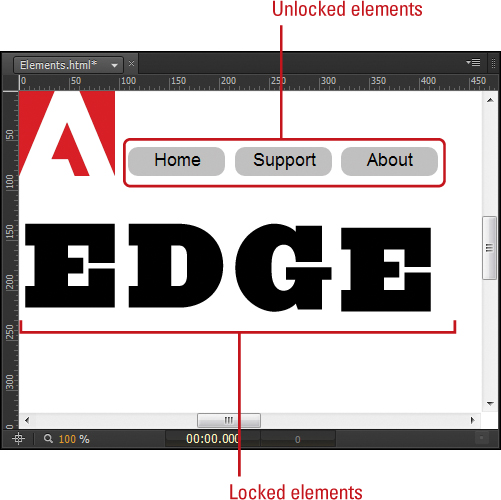
After you get all your content on the Stage, you can use rulers and guides to place the elements where you want for use in your composition. In the Elements panel, you can work with individual elements. You can stack and group elements one in front of the other to properly display them on the Stage, show or hide elements to make them easier to work with on the Stage, lock or unlock elements, such as a background, to keep them in place or allow them to move, or rename an element for better identification.
Creating Symbols
A symbol is a special asset that allows you to group together elements with its own Timeline, which is independent from the main Timeline for your composition. A symbol allows you to reuse elements without having to increase the amount of disk space the asset takes up on your system. When you copy and paste an element, such as an image, it increases the disk space usage for each copy. When you create a symbol, it’s known as a definition. When you use the symbol definition in your composition, it becomes an instance, which you can uniquely modify. You can add multiple instances of the same symbol and animate them differently. Each instance stands on its own. By using the same symbol definition, you’re only using the asset once, which reduces the time it takes to load it. When you create a symbol, you can specify whether to have it automatically play when the symbol starts.
Convert an Element to a Symbol
![]() Click the Selection Tool on the Tools panel.
Click the Selection Tool on the Tools panel.
![]() Select the existing element you want to convert into a symbol.
Select the existing element you want to convert into a symbol.
![]() Click the Modify menu, and then click Convert to Symbol.
Click the Modify menu, and then click Convert to Symbol.
Timesaver
Press Ctrl+Y (Win) or ![]() +Y (Mac) to convert to symbol.
+Y (Mac) to convert to symbol.
• You can also click the Add button (+) next to Symbols in the Library panel, and then click Convert selection to symbol.
![]() Enter a name for the symbol.
Enter a name for the symbol.
![]() To have the symbol automatically play when you display the symbol in the timeline, select the Autoplay timeline check box.
To have the symbol automatically play when you display the symbol in the timeline, select the Autoplay timeline check box.
![]() Click OK.
Click OK.
The symbol appears under Symbols in the Library panel, and the element in the Elements panel is changed and renamed with a number at the end to be an instance.
The converted element on the Stage is now an instance of the symbol.

Importing Symbols
In addition to creating a symbol directly in an Edge Animate composition, you can also create symbols by importing them from another composition. An imported symbol uses the Edge Animate Symbol File (*.ansym) format, which you export from Edge Animate. The imported symbol is actually a compressed file that looks very similar to the contents of a composition. When you import a symbol, it’s placed in the Library panel under Symbols. You can access the Import Symbols command from the Add button (+) next to Symbols in the Library panel.
Import Symbols
![]() In the Library panel, click the Add button (+) next to Symbols, and then click Import Symbols.
In the Library panel, click the Add button (+) next to Symbols, and then click Import Symbols.

The default file format is set to Edge Animate Symbol File (*.ansym; *.eglib).
![]() Navigate to the drive or folder where the file is located.
Navigate to the drive or folder where the file is located.
![]() Select the file you want to import.
Select the file you want to import.
• To import multiple files, hold down the ![]() (Mac) or Ctrl (Win) key and click additional files to select them.
(Mac) or Ctrl (Win) key and click additional files to select them.
![]() Click Open.
Click Open.

The symbol appears under Symbols in the Library panel.
Did You Know?
You can delete a symbol. In the Library panel under Symbols, right-click or control-click the symbol element, click Delete, and then click Yes, if prompted delete any instances.
You can rename a symbol. In the Library panel under Symbols, right-click or control-click the symbol element, click Rename, type a name, and then press Enter (Win) or Return (Mac).
Exporting Symbols
As you create and animate symbols for use in one animation, you may have use for it in another animation. In Edge Animate, you can export a symbol from a composition as an Edge Animate Symbol File (*.ansym), and then import into another composition. The exported symbol is actually a compressed file that looks very similar to the contents of a composition. The single exported file makes it easy to import into other Edge Animate compositions.
Export a Symbol
![]() In the Library panel, right-click (Win) or control-click (Mac) the symbol element, and then click Export.
In the Library panel, right-click (Win) or control-click (Mac) the symbol element, and then click Export.
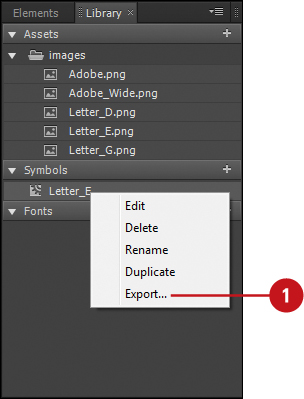
• You can also right-click or control-click a symbol on the Stage or Elements panel, and then click Export Symbol name.
The default file format is set to Edge Animate Symbol File (*.ansym).
![]() Type the new file name.
Type the new file name.
![]() Navigate to the drive and folder location where you want to export the symbol file.
Navigate to the drive and folder location where you want to export the symbol file.
• To create a new folder, click the New Folder button, type a folder name, and then press Enter (Win) or click Create (Mac).
![]() Click Save.
Click Save.
The program saves the exported symbol with the Edge Animate Symbol File (.ansym) file format.

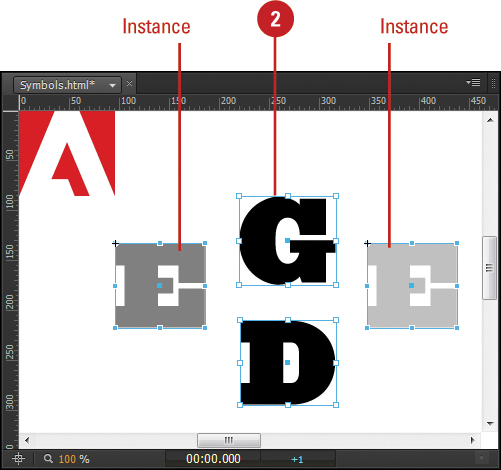
Creating an Instance from a Symbol
An instance is a copy of a symbol. When you use a symbol on the Stage or in the Timeline you are using an instance of it. You can animate an instance of a symbol and apply a variety of effects to it without affecting the original symbol in the Library. You can use multiple instances of the same symbol. When you change the properties of an instance in the Timeline or Properties panel, you are only applying these changes to that copy, or instance, of the symbol. In this way, you keep the file size down because Edge Animate only keeps track of the changes you’ve made while preserving the symbol in the form you created. If you have several instances of a symbol in your composition and you want to edit the artwork, you can make changes to the master symbol. When you do this, all of the instances of that symbol will be updated with these changes.
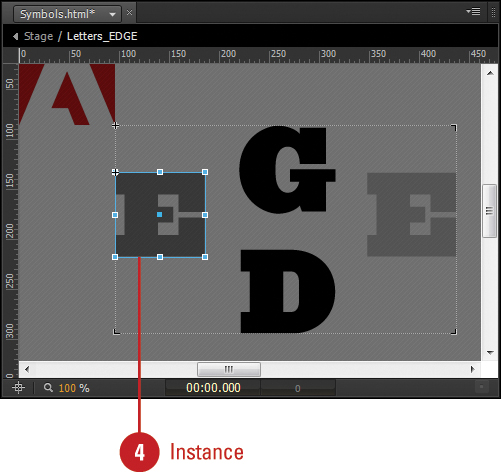
Create an Instance from a Symbol
![]() Click the Selection Tool on the Tools panel.
Click the Selection Tool on the Tools panel.
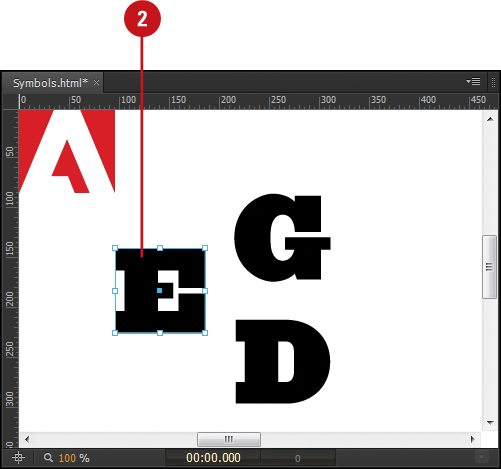
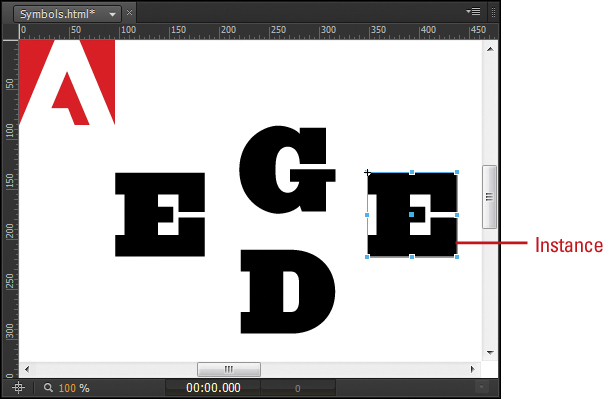
![]() In the Library panel, drag a symbol on the Stage.
In the Library panel, drag a symbol on the Stage.
The symbol appears renamed with a number at the end as an instance in the Elements panel.


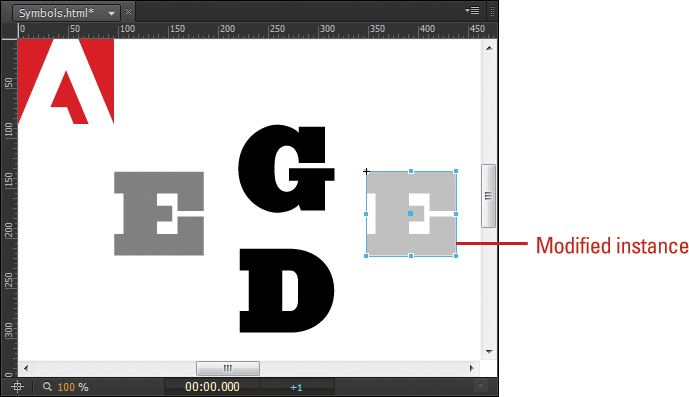
Modifying an Instance from a Symbol
You can animate an instance of a symbol and apply various effects to it without affecting the original symbol in the Library. When you change the properties of an instance in the Timeline or Properties panel, you are only applying these changes to that copy, or instance, of the symbol. The default setting for an instance is to play all animations on the Timeline, however, you can change the behavior with Playback commands, which allow you to stop, play, play in reverse, or specify exact times. You can set different Playback commands for each instance.
Modify an Instance in the Properties Panel
![]() Click the Selection Tool on the Tools panel.
Click the Selection Tool on the Tools panel.
![]() Select an instance of the symbol on the Stage or in the Elements panel.
Select an instance of the symbol on the Stage or in the Elements panel.
![]() Use the Properties and Timeline panels, modify the settings to change the instance or add an animation.
Use the Properties and Timeline panels, modify the settings to change the instance or add an animation.
• Display. Change the display of the instance.
• Overflow. Change the off Stage setting for the instance.
• Opacity. Change the transparency of the instance.
• Position and Size. Change settings to specify the position and size of the instance.
• Transform. Change settings to scale, skew, or rotate the instance.
• Playback. Specify how and when to play or stop an instance. Select the Scrub check box to play the instance animation when you scrub the Playhead in the Timeline.

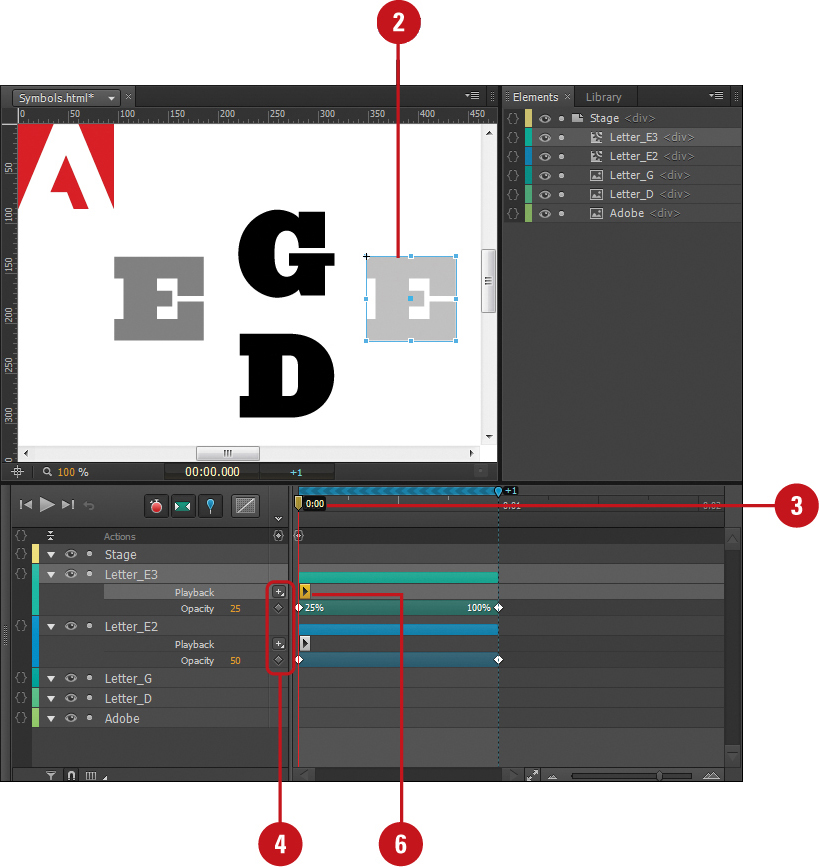
Modify an Instance with Playback Commands
![]() Click the Selection Tool on the Tools panel.
Click the Selection Tool on the Tools panel.
![]() Select an instance of the symbol on the Stage or in the Elements panel.
Select an instance of the symbol on the Stage or in the Elements panel.
![]() In the Timeline, drag the Playhead to where you want to add the Playback command.
In the Timeline, drag the Playhead to where you want to add the Playback command.
![]() In the Properties panel under Playback or in the Timeline next to Playback, click the Playback Actions button, and then select a Playback option:
In the Properties panel under Playback or in the Timeline next to Playback, click the Playback Actions button, and then select a Playback option:
• Play. Sets the instance to play.
• Play From. Sets the instance to play at a specific time or label.
• Play Reverse. Sets the instance to play in reverse.
• Play Reverse From. Sets the instance to play in reverse at a specific time or label.
• Stop. Sets the instance to stop.
• Stop At. Sets the instance to stop at a specific time or label.
A play or stop icon appears on the Timeline.
![]() In the Properties panel, select the Scrub check box to play the instance animation when you scrub the Playhead in the Timeline.
In the Properties panel, select the Scrub check box to play the instance animation when you scrub the Playhead in the Timeline.
![]() To delete the Playback command, select the icon in the Timeline, and then press Delete.
To delete the Playback command, select the icon in the Timeline, and then press Delete.
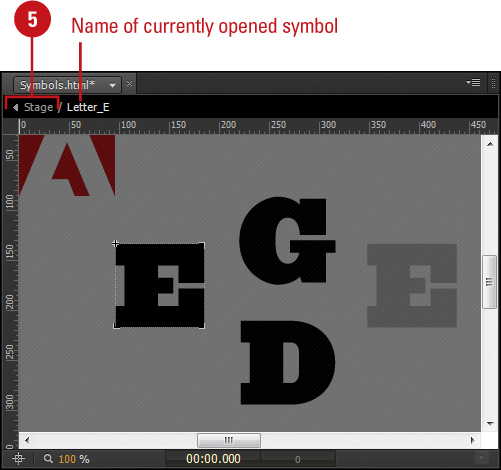
Editing Symbols
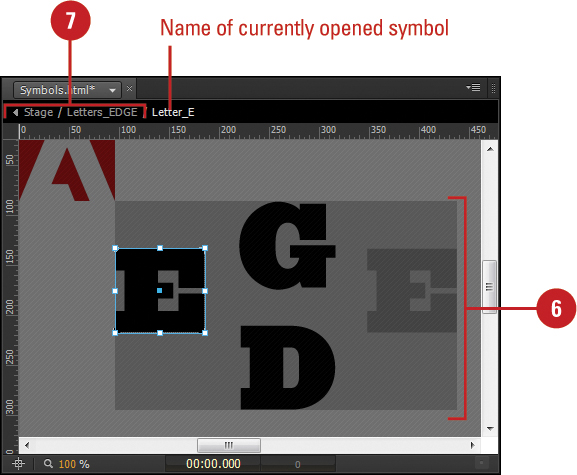
When you need to change or modify a symbol, you must enter a special symbol editing mode. Entering this mode allows you to view and edit the symbol. Any changes you make are stored in the Library, and all other instances of the symbol are updated with these changes. You can think of it like a master symbol. When you enter symbol editing mode, the window only displays elements associated with the symbol. It’s like a mini composition with its own Timeline, Elements, and Properties panels. You can modify an element in symbol editing mode just like in the main composition. Above the Stage is a Back button and Stage button along with the name of the symbol that you can use to exit symbol editing mode and return back to the main composition.
Edit a Symbol
![]() Click the Selection Tool on the Tools panel.
Click the Selection Tool on the Tools panel.
![]() Select an instance of the symbol on the Stage or in the Elements panel.
Select an instance of the symbol on the Stage or in the Elements panel.

![]() Click the Modify menu, and then click Edit Symbol.
Click the Modify menu, and then click Edit Symbol.
Timesaver
Double-click a symbol instance on the Stage or in the Elements panel.
Symbol editing mode opens, displaying its own Stage and Timeline. The Stage grays out with all the elements viewable for perspective purposes.
![]() Select an element on the Stage or in the Elements panel.
Select an element on the Stage or in the Elements panel.
![]() Modify the symbol in the Properties panel or in the Timeline.
Modify the symbol in the Properties panel or in the Timeline.
![]() Click the Back button or Stage on the Edit bar to exit symbol editing mode.
Click the Back button or Stage on the Edit bar to exit symbol editing mode.

Did You Know?
You can edit a symbol without the Stage elements. In the Library panel, double-click the Symbol icon, or right-click (Win) or control-click (Mac) the symbol element, and then click Edit.
Edit Symbol Stage Properties
![]() Click the Selection Tool on the Tools panel.
Click the Selection Tool on the Tools panel.
![]() Select an instance of the symbol on the Stage or in the Elements panel.
Select an instance of the symbol on the Stage or in the Elements panel.
![]() Click the Modify menu, and then click Edit Symbol.
Click the Modify menu, and then click Edit Symbol.
The Properties panel appears, displaying Stage properties.
![]() View and change settings in the Properties panel:
View and change settings in the Properties panel:

• Width and Height Size. The current size of the Stage. Point to the width (w) and height (h) and drag the scrub or click and enter a size in pixels (px) (fixed position) or percentage (%) (relative position).
• Overflow. The area outside of the Stage. Click the Overflow list arrow, and then select an option: visible, hidden, scroll (adds right and bottom scroll bars), or auto (adds scroll bars as needed).
• Autoplay. Select to start playing the animation when it is ready in your browser.
• Instance. Select to have the instance scale or resize.
• Min W and Max W. The settings specify the CSS minimum and maximum width for the Stage when the screen size changes.
![]() Click the Back button or Stage on the Edit bar to exit symbol editing mode.
Click the Back button or Stage on the Edit bar to exit symbol editing mode.
Nesting Symbols within Symbols
As you have seen, you can create or import a symbol in a composition. However, you can also create or import a symbol in other symbols. This technique is called nesting. The nested symbol becomes an element of the parent symbol. For example, you can create a car body symbol that animates across the screen and then create a car wheel symbol with two instances (for front and back) that spin inside the car body symbol. This keeps everything together in the parent symbol. The beauty of this happens when you want to export it for use in another composition, which get stored in a single file.
Nest a Symbol within a Symbol
![]() Click the Selection Tool on the Tools panel.
Click the Selection Tool on the Tools panel.
![]() Select an existing symbol and any other elements you want to include in the nested symbol.
Select an existing symbol and any other elements you want to include in the nested symbol.
![]() Click the Modify menu, and then click Convert to Symbol.
Click the Modify menu, and then click Convert to Symbol.
Timesaver
Press Ctrl+Y (Win) or ![]() +Y (Mac) to convert to symbol.
+Y (Mac) to convert to symbol.
![]() Enter a name for the symbol.
Enter a name for the symbol.
![]() To have the symbol automatically play when you display the symbol in the timeline, select the Autoplay timeline check box.
To have the symbol automatically play when you display the symbol in the timeline, select the Autoplay timeline check box.
![]() Click OK.
Click OK.

Did You Know?
You can duplicate a symbol. In the Library panel under Symbols, right-click or control-click the symbol element, and then click Duplicate. This creates a copy of the symbol, not an instance.
Work with a Nested Symbol
![]() Click the Selection Tool on the Tools panel.
Click the Selection Tool on the Tools panel.
![]() Select an instance of a nested symbol on the Stage or in the Elements panel.
Select an instance of a nested symbol on the Stage or in the Elements panel.

![]() Click the Modify menu, and then click Edit Symbol.
Click the Modify menu, and then click Edit Symbol.
Timesaver
Double-click a symbol instance on the Stage or in the Elements panel.
![]() Select an instance of a symbol on the Stage or in the Elements panel.
Select an instance of a symbol on the Stage or in the Elements panel.
![]() Click the Modify menu, and then click Edit Symbol.
Click the Modify menu, and then click Edit Symbol.
![]() Modify the nested symbol in the Properties panel or in the Timeline.
Modify the nested symbol in the Properties panel or in the Timeline.
![]() To exit symbol editing mode, do any of the following:
To exit symbol editing mode, do any of the following:
• Back. Click the Back button to exit the symbol to the parent symbol.
• Stage. Click Stage to exit the symbol to the main composition.
• Symbol name. Click the symbol name to exit the symbol to the parent symbol.
Copying or Duplicating Elements
You can copy and move elements from one location to another on the Stage. When you copy elements, a duplicate of the selected elements are placed on the Clipboard. When you move elements, the selected elements are removed and placed on the Clipboard. To complete the copy or move, you must paste the elements stored on the Clipboard in another location. Instead of taking two steps to copy and paste elements, you can complete the same task in one step by duplicating elements. Duplicating elements can be a powerful way of creating geometrical artwork. You can duplicate one or more selected elements by using the Duplicate command. The Duplicate command combines the Copy and Paste commands into one easy to use command.
Copy or Cut and Paste Elements
![]() Click the Selection Tool on the Tools panel.
Click the Selection Tool on the Tools panel.
![]() Select one or more elements on the Stage you want to copy or move (cut).
Select one or more elements on the Stage you want to copy or move (cut).

![]() Click the Edit menu, and then click Cut (move) or Copy.
Click the Edit menu, and then click Cut (move) or Copy.
Timesaver
Press Ctrl+V or Ctrl+C (Win) or![]() +V or
+V or![]() +C (Mac) to cut or copy.
+C (Mac) to cut or copy.
![]() Click the Edit menu, and then click Paste.
Click the Edit menu, and then click Paste.

Timesaver
Press Ctrl+V (Win) or![]() +V (Mac) to paste.
+V (Mac) to paste.
The selected elements are copied and pasted directly over the selected elements on the Stage, so you need to move them.
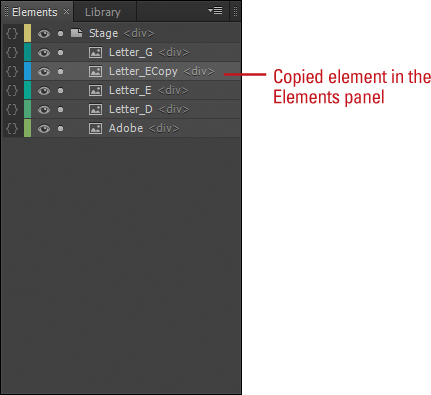
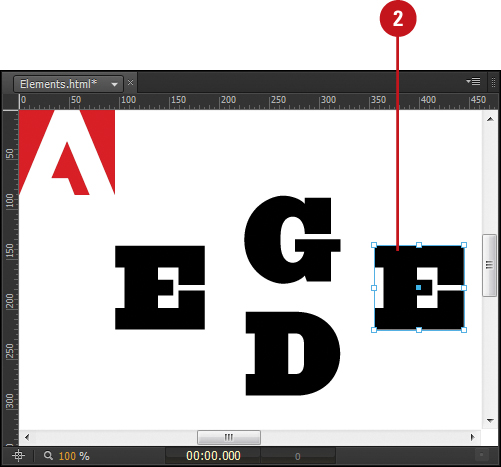
Duplicate Elements
![]() Click the Selection Tool on the Tools panel.
Click the Selection Tool on the Tools panel.
![]() Select one or more elements on the Stage you want to duplicate.
Select one or more elements on the Stage you want to duplicate.
![]() Click the Edit menu, and then click Duplicate, or Ctrl+drag (Win) or Option (Mac)+drag the selected elements.
Click the Edit menu, and then click Duplicate, or Ctrl+drag (Win) or Option (Mac)+drag the selected elements.

Timesaver
Press Ctrl+D (Win) or ![]() +D (Mac).
+D (Mac).
The selected elements are copied and pasted directly over the selected elements on the Stage, so you need to move them.
The new elements appear in the Elements panel with “Copy” appended to the name.
Did You Know?
You can use Copy and Paste Special commands to copy specialized elements in Edge Animate. With the Paste Special submenu on the Edit menu, you can paste transitions, inverted animations, and actions.
Deleting Elements
If you no longer need one or more elements, you can quickly delete them from your composition. This is important when you want to reduce the size of your project files. When you delete an element from a composition, the element is removed from the Elements panel, however, if there is a file, such as a graphic, associated with it, the file is not removed from your composition unless you manually delete it from the folder.
Delete Elements
![]() Click the Selection Tool on the Tools panel.
Click the Selection Tool on the Tools panel.
![]() Select one or more elements on the Stage you want to remove.
Select one or more elements on the Stage you want to remove.
![]() Click the Edit menu, and then click Delete.
Click the Edit menu, and then click Delete.
Timesaver
Press Backspace (Win) or delete (Mac).
The selected elements are removed from the Stage and Elements panel. However, they remain in the Library panel under Assets in the Images folder.
You’ll need to remove it manually in the Windows or File Explorer (Win) or Finder (Mac).
Delete Files of Elements
![]() In the Library panel under Assets, right-click (Win) or control-click the element file, and then click Reveal in Explorer (Win) or Reveal in Finder (Mac).
In the Library panel under Assets, right-click (Win) or control-click the element file, and then click Reveal in Explorer (Win) or Reveal in Finder (Mac).
Windows Explorer or Finder window opens, displaying the folder with the file selected.

![]() Delete the selected file using either of the following:
Delete the selected file using either of the following:
• Windows. Press Delete, and then click Yes.
• Mac. Drag the file to the Trash on the Dock.
The file is moved to the Recycle Bin (Win) or Trash (Mac), where you can permanently remove it.
![]() Switch back to Edge Animate, and then click Yes to update your composition with the change.
Switch back to Edge Animate, and then click Yes to update your composition with the change.
Displaying Rulers
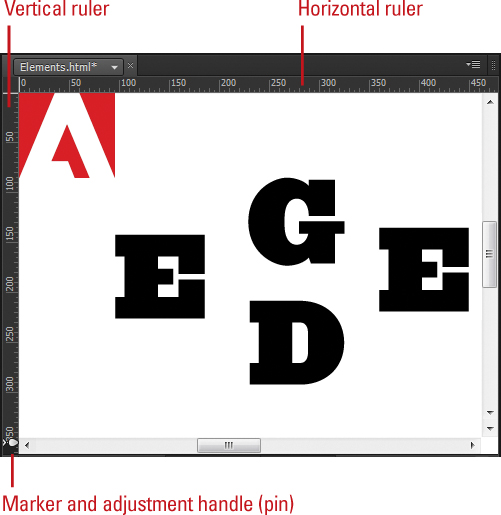
Ruler bars are located on the top and left sides of the Stage and serve several purposes. They help you measure the width and height of Edge Animate elements and they let you place guides on the screen to control the placement of elements on the Stage. In all, rulers serve a very important role. When you display rulers, you can use guides to help you correctly align elements with other elements. By using guides, you have access to precise alignment systems. To create guides, the ruler must first be visible. When you change the width or height of the Stage to percentage units to create a responsive (resizeable) design, the ruler displays an adjustment handle (pin) that you can drag to see how the Stage and its content respond to the sizing change. It also includes a marker above the adjustment handle to indicate the original location. When you no longer need the rulers, you can hide the rulers to free up more workspace.
Show and Hide Rulers
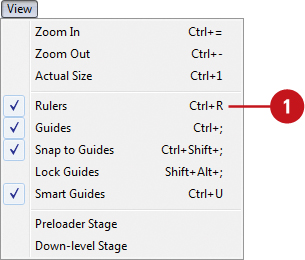
![]() Click the View menu, and then click Rulers.
Click the View menu, and then click Rulers.
Timesaver
Press Ctrl+R (Win) or ![]() +R (Mac) to show or hide the ruler.
+R (Mac) to show or hide the ruler.
A check mark appears next to the menu command to show the ruler.
![]() To hide rulers, click the View menu, and then click Rulers.
To hide rulers, click the View menu, and then click Rulers.
The check mark next to the menu command disappears to hide the rulers.
Displaying Guides
Edge Animate comes with guides and rulers to help you lay out artwork, text, and other elements with precision. A guide is a line that aids in aligning elements on the Stage. Guides are modifiable; you can show or hide them, lock them in place, have elements snap to them as they get close, and change the guide type to pixels or percentage. Guides appear in two colors, either purple for a pixel-based or teal for a percentage-based guide type. Though you see guides on the Stage during development, they are invisible when published.
Show and Hide Guides
![]() Click the View menu, and then click Guides.
Click the View menu, and then click Guides.

A check mark appears next to the menu command to show the guides.
![]() To hide the guide, click the View menu, and then click Guides.
To hide the guide, click the View menu, and then click Guides.
The check mark next to the menu command disappears to hide the guides.
Timesaver
Press Ctrl+’ (apostrophe) (Win) or ![]() +’ (apostrophe) (Mac) to show or hide guides.
+’ (apostrophe) (Mac) to show or hide guides.

See Also
See “Using Guides with Elements” on page 160 for more information on creating and working with guides.
Using Guides with Elements
A guide is a line that aids in aligning elements on the Stage. Use guides to align elements along a vertical or horizontal path. You can add multiple guides to the Stage. Before you can add a guide, you need to display guides and rulers, which you use to create them. Guides are modifiable; you can show or hide them, lock them in place, have elements snap to them as they get close, and change the guide type to pixels or percentage. Guides appear in two colors, either purple for a pixel-based or teal for a percentage-based guide type. Though you see guides on the Stage during development, they are invisible when published.
Create and Work with Guides
![]() Click the View menu, and then click Rulers to display rulers.
Click the View menu, and then click Rulers to display rulers.
![]() Click the Selection Tool on the Tools panel.
Click the Selection Tool on the Tools panel.

![]() To create a vertical guide, click on the vertical ruler and drag to the right to place the guide.
To create a vertical guide, click on the vertical ruler and drag to the right to place the guide.
![]() To create a horizontal guide, click on the horizontal ruler and drag down to place the guide.
To create a horizontal guide, click on the horizontal ruler and drag down to place the guide.
![]() To move a guide, point to the guide (cursor changes to a double-line with arrows), and then drag to reposition it.
To move a guide, point to the guide (cursor changes to a double-line with arrows), and then drag to reposition it.

![]() To remove a guide, point to the guide (cursor changes to a double-line with arrows), and then drag it off the Stage to the ruler.
To remove a guide, point to the guide (cursor changes to a double-line with arrows), and then drag it off the Stage to the ruler.
Did You Know?
You can lock or unlock guides on the Stage. Click the View menu, and then click Lock Guide to toggle on and off. You can also press Shift+Alt+; (Win) or Shift+Option+; (Mac).
Snap Elements to Guides
![]() Click the View menu, and then click Guides to display guides.
Click the View menu, and then click Guides to display guides.
![]() Click the View menu, and then click Snap to Guide to turn on (enable).
Click the View menu, and then click Snap to Guide to turn on (enable).
Timesaver
Press Ctrl+Shift+; (Win) or ![]() +Shift+; (Mac) to turn Snap to Guide on or off.
+Shift+; (Mac) to turn Snap to Guide on or off.
![]() Click the Selection Tool on the Tools panel.
Click the Selection Tool on the Tools panel.
![]() Drag an element close to a guide.
Drag an element close to a guide.
As you drag close to the guide, the element snaps to the guide.

View Position and Change Type
![]() Click the View menu, and then click Guides to display guides.
Click the View menu, and then click Guides to display guides.
![]() Point to the guide you want to view its position or change its type.
Point to the guide you want to view its position or change its type.
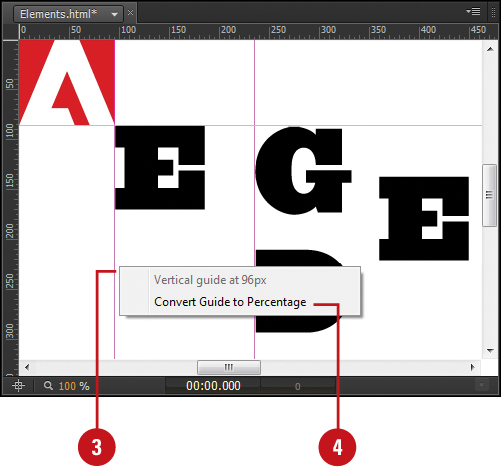
![]() Right-click (Win) or Control-click (Mac) the guide.
Right-click (Win) or Control-click (Mac) the guide.
The position of the guides appears on the context menu. For example, “Vertical guide at 96px”
![]() To convert the guide type to pixels or percentage, click Convert Guide to Pixels or Convert Guide to Percentage.
To convert the guide type to pixels or percentage, click Convert Guide to Pixels or Convert Guide to Percentage.
Pixel-based guides appear in purple and percentage-based guides appear in teal.
Aligning and Distributing Elements
Edge Animate provides two ways to align elements on the Stage. You can use Smart Guides or individual guides, or Align commands on the Modify menu. Smart Guides allow you to automatically display horizontal and vertical guides to help you move and align the edge or middle of selected element(s) with other elements on the Stage or to the center of the Stage. Smart Guides are automatically turned on by default. The Align commands, on the other hand, allow you to align two or more elements relative to each other vertically to the left, center, or right, or horizontally from the top, center, or bottom. To evenly space, or distribute, several elements relative to each other across the Stage, either horizontally or vertically, select them and then use Distribution commands on the Modify menu.
Align Elements with Smart Guides
![]() Click the Modify menu, and then click Smart Guides to turn it on (displays a check mark).
Click the Modify menu, and then click Smart Guides to turn it on (displays a check mark).
![]() Click the Selection Tool on the Tools panel.
Click the Selection Tool on the Tools panel.
![]() Select one or more elements you want to move and align.
Select one or more elements you want to move and align.
![]() Drag the selected element(s).
Drag the selected element(s).
As you move the element(s), Smart Guides appear to help you align it to the edge or middle of other elements on the Stage or to the center of the Stage.

See Also
See “Using Smart Guides with Elements” on page 90 for more information on working with Smart Guides.
See “Using Guides with Elements” on page 160 for more information on creating and working with guides.
Align Elements to Each Other
![]() Click the Selection Tool on the Tools panel.
Click the Selection Tool on the Tools panel.
![]() Select one or more elements you want to align with other elements.
Select one or more elements you want to align with other elements.

![]() Click the Modify menu, point to Align, and then click an option:
Click the Modify menu, point to Align, and then click an option:
• Left. Aligns all left edges to the left most element.
• Horizontal Center. Aligns all element centers to the horizontal center of the Stage.
• Right. Aligns all right edges to the right most element.
• Top. Aligns all top edges to the left top element.
• Vertical Center. Aligns all element centers to the vertical center of the Stage.
• Bottom. Aligns all bottom edges to the bottom most element.
Distribute Elements
![]() Click the Selection Tool on the Tools panel.
Click the Selection Tool on the Tools panel.
![]() Select two or more elements you want to evenly space.
Select two or more elements you want to evenly space.
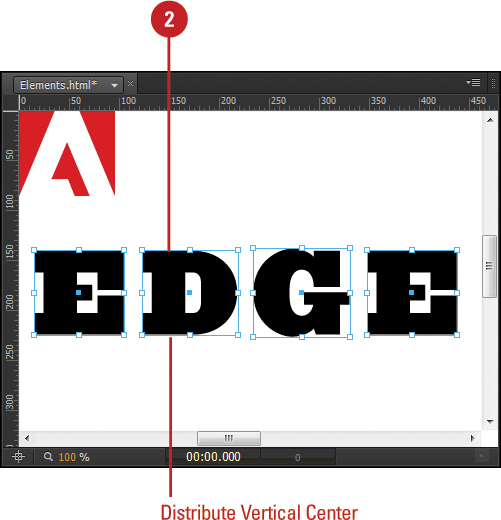
![]() Click the Modify menu, point to Distribute, and then click a distribution option: Left, Horizontal Center, Right, Top, Vertical Center, or Bottom.
Click the Modify menu, point to Distribute, and then click a distribution option: Left, Horizontal Center, Right, Top, Vertical Center, or Bottom.
Stacking Elements
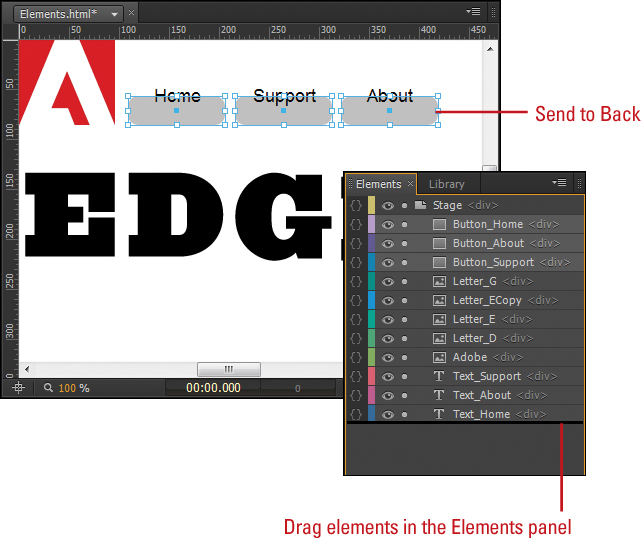
As you create or import elements on the Stage, each one appears in a stacking order, like layers of transparencies. Stacking is the placement of elements one on top of another. In other words, the first element that you create or import is on the bottom and the last element that you create or import is on top. The stacking order of the elements on the Stage appears in the Elements panel. The first element in the list is at the top of the stacking order and the last element is at the bottom. You can change the stacking order of elements by dragging elements in the Elements panel or using Arrange commands—Bring to Front, Bring Forward, Send Backward, and Send to Back—on the Modify menu.
Arrange Elements in Stacking Order
![]() Click the Selection Tool on the Tools panel.
Click the Selection Tool on the Tools panel.
![]() Select one or more elements on the Stage or in the Elements panel you want to arrange.
Select one or more elements on the Stage or in the Elements panel you want to arrange.

![]() Do any of the following:
Do any of the following:
• Stage. Click the Modify menu, point to Arrange, and then click a stacking option:
• Bring to Front. Brings the element to the top of the stacking list.
• Bring Forward. Brings the element up one level in the stacking list.
• Send Backward. Brings the element down one level in the stacking list.
• Send to Back. Brings the element to the bottom of the stacking list.
Timesaver
Press Ctrl+Shift+], Ctrl+], Ctrl+[, or Ctrl+Shift+[ (Win) or![]() +Shift+],
+Shift+],![]() +],
+],![]() +[, or
+[, or![]() +Shift+[ (Mac).
+Shift+[ (Mac).
• Elements Panel. Click a selected element name, and then drag it to the position you want (a thick black line appears to indicate the location).
Hiding and Showing Elements
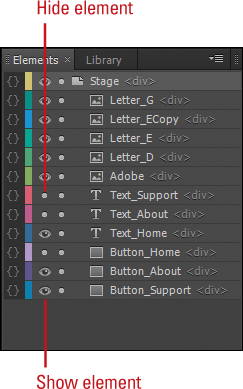
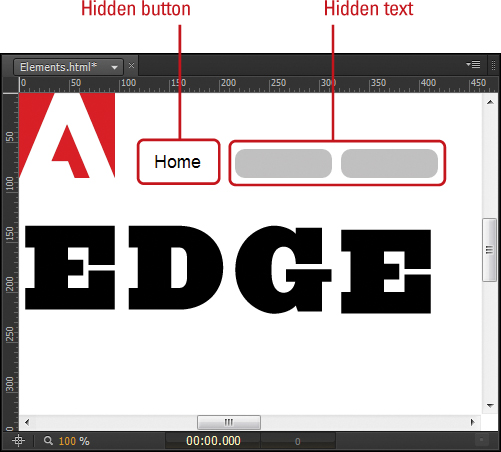
When you have a lot of elements on the Stage, especially when you open an existing HTML document, it’s hard to work with the ones you want without the other ones getting in the way. By temporarily hiding the elements that are in the way, it unclutters the Stage to allow you to focus on and work with the ones you want to change and animate. The Elements and Timeline panels include controls that you can click to quickly hide and show (toggle off and on) elements on the Stage. When you show or hide an element, an Eye icon (show) or grey dot (hide) appears in the Visibility column in the Elements and Timeline panels. When you save, close, and reopen your composition, any hidden elements remain hidden until you show them.
Hide and Show Elements
![]() In the Elements or Timeline panel, do the following:
In the Elements or Timeline panel, do the following:
• Hide. Click the Eye icon (changes to the grey dot) in the Visibility column to hide the element.
• Show. Click the grey dot (changes to the Eye icon) in the Visibility column to show the element.
Grouping Elements
Grouping elements together allows you to work with multiple elements as a single unit. When you group elements together, they are stored as individual elements in the same container, known as a DIV. Grouping elements together is useful when you want to use or move them around as one element. Groups have properties like any other element. You can give groups ID names, adjust properties, such as opacity, size, and rotate, and apply triggers and actions to them. If you want to break up a group into individual elements, you can ungroup it.
Group and Ungroup Elements
![]() Click the Selection Tool on the Tools panel.
Click the Selection Tool on the Tools panel.
![]() Select one or more elements on the Stage or in the Elements panel you want to arrange.
Select one or more elements on the Stage or in the Elements panel you want to arrange.
![]() Click the Modify menu, and then click Group Elements in DIV.
Click the Modify menu, and then click Group Elements in DIV.
Timesaver
Press Ctrl+G (Win) or ![]() +G to group elements.
+G to group elements.
In the Elements panel, a group is created, and then elements are indented below it.
![]() To ungroup elements, select the grouped elements on the Stage or in the Elements panel you want to arrange, click the Modify menu, and then click Ungroup Elements.
To ungroup elements, select the grouped elements on the Stage or in the Elements panel you want to arrange, click the Modify menu, and then click Ungroup Elements.

Timesaver
Press Ctrl+Shift+ G (Win) or ![]() +Shift+G to ungroup elements.
+Shift+G to ungroup elements.
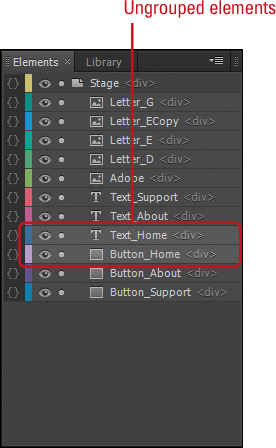
In the Elements panel, a group is removed, and then elements are independent.
Reparenting Elements
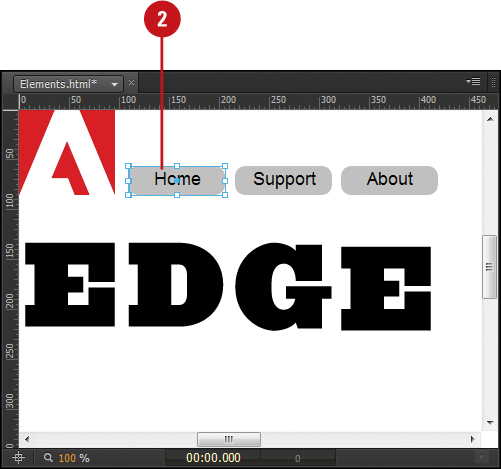
In the Elements panel, you’ll notice that the Stage is at the top of the list, and all the other elements in your composition are indented below it. The Stag is the parent and all the elements below it are the children. The children take on the properties of the parent, unless they are uniquely changed. In addition to the Stage parent/child relationship, you can also create your own parent/child relationships. You can create new relationships by moving (dragging) an element (becomes the child) on top of another element (becomes the parent) in the Elements or Timeline panel.
Reparent Elements
![]() In the Elements panel, do the following:
In the Elements panel, do the following:
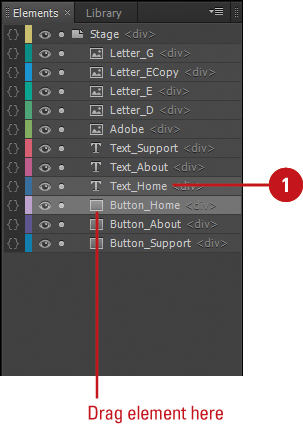
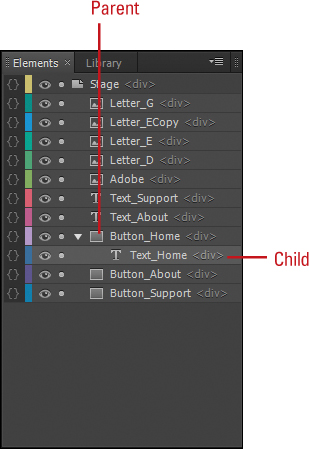
• Reparent. Drag an element (child) on top of another element (parent). When the parent element highlights, release the mouse to complete the process.
• Unparent. Drag the child element outside the parent element (a thick black line appears to indicate the location).
Did You Know?
You can unparent elements with Ungroup. In the Elements or Timeline panel, select the parent element, click the Modify menu, and then click Ungroup.
Locking and Unlocking Elements
The Elements and Timeline panels include controls that you can click to quickly lock and unlock (toggle on and off) elements on the Stage. When you lock or unlock an element, a padlock (lock) or grey dot (unlock) appears in the Lock column in the Elements and Timeline panels. Locking an element in place is useful when you don’t want it to move. For example, if you don’t want a background image to move while you work on other elements, you can lock the background image in place. If you want to move or modify a locked element, you need to unlock it first.
Lock and Unlock Elements
![]() In the Elements or Timeline panel, do the following:
In the Elements or Timeline panel, do the following:
• Lock. Click the grey dot (changes to the Lock icon) in the Lock column to lock the element.
• Unlock. Click the Lock icon (changes to the grey dot) in the Lock column to unlock the element.

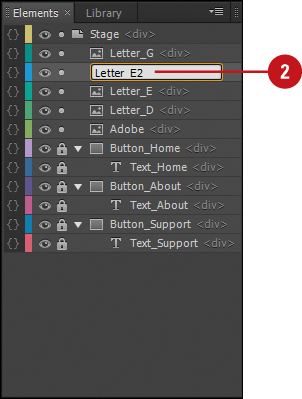
Renaming Elements
When you create an element in Edge Animate, the program automatically assigns a distinct name, such as Rectangle1, RoundRect3, or Ellipse2, or uses the file name from an import. To make it easier to identify and use in animations, you can rename element names in the Elements and Timeline panels. Renaming an element in Edge Animate is similar to editing a file name in your operating system.
Rename Elements
![]() In the Elements or Timeline panel, double-click the element name.
In the Elements or Timeline panel, double-click the element name.

The existing element name is selected in an edit box.
![]() Type to replace the existing name with a new one, or click to place the insertion point, and then edit the name.
Type to replace the existing name with a new one, or click to place the insertion point, and then edit the name.
![]() Press Enter (Win) or Return (Mac).
Press Enter (Win) or Return (Mac).